A Complete Guide to Annexin V Staining: Optimized Protocol for Early Apoptosis Detection in Research and Drug Development
This comprehensive guide provides researchers, scientists, and drug development professionals with a complete framework for implementing Annexin V staining to detect early apoptosis.
A Complete Guide to Annexin V Staining: Optimized Protocol for Early Apoptosis Detection in Research and Drug Development
Abstract
This comprehensive guide provides researchers, scientists, and drug development professionals with a complete framework for implementing Annexin V staining to detect early apoptosis. Covering foundational principles through advanced applications, the article details the calcium-dependent binding mechanism of Annexin V to externalized phosphatidylserine—a key early apoptosis marker. It presents optimized protocols for flow cytometry, addresses common troubleshooting scenarios with practical solutions, validates method specificity through proper controls, and compares Annexin V staining with alternative apoptosis detection techniques. With the global apoptosis detection market projected for significant growth, driven by cancer research and drug discovery applications, this resource delivers both theoretical understanding and practical methodology for reliable apoptosis assessment in diverse experimental systems.
Understanding Apoptosis and the Science Behind Annexin V Binding
The Critical Role of Apoptosis in Health, Disease, and Therapeutic Development
Apoptosis, or programmed cell death, is a fundamental biological process critical for embryonic development, immune system regulation, and the maintenance of tissue homeostasis in multicellular organisms [1] [2]. This highly regulated process enables the elimination of damaged, infected, or unnecessary cells without inducing an inflammatory response, thereby preserving tissue architecture and function. Conversely, dysregulated apoptosis is a hallmark of numerous human diseases; insufficient apoptosis can lead to cancer and autoimmune disorders, while excessive apoptosis contributes to neurodegenerative diseases, ischemic damage, and autoimmune conditions [2]. The molecular machinery of apoptosis converges on the activation of caspases, which orchestrate the characteristic biochemical and morphological changes, including chromatin condensation, DNA fragmentation, cell shrinkage, and membrane blebbing [2]. A critical early event in the apoptotic cascade is the loss of membrane phospholipid asymmetry, specifically the translocation of phosphatidylserine (PS) from the inner to the outer leaflet of the plasma membrane [1]. This exposure of PS on the cell surface provides a specific molecular target for detection methods, forming the basis of the Annexin V staining protocol that has become a cornerstone technique in apoptosis research.
Principles of Annexin V Staining
The Annexin V staining protocol leverages the high-affinity, calcium-dependent binding of Annexin V protein to exposed phosphatidylserine residues on the surface of apoptotic cells [1] [3]. Annexin V, a 35-36 kDa endogenous human protein, functions as a sensitive molecular probe for detecting the loss of plasma membrane asymmetry that characterizes early apoptosis [1] [2]. When conjugated to fluorochromes such as FITC, PE, or APC, Annexin V enables the identification and quantification of apoptotic cells using flow cytometry or fluorescence microscopy [1] [4] [3].
A critical enhancement to this methodology involves simultaneous staining with a vital dye, most commonly propidium iodide (PI) or 7-AAD, which allows for the discrimination between different stages of cell death [1] [5] [3]. These dyes are excluded from viable and early apoptotic cells with intact membranes but penetrate late apoptotic and necrotic cells, binding to nucleic acids and emitting fluorescence [1]. This dual-staining approach facilitates the differentiation of four distinct cell populations: viable cells (Annexin V-/PI-), early apoptotic cells (Annexin V+/PI-), late apoptotic cells (Annexin V+/PI+), and necrotic cells (Annexin V-/PI+) [5] [6]. The table below summarizes the interpretation of Annexin V/PI staining patterns.
Table 1: Interpretation of Annexin V and Propidium Iodide Staining Patterns
| Annexin V Staining | Propidium Iodide Staining | Cell Status | Membrane Integrity |
|---|---|---|---|
| Negative | Negative | Viable | Intact |
| Positive | Negative | Early Apoptotic | Intact (PS externalized) |
| Positive | Positive | Late Apoptotic | Compromised |
| Negative | Positive | Necrotic | Severely Compromised |
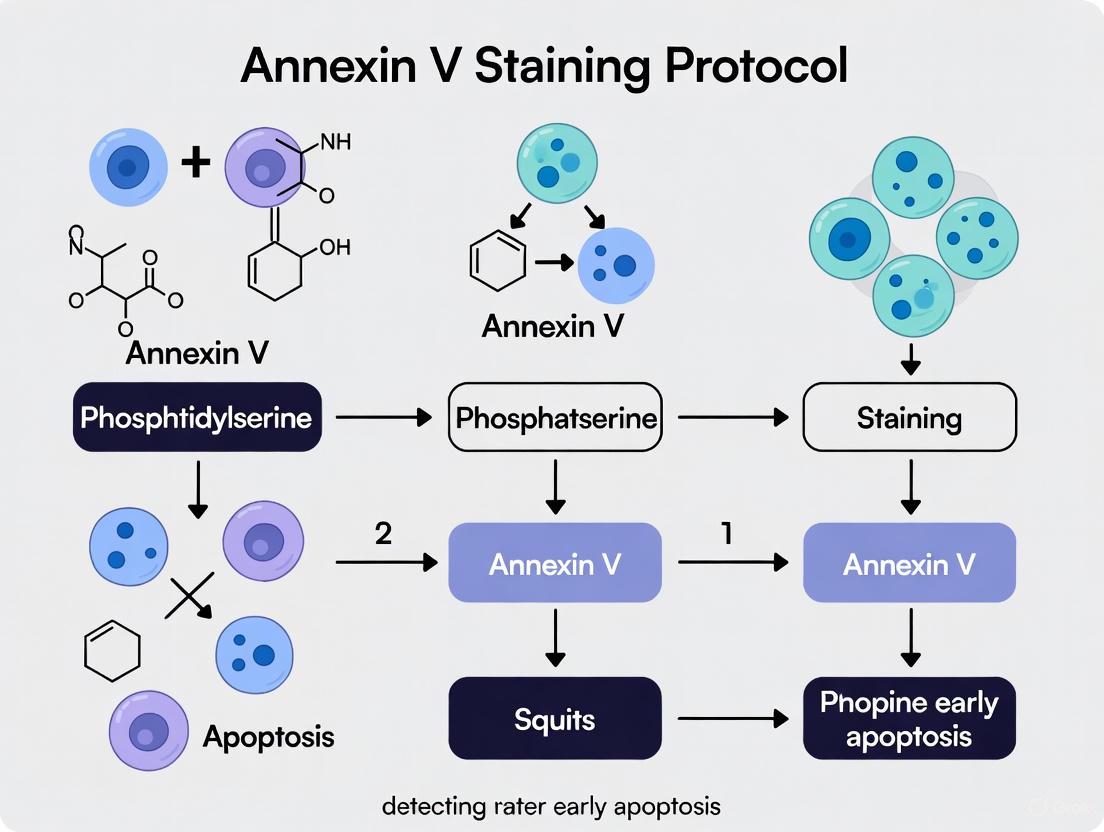
This staining principle is visually summarized in the following workflow diagram:
Comparative Analysis of Apoptosis Detection Methods
While Annexin V staining represents a gold standard for early apoptosis detection, researchers have developed numerous complementary techniques, each with distinct advantages and limitations. TUNEL assays detect DNA fragmentation resulting from internucleosomal cleavage during late apoptosis, while caspase activity assays measure the enzymatic activity of key proteases in the apoptotic cascade [1]. Western blotting and ELISA techniques require cell lysis and represent endpoint assessments, unlike the live-cell analysis capability of Annexin V staining [1]. Functional assays such as MTT and LDH measure metabolic activity and membrane integrity, respectively, providing information about cell viability but not specifically detecting apoptotic pathways [1]. More recently, advanced techniques like the biosensor ArFP have emerged, combining the selectivity of Annexin V with the sensitivity of bioluminescence from a serum-stable mutant of Renilla luciferase (RLuc8) [2]. This innovative approach enables apoptosis detection in vivo with lower background and higher signal-to-noise ratios compared to fluorescence methods [2].
Table 2: Comparison of Apoptosis Detection Methodologies
| Method | Detection Principle | Stage Detected | Key Advantages | Key Limitations |
|---|---|---|---|---|
| Annexin V Staining | PS externalization | Early | Live-cell analysis, rapid, quantitative | Cannot distinguish apoptosis from other PS-exposing death forms |
| TUNEL Assay | DNA fragmentation | Late | Specific for apoptotic DNA cleavage | Requires fixation, detects later stage |
| Caspase Activity | Caspase activation | Mid | Provides mechanistic insight | Does not detect caspase-independent apoptosis |
| MMP Assays | Mitochondrial membrane potential | Early-Mid | Indicators of intrinsic pathway | Does not specifically confirm apoptosis |
| ArFP Biosensor | PS externalization + bioluminescence | Early | In vivo application, high sensitivity | More complex reagent preparation |
Detailed Annexin V Staining Protocol for Flow Cytometry
Reagents and Materials
The following essential reagents and materials are required for performing Annexin V staining:
Table 3: Essential Research Reagent Solutions for Annexin V Staining
| Reagent/Material | Function/Purpose | Example Formulation |
|---|---|---|
| Fluorochrome-conjugated Annexin V | Binds exposed PS on apoptotic cells | FITC, PE, APC, or biotin conjugates |
| Propidium Iodide or 7-AAD | Viability dye for membrane integrity assessment | 0.5-10 μg/mL in binding buffer |
| 10X Binding Buffer | Provides optimal Ca2+ concentration for Annexin V binding | 0.1 M HEPES (pH 7.4), 1.4 M NaCl, 25 mM CaCl₂ |
| PBS Buffer | Cell washing and suspension | 8 g NaCl, 0.2 g KCl, 2.3 g Na₂HPO₄, 0.22 g KH₂PO₄ per liter, pH 7.4 |
| Fixable Viability Dyes | Alternative viability staining for complex panels | FVD eFluor 660, 506, or 780 |
Step-by-Step Protocol
Cell Preparation and Harvesting:
- For suspension cells: Collect 1-5 × 10⁵ cells by centrifugation at 500 × g for 7 minutes [7].
- For adherent cells: First collect media containing floating (potentially apoptotic) cells, then gently detach remaining adherent cells using minimal trypsinization followed by washing with serum-containing media to neutralize trypsin [1]. Harsh trypsinization can damage membranes and cause false positives [1].
Washing and Resuspension:
Staining Procedure:
- Transfer 100 μL of cell suspension (approximately 1-5 × 10⁵ cells) to a flow cytometry tube.
- Add 5 μL of fluorochrome-conjugated Annexin V [4] [3].
- For viability assessment, add 5 μL of propidium iodide (PI) staining solution (or 2-10 μL depending on cell type and optimization) [3].
- Gently vortex the tubes and incubate for 15-20 minutes at room temperature in the dark [4] [5].
Analysis:
- Add 400 μL of 1X binding buffer to each tube [5].
- Analyze samples by flow cytometry within 1 hour using FITC (or appropriate) signal detector for Annexin V and phycoerythrin signal detector for PI [1] [3].
- For accurate analysis, include appropriate controls: unstained cells, Annexin V only, and PI only samples [3].
The following diagram illustrates the complete experimental workflow:
Critical Controls and Optimization
Appropriate controls are essential for accurate data interpretation and instrument setup:
- Unstained cells: Determine cellular autofluorescence [3].
- Annexin V single-stain control: Set fluorescence compensation and gating [3].
- PI single-stain control: Set fluorescence compensation for viability dye [3].
- Induced apoptotic cells: Serve as positive control for apoptosis; can be generated using Staurosporine (Sigma, S4400) or Camptothecin (Sigma, C9911) [7].
- Annexin V blocking control: Pre-incubation with unconjugated Annexin V to demonstrate staining specificity by competitive binding [3].
Titration of Annexin V is recommended for each cell type to determine the optimal concentration that provides maximum separation between positive and negative populations in apoptotic cells while minimizing non-specific binding in healthy cells [7].
Applications in Biomedical Research and Drug Development
The Annexin V staining protocol has become an indispensable tool across multiple biomedical research domains due to its sensitivity, specificity, and quantitative nature. In oncology research, it is widely employed to assess the efficacy of chemotherapeutic agents by measuring treatment-induced apoptosis in cancer cell lines [1] [8]. For example, researchers have successfully utilized Annexin V-FITC/PI staining combined with APC-conjugated antibody labeling in MDA-MB-231 breast cancer cells treated with doxorubicin to simultaneously quantify apoptosis induction and track changes in CD44 expression [8]. This multiparametric approach provides key insights into signaling regulation and the mechanisms underlying the apoptotic response to cytotoxic treatments [8].
In immunology, the assay facilitates the study of activation-induced cell death in T-cells, a critical mechanism for maintaining immune tolerance and preventing autoimmunity [1]. The protocol also finds application in toxicology for evaluating compound toxicity, stem cell research for monitoring differentiation processes, and developmental biology for understanding tissue remodeling [1]. Recently, advanced applications have emerged utilizing the Annexin V-Renilla luciferase fusion protein (ArFP) for in vivo bioluminescence imaging of apoptosis in disease-relevant animal models, including surgery-induced ischemia/reperfusion, corneal injury, and retinal cell death as a model of age-related macular degeneration [2]. This innovative technology enables non-invasive monitoring of therapeutic efficacy and disease progression in living organisms, representing a significant advancement over traditional in vitro methods.
Troubleshooting and Technical Considerations
Despite its widespread utility, researchers may encounter technical challenges with the Annexin V staining protocol that require troubleshooting:
- Weak fluorescence signal: May result from insufficient Annexin V-FITC concentration, expired reagents, or improper storage conditions. Ensure proper storage and use fresh buffers [1].
- High background staining: Often stems from inadequate washing steps, non-specific binding, or excessive cell handling leading to mechanical damage. Optimize washing steps and verify buffer composition [1].
- Excessive Annexin V+/PI+ cells: May indicate over-induction of apoptosis leading to secondary necrosis, or membrane damage from harsh processing techniques [1].
- Calcium dependence: The critical calcium-dependent nature of Annexin V:PS interaction necessitates avoiding buffers containing EDTA or other calcium chelators during staining procedures [4].
- Temporal considerations: As apoptosis is a dynamic process, cells should be analyzed promptly (within 1 hour) after staining due to adverse effects on cell viability during prolonged storage [4].
- Fixation limitations: Cells must be incubated with Annexin V-FITC before fixation since any cell membrane disruption from fixation can cause non-specific binding of Annexin V to PS on the inner surface of the cell membrane [1].
For complex multicolor panels incorporating surface or intracellular markers, specific protocols combining Annexin V staining with antibody labeling are recommended. These typically involve initial cell surface antigen staining, followed by viability dye incubation, and finally Annexin V staining before analysis or intracellular staining procedures [4]. Proper compensation controls become increasingly critical as panel complexity grows to ensure accurate resolution of all parameters.
The externalization of phosphatidylserine (PS) represents a critical early molecular event in the programmed cell death pathway, serving as a fundamental "eat-me" signal that facilitates the immunologically silent clearance of apoptotic cells. In healthy, viable cells, PS is selectively maintained on the cytoplasmic leaflet of the plasma membrane through energy-dependent ATPase enzymes known as flippases, which actively transport PS from the outer to the inner membrane leaflet [9] [10]. This meticulously regulated membrane asymmetry is disrupted during the early stages of apoptosis, initiating a caspase-dependent process that simultaneously inactivates flippases while activating scramblases—proteins that catalyze the bidirectional movement of phospholipids across the membrane bilayer [9]. The resulting loss of phospholipid asymmetry enables PS to become exposed on the cell surface, where it functions as a universal recognition signal for phagocytic cells.
The molecular machinery governing PS externalization involves coordinated regulation of specific transporters. During apoptosis, caspase-mediated cleavage targets the ATP-dependent phospholipid flippase complex (comprised of ATP11C and CDC50A), leading to its inactivation and preventing PS internalization [9]. Concurrently, caspases activate the XK-related phospholipid scramblase Xkr8, which facilitates the transbilayer movement of PS to the outer leaflet [9]. This PS exposure on the apoptotic cell surface creates a binding site for phagocyte receptors and for Annexin V, a 35-36 kDa human protein that binds PS with high affinity in a calcium-dependent manner [1] [11]. This specific binding property forms the biochemical basis for one of the most widely employed apoptosis detection assays in biomedical research.
Annexin V Binding Protocol for Detecting Apoptosis
Core Staining Protocol for Flow Cytometry
The Annexin V staining protocol provides a robust methodology for identifying apoptotic cells by leveraging the calcium-dependent binding of fluorescently conjugated Annexin V to externally exposed phosphatidylserine. The following procedure is optimized for flow cytometric analysis, which allows for quantitative assessment of apoptosis across large cell populations [1] [4].
Cell Preparation and Staining:
- Harvest and Wash: Collect approximately 1-5 × 10^5 cells by centrifugation and wash once with 1X PBS [4]. For adherent cells, use gentle trypsinization (without EDTA) and wash with serum-containing media to neutralize the trypsin before proceeding [1].
- Resuspend in Binding Buffer: Resuspend the cell pellet in 500 µL of 1X Annexin V binding buffer. This specialized buffer provides the calcium ions essential for Annexin V binding to PS [1] [11].
- Add Annexin V Conjugate: Add 5 µL of fluorochrome-conjugated Annexin V (e.g., FITC, Alexa Fluor 488, PE, or APC) to the cell suspension [1] [4].
- Optional Viability Dye: To distinguish between early apoptotic and late apoptotic/necrotic cells, add 5 µL of a membrane-impermeant viability dye such as propidium iodide (PI) or 7-AAD at this step [1] [11].
- Incubate: Incubate the cell mixture for 5-15 minutes at room temperature, protected from light, to allow specific binding [1] [4].
Analysis:
- For protocols using PI or 7-AAD, analyze the cells immediately by flow cytometry without additional washing, as these dyes require continuous presence in the buffer [4].
- If no viability dye was used, or if using a fixable viability dye, add 2 mL of 1X binding buffer, centrifuge, discard the supernatant, and resuspend in 200 µL of fresh binding buffer before analysis [4].
- Analyze samples using a flow cytometer with appropriate laser and filter settings for the chosen fluorochromes. For Annexin V-FITC, use excitation at 488 nm and detection with an FITC signal detector (typically FL1) [1]. Cells should be analyzed within 4 hours to maintain optimal viability and staining integrity [4].
Critical Experimental Considerations and Modifications
- Viability Staining Combinations: Combining Annexin V with a viability dye is crucial for accurate apoptosis interpretation. PI and 7-AAD are common DNA-binding dyes that are excluded from viable and early apoptotic cells with intact membranes [1] [11]. Alternatively, fixable viability dyes (FVDs) can be used prior to Annexin V staining, particularly when subsequent intracellular staining or fixation is required [4].
- Calcium Dependency and Chelators: The binding of Annexin V to PS is strictly calcium-dependent. It is critical to avoid buffers containing EDTA, EGTA, or other calcium chelators during cell harvesting, washing, and staining procedures, as they will inhibit binding and cause false-negative results [4] [11].
- Handling of Adherent Cells: When working with adherent cell lines, harsh trypsinization can cause membrane damage and artifactual Annexin V binding. Use gentle, minimal trypsin and ensure proper washing with serum-containing media to inactivate the enzyme before staining [1].
- Fixation: Annexin V staining is typically performed on live cells. If fixation is necessary, it must be done after the Annexin V incubation step using an alcohol-free, aldehyde-based fixative, and buffers must contain calcium to prevent dissociation of the bound Annexin V [11].
Table 1: Interpretation of Annexin V/PI Dual Staining by Flow Cytometry
| Cell Population | Annexin V Staining | PI Staining | Biological Significance |
|---|---|---|---|
| Viable/Normal | Negative | Negative | Healthy cells with intact membranes and internal PS |
| Early Apoptotic | Positive | Negative | Cells with externalized PS but intact membrane |
| Late Apoptotic | Positive | Positive | Loss of membrane integrity in apoptotic cells |
| Necrotic | Negative (or may be positive) | Positive | Primary necrosis with compromised membrane |
Experimental Workflow Visualization
The following diagram illustrates the key decision points and steps in a standard Annexin V staining protocol for apoptosis detection:
Research Reagent Solutions for Apoptosis Detection
A wide array of commercial reagents and kits is available to facilitate robust detection of apoptosis via PS externalization. The selection of appropriate reagents depends on the specific experimental requirements, including the detection instrument (flow cytometer vs. microscope), need for multiplexing with other markers, and compatibility with downstream processing.
Table 2: Essential Reagents for Annexin V-Based Apoptosis Detection
| Reagent / Kit | Composition & Format | Primary Function & Application | Example Kits & Dyes |
|---|---|---|---|
| Annexin V Conjugates | Recombinant protein conjugated to various fluorochromes. Sold as standalone reagents or in kits. | Binds to externalized PS for detection of early apoptosis. Choice of fluorochrome depends on instrument and panel design. | FITC, Alexa Fluor 488, PE, APC, Pacific Blue [4] [11] |
| Viability Dyes | Membrane-impermeant nucleic acid stains or fixable dye compounds. | Distinguishes between intact (viable/early apoptotic) and compromised (late apoptotic/necrotic) membranes. | Propidium Iodide (PI), 7-AAD, SYTOX Green, Fixable Viability Dyes (FVDs) [4] [11] |
| Binding Buffer | 5X or 10X concentrated aqueous buffer containing calcium. | Provides optimal ionic and Ca2+ conditions for specific Annexin V binding to PS. Diluted to 1X for use. [1] [4] | Included in all commercial kits. |
| Integrated Kits | Pre-optimized combinations of Annexin V conjugate and compatible viability dye. | Provides a complete, convenient solution for a standard apoptosis assay, ensuring reagent compatibility. | Annexin V, Alexa Fluor 488/PI Kit; Annexin V APC/SYTOX Green Kit; Pacific Blue/SYTOX AADvanced Kit [11] |
Data Interpretation and Analysis
Gating Strategy and Population Quantification
Accurate interpretation of Annexin V staining data requires a systematic gating strategy during flow cytometric analysis. Researchers should first gate on the population of interest based on forward and side scatter properties, excluding debris and doublets. Viable cells typically exhibit low forward and side scatter, while apoptotic cells often show a slight reduction in forward scatter (cell size) and an increase in side scatter (granularity/complexity) [1]. Subsequent analysis involves creating a two-parameter dot plot of Annexin V fluorescence versus the viability dye (e.g., PI) fluorescence.
The resulting quadrants are used to quantify distinct cell populations as detailed in Table 1. The percentage of cells in the Annexin V-positive/PI-negative quadrant provides a quantitative measure of early apoptosis, which is the most specific indicator of PS externalization while membrane integrity remains intact [1] [10]. A significant increase in this population in treated samples compared to untreated controls is a clear indicator of apoptosis induction. It is critical to note that cells undergoing primary necrosis (Annexin V-negative/PI-positive) may become Annexin V-positive over time as the compromised membrane allows the probe to access PS on the inner leaflet, potentially confounding results [11] [10].
Comparison with Alternative Apoptosis Detection Methods
While the Annexin V assay is a gold standard for early apoptosis detection, it is one of several methods available, each with distinct advantages and limitations.
Table 3: Comparison of Annexin V Staining with Other Apoptosis Detection Methods
| Method | Target / Principle | Key Advantages | Key Limitations |
|---|---|---|---|
| Annexin V Staining | Binds to externalized PS on the outer membrane leaflet [1]. | Detects early apoptosis; live-cell analysis; quantitative with flow cytometry; can be combined with viability dyes. | Cannot distinguish apoptosis from other PS-exposing death (e.g., necroptosis) [1]; requires calcium; does not inform on upstream pathways. |
| TUNEL Assay | Detects DNA fragmentation resulting from internucleosomal cleavage. | Labels late apoptotic/necrotic cells; specific for DNA strand breaks. | Later event in apoptosis; more complex workflow; cannot detect early apoptosis [1]. |
| Caspase Activity Assays | Measures enzymatic activity of executioner caspases (e.g., caspase-3/7). | Provides mechanistic insight into apoptotic pathway activation. | Does not confirm completion of cell death program; activity may be transient [1]. |
| MMP Assays | Measures loss of mitochondrial membrane potential (ΔΨm). | Detects early event in intrinsic apoptosis pathway. | Not specific to apoptosis; changes can be reversible. |
| Western Blotting | Detects cleavage of apoptotic substrates (e.g., PARP, caspases). | Confirms apoptosis mechanistically; semi-quantitative. | End-point assay; requires cell lysis; no single-cell resolution [1]. |
Advanced Concepts and Recent Research Insights
Broader Implications of PS Externalization
Beyond its role as a simple "eat-me" signal for phagocytic clearance, PS externalization is now understood to be a central player in triggering profound immunosuppressive responses, a phenomenon referred to as innate apoptotic immunity (IAI) [9]. This immunomodulatory effect is contact-dependent but does not require actual engulfment of the apoptotic cell by the responding immune cell. Interestingly, recent research indicates that PS externalization, while crucial for clearance, is neither sufficient nor necessary to trigger the full IAI response, pointing to the involvement of other, protein-based determinants on the apoptotic cell surface [9].
Emerging Eat-Me Signals: The Role of Phosphatidylinositides
Recent unbiased proteomic studies have identified externalized phosphatidylinositides (PIPs), particularly PI(3,4,5)P3, as novel eat-me signals on apoptotic cells [12]. These phospholipids, normally restricted to the inner leaflet, are externalized during apoptosis in patches and blebs, similar to PS. This externalization is recognized by CD14+ phagocytes, and masking these PIPs or using CD14-knockout phagocytes significantly blocks the phagocytosis of apoptotic cells [12]. This discovery reveals a previously unknown cell death signal and suggests a more complex model where multiple phospholipids cooperate to ensure efficient corpse clearance.
A Revised Model of PS Externalization
Contrary to the traditional model focusing solely on scramblase activation and flippase inhibition, evidence now suggests that PS exposure during apoptosis reflects bidirectional membrane trafficking between the plasma membrane and the cytoplasm [13]. This model proposes that early apoptosis involves the formation of cytoplasmic vesicles derived from the plasma membrane, which subsequently traffic back to the cell surface in a calcium-dependent process, leading to PS externalization [13]. This revised understanding helps explain why some cancer cell lines exhibit a paucity of PS exposure despite undergoing apoptosis.
Annexin V is a 35-36 kDa cytosolic protein that belongs to a multigene family of calcium- and membrane-binding proteins found across virtually all eukaryotes [14]. Its defining biochemical characteristic is its high-affinity, calcium-dependent binding to anionic phospholipids, most notably phosphatidylserine (PS) [1] [11]. In healthy cells, PS is predominantly located on the inner, cytoplasmic leaflet of the plasma membrane. However, during the earliest stages of apoptosis, this membrane asymmetry is lost, and PS becomes translocated to the outer leaflet, serving as a definitive "eat-me" signal for phagocytic cells [1] [11]. Annexin V exploits this phenomenon, binding to exposed PS with a high degree of specificity, which forms the basis of its widespread use as a powerful tool for detecting programmed cell death. The binding is not merely a passive recognition event; recent research indicates that Annexin V actively influences membrane organization, inducing a lipid phase transition and stabilizing membrane defects, which has profound implications for its role in cellular repair processes [15]. This application note details the molecular mechanics of this interaction and provides standardized protocols for its application in apoptosis research.
Structural Basis for Calcium-Dependent Phospholipid Binding
The calcium-dependent binding specificity of Annexin V is an direct consequence of its highly conserved three-dimensional structure. The protein's core is formed by a compact, discoid structure composed of four homologous domains, each built from five α-helices [14]. The convex surface of this disc interacts with the membrane and contains the critical type II calcium-binding sites [14].
The Annexin Core and Type II Calcium-Binding Sites
Unlike classical calcium sensors that use EF-hand motifs, Annexin V employs type II sites, which are formed by polypeptide loops located between antiparallel α-helices on the membrane-interacting face of the protein [14]. In these sites, the calcium ion ((Ca^{2+})) is coordinated by carboxyl and carbonyl oxygen atoms from the protein's loops [14]. This configuration creates a bridge, where the (Ca^{2+}) ion simultaneously interacts with the protein and the phosphoryl moieties of negatively charged phospholipid headgroups in the target membrane [14]. This arrangement accounts for the specific lipid-binding selectivity of Annexin V for acidic phospholipids like phosphatidylserine.
Essential Calcium Binding Sites
Structural studies have revealed multiple bound calcium ions, but functional analyses demonstrate that not all sites contribute equally to membrane affinity. Mutagenesis studies have shown that the calcium-binding sites located in the AB and B helices across the four domains are particularly critical as shown in Table 1 below [16].
Table 1: Functional Contribution of Calcium-Binding Site Mutations in Annexin V
| Domain | Helix Location of Site | Contribution to Membrane Binding Affinity |
|---|---|---|
| Domain 1 | AB | Essential |
| Domain 2 | AB | Essential |
| Domain 3 | AB | Essential |
| Domain 4 | AB | Essential |
| Domain 1 | B | Essential |
| Domain 2 | B | Essential |
| Domain 3 | B | Essential |
| Domain 4 | B | Non-essential/Minor |
| Domain 1 | DE | Slight |
| Domain 2 | DE | None detected |
| Domain 3 | DE | None detected |
The data show that all four AB-helix sites and three of the four B-helix sites are essential for high-affinity membrane binding, with the sites within a given domain acting interdependently [16]. This multi-site binding explains the high observed cooperativity (Hill coefficient) in calcium titrations of Annexin V's membrane binding activity [16].
The following diagram illustrates the coordinated mechanism of calcium-dependent phospholipid binding and PS externalization during apoptosis:
Quantitative Binding Parameters and Assay Conditions
The interaction between Annexin V and phosphatidylserine is characterized by specific biochemical parameters that must be carefully controlled in experimental settings. The binding affinity is directly modulated by the availability of calcium ions, with the half-maximal binding typically occurring at calcium concentrations in the tens of micromolar range [15]. In the presence of a negatively charged bilayer, the calcium affinity of Annexin V's membrane-binding face increases from the millimolar to the tens of micromolar range [15]. For optimal binding in apoptosis assays, a calcium concentration of 2-2.5 mM in the binding buffer is standard, creating an environment that facilitates the formation of the (Ca^{2+}) bridge without inducing non-specific effects [1] [3]. Under these conditions, the difference in fluorescence intensity between apoptotic and non-apoptotic cells stained with a fluorescent Annexin V conjugate, as measured by flow cytometry, is typically about 100-fold, allowing for clear discrimination of cell populations [11].
Table 2: Key Quantitative Parameters for Annexin V Binding
| Parameter | Typical Value or Condition | Experimental Significance |
|---|---|---|
| Calcium Concentration for Half-Maximal Binding | Tens of µM [15] | Determines calcium sensitivity in physiological contexts. |
| Recommended Ca²⁺ in Assay Buffer | 2 - 2.5 mM [1] [3] | Provides optimal conditions for high-affinity PS binding during staining. |
| Protein Molecular Weight | 35-36 kDa [1] [17] | Important for reagent preparation and filtration. |
| Fluorescence Intensity Difference | ~100-fold [11] | Enables clear flow cytometric distinction between apoptotic and non-apoptotic cells. |
| Hill Coefficient (Cooperativity) | >1 (High) [16] | Reflects positive cooperativity in calcium-dependent membrane binding. |
Detailed Experimental Protocol for Apoptosis Detection
The following protocol is adapted from standardized procedures provided by leading reagent manufacturers and research protocols [1] [3]. It is designed for the detection of early apoptosis in suspension cells via flow cytometry using Annexin V conjugated to a fluorochrome (e.g., FITC) and a viability dye such as Propidium Iodide (PI).
Reagent Preparation
- 1X Annexin V Binding Buffer: Prepare a solution containing 10 mM HEPES (pH 7.4), 140 mM NaCl, and 2.5 mM CaCl₂. This can be made by diluting a commercial 10X concentrate [3].
- Annexin V Fluorochrome Conjugate: e.g., Annexin V-FITC. Keep protected from light and store as recommended.
- Viability Stain: e.g., Propidium Iodide (PI) solution (or 7-AAD). These are cell-impermeant dyes that stain the DNA of cells with compromised membrane integrity.
Cell Staining Procedure
- Cell Harvesting and Washing: Harvest cells (approximately (1 \times 10^5) to (5 \times 10^5)) by gentle centrifugation (e.g., 300 x g for 5 minutes). For adherent cells, use gentle trypsinization followed by washing with serum-containing media to inactivate the trypsin. Wash cells twice with cold PBS [1] [3].
- Cell Resuspension: Resuspend the cell pellet in 500 µL of 1X Annexin V Binding Buffer to achieve a concentration of approximately (1 \times 10^6) cells/mL. Transfer a 100 µL aliquot (containing ~(1 \times 10^5) cells) to a flow cytometry tube [1] [3].
- Staining: Add 5 µL of Annexin V-FITC and, for viability discrimination, 2-5 µL of PI [1] [3]. Gently vortex the tube to mix.
- Incubation: Incubate the cells for 15 minutes at room temperature (15-25°C) in the dark [3]. Shorter incubations (e.g., 5 minutes) are also used in some protocols [1].
- Analysis: Without washing, add 400 µL of 1X Annexin V Binding Buffer to each tube. Analyze the samples by flow cytometry within 1 hour to prevent loss of membrane integrity and signal deterioration [3].
Flow Cytometry Setup and Controls
- Instrument Setup: Use an excitation wavelength of 488 nm. Detect Annexin V-FITC fluorescence with the FITC signal detector (typically FL1, Em ~525 nm) and PI with the phycoerythrin signal detector (typically FL2 or FL3, Em >617 nm) [1] [11].
- Essential Controls:
- Unstained cells: To set the baseline fluorescence and voltage.
- Cells stained with Annexin V only: To adjust FL1 compensation and gate for Annexin V-positive cells.
- Cells stained with PI only: To adjust FL2/FL3 compensation and gate for PI-positive cells.
- Induced Apoptosis Positive Control: Treat cells with a known apoptosis inducer (e.g., 10 µM camptothecin for 4 hours) to establish a positive staining pattern [11].
- Specificity Control (Optional): Pre-incubate cells with an excess of unconjugated Annexin V (5-15 µg) to block PS binding sites, followed by Annexin V-FITC. This should significantly reduce the fluorescent signal, confirming binding specificity [3].
The experimental workflow and data interpretation strategy are summarized in the following diagram:
The Scientist's Toolkit: Essential Reagents and Materials
Successful execution of the Annexin V staining assay requires a set of specific, high-quality reagents. The table below catalogs the essential components and their functions.
Table 3: Key Research Reagent Solutions for Annexin V Staining
| Reagent / Material | Function / Purpose | Critical Notes |
|---|---|---|
| Recombinant Annexin V (conjugated to a fluorochrome) | The primary detection agent that binds externalized PS on apoptotic cells. | Available conjugated to various fluorochromes (FITC, PE, APC, Alexa Fluor dyes) for multiplexing [1] [11]. |
| Propidium Iodide (PI) or 7-AAD | Cell-impermeant viability dye that stains nucleic acids in cells with disrupted membranes. | Distinguishes late apoptotic/necrotic cells (Annexin V+/PI+) from early apoptotic cells (Annexin V+/PI-) [1] [3]. |
| 10X Annexin V Binding Buffer | Provides the optimal ionic strength and, crucially, the Ca²⁺ required for specific Annexin V-PS binding. | Must be diluted to 1X and contain a final Ca²⁺ concentration of ~2.5 mM [3]. |
| Phosphate Buffered Saline (PBS) | An isotonic solution for washing cells without causing lysis or activation. | Used to remove serum proteins and media prior to staining [3]. |
| Apoptosis Inducer (e.g., Camptothecin) | Provides a reliable positive control for the assay. | Validates the entire staining and detection workflow [11]. |
Applications, Limitations, and Troubleshooting
Broader Applications in Research and Drug Development
While apoptosis detection remains its primary application, the calcium-dependent phospholipid binding of Annexin V facilitates its use in other areas. It is employed as an anticoagulant in vitro due to its ability to shield exposed PS on activated platelets, thereby inhibiting the coagulation cascade [17]. In bone research, Annexin V facilitates mineralization in the extracellular matrix by binding to PS-rich matrix vesicles, promoting calcium influx and hydroxyapatite deposition [17]. Furthermore, its role in studying membrane repair is emerging, as it can self-assemble into 2D lattices at membrane injury sites in a calcium-dependent manner, stabilizing lipid bilayers and potentially facilitating resealing [15].
Assay Limitations and Critical Considerations
- Specificity Constraint: Annexin V binding indicates PS exposure, which is a hallmark of, but not exclusive to, apoptosis. Other processes like necrosis, necroptosis, and cellular activation can also lead to PS externalization [1].
- Calcium Dependence: The absolute requirement for calcium makes the assay sensitive to calcium chelators (e.g., EDTA, EGTA), which must be absent from all washing and resuspension buffers.
- Membrane Integrity: Cells with compromised membranes (necrotic or late-stage apoptotic) allow Annexin V to access PS on the inner leaflet, potentially causing false-positive apoptosis signals. This is why co-staining with a viability dye like PI is mandatory for accurate interpretation [11].
- Fixation Incompatibility: Cells must be analyzed live and unfixed. Standard fixation methods permeabilize the membrane, allowing Annexin V to bind internal PS. If fixation is necessary, specific, gentle (aldehyde-based, alcohol-free) protocols must be followed post-staining to retain signal [11].
Troubleshooting Common Issues
- Weak Fluorescence Signal: Check reagent expiration and storage conditions. Ensure the binding buffer contains sufficient Ca²⁺ (2.5 mM). Consider increasing the concentration of the Annexin V conjugate slightly [1].
- High Background/False Positives: Avoid harsh cell harvesting methods (e.g., excessive trypsinization, scraping) that can damage the plasma membrane. Ensure all centrifugation steps are gentle. Always include the viability dye to discriminate between true early apoptotic and damaged cells [1] [11].
- Unclear Population Separation in Flow Cytometry: Titrate the amount of Annexin V conjugate and PI for your specific cell type. Use single-stained controls to properly set compensation on the flow cytometer [3]. Analyze cells immediately after staining (within 1 hour).
Annexin V Staining Protocol for Early Apoptosis Detection Research
Apoptosis, or programmed cell death, is a fundamental biological process critical for maintaining cellular homeostasis, proper development, and immune function [1] [18]. The accurate detection of apoptosis is particularly crucial in drug discovery and biomedical research, where understanding cell death mechanisms is essential for evaluating therapeutic efficacy, especially in oncology and neurodegenerative disease research [18]. The Annexin V staining protocol has emerged as a gold standard method for identifying early apoptotic cells by exploiting a key biochemical event that occurs during apoptosis: the translocation of phosphatidylserine (PS) from the inner to the outer leaflet of the plasma membrane [1] [19]. This externalized PS creates a specific "eat-me" signal that can be detected by fluorescein-conjugated Annexin V protein in a calcium-dependent manner [18]. When combined with a viability dye such as propidium iodide (PI), this assay enables researchers to distinguish between viable, early apoptotic, late apoptotic, and necrotic cell populations within a heterogeneous sample [6] [19]. The compatibility of Annexin V staining with flow cytometry and fluorescence microscopy makes it particularly valuable for high-throughput drug screening and mechanistic studies in pharmaceutical development.
Principle and Mechanism of Annexin V Binding
Biochemical Basis of Phosphatidylserine Externalization
In healthy, viable cells, phosphatidylserine (PS) is asymmetrically distributed within the plasma membrane, residing exclusively on the inner cytoplasmic leaflet due to the activity of ATP-dependent translocases [18]. During the early stages of apoptosis, this membrane asymmetry collapses through the coordinated inactivation of translocases and activation of scramblases, resulting in the rapid exposure of PS on the extracellular surface [1] [18]. This PS externalization serves as a recognition signal for phagocytic cells to clear apoptotic cells without inducing inflammation [18]. Annexin V, a 35-36 kDa cellular protein, binds with high affinity to PS residues in the presence of calcium ions (Ca²⁺) [1] [20]. The binding is specific and dependent on the availability of physiological concentrations of calcium (typically 2.5 mM in binding buffers), making the assay sensitive to calcium-chelating agents such as EDTA [4] [21].
Discrimination of Apoptotic Stages with Viability Stains
The Annexin V assay achieves its discriminatory power through combination with membrane-impermeant DNA-binding dyes such as propidium iodide (PI) or 7-AAD [3] [19]. The plasma membrane of viable cells and early apoptotic cells remains intact and excludes these viability dyes, while the membrane integrity of late apoptotic and necrotic cells becomes compromised, allowing dye penetration and nuclear staining [1]. This differential staining pattern enables clear identification of four distinct cell populations:
- Viable cells (Annexin V⁻/PI⁻): No PS externalization and intact membranes
- Early apoptotic cells (Annexin V⁺/PI⁻): PS externalization with intact membranes
- Late apoptotic cells (Annexin V⁺/PI⁺): PS externalization with compromised membranes
- Necrotic cells (Annexin V⁻/PI⁺): Loss of membrane integrity without specific PS externalization
It is important to note that the Annexin V⁺/PI⁺ population may represent either late apoptotic cells (which have progressed from early apoptosis) or primary necrotic cells, requiring additional experimental context for precise interpretation [19].
Experimental Workflow and Protocol
The following section provides comprehensive methodologies for implementing Annexin V staining in apoptosis research, with specific considerations for different experimental scenarios in drug discovery contexts.
Standard Annexin V/FITC and Propidium Iodide Staining Protocol
This fundamental protocol is adapted from established methodologies [1] [4] [3] and serves as the foundation for most apoptosis detection applications in pharmaceutical screening.
Reagents and Equipment
- Annexin V conjugate: FITC-labeled Annexin V (other fluorochromes available including PE, APC, eFluor dyes) [4]
- Viability dye: Propidium iodide (PI) solution (50 µg/mL) or 7-AAD [3]
- Binding Buffer: 10X concentrate (0.1 M HEPES, pH 7.4; 1.4 M NaCl; 25 mM CaCl₂) diluted to 1X with distilled water [3]
- Phosphate Buffered Saline (PBS): Calcium-free, pH 7.2-7.4
- Flow cytometer with 488 nm excitation capability and appropriate filters (typically FL1 for FITC, FL2 for PI) [1]
- Cell culture reagents for maintaining and treating cells
Step-by-Step Procedure
Cell Preparation and Treatment:
- Harvest approximately 0.5-1 × 10⁶ cells per experimental condition [1] [3]. For adherent cells, use gentle, non-enzymatic dissociation methods (e.g., EDTA) or mild trypsinization with EDTA-free solutions, as calcium chelation interferes with Annexin V binding [21].
- Include necessary controls: unstained cells, Annexin V single-stain, PI single-stain (for compensation), and apoptosis-induced positive control (e.g., staurosporine-treated cells) [3] [21].
Washing and Resuspension:
Staining:
- Transfer 100 µL of cell suspension (containing 1-5 × 10⁵ cells) to a 5 mL flow cytometry tube.
- Add 5 µL of Annexin V-FITC conjugate and 5 µL of PI staining solution [3]. Note: Optimal PI volume may require titration (2-10 µL) depending on cell type [3].
- Gently vortex the tubes and incubate for 15 minutes at room temperature in the dark [4] [3].
Analysis:
Specialized Protocol Variations for Complex Assays
Annexin V Staining with Fixable Viability Dyes
For experiments requiring subsequent intracellular staining or fixation, replace PI with fixable viability dyes (FVDs) that covalently bind to amine groups in dead cells, preserving viability information after membrane permeabilization [4].
- Procedure:
- Wash cells twice with azide-free and serum/protein-free PBS [4].
- Resuspend cells at 1-10 × 10⁶ cells/mL in PBS and add 1 µL of FVD (e.g., eFluor 660, eFluor 506, or eFluor 780) per 1 mL of cells [4]. Note: FVD eFluor 450 is not recommended with Annexin V kits [4].
- Incubate 30 minutes at 2-8°C protected from light [4].
- Wash cells twice with Flow Cytometry Staining Buffer or equivalent [4].
- Proceed with Annexin V staining as described in section 3.1.2 [4].
Multiparametric Analysis with Surface Marker Staining
This advanced protocol enables simultaneous assessment of apoptosis and cell surface phenotypes, particularly valuable for immunology research and heterogeneous cell populations [4] [8].
- Procedure:
- Stain cells with fluorochrome-conjugated antibodies against surface antigens of interest using standard protocols [4].
- Wash cells twice with azide-free and serum/protein-free PBS [4].
- Perform viability staining with FVD as described in section 3.2.1 [4].
- Wash cells once with 1X Binding Buffer [4].
- Resuspend cells in 1X Binding Buffer and stain with Annexin V conjugate as described in section 3.1.2 [4].
- Analyze by flow cytometry without additional washing [4].
Experimental Workflow Visualization
The following diagram illustrates the complete experimental workflow for Annexin V staining, from cell preparation through data analysis:
Diagram 1: Experimental workflow for Annexin V apoptosis assay.
Data Interpretation and Analysis
Gating Strategy and Population Discrimination
Proper data analysis is critical for accurate quantification of apoptotic populations. The following table outlines the standard interpretation of Annexin V/PI staining patterns:
Table 1: Interpretation of Annexin V/PI staining results
| Annexin V Staining | PI Staining | Cell Population | Physiological State |
|---|---|---|---|
| Negative | Negative | Viable cells | Healthy cells with intact membranes and no PS exposure |
| Positive | Negative | Early apoptotic | Cells with PS externalization but intact membrane integrity |
| Positive | Positive | Late apoptotic | Cells with PS exposure and loss of membrane integrity |
| Negative | Positive | Necrotic | Cells with membrane damage without specific apoptosis |
Flow cytometric analysis typically displays results in a two-dimensional dot plot with Annexin V fluorescence on the x-axis and PI fluorescence on the y-axis [18]. The population distribution across the four quadrants provides immediate visualization of the apoptotic status within the sample. It is essential to establish proper quadrant positions using single-stained controls and unstained cells [3] [21]. The following diagram illustrates the logical framework for interpreting these staining patterns:
Diagram 2: Interpretation logic for Annexin V/PI staining patterns.
Quantitative Analysis in Drug Discovery Applications
In pharmaceutical research, Annexin V staining frequently serves as a quantitative endpoint for assessing therapeutic efficacy and cytotoxicity [18]. Data is typically reported as the percentage of cells in each apoptotic population, with statistical analysis comparing treated samples to appropriate controls. For drug screening applications, dose-response curves can be generated by plotting the percentage of apoptotic cells (both early and late) against drug concentration, enabling calculation of IC₅₀ values for apoptosis induction [18]. Time-course experiments further provide kinetic information about the onset and progression of cell death, which is valuable for understanding mechanism of action.
Research Reagent Solutions
Successful implementation of Annexin V staining requires careful selection of appropriate reagents and understanding their specific functions within the assay system.
Table 2: Essential reagents for Annexin V apoptosis detection
| Reagent | Function | Key Considerations |
|---|---|---|
| Annexin V Conjugate | Binds externalized phosphatidylserine on apoptotic cells | Available in multiple fluorochromes (FITC, PE, APC, etc.); selection depends on instrument configuration and potential spectral overlap with other probes [4] [21] |
| Propidium Iodide (PI) | Membrane-impermeant DNA dye identifying dead cells | Do not wash out after staining; must remain in buffer during acquisition [4]; concentration may require titration (2-10 µL/test) [3] |
| 7-AAD | Alternative viability dye with different spectral characteristics | Compatible with PE-conjugated Annexin V; red fluorescence (Ex/Em 546/647 nm) [3] |
| Binding Buffer | Provides calcium and isotonic conditions for Annexin V binding | Must contain 2.5 mM CaCl₂; avoid EDTA-containing buffers that chelate calcium and inhibit binding [4] [3] |
| Fixable Viability Dyes | Amine-reactive dyes for dead cell discrimination in fixed samples | Essential for intracellular staining protocols; avoid FVD eFluor 450 with Annexin V kits due to potential interference [4] |
Troubleshooting and Optimization
Even well-established protocols can encounter challenges. The following table addresses common issues and provides evidence-based solutions:
Table 3: Troubleshooting guide for Annexin V assays
| Problem | Potential Causes | Solutions |
|---|---|---|
| High background in controls | Over-trypsinization; mechanical damage; calcium chelation; platelet contamination (blood samples) | Use gentle, EDTA-free dissociation methods [21]; avoid excessive pipetting; ensure binding buffer contains calcium; remove platelets from blood samples [21] |
| Weak or no Annexin V signal | Insufficient apoptosis induction; missed apoptotic cells in supernatant; expired reagents; EDTA contamination | Include positive control; harvest both adherent and floating cells [21]; verify reagent activity; avoid EDTA in wash buffers [4] |
| Excessive PI staining | Over-induction of apoptosis leading to secondary necrosis; membrane damage from harsh processing | Titrate apoptosis inducer concentration and timing; use gentle cell handling techniques [1] |
| Poor population separation | Autofluorescence interference; inadequate compensation; poor cell condition | Select fluorochromes with minimal spectral overlap with cellular autofluorescence [21]; optimize compensation with single-stained controls; use healthy, log-phase cells [21] |
| Inconsistent results between replicates | Variable cell handling; uneven drug treatment; timing differences | Standardize cell preparation methods; ensure uniform treatment conditions; analyze samples at consistent time points after staining [1] |
Applications in Drug Discovery and Biomedical Research
The Annexin V staining protocol has become an indispensable tool across multiple domains of biomedical research, particularly in pharmaceutical development where quantitative assessment of cell death is paramount.
Oncology Drug Development
In cancer research, Annexin V staining is extensively used to evaluate the efficacy of chemotherapeutic agents, targeted therapies, and novel compounds [18]. The assay provides critical data on drug-induced apoptosis, allowing researchers to establish dose-response relationships, compare therapeutic indices, and identify mechanisms of drug resistance [18]. Furthermore, the combination of Annexin V staining with cell surface markers enables specific analysis of apoptosis in distinct tumor cell populations within complex samples, such as co-cultures or primary tumor specimens [8]. This application is particularly valuable for immunooncology studies assessing T-cell mediated killing of tumor cells.
Toxicological Assessment
Annexin V staining serves as a sensitive indicator of compound toxicity in preclinical safety assessment. The ability to detect early apoptotic changes before irreversible membrane damage occurs makes it valuable for identifying potentially toxic compounds earlier in the drug development pipeline [1]. In toxicology screens, the assay can distinguish between direct necrotic toxicity (Annexin V⁻/PI⁺) and programmed cell death (Annexin V⁺/PI⁻ followed by Annexin V⁺/PI⁺), providing mechanistic insight into compound toxicity [19].
Multiparametric Experimental Approaches
Contemporary apoptosis research increasingly employs Annexin V staining as part of multiparametric panels that assess multiple cellular parameters simultaneously [8] [19]. For example, combining Annexin V with cell cycle analysis (using PI or other DNA dyes), mitochondrial membrane potential sensors (JC-1), proliferation markers (BrdU, CellTrace Violet), or caspase activity probes provides comprehensive insights into cell death pathways and mechanisms [19]. These sophisticated approaches enable researchers to establish causal relationships between therapeutic interventions, signaling pathways, and apoptotic outcomes, accelerating the development of more effective and targeted therapies.
Comparative Analysis with Alternative Methods
While Annexin V staining represents a gold standard for early apoptosis detection, researchers should consider its relative advantages and limitations compared to alternative methodologies.
Table 4: Comparison of apoptosis detection methods
| Method | Detection Principle | Stage Detected | Key Advantages | Key Limitations |
|---|---|---|---|---|
| Annexin V Staining | PS externalization | Early apoptosis | Live cell analysis; distinguishes early/late apoptosis; compatible with flow cytometry | Cannot distinguish apoptosis from other PS-exposing death (necroptosis); calcium-dependent [1] |
| TUNEL Assay | DNA fragmentation | Late apoptosis | Specific for apoptotic DNA cleavage; works with fixed tissue | Requires fixation/permeabilization; later stage detection than Annexin V [1] |
| Caspase Activity Assays | Caspase enzyme activation | Early-mid apoptosis | Provides mechanistic insight; highly specific | Does not detect caspase-independent apoptosis; requires cell lysis for some formats [1] |
| MMP Assays (JC-1) | Mitochondrial membrane potential | Early apoptosis | Detects initiating events in intrinsic pathway | Does not specifically identify apoptotic cells; changes can be transient [19] |
The Annexin V staining protocol remains a cornerstone methodology in apoptosis research, offering robust, quantitative detection of early apoptotic cells with compatibility across multiple experimental platforms. Its particular value in drug discovery stems from the ability to rapidly screen compound libraries for cytotoxic and cytostatic activity while providing mechanistic information about cell death pathways. When properly optimized and controlled, this technique generates reproducible, publication-quality data that meets the rigorous standards of pharmaceutical development and biomedical research. As the field advances, integration of Annexin V staining into increasingly multiplexed experimental designs will further expand its utility in deciphering complex cellular responses to therapeutic interventions.
Cell death is a fundamental process in biology, and the accurate distinction between its two main forms—apoptosis and necrosis—is critical in biomedical research, particularly in drug development and toxicology. Apoptosis is a tightly regulated, programmed process essential for normal development and tissue homeostasis, while necrosis is an unregulated, pathological form of cell death resulting from external injury or stress [22] [23]. This application note details the core morphological and biochemical differences between these processes and provides a detailed protocol for their detection, with a specific focus on Annexin V staining for early apoptosis detection within the context of anticancer therapy evaluation.
The distinctions between apoptosis and necrosis span morphological, biochemical, and physiological dimensions, which are summarized in the table below for direct comparison.
Table 1: Comprehensive Comparison of Apoptosis and Necrosis
| Feature | Apoptosis | Necrosis |
|---|---|---|
| Cell Death Mechanism | Programmed, regulated cell death [22] [23] | Unprogrammed, accidental cell death [22] [23] |
| Triggering Factors | Internal signaling pathways, physiological cues, mild damage [22] [24] | External factors like injury, toxins, infections, ischemia [22] [24] |
| Energy Requirement | Energy-dependent (requires ATP) [23] | Energy-independent (does not require ATP) [23] |
| Membrane Integrity | Maintained until late stages; membrane blebbing occurs [22] [24] | Lost early in the process; membrane rupture [22] [24] |
| Key Morphological Changes | Cell shrinkage, chromatin condensation, nuclear fragmentation, formation of apoptotic bodies [25] [23] | Cell and organelle swelling, loss of membrane integrity, rupture [25] [23] |
| Inflammatory Response | Typically none; phagocytosis by neighboring cells [22] [23] | Prominent; leakage of cellular contents triggers inflammation [22] [23] |
| DNA Fragmentation | Endonuclease-cleaved into specific, regular fragments (DNA laddering) [23] | Random, irregular degradation [23] |
| Key Mediators | Caspase enzyme cascade [24] [23] | Not caspase-dependent [24] |
| Tissue Impact | Localized to individual cells; minimal impact on surrounding tissue [24] [23] | Affects groups of contiguous cells; can damage nearby tissue [24] [23] |
Visualizing the Signaling Pathways
The distinct nature of apoptosis and necrosis is rooted in their underlying biochemical pathways. The following diagrams illustrate the key signaling events for apoptosis and a specific form of regulated necrosis.
The Intrinsic and Extrinsic Apoptotic Pathways
The Necroptosis Pathway
While necrosis is often unregulated, necroptosis represents a programmed form of necrosis, often initiated when apoptotic pathways are blocked.
Application Note: Annexin V Staining for Early Apoptosis Detection
Principle of the Assay
The Annexin V staining protocol is a cornerstone technique for the specific detection of early apoptotic cells. Its principle is based on the high-affinity, calcium-dependent binding of Annexin V protein to phosphatidylserine (PS) [1] [11]. In viable, healthy cells, PS is exclusively located on the inner (cytoplasmic) leaflet of the plasma membrane. During the early stages of apoptosis, this membrane asymmetry is lost, and PS is translocated to the outer leaflet, where it becomes accessible for binding by Annexin V conjugates [1] [26]. The assay is typically combined with a vital dye, such as Propidium Iodide (PI), which is only able to enter cells with compromised plasma membranes. This dual staining allows for the discrimination between viable, early apoptotic, late apoptotic, and necrotic cell populations [1] [11].
The Scientist's Toolkit: Essential Reagents
Table 2: Key Research Reagent Solutions for Annexin V Staining
| Item | Function / Description |
|---|---|
| Annexin V Conjugate | A recombinant Annexin V protein conjugated to a fluorochrome (e.g., FITC, Alexa Fluor dyes). Binds externally exposed PS on apoptotic cells [1] [11]. |
| Propidium Iodide (PI) | A cell-impermeant DNA dye. Serves as a viability marker; stains cells with lost membrane integrity (necrotic/late apoptotic) [1] [26]. |
| Annexin V Binding Buffer | Provides the optimal calcium-containing environment required for efficient Annexin V binding to PS [1] [11]. |
| Apoptosis Inducer (Control) | A known apoptosis-inducing agent (e.g., Doxorubicin, Camptothecin) used to generate a positive control population [25] [11]. |
Detailed Step-by-Step Protocol
This protocol is optimized for the analysis of suspension and adherent cells via flow cytometry, based on established methodologies [1] [11] [27].
Stage 1: Cell Preparation and Staining
- Induce Apoptosis: Treat cells with the desired apoptotic stimulus (e.g., 5 μmol/L Doxorubicin for HeLa cells [25] or 10 μM Camptothecin for Jurkat cells [11]). Include an untreated control.
- Harvest Cells:
- For suspension cells: Collect 1–5 × 10^5 cells by centrifugation at 300–400 × g for 5 minutes. Gently resuspend in PBS.
- For adherent cells: Gently trypsinize, collect by centrifugation, and wash with serum-containing media to neutralize trypsin [1].
- Wash Cells: Resuspend the cell pellet in 500 μL of 1X Annexin V Binding Buffer.
- Stain Cells:
- Incubate: Incubate the cells at room temperature for 5–15 minutes in the dark to prevent photobleaching [1] [27].
Stage 2: Data Acquisition and Analysis
- Analyze by Flow Cytometry: Analyze the stained cells promptly (within 30-60 minutes) using a flow cytometer.
- Interpret Results: Use a dot plot of Annexin V fluorescence vs. PI fluorescence to identify distinct populations:
- Annexin V−/PI− (Lower Left): Viable, non-apoptotic cells.
- Annexin V+/PI− (Lower Right): Early apoptotic cells.
- Annexin V+/PI+ (Upper Right): Late apoptotic or necrotic cells.
Advanced Imaging and Morphological Confirmation
While flow cytometry is quantitative, advanced label-free imaging techniques like Full-Field Optical Coherence Tomography (FF-OCT) provide high-resolution, three-dimensional visualization of the characteristic morphological changes associated with each cell death type [25].
- Apoptotic Morphology: Cells exhibit features such as cell shrinkage, echinoid spine formation, membrane blebbing, and filopodia reorganization while maintaining membrane integrity until late stages [25] [23].
- Necrotic Morphology: Cells display rapid swelling (oncosis), membrane rupture, and leakage of intracellular contents, leading to a loss of cellular structure [25] [23].
Integrating Annexin V/PI staining with such imaging platforms validates the biochemical data with direct visual evidence, offering a more comprehensive analysis of cell death mechanisms [25] [28].
The precise differentiation between apoptosis and necrosis is vital for accurate interpretation of experimental results, particularly in drug discovery and toxicology. The Annexin V staining protocol provides a robust, sensitive, and quantitative method for detecting early apoptosis. When combined with viability dyes like PI and corroborated by high-resolution morphological imaging, researchers can confidently characterize cell death pathways, leading to more reliable assessments of cellular responses to therapeutic compounds and other stimuli.
Step-by-Step Annexin V Staining Protocol for Flow Cytometry
Research Reagent Solutions: Core Components for Apoptosis Detection
Successful detection of early apoptosis via Annexin V staining is contingent upon the precise preparation and functional understanding of its core reagents. The following table outlines the essential solutions, their critical components, and their primary roles in the assay.
Table 1: Key Reagents for Annexin V Staining Assay
| Reagent | Key Components | Primary Function | Critical Considerations |
|---|---|---|---|
| Binding Buffer | 0.1 M HEPES (pH 7.4), 1.4 M NaCl, 25 mM CaCl₂ [3] | Provides the optimal ionic and pH environment for calcium-dependent Annexin V binding to phosphatidylserine (PS) [1] | Must be free of EDTA or other calcium chelators that would inhibit binding [4] |
| Annexin V Conjugates | Recombinant Annexin V protein conjugated to a fluorophore (e.g., FITC, PE, APC) [4] | Binds specifically to PS exposed on the outer leaflet of the cell membrane, serving as the primary detection signal for early apoptosis [1] | Different fluorophores allow for multiplexing; choice depends on laser and filter setup of the flow cytometer [4] |
| Viability Dyes | Propidium Iodide (PI), 7-Aminoactinomycin D (7-AAD), or Fixable Viability Dyes (FVD) [4] [3] | Distinguishes late apoptotic/necrotic cells (viability dye-positive) from early apoptotic cells (viability dye-negative) based on membrane integrity [1] | PI and 7-AAD should not be washed out after staining; FVDs require staining prior to Annexin V [4] [3] |
Detailed Reagent Preparation and Formulation
Binding Buffer
The 1X binding buffer is typically prepared by a 1:9 dilution of a provided 10X concentrate with distilled water [4]. Its formulation is critical, with a final concentration of 2.5 mM CaCl₂ being essential for the Annexin V-phosphatidylserine interaction [3]. The HEPES buffer maintains a physiological pH of 7.4, while NaCl provides the necessary ionic strength. As emphasized, buffers containing calcium chelators like EDTA, EGTA, or citrate must be strictly avoided during staining, as they will prevent Annexin V binding [4].
Annexin V Conjugates and Viability Dyes
Annexin V conjugates are supplied as ready-to-use solutions. The standard volume used per test is 5 µL added to 100-500 µL of cell suspension [1] [4] [3]. The market offers a diverse range of conjugates, including Annexin V-FITC, -PE, -APC, and -PerCP-eFluor 710, providing flexibility for multicolor panel design [4] [29].
Viability dyes are equally critical for data interpretation. Propidium Iodide (PI) is a common choice, typically used at 2-5 µL per test [3]. As a membrane-impermeant dye, it is excluded from viable and early apoptotic cells. 7-AAD serves as an alternative to PI and is often recommended for use with red-emitting Annexin V conjugates like PE [3]. For more complex staining involving intracellular targets, fixable viability dyes (FVDs) are preferred, as their signal survives cell fixation and permeabilization. Notably, FVD eFluor 450 is not recommended for use with Annexin V detection kits [4].
Experimental Protocol for Flow Cytometry
The following diagram illustrates the core workflow for a typical Annexin V staining procedure for flow cytometry.
Diagram 1: Annexin V Staining Workflow
Step-by-Step Staining Procedure
- Cell Preparation: Harvest cells (1-5 x 10⁵) by centrifugation and wash once with cold PBS. For adherent cells, use gentle trypsinization and wash with serum-containing media to inactivate trypsin before proceeding [1].
- Buffer Resuspension: Resuspend the cell pellet in 100-500 µL of 1X Annexin V binding buffer at a concentration of 1-5 x 10⁶ cells/mL [4] [3].
- Annexin V Staining: Add 5 µL of the fluorochrome-conjugated Annexin V to the cell suspension. Gently vortex or pipette to mix [1] [4].
- Incubation: Incubate the cells for 5-15 minutes at room temperature protected from light [1] [4] [27].
- Viability Dye Addition: Without washing, add the viability dye—e.g., 2-5 µL of Propidium Iodide (PI) or 5 µL of 7-AAD [3].
- Final Incubation and Analysis: Incubate for another 5-15 minutes in the dark. Add an additional 300-400 µL of 1X binding buffer and analyze the samples by flow cytometry immediately, ideally within 1 hour [3] [30].
Critical Steps and Controls
- Calcium Dependence: The entire process must be performed with calcium-containing binding buffer to facilitate Annexin V binding [1] [4].
- Viability Dye Handling: Do not wash cells after the addition of PI or 7-AAD, as this can lead to loss of signal [4].
- Proper Controls: Essential controls for setting up flow cytometry compensation and quadrants include [3]:
- Unstained cells.
- Cells stained with Annexin V conjugate only.
- Cells stained with viability dye only.
- A positively induced apoptotic sample.
Data Interpretation and Troubleshooting
Gating Strategy and Population Analysis
Data from the dual-stained samples are plotted on a two-dimensional dot plot to distinguish the different cell states.
Diagram 2: Flow Cytometry Data Interpretation
Table 2: Interpreting Cell Populations from Annexin V/Viability Dye Staining
| Cell Population | Annexin V Staining | Viability Dye (PI/7-AAD) | Biological Interpretation |
|---|---|---|---|
| Viable/Live Cells | Negative | Negative | Healthy cells with intact membranes and no PS exposure [1] |
| Early Apoptotic Cells | Positive | Negative | Cells in early apoptosis, exposing PS but maintaining membrane integrity [1] |
| Late Apoptotic/Necrotic Cells | Positive | Positive | Cells in late-stage apoptosis (loss of membrane integrity) or necrotic cells [1] |
Troubleshooting Common Issues
- Weak Fluorescence Signal: Can result from insufficient Annexin V concentration, expired reagents, or incubation times that are too short. Ensure proper reagent storage and use fresh buffers [1].
- High Background/Non-specific Staining: Often caused by inadequate washing steps, excessive cell death during processing, or harsh trypsinization of adherent cells. Optimize washing steps and verify cell handling procedures [1].
- Unexpectedly High Annexin V+/PI+ Population: May indicate over-induced apoptosis leading to secondary necrosis, or physical damage to cells during harvest [1]. Always include an untreated control to establish basal levels of apoptosis and necrosis.
Accurate detection of early apoptosis via Annexin V staining is a cornerstone of cellular research in fields like oncology and drug development. The fundamental principle relies on the calcium-dependent binding of Annexin V to phosphatidylserine (PS), a phospholipid that translocates from the inner to the outer leaflet of the plasma membrane during early apoptosis [1] [11]. The integrity of this plasma membrane is critical for distinguishing early apoptosis from late-stage apoptosis or necrosis, which is typically achieved by co-staining with a viability dye like propidium iodide (PI) [1]. The success of this entire assay, however, is profoundly dependent on the initial step: the generation of a high-quality, single-cell suspension. Improper cell handling during this phase can mechanically damage the plasma membrane, leading to false-positive Annexin V staining and compromising the experimental data [31] [11]. This application note provides detailed protocols and comparative analysis for the optimal preparation of both suspension and adherent cell cultures, specifically within the context of Annexin V-based apoptosis detection.
Comparative Analysis: Suspension vs. Adherent Cells
The choice between suspension and adherent culture systems significantly impacts the workflow, scalability, and specific handling requirements for cell preparation. The table below summarizes the key characteristics of each system in the context of apoptosis research.
Table 1: Key Characteristics of Suspension vs. Adherent Cell Cultures in Apoptosis Research
| Characteristic | Suspension Cultures | Adherent Cultures |
|---|---|---|
| Growth Pattern | Cells grow free-floating in the culture medium [32] | Cells grow attached to a solid substrate [32] |
| Sample Preparation | Simpler; often requires only centrifugation and resuspension [31] | More complex; requires detachment (enzymatic/mechanical) before analysis [31] |
| Scalability | Easier to scale up using stirred-tank bioreactors [32] | Scaling up typically requires scale-out (e.g., more flasks) or fixed-bed bioreactors [32] |
| Risk of Artefactual Apoptosis | Lower risk of mechanical damage during harvesting | Higher risk; harsh trypsinization or scraping can induce membrane damage, causing false-positive Annexin V staining [1] |
| Common Applications | Hematopoietic cells, some cancer cell lines, production of viral vectors in biomanufacturing [32] | Most solid tissue-derived cell lines (e.g., HEK293, HeLa), primary cells |
Protocols for Cell Preparation
Protocol for Suspension Cells
This protocol is optimized to minimize stress and preserve membrane integrity for accurate Annexin V staining [1] [31].
Materials:
- Cells growing in suspension
- Flow Cytometry Staining Buffer or PBS
- Annexin V Binding Buffer (1X)
- Centrifuge
- Conical centrifuge tubes
Procedure:
- Collect Cells: Gently decant or pipette the cell culture into a 15 mL or 50 mL conical centrifuge tube.
- Centrifuge: Spin cells at 300–400 x g for 4–5 minutes at 2–8°C to form a pellet [31].
- Wash: Carefully decant the supernatant. Resuspend the cell pellet in an appropriate volume of Flow Cytometry Staining Buffer or PBS to wash away residual media and secretions.
- Recentrifuge: Repeat centrifugation at 300–400 x g for 4–5 minutes and discard the supernatant.
- Count and Resuspend: Perform a cell count and viability analysis. Resuspend cells in 1X Annexin V Binding Buffer at a concentration of 1 x 10^7 cells/mL (or as required by your specific assay) [1] [31]. The assay must now be performed on live cells without fixation.
Protocol for Adherent Cells
The critical factor for adherent cells is the gentle detachment from the substrate to avoid membrane damage.
Materials:
- Adherent cells at 70–80% confluence
- Accutase, Trypsin, or EDTA for detachment [31]
- Serum-containing media (for trypsin neutralization)
- Flow Cytometry Staining Buffer or PBS
- Annexin V Binding Buffer (1X)
- Centrifuge
- Conical centrifuge tubes
Procedure:
- Wash: Remove the culture medium and gently wash the cell monolayer with PBS to remove serum and dead cells.
- Detach Cells: Use a gentle dissociation agent like Accutase or a brief trypsin-EDTA treatment. Incubate for the minimal time required for cell detachment to avoid proteolytic damage [31].
- Neutralize: If using trypsin, neutralize the enzyme by adding a sufficient volume of serum-containing media.
- Harvest and Wash: Gently pipette the detached cells into a conical tube. Centrifuge at 300–400 x g for 4–5 minutes at 2–8°C and discard the supernatant [31].
- Resuspend and Count: Resuspend the cell pellet in staining buffer, perform a cell count and viability analysis.
- Final Resuspension: Centrifuge again and resuspend the final cell pellet in 1X Annexin V Binding Buffer at a concentration of 1 x 10^7 cells/mL [1]. Proceed immediately to Annexin V staining.
Table 2: Comparison of Cell Detachment Methods for Adherent Cells
| Method | Mechanism | Advantages | Disadvantages for Apoptosis Assays |
|---|---|---|---|
| Enzymatic (e.g., Trypsin) | Cleaves adhesion proteins | Fast and efficient | Can cleave surface proteins, including PS; may damage membrane integrity, increasing false positives [31] |
| Enzymatic (e.g., Accutase) | Combination of proteolytic and collagenolytic activities | Gentler on cell surface receptors; more suitable for sensitive assays | Slower action than trypsin |
| Chelating (e.g., EDTA) | Binds calcium, disrupting integrin-mediated adhesion | Does not digest proteins; preserves surface epitopes | Less effective for strongly adherent cell lines; may require longer incubation |
| Mechanical (Scraping) | Physically dislodges cells | Quick; no chemical treatment | High risk of plasma membrane rupture and necrotic cell death, leading to artefactual Annexin V/PI staining [1] |
The Scientist's Toolkit: Essential Reagents for Annexin V Staining
The following table details key reagents required for successful execution of an Annexin V apoptosis assay.
Table 3: Research Reagent Solutions for Annexin V Staining
| Reagent | Function | Key Considerations |
|---|---|---|
| Annexin V Conjugate | Fluorescently-labeled protein that binds externalized Phosphatidylserine (PS) on apoptotic cells [11] | Available conjugated to various dyes (e.g., FITC, Alexa Fluor 488, PE); choice depends on laser lines and filter sets of your flow cytometer or microscope [11] |
| Viability Stain (e.g., Propidium Iodide, 7-AAD, SYTOX Green) | DNA-binding dye excluded by intact membranes; identifies dead/late apoptotic cells with compromised membrane integrity [1] [11] | Critical for distinguishing early apoptotic (Annexin V+/PI-) from late apoptotic/necrotic cells (Annexin V+/PI+). Must be cell-impermeant [11] |
| Annexin V Binding Buffer | Provides the optimal calcium-containing environment for efficient Annexin V binding to PS [1] | Must contain Ca²⁺. Using an incorrect buffer will result in binding failure. |
| Flow Cytometry Staining Buffer | Used for washing and resuspending cells; typically a buffered solution like PBS, often with serum or BSA | Helps block non-specific binding and maintains cell viability during staining procedures [31] |
Visualizing the Workflow: From Cell Culture to Data Analysis
The following diagrams illustrate the core principles and experimental workflow for Annexin V-based apoptosis detection.
Annexin V Binding Principle
Experimental Workflow for Cell Preparation and Staining
The reliability of Annexin V staining for early apoptosis detection is inextricably linked to the quality of the initial cell preparation. Suspension cells offer a more straightforward path to a single-cell suspension with lower inherent risk of mechanical damage. In contrast, adherent cells demand a meticulously optimized and gentle detachment strategy to preserve plasma membrane integrity and prevent the introduction of artefacts. By following the detailed protocols and considerations outlined in this application note, researchers can ensure that their data truly reflects the biological state of apoptosis, thereby strengthening the validity of their findings in basic research and drug development.
Within the broader context of research on early apoptosis detection, the annexin V-FITC dual staining strategy represents a cornerstone technique for the quantitative analysis of programmed cell death. Apoptosis, a fundamental process in development, immune regulation, and tissue homeostasis, is characterized by a cascade of biochemical events, with the externalization of phosphatidylserine (PS) serving as a critical early marker [1] [33]. Under normal physiological conditions, PS is confined to the inner leaflet of the plasma membrane; during early apoptosis, this phospholipid translocates to the outer leaflet, while the cell membrane remains intact [11] [1]. The annexin V protein binds to these exposed PS residues with high affinity in a calcium-dependent manner [11]. By conjugating annexin V to a fluorochrome like FITC, researchers can reliably detect this early apoptotic event via flow cytometry [1].
The utility of annexin V staining is significantly enhanced by simultaneous use of a membrane-impermeant viability dye, such as propidium iodide (PI) or 7-AAD [4] [3]. These dyes are excluded from viable and early apoptotic cells with intact membranes but penetrate late apoptotic and necrotic cells, binding to nucleic acids [34]. This dual-staining approach enables the precise discrimination of four distinct cell populations: viable (annexin V−/PI−), early apoptotic (annexin V+/PI−), late apoptotic (annexin V+/PI+), and necrotic (annexin V−/PI+, though this population is less common) [11] [34]. This protocol details the application of this robust, quantitative method, providing researchers and drug development professionals with a reliable tool for assessing cellular responses to cytotoxic treatments, evaluating therapeutic efficacy, and elucidating death signaling pathways [8].
Materials and Reagents
Research Reagent Solutions
The following table catalogues the essential materials and reagents required for successful execution of the annexin V-FITC dual staining protocol.
Table 1: Essential Reagents and Materials for Annexin V-FITC Dual Staining
| Item | Function/Description | Key Considerations |
|---|---|---|
| Annexin V-FITC Conjugate | Fluorescently labels externalized phosphatidylserine on apoptotic cells [1]. | Calcium-dependent binding; requires specific buffer conditions [4]. |
| Propidium Iodide (PI) | Membrane-impermeant DNA dye identifying late apoptotic/necrotic cells [34]. | Do not wash out after staining; analyze samples promptly [4]. |
| 7-AAD Viability Stain | Alternative membrane-impermeant nucleic acid dye [3]. | Often used with Annexin V-PE conjugates to minimize spectral overlap [3]. |
| 10X Binding Buffer | Provides optimal calcium concentration and ionic strength for Annexin V-PS binding [3]. | Always dilute to 1X working concentration; avoid EDTA contamination [4]. |
| Flow Cytometry Staining Buffer | Used for washing cells to reduce background staining [4]. | Azide- and serum-free PBS is recommended for wash steps prior to staining [4]. |
| Fixable Viability Dyes (FVD) | Allow for subsequent intracellular staining and fixation [4]. | FVD eFluor 450 is not recommended for use with annexin V kits [4]. |
Protocol
Experimental Workflow
The following diagram illustrates the sequential steps for a standard annexin V-FITC/propidium iodide staining procedure for suspension cells:
Detailed Staining Procedure
This protocol is adapted from established methodologies provided by leading bioscience suppliers and research articles [4] [1] [3].
Cell Preparation and Harvesting
- Induce Apoptosis: Treat cells (e.g., MDA-MB-231 breast cancer cells with doxorubicin) using your chosen apoptotic stimulus [8].
- Harvest Cells: For adherent cells, detach using gentle, non-enzymatic methods (e.g., EDTA) or mild trypsinization followed by a wash with serum-containing media to inactivate trypsin, preserving membrane integrity [1]. For suspension cells, collect directly.
- Wash Cells: Pellet cells by centrifugation at 300–500 × g for 5 minutes. Discard the supernatant and wash the cell pellet twice with cold, azide-free PBS to remove residual media and serum proteins that can interfere with staining [4] [34].
- Resuspend Cells: After the final wash, thoroughly resuspend the cell pellet in 1X Annexin V Binding Buffer at a density of 1–5 × 10^6 cells/mL [4] [3].
Staining Process
- Aliquot Cells: Transfer 100 µL of the cell suspension (containing ~1–5 × 10^5 cells) into a 5 mL flow cytometry tube [3].
- Add Annexin V-FITC: Add 5 µL of Annexin V-FITC conjugate to the cell suspension. Gently vortex or pipette to mix thoroughly [1] [3].
- Incubate: Incubate the tubes for 15 minutes at room temperature (20–25°C) in the dark to protect the fluorochrome from photobleaching [3] [34].
- Add Viability Dye: After incubation, add 2–5 µL of Propidium Iodide (PI) Staining Solution [3] or 5 µL of 7-AAD Viability Stain [3]. Do not wash the cells after this step, as the viability dye must remain in the buffer during acquisition [4].
- Final Resuspension: Add 400 µL of 1X Annexin V Binding Buffer to the tubes to achieve an appropriate volume for flow cytometric analysis [3].
Flow Cytometric Acquisition
- Analyze the stained cells immediately, ideally within 1 hour, to prevent deterioration of the staining profile [4]. If a short delay is unavoidable, keep samples on ice.
- Use a flow cytometer equipped with a 488-nm laser. Detect FITC fluorescence (Annexin V) with a 530/30 nm bandpass filter (FL1) and PI fluorescence with a 585/42 nm or 617 nm bandpass filter (FL2 or FL3) [11].
- Acquire a minimum of 10,000 events per sample to ensure statistical robustness.
Essential Controls and Optimization
The inclusion of proper controls is non-negotiable for accurate data interpretation and gating.
Table 2: Required Experimental Controls for Annexin V/PI Staining
| Control Sample | Purpose | Staining Combination |
|---|---|---|
| Unstained Cells | To assess cellular autofluorescence and set negative populations. | No stains added. |
| Annexin V-FITC Only | To set the Annexin V-positive gate and compensate for FITC spillover into the PI channel. | Annexin V-FITC + Binding Buffer (no PI). |
| PI Only | To set the PI-positive gate and compensate for PI spillover into the FITC channel. | PI + Binding Buffer (no Annexin V-FITC). |
| Untreated Cells | To determine the basal level of apoptosis and necrosis in the population. | Full staining protocol. |
| Induced Apoptotic Cells | A positive control to validate the staining protocol and instrument settings. | Cells treated with a known apoptogen (e.g., camptothecin) and stained fully [11]. |
Data Analysis and Interpretation
Gating Strategy and Population Discrimination
The power of the dual-staining method lies in its ability to resolve distinct cell populations based on their staining profiles. The following logic diagram guides the interpretation of the flow cytometry dot plot:
- Viable Cells (Q3: Annexin V⁻/PI⁻): These cells exhibit no significant fluorescence in either channel, indicating an intact membrane and no externalization of phosphatidylserine [34].
- Early Apoptotic Cells (Q4: Annexin V⁺/PI⁻): This population is positive for annexin V binding but excludes PI, hallmarks of early apoptosis where PS is exposed but the plasma membrane remains intact [1] [35].
- Late Apoptotic Cells (Q2: Annexin V⁺/PI⁺): These cells are positive for both dyes, indicating that they have externalized PS and have subsequently lost membrane integrity, a characteristic of late-stage apoptosis or "secondary necrosis" [8] [34].
- Necrotic Cells (Q1: Annexin V⁻/PI⁺): While less common, this population consists of cells that have lost membrane integrity (PI-positive) without undergoing the apoptotic process of PS externalization (annexin V-negative) [34]. This can indicate primary necrosis.
Troubleshooting Common Issues
Even with a robust protocol, researchers may encounter challenges. The table below outlines common problems and their solutions.
Table 3: Troubleshooting Guide for Annexin V/PI Staining
| Problem | Potential Cause | Recommended Solution |
|---|---|---|
| High Background/Weak Signal | Insufficient washing; expired reagents; incorrect buffer. | Ensure fresh reagents and proper washing with azide-free PBS; verify 1X Binding Buffer preparation and absence of EDTA [4] [1]. |
| Low Percentage of Apoptotic Cells | Inefficient apoptosis induction; over-fixation; harsh cell harvesting. | Optimize inducer concentration/duration; avoid fixation if possible; use gentler detachment methods for adherent cells [1]. |
| High PI Signal in "Viable" Gate | Membrane damage during processing; prolonged staining/analysis time. | Use gentler pipetting; avoid enzymatic overtrypsinization; analyze samples within 1 hour of staining [4] [34]. |
| Unspecific Annexin V Staining | Calcium chelators in buffer; excessive cell death. | Ensure buffers are calcium-rich and free of EDTA; include a viability dye to identify dead cells for accurate gating [4] [11]. |
Comparative Analysis and Advanced Applications
Comparison with Hoechst 33342/PI Staining
While annexin V/PI is a widely accepted standard, other staining methods exist. A comparative study highlighted the limitations of Hoechst 33342/PI double staining. Although it worked for detecting apoptosis in dexamethasone-induced thymocytes, it produced contradictory and principle-conflicting results in the early stage of H₂O₂-induced K562 cell apoptosis [36]. This underscores the reliability and consistency of the annexin V/PI method across different cell death inducers.
Multiparametric Applications in Research
The basic annexin V-FITC/PI staining protocol can be powerfully extended to multiparametric analyses for deeper mechanistic insights. As demonstrated in a recent study, this approach can be combined with APC-conjugated antibodies to track changes in specific protein expression (e.g., CD44) simultaneously within defined apoptotic subpopulations [8]. Furthermore, protocols exist for integrating annexin V staining with fixable viability dyes and subsequent intracellular staining for cytokines, transcription factors, or other intracellular targets, providing a comprehensive view of cell state and signaling pathways in response to cytotoxic treatments [4].
Within the broader investigation of Annexin V staining protocols for early apoptosis detection, the precise optimization of incubation conditions and timing is a critical determinant of experimental success. This application note provides a detailed, evidence-based framework for researchers and drug development professionals to execute and refine the Annexin V staining procedure. The externalization of phosphatidylserine (PS) is a hallmark of early apoptosis, and its detection via calcium-dependent Annexin V binding forms the basis of this widely adopted assay [1]. However, the reliability of the results is profoundly influenced by specific procedural parameters, including incubation duration, temperature, and the integrity of cell membranes during processing. This document consolidates protocols from leading reagent manufacturers and core facilities to establish a robust and reproducible methodology.
Principles of the Annexin V Assay
The fundamental principle of this assay relies on the disruption of phospholipid asymmetry in the plasma membrane during early apoptosis. In viable cells, phosphatidylserine (PS) is predominantly confined to the inner, cytoplasmic leaflet of the membrane. A key early event in apoptosis is the rapid translocation of PS to the outer leaflet, exposing it to the external cellular environment [7] [37]. Annexin V is a 35-36 kDa natural protein with a high, calcium-dependent affinity for PS [38]. When conjugated to a fluorochrome, it serves as a sensitive probe for detecting this exposure.
To distinguish apoptosis from necrosis, Annexin V staining is typically paired with a membrane-impermeant DNA dye, such as Propidium Iodide (PI) or 7-AAD. Viable cells with intact membranes exclude these dyes, while late apoptotic and necrotic cells with compromised membrane integrity permit dye entry and nuclear staining [3] [39]. This dual-staining approach allows for the discrimination of four cell populations: viable (Annexin V-/PI-), early apoptotic (Annexin V+/PI-), late apoptotic (Annexin V+/PI+), and necrotic (Annexin V-/PI+, though this is less common) [39].
The following diagram illustrates the core workflow and the critical decision points for incubation and timing within the Annexin V staining procedure:
Critical Parameters for Incubation and Timing
The accuracy of the Annexin V assay is highly dependent on several meticulously controlled parameters. The table below summarizes the optimized conditions for key steps in the staining procedure, synthesized from multiple established protocols [4] [3] [6].
Table 1: Optimization of Key Staining Parameters
| Staining Parameter | Optimized Condition | Protocol Variations | Impact of Deviation |
|---|---|---|---|
| Annexin V Incubation Time | 10–15 minutes at Room Temperature (RT) | 5 minutes [1] to 20 minutes [40] | Short: Weak staining, false negatives.Long: Increased background, potential cell death. |
| Annexin V Incubation Temperature | Room Temperature (RT) | 2–8°C (when combined with viability dye) [4] | Cold: Reduced binding kinetics, weaker signal. |
| Viability Dye Incubation | 5–15 minutes at RT or on ice [4] | Added concurrently with Annexin V in some protocols [1] | N/A |
| Post-Staining Analysis Window | Immediately, within 1 hour [3] [7] [40] | Up to 4 hours if stored at 2–8°C [4] | Delayed analysis: Altered cell viability, loss of staining fidelity. |
| Calcium Concentration | 2.5 mM CaCl₂ in 1X Binding Buffer [3] [40] | Critical for Annexin V-PS binding [4] | Low/No Calcium: Abolishes Annexin V binding. |
Detailed Staining Protocol with Optimized Incubation
The following step-by-step protocol is designed for staining with Annexin V and Propidium Iodide (PI). It integrates the optimized parameters from Table 1.
Materials & Reagents:
- 1X Annexin V Binding Buffer (10 mM HEPES, 140 mM NaCl, 2.5 mM CaCl₂, pH 7.4) [3] [40]
- Fluorochrome-conjugated Annexin V (e.g., FITC, PE, APC)
- Propidium Iodide (PI) solution (or 7-AAD)
- Flow Cytometry Staining Buffer or PBS (cold, azide-free)
Procedure:
- Cell Preparation: Harvest cells gently using non-enzymatic dissociation or mild trypsin without EDTA, as EDTA chelates calcium and inhibits Annexin V binding [21]. For adherent cells, ensure the supernatant containing floating cells is collected, as it may be enriched in apoptotic cells [6] [7].
- Washing: Wash cells twice with cold PBS and then once with 1X Annexin V Binding Buffer by centrifugation (e.g., 300–500 × g for 5 minutes) [4] [3] [39].
- Cell Concentration: Resuspend the cell pellet in 1X Binding Buffer at a density of 1–5 × 10⁶ cells/mL [4] [3].
- Annexin V Staining: Aliquot 100 µL of cell suspension (containing ~1–5 × 10⁵ cells) into a flow cytometry tube. Add the recommended volume of fluorochrome-conjugated Annexin V (typically 5 µL). Gently vortex or tap the tube to mix.
- Optimized Incubation: Incubate the cells for 10–15 minutes at room temperature in the dark [4]. This is the critical window that allows for efficient, specific binding without promoting non-specific staining.
- Viability Dye Addition: Without washing, add PI (recommended starting volume is 2–5 µL) [3]. Gently mix.
- Viability Dye Incubation: Incubate for 5–15 minutes at room temperature or on ice, protected from light [4]. Do not wash the cells after this step, as the viability dye must remain in the buffer during acquisition.
- Dilution and Analysis: Add 400 µL of 1X Binding Buffer to the tubes [3] [40]. Analyze the samples by flow cytometry immediately, and within 1 hour of staining to prevent changes in cell viability and staining patterns [7] [39].
The Scientist's Toolkit: Essential Research Reagent Solutions
The following table details key reagents required for a successful Annexin V apoptosis assay, along with their critical functions and usage notes.
Table 2: Essential Reagents for Annexin V Staining
| Reagent | Function/Purpose | Key Considerations |
|---|---|---|
| Annexin V, Fluorochrome-Conjugated | Binds exposed phosphatidylserine (PS) for detection of early apoptotic cells. | Choose a fluorochrome (e.g., FITC, PE, APC) compatible with your flow cytometer and other markers. Avoid FITC if cells express GFP [21]. |
| Propidium Iodide (PI) | Membrane-impermeant DNA dye; identifies late apoptotic/necrotic cells. | Must not be washed out after staining. Keep in buffer during acquisition [4] [1]. |
| 7-AAD | Alternative membrane-impermeant nucleic acid dye; used as a viability marker. | Often paired with Annexin V-PE due to better spectral separation than PI/FITC [3]. |
| 1X Annexin V Binding Buffer | Provides optimal calcium concentration and ionic strength for specific Annexin V-PS binding. | Must contain 2.5 mM CaCl₂. Avoid buffers with EDTA or other calcium chelators [4] [21]. |
| Fixable Viability Dyes (FVD) | Distinguishes live/dead cells in complex panels; can be used prior to Annexin V staining. | Must be used before Annexin V staining and fixed after. FVD eFluor 450 is not recommended with certain Annexin V kits [4]. |
Advanced Applications and Integrated Protocols
For more complex experimental designs, such as incorporating surface or intracellular staining, the sequence of steps must be carefully planned to preserve Annexin V binding and cell viability.
- With Fixable Viability Dyes (FVD) and Surface Staining: Cells should first be stained for surface antigens, followed by incubation with the FVD in azide-free PBS for 30 minutes at 2–8°C. After washing, cells are then stained with Annexin V as described above [4].
- With Intracellular Staining: The Annexin V step must be performed after surface staining but before fixation and permeabilization, as fixation disrupts membrane integrity and allows Annexin V to bind to internal PS, causing false positives [4] [1].
Troubleshooting Common Incubation-Related Issues
Even with a standardized protocol, issues can arise. The table below addresses common problems directly linked to incubation and timing.
Table 3: Troubleshooting Incubation and Staining Problems
| Problem | Potential Cause | Recommended Solution |
|---|---|---|
| High Background in Unstained/Negative Controls | Non-specific binding; over-incubation with dye. | Titrate Annexin V to find the optimal concentration [7]. Strictly adhere to incubation times. |
| Weak Annexin V Signal | Insufficient incubation time or temperature; degraded reagents; low calcium. | Ensure incubation is for a full 10–15 min at RT. Verify the calcium concentration in the binding buffer [21] [1]. |
| Excessive PI Staining in Treated Sample | Overly harsh cell harvesting causing mechanical damage; delayed analysis. | Harvest cells gently using EDTA-free enzymes like Accutase [21]. Analyze samples within 1 hour of staining. |
| Unclear Population Separation | Inadequate compensation; cell autofluorescence. | Use single-stained controls (Annexin V-only, PI-only) for proper compensation [21] [3]. Consider using a brighter fluorochrome if autofluorescence is high. |
The consistent and accurate detection of early apoptosis via Annexin V staining is contingent upon a deeply understood and meticulously executed protocol. By adhering to the optimized incubation conditions—specifically, a 10–15 minute incubation with Annexin V at room temperature and prompt analysis within one hour—researchers can minimize artifacts and generate reliable, reproducible data. The guidelines and troubleshooting strategies provided herein offer a pathway to robust assay performance, forming a solid methodological foundation for critical research and drug development in cell biology.
Flow cytometry is a powerful tool for the quantitative analysis of apoptotic cells, with Annexin V staining serving as a gold standard method for detecting early apoptosis. This process is characterized by the loss of plasma membrane asymmetry and the externalization of phosphatidylserine (PS), a phospholipid normally confined to the inner leaflet of the membrane [1]. Annexin V, a 35-36 kDa calcium-dependent phospholipid-binding protein, exhibits high affinity for PS, making it an ideal probe for identifying cells in the early stages of programmed cell death [11]. When combined with a viability dye such as propidium iodide (PI), this assay enables researchers to distinguish between viable, early apoptotic, late apoptotic, and necrotic cell populations [1]. The accurate detection of these populations requires precise instrument configuration and an understanding of immediate analysis requirements to prevent artifacts and ensure data integrity.
Principles of Annexin V Binding and Apoptosis
Biochemical Mechanism of Phosphatidylserine Externalization
During early apoptosis, cells undergo distinct biochemical and morphological changes, one of the earliest being the translocation of phosphatidylserine from the inner to the outer leaflet of the plasma membrane. This loss of membrane asymmetry serves as a clear "eat-me" signal for phagocytic cells [1]. Annexin V binds specifically to these exposed PS residues in a calcium-dependent manner, forming the basis of the detection assay [1] [11]. The binding is reversible and requires maintained calcium concentrations throughout the analysis procedure. The integrity of the plasma membrane remains largely intact during early apoptosis, allowing for differentiation from late apoptotic and necrotic cells through the use of membrane-impermeant DNA binding dyes.
Apoptotic Pathway Signaling
The following diagram illustrates the key cellular events in apoptosis leading to phosphatidylserine externalization:
Flow Cytometry Instrument Configuration
Laser and Filter Configuration
Proper configuration of the flow cytometer is essential for accurate Annexin V detection. The instrument must be equipped with appropriate lasers and filters matched to the fluorochromes used in the experiment. Most commonly, Annexin V is conjugated to FITC (excitation/emission: 490/525 nm), which requires a 488 nm blue laser for excitation [11]. The emission is typically collected using a 530/30 nm bandpass filter. When using propidium iodide as a viability dye (excitation/emission: 535/617 nm), it is also excited by the 488 nm laser but detected with a 585/42 nm or 610/20 nm filter, depending on the specific instrument configuration [1] [3].
For more complex multicolor panels, additional lasers and filters may be required. For example, Annexin V conjugated to Alexa Fluor 647 (excitation/emission: 650/665 nm) requires a red laser (633-637 nm) and is detected with a 661/8 nm filter [11]. Before panel design, researchers must determine the number and type of lasers, the number of detectors, and the specific filters available on their flow cytometer [41]. This information is typically available in the instrument manual or through consultation with core facility staff.
Fluorescence Compensation Setup
Spectral overlap between fluorochromes is an inevitable challenge in multicolor flow cytometry that must be corrected through proper compensation. Fluorophores with overlapping emission spectra, such as FITC and PE, can generate false positive signals if not properly compensated [41]. For example, FITC emission has a spectral tail that extends into the PE detector range, making cells positive for FITC appear positive for PE without appropriate compensation [41].
To set compensation correctly, single-stained controls are essential for each fluorophore used in the experiment. These controls should contain both positive and negative populations and should ideally use the same cell type as the experimental samples [41]. Compensation is correctly set when the median fluorescence intensity of the negative population equals that of the positive population in the spillover channel [41]. The compensation procedure should be performed systematically, starting with fluorophores from the far-red end of the spectrum and moving stepwise to the lower wavelengths [41].
Detector Voltage Optimization
Proper voltage settings for photomultiplier tubes (PMTs) are critical for resolving dim positive populations from negative cells. Voltages should be optimized using unstained cells and single-stained controls to ensure optimal signal-to-noise ratio. When analyzing rare cell populations or detecting low-abundance antigens, using the brightest fluorophores (such as PE or APC) is recommended [41]. For Annexin V staining, which typically shows approximately 100-fold difference in fluorescence intensity between apoptotic and non-apoptotic cells [11], PMT voltages should be set to place the negative population appropriately in the logarithmic scale while ensuring the positive population remains on-scale.
Essential Reagents and Research Solutions
Successful Annexin V staining requires specific reagents optimized for maintaining cell viability, supporting calcium-dependent binding, and enabling accurate discrimination of apoptotic stages. The table below details the essential components for apoptosis detection using flow cytometry:
Table 1: Key Research Reagent Solutions for Annexin V Apoptosis Detection
| Reagent | Function | Application Notes |
|---|---|---|
| Annexin V Conjugate | Binds externalized phosphatidylserine on apoptotic cells | Available conjugated to FITC, PE, APC, Alexa Fluor dyes; choice depends on laser availability and panel design [11] |
| Viability Dye (PI, 7-AAD, SYTOX) | Identifies cells with compromised membrane integrity | Distinguishes early apoptotic (dye-negative) from late apoptotic/necrotic (dye-positive) cells [1] [3] [11] |
| Annexin Binding Buffer | Provides calcium and optimal pH for Annexin V binding | Critical calcium-dependent binding; typically used at 1X concentration [1] [3] |
| Cell Preparation Reagents | Harvest and wash cells while maintaining viability | Gentle trypsinization for adherent cells; serum-containing media to neutralize trypsin [1] |
Detailed Experimental Protocol for Annexin V Staining
Sample Preparation and Staining Workflow
The following diagram outlines the complete experimental workflow for Annexin V staining, from sample preparation to data analysis:
Step-by-Step Staining Procedure
Induce Apoptosis and Harvest Cells: Apply the apoptotic stimulus to cells. For suspension cells, collect 1-5 × 10^5 cells by centrifugation at 300-400 × g for 5 minutes. For adherent cells, gently trypsinize using trypsin without EDTA, then wash with serum-containing media to neutralize trypsin [1].
Wash Cells: Wash cells twice with cold phosphate-buffered saline (PBS) to remove residual media and cellular debris [3]. Maintaining cells at 4°C can help slow down metabolic processes and prevent additional apoptosis.
Prepare Cell Suspension: Resuspend the cell pellet in 1X Annexin V Binding Buffer at a concentration of approximately 1 × 10^6 cells/mL [3]. Transfer 100 μL of cell suspension (containing ~1 × 10^5 cells) to a flow cytometry tube.
Add Staining Reagents: Add 5 μL of Annexin V conjugate (e.g., Annexin V-FITC) and the appropriate volume of viability dye (e.g., 2-5 μL of propidium iodide) to the cell suspension [1] [3]. Gently vortex the tube to ensure proper mixing.
Incubate: Incubate the cells for 15 minutes at room temperature (15-25°C) in the dark to prevent fluorophore photobleaching [3].
Dilute and Analyze: Within 1 hour of staining, add 400 μL of 1X Annexin V Binding Buffer to each tube and analyze by flow cytometry [3]. Do not fix the cells, as fixation can permeabilize membranes and lead to artifactual Annexin V binding to internal PS.
Critical Controls for Setup and Validation
Appropriate controls are essential for setting instrument parameters, compensation, and validating the assay:
- Unstained Cells: To assess cellular autofluorescence and set photomultiplier tube voltages.
- Single-Stained Controls: Cells stained with Annexin V conjugate only (no viability dye) and viability dye only (no Annexin V) for proper compensation setup [3].
- Untreated Cells: To establish baseline apoptosis levels in the population.
- Induced Apoptosis Positive Control: Cells treated with a known apoptosis inducer (e.g., 10 μM camptothecin for 4 hours) to verify staining efficacy [11].
- Annexin V Blocking Control (Optional): Pre-incubation with unconjugated Annexin V to block binding sites, demonstrating staining specificity [3].
Immediate Analysis Requirements and Data Interpretation
Time-Sensitive Analysis Considerations
Annexin V staining is a live-cell assay with specific time constraints that impact data quality. Analyzed samples must be processed within 1 hour of staining completion [3]. The calcium-dependent binding of Annexin V to phosphatidylserine is reversible, and prolonged incubation can lead to signal loss. Additionally, the continued metabolic activity of cells may alter their staining profile over time. For consistent results, maintain stained samples at room temperature and avoid refrigeration, as cold temperatures can affect membrane properties and cause nonspecific staining.
Flow Cytometry Data Acquisition and Gating Strategy
Data acquisition should begin immediately after buffer addition using the pre-configured instrument settings. A minimum of 10,000 events per sample is generally recommended for statistical analysis, though rare populations may require higher event counts. The gating strategy typically involves:
- Forward scatter (FSC) vs. side scatter (SSC) to identify the primary cell population and exclude debris.
- FSC-H vs. FSC-A to select single cells and exclude doublets.
- Annexin V vs. viability dye dot plot to distinguish cell populations.
Table 2: Interpretation of Annexin V and Viability Dye Staining Patterns
| Annexin V Staining | Viability Dye Staining | Cell Population | Biological Significance |
|---|---|---|---|
| Negative | Negative | Viable cells | Healthy, non-apoptotic cells with intact membranes [1] |
| Positive | Negative | Early apoptotic cells | Cells undergoing early apoptosis with externalized PS but intact membranes [1] [11] |
| Positive | Positive | Late apoptotic/necrotic cells | Cells with compromised membrane integrity; may be late-stage apoptosis or necrosis [1] |
Advanced Applications and Multipanel Design
The Annexin V assay can be integrated into more complex multicolor flow cytometry panels to simultaneously examine apoptosis alongside cell surface phenotyping, intracellular signaling, or cell cycle status. When designing multicolor panels, several considerations are essential. Always assign the brightest fluorophores (such as PE or APC) to detect low-abundance antigens or rare cell populations, while using dimmer fluorophores for highly expressed targets like Annexin V [41]. Choose fluorophore combinations with minimal spectral overlap to reduce compensation complexity and potential spillover, avoiding problematic pairs such as APC and PE-Cy5 [41]. Include viability dyes in the panel to exclude dead cells that may exhibit nonspecific antibody binding. For high-parameter experiments, consider using tandem dyes carefully and validate their performance, as they can be susceptible to batch variability and degradation. Advanced analysis platforms like FlowJo provide tools for dimensionality reduction (t-SNE, UMAP) and clustering algorithms (PhenoGraph, FlowSOM) that can help visualize and identify distinct cellular subpopulations within Annexin V-stained samples [42] [43].
Troubleshooting Common Issues
Weak Annexin V signal may result from insufficient calcium concentration in the binding buffer, improper pH, or expired reagents. Verify buffer composition and prepare fresh dilutions as needed. High background staining can occur due to cellular necrosis from harsh processing, excessive trypsinization of adherent cells, or incomplete washing. Optimize cell harvesting methods and ensure gentle processing. Excessive viability dye uptake in the Annexin V-negative population indicates general cell death, potentially from toxic culture conditions or mechanical damage during processing. Poor compensation between channels often stems from inadequate single-stained controls or using the wrong cell type for controls. Always use compensation controls that match the experimental samples in both cell type and fluorophore brightness.
The accurate distinction between early and late apoptotic cell populations is a cornerstone of cellular research, particularly in fields such as cancer biology, neurobiology, and drug development. The Annexin V and Propidium Iodide (PI) dual-staining protocol, analyzed via flow cytometry, provides researchers with a powerful tool for achieving this distinction quantitatively. This methodology capitalizes on two fundamental biochemical events in the cell death cascade: the externalization of phosphatidylserine (PS) to the outer leaflet of the plasma membrane during early apoptosis, and the subsequent loss of membrane integrity in late apoptosis and necrosis [44] [45]. Annexin V, a 35-36 kDa calcium-dependent phospholipid-binding protein, exhibits high affinity for PS [44] [1]. In viable cells, PS is restricted to the inner membrane leaflet, but during early apoptosis, it translocates to the cell surface, creating a specific binding site for fluorescently conjugated Annexin V [45] [1]. Propidium Iodide serves as a complementary viability dye; it is a membrane-impermeant DNA intercalator that can only enter cells when plasma membrane integrity is compromised, a characteristic of late-stage apoptotic and necrotic cells [45] [46]. The simultaneous application of these two markers allows for the resolution of four distinct cell states based on their fluorescence profile, enabling researchers to move beyond simple viability assessment and track the progression of cell death in a population over time [45] [46] [47].
Principles of Quadrant Analysis
The interpretation of Annexin V/PI data relies on a four-quadrant dot plot generated from flow cytometry analysis. In this plot, the x-axis typically represents Annexin V fluorescence (e.g., FITC), while the y-axis represents PI fluorescence. Each quadrant corresponds to a specific cellular state, providing a snapshot of the entire population's health [45].
Table 1: Interpretation of Annexin V/PI Quadrant Analysis
| Quadrant | Annexin V Staining | PI Staining | Cell Status | Biological Interpretation |
|---|---|---|---|---|
| Q1 (Lower Right) | Positive | Negative | Early Apoptotic | Cells with exposed PS but intact membrane [45] [1]. |
| Q2 (Upper Right) | Positive | Positive | Late Apoptotic | Cells with exposed PS and compromised membrane [45] [46]. |
| Q3 (Lower Left) | Negative | Negative | Viable/Normal | Healthy cells with no PS exposure and intact membrane [45] [46]. |
| Q4 (Upper Left) | Negative | Positive | Necrotic | Cells with damaged membrane but no PS exposure [45] [47]. |
The following diagram illustrates the gating strategy and logical interpretation of the quadrant plot, connecting the experimental data to the biological conclusions drawn in Table 1.
Detailed Experimental Protocol
Materials and Reagents
A successful Annexin V/PI assay depends on the use of specific, high-quality reagents and their appropriate handling. The core components of the staining protocol are listed below.
Table 2: Essential Research Reagent Solutions for Annexin V/PI Staining
| Reagent/Buffer | Key Components | Critical Function in the Assay |
|---|---|---|
| Fluorochrome-conjugated Annexin V | Annexin V protein conjugated to FITC, PE, APC, etc. | Binds to externally exposed phosphatidylserine (PS) on apoptotic cells [4] [1]. |
| Propidium Iodide (PI) | Propidium Iodide solution in buffer. | Membrane-impermeant DNA dye; stains cells with compromised plasma membrane integrity [45] [3]. |
| 1X Annexin V Binding Buffer | 10 mM HEPES, 140 mM NaCl, 2.5 mM CaCl₂, pH 7.4 [4] [3]. | Provides the optimal ionic and calcium environment for specific Annexin V-PS binding [44] [4]. |
| Phosphate Buffered Saline (PBS) | NaCl, KCl, Na₂HPO₄, KH₂PO₄. | Used for washing cells to remove serum proteins and media that can interfere with staining [46]. |
| Fixable Viability Dyes (Optional) | eFluor 660, eFluor 780, etc. | Used as an alternative to PI for complex multicolor panels requiring cell fixation after staining [4]. |
Step-by-Step Staining Procedure
The following protocol is optimized for suspension cells or adherent cells that have been gently detached. All centrifugation steps should be performed at 300 × g for 5 minutes at room temperature unless otherwise specified [46] [3].
Cell Preparation and Harvesting:
- Induce apoptosis using the desired experimental treatment (e.g., chemical agent, radiation).
- For adherent cells, detach gently using non-enzymatic dissociation buffers or low-concentration trypsin/EDTA, followed by a wash with serum-containing media to neutralize trypsin [45] [1]. Harsh trypsinization can cause false-positive PI staining by damaging the membrane.
- For suspension cells, collect cells directly.
- Transfer cell suspension to a centrifuge tube and pellet cells. Wash cells once with cold PBS to remove residual media and proteins [4] [3].
Staining Incubation:
- Resuspend the cell pellet in 1X Annexin V Binding Buffer at a density of 1 × 10⁶ cells/mL [3].
- Transfer 100 µL of cell suspension (containing ~1 × 10⁵ cells) to a flow cytometry tube.
- Add 5 µL of fluorochrome-conjugated Annexin V to the cell suspension. Gently vortex the tube to mix [4] [3].
- Add 2-5 µL of Propidium Iodide (PI) solution. The optimal volume may require titration for different cell types [3].
- Incubate the cells at room temperature for 15 minutes in the dark [45] [4] [3].
Post-Staining Processing and Analysis:
- After incubation, add 400 µL of 1X Annexin V Binding Buffer to each tube [3].
- Keep samples on ice and protect from light. Analyze by flow cytometry as soon as possible, ideally within 1 hour, to prevent progression of apoptosis and loss of staining fidelity [4] [3].
- Do not wash the cells after adding PI, as this can lead to loss of the PI signal from late apoptotic cells.
Critical Controls and Instrument Setup
Robust data interpretation is impossible without proper controls and flow cytometer configuration.
Essential Controls:
- Unstained Cells: To determine background autofluorescence and set photomultiplier tube (PMT) voltages [3].
- Annexin V Single-Stained Control: Cells stained with Annexin V only, for compensation of spectral overlap into the PI detector [45] [3].
- PI Single-Stained Control: Cells stained with PI only, for compensation of spectral overlap into the Annexin V detector [45] [3].
- Untreated/Negative Control: Healthy, untreated cells to establish the baseline levels of apoptosis and necrosis [3].
- Induced Positive Control: Cells treated with a known apoptosis inducer (e.g., staurosporine, doxorubicin) to validate the staining protocol [45] [46].
Flow Cytometer Setup:
- Use the single-stained controls to perform electronic compensation, which corrects for the spillover of fluorescence between the Annexin V and PI detection channels [46].
- Create a dot plot with Annexin V fluorescence on the x-axis (e.g., FITC, FL1) and PI fluorescence on the y-axis (e.g., FL2 or FL3).
- Apply the quadrant gates based on the negative and single-stained populations. Acquire a minimum of 10,000 events per sample for statistically significant data [46].
Advanced Applications and Multiparametric Analysis
The basic Annexin V/PI assay can be integrated into more complex, multiparametric workflows to gain deeper insights into cellular signaling and death mechanisms. This is particularly valuable for dissecting heterogeneous cell populations or linking apoptosis to specific molecular pathways. A common application is the simultaneous analysis of apoptosis and cell surface or intracellular protein expression. For instance, researchers can track the loss of a specific stemness marker like CD44 during doxorubicin-induced apoptosis in breast cancer cells by adding an APC-conjugated anti-CD44 antibody to the Annexin V-FITC/PI staining panel [46] [8]. This approach allows for the correlation of protein expression levels with specific stages of cell death within the same sample. Furthermore, Annexin V/PI staining can be combined with other probes to create a comprehensive profile of cellular health. As demonstrated in recent methodologies, it is possible to integrate apoptosis measurement with assessments of proliferation (using dyes like CellTrace Violet), cell cycle status (BrdU/PI), and mitochondrial health (JC-1 for membrane potential) from a single sample [47]. These advanced applications transform the assay from a simple death detector into a powerful tool for mechanistic studies, enabling researchers to connect upstream signaling events and phenotypic changes to the final apoptotic outcome.
Troubleshooting and Best Practices
Even a well-established protocol can yield suboptimal results without careful attention to potential pitfalls. The following guidelines address common issues encountered in Annexin V/PI staining.
High Background in Viable Cells (Q3): This is often due to inadequate washing of cells after harvesting, leaving behind serum proteins or enzymes that cause non-specific binding. Ensure complete removal of the supernatant after each wash and use a protein-free PBS or binding buffer for the final resuspension [1].
Excessive Necrosis (High Q4 Population): This can result from overly harsh cell harvesting techniques. For adherent cells, minimize trypsinization time and use enzyme-free cell dissociation buffers whenever possible. Mechanical pipetting can also shear cells; always use gentle pipetting techniques [45] [1].
Unexpectedly Low Apoptotic Signal: Verify that the calcium concentration in the binding buffer is sufficient (typically 2.5 mM), as Annexin V binding is strictly calcium-dependent [44] [4]. Also, check the expiration dates of reagents, particularly Annexin V conjugates, as degraded fluorochromes will yield a weak signal.
General Best Practices:
- Calcium is Critical: Avoid using buffers containing EDTA or other calcium chelators during and after the staining procedure, as they will inhibit Annexin V binding [4].
- Process Promptly: Analyze samples immediately after staining (within 1 hour) to prevent artifacts from ongoing cell death [4] [3].
- Include a Viability Dye: Never rely on Annexin V staining alone. The PI (or alternative dye) is essential for distinguishing between early apoptosis (Annexin V+/PI-) and late apoptosis/necrosis (Annexin V+/PI+) [45] [47].
Solving Common Annexin V Staining Problems and Enhancing Assay Performance
In the study of programmed cell death, the Annexin V staining protocol represents a gold standard for the early detection of apoptosis. This technique leverages the calcium-dependent binding of Annexin V to phosphatidylserine (PS), a phospholipid that translocates from the inner to the outer leaflet of the plasma membrane during early apoptosis [11] [1]. However, the integrity and interpretability of this assay are exceptionally vulnerable to artifacts introduced during cell preparation. Specifically, the processes of cell harvesting, trypsinization, and the maintenance of calcium homeostasis are critical methodological factors that can profoundly influence the translocation of PS and the permeabilization of the cell membrane, leading to false-positive results [48] [49]. For researchers and drug development professionals, these artifacts present a significant risk of experimental bias, potentially compromising data validity in critical areas such as therapeutic efficacy screening and mechanistic studies of cell death. This application note synthesizes current empirical evidence to delineate the sources of these false positives and provides detailed, optimized protocols to ensure the accurate and reliable quantification of apoptosis.
The Critical Role of Cell Harvesting and Detachment
For researchers working with adherent cell lines, the initial step of cell detachment is a major source of experimental artifacts in Annexin V staining. The choice between enzymatic and mechanical harvesting methods can drastically alter the apparent apoptotic index, not by influencing the biological process itself, but by inflicting physical damage that mimics its hallmark [48].
Comparative Evidence of Harvesting Method Impact
Multiple independent studies have quantitatively demonstrated that mechanical detachment methods, such as scraping with a rubber policeman, consistently cause greater membrane damage compared to enzymatic approaches. This damage manifests as increased PS exposure, leading to false-positive Annexin V signals.
The table below summarizes quantitative findings from key studies investigating the impact of cell harvesting methods on membrane integrity and false-positive apoptosis signals:
Table 1: Impact of Cell Harvesting Methods on Membrane Integrity and Apoptosis Assays
| Cell Line/Type | Trypsinization (% Viable/PI-) | Scraping (% Viable/PI-) | Wash-Down (% Viable/PI-) | Key Findings | Source |
|---|---|---|---|---|---|
| Bon-1 (Pancreatic NET) | 90.27% (PBS)93.07% (Binding Buffer) | 63.63% (PBS)31.70% (Binding Buffer) | Not Tested | Binding buffer aggravated pre-existing membrane damage from scraping. | [50] |
| HT 29 (Colon Ca.) | ~73% (Viable) | ~30% (Viable) | ~30% (Viable) | Mechanical methods falsely labelled ~43% of cells as apoptotic. | [49] |
| A-673 (Rhabdomyosarcoma) | ~70% (Viable) | ~20% (Viable) | ~20% (Viable) | Trypsinization yielded 50% more viable cells than mechanical methods. | [49] |
| Multiple Cell Lines* | Accutase recommended | Scraping not recommended | Not Applicable | Accutase is a gentler enzymatic alternative to trypsin for sensitive cells. | [48] |
Note: The study in [48] involved MDA-MB-231, PC-3, MSU-1.1, HEK-293, and NT14 cell lines. Ca. = Carcinoma, NET = Neuroendocrine Tumor.
The data reveals a clear and consistent trend: mechanical harvesting causes substantial membrane damage. The study on Bon-1 cells provides a crucial insight—the standard Annexin V binding buffer, due to its high calcium content, can exacerbate membrane damage caused by scraping, leading to a dramatic increase in PI-positive cells (68.3%) compared to scraping followed by staining in PBS (36.37%) [50]. This suggests the damage from scraping makes cells uniquely vulnerable to the assay conditions themselves.
Protocol: Optimal Cell Harvesting for Adherent Cells
The following protocol is designed to minimize membrane damage during the harvesting of adherent cells for Annexin V staining, integrating recommendations from multiple sources [21] [48] [3].
Procedure:
- Preparation: Pre-warm culture medium and PBS (without calcium and magnesium) to 37°C. Pre-cool the Annexin V binding buffer to 4°C.
- Collect Supernatant: Carefully collect the culture supernatant from the adherent cell monolayer. Crucially, retain this supernatant, as it contains dead and apoptotic cells that have detached naturally. Centrifuge and keep the cell pellet.
- Wash and Detach:
- Gently rinse the monolayer with pre-warm PBS to remove residual serum and divalent cations.
- For detachment, use a minimal volume of a gentle enzymatic solution.
- Neutralize and Pool: Neutralize the enzymatic reaction by adding complete culture medium containing serum. Gently pipette the cells to create a single-cell suspension.
- Combine Fractions: Pool the neutralized cell suspension with the cell pellet collected from the supernatant in Step 2. This ensures a representative analysis of all cellular states in the population.
- Wash and Resuspend: Centrifuge the pooled cells (300 × g for 5 minutes) and gently resuspend the pellet in pre-cooled, serum-free culture medium or PBS. Proceed immediately to staining.
Trypsinization and Calcium Homeostasis
The enzymatic detachment of cells presents a paradox: while gentler than scraping, it introduces specific biochemical challenges that can directly interfere with the fundamental principle of the Annexin V assay.
The Dual Interference of Trypsin-EDTA
Trypsin-based solutions are commonly used for cell detachment, but their formulation poses two major threats to assay fidelity:
- Chelation of Calcium: Annexin V binding to PS is absolutely calcium-dependent [11]. The EDTA present in standard trypsin solutions is a chelating agent that binds and removes calcium ions from the cell microenvironment [21]. Residual EDTA on the cell surface can therefore inhibit the binding of Annexin V during the subsequent staining step, leading to false-negative results or an underestimation of early apoptosis [21].
- Proteolytic Damage: Trypsin is a protease that cleaves proteins. Excessive exposure can damage cell surface receptors and, critically, the integrity of the plasma membrane itself [49]. This non-specific damage can cause PS to become accessible to Annexin V regardless of apoptotic status, or allow PI to enter the cell, both of which generate false-positive signals.
Protocol: Mitigating Trypsin and EDTA Effects
This protocol provides steps to neutralize the adverse effects of trypsin-EDTA after cell detachment.
Procedure:
- Thorough Neutralization: After detachment, the trypsin-EDTA solution must be effectively neutralized. This is best achieved by adding a sufficient volume (e.g., at least double the volume of trypsin used) of complete culture medium. The serum in the medium provides protease inhibitors to halt tryptic activity and proteins to bind residual EDTA.
- Adequate Washing: Pellet the neutralized cell suspension by centrifugation (300 × g for 5 minutes). Gently resuspend the cell pellet in a larger volume (e.g., 2-5 mL) of pre-warm PBS or serum-free medium and centrifuge again. This wash step is critical to dilute and remove traces of EDTA from the cell pellet.
- Positive Control: To verify that your harvesting process has not introduced artifacts, include a positive control in your experiment. Treat a sample of cells with a known apoptosis inducer (e.g., camptothecin, staurosporine) and subject it to the exact same harvesting and staining procedure [11] [3]. This control validates the entire protocol, from detachment to detection.
Experimental Workflow and Reagent Solutions
A robust Annexin V staining assay depends not only on careful cell handling but also on a standardized workflow and the use of high-quality, appropriate reagents.
Comprehensive Staining and Analysis Protocol
The following workflow is adapted from manufacturer protocols and research articles to ensure specificity and minimize background [3] [46].
Procedure:
- Cell Preparation: After harvesting and washing as described in Sections 2.2 and 3.2, resuspend the final cell pellet in 1X Annexin V Binding Buffer at a density of ~1 × 10^6 cells/mL.
- Staining:
- Transfer 100 µL of the cell suspension (~1 × 10^5 cells) to a flow cytometry tube.
- Add the recommended volume of fluorochrome-conjugated Annexin V (typically 5 µL).
- Add a viability dye, such as 5 µL of Propidium Iodide (PI) or 7-AAD.
- Gently vortex the tubes and incubate for 15-20 minutes at room temperature (20-25°C) in the dark.
- Analysis:
- After incubation, add 400 µL of 1X Annexin V Binding Buffer to each tube to halt the reaction.
- Analyze the samples by flow cytometry within 1 hour. Prolonged delays can lead to a loss of signal integrity and increased background.
- Critical Controls: Always include the following controls for proper instrument setup and gating:
- Unstained cells: For setting fluorescence background.
- Annexin V single-stain: For compensating fluorescence spillover into the PI channel.
- PI single-stain: For compensating spillover into the Annexin V channel.
- Untreated & Induced Controls: For defining negative and positive populations.
The following diagram illustrates the logical decision-making process for optimizing the Annexin V staining protocol, from cell preparation to analysis, highlighting key steps to prevent false positives.
Research Reagent Solutions
The selection of appropriate reagents is fundamental to the success of the assay. The table below outlines key components and their functions.
Table 2: Essential Reagents for Annexin V Staining Assays
| Reagent | Function & Role in Assay | Key Considerations |
|---|---|---|
| Annexin V Conjugate | Fluorescently-labeled protein that binds externalized PS in a Ca2+-dependent manner. | Choose a fluorochrome (e.g., FITC, PE, APC) compatible with your flow cytometer and other labels (e.g., avoid FITC if cells express GFP) [21] [11]. |
| Viability Dye(e.g., PI, 7-AAD) | DNA-binding dye that is excluded by intact membranes; identifies late apoptotic/necrotic cells. | Distinguishes early apoptosis (Annexin V+/PI-) from late apoptosis/necrosis (Annexin V+/PI+). PI can be excited by 488, 532, or 546 nm lasers [21] [11]. |
| Annexin Binding Buffer | Provides a controlled ionic environment and, critically, the calcium (Ca2+) required for Annexin V-PS binding. | Always use the recommended buffer. Substituting with PBS will prevent binding and cause false negatives [3] [50]. |
| Gentle Detachment Reagents(e.g., Accutase) | Enzyme mixture for detaching adherent cells with minimal proteolytic activity and no EDTA. | Preserves membrane integrity and surface epitopes better than trypsin-EDTA, reducing false positives [48]. |
| Calcium- & Magnesium-Free PBS | Used for washing cells prior to detachment to remove divalent cations that inhibit trypsin/EDTA activity. | Pre-warming prevents temperature shock to cells. Ensures efficient cell detachment [46]. |
The Annexin V staining assay is a powerful tool for probing the mechanisms of cell death, but its accuracy is heavily dependent on technical rigor. As detailed in this application note, false-positive results are a significant risk, predominantly originating from the cell harvesting process. Mechanical detachment and the use of trypsin-EDTA without proper neutralization and washing are major contributors. By adopting the optimized protocols outlined herein—prioritizing gentle enzymatic detachment, ensuring complete neutralization of EDTA, utilizing appropriate binding buffers, and implementing rigorous controls—researchers can significantly mitigate these artifacts. For the scientific and drug development community, adherence to these refined methodologies is not merely a technical detail but a fundamental requirement for generating reliable, reproducible, and meaningful apoptosis data that can robustly inform biological understanding and therapeutic discovery.
A weak or absent signal in an Annexin V assay can significantly impede research progress in early apoptosis detection. This application note addresses this common challenge by providing a systematic framework to distinguish between two primary failure points: ineffective apoptosis induction or compromised reagent viability. Within the broader context of Annexin V staining protocol research, we present detailed, actionable protocols for verifying your experimental setup, ensuring that researchers can obtain reliable, interpretable data. The guidance is structured to support scientists and drug development professionals in validating their experimental conditions before drawing conclusions about cellular treatment efficacy.
The Annexin V Apoptosis Detection Principle
The Annexin V protocol detects the translocation of phosphatidylserine (PS) from the inner to the outer leaflet of the plasma membrane, a key early event in apoptosis [1] [6]. In viable cells, PS is maintained asymmetrically on the inner membrane. During early apoptosis, this asymmetry is lost, and PS becomes exposed on the cell surface.
Annexin V is a calcium-dependent phospholipid-binding protein with high affinity for PS [1]. When conjugated to a fluorochrome like FITC, it serves as a sensitive probe for detecting early apoptotic cells via flow cytometry. Propidium iodide (PI) or 7-AAD are viability dyes typically used in parallel; they are excluded by cells with intact plasma membranes but penetrate late apoptotic or necrotic cells, staining their DNA [4] [3] [51]. This dual-staining approach allows for the discrimination of several cell populations:
- Viable cells: Annexin V¯ / PI¯
- Early apoptotic cells: Annexin V⁺ / PI¯
- Late apoptotic/necrotic cells: Annexin V⁺ / PI⁺
The entire binding process is strictly dependent on calcium; therefore, buffers containing EDTA or other calcium chelators must be avoided as they will prevent Annexin V binding and cause a false negative signal [4].
Diagnostic Workflow for Signal Failure
When faced with a weak or absent signal, follow this logical troubleshooting pathway to identify the root cause. The process systematically evaluates both the biological system (the cells) and the technical reagents.
Verifying Reagent Viability and Quality
Compromised reagents are a frequent cause of assay failure. The table below outlines critical reagents, their functions, and verification methods.
Table: Research Reagent Solutions for Annexin V Staining
| Reagent | Critical Function | Verification of Viability | Common Failure Signs |
|---|---|---|---|
| Annexin V Conjugate | Binds externalized PS in a Ca²⁺-dependent manner [1] | Test with a verified apoptotic positive control cell sample [3] | No signal in positive control; expired product |
| Binding Buffer | Provides optimal Ca²⁺ concentration and ionic strength [4] [3] | Confirm pH ~7.4 and absence of EDTA/chelators [4] | Prevents all Annexin V binding |
| Viability Dye (PI/7-AAD) | Identifies loss of membrane integrity [51] [1] | Check with a fixed/permeabilized cell control (should be positive) [3] | No staining in dead cells |
| Cells | Biological substrate for the assay | Confirm >90% viability before assay start [1] | High background necrosis |
Detailed Protocol: Reagent Validation
This protocol uses a known apoptotic control to confirm that all reagents are functioning correctly.
Materials
- Test cell line (e.g., Jurkat, THP-1)
- Apoptosis inducer (e.g., 1µM Staurosporine for 4 hours)
- Complete set of Annexin V assay reagents [4] [3]
Procedure
- Induce Apoptosis: Treat 1-2 x 10⁶ cells with a validated apoptosis inducer. Include an untreated control.
- Harvest Cells: Collect both treated and untreated cells. Wash once with cold PBS [6].
- Stain Cells:
- Resuspend cell pellets (∼1x10⁵ cells) in 100 µL of 1X Binding Buffer.
- Add 5 µL of Annexin V conjugate. Incubate for 15 minutes at room temperature in the dark [4] [3].
- Add 5 µL of Propidium Iodide (PI) or 7-AAD. Do not wash after adding the viability dye [4] [3] [6].
- Add 400 µL of 1X Binding Buffer and analyze immediately by flow cytometry.
- Analysis:
- The successfully induced positive control should show a clear population of Annexin V⁺ cells.
- If the positive control works but your experimental samples do not, the issue likely lies with apoptosis induction in your experiment.
- If the positive control fails, the reagents are compromised and must be replaced.
Verifying Apoptosis Induction
If reagents are confirmed functional, the next step is to verify that your treatment is effectively inducing apoptosis.
Detailed Protocol: Induction Optimization and Verification
This protocol helps titrate and confirm the apoptotic effect of your treatment.
Materials
- Target cells
- Treatment agent
- Additional apoptosis markers (e.g., caspase inhibitor)
Procedure
- Dose-Response Titration:
- Prepare a series of treatment concentrations (e.g., 1x, 2x, 5x your standard dose).
- Treat cells for the standard duration (e.g., 24 hours).
- Perform Annexin V/PI staining as described in Section 4.1.
- Time-Course Analysis:
- Use your standard treatment dose.
- Harvest and stain cells at multiple time points (e.g., 6, 12, 24, 48 hours).
- Multi-Parametric Verification (Advanced):
- For conclusive verification, use this protocol in conjunction with other apoptosis assays. A recent Nature article describes a robust workflow combining Annexin V with other stains like JC-1 (mitochondrial membrane potential) and cell cycle markers to provide multilevel evidence of apoptosis [47].
- Analysis:
- The optimal dose/time should show a significant, dose-dependent increase in Annexin V⁺ cells compared to the untreated control.
- A successful induction typically shows 20-60% early apoptosis (Annexin V⁺/PI¯) for a potent stimulus.
Table: Establishing a Positive Control for Your Lab
| Cell Line | Recommended Inducer | Typical Conditions | Expected Outcome |
|---|---|---|---|
| Jurkat (T-cell leukemia) | Anti-Fas Antibacy (500ng/mL) [3] | 4-6 hours incubation | ~40-70% Annexin V⁺ |
| THP-1 (monocytic) | Staurosporine (1µM) | 4 hours incubation | ~30-50% Annexin V⁺ |
| Adherent Cell Lines | UV Irradiation | 10-50 J/m² followed by 4-6h incubation | ~20-60% Annexin V⁺ |
The Scientist's Toolkit: Essential Materials
Table: Key Reagents and Equipment for Annexin V Assay
| Item | Function/Application | Example Specifications |
|---|---|---|
| Annexin V Conjugate | Labels externalized phosphatidylserine | FITC, PE, or APC conjugate; 5µL per test [4] [3] |
| Viability Stain | Distinguishes membrane integrity | Propidium Iodide (PI) or 7-AAD; 2-5µL per test [4] [3] |
| 10X Binding Buffer | Provides calcium & ionic strength for binding | Dilute to 1X in distilled water; 0.1M HEPES, 1.4M NaCl, 25mM CaCl₂ [3] |
| Flow Cytometer | Data acquisition and analysis | 488nm laser capable; FITC detector (FL1), PI detector (FL2/FL3) [1] |
| Cell Culture Vessels | Cell growth and treatment | T25 flasks for ~2x10⁶ cells per sample [6] |
| Centrifuge | Cell washing and pelleting | Capable of 400-600 x g for 5 minutes [4] [6] |
Resolving weak or absent signals in Annexin V assays requires a systematic approach that definitively separates reagent failure from biological reality. By first establishing a verified positive control to confirm reagent viability, and then meticulously optimizing and confirming apoptosis induction, researchers can eliminate technical artifacts and generate robust, reproducible data on early apoptotic events. This rigorous verification process is fundamental to high-quality research in cell death mechanisms and drug development.
Optimizing Fluorescence Compensation with Single-Stained Controls
In multiparameter flow cytometry, accurate detection of early apoptotic cells hinges on the precise resolution of fluorescent signals. Fluorophores emit light across a broad spectrum, and this emitted light can be detected by channels intended for other markers, a phenomenon known as spectral spillover [52]. For Annexin V-based apoptosis assays, which commonly utilize Annexin V conjugated to fluorophores like FITC or PE in conjunction with a viability dye such as Propidium Iodide (PI) or 7-AAD, this spillover can obscure critical populations. Without proper correction, spillover signal increases background noise and can even generate false-positive populations, severely compromising the distinction between viable, early apoptotic, and late apoptotic cells [52].
Fluorescence compensation is a mathematical process that corrects for this spillover, and its accuracy is entirely dependent on the quality of single-stained controls [53] [52]. This application note provides detailed protocols and guidelines for generating these essential controls within the context of Annexin V staining protocols, ensuring the integrity of data in apoptosis research and drug development.
Theoretical Foundation: Principles of Spectral Spillover and Compensation
The Source of Spectral Spillover
In a flow cytometry experiment, each fluorophore has a characteristic emission spectrum. When multiple fluorophores are used simultaneously, the emission tail of one fluorophore can be detected by the filter set of another detector. For instance, the green emission of FITC (Annexin V-FITC) can spill into the yellow channel often used for PI, while the red emission of PI can spill into the far-red channels [53]. This spillover is not an error but a physical property of the fluorophores and the instrument's optical configuration.
The Compensation Process
Compensation is the process of subtracting the proportion of spillover signal from each detector. It calculates a compensation matrix that is applied to the raw data, ensuring that the signal in each detector is derived only from its intended fluorophore [53] [52]. The process requires a set of single-stain controls, where a sample is stained with only one fluorophore at a time. These controls allow the instrument's software to measure the exact amount of spillover from each fluorophore into every other detector [52].
The following diagram illustrates the workflow and logical relationships involved in preparing and using single-stained controls for effective compensation.
Essential Materials and Reagents
Successful preparation of single-stained controls requires carefully selected materials. The table below details the key research reagent solutions essential for this process, with a specific focus on Annexin V apoptosis detection.
Table 1: Research Reagent Solutions for Single-Stain Control Preparation
| Item | Function & Importance | Specific Examples & Notes |
|---|---|---|
| Single-Fluorophore Conjugates | To generate the control sample for each individual parameter. Using the correct conjugate is critical. | Annexin V-FITC [3], Annexin V-PE [4], Propidium Iodide (PI) [3] [54], 7-AAD [3], Fixable Viability Dyes (e.g., FVD eFluor 660/780) [4]. |
| Binding Buffer | Provides the calcium-dependent environment necessary for specific Annexin V binding to phosphatidylserine [1]. | Typically 10 mM HEPES, 140 mM NaCl, 2.5 mM CaCl₂, pH 7.4 [55]. Must be calcium-containing and free of EDTA/chelators [4]. |
| Control Particles | Serve as a consistent negative and positive population when biological cells are limiting or lack clear positive populations. | Antibody capture beads bind antibodies via Fc regions, providing a uniform positive signal [52]. |
| Biological Cells | The ideal substrate for controls, as they replicate the autofluorescence and non-specific binding of experimental samples. | Use the same cell type and treatment condition as the experimental sample. Apoptosis-induced cells can serve as a positive control for Annexin V [3]. |
Experimental Protocols for Control Preparation
Protocol A: Preparing Single-Stain Controls Using Biological Cells
This protocol is adapted from established Annexin V staining procedures and is the preferred method for generating high-quality controls [3] [4] [46].
- Cell Preparation: Harvest and wash your cell sample (e.g., untreated or apoptosis-induced cells) following standard procedures. Use approximately 1-5 x 10⁵ cells per control tube [4] [1].
- Aliquot Cells: Distribute the cell suspension into separate 5 mL tubes for each fluorophore in your panel. You will need one tube per fluorophore, plus one tube for an unstained control.
- Staining:
- Resuspend each cell pellet in 100 µL of 1X Binding Buffer.
- To each respective tube, add the single fluorophore-conjugated reagent. For example:
- Gently vortex the tubes and incubate for 15 minutes at room temperature in the dark [3].
- Washing and Resuspension: After incubation, add 2 mL of binding buffer to each tube, centrifuge (300-400 x g for 5 minutes), and carefully decant the supernatant. Resuspend each pellet in 300-500 µL of binding buffer for flow cytometric analysis [46].
- Fixation (Optional): If needed, cells can be fixed after staining. However, note that fixation can alter fluorescence intensity and autofluorescence [53].
Protocol B: Preparing Single-Stain Controls Using Antibody Capture Beads
This method is recommended when cell numbers are limited or when the biological cells lack a clear positive population for a given marker [52].
- Prepare Bead Suspension: Follow the manufacturer's instructions to prepare a suspension of antibody capture beads.
- Stain Beads:
- Aliquot the recommended volume of beads into separate tubes for each fluorophore.
- Add each individual fluorophore-conjugated antibody or Annexin V conjugate to its respective tube.
- Incubate for the time and temperature specified by the bead manufacturer, protected from light.
- Wash and Resuspension: Wash the beads to remove unbound antibody, then resuspend in an appropriate buffer for flow cytometry.
Best Practices and Troubleshooting
Adhering to the following rules is paramount for generating reliable single-stain controls [53]:
- Rule 1: Matched Autofluorescence. The positive and negative populations within a single control must have identical autofluorescence. This means both populations should be the same cell type or the same bead type. A mismatch will introduce errors during unmixing/compensation.
- Rule 2: Bright Positive Signal. The positive signal in the control must be as bright or brighter than the brightest signal expected in the experimental sample. This ensures the compensation matrix accurately corrects for the full range of spillover.
- Rule 3: Identical Reagents. The control must use the exact same fluorophore and conjugate as the full experiment. For tandem dyes (e.g., PE-Cy7), it is critical to use the same lot number to avoid variability due to degradation.
- Rule 4: Identical Processing. All single-stained controls must be treated identically to the experimental sample. This includes using the same fixation, washing, buffer, and storage conditions.
Table 2: Troubleshooting Common Issues with Single-Stained Controls
| Problem | Potential Cause | Solution |
|---|---|---|
| High background in negative population | Non-specific antibody binding; over-titration of antibody; insufficient washing. | Titrate antibodies to optimal concentration [53]; use Fc receptor blocking reagents; ensure adequate washing steps. |
| Poor separation of positive and negative populations | Weak positive signal; incorrect cell type for control. | Use a brighter fluorophore or a cell population known to express the target highly; confirm the viability dye is fresh and potent. |
| Compensation matrix does not correct spillover | Controls were processed differently from experimental samples; degradation of tandem dyes. | Strictly adhere to Rule 4 (identical processing); use fresh tandem dye conjugates from the same lot. |
| Unstable fluorescence signal over time | Fluorophore photobleaching; reagent degradation. | Protect all controls and samples from light during incubation and storage; use fresh reagents. |
Integration with Full Experimental Workflow
Single-stain controls are part of a comprehensive control strategy. They should be accompanied by other essential controls, including:
- Unstained Cells: To determine autofluorescence and set photomultiplier tube (PMT) voltages [53].
- Fluorescence Minus One (FMO) Controls: These controls, which contain all fluorophores except one, are particularly valuable for setting gates for dim markers or in complex panels, as they account for the spread caused by all other fluorophores in the panel [53].
- Biological Controls: Untreated (negative control) and apoptosis-induced (positive control) cell populations to validate the experimental outcome [3] [53].
By meticulously preparing and using single-stained controls, researchers can ensure the accuracy and reliability of their Annexin V apoptosis data, leading to more robust conclusions in the study of cell death mechanisms and therapeutic efficacy.
In the realm of flow cytometry, the ability to simultaneously detect multiple parameters has revolutionized our understanding of complex biological systems, particularly in advanced applications such as Annexin V staining for early apoptosis detection. Spectral overlap, also commonly referred to as spillover, occurs because fluorophores do not emit light at a single precise wavelength but rather across a range of wavelengths, creating emission spectra that frequently overlap with the detection channels of other fluorophores [56]. This phenomenon becomes increasingly problematic as researchers expand their panels to measure more parameters from limited biological samples, such as in sophisticated immunophenotyping experiments combined with apoptosis assessment [57].
When spectral overlap remains uncorrected, it generates false-positive signals that can severely compromise data interpretation [41]. For instance, in a typical Annexin V/propidium iodide apoptosis assay, spillover from a bright fluorophore like PE into the FITC channel could mistakenly categorize viable cells as early apoptotic, leading to fundamentally flawed scientific conclusions [1] [11]. The foundation of proper spillover management lies in the principle of compensation - a mathematical correction that calculates and subtracts the contribution of each fluorophore from all non-primary detection channels based on predetermined spillover coefficients [56] [41]. This application note provides a comprehensive framework for selecting fluorochromes and implementing protocols that effectively manage spectral overlap, with particular emphasis on Annexin V-based apoptosis detection within complex multi-parameter panels.
Core Principles of Spectral Overlap and Compensation
The Physical Basis of Fluorescence and Spectral Overlap
Fluorescence occurs through a precise photophysical process where a fluorophore absorbs photon energy, typically from a laser, causing electron excitation to a higher energy state. As these electrons return to their ground state, they release energy in the form of emitted photons with longer wavelengths than the excitation source [56]. Each fluorophore possesses characteristic excitation and emission spectra representing the range of wavelengths it can absorb and emit, respectively. The challenge in multicolor flow cytometry arises because these emission spectra are broad and often exhibit significant spectral overlap between different fluorophores [56] [58].
The spillover coefficient quantifies this overlap, representing the proportional signal detected in a secondary channel compared to the primary detection channel [56]. This coefficient remains consistent for a given fluorophore-laser-filter combination, enabling the application of compensation to correct for spectral overlap. The mathematical compensation process involves measuring the spillover of each fluorophore into every other detector using single-color controls, then applying a matrix-based correction to the experimental data [56] [41].
Critical Compensation Principles for Accurate Data
Proper compensation requires adherence to several fundamental principles to ensure accurate spillover correction. Compensation controls must be stained with fluorophores identical to those used in experimental samples, as even minor differences in tandem dye lots can significantly alter spectral properties [56] [53]. These controls must include both positive and negative cell populations with matched autofluorescence characteristics, typically achieved by using the same cell type for both populations [56] [53].
The positive population in compensation controls must demonstrate fluorescence intensity equal to or greater than any experimental sample to which the compensation will be applied [56] [53]. This ensures that the calculated spillover coefficients adequately account for the brightest signals encountered during experimentation. Additionally, compensation should be performed fresh for each experiment rather than relying on historical values, as instrument performance and reagent characteristics can vary over time [56]. For apoptosis assays specifically, this means preparing separate compensation controls for Annexin V conjugates and viability dyes rather than relying on previously established compensation matrices.
Systematic Approach to Fluorochrome Selection
Instrument Configuration and Fluorochrome Compatibility
The foundation of effective panel design begins with comprehensive understanding of your flow cytometer's configuration. Modern instruments may feature multiple lasers (e.g., 355 nm, 405 nm, 488 nm, 532 nm, 640 nm) with numerous detection channels per laser [41] [57]. Before selecting fluorochromes, researchers must identify the number and wavelengths of available lasers, the specific filters installed in each detection channel, and the detector types (photomultiplier tubes or avalanche photodiodes) for their instrument [41]. This information typically appears in instrument manuals or can be obtained through core facility managers.
Fluorochrome selection must align with instrument capabilities, as each fluorophore requires excitation by an appropriate laser line. For example, FITC and PE excite efficiently with a 488 nm laser, while APC and Alexa Fluor 647 require a 640 nm red laser for optimal excitation [11] [57]. The recent expansion of violet (405 nm) and ultraviolet (355 nm) lasers has enabled the use of fluorochromes like BV421 and BUV395, which help distribute signal across more laser lines to minimize spillover [57]. When designing panels for Annexin V experiments, ensure your cytometer has appropriate lasers and filters for your chosen Annexin V conjugate and compatible viability dye.
Matching Fluorochrome Brightness with Antigen Density
A fundamental principle in multicolor panel design involves strategic pairing of fluorochrome brightness with antigen expression levels. Bright fluorochromes should be reserved for detecting low-density antigens, while dim fluorochromes generally suffice for highly expressed antigens [41] [59] [57]. This approach maximizes the signal-to-noise ratio for challenging targets while minimizing unnecessary spillover from excessively bright fluorophores on abundant antigens.
Table 1: Fluorochrome Brightness Classification and Application Guidance
| Brightness Category | Example Fluorochromes | Recommended Application |
|---|---|---|
| Bright | PE, APC, BV421 | Low-expression antigens (e.g., cytokines, chemokine receptors) |
| Medium | FITC, PE-CF594, Alexa Fluor 488 | Medium-expression antigens |
| Dim | PerCP, APC-Cy7, Pacific Blue | High-expression antigens (e.g., CD45, CD4, CD8) |
For Annexin V staining, which typically detects intermediate expression levels of phosphatidylserine, medium-brightness fluorophores like FITC often provide sufficient signal [1] [11]. However, when incorporating Annexin V into larger panels examining rare apoptotic subpopulations, brighter conjugates such as PE or APC may be necessary to resolve subtle differences in staining intensity [11].
Strategic Fluorochrome Spreading and Combination
Minimizing spectral overlap requires strategic distribution of fluorochromes across available laser lines and detection channels. The most effective panels spread fluorochromes across multiple lasers rather than concentrating them on a single laser line [56] [57]. For instance, a 10-color panel might utilize two fluorophores per laser across five laser lines rather than attempting to detect eight fluorophores from a 488 nm laser with only two from other lasers.
Table 2: Optimal Fluorochrome Combinations for Minimal Spillover
| Laser Line | Strong Combinations | Problematic Combinations | Rationale |
|---|---|---|---|
| 488 nm | FITC + PE | FITC + PE-Cy7 | Minimal emission spectrum overlap between FITC and PE |
| 640 nm | APC + Alexa Fluor 700 | APC + APC-Cy7 | Significant spillover of APC-Cy7 into APC channel |
| 405 nm | BV421 + BV605 | BV421 + BV510 | Inadequate spectral separation with similar emission profiles |
Tandem dyes, which combine fluorophores to create new emission profiles, present special considerations. While valuable for expanding panel size, tandems exhibit lot-to-lot variability and photosensitivity that can alter spectral characteristics over time [56] [57]. When using tandems, employ the same lot for both compensation controls and experimental samples, and avoid prolonged light exposure during staining procedures. For critical applications like Annexin V staining where accurate discrimination of apoptotic populations is essential, consider using non-tandem alternatives when possible to enhance reproducibility.
Integrating Annexin V Staining into Multicolor Panels
Annexin V Conjugate Characteristics and Compatibility
Annexin V conjugates are available paired with numerous fluorophores, each with distinct spectral properties and compatibility requirements. Common conjugates include Annexin V-FITC, Annexin V-PE, Annexin V-APC, and conjugates with newer dyes like Alexa Fluor series [1] [3] [11]. The selection of an appropriate Annexin V conjugate must consider both the instrument configuration and other fluorophores in the panel to minimize spillover between Annexin V detection and critical immunophenotyping markers.
The binding characteristics of Annexin V remain consistent across different conjugates, with all formats utilizing the calcium-dependent phosphatidylserine recognition mechanism [1] [11]. However, fluorescence intensity varies significantly based on the brightness of the conjugated fluorophore. For panels requiring detection of subtle early apoptotic populations, brighter conjugates like Annexin V-PE or Annexin V-APC provide enhanced resolution [11]. When studying cell types with inherent autofluorescence, longer-wavelength conjugates such as Annexin V-APC may offer superior signal-to-noise ratios compared to FITC conjugates [11].
Viability Dye Selection and Apoptosis Discrimination
A critical component of Annexin V staining involves combining the phosphatidylserine probe with a viability dye to distinguish early apoptotic cells (Annexin V+/viability dye-) from late apoptotic and necrotic cells (Annexin V+/viability dye+) [1] [3] [11]. The viability dye must be spectrally compatible with the Annexin V conjugate and other panel components while maintaining membrane impermeability in early apoptotic cells.
Table 3: Viability Dye Compatibility with Annexin V Conjugates
| Annexin V Conjugate | Recommended Viability Dye | Alternative Options | Excitation Laser |
|---|---|---|---|
| FITC | Propidium Iodide (PI) | 7-AAD | 488 nm |
| PE | 7-AAD | SYTOX Green | 488 nm |
| APC | SYTOX Green | DAPI | 405 nm |
| Pacific Blue | SYTOX AADvanced | - | 405 nm |
Modern fixable viability dyes, which covalently bind to amine groups in non-viable cells, offer advantages for complex panels as they survive fixation and permeabilization procedures [11] [57]. When using fixable viability dyes, select options with excitation and emission spectra that minimize spillover into the Annexin V detection channel and other important markers in your panel. For example, when using Annexin V-FITC, a near-IR fixable viability dye excited by the 640 nm laser would create minimal spillover compared to a blue-excited viability dye.
Experimental Protocols for Optimal Results
Staining Protocol for Annexin V in Multicolor Panels
The following protocol outlines the optimal procedure for incorporating Annexin V staining into multicolor flow cytometry panels, with specific attention to minimizing spectral overlap issues:
Cell Preparation: Harvest and wash cells in cold phosphate-buffered saline (PBS). For adherent cells, use gentle detachment methods like cell scraping or mild enzymatic dissociation with trypsin-EDTA, followed by washing with serum-containing media to neutralize trypsin activity [1]. Maintain cells at 4°C throughout processing to prevent artifactual phosphatidylserine exposure.
Viability Staining: Resuspend cell pellet at 1-5×10⁶ cells/mL in appropriate buffer. Add fixable viability dye optimized for your panel configuration and incubate for 15-30 minutes at 4°C in the dark [11] [57]. Wash cells with cold PBS to remove unbound dye.
Surface Marker Staining: Resuspend cells in 100 μL of staining buffer containing Fc receptor blocking reagent if needed. Add titrated antibodies for surface markers and incubate for 20-30 minutes at 4°C in the dark [53] [57]. For intracellular target detection, perform fixation and permeabilization at this stage according to manufacturer protocols.
Annexin V Staining: Wash cells once with 1X Annexin V binding buffer. Resuspend cells in 100 μL of Annexin V binding buffer containing calcium and add titrated Annexin V conjugate [1] [3]. Incubate for 15 minutes at room temperature in the dark. For biotinylated Annexin V, include a secondary staining step with fluorescent streptavidin after the initial incubation [3].
Sample Acquisition: Add 400 μL of Annexin V binding buffer to maintain calcium concentration and analyze immediately by flow cytometry [3]. Complete acquisition within 1 hour of Annexin V staining as signal intensity may degrade over time.
Compensation Control Preparation
Accurate compensation requires carefully prepared single-stain controls for every fluorophore used in the panel, including Annexin V conjugates and viability dyes. Two primary approaches exist for control preparation:
Bead-Based Controls:
- Use antibody capture beads according to manufacturer instructions
- Add individual fluorophore-conjugated antibodies to separate bead aliquots
- Incubate for 15-20 minutes at room temperature in the dark
- Wash beads and resuspend in buffer for acquisition [53]
Cell-Based Controls:
- Use cells with known antigen expression patterns for each marker
- Split cells into aliquots for each fluorophore in the panel
- Stain each aliquot with a single antibody conjugate using the same protocol as experimental samples
- Include unstained cells for autofluorescence assessment [53]
For Annexin V controls, use cells with known apoptosis levels or induce apoptosis in a control cell population using established methods (e.g., camptothecin treatment) [11]. The positive population should demonstrate fluorescence intensity equal to or brighter than experimental samples. Ensure the negative and positive populations have identical autofluorescence properties by using the same cell type for both populations [53].
Essential Controls and Troubleshooting
Comprehensive Control Strategies
Robust multicolor flow cytometry, particularly when incorporating sensitive assays like Annexin V staining, requires implementation of comprehensive control strategies to validate results and ensure accurate data interpretation:
Unstained Controls: Determine inherent cellular autofluorescence for each cell type and treatment condition [53]. Autofluorescence patterns can change with cell activation, treatment, or fixation, so match control conditions precisely to experimental samples.
Single-Stain Controls: Essential for both conventional compensation and spectral unmixing algorithms [53] [57]. Prepare these using the same protocol as experimental samples and ensure positive populations are at least as bright as experimental samples.
Fluorescence Minus One (FMO) Controls: Critical for establishing accurate positive/negative boundaries, especially for low-abundance antigens or continuous expression patterns [53] [57]. FMO controls contain all fluorophores in the panel except one, revealing the background signal and spread caused by spectral overlap into the omitted channel.
Biological Controls: Include untreated cells to establish baseline apoptosis levels and induced apoptotic cells (e.g., with camptothecin or staurosporine) as positive controls [3] [11]. For Annexin V specificity, include a blocking control with recombinant unconjugated Annexin V to compete with fluorescent Annexin V binding [3].
Troubleshooting Spectral Overlap in Apoptosis Assays
Even with careful panel design, spectral overlap issues may arise that require systematic troubleshooting:
High Background in Annexin V Channel: Often results from spillover from bright fluorophores in other channels. Verify compensation using single-stain controls and consider switching to a brighter Annexin V conjugate at lower concentration rather than increasing conjugate concentration [1] [11].
Poor Resolution Between Apoptotic Populations: May indicate excessive spillover between Annexin V and viability dye channels. Ensure appropriate laser and filter configuration for the selected dye pair, and confirm viability dye is titrated to optimal concentration [11] [59].
Inconsistent Annexin V Staining: Can arise from calcium concentration variations in binding buffer or prolonged storage of prepared samples. Always use fresh binding buffer with correct calcium concentration and acquire samples within 1 hour of staining [1] [3].
Unexpected Population Distributions: May indicate improper compensation or significant spectral overlap. Verify compensation with single-stain controls and consider FMO controls to establish correct gating boundaries [60] [53]. For complex panels, implement Boolean gating strategies to eliminate debris and aggregates before apoptosis analysis [60].
The Scientist's Toolkit: Research Reagent Solutions
Table 4: Essential Reagents for Multicolor Apoptosis Analysis
| Reagent Category | Specific Examples | Function | Application Notes |
|---|---|---|---|
| Annexin V Conjugates | Annexin V-FITC, Annexin V-PE, Annexin V-APC, Annexin V-eFluor 450 | Detection of phosphatidylserine exposure during early apoptosis | Select conjugate based on panel configuration and instrument lasers; requires calcium-containing binding buffer |
| Viability Dyes | Propidium iodide, 7-AAD, SYTOX Green, Fixable viability dyes (e.g., Live/Dead) | Discrimination of membrane-intact and membrane-compromised cells | Match excitation/emission to available lasers and filters; fixable dyes permit intracellular staining |
| Binding Buffers | 1X Annexin V binding buffer (10 mM HEPES, 140 mM NaCl, 2.5 mM CaCl₂, pH 7.4) | Provides calcium-dependent phospholipid binding environment | Maintain calcium concentration critical for binding; must be isotonic to prevent artifactual staining |
| Compensation Tools | Antibody capture beads, UltraComp beads, ArC amine reactive beads | Consistent preparation of single-stain controls for compensation | Beads provide stable, consistent fluorescence intensity; some systems require specific bead types |
| Biological Controls | Camptothecin, staurosporine, anti-Fas antibody | Induction of apoptosis in control cells | Establish expected staining pattern and positive control for assay validation |
| Fc Blocking Reagents | Human Fc block, Mouse Fc block, species-specific serum | Reduce non-specific antibody binding via Fc receptors | Particularly important for immune cells with high Fc receptor expression |
Effective management of spectral overlap through strategic fluorochrome selection and rigorous experimental protocols enables researchers to conduct robust multiparameter experiments that incorporate Annexin V staining alongside sophisticated immunophenotyping panels. The systematic approach outlined in this application note emphasizes instrument-aware panel design, appropriate matching of fluorochrome brightness to antigen density, and implementation of comprehensive control strategies. By adhering to these principles and protocols, researchers can generate reliable, reproducible data that accurately captures the complex biology of apoptosis within heterogeneous cell populations, ultimately advancing drug development and fundamental biological research.
Preventing Platelet Interference in Primary Cell and Blood Samples
Within the context of early apoptosis detection research using Annexin V staining, a significant methodological challenge is the undesired activation and interference from platelets present in primary cell isolates and whole blood samples. Platelets, which are inherently sensitive to manipulation, can become activated during sample processing, leading to non-specific binding of Annexin V and subsequent compromised data fidelity [61] [62]. During activation, platelets expose phosphatidylserine (PS) on their outer membrane—the same phospholipid targeted by Annexin V to identify apoptotic cells [61]. This exposure is a key part of their procoagulant activity but can be easily mistaken for an apoptotic signal in a mixed cell population [62]. This application note details protocols and strategies to mitigate this interference, ensuring the accurate quantification of apoptosis in target cell populations.
Understanding the Interference Mechanism
The core of the problem lies in the shared molecular event of PS externalization. In apoptosis, PS exposure is a tightly regulated, early event signaling cell death. In platelets, PS exposure is a rapid activation response critical for coagulation.
Key Characteristics of Procoagulant Platelets
Research using multi-parameter flow cytometry has revealed that upon strong dual agonist stimulation (e.g., thrombin + CRP-XL), platelets form distinct subpopulations [62]. A subset of platelets adopts a procoagulant phenotype characterized by:
- High exposure of PS (Annexin V positive) [62].
- A smaller size and a tendency to fragment into microparticles [62].
- Retention of mitochondrial membrane potential (in some cases) [62].
Crucially, these procoagulant platelet subpopulations persist even after maximal stimulation, confirming they are not merely a transient state but a distinct population whose signals can confound apoptosis assays [62].
The following diagram illustrates the parallel pathways leading to Annexin V binding in target cells versus platelets, highlighting the sources of interference.
Mitigation Strategies and Experimental Protocols
A multi-pronged approach is essential to minimize platelet activation and to accurately distinguish their signal from that of apoptotic cells.
Sample Handling and Preparation
The most effective strategy is to prevent platelet activation at the source through careful handling.
- Gentle Blood Draw: Use a large-gauge needle and discard the first 1-2 ml of blood to avoid tissue factor contamination.
- Anticoagulant Selection: Sodium citrate is often preferred over EDTA because it is less likely to induce platelet activation and preserves calcium-dependent processes closer to physiology [62]. However, note that the Annexin V binding reaction requires calcium, so samples using citrate must be resuspended in a calcium-containing binding buffer for the staining step [4].
- Avoid Mechanical Stress: Pipette gently using wide-bore tips, avoid vortexing, and minimize sample agitation.
- Control Temperature: Allow blood to rest at room temperature before processing, as cold temperatures can activate platelets.
Physical Separation of Platelets
Physically removing platelets from the cell sample of interest is a highly effective strategy.
- Differential Centrifugation: This is a standard method for enriching peripheral blood mononuclear cells (PBMCs) and depleting platelets.
- Protocol: Dilute blood 1:1 with PBS or saline. Layer the diluted blood carefully over a Ficoll-Paque density gradient. Centrifuge at 400-500 × g for 30-40 minutes at room temperature with the brake off. After harvesting the PBMC layer, wash the cells multiple times (e.g., 2-3 times) with a generous volume of PBS or binding buffer at 200-300 × g for 10 minutes to pellet cells and remove the majority of platelets in the supernatant [63].
Gating and Identification by Flow Cytometry
When platelets cannot be completely removed, or when studying platelet-rich samples, robust flow cytometry gating is crucial. The following workflow outlines a multi-parameter strategy to discriminate target cells from platelets and platelet-derived microparticles.
Optimized Annexin V Staining Protocol for Complex Samples
The following detailed protocol is adapted from manufacturer guidelines and is specifically tailored for samples where platelet interference is a concern [3] [4].
Materials (Research Reagent Solutions) Table 1: Essential Reagents for Annexin V Staining
| Reagent | Function | Note on Preventing Interference |
|---|---|---|
| Sodium Citrate Tubes | Anticoagulant | Preferred initial anticoagulant to minimize platelet activation [62]. |
| 1X Annexin V Binding Buffer (10mM HEPES, 140mM NaCl, 2.5mM CaCl₂, pH 7.4) | Provides physiological environment for specific Annexin V-PS binding. | The calcium is essential. Avoid EDTA-containing buffers during staining [4]. |
| Fluorochrome-conjugated Annexin V (e.g., FITC, PE, APC) | Binds exposed phosphatidylserine. | Titrate for optimal signal-to-noise. |
| Vital Dye (e.g., Propidium Iodide (PI) or 7-AAD) | Identifies late apoptotic/necrotic cells with compromised membranes. | Do not wash out after adding; analyze immediately [4]. |
| Cell-specific Surface Marker Antibodies (e.g., CD45 for leukocytes) | Enables positive identification and gating on target cell population. | Critical for distinguishing target cells from platelets in a mixed sample. |
Experimental Procedure
- Sample Preparation: Process citrate-anticoagulated blood or primary cells with differential centrifugation (as in Section 3.2) to reduce platelet count. Perform all subsequent steps gently.
- Cell Washing: Wash the harvested cells twice with cold PBS. Resuspend the cell pellet in 1X Annexin V Binding Buffer at a concentration of 1-5 × 10⁶ cells/mL [4].
- Staining:
- Vital Dye Addition: Without washing, add 400 µL of 1X Binding Buffer and 5 µL of Propidium Iodide (PI) or 7-AAD to the tube [3] [4].
- Analysis: Analyze the sample by flow cytometry within 1 hour. Follow the gating strategy detailed in Section 3.3 to first identify the target cell population via the surface marker and light scatter, then analyze Annexin V and vital dye staining within that population.
Data Presentation and Analysis
The table below summarizes the key parameters that allow researchers to differentiate true apoptotic cells from interfering platelets during flow cytometry analysis.
Table 2: Key Parameters for Differentiating Apoptotic Cells from Activated Platelets
| Parameter | Apoptotic Nucleated Cell | Activated Platelet / Microparticle |
|---|---|---|
| Forward Scatter (FSC) | Medium to High | Very Low [62] |
| Side Scatter (SSC) | Medium to High | Low to Very Low [62] |
| Specific Surface Marker (e.g., CD45) | Positive | Negative |
| Platelet Marker (e.g., CD41/CD61) | Negative | Positive |
| Annexin V Staining | Positive (Early Apoptosis) | Positive [61] [62] |
| Vital Dye Staining | Negative (Early) / Positive (Late) | Typically Negative (unless lysed) |
Accurate detection of early apoptosis in primary cell and blood samples is contingent upon successfully mitigating interference from activated platelets. This can be achieved through a combination of meticulous sample handling, physical separation techniques, and a robust multi-parameter flow cytometry gating strategy that leverages cell size and specific surface markers. Implementing the protocols and controls described in this application note will provide researchers with greater confidence in their Annexin V staining data, ensuring that observed signals truly reflect apoptosis in their target cells rather than confounding activation events in platelets.
Within the framework of early apoptosis detection research, the Annexin V staining protocol is a cornerstone technique for identifying cells in the initial phases of programmed cell death. This assay capitalizes on the calcium-dependent binding of Annexin V to phosphatidylserine (PS), a phospholipid that translocates from the inner to the outer leaflet of the plasma membrane during early apoptosis [1] [7]. The integrity of this process is exceptionally vulnerable to temporal factors. From the moment cells are harvested to the final flow cytometric analysis, each minute counts. This application note details the critical timing considerations and protocols essential for generating reproducible and accurate data, ensuring that the observed results are a true reflection of the biological state rather than an artifact of procedural delay.
The Critical Role of Timing in Apoptosis Detection
Apoptosis is a dynamic and rapid process. A delayed analysis can lead to significant inaccuracies in quantifying cell populations. The primary reason is the fragile nature of apoptotic cells. Over time, early apoptotic cells (Annexin V+/PI-) can progress to late apoptosis (Annexin V+/PI+) due to the eventual loss of membrane integrity [64]. Furthermore, cells that have undergone necrosis or are damaged during handling can allow Annexin V to access PS on the inner membrane leaflet, leading to false-positive results [4] [7].
Perhaps a more profound limitation is highlighted by emerging research. A 2023 study demonstrated that a deep learning approach detecting apoptotic bodies could identify 70% of apoptosis events that were not detected by Annexin-V staining [65]. This suggests that the window for detecting the very earliest stages of apoptosis via PS externalization might be narrower than previously assumed, reinforcing the need for a meticulously timed protocol to capture the maximum number of genuine apoptotic events.
Comprehensive Staining Protocol with Integrated Timing
The following protocol synthesizes the most current recommendations from leading reagent manufacturers and core facilities to minimize temporal artifacts [4] [3] [7].
Materials and Reagents
Table: Essential Reagents for Annexin V Staining
| Reagent | Function | Critical Consideration |
|---|---|---|
| Fluorochrome-conjugated Annexin V | Binds exposed phosphatidylserine to detect early apoptosis. | Calcium-dependent; avoid EDTA. |
| Propidium Iodide (PI) or 7-AAD | Membrane-impermeable DNA dye; stains cells with compromised membranes. | Do not wash out after staining; keep in buffer during acquisition [4]. |
| 1X Annexin V Binding Buffer | Provides optimal calcium concentration and pH for binding. | Must be ice-cold for the final resuspension and analysis. |
| Fixable Viability Dyes (FVD) | Distinguishes live from dead cells; useful for multiparameter panels. | FVD eFluor 450 is not recommended with certain Annexin V kits [4]. |
Step-by-Step Procedure and Timing
Cell Harvesting (Duration: ~15 minutes)
- Suspension cells: Collect cells and media by centrifugation (e.g., 300-500 x g for 5 minutes at room temperature) [64] [3].
- Adherent cells: First, collect the media containing any detached (often dead or apoptotic) cells. Then, gently detach the adherent cells using a non-enzymatic method or mild trypsinization, followed by a wash with serum-containing media to inhibit trypsin [1] [7]. Crucially, perform this step as quickly and gently as possible to avoid mechanical damage that causes false positives [7].
Washing and Resuspension (Duration: ~10 minutes)
Annexin V Staining (Duration: 10-15 minutes)
- Transfer 100 µL of cell suspension (containing ~1-5 x 10^5 cells) to a flow cytometry tube.
- Add 5 µL of fluorochrome-conjugated Annexin V. Gently vortex or tap the tube to mix.
- Incubate for 10-15 minutes at room temperature in the dark [4] [3]. This incubation is sufficient for binding without promoting progression of cell death.
Washing and Viability Dye Addition (Duration: ~10 minutes)
- Add 2 mL of ice-cold 1X Binding Buffer and centrifuge (400-600 x g for 5 minutes). Discard the supernatant.
- Resuspend the cells in 200 µL of ice-cold 1X Binding Buffer.
- Add 5 µL of Propidium Iodide (PI) or 7-AAD staining solution. Do not perform a wash after this step, as the viability dye must remain in the buffer during acquisition [4] [3].
Flow Cytometric Analysis (Duration: MUST be completed within 1 hour)
The following workflow diagram visualizes this timed process and the critical decision points.
To facilitate easy reference in the laboratory, the key timing parameters from the protocol are consolidated into the following table.
Table: Summary of Critical Timing Parameters in Annexin V Staining
| Process Stage | Recommended Maximum Duration | Consequence of Delay |
|---|---|---|
| Post-harvest to Staining | As short as possible; keep cells cold. | Increased risk of false positives from cell stress/damage. |
| Annexin V Incubation | 10-15 minutes at Room Temperature [4] [3]. | Under-staining or over-staining; progression of cell death. |
| Viability Dye to Analysis | 1 hour [3] [7]; keep samples on ice. | Deterioration of sample viability; artifactual increase in late apoptotic/necrotic population. |
| Overall Process | Complete within 4 hours of initial harvest when using PI/7-AAD [4]. | Compromised data integrity and loss of early apoptotic population. |
Advanced Applications and Multiparametric Integration
The basic Annexin V protocol can be integrated into more complex, multiparametric workflows. A 2025 Nature Cell Death Discovery publication detailed a unified protocol analyzing proliferation, cell cycle, apoptosis, and mitochondrial potential from a single sample [47]. When combining Annexin V staining with other probes like CellTrace Violet or JC-1, the order of staining becomes critical. Typically, fixable viability dye (FVD) staining is performed first, followed by Annexin V, and finally, a viability dye like PI is added just before analysis [4] [47]. This sequential approach preserves membrane integrity for the Annexin V step and ensures accurate viability assessment.
The Scientist's Toolkit: Research Reagent Solutions
Table: Key Reagent Solutions for Annexin V Apoptosis Detection
| Reagent / Kit | Primary Function | Application Note |
|---|---|---|
| Annexin V Conjugates(e.g., FITC, PE, APC) | Detection of phosphatidylserine externalization on the outer membrane leaflet. | Choice of fluorochrome should be compatible with other markers in the panel and the flow cytometer's laser/filter configuration [4]. |
| Membrane-Impermeant Dyes(Propidium Iodide, 7-AAD) | Discrimination of late apoptotic and necrotic cells via DNA binding in permeabilized cells. | PI and 7-AAD must not be washed out after addition and should be present in the buffer during acquisition [4] [3]. |
| Annexin V Binding Buffer | Provides a calcium-rich, pH-stable environment essential for specific Annexin V-PS binding. | Must be free of EDTA or other calcium chelators. A 10X concentrate is often provided with kits and must be diluted to 1X with distilled water [4] [3]. |
| Fixable Viability Dyes (FVD)(e.g., FVD eFluor 660, 506) | Covalently labels amines in non-viable cells; allows for cell fixation and permeabilization post-staining. | Essential for complex intracellular staining protocols performed in conjunction with Annexin V. FVD eFluor 450 is not recommended for use with some Annexin V kits [4]. |
Validating Annexin V Results and Comparing Apoptosis Detection Methods
Accurate detection of apoptosis is fundamental in biomedical research, playing a critical role in understanding disease mechanisms, developmental biology, and evaluating the efficacy and cytotoxicity of therapeutic agents [66]. The Annexin V staining protocol has emerged as a gold standard method for identifying early apoptotic cells by detecting the externalization of phosphatidylserine (PS), a phospholipid that translocates from the inner to the outer leaflet of the plasma membrane during early apoptosis [1] [67]. However, the reliability and interpretation of this assay are profoundly dependent on the implementation of appropriate experimental controls. Without proper controls, researchers risk misinterpretation due to false positives, spectral overlap in flow cytometry, and inability to distinguish specific apoptosis from nonspecific staining [68] [49]. This application note details the essential controls—unstained cells, single-stained compensations, and apoptosis-induced populations—that form the foundation for rigorous Annexin V-based apoptosis research, providing scientists with a framework for generating reproducible and quantitatively accurate data.
The Critical Role of Controls in Annexin V Assays
The Annexin V assay operates on the principle that Annexin V protein binds with high affinity to PS in a calcium-dependent manner, while viability dyes like propidium iodide (PI) penetrate only cells with compromised membranes [1] [66]. This allows differentiation between viable (Annexin V⁻/PI⁻), early apoptotic (Annexin V⁺/PI⁻), late apoptotic (Annexin V⁺/PI⁺), and necrotic (Annexin V⁻/PI⁺) populations [46] [67]. Despite its widespread use, the assay presents several vulnerabilities that controls are designed to address.
Membrane integrity during cell harvesting represents a particularly significant source of experimental error. Mechanical detachment methods such as scraping or wash-down can cause nonspecific membrane damage in certain cell lines, leading to false-positive Annexin V staining and potentially misidentifying healthy cells as apoptotic [49]. One study demonstrated that in HT-29, PANC-1, and A-673 cell lines, mechanical detachment resulted in over 49% of cells being falsely identified as apoptotic compared to enzymatic trypsinization [49]. This highlights the necessity of selecting and validating appropriate harvesting methods for specific cell lines before conducting apoptosis analysis.
Furthermore, flow cytometry-based detection introduces technical challenges related to spectral overlap between fluorochromes, where signal from one fluorescent dye can spill over into the detection channel of another [46] [4]. Without proper compensation, this optical crosstalk can obscure the critical distinctions between cell populations, leading to inaccurate quadrant statistics and erroneous conclusions about treatment efficacy [3] [4].
Research Reagent Solutions
The following table summarizes the essential reagents required for implementing robust Annexin V staining protocols and appropriate experimental controls.
Table 1: Essential Reagents for Annexin V Staining and Controls
| Reagent | Function | Key Considerations |
|---|---|---|
| Annexin V Conjugate [1] [3] | Fluorescently-labeled protein that binds externalized phosphatidylserine on apoptotic cells. | Multiple fluorophore options available (FITC, PE, APC, etc.); selection depends on flow cytometer laser and filter configuration [4]. |
| Viability Dye (e.g., PI, 7-AAD) [1] [3] | Membrane-impermeable dye that identifies dead cells with compromised membrane integrity. | PI is common and economical; 7-AAD is recommended for use with Annexin V-PE conjugates due to better spectral separation [3]. |
| Binding Buffer [1] [3] | Provides optimal calcium concentration for Annexin V binding and maintains cell viability. | Critical to avoid buffers containing EDTA or other calcium chelators that would inhibit Annexin V binding [4]. |
| Apoptosis Inducer (e.g., Staurosporine, Doxorubicin) [46] [66] | Used to generate a reliable positive control population of apoptotic cells. | Validates the staining protocol; doxorubicin (1 μM for 48h) is effective in MDA-MB-231 cells [46]. |
| RNase A [68] | Enzyme that degrades cytoplasmic RNA, reducing false-positive PI staining. | Particularly important for primary cells and large cells with high RNA content; used at 50 μg/mL for 15 min at 37°C [68]. |
Establishing Essential Experimental Controls
Unstained Cells
Purpose and Application: Unstained cells serve as the fundamental baseline control, establishing the inherent autofluorescence and background signal of the cell population under investigation [3] [4]. This control is indispensable for setting flow cytometry detector voltages and defining the negative population boundaries for both Annexin V and PI fluorescence channels.
Detailed Protocol:
- Harvest and wash cells following the same procedure as experimental samples.
- Resuspend approximately 1-5 × 10⁵ cells in 100 μL of 1X Annexin V binding buffer [1] [3].
- Process the sample identically to stained cells, including incubation times, but omit the addition of any fluorescent dyes.
- Analyze via flow cytometry first to establish baseline autofluorescence and set photomultiplier tube (PMT) voltages so that the cell population is positioned in the lower left quadrant of the density plot [3].
Single-Stained Controls
Purpose and Application: Single-stained controls are mandatory for creating a compensation matrix that corrects for spectral overlap between the fluorescence emission spectra of Annexin V conjugates and viability dyes [46] [4]. These controls enable the accurate separation of signals required for distinguishing distinct cell populations.
Detailed Protocol:
- Prepare three aliquots of cells (1-5 × 10⁵ cells each) from the same source, preferably one that includes some apoptotic cells (such as an induced positive control) [3].
- Annexin V Single-Stain Control: Stain one aliquot with 5 μL of Annexin V conjugate (e.g., Annexin V-FITC) in 100 μL binding buffer. Incubate 15 minutes at room temperature in the dark, then add 400 μL binding buffer [3] [4].
- Viability Dye Single-Stain Control: Stain a second aliquot with 5 μL of PI (or the appropriate volume of 7-AAD) in 100 μL binding buffer. Incubate 15 minutes at room temperature in the dark, then add 400 μL binding buffer [3]. Do not wash after adding PI or 7-AAD [4].
- Third Fluorophore Single-Stain Control (if applicable): When combining Annexin V staining with antibody labeling for another marker (e.g., APC-conjugated anti-CD44), a separate aliquot stained only with this antibody is required to set compensation for that channel [46].
- Analyze these controls on the flow cytometer to calculate compensation values and create a compensation matrix that is applied to all experimental samples [46].
Apoptosis-Induced Positive Controls
Purpose and Application: Apoptosis-induced positive controls validate the entire staining protocol by confirming that the reagents are functioning correctly and that the system can detect a known apoptotic response [3] [66]. This control is crucial for verifying assay sensitivity and establishing appropriate gating strategies.
Detailed Protocol:
- Induction of Apoptosis: Treat cells with a known apoptosis-inducing agent. For example, incubate MDA-MB-231 cells with 1 μM doxorubicin for 48 hours, or use staurosporine (often at 0.1-1 μM for 2-4 hours) depending on the cell line [46] [66].
- Cell Harvesting: Harvest treated cells with gentle methods to avoid artifactual membrane damage. For adherent cells, enzymatic detachment with low-concentration trypsin (e.g., 0.125% trypsin-EDTA) is generally recommended over mechanical scraping, which can cause false positives in sensitive cell lines [49].
- Staining and Analysis: Stain the induced cells simultaneously with experimental samples using the dual Annexin V/PI staining protocol. This population should show a significant shift in the flow cytometry plot, with clear populations in the early apoptotic (Annexin V⁺/PI⁻) and/or late apoptotic (Annexin V⁺/PI⁺) quadrants [3].
Figure 1: Experimental workflow integrating essential controls for Annexin V staining. The process begins with preparing unstained, single-stained, and apoptosis-induced control samples alongside experimental samples. All samples are analyzed by flow cytometry, where data from controls are used to set compensation and gating before interpreting experimental data.
Advanced Control Considerations
Specificity Control: Annexin V Blocking
An additional control to demonstrate staining specificity involves pre-incubating cell samples with unconjugated recombinant Annexin V to block phosphatidylserine binding sites before adding the fluorescent Annexin V conjugate [3]. This control should significantly reduce fluorescent signal in apoptotic populations, confirming that the staining is specific for PS.
Addressing False Positives with RNase Treatment
A significant limitation of conventional PI staining is its affinity for cytoplasmic RNA, which can lead to false-positive identification of dead cells, particularly in large cells with high RNA content [68]. A modified protocol incorporating 1% formaldehyde fixation followed by treatment with 50 μg/mL RNase A for 15 minutes at 37°C has been shown to effectively remove cytoplasmic RNA and reduce false-positive events from up to 40% to less than 5% [68].
Cell Harvesting Considerations
The method of cell harvesting profoundly impacts Annexin V staining results. A comparative study of six cancer cell lines revealed that while some lines (Mel-Ho, SW480, PaTu 8988t) were unaffected by harvesting method, others (HT-29, PANC-1, A-673) showed dramatically increased false-positive Annexin V staining when mechanically detached compared to enzymatic trypsinization [49]. Researchers should pre-test harvesting methods on their specific cell lines to minimize mechanical artifact.
Data Interpretation and Analysis
Proper analysis of controlled experiments enables accurate quantification of cell death stages. The table below outlines the expected staining patterns for different cell populations following proper control implementation and compensation.
Table 2: Interpretation of Annexin V/PI Staining Results with Controls
| Cell Population | Annexin V Staining | PI Staining | Biological Status |
|---|---|---|---|
| Viable Cells | Negative | Negative | Healthy cells with intact membranes |
| Early Apoptotic Cells | Positive | Negative | Cells undergoing apoptosis with PS exposure but intact membranes |
| Late Apoptotic Cells | Positive | Positive | Cells in end-stage apoptosis with compromised membranes |
| Necrotic Cells | Negative* | Positive | Cells that have died via necrosis; may show Annexin V positivity if membranes are severely damaged [67] |
Figure 2: Data interpretation framework for Annexin V/PI staining. Cells are categorized into four distinct populations based on their fluorescence signals, enabling quantitative analysis of cell viability and death pathways.
The implementation of comprehensive experimental controls—unstained cells, single-stained compensation samples, and apoptosis-induced positive controls—is not optional but fundamental to generating reliable, interpretable data with the Annexin V staining protocol. These controls address critical vulnerabilities in the assay, including autofluorescence baseline determination, spectral compensation in flow cytometry, and protocol validation. Furthermore, attention to advanced considerations such as Annexin V blocking, RNase treatment for false-positive reduction, and appropriate cell harvesting methods elevates the quality of apoptosis research. By adhering to these detailed protocols for control experiments, researchers in drug development and basic science can ensure their conclusions about cellular responses to therapeutic agents are built upon a foundation of rigorous, reproducible experimental design.
In early apoptosis detection research using Annexin V staining, confirming the specificity of the phosphatidylserine (PS) binding signal is a critical step in experimental validation. Non-specific binding or other experimental artifacts can lead to misinterpretation of apoptosis levels, potentially compromising research conclusions and drug development studies. The Annexin V blocking experiment serves as a essential control that validates the specificity of the apoptosis detection assay by competitively inhibiting binding sites with unconjugated recombinant Annexin V prior to staining with the fluorescent conjugate. This application note provides detailed methodologies and data interpretation guidelines for implementing this crucial specificity validation within the broader context of Annexin V staining protocols for early apoptosis detection.
The Principle of Annexin V Blocking Experiments
Annexin V blocking experiments operate on the principle of competitive inhibition. The assay utilizes purified recombinant Annexin V protein, which is identical to the conjugated Annexin V used for detection but lacks a fluorescent tag. When added to cell samples prior to staining with fluorescent Annexin V, the recombinant protein binds specifically to exposed phosphatidylserine residues on apoptotic cells, thereby saturating the available binding sites.
The logical relationship and workflow of this process can be visualized as follows:
Diagram 1: Logical workflow of Annexin V blocking experiment
This sequence demonstrates how pre-incubation with unconjugated Annexin V prevents subsequent binding of the fluorescent conjugate, confirming that the observed signal in non-blocked samples results from specific PS binding rather than non-specific interactions. A successful blocking experiment demonstrates significantly reduced fluorescent signal in pre-blocked samples compared to non-blocked controls, validating that the original Annexin V staining was specific for exposed phosphatidylserine [3] [69].
Materials and Reagents
The Scientist's Toolkit: Essential Reagents for Blocking Experiments
| Item | Function/Purpose | Example Specifications |
|---|---|---|
| Purified Recombinant Annexin V | Competitively binds to and blocks PS sites; unconjugated | 0.5 mg/mL stock [69] |
| Fluorochrome-Conjugated Annexin V | Detection reagent for PS exposure after blocking | FITC, PE, APC, or other conjugates [3] [4] |
| 10X Binding Buffer | Provides optimal calcium and salt conditions for Annexin V binding | 0.1 M HEPES (pH 7.4), 1.4 M NaCl, 25 mM CaCl₂ [3] |
| Viability Stain | Distinguishes apoptotic from necrotic cells; membrane integrity indicator | Propidium Iodide (PI), 7-AAD, or Fixable Viability Dyes [4] [11] |
| Cell Preparation Buffers | Washes and resuspends cells while maintaining viability | Cold PBS, calcium-free for washes [3] [46] |
| Apoptosis-Inducing Agent | Generates positive control cells with exposed PS | Camptothecin, Staurosporine, Anti-Fas Antibody [69] [7] |
Key Parameters from Published Protocols
Table 1: Quantitative Reagent Specifications for Blocking Experiments
| Parameter | Specification | Notes/Sources |
|---|---|---|
| Recombinant Annexin V Concentration | 0.5 mg/mL stock [69] | Supplier stock concentration |
| Recombinant Annexin V Working Amount | 5-15 µg per test [3] [69] | Amount required to saturate binding sites |
| Cell Concentration for Staining | 1 × 10⁶ cells/mL [3] [69] | In 1X Binding Buffer |
| Cell Number per Test | 1 × 10⁵ cells [3] [69] | May be reduced to 0.5 × 10⁵ for optimal blocking [69] |
| Blocking Incubation Time | 15 minutes [3] [69] | Room temperature, in the dark |
| Fluorochrome-Conjugated Annexin V Volume | 5 µL per test [3] [69] | Following blocking step |
| Post-Staining Analysis Timeline | Within 1 hour [3] [69] | Due to viability concerns |
Step-by-Step Protocol
Annexin V Blocking Experimental Procedure
The following workflow outlines the complete blocking experiment procedure:
Diagram 2: Experimental workflow for Annexin V blocking protocol
Detailed Protocol Steps
Cell Preparation: Harvest cells using gentle methods to preserve membrane integrity. For adherent cells, use gentle detachment methods and combine floated cells with trypsinized populations [7] [46]. Wash cells twice with cold PBS to remove residual media and calcium chelators like EDTA that interfere with Annexin V binding [4].
Buffer Preparation: Dilute 10X binding buffer to 1X concentration using distilled water. The binding buffer must contain calcium ions (typically 2.5 mM) as Annexin V binding is calcium-dependent [3] [70].
Sample Allocation: Resuspend cell pellet in 1X Binding Buffer at a concentration of 1 × 10⁶ cells/mL. Transfer 100 µL aliquots (~1 × 10⁵ cells) to separate culture tubes for blocked test samples, unblocked controls, and single-stained compensation controls [3].
Blocking Incubation: Add 5-15 µg of purified recombinant Annexin V to the test samples. Gently vortex and incubate for 15 minutes at room temperature in the dark. The optimal amount may require titration based on cell type and apoptosis level [69].
Fluorescent Staining: After the blocking incubation, add 5 µL of fluorochrome-conjugated Annexin V to all appropriate tubes. Gently mix and incubate for 15 minutes at room temperature in the dark [3] [69].
Viability Staining: Add viability stain such as Propidium Iodide (2-10 µL) or 7-AAD (5 µL) to distinguish late apoptotic/necrotic cells. Do not wash after adding viability dyes as this would remove the stain [3] [4].
Flow Cytometry Analysis: Add 400 µL of 1X Binding Buffer to each tube and analyze by flow cytometry within 1 hour. Delayed analysis may affect cell viability and staining patterns [3] [7].
Essential Experimental Controls
Table 2: Required Controls for Specificity Validation
| Control Type | Purpose | Setup |
|---|---|---|
| Unblocked Apoptotic Cells | Demonstrates baseline Annexin V binding | Apoptotic cells + conjugated Annexin V only |
| Blocked Apoptotic Cells | Tests binding specificity | Apoptotic cells + recombinant Annexin V + conjugated Annexin V |
| Single-Stained Controls | Compensation for spectral overlap | Cells stained with conjugated Annexin V only or viability dye only |
| Unstained Cells | Determines background autofluorescence | Cells in binding buffer only |
| Healthy Cell Control | Determines background apoptosis | Untreated cells + conjugated Annexin V |
Data Interpretation and Analysis
Expected Outcomes and Significance
Successful blocking is demonstrated by a significant reduction in the fluorescent Annexin V signal in the pre-blocked sample compared to the unblocked control. Research shows that effective blocking can reduce the Annexin V-positive population from a clearly detectable level (e.g., M2 gated population in flow cytometry) to near background levels, similar to unstained or healthy cell controls [69].
In data interpretation, researchers should compare the percentage of Annexin V-positive cells in blocked versus unblocked conditions. A successful specificity validation shows at least a 70-80% reduction in Annexin V-positive cells in the blocked sample. This confirms that the original signal was due to specific PS binding rather than non-specific interactions or artifact [69].
Troubleshooting and Optimization
Common Challenges and Solutions
Incomplete Blocking: If blocking does not significantly reduce the fluorescent signal, increase the amount of recombinant Annexin V (up to 15 µg per test) or reduce the cell number to 0.5 × 10⁵ cells per test while maintaining the recombinant Annexin V amount [69].
High Background in Controls: Ensure all washing steps use calcium-free PBS and that binding buffer is freshly prepared. Verify that cells are handled gently throughout processing to avoid mechanical damage that causes non-specific Annexin V binding [7] [70].
Poor Viability Affecting Results: Analyze samples immediately after staining (within 1 hour) and keep cells on ice if analysis must be delayed. Use healthy, actively growing cells for experiments and avoid over-confluent cultures [3] [7].
Weak Apoptosis Signal: For positive controls, optimize apoptosis induction conditions. For Jurkat cells, treatment with 4-6 µM camptothecin for 4-6 hours or anti-Fas antibody with Protein G for 2-12 hours effectively induces apoptosis [69].
The Annexin V blocking experiment is an essential control that validates the specificity of apoptosis detection assays, providing critical confirmation that observed signals genuinely represent phosphatidylserine exposure rather than experimental artifacts. This protocol outlines a standardized approach for implementing this validation control within the broader context of Annexin V-based apoptosis research. By incorporating this specificity validation into their experimental workflow, researchers and drug development professionals can generate more reliable, interpretable data on programmed cell death mechanisms, ultimately strengthening research conclusions and supporting therapeutic development.
Apoptosis, or programmed cell death, is a fundamental biological process critical for development, immune regulation, and tissue homeostasis. Accurate detection of apoptosis is essential in fields such as cancer research, drug development, and immunology. This application note provides a detailed comparative analysis of two cornerstone apoptosis detection methods: the Annexin V assay for identifying early apoptotic events and the TUNEL assay for detecting late-stage apoptosis. We summarize their core principles, advantages, limitations, and technical protocols, providing researchers with a framework to select the most appropriate methodology based on their specific experimental requirements within the broader context of Annexin V staining protocol research.
Apoptosis is a highly regulated process characterized by a cascade of distinct biochemical and morphological events. The process can be triggered via intrinsic (mitochondrial) or extrinsic (death receptor) pathways, both culminating in the activation of executioner caspases [71]. These events occur in a chronological sequence, presenting specific, detectable hallmarks at different stages. Early apoptosis is marked by the loss of plasma membrane asymmetry and the translocation of phosphatidylserine (PS) from the inner to the outer leaflet of the membrane [1] [72]. Late apoptosis, on the other hand, is characterized by key events such as DNA fragmentation, a result of endonuclease activity, and the loss of cell membrane integrity [71] [72]. The specific detection of these sequential hallmarks forms the basis of the most common apoptosis assays.
Principle and Comparison of Annexin V and TUNEL Assays
The Annexin V and TUNEL assays target different biochemical events in the apoptotic cascade, making them suitable for identifying distinct stages of cell death.
Annexin V Assay leverages the high affinity of Annexin V, a 35-36 kDa protein, for phosphatidylserine (PS). In the presence of calcium ions, Annexin V binds specifically to PS residues exposed on the outer membrane of cells undergoing early apoptosis. When combined with a vital dye like propidium iodide (PI), which only penetinates cells with compromised membranes, the assay can discriminate between viable (Annexin V-/PI-), early apoptotic (Annexin V+/PI-), and late apoptotic or necrotic cells (Annexin V+/PI+) [1] [72].
TUNEL Assay (Terminal deoxynucleotidyl transferase dUTP Nick End Labeling) identifies late-stage apoptotic cells by detecting DNA fragmentation, a hallmark of late apoptosis. The enzyme Terminal deoxynucleotidyl transferase (TdT) catalyzes the addition of labeled dUTP to the 3'-hydroxyl ends of fragmented DNA, providing a direct marker for cells undergoing this terminal event [72].
The table below provides a direct, quantitative comparison of these two techniques.
Table 1: Comparative Analysis: Annexin V vs. TUNEL Assay
| Parameter | Annexin V Assay | TUNEL Assay |
|---|---|---|
| Primary Detection Target | Phosphatidylserine (PS) externalization [1] [72] | DNA fragmentation [72] |
| Stage of Apoptosis Detected | Early apoptosis [1] [72] | Late apoptosis [72] |
| Key Reagents | Annexin V-fluorochrome conjugate, Propidium Iodide (PI), Binding Buffer [1] [3] | TdT Enzyme, Labeled-dUTP (e.g., fluorescein-dUTP) [72] |
| Detection Platform | Flow cytometry, Fluorescence microscopy [1] | Flow cytometry, Fluorescence microscopy, Histological staining |
| Assay Workflow Duration | ~20-30 minutes (after cell harvesting) [1] [3] | Several hours (includes permeabilization and enzyme labeling steps) |
| Distinguishes Viable/Early/Late Apoptotic | Yes (when combined with PI) [1] [72] | No, identifies late apoptotic and necrotic cells. |
| Key Advantage | Rapid, live-cell analysis, distinguishes early and late stages [1] | Specific for biochemical hallmark of late apoptosis (DNA fragmentation) |
| Main Limitation | Cannot distinguish apoptosis from other PS-exposing cell death (e.g., necroptosis) [1] | Does not provide information on early apoptotic events; can label necrotic cells [71] |
Visualizing the Apoptotic Cascade and Assay Targets
The following diagram illustrates the sequential nature of apoptotic events and the specific stages targeted by the Annexin V and TUNEL assays.
Detailed Experimental Protocols
Annexin V/Propidium Iodide Staining Protocol for Flow Cytometry
This protocol is adapted from established commercial sources and is suitable for both suspension and adherent cell lines [1] [3].
3.1.1 Reagents and Materials
- 1X Annexin V Binding Buffer: 10 mM HEPES/NaOH (pH 7.4), 140 mM NaCl, 2.5 mM CaCl₂ [3].
- Fluorochrome-conjugated Annexin V (e.g., Annexin V-FITC, Annexin V-PE).
- Propidium Iodide (PI) Staining Solution or 7-AAD.
- Phosphate-Buffered Saline (PBS), cold.
- Flow cytometer equipped with appropriate lasers and filters (e.g., 488 nm excitation).
3.1.2 Step-by-Step Procedure
- Cell Harvesting and Washing: Harvest cells (including positive control cells induced with apoptosis-inducing agents) and wash them twice with cold PBS. Centrifuge at 300-500 x g for 5 minutes. For adherent cells, use gentle trypsinization and wash with serum-containing media to inactivate trypsin before proceeding [1].
- Cell Resuspension: Resuspend the cell pellet in 1X Annexin V Binding Buffer to a density of 1 x 10⁶ cells/mL [3].
- Staining: Transfer 100 µL of cell suspension (∼1 x 10⁵ cells) to a flow cytometry tube. Add 5 µL of Annexin V-FITC and 2-5 µL of PI (the optimal volume of PI should be titrated for your cell type) [3]. Gently vortex the tube to mix.
- Incubation: Incubate the cells for 15 minutes at room temperature (20-25°C) in the dark [3].
- Analysis: Within 1 hour of staining, add 400 µL of 1X Annexin V Binding Buffer to each tube and analyze by flow cytometry. Use FL1 (FITC) and FL2 or FL3 (PI) detectors.
3.1.3 Controls and Gating Strategy
- Unstained cells: To set autofluorescence levels.
- Annexin V single-stained control: For fluorescence compensation and gating.
- PI single-stained control: For fluorescence compensation and gating.
- Induced apoptosis positive control: To validate the assay performance.
Table 2: Research Reagent Solutions for Annexin V Assay
| Item | Function/Description | Example Specification |
|---|---|---|
| Annexin V-FITC | Fluorescent probe that binds to externalized PS in a Ca²⁺-dependent manner. | 100 tests, 5 µL per test [72] |
| Propidium Iodide (PI) | Vital dye that stains nucleic acids in cells with compromised membranes; excludes live and early apoptotic cells. | 50 µg/mL, 2-5 µL per test [1] [3] |
| 10X Annexin V Binding Buffer | Provides the optimal calcium and pH environment for specific Annexin V binding to PS. | 0.1 M HEPES, 1.4 M NaCl, 25 mM CaCl₂ [3] |
| 7-AAD | Alternative vital dye to PI, used with Annexin V-PE to avoid spectral overlap. | Ready-to-use solution [3] |
TUNEL Assay Protocol
This protocol outlines the general workflow for the TUNEL assay, which is typically performed using commercial kits.
3.2.1 Reagents and Materials
- Commercial TUNEL assay kit (e.g., containing TdT enzyme, labeled-dUTP, and reaction buffer).
- Phosphate-Buffered Saline (PBS).
- Fixative (e.g., 4% paraformaldehyde in PBS).
- Permeabilization solution (e.g., 0.1% Triton X-100 in 0.1% sodium citrate).
- Flow cytometer or fluorescence microscope.
3.2.2 Step-by-Step Procedure
- Cell Fixation: Harvest and wash cells. Fix cells with 4% paraformaldehyde for 1 hour at room temperature.
- Permeabilization: Wash cells twice with PBS. Permeabilize cells on ice for 2-5 minutes to allow the TUNEL reagents to access the nuclear DNA.
- TUNEL Reaction: Wash cells twice with PBS. Resuspend the cell pellet in the TUNEL reaction mixture (containing TdT and fluorescein-dUTP) and incubate for 60 minutes at 37°C in the dark.
- Analysis: Wash cells twice with PBS and resuspend in PBS for analysis by flow cytometry or microscopy (excitation: 488 nm; emission: 530 nm).
The choice between Annexin V and TUNEL assays is fundamentally dictated by the research question and the specific stage of apoptosis under investigation. The Annexin V assay is the superior tool for the early detection of apoptosis and for discriminating between viable, early apoptotic, and late apoptotic/necrotic cell populations in a rapid, flow cytometry-based workflow [1]. In contrast, the TUNEL assay provides definitive confirmation of late-stage apoptosis through the specific labeling of DNA fragmentation, a key biochemical endpoint [72].
A significant limitation of the Annexin V assay is its inability to definitively distinguish apoptosis from other forms of programmed cell death that also involve PS externalization, such as necroptosis [1] [71]. Furthermore, the assay is sensitive to handling artifacts, as any physical disruption of the cell membrane can lead to non-specific Annexin V binding [1]. The TUNEL assay, while highly specific for DNA breaks, can sometimes label cells undergoing necrosis and requires cell fixation, making it an endpoint assay unsuitable for live-cell analysis [71].
For a more comprehensive understanding of cell death mechanisms, these assays can be powerfully combined with other techniques, such as caspase activity assays or Western blotting for cleavage of apoptotic substrates [1] [71]. Furthermore, novel electrochemical approaches are emerging that detect PS exposure without the need for labeled Annexin V, offering potential for future low-cost, rapid diagnostics [73] [74]. Within the framework of thesis research on early apoptosis detection, the Annexin V staining protocol remains an indispensable, reliable, and high-throughput method for quantifying the initial phases of programmed cell death.
Within the framework of research on early apoptosis detection, the selection of an appropriate experimental method is paramount. Two of the most prominent techniques employed are the Annexin V staining assay, which detects the externalization of phosphatidylserine (PS) on the cell membrane, and caspase activity assays, which measure the enzymatic activity of key executioner caspases. This application note provides a detailed evaluation of these two methods, summarizing their comparative advantages and limitations to guide researchers and drug development professionals in selecting the optimal approach for their specific experimental context. The content is structured to furnish not only a theoretical comparison but also actionable protocols and data to inform laboratory practice.
Principle and Mechanism of Apoptosis
Apoptosis, or programmed cell death, is a fundamental biological process critical for development, immune regulation, and tissue homeostasis [1]. It is characterized by a cascade of biochemical events and distinctive morphological changes, including cell shrinkage, nuclear fragmentation, and the formation of apoptotic bodies [71].
Key Signaling Pathways
The process of apoptosis can be initiated via two principal pathways, both culminating in the activation of caspases:
- The Extrinsic Pathway: Triggered by the binding of extracellular death ligands to cell surface death receptors (e.g., TNF receptor, Fas), leading to the assembly of the death-inducing signaling complex (DISC) and activation of initiator caspase-8 [71].
- The Intrinsic Pathway: Initiated by intracellular stresses such as DNA damage or oxidative stress, leading to mitochondrial outer membrane permeabilization, release of cytochrome c, formation of the apoptosome, and activation of initiator caspase-9 [71].
Both pathways converge on the activation of executioner caspases-3 and -7, which mediate the terminal proteolytic events of apoptosis, including the cleavage of structural proteins and enzymes like poly (ADP-ribose) polymerase (PARP) [75] [71]. A hallmark of early apoptosis, independent of caspase activation in some instances, is the loss of plasma membrane asymmetry and the translocation of phosphatidylserine (PS) from the inner to the outer leaflet [11] [1].
The following diagram illustrates the key events in apoptosis detected by Annexin V and caspase assays:
Annexin V Staining Protocol for Flow Cytometry
This protocol is designed for the early detection of apoptotic cells in suspension using Annexin V conjugated to a fluorochrome (e.g., FITC) and propidium iodide (PI) for dead cell discrimination, followed by analysis via flow cytometry [1] [6].
Reagents and Solutions
- Annexin V-FITC (e.g., from Abcam kit ab14085 or equivalent)
- Propidium Iodide (PI) Staining Solution (or alternative viability dye like 7-AAD)
- 1X Annexin V Binding Buffer (typically 10 mM HEPES, 140 mM NaCl, 2.5 mM CaCl₂, pH 7.4)
- Phosphate Buffered Saline (PBS), without calcium or magnesium
- Cell culture reagents for washing (e.g., serum-containing media)
Procedure
Cell Preparation and Staining
- Harvest approximately 1-5 x 10⁵ cells by gentle centrifugation (335 × g for 5-10 minutes) and decant the supernatant [1] [68].
- Wash cells once with 1X PBS or serum-containing media (for adherent cells, use gentle trypsinization and wash before staining) [1].
- Resuspend the cell pellet thoroughly in 500 µL of 1X Annexin V Binding Buffer.
- Add 5 µL of Annexin V-FITC and, if required, 5 µL of PI [1]. Alternative viability dyes like 7-AAD or SYTOX AADvanced can be used depending on the kit and instrument configuration [11].
- Incubate the mixture for 15 minutes at room temperature in the dark [68] [6].
Analysis by Flow Cytometry
- Analyze the cells promptly by flow cytometry (without a wash step post-staining to prevent loss of weakly bound cells) [6].
- Use excitation at 488 nm. Measure Annexin V-FITC fluorescence with an FITC signal detector (e.g., FL1, 530/30 nm filter) and PI fluorescence with a phycoerythrin emission signal detector (e.g., FL2, 585/42 nm filter) [11] [1].
Data Interpretation
- Annexin V⁻/PI⁻: Viable, non-apoptotic cells.
- Annexin V⁺/PI⁻: Early apoptotic cells.
- Annexin V⁺/PI⁺: Late apoptotic or necrotic cells [1] [6].
Protocol Modifications and Considerations
- Fixation: If fixation is absolutely necessary post-staining, use an alcohol-free, aldehyde-based fixative and buffers containing Ca²⁺ to retain the Annexin V signal, though this is generally not recommended [11].
- Accuracy Improvement: A modified protocol incorporating a fixation step followed by RNase A treatment (50 µg/mL) post-staining has been shown to significantly reduce false-positive PI signals caused by cytoplasmic RNA staining, especially in large primary cells [68].
Caspase Activity Assay Protocol
This protocol outlines the measurement of executioner caspase-3/7 activity as a biochemical marker of apoptosis, adaptable for fluorometric or luminescent detection in a plate reader format [75].
Reagents and Solutions
- Caspase-3/7 Substrate: A luminogenic or fluorogenic substrate (e.g., DEVD-aminoluciferin for luminescent assays, or DEVD-AMC/AFC/R110 for fluorescent assays) [75].
- Assay Buffer: Compatible cell lysis and reaction buffer, often provided with commercial kits.
- Positive Control: An inducer of apoptosis (e.g., camptothecin or staurosporine).
- Cell Culture Reagents.
Procedure (Luminescent Assay Example)
Cell Preparation
- Seed and treat cells in an opaque-walled, white multi-well plate suitable for luminescence reading. For suspension cells, transfer directly to the plate [75].
- Include untreated and positive control wells.
Assay Execution
- Equilibrate the plate and Caspase-Glo 3/7 Reagent to room temperature.
- Add a volume of Caspase-Glo 3/7 Reagent equal to the volume of cell culture medium present in each well.
- Mix the contents gently using a plate shaker for 30 seconds to 1 minute.
- Incubate the plate at room temperature for 30 minutes to 2 hours (optimize incubation time for your cell type).
- Measure the luminescent signal (Relative Luminescence Units, RLU) using a plate-reading luminometer [75].
Data Interpretation
- An increase in luminescent or fluorescent signal relative to untreated controls indicates caspase-3/7 activation and is consistent with the induction of apoptosis.
Comparative Analysis: Annexin V vs. Caspase Activity Assays
The following tables summarize the key characteristics, advantages, and limitations of Annexin V staining and caspase activity assays.
Table 1: Direct Comparison of Key Assay Characteristics
| Characteristic | Annexin V Staining | Caspase Activity Assay |
|---|---|---|
| Target | Externalized Phosphatidylserine (PS) | Protease activity of Caspase-3/7 |
| Stage Detected | Early apoptosis (can also stain late apoptotic/dead cells) | Mid-stage apoptosis ("point of no return") [75] |
| Cellular Process | Loss of membrane asymmetry | Execution phase proteolysis |
| Typical Readout | Flow Cytometry, Fluorescence Microscopy | Luminescence, Fluorescence (Plate Reader) |
| Throughput | Moderate | High to Ultra-High [75] |
| Viability Dye Required | Yes, for accurate staging (e.g., PI) | No |
Table 2: Analysis of Advantages and Limitations
| Aspect | Annexin V Staining | Caspase Activity Assay |
|---|---|---|
| Key Advantages | - Detects early-stage apoptosis [1]- Provides single-cell resolution and population distribution [1]- Can distinguish early vs. late apoptotic and necrotic cells with a viability dye [11] [1] | - High sensitivity and dynamic range (luminescent) [75]- Amenable to high-throughput screening (HTS) in 1536-well formats [75]- Measures a key commitment point in apoptosis [75]- Homogeneous, "no-wash" assay format |
| Key Limitations | - False positives from permeabilized/necrotic cells; requires careful gating and controls [11] [68]- Calcium-dependent binding requires specific buffer [1]- Does not distinguish between apoptosis and other PS-exposing death (e.g., necroptosis) [1]- Not easily adapted to fixed tissue sections | - No single-cell information or viability status- Later event in the apoptosis cascade- Potential for assay interference from colored compounds or luciferase inhibitors in small-molecule screens [75]- Lytic assay, preventing subsequent cell analysis |
The Scientist's Toolkit: Essential Research Reagent Solutions
The following table details key reagents and their critical functions for successfully implementing the Annexin V staining protocol.
Table 3: Essential Reagents for Annexin V Staining Assays
| Reagent | Function/Principle | Key Considerations |
|---|---|---|
| Recombinant Annexin V | Binds with high affinity to externalized phosphatidylserine (PS) in a calcium-dependent manner [11] [1]. | Available conjugated to various fluorochromes (e.g., FITC, PE, APC, Alexa Fluor dyes) for compatibility with different laser lines and filter sets [11]. |
| Viability Stain (e.g., PI, 7-AAD, SYTOX Green) | Distinguishes between intact and compromised membranes. Impermeant to live cells; enters late apoptotic/necrotic cells to stain nucleic acids [11] [1]. | Critical to avoid false-positive Annexin V staining from inner leaflet PS binding in dead cells. Choice of dye depends on instrument configuration and fluorochrome compatibility [11]. |
| Annexin Binding Buffer | Provides the optimal calcium-containing environment for efficient Annexin V-PS binding while maintaining cell viability during staining [11] [1]. | Typically a 5X or 10X concentrate that must be diluted with pure water. Avoids the use of detergents [11]. |
| RNase A | Degrades cytoplasmic RNA. Used in a modified protocol post-fixation to eliminate false-positive PI staining from RNA, greatly improving accuracy [68]. | Particularly important for primary cells and cell types with high RNA content or large cytoplasmic volume [68]. |
Integrated Workflow for Apoptosis Detection
For a comprehensive analysis of cell death mechanisms, integrating multiple methods is highly recommended. The diagram below illustrates a potential workflow combining both Annexin V staining and caspase activity measurement.
Both Annexin V staining and caspase activity assays are powerful tools for apoptosis detection, yet they provide insights into different stages and aspects of the process. The choice of method should be dictated by the specific research question. Annexin V staining is ideal for detecting early apoptotic events and characterizing heterogeneous cell populations at a single-cell level. In contrast, caspase activity assays offer superior sensitivity and are better suited for high-throughput screening applications where a mid-stage, commitment marker is sufficient. For the most robust conclusions, particularly in complex experimental systems like drug toxicity assessment, employing these methods in a complementary manner provides a more definitive analysis of cell death mechanisms [76].
Annexin V staining serves as a cornerstone technique for detecting early apoptosis by identifying the externalization of phosphatidylserine (PS) on the outer leaflet of the plasma membrane, a hallmark event in programmed cell death [1] [77]. While invaluable, the standalone Annexin V assay provides a snapshot of a single apoptotic parameter. The growing complexity of biomedical research, particularly in drug discovery and mechanistic studies, demands a more holistic understanding of cell death pathways [78] [79]. Multiplexing—the simultaneous detection of multiple cellular parameters—addresses this need by integrating Annexin V with other markers to provide a nuanced, temporal, and mechanistic view of apoptosis. This approach allows researchers to distinguish early from late apoptotic events, correlate PS exposure with caspase activation, monitor cell cycle status, and track changes in specific protein expression concurrently with cell death [80] [8] [47]. This application note details practical protocols and workflows for integrating Annexin V into multiplexed assays, empowering researchers to extract richer, more meaningful data from their apoptosis experiments.
Principles and Benefits of Multiplexing with Annexin V
Multiplexed assays with Annexin V transform apoptosis detection from a static observation into a dynamic investigation of cell death pathways. The core principle involves leveraging the specificity of Annexin V for PS exposure and combining it with probes for distinct cellular events that occur at different stages of apoptosis or in response to various death stimuli.
The primary benefits of this integrated approach include:
- Temporal Resolution of Apoptosis: By combining Annexin V (early apoptosis) with a viability dye like Propidium Iodide (PI) and a marker for late apoptosis (e.g., activated Caspase-3), researchers can track the progression of individual cells through the apoptotic cascade. This allows for the clear distinction between viable (Annexin V−/PI−), early apoptotic (Annexin V+/PI−), late apoptotic (Annexin V+/Caspase-3+), and necrotic (Annexin V−/PI+) populations [80] [77].
- Mechanistic Insights: Integrating Annexin V staining with intracellular staining for signaling proteins, phosphorylated targets, or organelle-specific dyes (e.g., JC-1 for mitochondrial membrane potential) provides critical context. For instance, one can determine if a cytotoxic drug induces apoptosis primarily through the mitochondrial (intrinsic) pathway by observing mitochondrial depolarization preceding PS exposure [47].
- Correlation with Proliferation and Cell Cycle: Cell death and proliferation are intrinsically linked. A multiplexed approach can incorporate dyes like BrdU or CellTrace Violet to monitor cell cycle status and proliferation history within the same sample, revealing whether treatment-induced reductions in cell numbers are due to arrested proliferation, increased death, or a combination of both [47].
- Enhanced Data Quality and Efficiency: Analyzing multiple parameters from a single sample reduces experimental variability, conserves precious cells and reagents, and increases the informational yield per experiment, which is crucial for high-throughput screening in drug development [78] [79].
The following diagram illustrates the logical relationship between the different markers in a multiplexed apoptosis assay and how they inform on the cellular status.
Figure 1: Logical Framework for Interpreting Multiplexed Apoptosis Assays. This diagram shows how combinations of markers define distinct cell states during apoptosis and necrosis, and how proliferation markers can be correlated with these outcomes.
Key Multiplexing Assays and Experimental Protocols
Annexin V, Caspase-3, and PI for Temporal Staging of Apoptosis
This triad of markers provides a powerful tool for dissecting the apoptotic timeline, from initiation (caspase activation) to execution (PS exposure) and eventual loss of membrane integrity [80].
Detailed Experimental Protocol
Materials:
- Cells of interest (e.g., Jurkat, K562).
- Apoptosis inducer (e.g., 1 µM Staurosporine).
- Annexin V-APC (or other fluorochrome not conflicting with other channels).
- Active Caspase-3 Antibody, conjugated to FITC.
- Propidium Iodide (PI) stock solution (50 µg/mL).
- 1X Binding Buffer (10 mM HEPES, 140 mM NaCl, 2.5 mM CaCl₂, pH 7.4).
- Flow Cytometry Staining Buffer (PBS with 0.5-1% BSA).
- Permeabilization/Fixation Buffer (commercial kit recommended).
- 12 x 75 mm round-bottom tubes [4] [80].
Procedure:
- Induce and Harvest Cells: Treat cells with apoptosis inducer for a time-course (e.g., 0, 1, 2, 4, 20, 24 hours). Harvest both adherent and suspension cells, ensuring gentle detachment to preserve membrane integrity. Wash cells once with cold PBS [77].
- Stain for Annexin V and PI (Live Cell Staining):
- Resuspend cell pellet (~1 x 10⁶ cells) in 100 µL of 1X Binding Buffer.
- Add 5 µL of Annexin V-APC and 2-5 µL of PI [3].
- Incubate for 15 minutes at room temperature in the dark.
- Do not wash after this step. Immediately proceed to the next step or add 400 µL of Binding Buffer and analyze on the flow cytometer if no intracellular staining is required [4] [3].
- Fix and Permeabilize for Intracellular Caspase-3 Staining:
- After live-cell staining, wash cells with 2 mL of Staining Buffer. Centrifuge at 400-600 x g for 5 minutes. Discard supernatant.
- Resuspend cells in 100 µL of Fixation/Permeabilization buffer (from a kit like Foxp3/Transcription Factor Staining Buffer Set). Incubate for 30-60 minutes at 2-8°C in the dark [4].
- Wash cells twice with 2 mL of Permeabilization Buffer.
- Stain for Active Caspase-3:
- Resuspend the fixed and permeabilized cells in 100 µL of Permeabilization Buffer.
- Add the recommended amount of Anti-Active Caspase-3-FITC antibody.
- Incubate for 30 minutes at 2-8°C in the dark.
- Wash cells once with Permeabilization Buffer and once with Staining Buffer.
- Analysis: Resuspend the final cell pellet in 200-500 µL of Staining Buffer or 1X Binding Buffer. Analyze immediately by flow cytometry, using unstained and single-stained controls for compensation [80] [3].
Data Interpretation This method enables the identification of several distinct populations, providing a detailed kinetic profile of apoptosis. The analysis typically involves sequential gating to first exclude debris, then to identify viable, early apoptotic, late apoptotic, and necrotic cells based on Annexin V and PI, and finally to assess Caspase-3 activity within these populations.
Table 1: Population Phenotypes in Annexin V/Caspase-3/PI Multiplex Assay
| Cell Population | Annexin V | Caspase-3 | PI | Biological Interpretation |
|---|---|---|---|---|
| Viable | - | - | - | Healthy, non-apoptotic cells. |
| Early Apoptotic | + | +/- | - | Cells in early apoptosis; Caspase-3 may be activating. |
| Late Apoptotic (Caspase+) | + | + | -/+ | Cells in mid-late apoptosis; caspases active, membrane may be intact or becoming compromised. |
| Late Apoptotic/Necrotic | + | N/A | + | Terminal stage; membrane integrity lost; Caspase staining may be unreliable. |
| Necrotic | - | N/A | + | Primary necrotic cells; death without PS exposure. |
Annexin V/PI with Surface and Intracellular Protein Staining
This protocol is essential for linking apoptosis to changes in specific protein biomarkers, such as surface receptors or intracellular signaling molecules, in response to therapeutic agents [8].
Detailed Experimental Protocol
Materials:
- All materials from Section 3.1.
- Fluorochrome-conjugated antibody against target protein (e.g., CD44-APC).
- Fixable Viability Dye (FVD) eFluor 506, 660, or 780 [4].
Procedure:
- Harvest and Wash: Harvest cells as described. Wash twice with azide-free and serum/protein-free PBS [4].
- Stain Surface Antigen:
- Stain with Fixable Viability Dye:
- Resuspend cells in azide-free PBS.
- Add 1 µL of FVD per 1 mL of cells and vortex immediately.
- Incubate for 30 minutes at 2-8°C in the dark.
- Wash twice with Staining Buffer [4].
- Stain with Annexin V:
- Wash cells once with 1X Binding Buffer.
- Resuspend in 100 µL of 1X Binding Buffer.
- Add 5 µL of a fluorochrome-conjugated Annexin V that is spectrally distinct from the surface antibody and FVD (e.g., Annexin V-FITC).
- Incubate for 10-15 minutes at room temperature in the dark.
- Add 400 µL of 1X Binding Buffer. Do not wash. [4]
- Analysis: Analyze by flow cytometry within 1 hour. The FVD is used instead of PI for viability because it is fixed into the cells, allowing for subsequent permeabilization steps if intracellular staining is also required [4].
Comprehensive Workflow: Proliferation, Cell Cycle, Apoptosis, and Mitochondrial Health
For a systems-level view, Annexin V can be incorporated into a highly multiplexed workflow that assesses multiple interconnected cellular processes in a single sample [47].
Detailed Experimental Protocol
- Overview: This protocol sequentially incorporates CellTrace Violet (proliferation tracing), BrdU/PI (cell cycle analysis), JC-1 (mitochondrial membrane potential), and Annexin V/PI (apoptosis) staining.
- Procedure:
- Proliferation Tracing (Prior to Harvest):
- Prior to experiment, label cells with CellTrace Violet according to manufacturer's instructions. Culture labeled cells under experimental conditions for desired duration [47].
- BrdU Incorporation (Prior to Harvest):
- Add BrdU to the culture medium for a pulse (e.g., 1-2 hours) before harvesting cells [47].
- Harvest and Fix for Cell Cycle Analysis:
- Harvest cells and fix/permeabilize using a kit designed for BrdU/PI staining (e.g., BD Cytofix/Cytoperm). This step also incorporates DNase to expose the BrdU epitope.
- Stain cells with anti-BrdU antibody and PI.
- At this point, cells are fixed and can be stored if needed [47].
- Mitochondrial Staining (if performing on fixed cells, requires validation):
- For best results, stain a separate aliquot of live cells with JC-1 dye according to manufacturer's protocol before any fixation steps. Analyze immediately by flow cytometry [47].
- Annexin V Staining (Live Cell Assay):
- As described in Section 3.1, perform Annexin V/PI staining on a separate aliquot of live, unfixed cells just prior to analysis [47].
- Proliferation Tracing (Prior to Harvest):
This comprehensive workflow, while complex, generates up to eight distinct parameters from a single sample, providing an unparalleled view of cellular status in response to treatment.
The following diagram outlines the sequential steps for this comprehensive multiplexed workflow.
Figure 2: Experimental Workflow for Comprehensive Multiplexed Analysis. This flowchart details the parallel processing of cell aliquots for fixed-cell and live-cell assays, which are integrated during final data analysis.
Research Reagent Solutions
A successful multiplexed experiment relies on a carefully selected toolkit of reagents. The table below lists essential materials and their functions.
Table 2: Essential Research Reagents for Multiplexed Apoptosis Assays
| Reagent / Kit | Primary Function | Key Considerations |
|---|---|---|
| Annexin V Conjugates (FITC, PE, APC, etc.) [4] | Detection of phosphatidylserine exposure on the outer membrane leaflet (early apoptosis). | Choose a fluorochrome that does not spectrally overlap with other markers in the panel. Binding is calcium-dependent [1]. |
| Viability Dyes: Propidium Iodide (PI) [77], 7-AAD [3], Fixable Viability Dyes (FVD) [4] | Discrimination of cells with compromised membrane integrity (late apoptosis/necrosis). | PI/7-AAD cannot be used with permeabilization. FVDs are fixable and ideal for protocols involving intracellular staining [4]. |
| Caspase-3 Activation Kits [80] | Detection of caspase enzyme activation, a key event in the apoptosis execution phase. | Requires cell permeabilization. Provides earlier apoptosis insight than Annexin V in some contexts [80]. |
| Cell Proliferation Dyes: CellTrace Violet [47] | Tracking of cell divisions and proliferation history. | Stains cytoplasm; must be used on live cells prior to other staining steps. |
| BrdU Staining Kits [47] | Identification of cells actively synthesizing DNA (S-phase). | Requires denaturation or DNase treatment for antibody access after fixation. |
| Mitochondrial Dyes: JC-1 [47] | Assessment of mitochondrial membrane potential (ΔΨm). | J-aggregate (red) vs. monomer (green) fluorescence ratio indicates health. Best used on live cells. |
| Flow Cytometry Buffer Sets (Staining, Fixation/Permeabilization) [4] | Providing optimal medium for staining and enabling intracellular antigen access. | Use specific buffers for specific steps (e.g., Annexin V Binding Buffer for Annexin V stain). |
Data Analysis and Interpretation
The power of multiplexing is fully realized during data analysis. Using flow cytometry software, researchers can employ sophisticated gating strategies to dissect complex populations.
- Sequential Gating for Population Purity: Begin by gating on single cells based on FSC-A vs. FSC-H to exclude aggregates. Next, gate on viable cells using FVD or PI. Within the viable cell population, analyze Annexin V staining to identify early apoptotic cells. Further sub-gating on Annexin V+ cells can be performed to analyze levels of other markers, such as Caspase-3 or a surface protein of interest [8].
- Correlative Analysis: Modern flow cytometers and software can handle 10+ parameters simultaneously. Use biaxial plots (dot plots) to visualize the relationship between two parameters (e.g., Annexin V vs. Caspase-3) and histogram overlays to compare the expression of a single marker (e.g., CD44) in viable versus apoptotic populations gated from the same sample [8] [47].
- Quantitative Data Presentation: The final output of these assays is quantitative. Present data as the percentage of cells in each defined population (e.g., % Early Apoptotic, % Caspase-3+ Annexin V+). Mean Fluorescence Intensity (MFI) can be used to report the expression level of a protein within a specific apoptotic population. These quantitative data are crucial for dose-response studies and kinetic analyses of drug action [80] [47].
Table 3: Quantitative Results from a Representative Multiplex Study [80]
| Timepoint (h) | Viable (Annexin V−/PI−) | Early Apoptotic (Annexin V+/PI−) | Late Apoptotic (Caspase-3+/Annexin V+) | Necrotic (Annexin V−/PI+) |
|---|---|---|---|---|
| 0 | 95.2% | 2.1% | 1.5% | 1.2% |
| 1.5 | 70.5% | 18.3% | 8.1% | 3.1% |
| 4 | 45.1% | 25.6% | 22.4% | 6.9% |
| 20 | 15.8% | 18.9% | 55.3% | 10.0% |
Integrating Annexin V staining with other apoptosis and cell health markers through multiplexed assays represents a significant advancement over single-parameter analysis. The protocols detailed herein—from basic Annexin V/Caspase-3/PI triplex staining to comprehensive workflows incorporating proliferation, cell cycle, and mitochondrial metrics—provide researchers with a powerful toolkit to deconstruct the complex biology of cell death. This approach yields richer, more mechanistically informative data, which is indispensable for accelerating drug discovery, validating therapeutic mechanisms of action, and understanding disease pathophysiology. As flow cytometry technology continues to evolve, with improvements in instrumentation, fluorochromes, and data analysis software, the potential for even more complex and insightful multiplexed apoptosis assays will undoubtedly expand.
Assay Validation Standards for Reproducible Research and Regulatory Applications
Assay validation is a critical process that establishes the scientific backbone of reproducibility, reliability, and regulatory success in biomedical research and development. According to the Organisation for Economic Co-operation and Development (OECD), validation is “the process by which the reliability and relevance of a particular approach, method, process or assessment is established for a defined purpose” [81]. In the context of Annexin V staining for apoptosis detection, validation ensures that this widely used method consistently provides accurate, meaningful data across different laboratories and experimental conditions. The fundamental principles of validation remain constant—ensuring reliability (reproducibility within and between laboratories over time) and relevance (ensuring the test is meaningful and useful for its particular purpose) [81]. As research increasingly incorporates Annexin V protocols into critical applications such as drug development and toxicology screening, understanding and implementing rigorous validation standards becomes paramount for both scientific integrity and regulatory acceptance.
The Critical Role of Validation in Annexin V Apoptosis Detection
The Annexin V staining protocol detects early apoptosis by exploiting a key biochemical event: the translocation of phosphatidylserine (PS) from the inner to the outer leaflet of the plasma membrane. Annexin V, a 35-36 kDa calcium-dependent phospholipid-binding protein, then binds to these exposed PS residues with high affinity, allowing detection when conjugated to fluorochromes like FITC or PE [1] [7]. This membrane alteration represents an early event in apoptosis, occurring before other hallmark changes such as DNA fragmentation, making it particularly valuable for detecting initial stages of programmed cell death [1].
Without proper validation, Annexin V staining can yield inconsistent or misleading results due to several technical vulnerabilities. The assay is highly sensitive to calcium concentration, requiring precise buffer conditions and avoidance of calcium chelators like EDTA [4]. Sample processing introduces another variable, as harsh trypsinization or rough handling can mechanically damage cell membranes, creating artificial Annexin V binding sites and leading to false-positive results [1] [7]. Furthermore, the distinction between apoptosis and other forms of cell death such as necrosis requires careful interpretation of dual-staining patterns with viability dyes like propidium iodide (PI) or 7-AAD [1] [6].
These technical considerations underscore why validation is indispensable. For regulatory applications, validated Annexin V methods have become nearly indispensable for risk assessment, even while acknowledging their inherent imperfections, following the precedent set by other established toxicological tests [81].
Experimental Protocols for Validated Annexin V Staining
Core Staining Protocol for Flow Cytometry
The following methodology represents a consensus approach derived from multiple established protocols [1] [4] [6]:
- Cell Harvesting: Collect 1-5 × 10^5 cells per sample. For adherent cells, gently collect floating cells first, then detach remaining adherent cells using mild trypsinization. Avoid harsh processing that can damage membranes [1] [7].
- Washing and Buffer Preparation: Wash cells twice with cold PBS, then resuspend in 100μL of 1X Annexin V binding buffer. Prepare 1X binding buffer fresh from 10X concentrate according to manufacturer specifications [4] [3].
- Staining: Add 5μL of fluorochrome-conjugated Annexin V (FITC, PE, APC, or other conjugates). For viability discrimination, add 2-5μL of propidium iodide (PI), 7-AAD, or DAPI. Incubate at room temperature for 10-15 minutes protected from light [4] [6] [7].
- Analysis: Add 400μL of additional 1X binding buffer and analyze by flow cytometry within 1 hour. Do not wash cells after adding PI or 7-AAD, as these viability dyes must remain in the buffer during acquisition [4] [3].
Essential Experimental Controls
Proper validation requires implementing strategic controls to ensure accurate data interpretation:
- Unstained cells: To assess autofluorescence and set baseline fluorescence parameters [7] [3].
- Single-stained controls: Cells stained with Annexin V only (no viability dye) and viability dye only (no Annexin V) for compensation settings in flow cytometry [7] [3].
- Induced apoptosis positive control: Treat cells with apoptosis inducers like Staurosporine (1μM for 2-4 hours) or Camptothecin to generate a positive control population [7].
- Specificity control: Pre-incubate cells with 5-15μg of unconjugated Annexin V to block binding sites, followed by conjugated Annexin V, to demonstrate staining specificity [3].
- Untreated cell control: To establish baseline levels of apoptosis and necrosis in the experimental system [3].
Figure 1: Annexin V Staining Workflow. This core protocol outlines the essential steps for detecting apoptosis via phosphatidylserine externalization.
Reagent Optimization and Titration
The optimal amount of Annexin V conjugate may vary by cell line and should be empirically determined through titration. The goal is to find the Annexin V concentration that provides maximum separation between positive and negative populations in apoptotic cells while minimizing nonspecific binding in healthy cells [7]. Similarly, viability dye concentrations may require optimization; for PI, the recommended starting amount is 2μL/test, but this may range from 2-10μL depending on cell type and experimental system [3].
Validation Parameters for Annexin V Assays
Comprehensive validation of an Annexin V staining protocol requires evaluating multiple performance parameters that collectively demonstrate the assay's reliability and relevance for its intended purpose.
Table 1: Key Validation Parameters for Annexin V Apoptosis Assay
| Validation Parameter | Definition | Acceptance Criteria | Application to Annexin V |
|---|---|---|---|
| Accuracy | Degree to which measurement reflects true value | Consistent with expected results for controls | Verify with known apoptotic inducters; staining should be blockable with unconjugated Annexin V [82] [3] |
| Precision | Repeatability of results under consistent conditions | CV ≤ 15% for replicate measurements | Consistent results for technical replicates and between experiments [83] |
| Specificity | Ability to exclusively identify intended target | Minimal cross-reactivity or interference | Demonstrate specific binding to PS; no binding to live, healthy cells; block with unconjugated Annexin V [82] [3] |
| Sensitivity (LOD) | Lowest apoptosis level detectable above background | Signal ≥ 2-3x background | Determine minimum % apoptotic cells distinguishable from untreated controls [83] |
| Reproducibility | Consistency across operators, instruments, days | CV ≤ 15-20% for inter-assay comparison | Consistent results when performed by different operators or on different days [83] |
| Linear Range | Concentration range where response is proportional | R² ≥ 0.95 for dilution series | Test with serial dilutions of apoptotic cells mixed with healthy cells [83] |
| Robustness | Resistance to small, deliberate method variations | Consistent results with minor changes | Test impact of small variations in incubation time, temperature, or buffer composition [1] |
The validation approach should follow the "fit-for-purpose" principle, where the extent of validation reflects the assay's intended application [81]. For research use, establishing precision, specificity, and reproducibility may suffice, whereas applications informing regulatory decisions or clinical trials require more rigorous validation following established frameworks [84].
Regulatory Frameworks and Validation Requirements
Navigating the regulatory landscape for assay validation requires understanding the frameworks established by various national and international authorities.
United States Regulatory Framework
In the United States, the Interagency Coordinating Committee on the Validation of Alternative Methods (ICCVAM) was established in 1997 to address the growing need for regulatory acceptance of new toxicity-testing methods [81]. ICCVAM represents 15 federal agencies, including the FDA, EPA, and OSHA, and has established guidelines for nominating and submitting new test methods [81]. The National Toxicology Program (NTP) Interagency Center for the Evaluation of Alternative Toxicological Methods (NICEATM) supports ICCVAM by providing bioinformatics and computational toxicology support [81].
For clinical applications, the Clinical Laboratory Improvement Amendments (CLIA) establish quality standards for all laboratory testing [84]. However, CLIA alone may be insufficient for assays used in regulatory submissions. The FDA may require compliance with Clinical Laboratory Standards Institute (CLSI) guidelines, which provide detailed recommendations on study designs, requirements, statistical methods, and acceptance criteria [84].
International Validation Standards
Internationally, the OECD Mutual Acceptance of Data Decision stipulates that "data generated in the testing of chemicals in an OECD Member country in accordance with OECD Test Guidelines and OECD Principles of Good Laboratory Practice shall be accepted in other Member countries for purposes of assessment and other uses relating to the protection of man and the environment" [81]. This creates significant impetus for international standardization of validation methods.
In the European Union, the European Union Reference Laboratory for Alternatives to Animal Testing (EURL ECVAM) coordinates the evaluation of alternative methods at the European level [81]. The European system operates under the In Vitro Diagnostic Regulation (IVDR), which classifies companion diagnostics as Class C devices and requires submission to national competent authorities [84].
Table 2: Comparison of US and EU Regulatory Requirements for IVD Assays
| Aspect | United States | European Union |
|---|---|---|
| Regulatory Authority | FDA | Notified Bodies |
| Companion Diagnostic Classification | Class II or III | Class C (under IVDR) |
| Key Regulations | CLIA, 21 CFR Part 820, CLSI Guidelines | IVDR, ISO 13485, ISO 14971 |
| Submission Process | 510(k), De Novo, or PMA | Technical Dossier with Notified Body Assessment |
| Quality Systems | 21 CFR Part 820 (transitioning to integration with ISO 13485) | ISO 13485, ISO 15189 |
| Typical Timeline | 12-24 months for PMA | 12-18 months for CE marking |
Validation for Different Application Contexts
The validation requirements for an Annexin V assay vary significantly based on its intended application context:
- Research Use Only: Focus on analytical validation to ensure reliable research data.
- Clinical Trials: Requires compliance with CLIA standards and potentially an Investigational Device Exemption if used for treatment decisions [84].
- Companion Diagnostics: Must undergo rigorous Premarket Approval with analytical validation, clinical validation, and compliance with Quality System Regulations [84].
Figure 2: Validation Strategy Decision Tree. The appropriate validation pathway depends on the assay's intended application, with increasing stringency from research use to companion diagnostics.
The Scientist's Toolkit: Essential Reagents and Materials
Successful implementation and validation of Annexin V staining requires specific reagents and materials optimized for the assay's requirements.
Table 3: Essential Research Reagent Solutions for Annexin V Apoptosis Detection
| Reagent/Material | Function | Key Considerations |
|---|---|---|
| Fluorochrome-conjugated Annexin V | Binds externalized phosphatidylserine on apoptotic cells | Available in FITC, PE, APC, PerCP-eFluor710, and other conjugates; select based on flow cytometer configuration [4] |
| Viability Dyes (PI, 7-AAD, DAPI) | Distinguishes apoptotic from necrotic cells | PI and 7-AAD cannot penetrate intact membranes; DAPI preferred for UV laser-equipped instruments [4] [7] [3] |
| Annexin V Binding Buffer | Provides optimal calcium concentration for binding | Critical calcium-dependent binding; must avoid EDTA or other calcium chelators [4] |
| Apoptosis Inducers (Staurosporine, Camptothecin) | Generate positive control cells | Essential for assay validation and establishing compensation; treat cells for 2-4 hours before staining [7] |
| Fixable Viability Dyes | Allows subsequent intracellular staining | Enables multiplexing with surface and intracellular markers; FVD eFluor 450 not recommended with Annexin V kits [4] |
| Unconjugated Annexin V | Specificity control for binding | Blocks PS binding sites to confirm staining specificity; typically 5-15μg per test [3] |
Robust validation of Annexin V staining protocols is fundamental to generating reproducible, reliable data in apoptosis research. By implementing comprehensive validation strategies that address key parameters including accuracy, precision, specificity, and reproducibility, researchers can ensure their findings are scientifically sound and potentially suitable for regulatory submissions. The validation framework should follow established guidelines from organizations such as OECD, ICCVAM, and EURL ECVAM, with the level of validation rigor matched to the assay's intended purpose. As the field advances, continued standardization of Annexin V validation protocols will further enhance data comparability across studies and contribute to the assay's enduring utility in both basic research and applied drug development contexts.
Conclusion
Annexin V staining remains the gold standard for early apoptosis detection, offering researchers a reliable, specific method for quantifying phosphatidylserine externalization. When implemented with proper controls and optimization, this technique provides robust data for drug screening, toxicology studies, and basic apoptosis research. Future directions include integration with advanced platforms like high-content screening, 3D cell culture models, and AI-powered analysis, alongside emerging applications in immunotherapy response monitoring and companion diagnostic development. As personalized medicine advances, Annexin V-based apoptosis detection will continue to be essential for evaluating therapeutic efficacy and understanding cell death mechanisms across diverse disease contexts.
References
- 1. Annexin V staining assay protocol for apoptosis [https://www.abcam.com/en-us/technical-resources/protocols/annexin-v-for-apoptosis]
- 2. An enhanced bioluminescence-based Annexin V probe for ... [https://pmc.ncbi.nlm.nih.gov/articles/PMC5520691/]
- 3. Annexin V Staining Protocol [https://www.bdbiosciences.com/en-us/resources/protocols/annexin-v-staining-protocol]
- 4. Annexin V Staining Protocol for Flow Cytometry [https://www.thermofisher.com/us/en/home/references/protocols/cell-and-tissue-analysis/protocols/annexin-v-staining-flow-cytometry.html]
- 5. Annexin V and PI Staining for Apoptosis by Flow Cytometry [https://www.bio-techne.com/resources/protocols-troubleshooting/apoptosis-flow-annexin-v-protocol]
- 6. Protocol for Apoptosis Assay by Flow Cytometry Using ... [https://pmc.ncbi.nlm.nih.gov/articles/PMC4943750/]
- 7. Annexin V Stain Protocol | Flow Cytometry Core | ECU [https://medicine.ecu.edu/flow-core/annexin-v-stain-protocol/]
- 8. Flow cytometry-based quantitative analysis of cellular ... [https://www.sciencedirect.com/science/article/pii/S2405844024096968]
- 9. Phosphatidylserine externalization by apoptotic cells is ... [https://pmc.ncbi.nlm.nih.gov/articles/PMC9234239/]
- 10. Phosphatidylserine Externalization in Apoptosis [https://www.bio-techne.com/research-areas/apoptosis/phosphatidylserine-externalization]
- 11. Annexin V Staining | Thermo Fisher Scientific - US [https://www.thermofisher.com/us/en/home/life-science/cell-analysis/cell-viability-and-regulation/apoptosis/annexin-v-staining.html]
- 12. Externalized phosphatidylinositides on apoptotic cells are ... [https://www.nature.com/articles/s41418-022-00931-2]
- 13. Phosphatidylserine exposure during apoptosis reflects ... [https://www.nature.com/articles/cdd201293]
- 14. Annexins—a family of proteins with distinctive tastes for cell ... [https://www.nature.com/articles/s41467-024-45954-0]
- 15. Annexin-V stabilizes membrane defects by inducing lipid ... [https://www.nature.com/articles/s41467-019-14045-w]
- 16. Essential role of B-helix calcium binding sites in annexin V- ... [https://pubmed.ncbi.nlm.nih.gov/15280367/]
- 17. ANXA5: related mechanisms of osteogenesis and additional ... [https://pmc.ncbi.nlm.nih.gov/articles/PMC12058784/]
- 18. Annexin V PI Staining Guide for Apoptosis Detection [https://www.bosterbio.com/blog/post/methods/flow-cytometry-with-annexin-v-pi-staining?srsltid=AfmBOoqS4_DqvqrnTI5WY461lbSi_p25dUDscXrNcOWLzzid6_e5hVNx]
- 19. From proliferation to mitochondrial membrane potential ... [https://pmc.ncbi.nlm.nih.gov/articles/PMC11933298/]
- 20. Annexin V-FITC Early Apoptosis Detection Kit #6592 [https://www.cellsignal.com/products/cellular-assay-kits/annexin-v-fitc-early-apoptosis-detection-kit/6592?srsltid=AfmBOorXxbFO4g8HDvmLt5r98coa-R2By6koFOKPeCRNrtNomDH4OlLU]
- 21. Common Problems and Solutions in Annexin V-Based Flow ... [https://www.yeasenbio.com/blogs/cell/common-problems-and-solutions-in-annexin-v-based-flow-cytometry-apoptosis-assays]
- 22. Between Difference And Apoptosis - GeeksforGeeks Necrosis [https://www.geeksforgeeks.org/biology/difference-between-apoptosis-and-necrosis/]
- 23. What is the difference between necrosis and apoptosis ? [https://www.ptglab.com/news/blog/what-is-the-difference-between-necrosis-and-apoptosis/]
- 24. Necrosis Vs. Apoptosis: Processes, Necrotic Cell Death ... [https://www.akadeum.com/blog/necrosis-vs-apoptosis-processes-necrotic-cell-death-apoptosis-steps/?srsltid=AfmBOooTgn3QqniVs_EgjN0ouj0YTT-GufG-cPDFzBoeT7gjHWJaTd4L]
- 25. High-Resolution Imaging of Morphological Changes ... [https://www.mdpi.com/2079-6374/15/8/522]
- 26. Annexin V-FITC Early Apoptosis Detection Kit #6592 [https://www.cellsignal.com/products/cellular-assay-kits/annexin-v-fitc-early-apoptosis-detection-kit/6592?srsltid=AfmBOoqY5z0az0LR8K1TwDgS45xjzHBGP-jAyTIwmhRkAoZYINDiO_u1]
- 27. Detection of apoptosis by flow cytometry using Annexin V ... [https://bio-protocol.org/exchange/minidetail?id=932463&type=30]
- 28. Annexin V-FITC Apoptosis Detection Kit validated via the ... [https://www.enzo.com/applicationnote/annexin-v-fitc-apoptosis-detection-kit-validated-via-the-incucyte-s3-and-operettacls-automated-imaging-platforms/]
- 29. Annexin V Apoptosis Detection Kit Strategic Roadmap [https://www.archivemarketresearch.com/reports/annexin-v-apoptosis-detection-kit-328490]
- 30. 2.9. Annexin-V Staining [https://bio-protocol.org/exchange/minidetail?id=2199991&type=30]
- 31. BestProtocols: Cell Preparation for Flow Cytometry Protocols [https://www.thermofisher.com/us/en/home/references/protocols/cell-and-tissue-analysis/protocols/cell-preparation-flow-cytometery.html]
- 32. Adherent versus suspension based platforms: what is the ... [https://www.insights.bio/cell-and-gene-therapy-insights/journal/article/2244/Adherent-versus-suspension-based-platforms-what-is-the-near-future-of-viral-vector-manufacturing]
- 33. Programmed cell death detection methods - PubMed Central [https://pmc.ncbi.nlm.nih.gov/articles/PMC9308588/]
- 34. Annexin V PI Staining Guide for Apoptosis Detection [https://www.bosterbio.com/blog/post/methods/flow-cytometry-with-annexin-v-pi-staining?srsltid=AfmBOorShqHmGm1YTYAqVGb6bI7K0W2bKICcC0AtA57lGFBG2trvNqQF]
- 35. Annexin V Apoptosis Detection Kit with 7-AAD [https://www.stemcell.com/products/annexin-v-apoptosis-detection-kit-with-7-aad.html]
- 36. [Comparison between annexin V-FITC/PI and ... [https://pubmed.ncbi.nlm.nih.gov/25374090/]
- 37. Radiolabeled annexin V for imaging apoptosis in radiated ... [https://www.sciencedirect.com/science/article/abs/pii/S0969805108002011]
- 38. Annexin V-FITC Early Apoptosis Detection Kit #6592 [https://www.cellsignal.com/products/cellular-assay-kits/annexin-v-fitc-early-apoptosis-detection-kit/6592?srsltid=AfmBOoqhoVTD9xID8RUJKHhLI-IWI0uKKB0pJaAIu2W8-OWLzaaDPh-g]
- 39. Annexin V PI Staining Guide for Apoptosis Detection [https://www.bosterbio.com/blog/post/methods/flow-cytometry-with-annexin-v-pi-staining?srsltid=AfmBOoqV0uotIsiJzWiMHA8PDYQtFgr2hCP8isP8ReT9ZiAgZNz4H77L]
- 40. Protocol : Annexin V and PI Staining by Flow Cytometry [https://www.bio-techne.com/resources/protocols-troubleshooting/annexin-v-and-pi-staining-flow-cytometry]
- 41. Designing a multicolour flow | Abcam cytometry protocol [https://www.abcam.com/en-us/technical-resources/guides/flow-cytometry-guide/designing-a-multicolor-protocol]
- 42. Advanced flow cytometry data analysis ... [https://www.flowjo.com/advanced_analysis.html]
- 43. A Beginner's Guide To Analyzing and Visualizing Mass ... [https://pmc.ncbi.nlm.nih.gov/articles/PMC5765874/]
- 44. Detection of Apoptosis by Annexin V Labeling [https://www.sciencedirect.com/science/article/abs/pii/S0076687900220041]
- 45. Annexin V PI Staining Guide for Apoptosis Detection [https://www.bosterbio.com/blog/post/methods/flow-cytometry-with-annexin-v-pi-staining?srsltid=AfmBOoqW6nZ0HwWbs3oY4j33pupKzCRON0LnZre5VMbKft9mZvCrIrsZ]
- 46. Flow cytometry-based quantitative analysis of cellular ... [https://pmc.ncbi.nlm.nih.gov/articles/PMC11260931/]
- 47. From proliferation to mitochondrial membrane potential ... [https://www.nature.com/articles/s41420-025-02391-2]
- 48. Impact of cell harvesting methods on detection ... [https://pmc.ncbi.nlm.nih.gov/articles/PMC7798138/]
- 49. Cell Harvesting Method Influences Results of Apoptosis ... [https://ar.iiarjournals.org/content/33/8/3201]
- 50. Cell Harvesting Methods Affect Cellular Integrity of ... [https://ar.iiarjournals.org/content/38/12/6669]
- 51. Annexin V-FITC/PI Apoptosis Kit [https://www.apexbt.com/annexin-v-fitc-apoptosis-kit.html]
- 52. Compensation Controls - McGovern Medical School [https://med.uth.edu/imm/flow-cytometry-services/protocols-and-guidelines/compensation-controls/]
- 53. Spectral Flow Cytometry Panel Controls and Sample ... [https://www.thermofisher.com/us/en/home/life-science/cell-analysis/flow-cytometry/flow-cytometry-learning-center/flow-cytometry-resource-library/flow-cytometry-methods/spectral-flow-cytometry-panel-controls-sample-preparation.html]
- 54. Annexin V PI Staining Guide for Apoptosis Detection [https://www.bosterbio.com/blog/post/methods/flow-cytometry-with-annexin-v-pi-staining?srsltid=AfmBOoqKyFza5vCWvtv7qu-a1NoeW5W5Fgh3ftWEjAcDfRFndHVFQLgs]
- 55. PROTOCOL : Annexin V and PI Staining by Flow Cytometry [https://www.novusbio.com/content/protocol-annexin-v-and-pi-staining-flow-cytometry?srsltid=AfmBOoq5GWRIcUKj8Pj0nBftwKexHiucDFA88Cbz4zvHmu_y8lKO2oGQ]
- 56. Introduction to Spectral Overlap and Compensation in Flow ... [https://fluorofinder.com/newsletter-introduction-to-spectral-overlap-and-compensation-in-flow-cytometry/]
- 57. Multiparameter Conventional Flow Cytometry - PMC [https://pmc.ncbi.nlm.nih.gov/articles/PMC8054300/]
- 58. Mitigating fluorescence spectral overlap in wide-field ... [https://pmc.ncbi.nlm.nih.gov/articles/PMC3767456/]
- 59. Panel Design for Multicolor ... | Boster Bio Flow Cytometry [https://www.bosterbio.com/protocol-and-troubleshooting/flow-cytometry-optimization/fluorescent-conjugates]
- 60. My 3-step approach to gating Annexin V data appropriately [https://voices.uchicago.edu/ucflow/2012/07/08/my-3-step-approach-to-gating-annexin-v-data-appropriately/]
- 61. Annexin V as a Probe of Aminophospholipid Exposure and ... [https://www.sciencedirect.com/science/article/pii/S0006497120678478]
- 62. Platelet subpopulations remain despite strong dual agonist ... [https://pmc.ncbi.nlm.nih.gov/articles/PMC5780418/]
- 63. Comparison of several techniques for the detection ... [https://pmc.ncbi.nlm.nih.gov/articles/PMC6495494/]
- 64. Annexin V PI Staining Guide for Apoptosis Detection [https://www.bosterbio.com/blog/post/methods/flow-cytometry-with-annexin-v-pi-staining?srsltid=AfmBOorrLcwSbULEUguer6KlZAetZyQCzMp3K5U63lIZQrTvZZsNDvKs]
- 65. Automated detection of apoptotic bodies and cells in label-free ... [https://pmc.ncbi.nlm.nih.gov/articles/PMC10563152/]
- 66. Annexin V PI Staining Guide for Apoptosis Detection [https://www.bosterbio.com/blog/post/methods/flow-cytometry-with-annexin-v-pi-staining?srsltid=AfmBOoqO6soZSYIPgUUX0baOLA1uE4IYbRSGAtlw7oyi5IB8zSEUxTNm]
- 67. Cell death stages in single apoptotic and necrotic ... [https://www.nature.com/articles/srep04698]
- 68. Modified Annexin V/Propidium Iodide Apoptosis Assay For ... [https://pmc.ncbi.nlm.nih.gov/articles/PMC3169266/]
- 69. Purified Recombinant Annexin V [https://www.bdbiosciences.com/en-eu/products/reagents/flow-cytometry-reagents/research-reagents/single-color-antibodies-ruo/purified-recombinant-annexin-v.556416]
- 70. Annexin V PI Staining Guide for Apoptosis Detection [https://www.bosterbio.com/blog/post/methods/flow-cytometry-with-annexin-v-pi-staining?srsltid=AfmBOoq_aibKP5uUggfK-EZ15OC3OwwOT5MD0feMdFii8o78rgnR3RYA]
- 71. Programmed cell death detection methods: a systematic ... [https://link.springer.com/article/10.1007/s10495-022-01735-y]
- 72. Focusing on Apoptosis and recognizing the value of Annexin V [https://www.yeasenbio.com/blogs/cell/focusing-on-apoptosis-and-recognizing-the-value-of-annexin-v]
- 73. Emerging Electrochemical Approaches for the Early Detection ... [https://pmc.ncbi.nlm.nih.gov/articles/PMC12355238/]
- 74. Facile and quantitative electrochemical detection of yeast ... [https://www.nature.com/articles/srep04373]
- 75. Apoptosis Marker Assays for HTS - NCBI [https://www.ncbi.nlm.nih.gov/books/NBK572437/]
- 76. Drug toxicity assessment: cell proliferation versus cell death [https://www.nature.com/articles/s41420-022-01207-x]
- 77. Annexin V PI Staining Guide for Apoptosis Detection [https://www.bosterbio.com/blog/post/methods/flow-cytometry-with-annexin-v-pi-staining?srsltid=AfmBOooI-yxTqzyFM8cAb5hkcbPFTGrQ48KtWPyXH1m1NedsiwQtCKB3]
- 78. Annexin V Apoptosis Detection Kit in the Real World [https://www.linkedin.com/pulse/annexin-v-apoptosis-detection-kit-real-world-5-uses-kbgrc]
- 79. Apoptosis Assay Market Size Report, 2025 – 2034 [https://www.gminsights.com/industry-analysis/apoptosis-assay-market]
- 80. A Multiplex Assay to Simultaneously Monitor Apoptosis and ... [https://pubmed.ncbi.nlm.nih.gov/38294633/]
- 81. Model and Assay Validation and Acceptance - NCBI - NIH [https://www.ncbi.nlm.nih.gov/books/NBK424977/]
- 82. Regulatory Requirements for Assay Validation and Approval [https://www.legalreader.com/regulatory-requirements-for-assay-validation-and-approval/]
- 83. Pt. 3: How to Validate Your ELISA Assay for Reproducible, ... [https://blog.avivasysbio.com/pt.-3-how-to-validate-your-elisa-assay-for-reproducible-reliable-results]
- 84. Optimizing Immunohistochemistry Validation and ... [https://www.precisionformedicine.com/blog/optimizing-ihc-validation-regulatory-strategies]