A Researcher's Guide to Confirming Apoptosis Pathway Activation: From Foundational Concepts to Advanced Validation
This article provides a comprehensive framework for researchers and drug development professionals to confidently confirm the activation of specific apoptotic pathways.
A Researcher's Guide to Confirming Apoptosis Pathway Activation: From Foundational Concepts to Advanced Validation
Abstract
This article provides a comprehensive framework for researchers and drug development professionals to confidently confirm the activation of specific apoptotic pathways. It covers the fundamental principles of intrinsic and extrinsic apoptosis, details established and novel detection methodologies like flow cytometry and fluorescent reporters, offers troubleshooting strategies for common experimental pitfalls, and outlines rigorous validation techniques. By integrating foundational knowledge with practical application and validation protocols, this guide supports robust experimental design and accurate interpretation of apoptosis data in biomedical research and therapeutic development.
Decoding the Signals: Core Apoptosis Pathways and Their Key Biomarkers
A Technical Support Guide for Confirming Pathway Activation
This technical support center is designed to help researchers confirm the activation of specific apoptotic pathways in their experiments. Apoptosis, or programmed cell death, is primarily executed via two evolutionarily conserved gateways: the intrinsic (mitochondrial) pathway and the extrinsic (death receptor) pathway [1]. While distinct in their initiation, both pathways converge to activate a cascade of proteases called caspases that dismantle the cell [2] [3].
Core Signaling Pathways
The Intrinsic Apoptotic Pathway
The intrinsic pathway is activated in response to internal cellular stressors, such as DNA damage, oxidative stress, or growth factor withdrawal [1]. This pathway is critically regulated by the B-cell lymphoma 2 (Bcl-2) family of proteins [4] [2].
Key Molecular Mechanism:
- Initiation: Cellular stress signals activate "BH3-only" pro-apoptotic proteins (e.g., Bim, Bid, Puma, Noxa). These proteins neutralize the anti-apoptotic members of the Bcl-2 family (e.g., Bcl-2, Bcl-xL) [2].
- Mitochondrial Outer Membrane Permeabilization (MOMP): The inhibition of anti-apoptotic proteins allows the pro-apoptotic executioner proteins Bax and Bak to oligomerize and form pores in the mitochondrial outer membrane [4] [1].
- Cytochrome c Release: MOMP leads to the release of cytochrome c and other pro-apoptotic factors from the mitochondrial intermembrane space into the cytosol [2] [1].
- Apoptosome Formation & Caspase Activation: In the cytosol, cytochrome c binds to Apaf-1, forming a complex called the apoptosome. The apoptosome then recruits and activates the initiator caspase, caspase-9 [1] [3].
- Execution: Activated caspase-9 cleaves and activates executioner caspases (caspase-3, -6, and -7), leading to the systematic proteolysis of cellular components and the hallmark morphological changes of apoptosis [2] [3].
The Extrinsic Apoptotic Pathway
The extrinsic pathway is initiated by extracellular death signals transmitted through death receptors on the plasma membrane [1]. This pathway allows the cell to respond to external commands for self-elimination.
Key Molecular Mechanism:
- Ligand-Receptor Binding: Extracellular death ligands, such as Fas Ligand (FasL) or TNF-related apoptosis-inducing ligand (TRAIL), bind to their cognate death receptors (e.g., Fas, DR4/DR5) [4] [2].
- Death-Inducing Signaling Complex (DISC) Formation: Receptor trimerization leads to the recruitment of the adaptor protein FADD and the initiator caspase-8 (or caspase-10) to the intracellular death domain, forming the DISC [4] [1] [3].
- Caspase-8 Activation: Within the DISC, caspase-8 is activated through proximity-induced autocleavage [3].
- Execution: Activated caspase-8 can directly cleave and activate executioner caspases (caspase-3, -7). In some cell types (known as Type II cells), the apoptotic signal is amplified through the intrinsic pathway via caspase-8-mediated cleavage of the BH3-only protein Bid to its active form, tBid, which triggers MOMP [4] [3].
Key Experimental Methods for Pathway Confirmation
To conclusively determine which apoptotic pathway is activated, a multi-parameter approach is essential. The table below summarizes key assays and the specific markers they detect.
Table 1: Key Methodologies for Confirming Apoptotic Pathway Activation
| Methodology | Key Readout / Marker | Primary Pathway Interrogated | Technical Notes |
|---|---|---|---|
| Western Blot / ICC | Cleaved Caspase-9 | Intrinsic | A definitive marker for intrinsic pathway initiation [2]. |
| Cleaved Caspase-8 | Extrinsic | A definitive marker for extrinsic pathway initiation [3]. | |
| Cleaved Caspase-3 | Convergence Point | Indicates execution-phase activation; common to both pathways [2] [3]. | |
| Cytochrome c Release | Intrinsic | Relocate from mitochondria to cytosol; fractionation or immunofluorescence required [2]. | |
| Phospho-Bcl-2 Family | Intrinsic | Detects activating/inactivating post-translational modifications of regulators like Bim, Bad. | |
| Flow Cytometry (Annexin V/PI) | Phosphatidylserine Exposure | Early Apoptosis (Both) | Use with PI to distinguish early apoptotic (Annexin V+/PI-) from late apoptotic/necrotic cells (Annexin V+/PI+) [2]. |
| TUNEL Assay | DNA Fragmentation | Late Apoptosis (Both) | Labels 3'OH ends of fragmented DNA; not specific to apoptosis, so confirm with morphology [2]. |
| Mitochondrial Assays | Loss of ΔΨm (e.g., TMRE) | Intrinsic | Decreased fluorescence indicates loss of mitochondrial membrane potential, an early intrinsic event [2]. |
Frequently Asked Questions (FAQs) & Troubleshooting
Q1: My Annexin V assay shows a high percentage of necrotic cells (PI-positive) even in my untreated control. What could be the cause?
A: This is a common issue often related to cell health and handling.
- Poor Cell Health: The cells may have been in poor condition at the start of the experiment due to over-confluence, contamination, or harsh culture conditions. Ensure you begin with healthy, low-passage cells in the log phase of growth [5].
- Rough Handling: Excessive mechanical force during pipetting or over-digestion with trypsin during harvesting can compromise membrane integrity. Use gentle pipetting and consider using enzyme-free cell dissociation buffers for sensitive cell lines [6] [5].
- Improper Staining Protocol: After trypsinization, cells need to recover in complete medium for about 30 minutes to restore membrane integrity and prevent false-positive PI staining [6].
Q2: I am detecting DNA fragmentation with a TUNEL assay, but my Western blots show no cleavage of caspase-3. Is this still apoptosis?
A: Not necessarily. While DNA fragmentation is a hallmark of late apoptosis, it can also occur during other forms of cell death, such as necrosis [2]. The lack of caspase-3 cleavage strongly suggests a non-apoptotic, caspase-independent cell death mechanism. You should:
- Corroborate with Morphology: Examine cell morphology under a microscope for apoptotic features (cell shrinkage, membrane blebbing, apoptotic bodies) versus necrotic features (cell swelling, lysis) [2] [1].
- Check Other Caspases: Probe for cleavage of other executioner (caspase-6, -7) and initiator (caspase-8, -9) caspases to rule out assay-specific artifacts.
- Investigate Alternative Pathways: Consider investigating other programmed cell death pathways, such as necroptosis or ferroptosis, which can lead to DNA damage but are caspase-independent [3].
Q3: My treatment is supposed to activate the extrinsic pathway, but I see no activation of caspase-8. Why?
A: Several factors could explain this result.
- Inherent Resistance: Many cancer cells have developed mechanisms to resist extrinsic apoptosis. Check for the overexpression of inhibitory proteins like c-FLIP (which competes with caspase-8 for binding to FADD) or decoy receptors (DcR1/2) that sequester the death ligand TRAIL without transmitting a death signal [4].
- Insufficient Ligation/Clustering: Some DR4/5 agonist antibodies have limited efficacy because they only induce lower-order trimerization of death receptors, which is insufficient for robust DISC formation and caspase-8 activation [4].
- Protein Turnover: The cleavage of caspase-8 can be a rapid and transient event. Consider performing a time-course experiment to capture the optimal activation window.
Q4: How can I confirm that my drug is working through the intrinsic pathway via Bcl-2 inhibition?
A: To build a compelling case for a Bcl-2 inhibitor like venetoclax, use a combination of functional and biochemical assays.
- BH3 Profiling: This functional assay measures mitochondrial priming by exposing isolated mitochondria to specific BH3 peptides. It can predict sensitivity to Bcl-2 inhibition and confirm on-target engagement.
- Monitor Mitochondrial Events: Use TMRE or similar dyes to demonstrate a loss of mitochondrial membrane potential (ΔΨm) following treatment [2]. Also, confirm cytochrome c release into the cytosol via cell fractionation and Western blot [2].
- Demonstrate Caspase-9 Activation: Show specific cleavage of caspase-9, which is the direct downstream consequence of apoptosome formation triggered by cytochrome c release [2] [3].
The Scientist's Toolkit: Key Research Reagents
Table 2: Essential Reagents for Apoptosis Pathway Analysis
| Reagent / Assay | Primary Function | Key Application in Pathway Confirmation |
|---|---|---|
| Venetoclax (ABT-199) | Small-molecule Bcl-2 inhibitor (BH3 mimetic) | Tool compound to selectively induce the intrinsic apoptotic pathway; positive control for Bcl-2 dependency [4]. |
| Recombinant TRAIL / Agonistic DR5 Antibodies | Activate the extrinsic pathway by clustering DR4/DR5 | Tool compound to selectively induce the extrinsic apoptotic pathway; positive control for death receptor signaling [4]. |
| Annexin V Staining Kits | Binds to externalized phosphatidylserine | Flow cytometry or fluorescence microscopy to detect cells in early-to-mid apoptosis (common to both pathways) [2] [5]. |
| TUNEL Assay Kits | Labels 3'OH ends of fragmented DNA | Detection of late-stage apoptotic cells by marking DNA fragmentation; useful for tissue sections and cells [2]. |
| Caspase Activity Assays | Fluorometric or colorimetric detection of caspase cleavage | Quantify the enzymatic activity of specific caspases (e.g., 8, 9, 3/7) to pinpoint the initiating pathway [7]. |
| TMRE / JC-1 Dyes | Detect loss of mitochondrial membrane potential (ΔΨm) | Functional assay to confirm the occurrence of MOMP, a key event in the intrinsic pathway [2]. |
| Phospho-Specific Antibodies | Detect phosphorylation of Bcl-2 family proteins | Uncover regulatory mechanisms; e.g., phosphorylation can inactivate Bcl-2 or activate Bad. |
| Pan-Caspase Inhibitors (e.g., Z-VAD-FMK) | Irreversibly inhibits a broad range of caspases | Control to confirm that cell death is caspase-dependent and thus truly apoptotic. |
Core Concepts FAQ
Q1: What are the key molecular executors of apoptosis? The key executors are caspases, which are cysteine-aspartic proteases that cleave cellular substrates to orchestrate cell death. They are categorized as initiator caspases (e.g., caspase-8, -9, -10) that start the protease cascade, and executioner caspases (e.g., caspase-3, -6, -7) that dismantle the cell [3] [8]. Their activity is primarily regulated by two protein families: the Bcl-2 family, which governs the intrinsic (mitochondrial) pathway, and the Inhibitor of Apoptosis (IAP) proteins, which directly bind to and inhibit active caspases [9] [10].
Q2: How do the intrinsic and extrinsic apoptosis pathways converge? The intrinsic and extrinsic pathways converge at the level of executioner caspase activation.
- The extrinsic pathway is triggered by extracellular death ligands binding to cell surface receptors, leading to the formation of the Death-Inducing Signaling Complex (DISC) and activation of initiator caspase-8 [8].
- The intrinsic pathway is triggered by internal cellular stress signals (e.g., DNA damage), which is regulated by the Bcl-2 family and leads to mitochondrial outer membrane permeabilization (MOMP), cytochrome c release, and formation of the apoptosome to activate initiator caspase-9 [11] [12] [8]. In some cell types (Type II), caspase-8 from the extrinsic pathway cleaves the pro-apoptotic Bcl-2 protein Bid, generating tBid which amplifies the death signal through the intrinsic pathway. Both pathways ultimately activate the same executioner caspases-3 and -7, leading to the systematic cleavage of cellular components [3] [8].
Q3: What is the primary function of the Bcl-2 protein family? The Bcl-2 family are critical regulators of the intrinsic apoptosis pathway by controlling mitochondrial outer membrane permeabilization (MOMP), the point of no return for the cell [11] [12]. The family is divided into three functional groups:
- Anti-apoptotic proteins (e.g., BCL2, BCL-XL, MCL1): They preserve mitochondrial integrity and prevent cytochrome c release by sequestering pro-apoptotic members [11] [12].
- Multi-domain pro-apoptotic proteins (BAX, BAK): When activated, they oligomerize at the mitochondrial membrane to form pores that allow cytochrome c release [12].
- BH3-only pro-apoptotic proteins (e.g., BIM, BID, BAD, PUMA): They act as cellular stress sensors and initiate apoptosis by either inhibiting anti-apoptotic proteins or directly activating BAX/BAK [11] [12].
Q4: How do IAPs inhibit cell death, and how can this be overcome therapeutically? Inhibitor of Apoptosis (IAP) proteins, such as XIAP, cIAP1, and cIAP2, suppress cell death by directly binding to and inhibiting caspases [9] [10]. A key mechanism of XIAP is the inhibition of executioner caspases-3 and -7, and initiator caspase-9 [10]. This inhibition can be overcome by endogenous proteins like Smac/DIABLO, which is released from the mitochondria during intrinsic apoptosis. Smac binds to IAPs via its IAP-binding motif (IBM), displacing them from caspases and thereby promoting apoptosis [9] [13]. Therapeutically, SMAC mimetics are a class of drugs designed to antagonize IAPs, thus reactivating apoptosis in cancer cells [13] [10].
Troubleshooting Experimental Issues
Q5: My flow cytometry Annexin V/PI staining shows high background. What could be wrong? High background in Annexin V/propidium iodide (PI) assays is often due to technical artifacts. Key considerations include:
- Calcium Ions: Annexin V binding is calcium-dependent. Ensure your binding buffer is supplemented with sufficient CaCl₂ and avoid chelating agents like EDTA or EGTA in your wash buffers [14].
- Cell Handling: Over-trypsinization of adherent cells or excessive mechanical stress during processing can damage the plasma membrane, causing false-positive PI staining and non-specific Annexin V binding. Use gentle detachment protocols and handling techniques [14].
- Timing and Washing: Do not wash cells after adding PI, as this can wash out the dye from dead cells and lead to inaccurate results. Analyze samples immediately after staining [14].
- Controls: Always include an unstained control, single-stained controls (Annexin V only, PI only), and a positive control (e.g., cells treated with a known apoptosis inducer) to properly set up your flow cytometry compensation and gates [14].
Q6: I am not detecting Caspase-3/7 activity in my cell-based assay despite evidence of cell death. Why? A lack of caspase-3/7 signal in dying cells can indicate the activation of alternative, non-apoptotic cell death pathways.
- Alternative Death Pathways: Your cell death trigger may be inducing caspase-independent pathways such as necroptosis, pyroptosis, or ferroptosis [3] [13]. These pathways may not activate executioner caspases in the same way as canonical apoptosis.
- Inhibition by IAPs: High levels of IAP proteins (e.g., XIAP) in your cell model may be effectively inhibiting any active caspase-3/7, masking their activity in the assay [9] [10].
- Assay Interference: Certain compounds in your treatment can interfere with the assay chemistry. For luminescent assays, some small molecules can quench the signal or inhibit the luciferase enzyme [15]. Validate your assay with a positive control like staurosporine to ensure it is functioning correctly.
- Troubleshooting Steps:
- Confirm apoptosis by using multiple methods (e.g., Western blot for PARP cleavage).
- Test for markers of other death pathways (e.g., MLKL phosphorylation for necroptosis, LDH release for pyroptosis/necrosis).
- Combine your treatment with a SMAC mimetic to inhibit IAPs and see if caspase activity is unmasked [13].
Q7: My Western blot shows no cleavage of a key caspase substrate, but other apoptosis markers are positive. What should I check? This discrepancy suggests a potential issue with your assay specificity or timing.
- Antibody Specificity: Ensure your antibody is specific for the cleaved form of the substrate and validate it with a known positive control lysate.
- Temporal Dynamics: The cleavage of different substrates occurs at different times after caspase activation. You may have harvested cells too early or too late to capture the cleavage event for your specific substrate. Perform a time-course experiment.
- Pathway Specificity: Confirm that your apoptosis inducer activates the expected pathway. For instance, some death receptors may primarily trigger necroptosis if caspase-8 is inhibited [3].
- Cellular Context: Check if your substrate is expressed in your cell model, as expression can be cell-type dependent.
Pathway Confirmation & Data Interpretation
Q8: What is a multi-parametric approach to confirm intrinsic apoptosis pathway activation? To conclusively demonstrate intrinsic apoptosis, measure key events at multiple nodal points in the pathway, as summarized in the table below.
Table 1: Key Assays for Confirming Intrinsic Apoptosis
| Pathway Step | Key Readout | Experimental Method | Interpretation of Positive Result |
|---|---|---|---|
| BCL2 Family Activation | BAX/BAK oligomerization; BIM binding to BCL2 | Immunoprecipitation; BH3 profiling | Pro-apoptotic BCL2 proteins are activated [11] [12]. |
| Mitochondrial Membrane Permeabilization | Cytochrome c release; loss of mitochondrial membrane potential (ΔΨm) | Western blot (cytosolic fraction); flow cytometry with JC-1/TMRM dyes | The "point of no return"; intrinsic pathway is engaged [12] [8]. |
| Caspase Activation | Caspase-9 and caspase-3/7 activity; PARP cleavage | Luminescent activity assays; Western blot | The apoptotic caspase cascade is executing cell death [15] [8]. |
| IAP Inhibition | Smac release; caspase derepression | Western blot (cytosolic fraction); assay with SMAC mimetic | Endogenous caspase inhibitors are neutralized [9] [13]. |
Q9: How can I distinguish between apoptosis, necroptosis, and pyroptosis? These programmed cell death forms have distinct molecular regulators and morphological features. The following table provides key markers for their identification.
Table 2: Distinguishing Between Different Forms of Programmed Cell Death
| Feature | Apoptosis | Necroptosis | Pyroptosis |
|---|---|---|---|
| Key Regulators | Caspases-8, -9, -3/7; Bcl-2 family [8] | RIPK1, RIPK3, MLKL (caspase-8 inhibited) [3] | Caspase-1, -4, -5, -11; Gasdermin D (GSDMD) [3] |
| Morphology | Cell shrinkage, membrane blebbing, apoptotic bodies [13] | Cellular swelling, plasma membrane rupture [3] | Plasma membrane pore formation, cell lysis, release of IL-1β [3] |
| Inflammation | Generally non-inflammatory [3] | Pro-inflammatory [3] | Highly pro-inflammatory [3] |
| Key Assay(s) | Caspase-3/7 activity; Annexin V/PI (early stage) [15] | Phospho-MLKL Western blot; LDH release [3] | GSDMD cleavage (Western blot); LDH release; IL-1β release [3] |
Research Reagent Solutions
Table 3: Essential Reagents for Apoptosis Research
| Reagent / Assay | Key Target/Principle | Primary Function in Experiment |
|---|---|---|
| BH3 Mimetics (e.g., Venetoclax) | BCL2 hydrophobic groove [11] | Small molecule inhibitors that selectively antagonize anti-apoptotic BCL2 proteins to induce or sensitize to intrinsic apoptosis. |
| SMAC Mimetics | IAP BIR domains [13] [10] | Small molecule antagonists of IAP proteins that promote caspase activation and can induce cell death alone or in combination. |
| Caspase-Glo 3/7 Assay | Caspase-3/7 activity [15] | A luminescent, homogeneous assay that measures the activity of key executioner caspases as a marker of late-stage apoptosis. |
| Recombinant Annexin V Probes | Phosphatidylserine (PS) exposure [14] [15] | Fluorescently- or enzymatically-tagged proteins that bind to PS on the outer leaflet of the plasma membrane, a hallmark of early apoptosis. |
| Fluorescent Mitochondrial Dyes (JC-1, TMRM) | Mitochondrial membrane potential (ΔΨm) | Flow cytometry or fluorescence microscopy dyes used to detect the loss of ΔΨm, an early event in the intrinsic apoptotic pathway. |
| Z-VAD-FMK (pan-caspase inhibitor) | Broad-spectrum caspase inhibitor [10] | A cell-permeable compound used to determine if cell death is caspase-dependent (Z-VAD-inhibitable) or independent. |
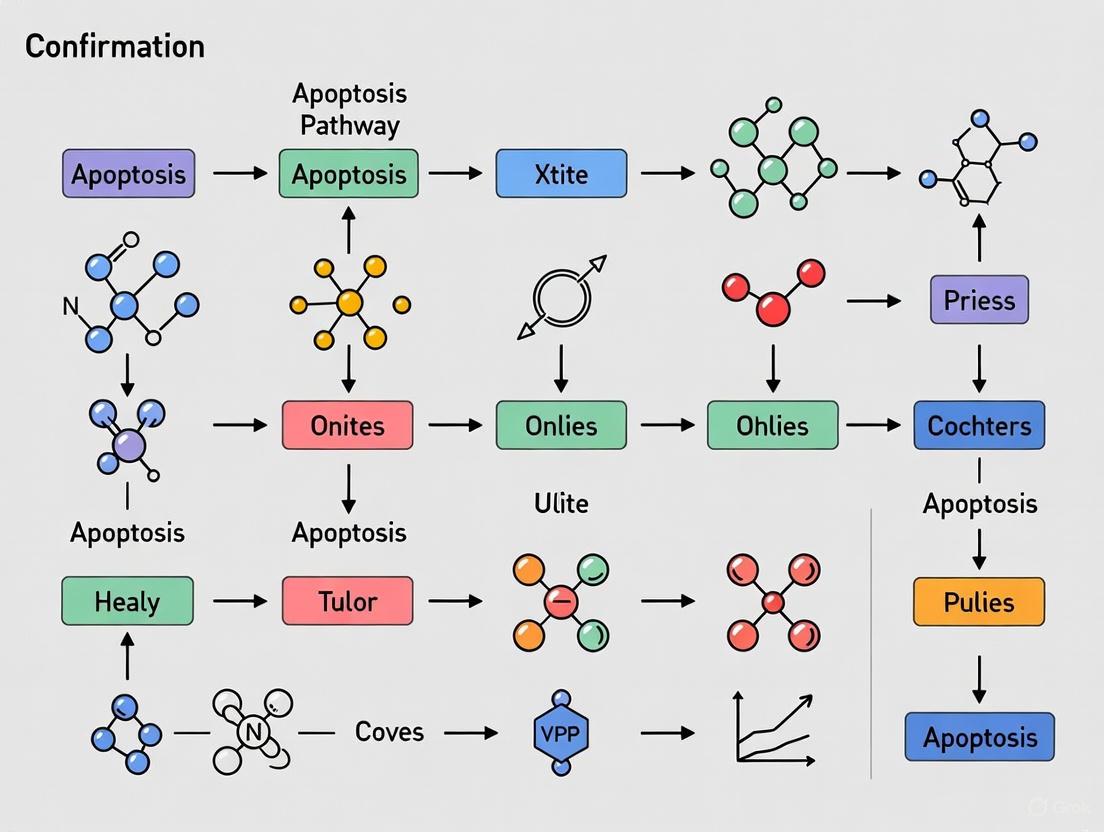
Signaling Pathway Diagrams
Apoptosis Signaling Pathways Overview
Experimental Workflow for Apoptosis Confirmation
Technical Support Center
This technical support center provides troubleshooting guidance for common experimental challenges in detecting key biomarkers of the intrinsic apoptotic pathway. Use these resources to confirm specific pathway activation reliably.
Cytochrome c Release Assays
Q1: I see weak or no Cytochrome c signal in my western blot of the cytosolic fraction, but my positive control is fine. What could be wrong? A: This is a common issue, often related to fractionation quality and protein stability.
- Cause 1: Incomplete or Harsh Fractionation.
- Solution: Optimize your digitonin-based fractionation protocol. Use a low concentration of digitonin (e.g., 0.05%) to selectively permeabilize the plasma membrane without disrupting the mitochondrial outer membrane. Validate fractionation by probing for compartment-specific markers (e.g., COX IV for mitochondria, LDH for cytosol).
- Cause 2: Protein Degradation.
- Solution: Ensure all buffers are ice-cold and supplemented with a broad-spectrum protease inhibitor cocktail immediately before use. Perform fractionation steps quickly and on ice.
- Cause 3: Insufficient Apoptotic Induction.
- Solution: Titrate your apoptotic inducer (e.g., Staurosporine, Etoposide) and extend treatment time. Use a positive control like UV irradiation to confirm system responsiveness.
Q2: My immunofluorescence for Cytochrome c shows a punctate mitochondrial pattern even in my treated samples. Why isn't the release clear? A: This suggests either incomplete release or an issue with image capture and analysis.
- Cause 1: Fixed-Cell Artifacts.
- Solution: Ensure fixation is performed with fresh, ice-cold 4% PFA for no longer than 20 minutes. Avoid using methanol, which can permeabilize all membranes and cause redistribution artifacts.
- Cause 2: Inadequate Z-stack Capture.
- Solution: Cytochrome c release creates a diffuse, weak signal. Capture a full Z-stack through the cells and create a maximum intensity projection to visualize the full cytoplasmic volume. Compare the pattern to a mitochondrial marker (e.g., TOM20) in a merged image.
Smac/DIABLO Detection
Q3: The Smac/DIABLO signal in my cytosolic fraction is inconsistent between replicates. How can I improve reproducibility? A: Inconsistency often stems from the lability of the protein or the fractionation process.
- Cause 1: Protease Sensitivity.
- Solution: Smac/DIABLO can be degraded rapidly. Add a specific caspase inhibitor (e.g., Z-VAD-FMK) to your fractionation buffers to prevent cleavage by activated caspases, in addition to standard protease inhibitors.
- Cause 2: Variable Fractionation Efficiency.
- Solution: Pre-clear your post-nuclear supernatant by a high-speed centrifugation step (e.g., 10,000 x g for 10 min) to ensure all mitochondria are pelleted before collecting the pure cytosolic fraction (supernatant). Always run a mitochondrial fraction on the same blot to confirm the "loss" of signal from this compartment.
Q4: Can I use ELISA to quantify Smac/DIABLO release? A: Yes, but with caveats. Several commercial Smac/DIABLO ELISA kits are available.
- Advantage: Provides quantitative data superior to western blot densitometry.
- Challenge: The assay must be performed on a clean cytosolic fraction. Any mitochondrial contamination will lead to a massive overestimation. Validate your fractionation method thoroughly before using ELISA.
Bax/Bak Activation and Oligomerization
Q5: My Bax activation assay (using conformation-specific antibodies like 6A7) shows high background in untreated controls. A: High background is typically due to antibody non-specificity or exposure of cryptic epitopes during cell lysis.
- Cause 1: Non-optimized Lysis.
- Solution: Use a milder, non-denaturing lysis buffer (e.g., CHAPS-based). Avoid harsh detergents like SDS in the lysis buffer, as they can denature Bax and expose the 6A7 epitope artificially.
- Cause 2: Antibody Concentration.
- Solution: Titrate the 6A7 antibody carefully. Perform an immunoprecipitation with 6A7 followed by western blotting for total Bax, rather than a direct western blot, to increase specificity.
Q6: How do I interpret my crosslinking data for Bax/Bak oligomerization? A: Interpretation relies on comparing molecular weights.
- Guideline: After treating mitochondria with a crosslinker like BMH or DSS, run the samples on a non-reducing SDS-PAGE gel.
- Monomeric Band: ~20-25 kDa (Bax/Bak).
- Dimeric Band: ~40-50 kDa.
- Higher-order Oligomers: Higher molecular weight smears or discrete bands. The appearance of dimers and higher-order oligomers in treated samples, but not in controls, confirms activation.
Data Presentation
Table 1: Expected Molecular Weights and Localization Shifts for Intrinsic Pathway Biomarkers
| Biomarker | Steady State Localization | Active State Localization | Key Assays | Expected Molecular Weight (approx.) |
|---|---|---|---|---|
| Cytochrome c | Mitochondrial Intermembrane Space | Cytosol | Subcellular Fractionation + WB, IF, IHC | 12-15 kDa |
| Smac/DIABLO | Mitochondrial Intermembrane Space | Cytosol | Subcellular Fractionation + WB, IF, ELISA | 23 kDa (pro-form), 21 kDa (mature) |
| Bax | Cytosol (inactive) | Mitochondrial Membrane (active) | IF Colocalization, Conformation-specific IP/WB, Crosslinking | 20-25 kDa (monomer) |
| Bak | Mitochondrial Membrane (inactive) | Mitochondrial Membrane (active) | Conformation-specific IP/WB, Crosslinking | 25 kDa (monomer) |
Table 2: Common Apoptotic Inducers and Their Primary Targets
| Inducer | Primary Target/Mechanism | Typical Concentration/ Dose | Key Readout for Intrinsic Pathway |
|---|---|---|---|
| Staurosporine | Broad-spectrum Kinase Inhibitor | 0.1 - 1 µM for 2-6 hours | Strong Cytochrome c release, Caspase-3 cleavage |
| Etoposide | Topoisomerase II Inhibitor | 10 - 100 µM for 4-16 hours | Bax activation, Cytochrome c release |
| UV-C Irradiation | Direct DNA Damage | 20 - 100 J/m² | Rapid Cytochrome c and Smac/DIABLO release |
| ABT-737 / Navitoclax | Bcl-2 / Bcl-xL Inhibitor | 0.1 - 10 µM for 4-24 hours | Direct Bax/Bak activation, oligomerization |
Experimental Protocols
Protocol 1: Subcellular Fractionation for Cytochrome c and Smac/DIABLO Release
- Harvest & Wash: Harvest cells (~2x10⁷) by trypsinization, pellet, and wash once with ice-cold PBS.
- Permeabilize Plasma Membrane: Resuspend cell pellet in 1 mL of Hypotonic Lysis Buffer (20 mM HEPES-KOH pH 7.5, 10 mM KCl, 1.5 mM MgCl₂, 1 mM EDTA, 1 mM EGTA, 1 mM DTT, 0.05% Digitonin, Protease Inhibitors). Incubate on ice for 10 minutes.
- Fractionate: Centrifuge at 1,000 x g for 5 minutes at 4°C to pellet nuclei. Transfer the supernatant (S1) to a new tube.
- Isolate Cytosol & Mitochondria: Centrifuge S1 at 10,000 x g for 15 minutes at 4°C.
- The resulting supernatant (S2) is the Cytosolic Fraction.
- The pellet (P2) is the Heavy Membrane/Mitochondrial Fraction. Resuspend this pellet in 100 µL of RIPA buffer.
- Analyze: Run 20-50 µg of protein from each fraction on SDS-PAGE and perform western blotting for Cytochrome c, Smac/DIABLO, and compartment markers (e.g., COX IV for mitochondria, α-tubulin for cytosol).
Protocol 2: Crosslinking to Detect Bax/Bak Oligomerization
- Isolate Mitochondria: From untreated and treated cells, isolate mitochondria using a standard differential centrifugation protocol.
- Crosslink: Resuspend purified mitochondrial pellets in Crosslinking Buffer (20 mM HEPES-KOH pH 7.5, 100 mM NaCl). Add the crosslinker BMH (Bismaleimidohexane) to a final concentration of 1 mM from a fresh 100 mM stock in DMSO. Incubate at 30°C for 30 minutes.
- Quench Reaction: Stop the crosslinking by adding DTT to a final concentration of 20 mM and incubate on ice for 15 minutes.
- Solubilize & Analyze: Pellet mitochondria, solubilize in non-reducing Laemmli sample buffer, and analyze by SDS-PAGE (without β-mercaptoethanol) and western blotting for Bax or Bak.
Pathway & Workflow Visualization
Intrinsic Apoptosis Pathway
Cytochrome c Release Workflow
The Scientist's Toolkit
Table 3: Essential Research Reagents for Intrinsic Pathway Analysis
| Reagent | Function & Application |
|---|---|
| Digitonin | Mild detergent for selective plasma membrane permeabilization in subcellular fractionation. |
| Protease Inhibitor Cocktail | Prevents degradation of labile proteins like Cytochrome c and Smac/DIABLO during fractionation. |
| Conformation-specific Antibodies (e.g., Bax 6A7) | Immunoprecipitates or detects the active, mitochondrial form of Bax. |
| Crosslinkers (e.g., BMH, DSS) | Stabilize protein-protein interactions to detect Bax/Bak oligomerization via western blot. |
| Compartment Markers (COX IV, TOM20, LDH, α-Tubulin) | Validate the purity of subcellular fractions (mitochondrial vs. cytosolic). |
| Caspase Inhibitor (Z-VAD-FMK) | Pan-caspase inhibitor; used to prevent downstream caspase-mediated effects and Smac/DIABLO degradation. |
| BH3 Mimetics (e.g., ABT-737) | Small molecule inducers that directly activate Bax/Bak by inhibiting anti-apoptotic Bcl-2 proteins. |
Frequently Asked Questions (FAQs)
FAQ 1: What are the key biomarkers to confirm activation of the extrinsic apoptosis pathway? The primary biomarkers for confirming extrinsic apoptosis pathway activation are the formation of the Death-Inducing Signaling Complex (DISC) and the proteins within it. Key biomarkers include:
- Caspase-8: The initiator caspase is recruited to the DISC and undergoes activation through dimerization and autoproteolytic processing. Detecting the cleaved, active fragments of caspase-8 (e.g., p43/p41 and p18) is a critical marker [16] [17].
- FADD (Fas-Associated protein with Death Domain): This adaptor protein is recruited directly to activated death receptors (like CD95/Fas) and is an essential core component of the DISC. Its presence confirms DISC assembly [16] [17].
- DISC Formation: The functional complex itself, comprising the death receptor (e.g., CD95), FADD, and procaspase-8. Its assembly provides the platform for caspase-8 activation [16] [17].
FAQ 2: How can I specifically measure caspase-8 activity at the native DISC? A specific protocol involves immunoprecipitating the DISC and performing a caspase activity assay on the isolated complex.
- Induce Apoptosis: Treat cells (e.g., HeLa-CD95) with a death ligand like CD95L [16].
- Immunoprecipitate the DISC: Use an antibody against the death receptor (e.g., anti-CD95) to isolate the native complex from cell lysates [16].
- Perform Caspase-8 Activity Assay: Incubate the immunoprecipitated complex with a caspase-8-specific substrate and measure the resulting fluorescence or luminescence [16].
- Confirm by Western Blot: Analyze the same immunoprecipitated samples by western blot to confirm the presence of DISC components like FADD, caspase-8, and c-FLIP [16]. This combined approach allows you to analyze both the formation and the enzymatic activity of the DISC from the same sample.
FAQ 3: My western blot shows poor signal for cleaved caspase-8. What could be wrong? Weak cleaved caspase-8 signals can result from several issues:
- Inefficient Apoptosis Induction: The death receptor may not have been adequately stimulated. Optimize the concentration and incubation time of your death ligand (e.g., CD95L) [16].
- Rapid Turnover of Active Caspase-8: The cleaved, active fragments can be short-lived. Use a broad-spectrum caspase inhibitor in your lysis buffer to stabilize the active forms before they degrade [18].
- Insufficient Protein Load: The amount of active caspase-8 may be low. Concentrate your cell lysates or load more protein, and use antibodies specifically validated to detect the cleaved fragments [18].
- Cell Type Considerations: Remember that in "Type II" cells, the activation of caspase-8 at the DISC may be weaker and require mitochondrial amplification for full commitment to apoptosis. In these cells, you might also need to look for downstream markers like cleaved BID (tBID) or caspase-3 [17].
FAQ 4: What is the functional difference between Type I and Type II cells in extrinsic apoptosis? The distinction lies in how the death signal is amplified after DISC formation [17]:
- Type I Cells: Sufficiently high levels of active caspase-8 are generated at the DISC to directly cleave and activate executioner caspases (like caspase-3), leading to apoptosis without mitochondrial involvement [17].
- Type II Cells: The amount of active caspase-8 from the DISC is insufficient to directly activate executioner caspases, often due to high levels of inhibitors like XIAP. The signal is amplified via caspase-8-mediated cleavage of the protein BID into tBID. tBID then triggers mitochondrial outer membrane permeabilization (MOMP), leading to cytochrome c release and apoptosome-mediated activation of caspase-9 and -3 [17]. This difference is crucial for experimental design, as confirming pathway activation in Type II cells often requires assessing mitochondrial markers like tBID formation.
Troubleshooting Guides
Table 1: Troubleshooting DISC Analysis and Caspase-8 Activation
| Problem | Possible Cause | Potential Solution |
|---|---|---|
| Weak or no caspase-8 signal in DISC IP | Inefficient immunoprecipitation; Low DISC formation | Use validated antibodies for IP (e.g., anti-CD95); Confirm apoptosis induction efficiency with positive controls [16]. |
| High background in immunoprecipitation | Non-specific antibody binding | Include a beads-only control and an isotype control; Increase wash stringency [16]. |
| No caspase-8 activity in assay despite DISC presence | Presence of caspase inhibitors (e.g., c-FLIP, XIAP) | Check expression levels of c-FLIP and XIAP in your cell line; Use a more sensitive luminogenic substrate for detection [15] [17]. |
| Inconsistent results between replicates | Low cell viability before stimulation; Improper sample handling | Ensure cell viability is >93% before experiments; Process all samples simultaneously and use fresh protease inhibitors [16]. |
Guide: Confirming Specific Pathway Activation in Your Experiments
To conclusively demonstrate extrinsic pathway activation, a multi-faceted approach is recommended:
- Direct Confirmation of DISC Assembly: Use co-immunoprecipitation with an antibody against your death receptor to confirm the recruitment of FADD and procaspase-8 [16].
- Detect Caspase-8 Activation:
- Verify Downstream Substrate Cleavage:
- Use Pharmacological Inhibitors: Include specific caspase-8 inhibitors (e.g., Z-IETD-FMK) in your experiments. A reduction in downstream apoptotic events upon inhibition confirms the specificity of the pathway activation [16].
Signaling Pathways and Experimental Workflows
Diagram: The Extrinsic Apoptosis Pathway
Diagram: Workflow for Measuring Caspase-8 Activity at the DISC
Research Reagent Solutions
Table 2: Key Reagents for Analyzing the Extrinsic Pathway
| Reagent | Function / Target | Example Application |
|---|---|---|
| Recombinant CD95L / TRAIL | Death receptor agonist | Induces extrinsic apoptosis and triggers DISC formation [16]. |
| Anti-CD95 (APO-1) Antibody | Death receptor (CD95) | Used for immunoprecipitation of the native DISC [16]. |
| Anti-Caspase-8 Antibody (e.g., clone C15) | Caspase-8 (pro and cleaved forms) | Detects caspase-8 recruitment to the DISC and its cleavage/activation via western blot [16] [18]. |
| Anti-FADD Antibody (e.g., clone 1C4) | Adaptor protein FADD | Confirms FADD recruitment to the DISC in western blot or IP [16]. |
| Caspase-8 Fluorogenic/Luminogenic Substrate (e.g., IETD-afc, IETD-aminoluciferin) | Active caspase-8 enzyme | Measures caspase-8 enzymatic activity in isolated DISC or lysates [16] [15]. |
| Caspase-8 Inhibitor (Z-IETD-FMK) | Specific caspase-8 inhibitor | Serves as a negative control to confirm the specificity of caspase-8-dependent events [16]. |
| Anti-c-FLIP Antibody (e.g., clone NF6) | Regulatory protein c-FLIP | Detects the presence of this key caspase-8 inhibitor at the DISC [16]. |
| Anti-BID / tBID Antibody | Substrate BID and its cleaved product tBID | Marks caspase-8 activity and mitochondrial amplification in Type II cells [17]. |
Activation of executioner caspases-3 and -7 represents the definitive molecular commitment to apoptotic cell death. These proteases are the convergence point for both the intrinsic (mitochondrial) and extrinsic (death receptor) apoptotic pathways, responsible for the systematic dismantling of the cell through cleavage of hundreds of cellular substrates [19] [20]. Their activation serves as a crucial indicator for researchers confirming specific pathway activation in apoptosis experiments, making them essential biomarkers in cell death research across basic science, drug discovery, and therapeutic development.
FAQs & Troubleshooting Guides
FAQ 1: What are the primary markers that confirm caspase-3/7 activation in my experiments?
Answer: Multiple complementary markers can confirm caspase-3/7 activation:
- Proteolytic Cleavage: Detection of cleaved/activated fragments via Western blot (caspase-3: ~17/19 kDa; caspase-7: ~20 kDa) [21] [22]
- Enzymatic Activity: Measurement of DEVDase activity using fluorescent or luminescent substrates [21] [23]
- Substrate Cleavage: Presence of cleaved caspase substrates like PARP, DFF45, or ROCK1 [24]
- Localization: In later apoptosis stages, active caspases can be detected extracellularly upon secondary necrosis [22]
FAQ 2: Why is my caspase activity signal transient or decreasing at later timepoints?
Answer: Caspase activity is inherently transient. The signal decreases because:
- Cells progress to secondary necrosis, rupturing and releasing cytoplasmic caspases into the media [23]
- Caspase activity naturally declines as apoptotic execution completes [23]
- Solution: Implement kinetic cytotoxicity assays (e.g., CellTox Green) to identify the optimal window for caspase measurement, typically when cytotoxicity first becomes detectable [23]
Table 1: Temporal Caspase-3/7 Activation Profiles for Different Apoptosis Inducers
| Inducer | Peak Activity Time | Signal Decline | Recommended Measurement Window |
|---|---|---|---|
| Staurosporine | 6 hours | Significant by 24 hours | 4-8 hours [23] |
| Bortezomib | 24 hours | Moderate by 50 hours | 18-30 hours [23] |
| Carfilzomib | 24-48 hours | Gradual | 24-80 hours [21] |
| Oxaliplatin | Progressive increase | Delayed | 24-120 hours [21] |
FAQ 3: How can I distinguish specific caspase-3 versus caspase-7 activation?
Answer: Several approaches enable distinction:
- Specific Antibodies: Use caspase-3-specific (ab32351) or caspase-7-specific antibodies in Western blot or IF [25]
- Genetic Models: Utilize caspase-3 deficient MCF-7 cells, which retain caspase-7-mediated DEVD cleavage [21]
- Activity-Based Probes: Employ specific fluorescent probes that can differentiate between these executioners [19]
FAQ 4: Can executioner caspases contribute to other cell death pathways besides apoptosis?
Answer: Yes. Emerging research shows caspase-3/7 can promote:
- Pyroptosis: In microglia, caspase-3/7 activation contributes to GSDMD-associated pyroptosis in neuroinflammatory conditions [24]
- Immunogenic Cell Death: Through surface calreticulin exposure and potential extracellular proteolytic functions [21] [22]
FAQ 5: Why do I detect extracellular caspase activity in my assays?
Answer: Extracellular caspase activity appears during secondary necrosis when:
- Apoptotic cells are not efficiently cleared by efferocytosis [22]
- Plasma membrane integrity is lost in late apoptosis stages [22]
- This extracellular activity can cleave membrane-bound protein ectodomains, potentially contributing to tumor microenvironment modulation [22]
Experimental Protocols & Methodologies
Protocol 1: Real-Time Live-Cell Imaging of Caspase-3/7 Activation
Principle: Utilizes lentiviral-delivered stable reporters expressing ZipGFP-based caspase-3/7 biosensor with constitutive mCherry marker [21]
Detailed Methodology:
- Reporter Design: Express DEVD-containing ZipGFP construct with constitutive mCherry in target cells [21]
- Stable Line Generation: Create lentiviral reporters and transduce target cells; select stable populations [21]
- Imaging Setup: Plate cells in appropriate imaging chambers and treat with apoptotic inducers
- Time-Lapse Imaging: Acquire GFP/mCherry images every 30-60 minutes for 24-120 hours [21]
- Data Analysis: Quantify GFP fluorescence increase normalized to mCherry signal [21]
Validation:
- Confirm specificity with pan-caspase inhibitor zVAD-FMK [21]
- Correlate with Western blot for cleaved PARP and caspase-3 [21]
- Use Annexin V/PI staining to confirm apoptosis progression [21]
Protocol 2: Multiplexed Caspase Activity, Cytotoxicity, and Viability Assessment
Principle: Simultaneously measures caspase-3/7 activity, membrane integrity, and viability from single wells [23]
Detailed Methodology:
- Experimental Setup: Seed cells in multi-well plates with CellTox Green Cytotoxicity Dye [23]
- Treatment: Apply apoptotic inducers and incubate at 37°C
- Kinetic Monitoring: Read cytotoxicity fluorescence every 4-6 hours [23]
- Endpoint Measurement: When cytotoxicity increases, add Caspase-Glo 3/7 Reagent and CellTiter-Fluor Viability Reagent [23]
- Data Analysis: Calculate fold-change from controls for all three parameters [23]
Troubleshooting Tips:
- For transient caspase signals (e.g., staurosporine), use early timepoints (4-8 hours) [23]
- For delayed signals (e.g., bortezomib), use later timepoints (18-30 hours) [23]
- Include digitonin-treated controls to distinguish primary necrosis (cytotoxicity without caspase activation) [23]
Protocol 3: Immunofluorescence Detection of Active Caspase-3/7
Principle: Antibody-based detection preserves spatial context of caspase activation within individual cells [25]
Detailed Methodology:
- Cell Preparation: Culture cells on chamber slides and treat with apoptotic inducers
- Fixation: Aspirate media and fix cells with 4% paraformaldehyde for 15 minutes [25]
- Permeabilization: Incubate in PBS/0.1% Triton X-100 for 5 minutes at room temperature [25]
- Blocking: Apply blocking buffer (PBS/0.1% Tween 20 + 5% serum) for 1-2 hours [25]
- Primary Antibody: Incubate with anti-caspase-3 antibody (1:200 dilution) overnight at 4°C [25]
- Secondary Antibody: Apply fluorescent-conjugated secondary antibody (1:500) for 1-2 hours, protected from light [25]
- Mounting and Imaging: Mount with anti-fade medium and image with fluorescence microscopy [25]
Optimization Notes:
- Include no-primary-antibody controls to assess background [25]
- For tissue samples, optimize permeabilization time (10-30 minutes) [25]
- Compatible with multiplexing for other apoptotic markers (e.g., cleaved PARP, TUNEL) [25]
Signaling Pathways & Experimental Workflows
Caspase Activation Convergence Point
Table 2: Key Research Reagent Solutions for Caspase-3/7 Detection
| Reagent/Assay | Function/Principle | Application Context | Key Features |
|---|---|---|---|
| ZipGFP Caspase Reporter | DEVD-based split-GFP reconstitution upon cleavage [21] | Live-cell imaging in 2D/3D models [21] | • Real-time kinetics • Minimal background • Single-cell resolution [21] |
| Caspase-Glo 3/7 Assay | Luminescent DEVD-cleavage assay [23] | Endpoint population measurement [23] | • High sensitivity • Homogeneous format • Compatible with multiplexing [23] |
| Anti-Caspase-3 Antibody (ab32351) | Binds active caspase-3 fragments [25] | Immunofluorescence, Western blot [25] | • Specific for cleaved form • Preserves spatial context [25] |
| CellTox Green Cytotoxicity Assay | DNA-binding dye excluded from viable cells [23] | Kinetic cytotoxicity monitoring [23] | • Real-time monitoring • Predicts caspase measurement window [23] |
| zVAD-FMK | Irreversible pan-caspase inhibitor [21] | Specificity controls [21] | • Confirms caspase-dependent signals • Validates assay specificity [21] |
Experimental Workflow for Caspase Activation
Advanced Technical Considerations
Executioner Caspase Functions Beyond Classical Apoptosis
Recent research has revealed non-apoptotic roles for caspase-3/7 that impact experimental interpretation:
Extracellular Proteolytic Activity: During secondary necrosis, active caspases-3/7 released into extracellular space can cleave membrane-bound protein ectodomains, functioning similarly to metalloproteases in tumor microenvironment remodeling [22]. This activity persists in slightly acidic conditions typical of tumor microenvironments [22].
Pyroptosis Cross-Talk: In neuroinflammatory conditions, caspase-3/7 activation promotes GSDMD-associated microglial pyroptosis, demonstrating convergence between apoptotic and pyroptotic pathways [24]. siRNA suppression of caspase-3/7 prevents membrane rupture and pyroptotic body formation in human microglia [24].
Immunogenic Cell Death (ICD): Caspase-3/7 activation can contribute to ICD through surface exposure of calreticulin, an "eat me" signal for dendritic cells and macrophages [21]. This bridges apoptotic execution to adaptive immune activation.
3D Model Applications
The ZipGFP caspase reporter platform enables apoptosis monitoring in physiologically relevant 3D models:
- Spheroid Models: MiaPaCa-2 spheroids show time-dependent GFP signal increases following apoptosis induction [21]
- Patient-Derived Organoids (PDOs): Pancreatic ductal adenocarcinoma PDOs demonstrate localized caspase activation within heterogeneous structures [21]
- HUVEC Spheroids: 3D endothelial models maintain mCherry expression while showing induced GFP upon treatment [21]
Critical Timing Considerations
Table 3: Troubleshooting Caspase Detection: Common Issues and Solutions
| Problem | Potential Causes | Solution Approaches |
|---|---|---|
| Weak or absent caspase signal | • Incorrect timing • Insufficient apoptosis induction • Caspase-independent death | • Kinetic cytotoxicity monitoring • Titrate inducer concentrations • Include positive controls [23] |
| High background in imaging | • Inadequate blocking • Antibody concentration too high • Insufficient washing | • Optimize serum blocking conditions • Titrate primary antibody • Increase wash stringency [25] |
| Inconsistent results between replicates | • Cell passage number variations • Uneven plating density • Temperature fluctuations | • Standardize cell culture conditions • Validate plating density • Use precise temperature control [23] |
| Discrepancy between activity and cleavage data | • Different detection timepoints • Enzyme activity vs. protein presence • Inhibition by IAP proteins | • Synchronize measurement timepoints • Use complementary methods • Consider Smac mimetics [19] |
| Extracellular caspase activity interference | • Secondary necrosis progression • Efferocytosis inefficiency | • Earlier timepoint measurement • Include efferocytosis inhibitors • Distinguish intra- vs extracellular activity [22] |
Tools of the Trade: Methodologies for Detecting Pathway-Specific Apoptosis
Confirming the activation of specific apoptotic pathways is a cornerstone of research in cell biology, oncology, and drug development. Within this framework, Western blotting emerges as an indispensable technique for directly probing the protein-level events that define pathway engagement, such as the cleavage of executioner caspases. This technical support center is structured within the broader thesis of "How to confirm specific pathway activation in apoptosis experiments," providing researchers with detailed protocols, troubleshooting guides, and reagent solutions to reliably detect key apoptotic markers. The content that follows is designed to empower scientists to generate reproducible, high-quality data that can definitively illustrate the induction of programmed cell death through the intrinsic, extrinsic, or perforin/granzyme pathways.
Experimental Protocols for Apoptosis Detection
Protocol 1: Induction of Apoptosis in Cell Culture
This protocol outlines methods for inducing apoptosis via the extrinsic (death receptor) and intrinsic (mitochondrial) pathways, providing the foundational cell samples for subsequent Western blot analysis [26].
Biological Induction (Extrinsic Pathway):
- Principle: Activate the Fas/TNF receptor family using an agonist antibody to trigger the caspase cascade.
- Procedure:
- Grow and maintain Jurkat cells (or other Fas-bearing cell lines) in RPMI-1640 medium with 10% FBS.
- Harvest exponentially growing cells (at ~1x10^5 cells/mL) by centrifugation at 300–350 x g for 5 minutes.
- Resuspend the cell pellet in fresh medium to a final density of 5x10^5 cells/mL.
- Add an appropriate concentration of an anti-Fas (anti-CD95) monoclonal antibody.
- Incubate the cells for 2–4 hours in a humidified 37°C, 5% CO2 incubator.
- Include a negative control of untreated cells incubated under identical conditions.
Chemical Induction (Intrinsic Pathway):
- Principle: Use DNA-damaging or stress-inducing agents to trigger the p53-dependent mitochondrial pathway.
- Procedure:
- Inoculate adherent or suspension cells at a density of ~1x10^6 cells/mL.
- Add a cellular-damaging agent from the table below to induce apoptosis.
Table: Chemical Inducers for Apoptosis
| Agent | Final Working Concentration | Stock Solution | Pathway |
|---|---|---|---|
| Doxorubicin | 0.2 µg/mL | 25 µg/mL in H2O | p53-dependent/DNA damage |
| Etoposide | 1 µM | 1 mM in DMSO | p53-dependent/DNA damage |
| Staurosporine | 1–10 µM | 1 mM in DMSO | Kinase inhibition/Mitochondrial |
| Camptothecin | 2–10 µM | 1 mM in DMSO | Topoisomerase inhibition |
| Actinomycin D | 50–100 nM | Prepared in DMSO | Transcription inhibition |
- For a negative control, add an equivalent volume of the solvent (e.g., DMSO or H2O) to the cell culture.
- Harvest cells at various time points post-treatment (e.g., 8, 12, 16, 24, 48, and 72 hours) to capture the dynamics of apoptosis progression.
Protocol 2: Western Blot Analysis of Cleaved Caspase-3
This protocol details the detection of cleaved caspase-3, a critical executioner protease and a definitive marker of apoptosis commitment [27].
Sample Preparation:
- Lyse harvested cells in RIPA buffer supplemented with protease and phosphatase inhibitors (e.g., 1 µg/mL leupeptin and 2.5 mM PMSF) to prevent protein degradation [28].
- Determine protein concentration using a BCA assay.
- Prepare samples by heat-denaturing 20-30 µg of total protein in Laemmli sample buffer containing 5% 2-mercaptoethanol at 95-100°C for 5 minutes.
Gel Electrophoresis and Transfer:
- Resolve denatured proteins on a 15% SDS-PAGE gel to optimally separate low molecular weight caspase fragments.
- Transfer proteins from the gel to a 0.2 µm nitrocellulose membrane.
- For low molecular weight proteins like cleaved caspase-3 (19 kDa, 17 kDa), use a wet transfer system at 70V for 2 hours at 4°C to prevent "blow-through" [28]. Staining the gel post-transfer with Coomassie Blue or using a reversible membrane stain is recommended to confirm transfer efficiency.
Antibody Probing with the Sheet Protector (SP) Strategy:
- Blocking: Block the membrane with 5% non-fat dry milk in TBST for 1 hour at room temperature with gentle agitation [29] [27].
- Primary Antibody Incubation: Use the innovative SP strategy to conserve precious antibody [29].
- Briefly rinse the blocked membrane in TBST and blot excess liquid with a paper towel.
- Place the semi-dried membrane on a leaflet of a cropped sheet protector.
- Apply a minimal volume (e.g., 20-150 µL) of rabbit monoclonal anti-cleaved caspase-3 primary antibody (diluted 1:1000 in 5% BSA or milk) directly onto the membrane [27].
- Gently overlay the solution with the upper leaflet of the sheet protector, allowing it to form a thin, even layer over the membrane. Seal the SP unit in a humidified bag to prevent evaporation if incubating for over 2 hours.
- Incubate at room temperature for 15 minutes to 2 hours, or overnight at 4°C for maximum sensitivity without agitation [29].
- Washing and Secondary Antibody: Wash the membrane three times in TBST for 5 minutes each. Incubate with an HRP-conjugated goat anti-rabbit secondary antibody (diluted 1:5000 in 5% milk in TBST) for 1 hour at room temperature with agitation [27].
- Detection: Wash the membrane again. Treat with a chemiluminescent substrate (e.g., SuperSignal Pico) and image using a digital blot scanner or X-ray film [27].
Normalization: Probe the same membrane for a loading control housekeeping protein like β-tubulin or GAPDH after stripping or by using a different fluorescent channel [27]. Perform densitometric analysis using software like ImageJ to quantify the band intensities of cleaved caspase-3 relative to the loading control.
Troubleshooting Guides and FAQs
Frequently Asked Questions
Q1: Why do I see three bands (approximately 20 kDa, 19 kDa, and 17 kDa) when probing for cleaved caspase-3? A: This is a characteristic and well-documented observation. All three bands represent the large subunit of caspase-3 cleaved at Asp175. The distinction arises from the stepwise processing of its N-terminal pro-domain [30]:
- The 20 kDa fragment is generated by initial cleavage at Asp175.
- The 19 kDa fragment results from further cleavage at Asp9.
- The 17 kDa fragment is the fully mature subunit after additional cleavage at Asp28. The accumulation of the 20 and 19 kDa intermediates can occur due to partial inhibition of the full maturation process [30].
Q2: My Western blot shows a weak or no signal for my target apoptotic protein. What should I check? A: A weak signal can stem from multiple sources. Systematically check the following [31] [28]:
- Protein Load & Integrity: Ensure sufficient protein (20-30 µg for total protein, up to 100 µg for post-translational modifications) is loaded and that samples are fresh and prepared with inhibitors to prevent degradation.
- Transfer Efficiency: Confirm successful transfer by staining your gel post-transfer. For low MW targets, reduce transfer time to prevent blow-through and use a 0.2 µm pore size nitrocellulose membrane.
- Antibody Functionality: Verify the antibody is specific for the target (e.g., "cleaved" caspase-3 vs. total caspase-3) and that the species reactivity matches your sample. Use a positive control, such as an apoptosis-induced cell lysate.
- Antibody Concentration: Titrate your primary antibody. The SP strategy may require a higher antibody concentration than conventional methods to compensate for the smaller volume [29].
Q3: I have high background on my blot. How can I reduce it? A: High background is often related to antibody concentration or blocking conditions [31].
- Antibody Concentration: Decrease the concentration of your primary or secondary antibody.
- Blocking: Ensure complete blocking by using 5% non-fat dry milk or BSA for at least 1 hour at room temperature. For phospho-proteins, BSA is often preferred.
- Washing: Increase the number and volume of TBST washes (e.g., 3 x 10 minutes) after antibody incubations. Ensure TBST contains 0.1% Tween-20.
- Buffer Compatibility: Prepare antibody dilutions in the recommended buffer (BSA or milk). Using milk with some antibodies can be too stringent and reduce signal, while BSA can sometimes lead to higher background [28].
Q4: What are the advantages of the Sheet Protector (SP) strategy over the conventional method? A: The SP strategy offers several key benefits [29]:
- Antibody Conservation: Drastically reduces antibody consumption (20-150 µL vs. 10 mL per blot).
- Faster Incubation Times: Enables rapid detection on the order of minutes, compared to overnight incubations.
- Simplified Workflow: Does not require agitation or refrigeration in many cases.
- Accessibility: Utilizes a common, inexpensive laboratory stationery item.
Troubleshooting Table
Table: Western Blot Troubleshooting for Apoptosis Markers
| Problem | Possible Cause | Recommended Solution |
|---|---|---|
| Multiple Bands | Non-specific antibody binding. | Optimize antibody concentration; use a more specific antibody (e.g., anti-cleaved). |
| Protein degradation. | Use fresh protease inhibitors; prepare samples on ice [28]. | |
| Post-translational modifications (e.g., phosphorylation, glycosylation). | Consult databases like PhosphoSitePlus; use enzymatic treatments (e.g., PNGase F) to confirm [28]. | |
| Weak/No Signal | Insufficient protein transfer. | Stain gel post-transfer to check efficiency; optimize transfer time/voltage [31]. |
| Low antibody affinity or titer. | Titrate antibody; use a positive control lysate [28]. | |
| Inefficient antigen retrieval (masked epitopes). | Avoid over-fixing; try a different sample buffer or denaturing conditions. | |
| High Background | Antibody concentration too high. | Decrease concentration of primary and/or secondary antibody [31]. |
| Incomplete blocking or washing. | Extend blocking time; increase number/volume of washes with TBST [31]. | |
| Membrane dried out during processing. | Ensure membrane remains covered with liquid or buffer at all times [31]. | |
| Smearing | Sample overloading. | Reduce the amount of total protein loaded per lane [28]. |
| Protein aggregation. | Sonicate samples to shear genomic DNA before loading [28]. | |
| Presence of glycosylated proteins. | Treat samples with PNGase F to remove N-linked glycans and confirm [28]. |
The Scientist's Toolkit: Research Reagent Solutions
Table: Essential Reagents for Apoptosis Pathway Analysis by Western Blot
| Item | Function / Role in Experiment |
|---|---|
| Anti-Fas (CD95) mAb | Agonist antibody used to induce the extrinsic apoptotic pathway in sensitive cell lines like Jurkat cells [26]. |
| Chemical Inducers (e.g., Staurosporine) | Small molecules used to trigger the intrinsic (mitochondrial) apoptotic pathway through DNA damage or cellular stress [26]. |
| Phosphatase & Protease Inhibitor Cocktails | Added to lysis buffers to preserve the post-translational modification state (e.g., phosphorylation) and prevent protein degradation during sample preparation [28]. |
| Anti-Cleaved Caspase-3 Antibody | Primary antibody specifically recognizing the activated (cleaved) form of caspase-3, serving as a definitive marker of apoptosis execution [27]. |
| HRP-Conjugated Secondary Antibody | Enzyme-linked antibody that binds the primary antibody, enabling detection via chemiluminescence. |
| Enhanced Chemiluminescent (ECL) Substrate | A luminol-based reagent that produces light in the presence of HRP, allowing visualization of the target protein bands. |
| Nitrocellulose Membrane (0.2 µm) | The solid support to which proteins are transferred; the smaller pore size is optimal for retaining low molecular weight caspase fragments. |
| Sheet Protector | A common stationery item used in the SP strategy to distribute minimal antibody volumes evenly across the membrane, conserving reagent [29]. |
| Housekeeping Protein Antibodies (e.g., β-Tubulin, GAPDH) | Primary antibodies against constitutively expressed proteins used as loading controls to normalize for potential variations in sample loading and transfer. |
Signaling Pathways and Experimental Workflows
Caspase-3 Activation Pathway
The following diagram illustrates the proteolytic maturation cascade of caspase-3, a key event in apoptosis execution, explaining the origin of multiple bands observed on Western blots.
Western Blot Workflow for Apoptosis
This diagram outlines the core steps of the Western blotting procedure, integrating the Sheet Protector (SP) strategy for antibody incubation.
Frequently Asked Questions (FAQs)
General Principles and Applications
Q1: Why should I combine Annexin V/PI staining with phospho-protein detection in a single flow cytometry experiment?
Combining these assays allows you to directly correlate a cell's apoptotic status with the activity of specific signaling pathways within the same individual cell. Annexin V/PI staining identifies cells as viable, early apoptotic, or late apoptotic/necrotic [32] [33]. Simultaneous phospho-protein detection reveals the activation state of kinases and signaling proteins (e.g., components of the PI3K/AKT or JAK-STAT pathways) in these distinct cell populations [34] [35]. This multiplexing is particularly powerful in heterogeneous samples, such as solid tumors, where you can distinguish signaling responses in tumor cells (e.g., CD45-) from infiltrating immune cells (e.g., CD45+) [35]. This high-content, single-cell data can elucidate mechanisms of drug action, identify biomarkers of response, and explain heterogeneous reactions to therapy [34] [36].
Q2: What are the critical points in the experimental workflow where the protocol differs from a standard Annexin V/PI assay?
The most critical difference is the need to fix and permeabilize the cells to allow antibodies against intracellular phospho-proteins to enter the cell. This step must be performed after Annexin V staining and incubation, but before PI staining [37]. A standard Annexin V/PI protocol uses live, unfixed cells. In the multiplex protocol, cells are fixed after Annexin V binding is complete. This fixation preserves the Annexin V staining pattern on the cell surface while making intracellular epitopes accessible. Importantly, PI staining is performed after permeabilization or is replaced by a fixable viability dye (FVD) prior to fixation to avoid losing viability information during the permeabilization process [37].
Protocol and Staining
Q3: What is the correct order for adding stains in this multiplexed panel?
The correct staining order is crucial for success. The recommended sequence is:
- Cell Surface Markers (e.g., CD45 for immunophenotyping): Stain live cells.
- Annexin V Conjugate: Stain in a calcium-rich binding buffer. Incubate.
- Fixation: Fix cells to preserve the Annexin V and surface marker staining.
- Permeabilization: Make the cell membrane permeable to antibodies.
- Intracellular Staining: Add antibodies against phospho-proteins (e.g., pS6, pSTAT5).
- Viability Assessment (if not using FVD): Add PI. Note that PI can be added after permeabilization to stain DNA in cells with compromised membranes, but the interpretation may be confounded by the permeabilization step. Using a fixable viability dye (FVD) before step 1 is the preferred method for accurate viability gating [37].
Q4: Can I use a standard fixation/permeabilization buffer, or are there special considerations?
Standard intracellular fixation and permeabilization buffers are suitable [37]. However, it is critical to ensure that the fixation step does not use a buffer containing calcium chelators like EDTA, as the binding of Annexin V to phosphatidylserine is calcium-dependent [37]. Always confirm that your fixation buffer is compatible. Furthermore, the fixation time should be optimized and standardized, as over-fixation can mask some phospho-epitopes [35].
Troubleshooting and Data Analysis
Q5: I am seeing high background in my phospho-protein channels. What could be the cause?
High background can stem from several sources:
- Inadequate Washing: Ensure thorough washing after the permeabilization step to remove unbound antibodies.
- Insufficient Antibody Titration: Phospho-specific antibodies must be carefully titrated on stimulated and unstimulated cells to determine the optimal signal-to-noise ratio [34] [38].
- Non-Specific Antibody Binding: Use a protein block (e.g., serum from the host species of your secondary antibody) or an intracellular staining buffer designed to reduce non-specific binding during the intracellular staining step.
- Over-fixation: Excessive fixation can increase autofluorescence and non-specific antibody binding.
Q6: My Annexin V signal is weak or lost after the protocol. How can I fix this?
The loss of Annexin V signal is almost always due to the introduction of a calcium-chelating agent. To prevent this:
- Check All Buffers: Verify that none of your surface staining buffers, fixation buffers, or permeabilization buffers contain EDTA or EGTA. Annexin V binding is strictly calcium-dependent [37].
- Use Calcium-Containing Buffers: Ensure that the Annexin V binding buffer and any wash buffers used up until the fixation step contain the recommended concentration of calcium chloride (typically 2.5 mM) [32] [37].
Q7: How do I set up my flow cytometry controls for this complex experiment?
Proper controls are essential for accurate data interpretation. The table below summarizes the necessary controls.
Table 1: Essential Controls for Multiplexed Annexin V/Phospho-Protein Flow Cytometry
| Control Type | Purpose | Description |
|---|---|---|
| Unstained Cells | To set baseline fluorescence and PMT voltages. | Cells processed without any stains. |
| Single-Color Controls | For compensation to correct spectral overlap. | Cells stained individually with each fluorochrome-conjugated reagent (Annexin V, each surface antibody, each phospho-antibody, PI/FVD). |
| FMO (Fluorescence Minus One) | To accurately set positive/negative gates, especially for phospho-proteins. | Cells stained with all antibodies except one. |
| Biological Controls | To validate the assay functionality. | Induced Apoptosis Control: Cells treated with an apoptosis inducer (e.g., staurosporine, cisplatin) [39]. Phospho-Protein Stimulation Control: Cells treated with a known activator of the pathway (e.g., PMA/ionomycin for T-cells) [38]. |
| Viability Control | To distinguish true signaling from artifacts in dead cells. | Use an FVD stained prior to fixation to identify and gate out dead cells. |
Troubleshooting Guide
Table 2: Common Problems and Solutions
| Problem | Potential Cause | Solution |
|---|---|---|
| High background in phospho-protein detection | Non-specific antibody binding. | Titrate all phospho-specific antibodies; include a protein block during intracellular staining [38]. |
| Poor phospho-specific signal | Inadequate stimulation or epitope loss. | Include a stimulated control; optimize fixation time to avoid over-fixation [35]. |
| Loss of Annexin V signal | Calcium chelation in buffers. | Ensure all buffers pre-fixation are calcium-rich and EDTA-free [37]. |
| Increased necrotic population (Annexin V-/PI+) | Rough cell handling. | Use gentle detachment methods (e.g., non-enzymatic) and avoid vortexing [33]. |
| Poor cell yield after processing | Cell loss during multiple steps. | Use a centrifuge with a soft acceleration/deceleration setting; pellet cells at recommended speeds (300-500 x g) [38]. |
| Uncompensated spillover | Complex panel with bright fluorochromes. | Prepare single-stained controls with the same type of cells (fixed/permeabilized if applicable) and run compensation correctly on the flow cytometer. |
The Scientist's Toolkit: Key Research Reagent Solutions
Table 3: Essential Materials and Reagents
| Item | Function | Key Considerations |
|---|---|---|
| Fluorochrome-conjugated Annexin V | Detects phosphatidylserine exposure on the outer membrane, a marker of early apoptosis. | Must be used in a calcium-containing binding buffer. Avoid conjugates with fluorochromes that spectrally overlap with critical phospho-antibodies [37] [33]. |
| Fixable Viability Dye (FVD) | Distinguishes live from dead cells. Crucial for this protocol. | Must be added to live cells before fixation. The FVD covalently binds to amines in dead cells, preserving viability information through fixation/permeabilization. Do not use FVD eFluor 450 with Annexin V kits [37]. |
| Phospho-Specific Antibodies | Detect phosphorylation states of intracellular target proteins (e.g., pSTAT, pAKT, pS6). | Must be validated for flow cytometry and for use in fixed and permeabilized cells. Requires careful titration [34] [35]. |
| Intracellular Fixation & Permeabilization Buffer Set | Preserves cell surface and intracellular epitopes and allows intracellular antibody access. | Standard commercial kits (e.g., Foxp3/Transcription Factor Staining Buffer Set) are recommended [37]. |
| Cell Stimulation Cocktails (e.g., PMA/Ionomycin) | Positive control for phospho-protein staining. Activates multiple signaling pathways. | Used to validate antibody performance and assay conditions [38]. |
| Fluorescent Cell Barcoding (FCB) Dyes | Allows pooling of multiple samples into one tube. | Reduces technical variability, antibody consumption, and acquisition time. Samples are stained with unique combinations of barcoding dyes post-fixation, then pooled for antibody staining [38]. |
Experimental Workflow and Pathway Diagrams
Diagram 1: Multiplexed Staining Workflow
Diagram 2: Key Apoptosis & Signaling Pathways
Caspase-sensitive fluorescent biosensors represent a transformative technology for real-time monitoring of apoptosis in live cells. These sophisticated tools leverage the specific proteolytic activity of caspases—key executioner enzymes in apoptotic pathways—to trigger measurable fluorescence signals, enabling researchers to track cell death dynamics without invasive fixation or endpoint assays.
Apoptosis, or programmed cell death, is a fundamental process regulated through intrinsic (mitochondrial) and extrinsic (death receptor) pathways that converge on caspase activation [20]. These proteases are categorized as initiators (caspase-8, -9) and executioners (caspase-3, -6, -7), with each recognizing specific peptide sequences [40] [20]. Advanced reporter systems exploit this specificity by incorporating caspase-cleavable peptide linkers between fluorescent proteins or fluorophore-quencher pairs, creating visible signals precisely when and where apoptosis occurs.
Technical Foundations & Biosensor Design Principles
Core Mechanism of Caspase-Activatable Reporters
Caspase-sensitive biosensors operate on a fundamental molecular principle: they remain optically silent until cleaved by specific caspase enzymes, at which point they generate a fluorescent signal.
The most common design strategies include:
FRET-Based Reporters: These employ two fluorescent proteins with compatible emission/absorption spectra connected by a caspase-cleavable peptide linker. Before cleavage, Fluorescence Resonance Energy Transfer occurs, but cleavage physically separates the fluorophores, eliminating FRET and changing the emission profile [40]. A typical implementation uses CFP and YFP linked by DEVD, LEVD, or WEHD sequences.
Fluorophore-Quencher Systems: These utilize a near-infrared dye linked to a quencher via a caspase-cleavable peptide. Cleavage releases the fluorophore from quenching, generating a strong fluorescence signal [41]. The hemicyanine-based WEHD-HCy biosensor exemplifies this approach.
Split-Fluorescent Protein Systems: These leverage fragments of fluorescent proteins connected by caspase-cleavable linkers. Cleavage enables proper folding and chromophore maturation, creating a time-accumulating fluorescent signal [42]. The ZipGFP-based caspase-3/7 reporter represents this advanced design.
Caspase Substrate Specificities
Different caspases recognize distinct tetra-peptide sequences, enabling specific monitoring of various apoptotic pathways:
| Caspase | Primary Function | Preferred Sequence | Biosensor Examples |
|---|---|---|---|
| Caspase-1 | Inflammasome activation | WEHD [41] | WEHD-HCy [41] |
| Caspase-3/-7 | Executioner apoptosis | DEVD [42] | ZipGFP-DEVD [42] |
| Caspase-6 | Executioner apoptosis | VEID [40] | Custom substrates [40] |
| Caspase-8 | Extrinsic pathway initiation | IETD [40] | FRET-based reporters [40] |
| Caspase-9 | Intrinsic pathway initiation | LEHD [40] | Fluorogenic substrates [40] |
Apoptosis Signaling Pathways: Visual Guide
The following diagrams illustrate the key apoptosis pathways and how biosensors integrate with these signaling cascades.
Research Reagent Solutions Toolkit
| Reagent Category | Specific Examples | Function & Application |
|---|---|---|
| Caspase Biosensors | WEHD-HCy, YVAD-HCy [41] | Caspase-1 detection in inflammasome studies |
| CFP-LEVD-YFP FRET probe [40] | Monitoring caspase-6/8 activity in live cells | |
| ZipGFP-DEVD caspase-3/7 reporter [42] | Executioner caspase activity in 2D/3D models | |
| Inhibitors & Controls | z-VAD-FMK (pan-caspase) [42] | Negative control for caspase-dependent activation |
| Specific caspase inhibitors (z-DEVD, z-IETD) [40] | Determining specific caspase involvement | |
| Validation Reagents | Annexin V / Propidium Iodide [43] | Membrane changes in apoptosis |
| JC-1 mitochondrial dye [43] | Mitochondrial membrane potential assessment | |
| Antibodies to cleaved PARP, caspase-3 [42] | Western blot validation of apoptosis | |
| Cell Death Inducers | Carfilzomib, Etoposide, Camptothecin [42] [40] | Positive control apoptosis inducers |
| Staurosporine [40] | Intrinsic pathway activation | |
| Anti-FAS antibody [40] | Extrinsic pathway activation |
Experimental Protocols
Protocol: Real-Time Apoptosis Monitoring with FRET-Based Caspase Biosensors
Principle: This protocol utilizes a CFP-YFP FRET pair connected by a caspase-cleavable linker (LEVD or DEVD). Caspase activation cleaves the linker, eliminating FRET and increasing CFP:YFP emission ratio [40].
Materials:
- CFP-LEVD-YFP plasmid construct [40]
- Appropriate cell line (HeLa, Jurkat, or primary cells)
- LipofectAMINE Plus transfection reagent [40]
- Apoptosis inducers (etoposide, camptothecin, staurosporine)
- Caspase inhibitors (z-VAD-FMK, specific caspase inhibitors)
- Fluorescence microscope or flow cytometer with FRET capability
Procedure:
- Cell Transfection: Plate cells in 6-well plates and transfert with 500 ng CFP-LEVD-YFP plasmid using LipofectAMINE Plus according to manufacturer instructions [40].
- Expression Period: Incubate for 24-48 hours to allow biosensor expression.
- Experimental Treatment: Apply apoptosis-inducing agents with or without caspase inhibitors.
- FRET Measurement:
- For flow cytometry: excite at 405nm (CFP), collect emissions at 475nm (CFP) and 525nm (YFP). Calculate FRET ratio as YFP:CFP emission [40].
- For microscopy: capture sequential CFP and YFP images, calculate pixel-by-pixel FRET efficiency.
- Data Analysis: Cells with diminished FRET indicate caspase activation. Compare treated vs. control populations.
Troubleshooting: High background FRET may indicate inadequate linker cleavage. Verify caspase activity with complementary methods (Western blot for cleaved caspases). Low expression may require optimization of transfection conditions.
Protocol: Monitoring Inflammasome Activation with WEHD-HCy Biosensor
Principle: This protocol uses the WEHD-HCy near-infrared fluorescent biosensor that specifically detects caspase-1 activation during inflammasome formation [41].
Materials:
- WEHD-HCy biosensor [41]
- Inflammasome activation models (DSS-induced IBD, Salmonella infection, acute arthritis) [41]
- Bone marrow-derived macrophages (BMDMs) [41]
- Near-infrared fluorescence imaging system
Procedure:
- Cell Preparation: Isolate and culture BMDMs from 6-8 week-old mice for 5 days with appropriate differentiation factors [41].
- Biosensor Application: Incubate cells with 25μM WEHD-HCy in working buffer (50mM HEPES, pH 7.2, 50mM NaCl, 0.1% Chaps, 10mM EDTA, 5% Glycerol, 10mM DTT) [41].
- Inflammasome Activation: Apply specific inflammasome activators (e.g., ATP for NLRP3, transfected DNA for AIM2).
- Imaging: Monitor fluorescence intensity over time (approximately 8 hours) using NIR imaging capabilities.
- Validation: Confirm inflammasome activation by Western blot for processed caspase-1, IL-1β, or GSDMD [41].
Troubleshooting: If signal is weak, verify caspase-1 specificity using caspase-1 inhibitors or knockout cells. For in vivo applications, optimize delivery route and timing relative to disease induction.
Biosensor Performance Characteristics
Quantitative performance data for various caspase-sensitive biosensors:
| Biosensor | Target Caspase | Fold Increase | Time Course | Applications |
|---|---|---|---|---|
| WEHD-HCy [41] | Caspase-1 | 11.8-fold | 8 hours | Inflammatory bowel disease, Salmonella infection, acute arthritis |
| YVAD-HCy [41] | Caspase-1 | 5.1-fold | 8 hours | Inflammasome activation models |
| CFP-LEVD-YFP [40] | Caspase-6/8 | FRET elimination | Hours-days | Flow cytometric monitoring in Jurkat/HeLa cells |
| ZipGFP-DEVD [42] | Caspase-3/7 | High signal:noise | Up to 120 hours | 2D monolayers, 3D spheroids, patient-derived organoids |
Biosensor Mechanism Visualization
Frequently Asked Questions (FAQs)
Q1: How do I determine whether to use a FRET-based biosensor versus a fluorophore-quencher system?
The choice depends on your experimental needs and equipment capabilities. FRET-based systems (CFP-YFP) are ideal for ratiometric measurements that normalize for expression levels and are excellent for tracking dynamics in single cells [40]. Fluorophore-quencher systems (like HCy-based sensors) typically offer higher signal-to-noise ratios and are better suited for in vivo imaging and whole-population measurements [41]. Consider your imaging equipment, need for quantification, and model system when selecting.
Q2: My biosensor shows unexpected background activation in control cells. What could be causing this?
Background activation can stem from several sources:
- Basal caspase activity: Some cell types have physiologically relevant basal caspase activity [40]. Include caspase inhibitor controls (z-VAD-FMK) to confirm specificity.
- Sensor overexpression: High expression levels may cause non-specific cleavage. Titrate expression levels and use moderate promoters.
- Cellular autofluorescence: Some cells (especially macrophages) exhibit autofluorescence. Use spectral unmixing or include untransfected controls.
- Non-apoptotic caspase functions: Caspases participate in other processes like differentiation. Include multiple apoptosis validation methods (Annexin V, morphology) [44].
Q3: How specific are these biosensors for individual caspases?
While biosensors are designed with optimal cleavage sequences, some cross-reactivity occurs. DEVD-based sensors primarily detect caspase-3 but are also cleaved by caspase-7 [42]. WEHD is optimal for caspase-1 but may be cleaved by related inflammatory caspases [41]. Always validate with specific caspase inhibitors or genetic approaches (knockouts) and use complementary methods like Western blotting to confirm which caspases are active.
Q4: Can I use these biosensors in 3D culture systems like organoids or spheroids?
Yes, recent advances have successfully adapted biosensors for 3D systems. The ZipGFP-DEVD caspase-3/7 reporter has been used in patient-derived organoids and spheroids [42]. Key considerations include:
- Ensuring adequate biosensor penetration throughout the 3D structure
- Using near-infrared or far-red fluorophores for better tissue penetration
- Accounting for potential hypoxia gradients that might affect apoptosis patterns
- Using confocal or light-sheet microscopy for optimal 3D imaging
Q5: How do I distinguish between apoptosis and other forms of cell death using these biosensors?
Caspase activation is characteristic of apoptosis but not necrosis or autophagic cell death. To distinguish:
- Combine with membrane integrity dyes (propidium iodide) - apoptotic cells exclude PI until late stages [43]
- Monitor multiple parameters simultaneously (caspase activation plus mitochondrial membrane potential using JC-1) [43]
- Assess morphology - apoptosis typically shows cell shrinkage and nuclear condensation
- Use additional markers for alternative death pathways (LC3 for autophagy, RIPK1 for necroptosis)
Troubleshooting Guide
| Problem | Potential Causes | Solutions |
|---|---|---|
| Weak or no signal | Insufficient caspase activation | Verify apoptosis induction with positive controls (staurosporine, etoposide) |
| Inadequate biosensor expression | Optimize transfection; use stronger promoters; confirm expression with constitutive marker | |
| Suboptimal cleavage sequence | Match sensor sequence to predominant caspases in your model (DEVD for executioner, WEHD for inflammasome) | |
| Signal in untreated controls | Basal caspase activity | Include caspase inhibitor controls; use cells with known low basal apoptosis |
| Sensor overexpression toxicity | Titrate expression levels; use inducible promoters | |
| Non-specific protease cleavage | Verify specificity with caspase-deficient cells or specific inhibitors | |
| Poor temporal resolution | Slow fluorescence maturation | Use rapidly maturing fluorophores; consider alternative designs (fluorophore-quencher) |
| Signal saturation | Reduce expression levels; use less sensitive detection settings | |
| Inconsistent results between technical replicates | Variable transfection efficiency | Use stable cell lines instead of transient transfection |
| Edge effects in culture plates | Use interior wells for experiments; maintain consistent culture conditions | |
| Cell density variations | Standardize seeding density and confirm consistency across replicates |
FAQs and Troubleshooting Guides
Frequently Asked Questions
Q1: What are the key markers for confirming apoptosis via IHC, and how do they relate to specific pathway activation?
Several key markers are used to confirm apoptosis and can provide insight into the specific pathway activated. The table below summarizes the primary markers and the pathways they indicate.
| Marker | Pathway Indicated | Key Insight |
|---|---|---|
| Active Caspase-3 [45] [46] | Common executioner of both intrinsic and extrinsic pathways | The main executioner caspase; its presence indicates active apoptosis. |
| Active Caspase-9 [47] | Intrinsic (Mitochondrial) Pathway | An initiator caspase for the intrinsic pathway, activated by cellular stress. |
| Cleaved PARP (c-PARP) [45] [46] | Downstream substrate of executioner caspases (3 & 7) | A key substrate cleaved by caspase-3 and -7; its presence confirms functional caspase activation. [45] |
| Active Caspase-7 [45] | Can be an executioner in caspase-3-deficient contexts | Can substitute for caspase-3 in some cells; use with caspase-3 to discriminate between apoptotic pathways. [45] |
Q2: I am getting weak or no staining for my apoptosis marker (e.g., active caspase-3). What could be the cause?
Weak or absent staining is a common issue. The table below outlines potential causes and solutions.
| Possible Cause | Test or Action |
|---|---|
| Inadequate Antigen Retrieval [48] | Use a microwave oven or pressure cooker for retrieval, not a water bath. Optimize the retrieval buffer and ensure it is fresh. [48] |
| Antibody Potency or Storage [49] [50] | Ensure the antibody is stored correctly and avoid freeze-thaw cycles. Test antibody potency on a known positive control tissue. [49] |
| Sample Over-fixation [50] | Reduce fixation time or use antigen retrieval to unmask epitopes altered by prolonged formalin fixation. |
| Inactive Detection System [49] | Verify the expiration date of your detection reagents. Test the enzyme-substrate reaction independently to ensure it is working. |
| Insufficient Epitope Availability | For phospho-specific antibodies or rare proteins, the sample may be truly negative. Always use a validated positive control. [48] |
Q3: My IHC staining has high background, making it difficult to interpret specific apoptosis signals. How can I reduce this?
High background can obscure specific staining. Here are the main causes and how to address them.
| Possible Cause | Test or Action |
|---|---|
| Endogenous Enzyme Activity [48] [49] | Quench endogenous peroxidases by incubating slides in 3% H₂O₂ for 10 minutes before primary antibody incubation. |
| Nonspecific Antibody Binding [49] [50] | Titrate the primary antibody to find the optimal concentration. Ensure adequate blocking with normal serum or BSA. |
| Endogenous Biotin [48] [49] | When using biotin-based detection, block endogenous biotin with a commercial blocking kit, especially in kidney and liver tissues. Use polymer-based detection systems to avoid this issue entirely. [48] |
| Secondary Antibody Cross-Reactivity [48] | Always include a control slide stained without the primary antibody. If background appears, use a secondary antibody that has been cross-adsorbed against the host species of your sample. |
| Inadequate Washing [48] | Wash slides thoroughly (e.g., 3 times for 5 minutes with TBST) after primary and secondary antibody incubations. |
The Scientist's Toolkit: Key Reagent Solutions
The following table details essential reagents and materials for successfully performing IHC detection of apoptosis.
| Item | Function / Explanation |
|---|---|
| Phospho-specific & Cleavage-Site Specific Antibodies | These are crucial for detecting activated, pro-apoptotic proteins like active caspase-3 and cleaved PARP, which are direct markers of ongoing apoptosis. [45] [46] |
| Polymer-Based Detection Reagents | These systems (e.g., SignalStain Boost) offer enhanced sensitivity compared to traditional avidin-biotin systems and avoid background from endogenous biotin. [48] |
| Antigen Retrieval Buffers | Essential for reversing formaldehyde-induced cross-links and exposing hidden epitopes. The optimal buffer (e.g., citrate, EDTA) should be determined empirically and prepared fresh. [48] |
| Controlled Positive Control Tissues | Tissues or TMAs with known apoptosis markers are non-negotiable for validating your staining protocol and antibody performance. [48] [51] |
| Specific Chemical Inducers (e.g., CID) | In research models, inducers like the CID for the iCaspase-9 (iC9) system allow for precise, temporal activation of the intrinsic apoptotic pathway to study its effects. [47] |
Experimental Workflow & Pathway Visualization
IHC Detection Points in Apoptotic Pathways
IHC Workflow for Apoptosis Detection
This technical support center provides detailed methodologies and troubleshooting guides for two fundamental functional assays in apoptosis research: measuring mitochondrial membrane potential (ΔΨm) and caspase activity. These assays are crucial for researchers and drug development professionals seeking to confirm the activation of specific cell death pathways. The intrinsic apoptotic pathway is characterized by mitochondrial outer membrane permeabilization, leading to a loss of ΔΨm, which precedes the activation of executioner caspases, such as caspase-3. This resource offers standardized protocols, identifies common experimental pitfalls, and provides solutions to ensure the generation of reliable, reproducible data in your research.
Measuring Mitochondrial Membrane Potential (ΔΨm)
Core Principles and Assay Kits
The mitochondrial membrane potential (ΔΨm) is the electrical potential difference across the inner mitochondrial membrane. It is generated by the proton pumps of the electron transport chain and is essential for ATP production through oxidative phosphorylation. A decrease in ΔΨm (depolarization) is a key early event in the intrinsic apoptotic pathway.
Commonly Used Fluorescent Dyes and Kits:
| Assay Type / Dye | Detection Method | Key Characteristics | Example Kit/Reference |
|---|---|---|---|
| TMRE (Tetramethylrhodamine, ethyl ester) | Flow Cytometry, Fluorescent Microscopy, Microplate Spectrophotometry | Cell-permeant, cationic, accumulates in active mitochondria; loss of fluorescence indicates depolarization. | TMRE-Mitochondrial Membrane Potential Assay Kit (ab113852) [52] |
| JC-1 | Flow Cytometry, Fluorescent Microscopy | Exhibits potential-dependent accumulation in mitochondria, indicated by a fluorescence emission shift from green (~529 nm) to red (~590 nm). | Cited in extracellular ATP-induced apoptosis study [53] |
| JC-10 | Microplate Spectrophotometry, Flow Cytometry | Analog of JC-1 with improved aqueous solubility. | JC-10 Assay Kits (ab112134, ab112133) [52] |
| Rhodamine 123 | Flow Cytometry, Fluorescence Microscopy | Cell-permeant, cationic, green-fluorescent dye that accumulates in active mitochondria. | - |
Detailed TMRE Assay Protocol
The TMRE assay is a widely used method for quantifying changes in ΔΨm in live cells [52].
Workflow Diagram: TMRE Assay Protocol
Materials:
- Complete TMRE Assay Kit (e.g., ab113852), containing TMRE stock solution and FCCP [52].
- Live cells (adherent or suspension).
- Appropriate cell culture media and buffers (PBS, PBS/0.2% BSA).
- Equipment: Flow cytometer, fluorescent microscope, or fluorescent microplate reader.
Step-by-Step Methodology:
- Positive Control Setup: Add the ionophore uncoupler FCCP (e.g., 10-100 µM) to a control sample of cells and incubate for 10 minutes at 37°C. FCCP abolishes ΔΨm, serving as a critical control for depolarization [52].
- Staining: Incubate both experimental and control cells with TMRE (typical working concentration 100-500 nM) for 15-30 minutes at 37°C, protected from light [52].
- Washing: Pellet suspension cells or remove media from adherent cells. Wash the cells gently with PBS or PBS containing 0.2% BSA to remove excess, unincorporated dye [52].
- Analysis: Resuspend cells in an appropriate buffer and analyze immediately.
- Flow Cytometry: Use a 488 nm laser for excitation and detect emission at ~575 nm. A shift to lower fluorescence indicates depolarization [52].
- Fluorescence Microscopy: Image cells using standard TRITC/Rhodamine filter sets. Healthy mitochondria appear bright red-orange [52].
- Microplate Reader: Use excitation/emission wavelengths of ~549/575 nm [52].
TMRE Assay Troubleshooting FAQs
Q1: My TMRE signal is too dim or absent across all samples. What could be wrong?
- A: Dye Concentration/Activity: Confirm the TMRE stock solution is fresh and has been stored correctly (-20°C). Perform a concentration gradient to determine the optimal staining concentration for your cell type.
- A: Cell Viability: Ensure cells are healthy and >90% viable at the start of the experiment. High levels of spontaneous cell death will reduce the overall signal.
- A: Instrument Settings: Verify the instrument (cytometer, microscope) settings and filters are correct for TMRE. Check for potential photobleaching by reducing laser power or exposure time.
Q2: The difference between my FCCP-treated control and untreated cells is minimal.
- A: FCCP Efficacy and Concentration: Titrate the FCCP concentration (e.g., test 10-100 µM) and ensure a sufficient incubation time (at least 10 min) to achieve complete depolarization. Confirm FCCP stock solution integrity [52].
- A: Assay Specificity: TMRE is a potentiometric dye, but it can also bind to other cellular membranes. The FCCP control is essential to confirm that the signal loss is specifically due to changes in ΔΨm.
Q3: Can I use fixed cells for the TMRE assay?
- A: No. TMRE staining is not compatible with cell fixation. The assay must be performed on live cells to provide an accurate measurement of membrane potential [52].
Measuring Caspase Activation
Core Principles and Detection Methods
Caspases are a family of cysteine-dependent proteases that are crucial mediators of apoptosis. Executioner caspases, such as caspase-3, are activated by proteolytic cleavage and are responsible for the morphological changes associated with apoptotic cell death.
Common Caspase Detection Methods:
| Method | Detection Principle | Key Characteristics | Example Kit/Reference |
|---|---|---|---|
| Anti-Activated Caspase Antibodies | Flow Cytometry, Immunofluorescence, Western Blot | Uses antibodies specific to the cleaved, active form of the caspase. Provides direct evidence of activation. | Flow cytometry with PE-anti-active caspase-3 [54] [53] |
| Fluorogenic Substrate Assays (DEVDase) | Spectrofluorometry, Flow Cytometry | Uses substrates (e.g., DEVD- AFC/AMC) cleaved by caspases, releasing a fluorescent product. Measures enzymatic activity. | - |
| Sandwich ELISA | Colorimetric / Chemiluminescent Detection | Uses antibodies to capture and detect the cleaved caspase. Highly sensitive and quantitative for cell lysates. | Human Caspase 3 (Cleaved) ELISA Kit (KHO1091) [55] |
| FRET-Based Sensors & Live-Cell Imaging | Fluorescence Microscopy | Uses engineered proteins where caspase cleavage disrupts FRET, allowing real-time monitoring in live cells. | Cutting-edge innovations [56] |
Detailed Protocol: Flow Cytometry for Cleaved Caspase-3
Flow cytometry using antibodies against the cleaved (activated) form of caspase-3 is a powerful method for detecting early apoptosis at the single-cell level, even before phosphatidylserine exposure [54].
Workflow Diagram: Cleaved Caspase-3 Flow Cytometry
Materials:
- Cells (untreated and apoptosis-induced).
- Fixation buffer (e.g., 4% paraformaldehyde).
- Permeabilization buffer (e.g., ice-cold methanol or commercial saponin-based buffers).
- Antibody: Phycoerythrin (PE)-conjugated anti-active caspase-3 antibody.
- Flow cytometry staining buffer (PBS with 1-2% FBS or BSA).
- Flow cytometer.
Step-by-Step Methodology:
- Cell Preparation: Harvest treated and control cells. Wash once with cold PBS.
- Fixation and Permeabilization: Fix cells with 4% PFA for 10-15 minutes at room temperature. Wash, then permeabilize cells with ice-cold 90% methanol or a commercial permeabilization buffer for 15-30 minutes on ice. This step is critical for antibody access to intracellular targets.
- Antibody Staining: Wash cells twice with flow cytometry staining buffer. Resuspend the cell pellet in staining buffer containing the PE-conjugated anti-active caspase-3 antibody. Incubate for 30-60 minutes at room temperature in the dark.
- Washing and Analysis: Wash cells twice to remove unbound antibody. Resuspend in staining buffer and analyze by flow cytometry using a 488 nm laser and detecting PE emission at ~575 nm. An increase in fluorescence in the PE channel indicates caspase-3 activation [54] [53].
Caspase Assay Troubleshooting FAQs
Q1: I see high background signal in my unstained/negative control in flow cytometry.
- A: Antibody Titration: The antibody concentration may be too high. Perform a titration experiment to find the optimal concentration that maximizes the signal-to-noise ratio.
- A: Insufficient Washing: Ensure adequate washing after the antibody incubation step to remove all unbound antibody.
- A: Non-Specific Binding: Include a species-matched isotype control to account for non-specific antibody binding. Adding a higher concentration of BSA (e.g., 2-3%) to the staining buffer can also help block non-specific sites.
Q2: My caspase activation data does not correlate with other apoptosis markers (e.g., Annexin V).
- A: Temporal Sequence of Apoptosis: This is a common and often expected finding. Caspase activation, particularly of caspase-3, can occur earlier than phosphatidylserine externalization (Annexin V binding) and the loss of mitochondrial membrane potential (ΔΨm) [54]. Analyze multiple time points to capture the kinetic sequence of apoptotic events.
- A: Caspase-Independent Apoptosis: In some cases, cell death may proceed via caspase-independent pathways. Correlate your findings with other viability and cell death assays.
Q3: Should I use an activity assay (DEVDase) or an antibody-based method (cleaved caspase-3)?
- A: Antibody-based methods (flow cytometry, ELISA, Western blot) directly measure the presence of the activated protease, confirming that the cleavage event has occurred. They are highly specific [55] [56].
- A: Activity-based assays (fluorogenic substrates) measure the enzymatic function of the active caspase. While also specific, they report on the functional capacity of the enzyme and can be adapted for high-throughput screening [56].
- Recommendation: Using both methods in parallel provides the most comprehensive confirmation, demonstrating both the proteolytic cleavage and the resultant enzymatic activity.
Integrated Data Interpretation and Pathway Confirmation
Pathway Context and Experimental Design
Confirming specific pathway activation in apoptosis requires a multi-faceted approach. The intrinsic (mitochondrial) pathway is characterized by an early loss of ΔΨm, followed by the activation of executioner caspases like caspase-3. The extrinsic (death receptor) pathway can activate caspases directly, which can then feed back to amplify mitochondrial dysfunction.
Diagram: Apoptotic Pathway Integration
The Scientist's Toolkit: Essential Research Reagent Solutions
| Item / Reagent | Function / Application | Example / Note |
|---|---|---|
| TMRE Assay Kit | A complete solution for measuring mitochondrial membrane potential via fluorescence. | Includes TMRE dye and FCCP uncoupler for validation [52]. |
| JC-1/JC-10 Dyes | Ratiometric dyes for ΔΨm; the J-aggregate/monomer shift provides an internal ratio metric. | Useful for confirming depolarization independent of dye concentration [52] [53]. |
| FCCP (Carbonyl cyanide 4-(trifluoromethoxy)phenylhydrazone) | A mitochondrial uncoupler used as a critical positive control to dissipate ΔΨm. | Validates that signal loss is due to specific depolarization [52]. |
| Anti-Active Caspase-3 Antibody (PE-conjugated) | Antibody for direct detection of cleaved, activated caspase-3 by flow cytometry or microscopy. | Enables early apoptosis detection at the single-cell level [54] [53]. |
| Cleaved Caspase-3 ELISA Kit | A highly sensitive and quantitative immunoassay for measuring cleaved caspase-3 in cell lysates. | Ideal for precise, well-based quantification [55]. |
| Fluorogenic Caspase Substrate (e.g., DEVD-AFC) | A peptide substrate that releases a fluorescent moiety upon cleavage by caspase-3/7. | Measures enzymatic activity in a plate reader format. |
| Flow Cytometer with 488nm Laser | Essential instrument for analyzing TMRE fluorescence and antibody-conjugated signals (e.g., PE). | Standard configuration allows for both assays. |
Beyond the Basics: Solving Common Problems in Apoptosis Assay Design
Troubleshooting Guide: Key Questions and Solutions
FAQ 1: My apoptosis inducer is not causing cell death. How do I check if it is working?
The efficacy of chemical inducers can vary significantly based on cell type, concentration, and treatment duration.
Solution: Verify the optimal working conditions for your specific cell line. The table below summarizes established protocols for common apoptosis inducers from reliable protocols [26].
Experimental Protocol for Chemical Induction:
- Cell Preparation: Inoculate adherent cells into 10 cm² tissue culture dishes or suspension cells into T75 flasks at a concentration of ~1 x 10⁶ cells/mL [26].
- Application of Inducer: Add the cellular-damaging agent at the recommended concentration (see Table 1). Prepare a negative control by adding an equal volume of the solvent (e.g., DMSO or H₂O) to control cells [26].
- Incubation and Harvest: Harvest cells at different time points (e.g., 8, 12, 16, 24, 48, and 72 hours) after addition of the agent. Not all reagents will affect a particular cell line in the same way, so a time course is essential [26].
- Detection: Proceed to detect apoptosis using your method of choice (e.g., flow cytometry for Annexin V/PI, western blot for caspase cleavage) [26].
Table 1: Common Apoptosis Inducers and Their Working Concentrations
| Inducer | Recommended Final Concentration | Stock Solvent | Primary Mechanism |
|---|---|---|---|
| Doxorubicin [26] | 0.2 µg/mL | H₂O | DNA damage; p53-dependent G1 arrest |
| Etoposide [26] | 1 µM | DMSO | DNA damage; topoisomerase II inhibitor |
| Staurosporine [26] | 1–10 µM | DMSO | Broad-spectrum kinase inhibitor |
| Camptothecin [26] | 2–10 µM | DMSO | DNA damage; topoisomerase I inhibitor |
| Raptinal [57] | 10–40 µM | DMSO | Rapid intrinsic pathway induction; acts downstream of BAX/BAK |
FAQ 2: How do I confirm my cell line model is appropriate for studying the intended apoptotic pathway?
A common pitfall is using a cell line that lacks the necessary components of the apoptotic pathway you wish to study.
Solution: Confirm the expression of key receptors and proteins in your cell line.
- For Extrinsic Pathway (e.g., via Fas/TRAIL receptors): This pathway requires cells to express specific death receptors on their surface [26]. Biological induction methods using anti-Fas antibodies provide specificity for receptor-bearing cells [26]. If your cells do not express the receptor, apoptosis will not be initiated via this route.
- For Intrinsic Pathway (e.g., via DNA damage): This pathway is more universal but can be influenced by the expression levels of pro- and anti-apoptotic Bcl-2 family proteins [20] [58]. Cell lines with high levels of anti-apoptotic proteins like Bcl-2 or Bcl-xL may be resistant [59].
Experimental Protocol: Validating Receptor/Protein Expression
- Sample Collection: Harvest untreated cells and prepare cell lysates using a suitable lysis buffer [26].
- Protein Detection: Perform western blotting to detect the presence of key proteins.
- Analysis: Always compare protein levels with a control cell line known to be sensitive to your chosen apoptosis inducer to confirm expression [26].
FAQ 3: I have confirmed receptor expression, but apoptosis is still not triggered. What could be wrong?
Even with receptor expression, downstream pathway disruptions or inadequate signaling can prevent cell death.
Solution: Systematically check the activation of key steps in the apoptotic cascade post-induction.
Experimental Protocol: Confirming Pathway Activation
- Induction and Lysate Preparation: Treat cells with your chosen inducer and prepare lysates at multiple time points (e.g., 0, 2, 4, 8 hours) [26].
- Western Blot Analysis: Probe for markers of pathway activation:
- Extrinsic Pathway: Look for cleavage of Caspase-8 and its downstream target Caspase-3 [20].
- Intrinsic Pathway: Look for cleavage of Caspase-9, release of cytochrome c from mitochondria (requires mitochondrial fractionation), and cleavage of Caspase-3 [20] [57]. The PARP protein is a classic substrate of executioner caspases; its cleavage is a strong indicator of apoptosis [20].
- Inhibition as a Control: Use pan-caspase inhibitors like Z-VAD-FMK or Q-VD-OPh. If cell death is prevented, it confirms that death is caspase-dependent apoptosis [20] [57].
Apoptosis Signaling Pathways
Diagram: Core Apoptosis Signaling Pathways
Experimental Workflow for Troubleshooting
Diagram: Troubleshooting Apoptosis Induction
The Scientist's Toolkit: Key Research Reagents
Table 2: Essential Reagents for Apoptosis Research
| Reagent / Tool | Function / Application | Key Examples / Notes |
|---|---|---|
| Chemical Inducers [26] [57] | Induce intrinsic or extrinsic apoptosis. | Staurosporine, Doxorubicin, Etoposide, Raptinal (rapid intrinsic). See Table 1 for concentrations. |
| Biological Inducers [26] | Activate specific death receptors. | Anti-Fas (CD95) monoclonal antibody, Recombinant TRAIL/TNF-α. |
| Caspase Inhibitors [26] [20] | Confirm caspase-dependent apoptosis; dissect pathway steps. | Z-VAD-FMK (pan-caspase inhibitor), Q-VD-OPh (broad-spectrum). |
| Antibodies for Detection [26] [20] | Detect protein expression and cleavage via Western Blot. | Anti-Caspase-3, -8, -9; Anti-PARP; Anti-Bcl-2 family proteins; Anti-Fas. |
| Flow Cytometry Assays [61] [62] | Quantify apoptotic cell population. | Annexin V / Propidium Iodide (PI) staining kit. |
| Cell Viability Assays [61] | Measure metabolic activity as an indicator of cell health. | MTT, MTS, XTT, WST-1/8, Resazurin assays. |
Frequently Asked Questions (FAQs)
FAQ 1: Why is timing so critical for accurately detecting apoptosis in my experiments? Apoptosis is a rapid, dynamic process with significant temporal variability. The initiation and peak of apoptotic events are not uniform across all cells in a population, influenced by factors such as cell cycle stage, local concentration of the therapeutic agent, and hypoxia [63]. Capturing key events like caspase activation or phosphatidylserine externalization requires alignment with their specific temporal windows post-treatment. Incorrect timing can lead to false negatives, as the signal may have already peaked and diminished before measurement [63].
FAQ 2: What are the primary pathways I need to consider when planning my timepoints? The two primary pathways are the intrinsic (mitochondrial) and extrinsic (death receptor) pathways, which converge on the activation of executioner caspases [4] [1].
- Intrinsic Pathway: Initiated by cellular stress (e.g., DNA damage), regulated by BCL-2 family proteins, leading to mitochondrial outer membrane permeabilization (MOMP) and cytochrome c release. This activates caspase-9 via the apoptosome [1] [3].
- Extrinsic Pathway: Triggered by ligand binding (e.g., TRAIL, Fas-L) to death receptors (e.g., DR4/5) on the cell surface, leading to the formation of the Death-Inducing Signaling Complex (DISC) and activation of caspase-8 [4].
FAQ 3: My apoptosis assay shows weak signal. Is this a problem with my dosage or my timepoints? It could be either, or both. A low dose may not trigger a robust apoptotic response, while an incorrectly timed assay may miss the peak of the response [63]. You should first perform a time-course experiment using a positive control (e.g., a known apoptosis inducer like staurosporine) to establish the kinetic profile for your specific model. Subsequently, conduct a dose-response analysis at the identified optimal timepoint to determine the effective concentration.
FAQ 4: What are the key executioner caspases, and when do they typically activate? Caspase-3 and caspase-7 are the key executioner caspases. They are activated downstream of both intrinsic and extrinsic pathways and are responsible for the proteolytic cleavage of hundreds of cellular substrates, leading to the characteristic morphological changes of apoptosis [3] [42]. Activation typically occurs hours after the initial apoptotic insult, but the exact timing is model-dependent [42] [63].
Troubleshooting Guides
Weak or No Signal in Caspase Activity Assays
Problem: You are unable to detect activated caspases in your assay.
Potential Causes and Solutions:
| Potential Cause | Solution |
|---|---|
| Incorrect Timepoint | The assay was performed before caspase activation peaked or after activity had declined. Solution: Perform a detailed time-course experiment, sampling every few hours post-induction (e.g., 2, 4, 6, 8, 12, 24 hours) to identify the signal peak [63]. |
| Insufficient Apoptotic Induction | The dosage or duration of your apoptosis inducer is too low. Solution: Conduct a dose-response curve and confirm cell death using a viability assay (e.g., MTT, trypan blue exclusion). Ensure your positive control is working. |
| IAP Overexpression | Cancer cells may overexpress Inhibitor of Apoptosis Proteins (IAPs) like XIAP, which directly bind and inhibit caspases [4]. Solution: Combine your treatment with SMAC mimetics to antagonize IAPs or use higher concentrations of the inducer. |
| Inefficient Lysis or Sample Preparation | Active caspases may not be efficiently extracted or the assay conditions are suboptimal. Solution: Follow a validated protocol for preparing samples for caspase activity assays or Western blotting [64]. |
Inconsistent Results in Flow Cytometry (Annexin V/PI)
Problem: Staining with Annexin V and/or Propidium Iodide (PI) is inconsistent between replicates or does not match other apoptosis readouts.
Potential Causes and Solutions:
| Potential Cause | Solution |
|---|---|
| Kinetic Nature of Phosphatidylserine (PS) Exposure | PS externalization is a transient event. Cells may progress through the Annexin V+/PI- stage (early apoptosis) very quickly to the Annexin V+/PI+ stage (late apoptosis/necrosis) [42]. Solution: Tightly control the time between induction, harvesting, and staining. Collect time points closely spaced (e.g., 1-2 hour intervals) to capture the population dynamics. |
| Harvesting-Induced Apoptosis | Mechanical stress during cell scraping can induce artifactual PS exposure. Solution: Where possible, use enzymatic dissociation (e.g., trypsin-EDTA, Accutase) which is generally gentler, though optimization is required as trypsin can also cleave surface proteins [64]. |
| Improper Gating | Debris or cell clumps are being included in the analysis. Solution: Use forward and side scatter gating to clearly isolate the single, intact cell population. Include unstained and single-stained controls for proper compensation and gating. |
Quantitative Data for Experimental Planning
Table 1: Exemplary Timepoints for Key Apoptotic Events Post-Induction
Data synthesized from literature surveys and experimental models. These are guidelines; empirical optimization is essential [42] [63].
| Apoptotic Event | Detection Method | Exemplary Peak Time Range (Post-Induction) | Notes |
|---|---|---|---|
| Early Signaling (e.g., Caspase-8 activation) | Western Blot (cleaved caspase-8) | 30 min - 4 hours | Extrinsic pathway; can be very rapid [3]. |
| Mitochondrial Membrane Permeabilization | Cytochrome c release assay, ΔΨm dyes | 1 - 6 hours | Key commitment step in intrinsic pathway [1]. |
| Executioner Caspase Activation (Caspase-3/7) | Fluorogenic DEVD assay, Western Blot, Live-cell reporter (ZipGFP) [42] | 4 - 24 hours | A key, definitive step to capture; timing varies widely by model and stimulus [42]. |
| Phosphatidylserine Externalization | Annexin V staining / Flow Cytometry | 2 - 12 hours | Transient event; early apoptotic marker [42]. |
| DNA Fragmentation | TUNEL Assay | 8 - 48 hours | Later-stage event [1]. |
Table 2: Reported Effective Dosages for Common Apoptosis Inducers
Dosages are model-dependent. Always conduct a dose-response curve in your system.
| Inducer | Primary Pathway Targeted | Exemplary Concentration Range | Model System Notes |
|---|---|---|---|
| Staurosporine | Intrinsic (Kinase inhibitor) | 0.1 - 2 µM | Broad-spectrum inducer; commonly used as a positive control. |
| TRAIL/Apo2L | Extrinsic (DR4/5 agonist) | 10 - 100 ng/mL | Selective for cancer cells; some lines are resistant [4]. |
| ABT-199 (Venetoclax) | Intrinsic (BCL-2 inhibitor) | 1 - 100 nM | FDA-approved for CLL and AML; specific to BCL-2 [4]. |
| Carfilzomib | Intrinsic (Proteasome inhibitor) | 5 - 50 nM | Used in validated caspase-3/7 reporter systems [42]. |
| Oxaliplatin | Intrinsic (DNA damage) | 10 - 100 µM | Chemotherapy agent; induces DNA cross-linking [42]. |
Experimental Protocols
Protocol: Time-Course Assay for Caspase-3/7 Activity Using a Fluorogenic Substrate
Principle: This protocol measures the kinetic activity of executioner caspases-3 and -7 in cell lysates using a fluorogenic substrate (e.g., Ac-DEVD-AFC). Upon cleavage, the fluorophore is released, producing a quantifiable signal [42].
Materials:
- Cells treated with apoptosis inducer.
- Caspase lysis buffer.
- Fluorogenic caspase-3/7 substrate (e.g., Ac-DEVD-AFC).
- Assay buffer (e.g., HEPES, pH 7.4).
- 96-well plate (black-walled, clear-bottom is ideal).
- Plate-reading fluorometer.
Method:
- Treatment & Harvest: At each predetermined timepoint (e.g., 0, 2, 4, 8, 12, 24h post-induction), harvest cells by gentle centrifugation.
- Lysate Preparation: Lyse cell pellets on ice with an appropriate volume of caspase lysis buffer for 15-30 minutes. Centrifuge at high speed (e.g., 12,000-15,000 x g) for 15 minutes at 4°C to remove cellular debris.
- Protein Quantification: Determine the protein concentration of the supernatant (e.g., via Bradford assay).
- Reaction Setup: In a 96-well plate, combine a consistent amount of protein (e.g., 50 µg) from each lysate with assay buffer and the fluorogenic substrate (final concentration ~50 µM). Bring the total volume to 100-200 µL per well.
- Incubation and Measurement: Incubate the plate at 37°C and measure the fluorescence (e.g., Excitation/Emission ~400/505 nm for AFC) at regular intervals (e.g., every 15-30 minutes) for 1-3 hours.
- Data Analysis: Calculate the rate of fluorescence increase (slope) for each sample, normalized to total protein. Plot the activity versus time to identify the peak of caspase activation.
Protocol: Real-Time Live-Cell Imaging of Apoptosis Using a Fluorescent Reporter
Principle: This protocol utilizes stable cell lines expressing a fluorescent biosensor (e.g., ZipGFP) for caspase-3/7 activity, allowing for dynamic, single-cell tracking of apoptosis in real-time [42].
Materials:
- Stable reporter cell line (e.g., expressing ZipGFP-based caspase-3/7 reporter and constitutive mCherry).
- Apoptosis inducer.
- Pan-caspase inhibitor (e.g., zVAD-FMK, for negative control).
- Live-cell imaging system (e.g., IncuCyte or confocal microscope with environmental chamber).
- Appropriate cell culture plates for imaging (e.g., 96-well glass-bottom plates).
Method:
- Seeding and Treatment: Seed reporter cells into the imaging plate and allow to adhere. Treat cells with the apoptosis inducer and controls (e.g., vehicle and zVAD-FMK co-treatment).
- Image Acquisition: Place the plate in the live-cell imager maintained at 37°C and 5% CO₂. Program the system to capture images (both GFP and mCherry/mCherry channels) from multiple fields of view at regular intervals (e.g., every 1-4 hours) for the duration of the experiment (e.g., 48-120 hours).
- Data Analysis:
- Kinetics: Quantify the mean GFP fluorescence intensity per well or the percentage of GFP-positive cells over time.
- Validation: Use the constitutive mCherry signal to normalize for cell presence and to monitor viability loss over the long term via automated cell counting algorithms [42].
- Specificity: Confirm caspase-specificity by demonstrating signal suppression with zVAD-FMK.
Signaling Pathways and Experimental Workflows
Apoptotic Signaling Pathways
Experimental Workflow for Kinetic Analysis
The Scientist's Toolkit: Key Research Reagents
Table 3: Essential Reagents for Apoptosis Pathway Confirmation
| Reagent Category | Specific Example(s) | Primary Function / Target | Key Consideration |
|---|---|---|---|
| Pathway-Specific Inducers | TRAIL (dulanermin); ABT-199 (Venetoclax); Staurosporine | Selectively activate extrinsic pathway (DR4/5), inhibit BCL-2, or broadly induce intrinsic pathway. | Use to confirm which pathway is operative in your model. Resistance can occur [4]. |
| Caspase Activity Probes | Fluorogenic substrates (Ac-DEVD-AFC); Live-cell reporters (ZipGFP-DEVD) [42] | Directly measure the enzymatic activity of executioner caspases-3/7. | DEVD is the canonical cleavage sequence. Live-cell reporters enable real-time kinetics [42]. |
| Caspase Inhibitors | zVAD-FMK (pan-caspase inhibitor) | Irreversibly inhibits a broad range of caspases. | Essential control to confirm caspase-dependence of observed cell death [42]. |
| Antibodies for Western Blot | Anti-cleaved caspase-3, -8, -9; Anti-cleaved PARP | Detect specific, activated forms of caspases and a key executioner substrate (PARP). | Cleavage indicates activation. Provides a snapshot of pathway engagement at harvest [42]. |
| Flow Cytometry Reagents | Annexin V (conjugated to fluorophores); Propidium Iodide (PI) | Detect phosphatidylserine exposure on the outer membrane (early apoptosis) and loss of membrane integrity (late apoptosis/necrosis), respectively [42]. | Distinguishes stages of cell death. Timing is critical due to transient nature of PS exposure. |
Confirming the activation of a specific cell death pathway is a critical challenge in biomedical research. The morphological and biochemical hallmarks of apoptosis, necrosis, and other regulated cell death pathways can overlap, leading to misinterpretation of experimental results. This technical support guide provides clear methodologies and troubleshooting advice to help researchers accurately distinguish between these pathways, ensuring the validity of conclusions about pathway activation in apoptosis experiments.
FAQ: Fundamental Concepts and Distinctions
What are the primary morphological differences between apoptosis and necrosis?
Apoptosis and necrosis present with distinct morphological features, which are summarized in the table below.
Table 1: Morphological and Physiological Differences Between Apoptosis and Necrosis
| Feature | Apoptosis | Necrosis |
|---|---|---|
| Cell Size | Shrinkage (pyknosis) | Swelling (oncosis) |
| Plasma Membrane | Blebbing, intact integrity, formation of apoptotic bodies | Loss of integrity, rupture |
| Nucleus | Chromatin condensation, fragmentation (karyorrhexis) | Condensation and disintegration |
| Mitochondria | Decrease in membrane potential, swelling | Swelling and fragmentation |
| Inflammation | Typically none | Prominent inflammatory response |
| Energy Requirement | ATP-dependent | ATP-independent |
| Post-death Clearance | Phagocytosis by neighboring cells | Cell lysis [65] |
Why is it insufficient to rely on a single assay to confirm apoptosis?
A single assay often measures only one parameter of cell death, which may not be exclusive to apoptosis. For example, a positive TUNEL assay indicates DNA fragmentation but can also occur in late-stage necrosis or other cell death forms [66]. The Nomenclature Committee on Cell Death (NCCD) recommends that a cell be considered dead only after it has lost plasma membrane integrity, undergone complete disintegration, or been engulfed in vivo. To accurately confirm apoptosis, it is essential to perform multiple, methodologically unrelated assays that assess different hallmarks of the process, such as caspase activation, phosphatidylserine externalization, and characteristic nuclear morphology [66].
What are the common pitfalls in flow cytometry analysis of apoptosis?
Common pitfalls in flow cytometry include:
- Over-reliance on Annexin V/PI: Annexin V binds to phosphatidylserine exposed on the outer leaflet of the plasma membrane, an early event in apoptosis. However, this exposure can also occur in other conditions, and necrotic cells with permeable membranes will also be positive for propidium iodide (PI). The appropriate gating strategy is crucial for distinguishing early apoptotic (Annexin V+/PI-), late apoptotic (Annexin V+/PI+), and necrotic (Annexin V-/PI+) populations [67] [68].
- Misinterpretation of DNA Fragmentation: Assays that detect DNA fragmentation, like the TUNEL assay, can yield positive results not only in apoptosis but also in necrotic cells undergoing random DNA degradation [67].
- Improper Sample Preparation: Fixation and permeabilization steps can artificially alter the staining profile of cells, leading to false positives or negatives [67].
FAQ: Troubleshooting Experimental Issues
How can I determine if cell death is apoptotic when caspase inhibitors do not provide complete protection?
If cell death is not fully inhibited by caspase inhibitors, it suggests the involvement of non-apoptotic or alternative cell death pathways.
- Consider Necroptosis: Caspase-8 inhibition can, in certain contexts, promote necroptosis, a form of programmed necrosis. In this pathway, receptor-interacting protein kinases 1 and 3 (RIPK1/RIPK3) form the necrosome, which phosphorylates Mixed Lineage Kinase Domain-Like (MLKL). Phosphorylated MLKL oligomerizes and inserts into the plasma membrane, causing lytic cell death [65]. This process can be inhibited by specific necroptosis inhibitors like Necrostatin-1 (targeting RIPK1).
- Assess for Other Pathways: Explore other caspase-independent pathways such as ferroptosis (an iron-dependent form of death characterized by lipid peroxidation) or pyroptosis (a caspase-1-dependent inflammatory cell death) [69] [70]. Using a panel of specific inhibitors for these pathways can help identify the primary mechanism.
My flow cytometry data shows a high percentage of Annexin V+/PI+ cells. Does this confirm late-stage apoptosis?
While a population of Annexin V+/PI+ cells is often interpreted as late apoptosis, it is not conclusive. This staining pattern can also indicate:
- Primary Necrosis: Cells that have undergone unregulated necrosis will also be positive for both markers due to the loss of membrane integrity.
- The Kinetics of Cell Death: To distinguish between these possibilities, perform a time-course experiment. In apoptosis, you should observe a progression of cells from an Annexin V-/PI- (viable) to Annexin V+/PI- (early apoptotic) and finally to Annexin V+/PI+ (late apoptotic) state. A static measurement showing only Annexin V+/PI+ cells is ambiguous [67] [66]. Corroborate with other assays, such as analysis of nuclear morphology or caspase activation, to confirm the apoptotic nature of the death.
Key Methodologies and Detection Strategies
Accurate discrimination of cell death modalities requires a multi-parametric approach. The following diagram and table outline a logical workflow and the key biochemical markers for identifying different pathways.
Diagram 1: Logical workflow for discriminating cell death mechanisms.
Table 2: Key Biomarkers and Functional Assays for Regulated Cell Death (RCD)
| Cell Death Type | Key Biomarkers | Recommended Detection Methods |
|---|---|---|
| Apoptosis | Caspase-3/7 activation, Phosphatidylserine exposure, Cytochrome c release, DNA fragmentation (laddering) | Annexin V/PI flow cytometry, Caspase activity assays, TUNEL assay, Western blot (cleaved PARP, caspases) [69] [65] |
| Necroptosis | Phospho-RIPK1, Phospho-RIPK3, Phospho-MLKL (pMLKL) | Western blot (pRIPK3, pMLKL), Immunofluorescence (MLKL membrane translocation) [69] [65] |
| Pyroptosis | Caspase-1 activation, Gasdermin D (GSDMD) cleavage, IL-1β release | Western blot (cleaved Caspase-1, GSDMD), ELISA (IL-1β) [69] |
| Ferroptosis | Lipid peroxidation, GPX4 inactivation, ROS production | Lipid peroxidation probes (C11-BODIPY), GPX4 activity assay, Iron chelators (e.g., Deferoxamine) [69] |
Detailed Protocol: Multi-Parametric Assessment of Apoptosis
This protocol combines several methods to robustly confirm apoptosis.
Objective: To distinguish apoptosis from necrosis using a combination of morphological assessment, flow cytometry, and protein analysis.
Materials:
- Cell culture and treatment reagents
- Annexin V binding buffer
- Fluorescently conjugated Annexin V
- Propidium Iodide (PI) solution
- Hoechst 33342 or DAPI nuclear stain
- Lysis buffer for Western blotting
- Antibodies against cleaved caspase-3 and β-actin
Procedure:
- Induction and Harvest: Treat cells with your apoptotic inducer and appropriate controls (e.g., untreated, necrosis control with H~2~O~2~). Harvest both adherent and floating cells to avoid bias.
- Morphological Analysis (Nuclear Condensation):
- Resuspend a pellet of cells in culture medium containing a nuclear stain (e.g., Hoechst 33342 at 1 µg/mL).
- Incubate for 15-20 minutes at 37°C.
- Place a drop of cell suspension on a slide and visualize under a fluorescence microscope. Apoptotic cells will show brightly stained, condensed, and fragmented nuclei compared to the diffuse staining of viable cells [68] [66].
- Flow Cytometry (Annexin V/PI Staining):
- Resuspend 1x10^5^ to 1x10^6^ cells in 100 µL of Annexin V binding buffer.
- Add fluorescently conjugated Annexin V and PI according to the manufacturer's instructions.
- Incubate for 15 minutes at room temperature in the dark.
- Add 400 µL of binding buffer and analyze by flow cytometry within 1 hour.
- Interpretation: Gate populations as viable (Annexin V-/PI-), early apoptotic (Annexin V+/PI-), late apoptotic (Annexin V+/PI+), and necrotic (Annexin V-/PI+). A strong population in the early and late apoptotic quadrants supports apoptotic induction [68] [66].
- Western Blot Analysis (Caspase Activation):
- Lyse cells from the same treatment conditions in RIPA buffer.
- Separate proteins by SDS-PAGE and transfer to a nitrocellulose membrane.
- Probe the membrane with an antibody specific for cleaved caspase-3. This is a critical confirmation, as it detects the active form of this key executioner caspase.
- Re-probe the membrane for a loading control like β-actin.
- Interpretation: The appearance of a band for cleaved caspase-3 in the induced sample, but not in the untreated control, provides biochemical evidence of apoptotic pathway activation [69] [65].
The Scientist's Toolkit: Research Reagent Solutions
Table 3: Essential Reagents for Cell Death Research
| Reagent / Assay | Function / Target | Key Application |
|---|---|---|
| Annexin V (FITC conjugate) | Binds phosphatidylserine exposed on the outer membrane | Flow cytometry to detect early apoptosis [68] [65] |
| Propidium Iodide (PI) | DNA intercalating dye that stains cells with compromised membranes | Flow cytometry to distinguish viable from dead cells [68] |
| Z-VAD-FMK (pan-caspase inhibitor) | Irreversibly inhibits a broad range of caspases | Functional confirmation of caspase-dependent apoptosis [1] [70] |
| Anti-Cleaved Caspase-3 Antibody | Detects the activated form of caspase-3 | Western blot or IF to confirm executioner caspase activation [69] [65] |
| Hoechst 33342 / DAPI | Cell-permeable and impermeable nuclear stains, respectively | Fluorescence microscopy to assess nuclear morphology (condensation, fragmentation) [68] [66] |
| Anti-phospho-MLKL Antibody | Detects the active form of MLKL | Western blot or IF to confirm necroptosis induction [69] [65] |
| C11-BODIPY 581/591 | Fluorescent sensor for lipid peroxidation | Flow cytometry or microscopy to detect ferroptosis [69] |
| Necrostatin-1 (Nec-1) | Selective inhibitor of RIPK1 | Functional confirmation of necroptosis [65] |
Why are proper controls non-negotiable in apoptosis research?
In apoptosis research, proper controls are the foundation for reliable data interpretation. Apoptosis is a transient process with rapidly changing protein modifications, making it easy to miss key events or mistake nonspecific effects for true pathway activation [71]. Controls allow you to:
- Verify your assay is working.
- Confirm specific apoptotic pathway induction.
- Rule out off-target or nonspecific effects.
- Troubleshoot failed experiments effectively.
Without controls, you cannot be certain if your results are a true biological response or an artifact of experimental error.
FAQs and Troubleshooting Guides
FAQ 1: What is the minimum set of controls I need for a basic apoptosis induction experiment?
For any experiment designed to confirm specific pathway activation, a three-control design is essential:
- Untreated Control: Cells under normal growth conditions. This establishes the baseline, non-apoptotic state of your markers.
- Induced (Positive) Control: Cells treated with a known, potent apoptosis inducer. This control verifies that your detection methods (e.g., antibodies, assays) can successfully identify apoptosis when it happens.
- Inhibitor-Treated Control: Cells treated with both the inducer and a specific caspase inhibitor (e.g., Z-VAD-FMK). This confirms that the observed cell death is specifically due to apoptotic caspase activation.
FAQ 2: My western blot shows no cleaved caspase-3 after treatment with my experimental compound. What could be wrong?
This common issue can be systematically diagnosed using your controls. Follow this troubleshooting workflow:
FAQ 3: How do I choose the right positive control inducer for my experiment?
The choice of inducer depends on which apoptotic pathway you wish to activate. Using a pathway-specific inducer helps interpret which branch your experimental compound might be triggering.
| Inducer | Pathway Targeted | Common Working Concentration | Mechanism of Action |
|---|---|---|---|
| Etoposide [71] | Intrinsic | 25 µM (e.g., in Jurkat cells, 5 hrs) [71] | Causes DNA damage by inhibiting topoisomerase II, leading to p53 activation and mitochondrial apoptosis. |
| Cytochrome c (in cell-free systems or with permeabilization) [71] | Intrinsic | N/A (Used in cytoplasmic extracts) [71] | Directly triggers the formation of the apoptosome and activation of caspase-9. |
| Anti-Fas Antibody (for Fas-sensitive cells) | Extrinsic | Varies by cell line | Activates the Fas death receptor, directly recruiting FADD and activating caspase-8 [72]. |
| TNF-α (often with a sensitizer like cycloheximide) | Extrinsic | Varies by cell line | Binds to TNF receptors, potentially initiating apoptosis through caspase-8 activation [20]. |
FAQ 4: My flow cytometry Annexin V data is inconclusive. What are the critical steps often missed?
Annexin V binding is calcium-dependent and detects early apoptosis, while propidium iodide (PI) stains late apoptotic and necrotic cells [43]. Inconclusive results often stem from poor protocol execution.
- Critical Step 1: Avoid Chelators. The binding buffer must contain calcium chloride and must NOT contain EDTA or EGTA, as these chelate calcium and abolish Annexin V binding [73].
- Critical Step 2: No Post-Stain Wash. After adding PI, do not wash the cells [73]. Washing will remove the PI from dead cells, leading to inaccurate results.
- Critical Step 3: Include Essential Controls. For clean flow cytometry data, you must run the following single-stain and control samples to set compensation and gating accurately:
- Unstained cells
- Annexin V only
- PI only
- Untreated cells
- Induced (apoptotic) cells
The Scientist's Toolkit: Key Research Reagent Solutions
| Reagent / Kit | Function in Apoptosis Detection | Key Considerations |
|---|---|---|
| Caspase-3/7 Luminescent Assay [15] | Measures activity of key executioner caspases. Highly sensitive and amenable to HTS. | Luminogenic substrates (e.g., Caspase-Glo) are 20-50x more sensitive than fluorogenic versions [15]. |
| Annexin V-FITC / PI Kit [43] [73] | Detects PS externalization (early apoptosis) and loss of membrane integrity (late apoptosis/necrosis). | Requires calcium-containing buffer. Distinguishes early apoptotic (Annexin V+/PI-), late apoptotic (Annexin V+/PI+), and necrotic (Annexin V-/PI+) cells [43]. |
| Caspase Inhibitor (e.g., Z-VAD-FMK) | A pan-caspase inhibitor used to confirm that cell death is caspase-dependent apoptosis. | A critical control to include with your inducer to demonstrate specificity of the apoptotic response. |
| JC-1 Dye [43] | A mitochondrial membrane potential dye. Healthy mitochondria form red fluorescent aggregates; apoptotic mitochondria remain green. | A decrease in the red/green fluorescence ratio is a strong indicator of mitochondrial depolarization, an early intrinsic apoptosis event [43]. |
| Control Cell Extracts (e.g., from CST) [71] | Pre-made lysates from induced and uninduced cells. Act as perfect positive and negative controls for western blotting. | Ensures your antibodies and western blot protocol are working, isolating troubleshooting to your sample preparation [71]. |
| PARP Antibody [74] [18] | Detects cleavage of PARP (from full-length ~116 kDa to ~89 kDa fragment), a hallmark substrate of executioner caspases. | A classic and robust marker for apoptosis. Always probe for both full-length and cleaved forms. |
Experimental Protocols for Key Apoptosis Assays
This is a homogeneous, "add-mix-read" protocol ideal for high-throughput screening.
- Cell Plating: Plate cells in an opaque-walled, white microplate for optimal luminescence signal detection.
- Treatment: Treat cells with your experimental compound, positive control inducer (e.g., 25 µM Etoposide), and vehicle control.
- Equilibrate Reagents: Thaw and equilibrate the Caspase-Glo 3/7 reagent to room temperature.
- Add Reagent: Add an equal volume of Caspase-Glo 3/7 reagent to each well.
- Mix and Incubate: Mix contents gently on a plate shaker and incubate at room temperature for 30-60 minutes (optimize time for your cell type).
- Measure Luminescence: Read the plate using a luminometer. The signal, in Relative Luminescence Units (RLU), is proportional to caspase-3/7 activity.
This protocol is for suspension cells or trypsinized adherent cells. Note: Use gentle trypsinization for adherent cells, as harsh treatment can cause false-positive PS externalization.
- Harvest and Wash: Harvest cells and pellet by centrifugation at 300 x g for 5 minutes. Wash cells once with PBS.
- Resuspend in Binding Buffer: Resuspend cell pellet in 1X Annexin V Binding Buffer at a concentration of 1-5 x 10^6 cells/mL. Ensure your buffer contains Ca²⁺. [73]
- Stain with Annexin V: Add 5 µL of fluorochrome-conjugated Annexin V to 100 µL of cell suspension. Incubate for 15 minutes at room temperature in the dark.
- Add PI and Analyze: Add 10 µL of Propidium Iodide (PI) solution to the cells. Do not wash. Analyze by flow cytometry within 60 minutes [73].
This protocol outlines the key steps for detecting classic apoptosis markers like cleaved caspases and PARP.
- Cell Lysis: Lyse cells in a suitable RIPA buffer supplemented with protease and phosphatase inhibitors immediately after treatment.
- Protein Quantification: Determine protein concentration of each lysate using a BCA or Bradford assay.
- SDS-PAGE: Load equal amounts of protein (e.g., 20-30 µg) and separate by SDS-PAGE.
- Transfer: Transfer proteins from the gel to a nitrocellulose or PVDF membrane.
- Blocking: Block the membrane with 5% non-fat milk or BSA in TBST for 1 hour.
- Primary Antibody Incubation: Incubate with primary antibodies against your target proteins (e.g., Cleaved Caspase-3, Cleaved PARP, Total Caspase-3, Bcl-2) diluted in blocking buffer overnight at 4°C.
- Washing and Secondary Incubation: Wash membrane and incubate with an HRP-conjugated secondary antibody for 1 hour.
- Detection: Detect bands using enhanced chemiluminescence (ECL) reagent and image.
Interpretation: Look for the appearance of cleaved fragments (e.g., Cleaved Caspase-3 at ~17/19 kDa, Cleaved PARP at ~89 kDa) in the induced control and, if applicable, your treated samples. The inhibitor control should show a reduction or absence of these cleaved fragments [71] [18].
Apoptosis Signaling Pathways: A Visual Guide
The two main pathways converge on the activation of executioner caspases. The diagram below illustrates the key components and their interactions.
Frequently Asked Questions (FAQs)
1. Why does my control sample show low cell viability or spontaneous apoptosis? Low viability in control samples can occur if cells are over-confluent, starved due to nutrient depletion in the medium, or subjected to rough handling during mechanical or enzymatic dissociation (e.g., over-trypsinization) [75] [76]. For long-term treatments, ensure you replace the culture medium regularly to prevent nutrient exhaustion, which can trigger spontaneous apoptosis [75].
2. I am using Annexin V/PI staining, but I see no positive signals in my treated group. What could be wrong? This can happen if the apoptosis-inducing treatment is too mild (insufficient concentration or duration) or due to operational errors, such as forgetting to add a dye or washing the cells after staining, which removes the bound Annexin V [76] [77]. Always include a positive control (e.g., cells treated with a known apoptosis inducer like staurosporine) to verify your kit and protocol are functioning correctly [78].
3. My flow cytometry plots show unclear cell population clustering. How can I improve this? Poor clustering can be caused by high cellular autofluorescence, a generally poor cell state where many cells have non-specifically exposed phosphatidylserine (PS), or insufficient dye concentration [77]. Using healthy, log-phase cells, selecting fluorochromes that don't overlap with cellular autofluorescence, and ensuring optimal dye concentrations can help achieve better population separation [76].
4. Why am I seeing a high background or false-positive signals in my TUNEL assay? In TUNEL assays, false positives are often due to extensive DNA damage from improper sample fixation, such as using acidic fixatives or fixing for too long [79]. Optimize your protocol by using a neutral-buffered 4% paraformaldehyde solution, controlling the fixation time, and carefully titrating the Proteinase K concentration and incubation time to avoid disrupting nucleic acid structures [79].
Troubleshooting Guide for Common Artefacts
The table below summarizes frequent issues, their potential causes, and verified solutions.
| Common Problem | Primary Causes | Recommended Solutions |
|---|---|---|
| High background / False positives [79] [80] | Improper fixation; Over-incubation with stain; Contaminated reagents; Cellular autofluorescence. | Use neutral pH fixative; Optimize staining time; Include controls; Choose non-overlapping fluorophores [76] [79]. |
| Weak or absent signal [76] [79] [77] | Insufficient apoptosis induction; Reagent degradation (e.g., TdT enzyme); Omission of key reagents (e.g., PI); Forgetting to collect detached cells. | Include a positive control; Use fresh reagents; Verify all staining steps; Collect all cells (both adherent and in supernatant) [75] [76]. |
| Unclear population clustering in Flow Cytometry [76] [77] | Poor compensation; Spectral overlap; Poor cell health; Excessive handling. | Use single-stain controls for compensation; Select dyes with minimal spectral overlap; Use healthy cells; Handle gently [76] [78]. |
| Low cell viability in control samples [75] [76] | Over-confluence; Nutrient starvation; Rough detachment (trypsin/EDTA); Extended incubation post-staining. | Use sub-confluent cultures; Refresh medium regularly; Use gentle, EDTA-free dissociation enzymes (e.g., Accutase); Analyze samples promptly [75] [76]. |
| Inconsistent results between replicates [81] [82] | Inaccurate pipetting; Improper reagent storage; Clogged flow cytometer probe; Equipment out of calibration. | Calibrate pipettes; Equilibrate all reagents to room temperature; Clean instrument probe; Perform regular instrument calibration [81] [82]. |
Essential Experimental Protocols
Protocol 1: Annexin V/Propidium Iodide (PI) Staining for Flow Cytometry
This protocol is a cornerstone for distinguishing between viable, early apoptotic, and late apoptotic/necrotic cells [78].
Key Reagent Solutions:
- Annexin V-FITC: A fluorescently conjugated protein that binds to phosphatidylserine (PS) exposed on the outer leaflet of the cell membrane in early apoptosis. The binding is calcium-dependent [76] [78].
- Propidium Iodide (PI): A DNA-intercalating dye that is impermeable to live and early apoptotic cells. It stains cells that have lost membrane integrity (late apoptosis and necrosis) [78].
- Binding Buffer: Provides the calcium ions necessary for Annexin V binding and maintains an optimal osmotic pressure to preserve cell integrity during staining [77] [78].
- EDTA-free Dissociation Enzyme (e.g., Accutase): Gently detaches adherent cells without chelating calcium or damaging the cell membrane, which is crucial for accurate Annexin V binding [76].
Workflow:
- Cell Preparation: Gently harvest adherent cells using a non-enzymatic or EDTA-free dissociation method to preserve membrane integrity. For suspension cells, collect directly. Wash cells once with cold PBS [78].
- Resuspension: Resuspend the cell pellet in 1X Binding Buffer at a concentration of 1x10^6 cells/mL [78].
- Staining: Aliquot 100 µL of cell suspension into a flow cytometry tube. Add 5 µL of Annexin V-FITC and 5 µL of PI solution. Gently vortex to mix [78].
- Incubation: Incubate at room temperature for 15 minutes in the dark [78].
- Analysis: Within 1 hour, add 400 µL of Binding Buffer to each tube and analyze by flow cytometry. Keep samples on ice if analysis is delayed [76] [78].
Protocol 2: Sample Preparation for Accurate Assessment of Adherent Cell Viability
This protocol highlights a critical step often overlooked when working with adherent cells, ensuring the analysis captures the entire cell population [75].
Workflow:
- Treat Cells: Apply the experimental treatment to the adherent cells.
- Collect Supernatant: Carefully transfer the culture medium (which contains dead and dying cells that have detached) to a centrifuge tube.
- Harvest Adherent Cells: Gently detach the remaining adherent cells using trypsin-EDTA or a similar agent and transfer them to the same tube as the supernatant collection.
- Centrifuge: Pellet all cells from the combined sample by centrifugation.
- Wash and Analyze: Proceed with your chosen viability or apoptosis assay (e.g., Annexin V/PI staining, trypan blue exclusion) on the complete cell pellet.
The Scientist's Toolkit: Key Reagent Solutions
| Reagent / Material | Function | Key Consideration |
|---|---|---|
| Annexin V (FITC, PE, etc.) | Binds to externalized Phosphatidylserine (PS) to detect early apoptosis [76] [78]. | Calcium-dependent binding. Avoid using trypsin-EDTA for cell harvesting, as EDTA chelates calcium and inhibits binding [76]. |
| Viability Dyes (PI, 7-AAD) | Membrane-impermeable dyes that stain DNA in cells with compromised membranes (late apoptosis/necrosis) [83] [78]. | Distinguishes late apoptotic from early apoptotic cells. Can be combined with Annexin V for a more complete picture [78]. |
| EDTA-free Dissociation Reagents (e.g., Accutase) | Gently detaches adherent cells without chelating calcium or damaging surface epitopes [76]. | Preserves Annexin V binding sites and overall cell health, leading to more accurate results [76]. |
| Binding Buffer (with Ca²⁺) | Provides the necessary ionic environment for optimal Annexin V binding to PS [77] [78]. | Incorrect dilution can alter osmotic pressure and induce apoptosis. Always prepare according to manufacturer instructions [77]. |
| DNase I | Used to create a positive control for the TUNEL assay by intentionally fragmenting DNA [79]. | Essential for validating that a failed TUNEL assay is due to sample/preparation issues, not reagent failure [79]. |
Decision Framework for Apoptosis Assay Validation
This diagram outlines a logical path to confirm that your observed cell death is specifically due to apoptosis and not other forms of regulated cell death.
Ensuring Specificity: Validation Strategies and Comparative Analysis of Techniques
This technical support center is designed to serve researchers, scientists, and drug development professionals focused on validating specific pathway activation in apoptosis experiments. A cornerstone of this research involves using genetic tools like siRNA knockdown alongside pharmacological agents such as caspase inhibitors to establish a causal relationship between a gene of interest and apoptotic cell death. Proper execution and interpretation of these experiments are critical for confirming that an observed phenotype is specifically due to the loss of the target gene and not an off-target effect. This guide provides detailed troubleshooting and methodological support to ensure the reliability and reproducibility of your findings, framed within the broader thesis of confirming pathway specificity in apoptosis research.
Core Concepts and Signaling Pathways
The Central Role of Caspases in Apoptosis
Apoptosis, a programmed cell death, is primarily driven by a family of cysteine proteases known as caspases [84] [20]. These enzymes are synthesized as inactive zymogens and become activated through a proteolytic cascade. Caspases are categorized as follows:
- Initiator Caspases (e.g., Caspase-8, -9, -10): These act at the apex of apoptotic signaling pathways. Their activation occurs through dimerization induced by multi-protein complexes [84] [85].
- Effector Caspases (e.g., Caspase-3, -6, -7): These are cleaved and activated by initiator caspases. They directly execute the apoptotic program by cleaving a vast array of cellular substrates, leading to the characteristic morphological changes of apoptosis [84] [20].
The diagram below illustrates the core apoptotic pathways and key points of validation.
The Principle of Genetic and Pharmacological Validation
Confirming that a gene is part of a specific apoptotic pathway requires a multi-faceted validation strategy. Relying on a single siRNA can lead to false positives due to off-target effects, where the siRNA inadvertently silences other genes with partial sequence homology [86]. A robust validation strategy includes:
- Multiple siRNAs: Using at least two distinct siRNAs targeting different regions of the same gene to confirm the phenotype is reproducible [86] [87].
- Rescue Experiments: Re-introducing a version of the target gene that is resistant to the siRNA (e.g., through silent mutations) to reverse the observed apoptotic phenotype. This is considered a gold-standard validation of specificity [86].
- Pharmacological Inhibition: Using specific caspase inhibitors to delineate which apoptotic pathway is being activated upon gene knockdown [85] [87]. For example, a pan-caspase inhibitor (Z-VAD-FMK) can confirm caspase-dependence, while specific inhibitors for caspase-8 (Z-IETD-FMK) or caspase-9 (Z-LEHD-FMK) can pinpoint the initiating pathway.
The following workflow integrates these concepts into a logical experimental sequence.
Troubleshooting Guides
Common Experimental Issues and Solutions
| Problem | Potential Cause | Recommended Solution | Follow-up Validation |
|---|---|---|---|
| No apoptosis after siRNA knockdown | Inefficient knockdown [86] | - Optimize transfection protocol (e.g., reagent, cell density).- Check knockdown efficiency by Western Blot (protein) and/or RT-PCR (mRNA) [86]. | Use a positive control siRNA (e.g., targeting known pro-apoptotic gene). |
| Apoptosis with non-targeting control siRNA | Off-target effects or cytotoxic transfection [86] | - Include multiple control siRNAs.- Titrate siRNA concentration to minimize toxicity [86]. | Perform rescue experiment to rule out off-target effects [86]. |
| High background apoptosis in untreated cells | Poor cell health or serum starvation | Use low-passage, healthy cells and ensure culture conditions are optimal (serum, CO₂, humidity). | Include a "no transfection" control and normalize data accordingly. |
| Inconsistent caspase activity data | Unreliable assay execution or cell seeding | - Use a homogeneous caspase-3/7 assay (e.g., Apo-ONE) [86].- Ensure cells are seeded evenly and assay is performed in triplicate [86]. | Confirm results with an alternative method (e.g., Western Blot for cleaved caspase-3 or PARP) [86] [87]. |
| Rescue construct does not reverse phenotype | Mutations not silent or protein is non-functional [86] | - Sequence the rescue construct to verify silent mutations.- Confirm the rescued protein is expressed and localized correctly via Western Blot/IF [86]. | Use a different tagging strategy or a full-length cDNA clone from a reputable source. |
siRNA-Specific Troubleshooting FAQs
Q1: I used a single siRNA and observed a strong apoptotic phenotype. Can I consider my gene validated?
A: No. A phenotype resulting from a single siRNA is merely a preliminary hit and must be confirmed using a second, distinct siRNA targeting a different region of the same gene [86]. If the phenotype is not reproducible with the second siRNA, it is likely an off-target effect. For example, in a study of novel genes, an initial siRNA for BTBD1 induced caspase activity, but a second siRNA did not, revealing the first result was an off-target effect [86].
Q2: How do I design a proper rescue experiment for my siRNA study?
A: A robust rescue experiment involves cloning the cDNA of your target gene into an expression vector and introducing silent mutations (changing the nucleotide sequence without altering the amino acid sequence) in the region targeted by the siRNA [86]. This creates an "siRNA-resistant" version of the gene. When this construct is co-transfected with the siRNA, it should express the protein and reverse the apoptotic phenotype, thus confirming the specificity of your siRNA [86].
Q3: My siRNA knockdown efficiently reduced mRNA levels, but I see no change in apoptosis. What could be wrong?
A: This suggests the protein may have a long half-life. Check protein levels by Western Blot to ensure the knockdown is effective at the protein level [86]. You may need to extend the time post-transfection before assaying for apoptosis (e.g., 72-96 hours) to allow for sufficient protein turnover.
Detailed Experimental Protocols
Protocol: Validating Apoptosis via siRNA Knockdown and Caspase-3/7 Assay
This protocol is adapted from established methods for measuring caspase activation following genetic knockdown [86] [88] [87].
Key Reagents:
- Target-specific siRNAs (at least two different sequences) and non-targeting control siRNA [86]
- Appropriate transfection reagent (e.g., Lipofectamine RNAiMAX, DharmaFECT) [86] [87]
- Cell line of interest (e.g., HeLa, SW-480, DLD-1)
- Apo-ONE Homogeneous Caspase-3/7 Assay kit or equivalent [86]
- Lysis buffer for Western Blot (optional for validation)
- Antibodies for target protein and loading control (e.g., β-actin) [86] [87]
Procedure:
- Seed Cells: Plate cells in a 96-well microplate (for caspase assay) and/or 6-well plate (for RNA/protein extraction) to reach 50-70% confluency at the time of transfection [86] [87].
- Transfect siRNA:
- For each sample, prepare siRNA complexes in serum-free medium according to your transfection reagent's instructions. A final siRNA concentration of 20 nM is a common starting point [86].
- Transfer the complexes to the plated cells. Include wells for a non-targeting siRNA control and an untreated control.
- Incubate cells for 48-72 hours at 37°C, 5% CO₂ [86] [87].
- Confirm Knockdown (Essential Validation):
- Measure Caspase-3/7 Activity:
- Following the manufacturer's protocol for the Apo-ONE assay, add an equal volume of the caspase-3/7 substrate reagent directly to the medium in each well of the 96-well plate [86].
- Incubate the plate at room temperature for 1-3 hours, protected from light.
- Measure fluorescence in a microplate reader at an excitation/emission wavelength of 485/535 nm [86]. Assay each condition in triplicate for statistical power.
- Data Analysis:
- Calculate the average fluorescence for each condition.
- Normalize the data to the untreated or non-targeting control siRNA.
- A statistically significant increase in caspase-3/7 activity in both specific siRNA groups compared to controls indicates induction of apoptosis.
Protocol: Pathway Mapping with Caspase Inhibitors
This protocol helps determine whether the intrinsic or extrinsic apoptotic pathway is activated upon gene knockdown [85] [87].
Key Reagents:
- Pan-caspase inhibitor (e.g., Z-VAD-FMK)
- Caspase-8 specific inhibitor (e.g., Z-IETD-FMK)
- Caspase-9 specific inhibitor (e.g., Z-LEHD-FMK)
- DMSO (vehicle control)
Procedure:
- Pre-treat Cells: After siRNA transfection (e.g., at 24 hours post-transfection), add the caspase inhibitors to the cell culture medium. A typical working concentration for these cell-permeable inhibitors is 20-50 µM [85].
- Include Controls: Treat control wells with an equal volume of DMSO (vehicle).
- Incubate: Continue to incubate the cells for the remainder of the knockdown period (e.g., until 48-72 hours total).
- Assay for Apoptosis: Measure the apoptotic endpoint (e.g., caspase-3/7 activity, Annexin V staining) as described in Section 4.1.
- Interpretation:
- If apoptosis is blocked by Z-IETD-FMK (caspase-8 inhibitor), it suggests involvement of the extrinsic pathway.
- If apoptosis is blocked by Z-LEHD-FMK (caspase-9 inhibitor), it suggests involvement of the intrinsic pathway.
- Blockage by the pan-caspase inhibitor Z-VAD-FMK confirms the death is caspase-dependent.
The Scientist's Toolkit: Research Reagent Solutions
The following table lists key reagents essential for conducting genetic and pharmacological validation experiments in apoptosis research.
| Reagent / Tool | Function / Purpose | Example Products / Targets |
|---|---|---|
| siRNAs | Gene-specific knockdown to investigate gene function [86] [87]. | ON-TARGETplus SMARTpools (Dharmacon), esiRNA (Sigma), custom designs. |
| Caspase-3/7 Assay Kits | Quantitative measurement of effector caspase activity, a key marker of apoptosis [86] [88]. | Apo-ONE Homogeneous Caspase-3/7 Assay (Promega), IncuCyte Caspase-3/7 Reagent (Sartorius). |
| Caspase Inhibitors | Pharmacological blockade of specific caspases to map the apoptotic pathway involved [85]. | Z-VAD-FMK (pan-caspase), Z-IETD-FMK (caspase-8), Z-LEHD-FMK (caspase-9). |
| Antibodies for Immunoblotting | Validation of protein knockdown and detection of apoptosis markers [86] [87]. | Anti-cleaved Caspase-3, Anti-PARP (cleaved), Anti-target protein, Anti-β-actin (loading control). |
| Expression Vectors | Delivery of siRNA-resistant genes for rescue experiments [86]. | pcDNA3.1, pCMV, lentiviral vectors. |
| Site-Directed Mutagenesis Kits | Introduction of silent mutations into cDNA to create siRNA-resistant constructs [86]. | QuikChange II Kit (Agilent). |
| Cell Viability Assays | Complementary measurement of cell health and death post-knockdown [87]. | MTT assay, CellTiter-Glo Luminescent Assay. |
FAQs on Data Interpretation and Pathway Confirmation
Q1: My gene knockdown increases caspase-8 and caspase-9 activity. What does this mean?
A: This is a common finding, often indicating crosstalk between the intrinsic and extrinsic pathways. For example, in some cells, active caspase-8 can cleave the protein Bid, which then triggers mitochondrial outer membrane permeabilization (MOMP), thereby activating the intrinsic pathway [84] [20]. This is characteristic of so-called "Type II" cells. Your gene may be acting upstream of both pathways or directly at the point of crosstalk [87].
Q2: How can I be sure my rescue experiment is conclusive?
A: A conclusive rescue experiment must demonstrate three things:
- The siRNA effectively knocks down the endogenous (wild-type) gene.
- The exogenously expressed, siRNA-resistant gene is produced at near-physiological levels (avoid massive overexpression, which can cause artifacts).
- The apoptotic phenotype (e.g., high caspase activity) is significantly reduced back to baseline levels upon expression of the rescue construct [86]. Quantitative data showing this reversal is key.
Q3: What are the critical controls for a publication-quality siRNA apoptosis study?
A: The minimum set of controls includes:
- Non-targeting siRNA control: To account for non-specific effects of the transfection process and the siRNA itself.
- Untreated cells: To establish a baseline.
- Knockdown efficiency control: Western Blot or RT-PCR data for the target gene.
- Positive control for apoptosis: A known pro-apoptotic stimulus or siRNA to ensure your assay is working.
- Multiple siRNAs: At least two independent siRNAs targeting the same gene.
- Rescue control: The siRNA-resistant construct should be transfected alone to show it does not induce apoptosis on its own.
Confirming specific pathway activation in apoptosis experiments requires a multifaceted approach. Relying on a single assay can lead to misinterpretation, as no single method can fully capture the complexity of apoptotic signaling. Correlative analysis, which integrates data from multiple complementary assays, is essential for strengthening experimental findings and validating that a specific apoptotic pathway has been activated. This technical guide provides troubleshooting advice and FAQs to help researchers implement robust, multi-assay strategies for apoptosis pathway confirmation.
Frequently Asked Questions (FAQs)
Why is a single assay insufficient to confirm apoptosis pathway activation?
A single assay provides limited information and cannot distinguish between different apoptotic pathways or other forms of regulated cell death. Apoptosis involves multiple biochemical events that occur at different stages, and these are not uniformly captured by any single method. For example:
- Caspase activation assays detect executioner phases but may miss early initiating events.
- Morphological assessments identify late-stage characteristics but provide limited mechanistic insight.
- Membrane asymmetry changes detect early apoptosis but cannot differentiate between intrinsic and extrinsic pathways.
Using multiple orthogonal methods that detect different aspects of apoptosis provides complementary evidence that strengthens pathway assignment and reduces false positives/negatives [89].
What complementary assays should I use to distinguish between intrinsic and extrinsic apoptotic pathways?
The intrinsic (mitochondrial) and extrinsic (death receptor) pathways have distinct initiators but converge on common executioner caspases. To distinguish them, employ assays that target pathway-specific events:
Intrinsic Pathway Confirmation:
- Measure mitochondrial membrane potential (ΔΨm) disruption using JC-1 or TMRM dyes
- Detect cytochrome c release from mitochondria via western blotting or immunofluorescence
- Monitor Bax/Bak activation and translocation to mitochondria
Extrinsic Pathway Confirmation:
- Assess death receptor (Fas, TNFR) activation via surface expression or oligomerization
- Measure caspase-8 activation specifically using fluorogenic substrates or cleavage detection
- Detect formation of the Death-Inducing Signaling Complex (DISC)
Common Execution Phase Assays:
- Caspase-3/7 activity using luminogenic or fluorogenic substrates [15]
- PARP cleavage detection by western blot
- Phosphatidylserine externalization via Annexin V binding [90]
How can I validate antibody specificity in apoptosis pathway experiments?
Antibody validation is crucial for techniques like western blotting and immunofluorescence. Implement these strategies:
- Genetic controls: Use knockout/knockdown cells to confirm absence of signal [91]
- Orthogonal approaches: Correlate with RNA or proteomic data from multiple cell lines with different expression levels [92]
- Independent antibodies: Use multiple clones recognizing different epitopes of the same protein
- Overexpression controls: Express tagged proteins to confirm detection capability [92]
- Technical controls: Include known positive and negative controls in every experiment
Be aware that antibody performance is highly context-dependent, and validation by suppliers doesn't guarantee performance in your specific experimental system [91].
What are common pitfalls in interpreting caspase activation assays?
Caspase activation is often used as an apoptosis marker, but several caveats require consideration:
- Pan-caspase inhibitors like zVAD-fmk can sometimes shift cell death to necroptosis, giving false negatives for apoptosis [1]
- Caspase-3/7 activity assays may not detect initiator caspases (e.g., caspase-8, -9) that operate upstream
- Substrate choice matters: DEVD-based substrates primarily detect caspase-3/7 but may also be cleaved by other proteases
- Luminescent assays (e.g., Caspase-Glo) are highly sensitive but can be affected by luciferase inhibitors in compound libraries [15]
- Activity vs. cleavage: Cleaved caspase fragments don't always correlate with enzymatic activity
Always correlate caspase data with other apoptosis markers such as phosphatidylserine exposure or morphological changes.
How can pathway enrichment analysis help interpret apoptosis omics data?
Pathway enrichment analysis (PEA) can identify apoptotic pathways in transcriptomic or proteomic data, but requires careful implementation:
- Choose the right analysis type: Overrepresentation Analysis (ORA) for gene lists or Gene Set Enrichment Analysis (GSEA) for ranked lists [93]
- Use multiple databases: Combine KEGG, Reactome, and Gene Ontology terms for comprehensive coverage
- Ensure input quality: "Garbage in, garbage out" - verify gene/protein identification and quantification accuracy [93]
- Interpret cautiously: PEA identifies associated pathways but doesn't prove activation/inactivation without experimental validation [94]
- Correlate with orthogonal data: Combine transcriptomic PEA results with protein-level assays like western blotting
Troubleshooting Guides
Problem: Inconsistent Results Between Different Apoptosis Assays
Potential Causes and Solutions:
| Symptom | Possible Cause | Solution |
|---|---|---|
| Positive caspase activity but negative Annexin V | Early apoptosis detection; PS externalization not yet occurred | Extend time course; use later time points |
| Positive Annexin V but negative caspase activity | Caspase-independent cell death; secondary necrosis | Include viability dyes (PI) to distinguish late apoptosis vs. necrosis [90] |
| Morphological apoptosis without biochemical evidence | Alternative cell death pathways (e.g., necroptosis) | Use specific pathway inhibitors (e.g., necrostatin-1 for necroptosis) |
| Cell line-specific variations in response | Differential expression of pathway components | Pre-screen cell lines for key apoptosis regulators (Bcl-2 family, caspase-8) |
Problem: High Background in Caspase Activity Assays
Troubleshooting Steps:
- Optimize cell number: Too many cells can increase background luminescence/fluorescence; perform cell titration [15]
- Check reagent stability: Caspase substrates can degrade; prepare fresh reagents and include positive controls (e.g., staurosporine-treated cells)
- Assess compound interference: Test compounds in library screens can quench signals or inhibit luciferase; include internal controls [15]
- Validate assay specificity: Use caspase inhibitors (e.g., Z-VAD-FMK) to confirm signal is caspase-dependent
- Optimize incubation time: Excessive incubation can increase background; establish time course for optimal signal-to-noise
Problem: Distinguishing Apoptosis from Other Regulated Cell Death Pathways
Discrimination Strategy:
| Cell Death Type | Key Markers | Exclusion Methods |
|---|---|---|
| Apoptosis | Caspase-3/7 activation, PS exposure, nuclear fragmentation | Pan-caspase inhibition |
| Necroptosis | RIPK1/RIPK3 phosphorylation, MLKL oligomerization | RIPK1 inhibitors (necrostatin-1), caspase-8 activity |
| Pyroptosis | Caspase-1 activation, GSDMD cleavage, IL-1β release | Caspase-1 inhibitors, GSDMD knockout |
| Ferroptosis | Lipid peroxidation, GPX4 inactivation | Iron chelators, ferroptosis inhibitors (ferrostatin-1) |
| Autophagy-dependent | LC3-I to LC3-II conversion, autophagosome formation | Autophagy inhibitors (chloroquine, 3-MA) |
Experimental Protocols for Key Apoptosis Assays
Protocol 1: Integrated Caspase Activity and Phosphatidylserine Exposure Analysis
This protocol enables simultaneous assessment of early and mid-stage apoptosis markers.
Materials:
- Caspase-Glo 3/7 Reagent [15]
- Annexin V Binding Buffer (1X) [90]
- Annexin V FL Conjugate
- Propidium Iodide (PI) solution
- Opaque white-walled plates
- Cell counter or flow cytometer
Procedure:
- Treat cells with apoptosis inducer and appropriate controls in multi-well plates
- At designated timepoints, transfer aliquot of cells for Annexin V/PI staining:
- Harvest 1×10⁶ cells by gentle centrifugation
- Resuspend in 100μL 1X Annexin V Binding Buffer
- Add Annexin V FL Conjugate (1μL) and PI (1μL)
- Incubate 15-30 minutes at room temperature in dark
- Add additional 400μL binding buffer
- Analyze by flow cytometry or automated cell counter [90]
- For caspase activity: Add equal volume Caspase-Glo 3/7 Reagent to remaining cells
- Incubate 30-60 minutes at room temperature
- Record luminescence with plate reader [15]
- Correlate data: Caspase activation should precede or coincide with PS externalization
Protocol 2: Mitochondrial Pathway Assessment via Cytochrome c Release
Materials:
- Digitonin permeabilization buffer
- Mitochondrial isolation kit
- Anti-cytochrome c antibody
- Confocal microscopy supplies or subcellular fractionation equipment
Procedure:
- Fractionate cells into cytosolic and mitochondrial fractions:
- Wash cells with ice-cold PBS
- Incubate with digitonin buffer (0.05% in PBS) for 5 minutes on ice
- Collect supernatant (cytosolic fraction)
- Lyse remaining cells for mitochondrial fraction
- Perform western blotting:
- Separate fractions by SDS-PAGE
- Transfer to membrane
- Probe with anti-cytochrome c antibody
- Use mitochondrial (e.g., COX IV) and cytosolic (e.g., LDH) markers to validate fractionation
- Alternative immunofluorescence method:
- Stain cells with anti-cytochrome c and mitochondrial dyes (e.g., MitoTracker)
- Fix and image via confocal microscopy
- Quantify cells with diffuse vs. punctate cytochrome c staining
Research Reagent Solutions
| Reagent Category | Specific Examples | Function in Apoptosis Detection |
|---|---|---|
| Caspase Substrates | DEVD-aminoluciferin (Caspase-Glo 3/7), DEVD-AMC, DEVD-AFC | Detection of executioner caspase activity via cleavage and signal generation [15] |
| PS Binding Agents | Annexin V-FITC, Annexin V-PE, Annexin V-conjugates | Detection of phosphatidylserine externalization on cell surface [90] |
| Viability Indicators | Propidium Iodide, 7-AAD, SYTOX dyes | Exclusion of dead/necrotic cells with compromised membrane integrity [90] |
| Mitochondrial Dyes | JC-1, TMRM, MitoTracker dyes | Assessment of mitochondrial membrane potential and mass |
| Pathway Inhibitors | Z-VAD-FMK (pan-caspase), Necrostatin-1 (necroptosis), Ferrostatin-1 (ferroptosis) | Specific inhibition to confirm pathway involvement [89] |
| Antibody Validation Tools | KO cell lines, siRNA/shRNA, overexpression constructs | Confirmation of antibody specificity for target proteins [92] [91] |
Apoptosis Signaling Pathways and Experimental Workflows
Correlative Analysis Workflow
Quantitative Data Comparison for Apoptosis Assays
Assay Performance Characteristics
| Assay Method | Detection Target | Optimal Timeframe | Key Advantages | Key Limitations |
|---|---|---|---|---|
| Annexin V/PI Binding [90] | Phosphatidylserine externalization | Early apoptosis (1-4 hours) | Distinguishes early vs. late apoptosis; quantitative by flow cytometry | Cannot differentiate apoptotic pathways; requires viable single-cell suspension |
| Caspase-3/7 Activity [15] | Executioner caspase activation | Mid-stage apoptosis (2-8 hours) | Highly sensitive; adaptable to HTS; quantitative | May miss caspase-independent apoptosis; substrate specificity issues |
| Mitochondrial Membrane Potential | ΔΨm disruption | Mid-stage intrinsic pathway (1-6 hours) | Pathway-specific for intrinsic apoptosis; can be live-cell | Technical variability; affected by metabolic status |
| Cytochrome c Release [1] | Mitochondrial apoptogen release | Early intrinsic pathway (30min-4 hours) | Direct evidence of MOMP; pathway-specific | Requires subcellular fractionation or sophisticated imaging |
| DNA Fragmentation (TUNEL) | Nuclear DNA breaks | Late apoptosis (4-24 hours) | Highly specific for late-stage apoptosis; histological compatibility | Late event; may miss early stages; can detect non-apoptotic DNA damage |
| Morphological Analysis [89] | Cellular and nuclear changes | Mid to late apoptosis (4-24 hours) | Gold standard; provides visual confirmation | Subjective; time-consuming; requires expertise |
Correlation Timeline of Apoptotic Events
| Event Sequence | Biochemical/Morphological Event | Primary Detection Methods | Expected Correlation with Other Events |
|---|---|---|---|
| Early Events (0-4 hours) | Death receptor engagement (extrinsic) | Immunoprecipitation, co-localization | Should precede caspase-8 activation |
| Mitochondrial membrane depolarization (intrinsic) | JC-1, TMRM staining | Correlates with cytochrome c release | |
| Phosphatidylserine externalization | Annexin V binding [90] | Precedes membrane permeability; caspase-3 may follow | |
| Mid-Stage Events (1-8 hours) | Initiator caspase activation (caspase-8/-9) | Fluorogenic substrates, cleavage detection | Pathway-specific; should align with appropriate triggers |
| Cytochrome c release | Western blot, immunofluorescence [1] | Specific to intrinsic pathway; follows MOMP | |
| Executioner caspase activation (caspase-3/-7) | Luminescent/Fluorogenic assays [15] | Should correlate with downstream events (PARP cleavage) | |
| Late Events (4-24 hours) | DNA fragmentation | TUNEL assay, DNA laddering | Follows caspase activation; correlates with morphological changes |
| Morphological changes | Microscopy, flow cytometry [89] | Should align with biochemical evidence of apoptosis |
Apoptosis, or programmed cell death, is a fundamental biological process critical for development, tissue homeostasis, and immune function [1]. Researchers investigating apoptosis must often confirm the activation of specific cell death pathways, namely the extrinsic (death receptor) pathway or the intrinsic (mitochondrial) pathway [26] [1]. The accurate detection of apoptosis is therefore paramount in diverse fields, from basic cell biology to drug discovery. Currently, three principal technological platforms are employed for this purpose: flow cytometry, light microscopy, and microfluidic systems. Each platform offers distinct advantages, limitations, and specific applications, making the choice of method a critical experimental decision.
This technical support article provides a comparative analysis of these key detection platforms, framed within the context of confirming specific pathway activation in apoptosis research. We have structured this resource to directly address the practical challenges you might encounter in your experiments, offering troubleshooting guides, detailed protocols, and data interpretation support to enhance the reliability and reproducibility of your apoptosis assays.
Platform Comparison & Technical Specifications
Quantitative Comparison of Apoptosis Detection Platforms
The following table summarizes the core capabilities, throughput, and key applications of each platform, providing a clear framework for selection based on experimental needs.
Table 1: Technical Comparison of Apoptosis Detection Platforms
| Feature | Flow Cytometry | Light Microscopy | Microfluidic Systems |
|---|---|---|---|
| Primary Strength | High-throughput, multiparameter single-cell analysis [95] | Real-time visualization of morphological changes [96] | Low reagent consumption, potential for automation and integration [97] [98] |
| Throughput | Very High (up to 50,000 cells/sec) [99] | Low to Moderate | Moderate to High [98] |
| Pathway Resolution | Excellent (via specific markers, e.g., caspases for extrinsic/intrinsic) [95] | Good (via time-lapse of morphology) | Good (multiplexed cytokine secretion profiling) [97] |
| Key Readouts | DNA fragmentation, mitochondrial potential (Δψm), caspase activation, phosphatidylserine exposure [95] | Cell shrinkage, membrane blebbing, nuclear fragmentation [96] | Secreted cytokines, single-cell protein counting, integrated cell culture & analysis [97] [98] |
| Troubleshooting Focus | Optimizing particle concentration, fluorescence compensation [99] [100] | Maintaining cell health during imaging, avoiding assay-induced death [96] | Managing chip-to-chip variability, ensuring consistent flow [101] |
Research Reagent Solutions for Apoptosis Detection
A successful apoptosis experiment relies on high-quality reagents. The table below details essential reagents and their functions for detecting key apoptotic events.
Table 2: Key Reagents for Apoptosis Pathway Analysis
| Reagent / Assay | Target / Function | Application & Pathway Insight |
|---|---|---|
| Annexin V (FITC, APC) | Binds to phosphatidylserine (PS) exposed on the outer leaflet of the plasma membrane [95] [100] | Detects early apoptosis; common for both pathways, often used with viability dyes. |
| Propidium Iodide (PI) / 7-AAD | DNA intercalator; impermeant to live and early apoptotic cells [95] | Distinguishes late apoptotic/necrotic cells (PI+) from early apoptotic cells (Annexin V+/PI-). |
| FLICA (FAM-VAD-FMK) | Irreversible binder to active caspase sites [95] | Pan-caspase activity marker; indicates execution phase of both intrinsic and extrinsic pathways. |
| TMRM | Fluorescent cationic probe accumulated by active mitochondria [95] | Measures mitochondrial transmembrane potential (Δψm); loss is a key marker of intrinsic pathway activation. |
| Anti-Fas (anti-CD95) mAb | Agonist antibody that activates the Fas death receptor [26] | Specifically induces the extrinsic apoptosis pathway in susceptible cells (e.g., Jurkat). |
| Staurosporine | Protein kinase inhibitor [96] [26] | A potent chemical inducer of intrinsic apoptosis, though it can also trigger parallel caspase-independent pathways. |
| Click-iT TUNEL Assay | Labels 3'-OH ends of fragmented DNA [102] | Detects late-stage apoptotic DNA cleavage; a hallmark of both pathways. |
Experimental Protocols for Pathway Confirmation
Multiparameter Flow Cytometry for Extrinsic Pathway Activation
This protocol uses FLICA and PI to delineate caspase activation and cell membrane integrity, key for confirming extrinsic pathway engagement [95] [26].
Procedure:
- Induction: Treat Jurkat cells (or other Fas-sensitive line) with an appropriate concentration of anti-Fas (anti-CD95) monoclonal antibody (e.g., 1-2 µg/mL) for 2-4 hours in a 37°C incubator [26]. Include an untreated control.
- Harvest: Collect cells by centrifugation at 300–350 x g for 5 minutes. Resuspend the pellet in 1-2 mL of PBS and centrifuge again. Discard the supernatant.
- Staining: Resuspend the cell pellet in 100 µL of PBS. Add 3 µL of the FLICA working solution (e.g., FAM-VAD-FMK).
- Incubation: Incubate for 60 minutes at +37°C, protected from light. Gently agitate the tubes every 20 minutes.
- Wash: Add 2 mL of PBS and centrifuge for 5 minutes at 300–350 x g. Discard the supernatant and repeat this wash step once more.
- Viability Staining: Resuspend the final pellet in 100 µL of a PI staining mixture (diluted in PBS). Incubate for 3-5 minutes, then add 500 µL of PBS. Keep samples on ice.
- Analysis: Analyze immediately on a flow cytometer using 488 nm excitation. Collect FLICA (FITC channel) and PI (PE-Texas Red or similar channel) signals.
Data Interpretation:
- Viable Cells: FLICA⁻ / PI⁻
- Early Apoptotic (Caspase Active): FLICA⁺ / PI⁻
- Late Apoptotic/Necrotic: FLICA⁺ / PI⁺
Microscopy for Real-Time Observation of Apoptotic Morphology
This protocol uses differential interference contrast (DIC) and fluorescent nuclear stains to visualize the hallmark morphological changes of apoptosis in real time [96].
Procedure:
- Cell Preparation: Plate cells (e.g., PtK1 or HeLa) in glass-bottom MatTek dishes and allow them to adhere for 24 hours in appropriate medium without phenol red.
- Induction & Staining: Induce apoptosis by adding 1-10 µM Staurosporine [26]. Simultaneously, add a live-cell compatible caspase substrate like NucView 488.
- Image Acquisition: Place the culture dish on an inverted microscope (e.g., Nikon Eclipse Ti) equipped with DIC and fluorescence optics, and an environmental chamber maintained at 37°C and 5% CO₂.
- Time-Lapse Imaging: Capture images in a single Z-plane at a rate of 2-4 frames per minute. Acquire both DIC and fluorescent (e.g., GFP channel for NucView 488) images at each time point.
- Analysis: Review the time-lapse sequence for key morphological events: cell shrinkage, membrane blebbing (DIC), and nuclear condensation/fragmentation (fluorescence).
Microfluidic Cytometry for Single-Cell Protein Quantification
This protocol outlines the use of a constriction-based microfluidic device to count specific cytosolic proteins, such as β-actin, at the single-cell level, which can be adapted for apoptosis-related proteins [98].
Procedure:
- Cell Processing: Harvest and fix cells with 2% formaldehyde for 15 min at 4°C. Permeabilize cells with Triton X-100 (concentration optimized for cell type, e.g., 0.05-0.3% for A549) for 15 min at 4°C.
- Blocking and Staining: Block cells with 5% BSA for 30 min at room temperature. Incubate with a primary antibody against the target protein (e.g., anti-β-actin) labeled with a fluorescent probe (e.g., at 1:100 dilution) for 1-2 hours.
- Microfluidic Analysis: Resuspend stained cells in PBS with 0.5% BSA at ~10 million cells/mL. Aspirate the cell suspension into the constriction microchannel.
- Data Acquisition: As each cell is deformed through the constriction channel, measure its fluorescent profile over time using a PMT detector.
- Calibration & Calculation: Flush solutions of fluorescent antibodies at known concentrations through the channel to create a calibration curve. Use the raw fluorescent pulses and the calibration curve to calculate the absolute number of target proteins per cell [98].
Troubleshooting Guides & FAQs
Flow Cytometry Troubleshooting
Problem: Unclear population clustering in Annexin V/PI assay.
- Possible Causes & Solutions:
- Cause 1: Cells have spontaneous fluorescence [100].
- Solution: Try using reagent kits with different fluorochromes (e.g., switch from FITC to APC).
- Cause 2: Excessive apoptosis leads to insufficient dye binding [100].
- Solution: Increase the concentration of the Annexin V and/or PI dyes.
- Cause 3: Poor cell state, leading to generalized phosphatidylserine (PS) exposure [100].
- Solution: Ensure cells are healthy and treated gently during all handling and digestion steps.
Problem: Lack of a positive signal in nuclear staining (PI/7-AAD).
- Possible Causes & Solutions:
- Cause 1: Reagent was not added or has degraded due to improper storage [100].
- Solution: Repeat the experiment, ensuring reagents are added and stored correctly (e.g., 7-AAD at -20°C).
- Cause 2: The threshold on the flow cytometer is set too high [100].
- Solution: Adjust the instrument settings and lower the detection threshold.
- Cause 3: Cells did not undergo significant apoptosis or late-stage death.
- Solution: Re-optimize apoptosis induction conditions (e.g., increase inducer concentration or duration).
Problem: Normal control cells show a significant amount of apoptosis.
- Possible Causes & Solutions:
- Cause 1: Poor cellular status before the experiment [100].
- Solution: Culture fresh cells and ensure they are in a logarithmic growth phase with high viability.
- Cause 2: Rough handling during experimental operations or over-digestion with trypsin [102] [100].
- Solution: Treat cells gently. For adherent cells, consider using a non-enzymatic cell dissociation buffer to preserve membrane integrity [102].
- Cause 3: The Annexin V binding buffer was diluted incorrectly, creating an osmotic imbalance [100].
- Solution: Always prepare buffers according to the manufacturer's instructions.
General Apoptosis Induction & Detection FAQs
Q: How can I specifically confirm the activation of the extrinsic pathway? A: Utilize a specific inducer of the extrinsic pathway, such as an agonist anti-Fas (CD95) antibody, and monitor early caspase activation (e.g., with FLICA) in a time-course experiment. This can be effectively combined with flow cytometry for multiparameter analysis [95] [26].
Q: My treatment group shows only late apoptosis/necrosis, with no early apoptotic population. Why? A: This is often a result of overly intense treatment conditions. The cell death may be occurring too rapidly, bypassing classical apoptotic signaling. To resolve this, gently treat the cells by reducing the drug concentration or ensuring that the amount of organic solvent (e.g., DMSO) used to dissolve the drug is controlled below 0.5% [100].
Q: What is the advantage of using microscopy over flow cytometry for apoptosis detection? A: The primary advantage of microscopy is the ability to perform real-time monitoring of cellular events. It allows you to visually confirm characteristic morphological changes like blebbing and shrinkage within individual cells over time, and to establish the sequence of events, which is lost in the population-averaged "snapshot" provided by flow cytometry [96].
Workflow and Pathway Diagrams
Logical Workflow for Platform Selection
The following diagram outlines a decision-making workflow to help researchers select the most appropriate detection platform based on their specific experimental goals and constraints.
Diagram 1: Platform Selection Workflow. This flowchart guides the selection of an apoptosis detection platform based on key experimental requirements such as the need for real-time imaging, high-throughput analysis, sample volume constraints, or multiplexing capabilities.
Apoptosis Signaling Pathways & Detection Nodes
This diagram maps the core intrinsic and extrinsic apoptosis pathways and indicates key nodes where the detection platforms discussed can measure specific biochemical events.
Diagram 2: Apoptosis Pathways and Detection Nodes. This diagram illustrates the key steps in the extrinsic and intrinsic apoptosis pathways. The nodes in green show where different detection platforms can measure specific biochemical or morphological events, allowing researchers to confirm pathway activation.
Scientific Rationale: Survivin in Cancer
Survivin (BIRC5), a member of the Inhibitor of Apoptosis (IAP) protein family, is a critical regulator of both cell division and programmed cell death [103] [104]. Unlike most other IAPs, survivin is characterized by its distinct expression profile: it is largely undetectable in most terminally differentiated adult tissues but is dramatically overexpressed in virtually all human cancers [103] [104]. This overexpression is associated with tumor cell proliferation, progression, angiogenesis, resistance to therapy, and poor patient prognosis [103].
Survivin is the smallest mammalian IAP, containing a single baculovirus IAP repeat (BIR) domain and a long carboxyl-terminus α-helix, and it often forms a stable homodimer [105]. Its function extends beyond apoptosis inhibition to include essential roles in cell cycle regulation, particularly as a component of the Chromosomal Passenger Complex (CPC), which ensures accurate chromosomal segregation during mitosis [104].
Key Mechanistic Insights
- Apoptosis Inhibition: While survivin does not directly bind caspases like XIAP does, it inhibits apoptosis through cooperative interactions. A key mechanism involves its complex formation with XIAP, which stabilizes XIAP and synergistically enhances its anti-caspase activity [105]. A specific pool of survivin located in mitochondria is released into the cytosol in response to cell death stimuli and participates in this complex [105].
- Dual Cellular Role: Survivin's function is compartment-specific. Its role in the CPC is essential for cytokinesis, while its cytosolic/mitochondrial pool is implicated in inhibiting apoptosis [105] [104].
Table 1.1: Core Characteristics of Survivin
| Characteristic | Description |
|---|---|
| Gene Name | BIRC5 [103] |
| Protein Family | Inhibitor of Apoptosis (IAP) [103] |
| Primary Functions | Inhibition of apoptosis; Regulation of cytokinesis and cell cycle progression [103] [104] |
| Expression in Normal Tissues | Low or absent in most adult tissues; expressed in adult stem cells (ASCs) [104] |
| Expression in Cancer | Highly overexpressed in most human cancers (e.g., lung, pancreatic, breast) [103] [104] |
| Functional Domains | Single BIR domain; carboxyl-terminus α-helix [105] |
Experimental Validation: A Stepwise Approach
This section provides a detailed, actionable framework for researchers to validate that their experimental intervention successfully disrupts the Survivin-IAP axis and restores apoptotic competence in cancer models.
Step 1: Confirm Target Engagement and Survivin Disruption
The initial step is to verify that your therapeutic agent effectively reduces survivin levels or disrupts its function.
1.1 Quantitative Analysis of Survivin Expression
- Methodology: Use Western Blotting and Quantitative RT-PCR to measure changes in survivin protein and mRNA levels, respectively, following treatment.
- Protocol Details:
- Cell Preparation: Use synchronized cell populations to account for cell cycle-dependent expression of survivin [103]. Treat with your candidate inhibitor (e.g., small molecule, siRNA) and include appropriate controls (e.g., DMSO, scramble siRNA).
- qRT-PCR: Isolate total RNA. Design primers specific for the survivin (BIRC5) transcript. The survivin promoter contains CDE/CHR elements, so note that expression is cell cycle-regulated [103]. Normalize data to a housekeeping gene (e.g., GAPDH, β-actin).
- Western Blotting: Prepare whole-cell lysates. Resolve proteins via SDS-PAGE and transfer to a membrane. Probe with a validated anti-survivin antibody. An antibody that detects phosphorylation at Thr34 is particularly useful, as this modification by CDK1 is critical for survivin's mitotic and anti-apoptotic functions [103].
- Troubleshooting FAQ:
- Q: My Western blot shows multiple non-specific bands. How can I confirm specificity?
- A: Include a positive control lysate from a known survivin-positive cancer cell line (e.g., HeLa, MCF-7). Perform a siRNA knockdown of survivin in your cells and confirm the loss of the specific band. Ensure antibody is validated for specificity in your application.
- Q: Survivin mRNA and protein levels do not correlate after treatment. What could be the reason?
- A: This discrepancy suggests post-transcriptional or post-translational regulation. Survivin is regulated by multiple miRNAs (e.g., miR-34a, miR-203) that can affect mRNA stability without immediate protein loss [103]. Furthermore, protein stability can be altered by pathways like EGFR signaling, which can prolong the survivin protein half-life via the Raf-1/MEK pathway [103].
- Q: My Western blot shows multiple non-specific bands. How can I confirm specificity?
1.2 Disruption of Survivin-Protein Interactions
- Methodology: Co-Immunoprecipitation (Co-IP) is the standard method to validate the disruption of critical survivin complexes, such as the Survivin-XIAP complex or the Chromosomal Passenger Complex.
- Protocol Details:
- Lysis: Use a mild, non-denaturing lysis buffer to preserve protein-protein interactions.
- Immunoprecipitation: Incubate lysates with an antibody against survivin or its binding partner (e.g., XIAP, Borealin). Use an isotype control antibody to identify non-specific binding.
- Detection: Analyze the immunoprecipitated complexes by Western blotting, probing for the suspected binding partners.
- Troubleshooting FAQ:
- Q: My Co-IP shows high background noise. How can I improve the signal-to-noise ratio?
- A: Optimize antibody concentration to minimize non-specific binding. Increase the number and stringency of washes (e.g., slightly increase salt concentration). Pre-clear the lysate with protein A/G beads before adding the primary antibody.
- Q: My Co-IP shows high background noise. How can I improve the signal-to-noise ratio?
Table 2.1: Key Survivin Interactions and Functional Consequences
| Interacting Partner | Functional Consequence of Interaction | Method for Validation |
|---|---|---|
| XIAP | Stabilizes XIAP, synergistically inhibits caspases, enhances tumor growth [105] | Co-Immunoprecipitation |
| Smac/DIABLO | Sequesters pro-apoptotic Smac, preventing it from inhibiting IAPs [105] | Co-Immunoprecipitation |
| Borealin | Part of the Chromosomal Passenger Complex (CPC); essential for chromosome segregation [105] | Co-Immunoprecipitation / Immunofluorescence |
| Caspase-3 (indirect) | Inhibits caspase-3 activation via cooperative mechanisms with other IAPs [103] | Caspase-3 Activity Assay |
Step 2: Measure Downstream Apoptotic Activation
After confirming survivin disruption, the next step is to document the activation of the apoptotic cascade.
2.1 Caspase Activity Assays
- Methodology: Use fluorometric or colorimetric caspase activity assays to quantify the enzymatic activity of key caspases. Flow cytometry with antibodies against cleaved caspase-3 provides single-cell resolution.
- Protocol Details:
- Caspase Selection: Focus on initiator caspase-8 (extrinsic pathway) and caspase-9 (intrinsic pathway), and executioner caspase-3/7 [20] [106].
- Assay Workflow: Harvest treated and control cells. Lyse cells and incubate lysates with caspase-specific substrates that release a fluorescent or colorimetric product upon cleavage. Measure signal intensity with a plate reader.
- Flow Cytometry: Fix and permeabilize cells, then stain with a fluorescently-labeled antibody specific for the cleaved (active) form of caspase-3. Analyze using a flow cytometer.
- Troubleshooting FAQ:
- Q: I detect caspase-3 cleavage by Western blot, but the enzymatic activity is low. Why?
- A: Caspase activity can be transient. The time point of measurement is critical. Perform a time-course experiment to capture peak activity. Also, active caspases can be rapidly inhibited by remaining IAP proteins; consider using a pan-caspase inhibitor as a negative control.
- Q: I detect caspase-3 cleavage by Western blot, but the enzymatic activity is low. Why?
2.2 Mitochondrial Membrane Potential (ΔΨm) Assessment
- Methodology: Use fluorescent dyes like TMRE (tetramethylrhodamine, ethyl ester) or JC-1 and analyze by flow cytometry or fluorescence microscopy.
- Protocol Details:
- Staining: Incubate live cells with TMRE, which accumulates in active mitochondria with intact membrane potential.
- Analysis: In apoptotic cells, the mitochondrial membrane potential collapses, leading to a loss of TMRE fluorescence. A shift to lower fluorescence intensity in treated cells compared to controls indicates apoptosis induction [106].
- Troubleshooting FAQ:
- Q: The TMRE signal is weak even in my untreated controls. What is wrong?
- A: Optimize the dye concentration and incubation time. Confirm cell viability before staining. Include a control with an uncoupler like CCCP, which collapses ΔΨm, to validate the assay's functionality.
- Q: The TMRE signal is weak even in my untreated controls. What is wrong?
2.3 DNA Fragmentation and Phosphatidylserine Externalization
- Methodology:
- TUNEL Assay: Labels DNA strand breaks, a late apoptotic event, using terminal deoxynucleotidyl transferase (TdT) [106].
- Annexin V Staining: Binds to phosphatidylserine (PS), which is externalized to the outer leaflet of the plasma membrane early in apoptosis. Typically used in combination with a viability dye like propidium iodide (PI) to distinguish early apoptotic (Annexin V+/PI-) from late apoptotic/necrotic cells (Annexin V+/PI+) [106].
- Protocol Details:
- Follow manufacturer's instructions for commercially available kits. For Annexin V, use calcium-containing buffer, as the binding is calcium-dependent. Analyze by flow cytometry.
Table 2.2: Apoptosis Assays: Applications and Considerations
| Assay | Target / Principle | Stage of Apoptosis | Key Advantage | Key Limitation |
|---|---|---|---|---|
| Annexin V / PI | Externalized PS / Membrane Integrity | Early | Distinguishes early apoptosis from late apoptosis/necrosis | Less suitable for tissue sections; requires live cells [106] |
| Caspase Activity | Proteolytic cleavage of specific substrates | Mid | Provides direct functional readout of key apoptosis executers | Activity can be transient [106] |
| Cleaved Caspase-3 IHC/IF | Activated executioner caspase | Mid | Excellent for tissue sections; single-cell resolution | Does not measure enzymatic activity, only presence [106] |
| TUNEL | DNA strand breaks | Late | Highly specific for late-stage apoptosis | Can miss early events; can label necrotic cells [106] |
| TMRE / JC-1 | Mitochondrial Membrane Potential (ΔΨm) | Early (Intrinsic Pathway) | Sensitive early indicator of intrinsic pathway activation | Not specific for apoptosis; can be affected by general metabolic stress [106] |
Step 3: Link Phenotype to Mechanism via Functional Assays
Finally, demonstrate that the observed cell death is specifically due to apoptosis restoration and is functionally consequential.
3.1 Clonogenic Survival Assay
- Methodology: This gold-standard assay measures the ability of a single cell to proliferate indefinitely, forming a colony. It evaluates long-term cell damage and reproductive death.
- Protocol Details:
- Seed cells at low density in multi-well plates.
- Treat cells with your survivin-targeting agent for a defined period.
- Remove the agent, allow cells to grow for 1-3 weeks, then fix and stain colonies.
- A significant reduction in the number and size of colonies in the treated group indicates successful suppression of clonogenic capacity, a key hallmark of effective anti-cancer therapy [104].
3.2 Cell Viability and Cytotoxicity Assays
- Methodology: Use assays like MTT or CellTiter-Glo to measure metabolic activity or ATP levels as proxies for cell viability. These provide a higher-throughput complement to clonogenic assays.
- Protocol Details:
- Seed cells in 96-well plates, treat with a dose range of your inhibitor, and incubate.
- Add the reagent according to the manufacturer's protocol and measure absorbance or luminescence.
- Critical Consideration: A decrease in viability can be due to either apoptosis or other forms of cell death (e.g., necrosis) or cytostasis. Therefore, these assays must be combined with the specific apoptotic markers described in Step 2.
3.3 Cell Cycle Analysis
- Methodology: Use propidium iodide (PI) staining and flow cytometry to analyze DNA content.
- Protocol Details:
- Fix cells with ethanol, then treat with RNase and PI.
- Analyze DNA content by flow cytometry. Survivin inhibition often leads to cell cycle arrest in G2/M phase and an increase in the sub-G1 population (indicative of apoptotic cells with fragmented DNA) [103].
- Troubleshooting FAQ:
- Q: My cell cycle analysis shows a large sub-G1 peak but no corresponding increase in Annexin V staining. What does this mean?
- A: The sub-G1 peak is a late apoptotic marker, while Annexin V staining is an early marker. It's possible you are capturing cells at a later stage of death. However, also verify that your fixation and staining for Annexin V were performed correctly on live, unfixed cells.
- Q: My cell cycle analysis shows a large sub-G1 peak but no corresponding increase in Annexin V staining. What does this mean?
The Scientist's Toolkit: Research Reagent Solutions
Table 3.1: Essential Reagents for Validating Survivin-Targeted Therapies
| Reagent / Assay Type | Specific Example(s) | Primary Function in Validation |
|---|---|---|
| Target Validation | siRNA/shRNA against BIRC5; CRISPR/Cas9 constructs | To genetically knock down or knock out survivin and confirm on-target effects [103] |
| Survivin Detection | Anti-Survivin Antibody (for WB, IF); Anti-phospho-Survivin (Thr34) | To measure total survivin protein levels and its activated (mitotic) form [103] |
| Interaction Analysis | Antibodies for Co-IP: XIAP, Borealin, Smac/DIABLO | To validate disruption of critical survivin-protein complexes [105] |
| Caspase Activity | Fluorogenic substrates: DEVD-AFC (Casp-3/7), LEHD-AFC (Casp-9) | To quantitatively measure the enzymatic activity of key apoptotic caspases [106] |
| Apoptosis Detection | Annexin V Apoptosis Detection Kits; TUNEL Assay Kits | To detect early (PS exposure) and late (DNA fragmentation) apoptotic events [106] |
| Mitochondrial Health | TMRE, JC-1 dyes | To assess mitochondrial membrane potential as an early indicator of intrinsic apoptosis [106] |
| Cell Viability/Death | MTT, CellTiter-Glo; Propidium Iodide (PI) | To measure metabolic activity, ATP content, and membrane integrity [106] |
Troubleshooting Common Experimental Challenges
FAQ 1: My intervention successfully reduces survivin levels, but I do not observe significant apoptosis. What are potential reasons?
- Compensatory Mechanisms: Other IAP family members, such as XIAP or cIAP1, may compensate for the loss of survivin [105]. Validate the status of other IAPs in your model.
- Dominant Pro-Survival Signaling: Strong activation of pro-survival pathways like PI3K/Akt or STAT3 can override the pro-apoptotic signal from survivin inhibition [103] [104]. Check the activation status of these pathways (e.g., phosphorylated Akt) and consider combining your survivin inhibitor with pathway-specific inhibitors.
- Insufficient Stress or "Priming": Cancer cells may require an additional apoptotic stimulus. Repeating the experiment in the presence of a low-dose chemotherapeutic agent (e.g., etoposide) or TNF-α can "prime" the cells for death, revealing the sensitizing effect of survivin disruption [105] [103].
- Time Point Selection: Apoptosis is a transient process. Perform a detailed time-course experiment to capture the window of cell death.
FAQ 2: I see a strong apoptotic response, but my clonogenic assay shows minimal effect. Why the discrepancy?
- Assay Sensitivity and Timing: Viability assays (e.g., MTT) measure acute cell death in a bulk population but may not distinguish between cells that are dead and those that are merely growth-arrested. The clonogenic assay is more stringent, measuring the reproductive death of the stem-cell-like population within the culture. A potent therapy must eliminate this population to prevent long-term regrowth. The results suggest your treatment may be cytostatic or only killing a subset of cells without affecting the long-term replicative potential of the cancer stem cells.
FAQ 3: How can I distinguish off-target effects from on-target survivin disruption in my phenotype?
- Genetic Rescue Experiment: The most definitive approach is to perform a rescue experiment. After knocking down endogenous survivin (e.g., with siRNA targeting the 3'UTR), re-express a recombinant, siRNA-resistant survivin cDNA (lacking the 3'UTR). If the apoptotic phenotype and caspase activation are reversed upon re-expression, it confirms the effect was specifically due to survivin loss.
- Use Multiple Modalities: Employ at least two independent methods to target survivin (e.g., a different siRNA sequence, a small-molecule inhibitor). If consistent phenotypes are observed across different targeting strategies, it strengthens the case for an on-target effect.
Apoptosis, or programmed cell death, is a fundamental process regulated by a cascade of molecular events, primarily driven by a family of cysteine proteases known as caspases. Confirming the activation of specific apoptotic pathways is a critical step in many areas of biological research, including cancer biology, immunology, and drug discovery. Researchers have a toolbox of methods at their disposal, each with distinct technical parameters of sensitivity, specificity, and throughput. Understanding these parameters is essential for designing robust experiments and accurately interpreting data on pathway activation. This guide provides a technical overview of common methods and troubleshooting support for researchers working in this field.
The core apoptosis signaling pathways are summarized in the diagram below, illustrating the key initiators and executioners.
Technical Parameter Comparison of Key Methods
The following table summarizes the core technical parameters of commonly used methods for assessing apoptosis and its specific pathways. This comparison aids in selecting the most appropriate technique for a given experimental goal.
Table 1: Technical Parameter Comparison of Apoptosis Assessment Methods
| Method | Primary Measured Parameter | Approximate Sensitivity (as commonly reported) | Specificity Considerations | Throughput Capacity | Key Applications in Pathway Confirmation |
|---|---|---|---|---|---|
| RT-qPCR | mRNA expression of pathway-specific genes (e.g., cytokines, surface markers) | High (detects low copy numbers); validated by amplification efficiencies of 95%–101% [107]. | High for sequence-specific targets; dependent on primer design. Does not confirm protein-level activation. | Medium (plate-based, 3-4 hours processing) | Confirming polarization states (e.g., M1/M2) via cytokine shifts; inferring upstream pathway activity [107]. |
| Flow Cytometry | Protein-level expression (surface/intracellular), e.g., CD86, CD64, CD206 [107]. | High (detects rare cell populations). Statistical power from thousands of events. | High, dependent on antibody specificity. Multiplexing allows for co-expression analysis. | High (with automated loaders). | Immunophenotyping (e.g., M1: CD64+, M2: CD206+) [107]. Direct analysis of caspase activation via specific antibodies or FLICA probes. |
| Fluorescence Imaging (Di-4-ANEPPDHQ) | Membrane order / potential shifts (e.g., M1: depolarized/red shift) [107]. | Statistically significant differences reported (p < 0.0001) [107]. | Differentiates phenotypes (M1/M2) via membrane behavior; may require validation with other methods. | Low to Medium (single-field or slide-based). | Real-time, label-free assessment of cell activation states like macrophage polarization, as a functional correlate to pathway activation [107]. |
| Caspase Activity Assays | Proteolytic activity of specific caspases using fluorogenic/colorimetric substrates. | Suitable for HTS; Z'-factor of 0.58 reported for a caspase-10 HTS [108]. | High for targeted caspase, but cross-reactivity with highly homologous caspases can be a challenge [108]. | Very High (96/384-well plate format). | Directly confirms the enzymatic activity of initiator (e.g., Casp-8, -9) and executioner (e.g., Casp-3/7) caspases, providing direct evidence of pathway execution [108] [109]. |
| TUNEL Assay | DNA fragmentation (a late-stage apoptotic event). | High sensitivity for detecting DNA breaks. | Can detect late apoptosis; may show positivity in necrotic cells due to DNA fragmentation [110]. | Medium (microscopy), Medium-High (flow cytometry). | Confirming the final stages of apoptosis. Specificity for apoptosis over necrosis should be confirmed via morphology [110]. |
Detailed Experimental Protocols for Key Assays
Protocol: RT-qPCR for Apoptosis-Related Gene Expression
This protocol is used to quantify mRNA expression changes in genes associated with apoptotic pathways or cell states, such as cytokine profiles in polarized macrophages [107].
- Cell Lysis and RNA Extraction: Lyse cells using a suitable method like the triazole-hybrid method. Extract total RNA using a commercial kit (e.g., RNeasy Plus Mini Kit). Quantify RNA concentration and purity using a Nanodrop spectrophotometer [107].
- cDNA Synthesis: Use 1000 ng of total RNA per reaction for reverse transcription with an RT master mix. Perform the reaction on a thermal cycler according to the manufacturer's protocol [107].
- qPCR Setup and Run:
- Prepare a 10 µL reaction mix containing: 2 µL cDNA, 0.2 µL forward primer (200 nM final), 0.2 µL reverse primer (200 nM final), 2.6 µL nuclease-free water, and 5 µL qPCR Master Mix [107].
- Run the plate on a real-time PCR cycler with the following program: (1) Initial denaturation: 95°C for 3 minutes. (2) 40 cycles of: 95°C for 5 seconds (denaturation) and 61°C for 30 seconds (annealing/extension) [107].
- Include a melting curve analysis: 65°C for 5 seconds followed by 95°C for 30 seconds [107].
- Data Analysis: Use a stable reference gene (e.g., 18S rRNA) for normalization. Calculate fold-change differences using the 2^–ΔΔCq method. Ensure primer efficiencies (95%-101%) are validated via standard curves [107].
Protocol: Flow Cytometry for Surface Marker Analysis
This protocol details the steps for staining and analyzing cell surface markers to identify specific immunophenotypes, such as pro-inflammatory M1 macrophages [107].
- Cell Preparation: Seed, differentiate, and polarize cells (e.g., THP-1 monocytes into M0, M1, and M2 macrophages). Detach adherent cells using accutase and centrifuge at 200×g for 5 minutes. Wash the cell pellet with PBS [107].
- Staining:
- Resuspend the cell pellet and divide it into flow tubes. Include an unstained control.
- For each stained sample, add 100 µL of staining buffer and 5 µL of each antibody (e.g., CD86-FITC + CD64-PerCP-Cy5.5 for M1; CD11b-FITC + CD206-PE for M2) [107].
- Incubate for 30 minutes at room temperature in the dark.
- Washing and Acquisition: Wash the cells with PBS to remove unbound antibody. Resuspend the final pellet in 200 µL of PBS. Analyze the samples immediately on a flow cytometer (e.g., FACSCanto II) using appropriate software (e.g., FACSDiva) [107].
- Gating Strategy: First, gate on the live cell population based on forward and side scatter. Then, analyze fluorescence in the respective channels compared to unstained and isotype controls.
Protocol: Caspase Activity High-Throughput Screening (HTS) Assay
This protocol is adapted from a recent HTS for caspase-10 inhibitors and exemplifies how caspase activity can be measured in a high-throughput format [108].
- Protein Engineering (Optional): For studying specific caspases like caspase-10 with low background, an engineered protein (e.g.,
proCASP10TEV Linker) where the native cleavage site is replaced with a Tobacco Etch Virus (TEV) protease site can be used [108]. - Assay Setup:
- In a 384-well plate, combine the engineered procaspase-10 (e.g., 333 nM) with TEV protease (e.g., 667 nM) to activate it [108].
- Add the compound library (approximately 100,000 compounds) and incubate.
- Initiate the reaction by adding a fluorogenic caspase substrate (e.g., Ac-VDVAD-AFC for caspase-10) at a working concentration of 10 µM [108].
- Data Acquisition and Analysis:
Troubleshooting Guides and FAQs
Annexin V/Flow Cytometry Troubleshooting
Problem 1: Lack of early apoptotic cells in the analysis, with a large population of late apoptotic/necrotic cells.
- Possible Cause: The treatment conditions are too harsh, causing rapid cell death that bypasses the characteristic stages of apoptosis. This can be caused by high drug concentrations or excessive amounts of organic solvents used to dissolve the drugs [111].
- Solution: Optimize treatment conditions by reducing drug concentration and ensuring the concentration of solvents like DMSO is below 0.5% (v/v) [111].
Problem 2: Unclear cell population clustering in flow cytometry plots.
- Possible Causes:
- Cells have high levels of autofluorescence.
- The cell state is poor, leading to widespread phosphatidylserine (PS) exposure.
- The amount of dye is insufficient for the number of apoptotic cells [111].
- Solutions:
- Use reagent kits with different fluorophores to avoid autofluorescence interference.
- Ensure gentle handling of cells during culture and all experimental procedures.
- Titrate and potentially increase the concentration of the Annexin V and PI/7-AAD dyes [111].
Problem 3: No positive signal from the nuclear dye (PI/7-AAD/DAPI).
- Possible Causes: Forgetting to add the dye, reagent degradation due to improper storage, the cells are not undergoing apoptosis, or the flow cytometer threshold is set too high [111].
- Solutions:
- Repeat the experiment, confirming all dyes are added.
- Check storage conditions (e.g., 7-AAD should be stored at -20°C) and repurchase if needed.
- Include a positive control (e.g., cells treated with a known apoptosis inducer) and check for apoptotic morphology under a microscope.
- Adjust the flow cytometer's threshold and voltage settings [111].
TUNEL Assay Troubleshooting
Problem 1: No positive signal in the TUNEL assay.
- Possible Causes: Degraded DNA in the sample, inactivation of the TdT enzyme, insufficient cell permeabilization, or excessive washing [110].
- Solutions:
- Always include a positive control (e.g., a sample treated with DNase I) to validate the assay workflow.
- Confirm reagents are valid and have not expired.
- Optimize the permeabilization step (e.g., Proteinase K concentration at 10–20 µg/mL for 15–30 minutes).
- Reduce the number and duration of washes, and avoid using a shaker during washing [110].
Problem 2: High background fluorescence in TUNEL staining.
- Possible Causes: Autofluorescence from the sample (e.g., from hemoglobin or mycoplasma contamination), inadequate washing, or weak positive signals requiring excessive exposure [110].
- Solutions:
- Use a positive control to diagnose if the issue is sample-specific.
- For autofluorescence, check unstained controls and consider using fluorescence quenching agents or choosing a fluorophore in a different channel.
- Perform mycoplasma testing and eradication if contamination is suspected.
- Improve washing efficiency by using PBS with 0.05% Tween 20 [110].
Problem 3: Nonspecific staining outside the nucleus.
- Possible Causes: DNA fragmentation from necrosis or tissue autolysis, or excessive concentrations of TdT/dUTP or overly long reaction times [110].
- Solutions:
- Combine TUNEL with morphological staining (e.g., H&E) to distinguish apoptotic nuclei (condensed, fragmented) from necrotic cells.
- Use freshly prepared tissues and minimize processing time.
- Titrate down the concentrations of TdT and labeled dUTP, and/or shorten the reaction incubation time [110].
Research Reagent Solutions
This table lists key reagents and their functions for studying apoptosis pathway activation.
Table 2: Essential Reagents for Apoptosis Pathway Analysis
| Reagent / Kit | Primary Function | Example Application in Pathway Confirmation |
|---|---|---|
| Fluorogenic Caspase Substrates (e.g., Ac-VDVAD-AFC) | Caspase-specific peptides linked to a fluorophore. Cleavage releases the fluorophore, generating a measurable signal. | Directly measuring the enzymatic activity of specific caspases (e.g., caspase-10 with VDVAD) in activity assays [108]. |
| Annexin V Apoptosis Detection Kit | Detects phosphatidylserine (PS) externalization on the cell surface, an early event in apoptosis. | Distinguishing early apoptotic (Annexin V+/PI-), late apoptotic (Annexin V+/PI+), and necrotic (Annexin V-/PI+) populations by flow cytometry [112] [111]. |
| TUNEL Assay Kit | Labels DNA strand breaks, a hallmark of late-stage apoptosis, using terminal deoxynucleotidyl transferase (TdT). | Visualizing and quantifying cells in the final stages of apoptosis in situ (tissue sections) or in culture [110]. |
| Caspase-Specific Antibodies (for Flow Cytometry/Western Blot) | Detect total protein levels or activated (cleaved) forms of caspases. | Confirming the presence and processing/activation of initiator and executioner caspases (e.g., cleaved Caspase-3) [107] [113]. |
| Cell Surface Marker Antibodies (e.g., CD64, CD206) | Identify specific cell phenotypes via proteins expressed on the cell surface. | Immunophenotyping to infer activation of upstream signaling pathways (e.g., M1 polarization via CD64 expression) [107]. |
| Engineed Activable Caspases (e.g., proCASP10TEV Linker) | Engineered zymogens with low background activity, activated by a specific protease (e.g., TEV). | High-throughput screening for state-specific (e.g., zymogen) inhibitors, improving selectivity [108]. |
Pathway Cross-Talk and Experimental Design
The interplay between different programmed cell death pathways is complex. Caspases often act as critical nodes in this network, and their activity can determine the mode of cell death. The following diagram illustrates the central role of caspases like Caspase-8 in regulating apoptosis, necroptosis, and pyroptosis.
Key Experimental Design Consideration: Given this cross-talk, confirming activation of a specific pathway requires a multi-faceted approach. Relying on a single parameter (e.g., only TUNEL for apoptosis) can be misleading. A robust experimental design should combine multiple methods, such as:
- Measuring initiator caspase activity (e.g., caspase-8 for extrinsic apoptosis) [108] [3].
- Detecting executioner caspase activity (caspase-3/7) [109].
- Assessing morphological endpoints (e.g., TUNEL, Annexin V) [111] [110].
- Using specific inhibitors or genetic knockouts to block one pathway and observe the effect on cell fate [3].
Conclusion
Confirming specific apoptosis pathway activation requires a multi-faceted strategy that integrates foundational knowledge of biochemical pathways with carefully selected and validated methodological approaches. A successful confirmation hinges not on a single assay, but on a combination of techniques that provide correlative evidence—from Western blotting showing caspase cleavage to functional assays demonstrating loss of mitochondrial membrane potential. The future of apoptosis research lies in the adoption of real-time, high-content technologies, such as novel fluorescent reporters, that provide dynamic insights into cell death processes. For drug development, this rigorous, pathway-focused approach is paramount for accurately characterizing novel therapeutic mechanisms, such as peptide-mediated disruption of IAP interactions or miRNA inhibition, and for effectively translating these discoveries into clinical applications that can overcome apoptosis resistance in cancer and other diseases.
References
- 1. Apoptosis: A Comprehensive Overview of Signaling ... [https://www.mdpi.com/2073-4409/13/22/1838]
- 2. Mechanisms of Cell Death: Apoptosis - CST Blog [https://blog.cellsignal.com/mechanisms-of-cell-death-apoptosis]
- 3. Caspases as master regulators of programmed cell death [https://www.nature.com/articles/s12276-025-01470-9]
- 4. Targeting apoptotic pathways for cancer therapy - PMC [https://pmc.ncbi.nlm.nih.gov/articles/PMC11245162/]
- 5. Analysis and Solution of Common Problems in Annexin V ... [https://www.elabscience.com/resources/cell-function-guidelines-and-q-a/981?srsltid=AfmBOoqCzE8AK5RMcF_f90jTE48vnJenw9iPK3bCEfRhL-X8gNPscyBR]
- 6. Cell Viability, Proliferation, Cryopreservation, and ... [https://www.thermofisher.com/tr/en/home/technical-resources/technical-reference-library/cell-analysis-support-center/cell-viability-proliferation-cryopreservation-apoptosis-support/cell-viability-proliferation-cryopreservation-apoptosis-support-troubleshooting.html]
- 7. Apoptosis Screening and Profiling Services [https://bpsbioscience.com/screening-profiling-services/apoptosis]
- 8. Caspase Functions in Cell Death and Disease - PMC [https://pmc.ncbi.nlm.nih.gov/articles/PMC3683896/]
- 9. Inhibitor of Apoptosis (IAP) Proteins–Modulators of Cell ... [https://pmc.ncbi.nlm.nih.gov/articles/PMC3552501/]
- 10. Inhibitor of apoptosis [https://en.wikipedia.org/wiki/Inhibitor_of_apoptosis]
- 11. The BCL2 family: from apoptosis mechanisms to new ... [https://www.nature.com/articles/s41392-025-02176-0]
- 12. Bcl-2 family [https://en.wikipedia.org/wiki/Bcl-2_family]
- 13. Reactivating apoptotic pathways in cancer: A review of ... [https://www.sciencedirect.com/science/article/abs/pii/S0014299925007198]
- 14. Experimental protocol to study cell viability and apoptosis [https://www.ptglab.com/support/flow-cytometry-protocol/experimental-protocol-to-study-cell-viability-and-apoptosis/?srsltid=AfmBOopw0p5cuJ4lMYgcH8NKlRBm8riblCXYwAFodA8Hjekir41O9Q5Q]
- 15. Apoptosis Marker Assays for HTS - NCBI [https://www.ncbi.nlm.nih.gov/books/NBK572437/]
- 16. Protocol for measuring the caspase-8 activity at the DED ... [https://pmc.ncbi.nlm.nih.gov/articles/PMC12539301/]
- 17. Multiple entanglements of different cell death pathways, in ... [https://www.frontiersin.org/journals/cell-and-developmental-biology/articles/10.3389/fcell.2025.1667611/full]
- 18. Apoptosis western blot guide [https://www.abcam.com/en-us/knowledge-center/western-blot/western-blot-analysis-of-apoptosis]
- 19. A Comprehensive Exploration of Caspase Detection Methods [https://pmc.ncbi.nlm.nih.gov/articles/PMC11121653/]
- 20. Apoptosis: A Comprehensive Overview of Signaling Pathways ... [https://pmc.ncbi.nlm.nih.gov/articles/PMC11592877/]
- 21. Integrated real-time imaging of executioner dynamics... caspase [https://www.nature.com/articles/s41420-025-02662-y?error=cookies_not_supported&code=997d5d12-8110-4bfe-afc4-0e9db0552642]
- 22. - Apoptotic and - Caspases Cleave Extracellular Domains of... 3 7 [https://pmc.ncbi.nlm.nih.gov/articles/PMC12026882/]
- 23. Using a Real Time Kinetic Cytotoxicity Assay to Determine ... [https://www.promega.com/resources/pubhub/using-a-real-time-kinetic-cytotoxicity-assay-to-determine-when-to-detect-apoptosis/]
- 24. of the Activation - executioner and - caspases promotes microglial... 3 7 [https://jneuroinflammation.biomedcentral.com/articles/10.1186/s12974-020-01902-5]
- 25. Protocol for detection of caspases using immunofluorescence [https://www.abcam.com/en-us/technical-resources/protocols/immunofluorescence-protocol-to-detect-caspases]
- 26. Induction of apoptosis in cells [https://www.abcam.com/en-us/technical-resources/protocols/induce-apopotosis]
- 27. Western blot analysis of cleaved caspase-3 protein [19] [https://bio-protocol.org/exchange/minidetail?id=3198837&type=30]
- 28. Western Blotting Troubleshooting Guide [https://www.cellsignal.com/learn-and-support/troubleshooting/western-blot-troubleshooting-guide?srsltid=AfmBOoqu1FGwNV-9BBKJ7oPgUjk-q2Vt8f_RkPI9KN3wcEOWoaHncD-C]
- 29. Sheet Protector Strategy for Western Blot to Reduce ... [https://pmc.ncbi.nlm.nih.gov/articles/PMC12462392/]
- 30. Why do I see three bands when probing for cleaved ... [https://www.cellsignal.com/learn-and-support/technical-support/why-do-i-see-three-bands-when-probing-for-cleaved-caspase-3/000001077?srsltid=AfmBOopipuUpHTqDCTwoaTV4ImaVCV14ouRcuiDX_oXYkPuhFF0OC2ip]
- 31. Western Blot Troubleshooting [https://www.thermofisher.com/us/en/home/life-science/protein-biology/protein-biology-learning-center/protein-gel-electrophoresis-information/western-blot-troubleshooting.html]
- 32. Annexin V and PI Staining Protocol for Apoptosis by Flow Cytometry | Bio-Techne [https://www.bio-techne.com/resources/protocols-troubleshooting/apoptosis-flow-annexin-v-protocol]
- 33. Annexin V PI Staining Guide for Apoptosis Detection | Boster Bio [https://www.bosterbio.com/blog/post/methods/flow-cytometry-with-annexin-v-pi-staining]
- 34. Phospho-specific flow cytometry in drug discovery [https://www.sciencedirect.com/science/article/abs/pii/S1740674905000594]
- 35. Phospho-protein detection in solid tumors using ... [https://oncology.labcorp.com/phospho-protein-detection-solid-tumors-using-phospho-flow-cytometry]
- 36. Convergence of pathway analysis and pattern recognition ... [https://www.nature.com/articles/s41418-020-0512-5]
- 37. BestProtocols: Annexin V Staining Protocol for Flow Cytometry | Thermo Fisher Scientific - US [https://www.thermofisher.com/us/en/home/references/protocols/cell-and-tissue-analysis/protocols/annexin-v-staining-flow-cytometry.html]
- 38. Immunophenotyping with (phospho)protein profiling and ... [https://pmc.ncbi.nlm.nih.gov/articles/PMC11106235/]
- 39. Kinetic quantification of apoptosis using Incucyte® live-cell ... [https://www.news-medical.net/whitepaper/20251027/Kinetic-quantification-of-apoptosis-using-Incucytec2ae-live-cell-imaging-assays.aspx]
- 40. Monitoring Caspase Activity in Living Cells Using Fluorescent ... [https://pmc.ncbi.nlm.nih.gov/articles/PMC1615789/]
- 41. Caspase-1-responsive fluorescence biosensors for ... [https://www.sciencedirect.com/science/article/abs/pii/S0956566322008521]
- 42. Integrated real-time imaging of executioner caspase ... [https://www.nature.com/articles/s41420-025-02662-y]
- 43. Apoptosis Detection: Methods, Assays & Analysis ... [https://www.revvity.com/ask/apoptosis]
- 44. Apoptosis assays with lymphoma cell lines [https://pmc.ncbi.nlm.nih.gov/articles/PMC2360094/]
- 45. Assessment of Apoptosis by Immunohistochemistry to Active ... [https://pmc.ncbi.nlm.nih.gov/articles/PMC2664986/]
- 46. Apoptosis Detection [https://www.bdbiosciences.com/en-us/learn/research/cell-biology/apoptosis]
- 47. Caspase 9-induced apoptosis enables efficient fetal cell ... [https://www.nature.com/articles/s41467-025-57795-6]
- 48. Immunohistochemistry (IHC) Troubleshooting Guide & the ... [https://www.cellsignal.com/learn-and-support/troubleshooting/ihc-troubleshooting-guide?srsltid=AfmBOorHc3XKbUk31YDfzerbmFYoygc7VK6bhbjjIeB5HuoLrzrZJ6XF]
- 49. IHC Troubleshooting Guide [https://www.thermofisher.com/us/en/home/life-science/protein-biology/protein-biology-learning-center/protein-biology-resource-library/pierce-protein-methods/ihc-troubleshooting-guide.html]
- 50. Troubleshooting Guide: Immunohistochemistry [https://www.rndsystems.com/resources/technical/troubleshooting-guide-immunohistochemistry]
- 51. Tumor Tissue Microarrays (TMAs): Importance, ... [https://blog.crownbio.com/tumor-tissue-microarrays-cancer-research]
- 52. TMRE-Mitochondrial Membrane Potential Assay Kit [https://www.abcam.com/en-us/products/assay-kits/tmre-mitochondrial-membrane-potential-assay-kit-ab113852]
- 53. Extracellular ATP induces apoptosis through P2X7R activation ... [https://pmc.ncbi.nlm.nih.gov/articles/PMC5351599/]
- 54. Flow cytometry detection of caspase 3 activation in ... [https://pubmed.ncbi.nlm.nih.gov/10805935/]
- 55. Human Caspase 3 (Cleaved) ELISA Kit (KHO1091) [https://www.thermofisher.com/elisa/product/Human-Caspase-3-Cleaved-ELISA-Kit/KHO1091]
- 56. A Comprehensive Exploration of Caspase Detection Methods [https://www.mdpi.com/1422-0067/25/10/5460]
- 57. Raptinal: a powerful tool for rapid induction of apoptotic cell ... [https://www.nature.com/articles/s41420-024-02120-1]
- 58. From computational modelling of the intrinsic apoptosis ... [https://www.nature.com/articles/cddis201436]
- 59. Systems analysis of apoptosis protein expression allows ... [https://www.nature.com/articles/cdd2013106]
- 60. Apoptosis-related genes change their expression with age ... [https://pmc.ncbi.nlm.nih.gov/articles/PMC2829878/]
- 61. Cell-Based Methods for Determination of Efficacy ... [https://pmc.ncbi.nlm.nih.gov/articles/PMC6313784/]
- 62. Apoptosis – what assay should I use? [https://www.bmglabtech.com/en/blog/apoptosis-what-assay-should-i-use/]
- 63. Mistiming Death: Modeling the Time-Domain Variability of ... [https://pmc.ncbi.nlm.nih.gov/articles/PMC8279023/]
- 64. Protocols & Troubleshooting Guides [https://www.rndsystems.com/resources/protocols-troubleshooting-guides]
- 65. What is the difference between necrosis and apoptosis? [https://www.ptglab.com/news/blog/what-is-the-difference-between-necrosis-and-apoptosis/?srsltid=AfmBOopMGBtOTCAX4VYQuUbQYrPom7Hug9VhA72_k9-Lp2QNmEqGmAzv]
- 66. Guidelines for the use and interpretation of assays ... [https://pmc.ncbi.nlm.nih.gov/articles/PMC2757140/]
- 67. Chapter 24 Difficulties and pitfalls in analysis of apoptosis [https://www.sciencedirect.com/science/article/pii/S0091679X01630280]
- 68. Discriminating Between Apoptosis, Necrosis, Necroptosis ... [https://pubmed.ncbi.nlm.nih.gov/38112058/]
- 69. Guidelines for Regulated Cell Death Assays - PubMed Central [https://pmc.ncbi.nlm.nih.gov/articles/PMC7970050/]
- 70. Insights on the crosstalk among different cell death ... [https://www.nature.com/articles/s41420-025-02328-9]
- 71. How to Control Your Apoptosis, Autophagy & Mitophagy ... [https://blog.cellsignal.com/control-extracts-for-western-blot]
- 72. Death by design: mechanism and control of apoptosis [https://www.sciencedirect.com/science/article/pii/S0968000499014851]
- 73. Experimental protocol to study cell viability and apoptosis [https://www.ptglab.com/support/flow-cytometry-protocol/experimental-protocol-to-study-cell-viability-and-apoptosis/?srsltid=AfmBOooxnQ3I5_w_3apMF5-RoUT8G6SNVcNXRtk34VCnNwxk90H3oSEU]
- 74. Apoptosis: A Four-Week Laboratory Investigation for ... [https://pmc.ncbi.nlm.nih.gov/articles/PMC256977/]
- 75. Sample Preparation of Adherent Cell Lines for Flow ... [https://pubmed.ncbi.nlm.nih.gov/39835228/]
- 76. Common Problems and Solutions in Annexin V-Based Flow ... [https://www.yeasenbio.com/blogs/cell/common-problems-and-solutions-in-annexin-v-based-flow-cytometry-apoptosis-assays]
- 77. Analysis and Solution of Common Problems in Annexin V ... [https://www.elabscience.com/resources/cell-function-guidelines-and-q-a/981?srsltid=AfmBOoq_bzcUJVzavzqwvzBwfS8RG9sk0fv1JC6Q6pmHvuXqX5cxKq8v]
- 78. Annexin V PI Staining Guide for Apoptosis Detection [https://www.bosterbio.com/blog/post/methods/flow-cytometry-with-annexin-v-pi-staining?srsltid=AfmBOoqgKbNXS3MVGRli1eQkhFd6q7liXbkk4LaVHlZakyapjggHX3s5]
- 79. Common Problems and Solutions in TUNEL Assay for ... [https://www.arcegen.com/blogs/cell-anti-contamination-assembly/common-problems-and-solutions-in-tunel-assay-for-detecting-cell-apoptosis]
- 80. Interference and Artifacts in High-content Screening - NCBI - NIH [https://www.ncbi.nlm.nih.gov/books/NBK615088/]
- 81. Help for Your New Lab Techs: Avoiding Sample Prep ... [https://blog.omni-inc.com/blog/help-for-your-new-lab-techs-avoiding-sample-prep-mistakes]
- 82. Luminex Troubleshooting Guide [https://www.rndsystems.com/resources/protocols/troubleshooting-guide-luminex]
- 83. An Overview of the Current State of Cell Viability ... [https://pmc.ncbi.nlm.nih.gov/articles/PMC11719996/]
- 84. Cellular Mechanisms Controlling Caspase Activation and ... [https://pmc.ncbi.nlm.nih.gov/articles/PMC3660825/]
- 85. Caspases Inhibitors and Activators [https://www.sigmaaldrich.com/US/en/technical-documents/technical-article/protein-biology/protein-expression/caspases?srsltid=AfmBOop53sOgIpG6zat614xnUPx2Kfl5V-1JueqkH7w-wMGUkxPRAgfZ]
- 86. Thorough validation of siRNA-induced cell death ... [https://pmc.ncbi.nlm.nih.gov/articles/PMC1345702/]
- 87. Knock-down of LRP/LR promotes apoptosis in early and late ... [https://bmccancer.biomedcentral.com/articles/10.1186/s12885-018-4531-2]
- 88. 2.3. siRNA-Mediated Knockdown of LDLR and Caspase-3 ... [https://bio-protocol.org/exchange/minidetail?id=18327347&type=30]
- 89. Guidelines for Regulated Cell Death Assays: A Systematic ... [https://www.frontiersin.org/journals/cell-and-developmental-biology/articles/10.3389/fcell.2021.634690/full]
- 90. Apoptosis Assay Protocol | Technical Note 244 [https://www.denovix.com/tn-244-denovix-apoptosis-assay-protocol/]
- 91. Antibody validation for Western blot: By the user, for the user [https://pmc.ncbi.nlm.nih.gov/articles/PMC6983856/]
- 92. Antibody Validation for Flow Cytometry [https://blog.addgene.org/antibody-validation-for-flow-cytometry]
- 93. Nine quick tips for pathway enrichment analysis - PMC [https://pmc.ncbi.nlm.nih.gov/articles/PMC9371296/]
- 94. How to test activation/inactivation of pathways? [https://www.biostars.org/p/242519/]
- 95. Flow cytometry-based apoptosis detection - PMC [https://pmc.ncbi.nlm.nih.gov/articles/PMC3863590/]
- 96. Light Microscopy as a Tool to Detect Apoptosis and Other ... [https://pmc.ncbi.nlm.nih.gov/articles/PMC12051451/]
- 97. Microfluidic system for immune cell activation and ... [https://pmc.ncbi.nlm.nih.gov/articles/PMC9553286/]
- 98. A Microfluidic Fluorescent Flow Cytometry Capable of ... [https://www.nature.com/articles/s41598-018-32333-1]
- 99. The Intersection of Flow Cytometry with Microfluidics and ... [https://pmc.ncbi.nlm.nih.gov/articles/PMC4077616/]
- 100. Analysis and Solution of Common Problems in Annexin V ... [https://www.elabscience.com/resources/cell-function-guidelines-and-q-a/981?srsltid=AfmBOopCVjV1_rrKtnnMIA-I1fZoJHZpd0U5K1F40rFsCVXkyOaSAmrM]
- 101. AI-CMCA: a deep learning-based segmentation framework ... [https://www.nature.com/articles/s41598-025-11508-7]
- 102. Cell Viability, Proliferation, Cryopreservation, and ... [https://www.thermofisher.com/us/en/home/technical-resources/technical-reference-library/cell-analysis-support-center/cell-viability-proliferation-cryopreservation-apoptosis-support/cell-viability-proliferation-cryopreservation-apoptosis-support-troubleshooting.html]
- 103. Survivin and Tumorigenesis: Molecular Mechanisms and ... [https://pmc.ncbi.nlm.nih.gov/articles/PMC4747886/]
- 104. Survivin (BIRC5): Implications in cancer therapy [https://www.sciencedirect.com/science/article/pii/S0024320524003783]
- 105. SURVIVIN AND IAP PROTEINS IN CELL DEATH ... [https://pmc.ncbi.nlm.nih.gov/articles/PMC3198835/]
- 106. Seven Assays to Detect Apoptosis - CST Blog [https://blog.cellsignal.com/blog.cellsignal.com/cell-process-seven-assays-to-detect-apoptosis]
- 107. Comparative analysis of RT-qPCR, flow cytometry, and Di ... [https://pmc.ncbi.nlm.nih.gov/articles/PMC12418842/]
- 108. An activation-based high throughput screen identifies caspase ... [https://pubs.rsc.org/en/content/articlehtml/2025/cb/d5cb00017c]
- 109. Restoring apoptosis in breast cancer via peptide mediated ... [https://www.nature.com/articles/s41598-025-24772-4]
- 110. How Much Do You Know About TUNEL Staining? A ... - Yeasen [https://www.yeasenbio.com/blogs/cell/how-much-do-you-know-about-tunel-staining-a-troubleshooting-guide-for-abnormal-staining-results]
- 111. Analysis and Solution of Common Problems in Annexin V ... [https://www.elabscience.com/resources/cell-function-guidelines-and-q-a/981?srsltid=AfmBOooF9kaiepXMtvmDkNBDJcjJGqCpSUYLKiBeVrFJGnkb2Ay7T5bm]
- 112. North America Apoptosis Assay Market Trends 2025–2034 [https://www.gminsights.com/industry-analysis/north-america-apoptosis-assay-market]
- 113. Detection of CLCF1 protein expression by flow cytometry [https://www.nature.com/articles/s41598-024-64101-9]