Achieving Low-Background Cleaved Caspase-3 Immunofluorescence: A Complete Guide from Basics to Advanced Applications
This article provides a comprehensive guide for researchers and drug development professionals on performing cleaved caspase-3 immunofluorescence with minimal background.
Achieving Low-Background Cleaved Caspase-3 Immunofluorescence: A Complete Guide from Basics to Advanced Applications
Abstract
This article provides a comprehensive guide for researchers and drug development professionals on performing cleaved caspase-3 immunofluorescence with minimal background. It covers the foundational role of caspase-3 as an apoptosis executioner, detailed protocols for sample preparation and antibody selection, advanced troubleshooting for common artifacts, and methods for validation against other techniques. The content integrates the latest methodological insights and commercial antibody comparisons to enable precise, reliable detection of apoptotic cells in both 2D and 3D culture systems for research and screening applications.
Understanding Cleaved Caspase-3: The Key Executioner of Apoptosis and Its Detection Principle
The Critical Role of Caspase-3 in Apoptotic Pathways and Cell Death
Caspase-3 is a crucial executioner protease that serves as a central mediator of apoptotic cell death, playing an indispensable role in both physiological and pathological processes. As a member of the cysteine-aspartic acid protease family, caspase-3 exists as an inactive 32-kDa proenzyme that requires proteolytic cleavage at specific aspartate residues to become activated into its functional form, consisting of p17 and p12 subunits [1]. This activation places caspase-3 at the convergence point of both intrinsic and extrinsic apoptotic pathways, where it catalyzes the specific cleavage of numerous key cellular proteins, ultimately leading to the characteristic morphological and biochemical changes associated with apoptosis [2].
The critical nature of caspase-3 in normal development is evidenced by its essential role in brain development, while in disease contexts, particularly cancer, its dysregulation contributes significantly to pathogenesis [2]. Beyond its classical apoptotic functions, emerging research has revealed that caspase-3 also participates in non-apoptotic processes including synaptic plasticity and long-term depression in neurons through cleavage of substrates such as Gap43 [3]. Furthermore, caspase-3 interacts with pyroptotic pathways through its ability to cleave Gasdermin E (GSDME), serving as a molecular switch between apoptotic and pyroptotic cell death modalities depending on cellular context [4].
Caspase-3 in Apoptotic Signaling Pathways
Biochemical Characteristics and Activation Mechanisms
Caspase-3 functions as a key executioner caspase that is activated through proteolytic processing by initiator caspases in both major apoptotic pathways. The enzyme recognizes and cleaves peptide bonds following aspartate residues, with particular specificity for the DEVD sequence (Asp-Glu-Val-Asp) [5]. Initially synthesized as an inactive zymogen, caspase-3 undergoes proteolytic cleavage at specific aspartate residues to form the active heterotetramer composed of two p17 and two p12 subunits [1]. This activation mechanism positions caspase-3 downstream in the caspase cascade, where it serves as the primary effector of apoptotic execution.
The activation of caspase-3 occurs through two well-defined hierarchical pathways. In the intrinsic pathway, cellular stress signals such as DNA damage or oxidative stress trigger mitochondrial outer membrane permeabilization, leading to cytochrome c release into the cytosol. Cytochrome c then binds to Apaf-1, forming the apoptosome complex that activates caspase-9, which in turn cleaves and activates procaspase-3 [4] [6]. In the extrinsic pathway, death ligands such as TNF-α or Fas ligand bind to their corresponding death receptors, leading to the formation of the death-inducing signaling complex (DISC) and activation of caspase-8, which can directly cleave and activate procaspase-3 [4]. Additionally, caspase-8 can cleave Bid to generate tBid, which amplifies the apoptotic signal through the intrinsic pathway [4].
Caspase-3-Mediated Apoptotic Execution
Once activated, caspase-3 orchestrates the systematic dismantling of the cell through cleavage of specific structural and functional proteins. The protease catalyzes the cleavage of numerous vital cellular substrates, including structural proteins like nuclear lamins, cytoskeletal proteins, and DNA repair enzymes such as PARP, leading to the characteristic morphological changes of apoptosis [2]. These changes include chromatin condensation, DNA fragmentation into oligonucleosomal fragments, plasma membrane blebbing, and eventual formation of apoptotic bodies [2] [1].
The essential nature of caspase-3 for certain apoptotic processes is demonstrated by its indispensable role in apoptotic chromatin condensation and DNA fragmentation across all cell types examined [2]. The activation of caspase-3 represents a commitment point in the cell death pathway, after which the process becomes irreversible. This commitment is reflected in caspase-3's function as a crucial mediator that determines cellular viability in response to diverse death stimuli [2].
Figure 1: Caspase-3 Activation Pathways in Apoptosis. This diagram illustrates the intrinsic (mitochondrial) and extrinsic (death receptor) pathways that converge on caspase-3 activation, leading to execution of apoptosis.
Caspase-3 as a Switch Between Apoptosis and Pyroptosis
Beyond its established role in apoptosis, caspase-3 serves as a critical molecular switch determining cellular fate between apoptosis and pyroptosis through its interaction with Gasdermin E (GSDME). The decision between these distinct cell death modalities depends on the expression levels and cleavage status of GSDME [4]. When GSDME is highly expressed in cells, activated caspase-3 cleaves GSDME, releasing its N-terminal domain that translocates to the plasma membrane and forms pores, resulting in the characteristic swelling, membrane rupture, and inflammatory death of pyroptosis [4]. Conversely, when GSDME expression is low or absent, caspase-3 activation leads to classical apoptosis without the inflammatory component [4].
This switching mechanism has significant implications for cancer biology and therapy. Interestingly, GSDME expression is frequently silenced in cancer cells through promoter hypermethylation, shifting the balance toward non-inflammatory apoptotic death [4]. However, treatment with DNA methyltransferase inhibitors such as Decitabine can reverse this silencing, restoring GSDME expression and potentially redirecting cell death toward pyroptosis, which may enhance anti-tumor immunity through the release of inflammatory mediators [4]. This caspase-3/GSDME axis represents a promising target for cancer therapy, as it potentially allows for harnessing both cell death pathways while stimulating anti-tumor immune responses.
The positioning of GSDME in cell death pathways is bidirectional, as it can function both downstream and upstream of caspase-3. In some contexts, GSDME connects extrinsic and intrinsic apoptotic pathways and promotes caspase-3 activation, forming a self-amplifying feed-forward loop that enhances cell death execution [4]. This complex interplay between caspase-3 and GSDME demonstrates the sophisticated regulation of cell death pathways and provides multiple potential intervention points for therapeutic manipulation.
Detection Methods and Activity Assays for Caspase-3
Comparison of Caspase-3 Detection Methodologies
Table 1: Comparative Analysis of Caspase-3 Detection Methods
| Method | Principle | Applications | Sensitivity | Throughput | Key Advantages |
|---|---|---|---|---|---|
| Immunofluorescence | Antibody binding to caspase-3 with fluorescent detection | Fixed cells/tissues, spatial localization | Moderate | Low-medium | Preserves cellular architecture, subcellular localization [7] |
| Colorimetric Assay | DEVD-pNA cleavage measured at 405nm | Cell lysates, activity quantification | High | Medium-high | Simple, convenient, quantitative activity measurement [5] |
| FRET-Based Sensors | Cleavage of DEVD sequence between fluorophores | Live-cell imaging, real-time kinetics | High | Low | Real-time monitoring in live cells, temporal resolution [8] |
| FLIM-FRET | Fluorescence lifetime changes upon DEVD cleavage | Complex environments (3D, in vivo) | Very High | Low | Intensity-independent, suitable for thick samples [9] |
| Western Blot | Antibody detection following electrophoresis | Protein expression/cleavage in lysates | Moderate | Low | Confirms specific cleavage, semi-quantitative [6] |
| Genetically Encoded Reporters | Circularly permuted fluorescent proteins | Long-term live-cell imaging | High | Medium | No substrate addition, compatible with extended imaging [8] |
Detailed Immunofluorescence Protocol for Cleaved Caspase-3 Detection
The following protocol provides a standardized method for detecting cleaved caspase-3 in fixed cell samples using immunofluorescence, optimized for low background and high specificity:
Sample Preparation and Fixation:
- Culture cells on sterile glass coverslips until they reach 60-80% confluence.
- Apply apoptotic stimuli as required by experimental design (e.g., chemotherapeutic agents, UV irradiation, or other death inducers).
- Rinse cells gently with warm phosphate-buffered saline (PBS, pH 7.4) to remove debris and dead cells.
- Fix cells with 4% paraformaldehyde in PBS for 15 minutes at room temperature.
- Rinse three times with PBS, 5 minutes per wash.
Permeabilization and Blocking:
- Permeabilize fixed samples by incubating in PBS containing 0.1% Triton X-100 for 5 minutes at room temperature to allow antibody access to intracellular epitopes.
- Wash three times with PBS, 5 minutes each at room temperature.
- Drain excess liquid and add 200 μL of blocking buffer (PBS/0.1% Tween 20 + 5% serum from the host species of the secondary antibody).
- Lay slides flat in a humidified chamber and incubate for 1-2 hours at room temperature to block non-specific binding sites.
- Rinse once briefly with PBS.
Antibody Incubation:
- Prepare primary antibody (e.g., anti-cleaved caspase-3) diluted 1:200 in blocking buffer.
- Apply 100 μL of diluted primary antibody to each sample.
- Incubate slides in a humidified chamber overnight at 4°C.
- Include a negative control without primary antibody to assess non-specific binding.
- The following day, wash slides three times for 10 minutes each with PBS/0.1% Tween 20 at room temperature.
Detection and Mounting:
- Prepare appropriate fluorescently-labeled secondary antibody (e.g., goat anti-rabbit Alexa Fluor 488 conjugate) diluted 1:500 in PBS.
- Apply 100 μL of secondary antibody solution to each sample.
- Incubate in a humidified chamber, protected from light, for 1-2 hours at room temperature.
- Wash three times with PBS/0.1% Tween 20 for 5 minutes each, protected from light.
- Drain excess liquid and mount slides using an appropriate anti-fade mounting medium.
- Seal coverslips with clear nail polish and store at 4°C protected from light until imaging.
- Image using a fluorescence microscope with appropriate filter sets [7].
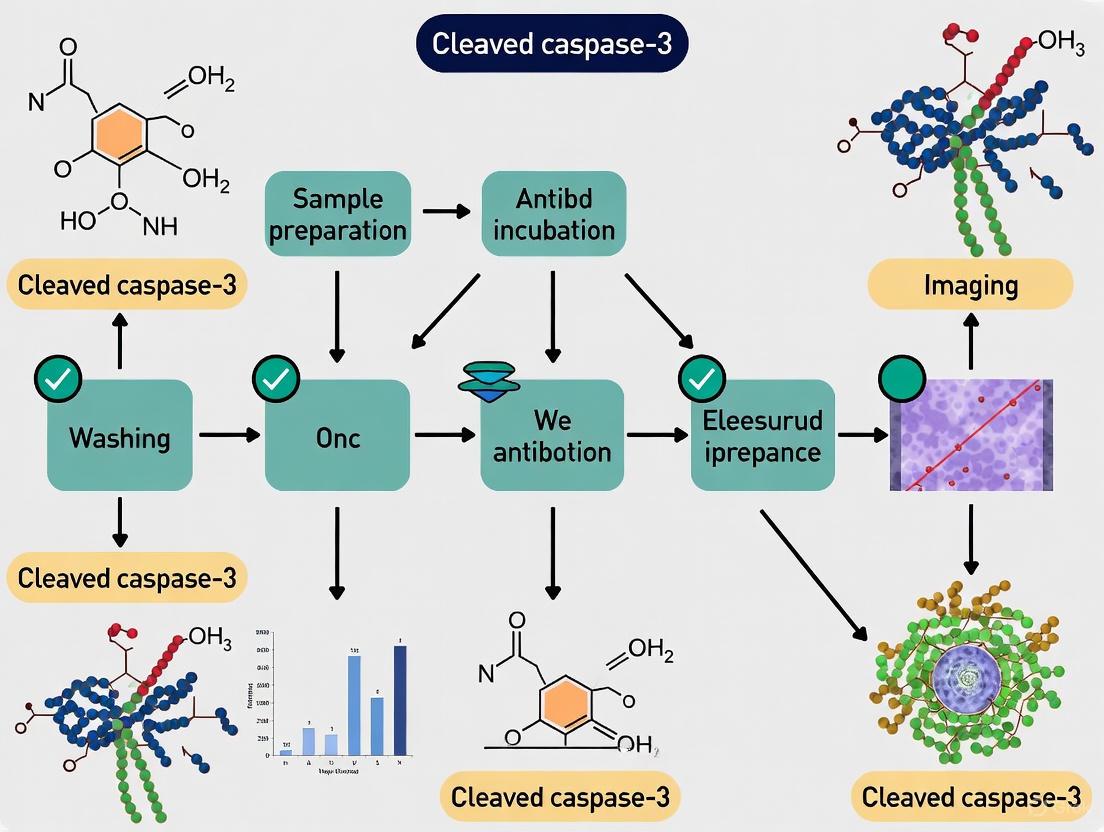
Figure 2: Immunofluorescence Workflow for Cleaved Caspase-3 Detection. Key incubation steps are highlighted in yellow, indicating critical phases requiring precise optimization.
Advanced Fluorescence-Based Detection Systems
Recent technological advances have enabled the development of sophisticated genetically-encoded reporters for real-time monitoring of caspase-3 activity in live cells. One innovative approach involves cyclized chimeric proteins containing caspase-3 cleavage sites that switch from non-fluorescent to fluorescent upon cleavage [8]. These reporters, such as the Venus-based caspase-3 activity indicator (VC3AI), remain non-fluorescent in healthy cells but become strongly fluorescent upon cleavage by activated caspase-3/7 during apoptosis, providing a robust signal-to-background ratio for sensitive detection [8].
Fluorescence Lifetime Imaging Microscopy (FLIM) combined with FRET-based caspase-3 reporters represents another advanced methodology that offers significant advantages for complex experimental environments. FLIM-FRET measures changes in fluorescence lifetime rather than intensity, making it independent of reporter concentration, excitation light fluctuations, and tissue depth [9]. This technique is particularly valuable for monitoring caspase-3 activation in 3D cell culture systems, tumor spheroids, and in vivo models where traditional intensity-based measurements may be compromised by light scattering and absorption [9]. The LSS-mOrange-DEVD-mKate2 FRET pair exemplifies this technology, where caspase-3 cleavage separates the donor and acceptor molecules, resulting in increased donor fluorescence lifetime that can be precisely quantified [9].
Research Reagent Solutions for Caspase-3 Studies
Table 2: Essential Research Reagents for Caspase-3 Detection and Inhibition
| Reagent Category | Specific Examples | Function & Application | Key Features |
|---|---|---|---|
| Primary Antibodies | Anti-Caspase-3, Anti-cleaved Caspase-3 | Target protein detection in IF, WB | Specificity for pro-form or activated cleaved form [7] [1] |
| Fluorescent Secondaries | Goat anti-rabbit Alexa Fluor 488 conjugate | Signal amplification and detection | High brightness, photostability for sensitive detection [7] |
| Colorimetric Substrates | Ac-DEVD-pNA | Caspase-3 activity measurement | Cleavage releases pNA, measurable at 405nm [5] |
| Specific Inhibitors | Ac-DEVD-CHO, Z-DEVD-fmk | Caspase-3 activity inhibition | Irreversible active-site targeting, mechanism validation [5] [8] |
| FRET Reporters | LSS-mOrange-DEVD-mKate2, VC3AI | Live-cell caspase-3 activity monitoring | Real-time kinetics, single-cell resolution [9] [8] |
| Cell Lysis Buffers | Commercial caspase lysis buffers | Protein extraction for activity assays | Maintains enzyme activity, compatible with downstream applications [5] |
| Control Materials | pNA standard, active recombinant caspase-3 | Assay standardization and validation | Quantification reference, protocol optimization [5] |
Clinical Implications and Therapeutic Applications
The role of caspase-3 extends beyond fundamental biology into significant clinical applications, particularly in cancer diagnostics, prognosis, and therapeutic development. In buccal mucosa squamous cell carcinoma (BMSCC), elevated expression levels of both caspase-3 and cleaved caspase-3 have been observed in tumor tissues compared to adjacent normal tissues, suggesting their involvement in tumorigenesis [1]. Importantly, high caspase-3 expression correlates with poor pathological outcomes including advanced pathological stage and larger tumor size, indicating its potential value as a prognostic biomarker [1].
The paradoxical association between caspase-3 expression and poor prognosis in certain cancers may reflect complex compensatory mechanisms where cancer cells develop strategies to survive despite caspase-3 activation, or alternatively, that caspase-3 contributes to tumor progression through non-apoptotic functions. In BMSCC patients receiving postoperative radiotherapy, high caspase-3 expression was associated with poor disease-free survival, suggesting its potential utility in predicting treatment response [1]. Furthermore, patients with early-stage disease or without lymph node invasion showed better disease-specific survival when they had low co-expression of both cleaved caspase-3 and caspase-3 compared to those with positive/high expression of either or both proteins [1].
From a therapeutic perspective, the caspase-3/GSDME signaling axis presents promising opportunities for cancer treatment strategies. By modulating the switch between apoptosis and pyroptosis through manipulation of GSDME expression, it may be possible to enhance the anti-tumor efficacy of conventional chemotherapeutic agents while simultaneously stimulating anti-tumor immunity [4]. The ability to redirect cell death toward the more inflammatory pyroptotic pathway could potentially overcome the immunosuppressive tumor microenvironment and enhance therapeutic outcomes. Additionally, caspase-3 detection methods serve as valuable tools in drug discovery pipelines, enabling high-throughput screening of compounds that can effectively induce apoptotic cell death in target cells [6].
Caspase-3 is a cysteine-aspartic acid protease that functions as a critical executioner of apoptosis, responsible for the proteolytic cleavage of many key cellular proteins, such as poly(ADP-ribose) polymerase (PARP) [10]. This enzyme exists in cells as an inactive zymogen that requires proteolytic processing for activation. The activation mechanism involves cleavage at specific aspartic acid residues to generate the mature active enzyme composed of large (p17) and small (p12) subunits [10] [11]. Understanding the precise molecular events that distinguish the active form of caspase-3 from its inactive precursor is fundamental for accurate interpretation of apoptosis assays in research and drug development contexts.
The transition from inactive procaspase-3 to active caspase-3 involves two crucial cleavage events. The initial cleavage occurs within the interdomain linker by initiator caspases (such as caspase-9), followed by a second cleavage that removes the N-terminal prodomain [12]. Recent research has revealed that the prodomain plays a previously unrecognized regulatory role in this process, with specific amino acids within the first 10 N-terminal residues being essential for prodomain removal and full caspase activation [12]. This sophisticated regulatory mechanism ensures precise control over this potent executioner of cell death.
Molecular Mechanisms of Caspase-3 Activation
Structural Transitions During Activation
The structural transformation of caspase-3 from inactive zymogen to active protease involves coordinated conformational changes and proteolytic processing. In its inactive form, caspase-3 exists as a dimer with a structure that maintains the enzyme in a latent state. The activation process requires proteolytic processing at specific aspartic acid residues, including Asp175, which separates the large and small subunits [10]. This cleavage event is essential for the formation of the active site configuration.
Table 1: Key Cleavage Sites in Caspase-3 Activation
| Site | Position | Function | Resulting Fragments |
|---|---|---|---|
| D9 | Prodomain | Initial activation cleavage | Enables prodomain removal |
| D28 | Prodomain/p20 junction | Complete prodomain removal | Releases prodomain |
| D175 | Large/small subunit junction | Active site formation | p17 and p12 subunits |
Following cleavage at Asp175, the p17 and p12 subunits dimerize to form the active heterotetramer (p17/p12)₂, which constitutes the functional enzyme with exposed active site centered at cysteine 163 (C163) [12] [10]. The formation of this heterotetramer is essential not only for catalytic activity but also for enzyme stability, as the active complex is otherwise rapidly degraded within cells [11].
Critical Role of the Prodomain
Contrary to earlier assumptions, the N-terminal prodomain of caspase-3 is not merely an inhibitory region but plays an active regulatory role in the activation process. Research using caspase-3 mutants has demonstrated that complete removal of the 28-amino acid prodomain (Δ28 mutant) does not result in constitutive enzyme activity but rather lowers the activation threshold, making cells more susceptible to death signals [12].
Interestingly, specific regions within the prodomain are essential for proper activation. Removal of the first 10 N-terminal amino acids (Δ10 mutant) renders caspase-3 inactive, despite cleavage at the interdomain linker [12]. Point mutation studies have identified aspartic acid at position 9 (D9) as particularly critical for caspase-3 function, suggesting that an initial cleavage event at D9 is prerequisite for subsequent cleavage at D28 that completely removes the prodomain and enables full caspase activation [12].
Caspase-3 Activation Pathway: This diagram illustrates the sequential proteolytic processing events required for caspase-3 activation, highlighting the critical role of prodomain cleavage at D9 and D28 prior to the formation of the active heterotetramer.
Detection Methodologies for Active Caspase-3
Antibody-Based Detection Strategies
Immunofluorescence detection of cleaved caspase-3 relies on antibodies that specifically recognize the activated form of the enzyme while showing minimal reactivity with the full-length procaspase-3. The Cleaved Caspase-3 (Asp175) Antibody (#9661) exemplifies such reagents, as it detects endogenous levels of the large fragment (17/19 kDa) of activated caspase-3 resulting from cleavage adjacent to Asp175, but does not recognize full-length caspase-3 or other cleaved caspases [10].
Table 2: Antibody Specifications for Cleaved Caspase-3 Detection
| Parameter | Specification | Application Details |
|---|---|---|
| Target Epitope | Amino-terminal residues adjacent to Asp175 | Synthetic peptide immunogen |
| Reactivity | Human, Mouse, Rat, Monkey | 100% sequence homology |
| Western Blot | 1:1000 dilution | Detects 17/19 kDa fragments |
| Immunofluorescence | 1:400 dilution | Fixed and permeabilized cells |
| Flow Cytometry | 1:800 dilution | Fixed/Permeabilized conditions |
| Specificity | Does not recognize full-length caspase-3 | Minimal cross-reactivity |
The specificity of these antibodies is paramount for accurate interpretation of experimental results. For instance, the Cleaved Caspase-3 (Asp175) Antibody has been validated to detect only the activated form resulting from cleavage adjacent to Asp175, providing researchers with a specific tool for distinguishing active caspase-3 from its inactive precursor [10] [13].
Immunofluorescence Protocol for Cleaved Caspase-3
This optimized protocol enables specific detection of active caspase-3 in fixed cells while minimizing background signal, making it ideal for apoptosis research in various cell types.
Materials Required:
- Primary antibody against cleaved caspase-3 (e.g., Cleaved Caspase-3 (Asp175) Antibody #9661)
- Prepared, fixed samples on slides
- Triton X-100 or NP-40
- PBS
- Blocking buffer (PBS/0.1% Tween 20 + 5% appropriate serum)
- Fluorescently conjugated secondary antibody (e.g., Alexa Fluor conjugates)
- Mounting medium
- Humidified chamber
Procedure:
- Permeabilization: Incubate fixed samples in PBS/0.1% Triton X-100 (or 0.1% NP-40) for 5 minutes at room temperature [7].
- Washing: Wash slides three times in PBS, for 5 minutes each at room temperature.
- Blocking: Drain slides and apply 200 μL of blocking buffer (PBS/0.1% Tween 20 + 5% serum from secondary antibody host species). Incubate flat in a humidified chamber for 1-2 hours at room temperature [7].
- Primary Antibody Incubation: Apply 100 μL of primary antibody diluted in blocking buffer (recommended 1:200-1:400 depending on validation). Incubate slides in a humidified chamber overnight at 4°C [7] [10].
- Washing: The next day, wash slides three times for 10 minutes each in PBS/0.1% Tween 20 at room temperature.
- Secondary Antibody Incubation: Apply 100 μL of appropriate fluorescently conjugated secondary antibody diluted in PBS (typically 1:500). Incubate protected from light for 1-2 hours at room temperature [7].
- Final Washes: Wash three times in PBS/0.1% Tween 20 for 5 minutes, protected from light.
- Mounting: Drain liquid, apply mounting medium, and observe with fluorescence microscopy.
Critical Controls:
- Include a negative control without primary antibody to assess non-specific secondary antibody binding
- Use apoptosis-induced positive control cells to validate antibody performance
- Include caspase-3 inhibitor-treated cells (e.g., Z-DEVD-FMK) to confirm specificity [11]
Cleaved Caspase-3 IF Workflow: This experimental workflow details the critical steps for specific detection of active caspase-3 by immunofluorescence, highlighting proper permeabilization, blocking, and washing procedures to minimize background.
Validation and Troubleshooting
Specificity Validation Techniques
Ensuring antibody specificity is crucial for accurate interpretation of cleaved caspase-3 detection. Several validation approaches should be employed:
Pharmacological Inhibition: Utilize cell-permeable caspase-3 selective inhibitors (e.g., Z-DEVD-FMK) to prevent caspase-3 activation. These inhibitors not only block enzymatic activity but also stabilize the active complex by preventing its degradation [11]. In cells treated with such inhibitors, cleaved caspase-3 immunoreactivity should be significantly reduced.
Genetic Approaches: Employ caspase-3 deficient cell lines complemented with wild-type or catalytically inactive caspase-3 (C163A or C163S mutants) [12]. The catalytically inactive mutants undergo cleavage but lack enzymatic activity, helping distinguish between mere cleavage and functional activation.
Molecular Weight Verification: By western blot analysis, confirm that detected bands correspond to the expected molecular weights of the large fragment (17/19 kDa) of activated caspase-3 [10]. This helps exclude non-specific recognition of unrelated proteins.
Troubleshooting Common Issues
Table 3: Troubleshooting Guide for Cleaved Caspase-3 Detection
| Problem | Potential Causes | Solutions |
|---|---|---|
| High Background | Inadequate blocking or washing | Extend blocking time to 2 hours; increase wash frequency; use serum from secondary antibody host species |
| Weak Signal | Low antibody concentration or poor antigen preservation | Titrate primary antibody concentration; optimize fixation conditions; avoid over-fixation |
| No Signal in Positive Controls | Antibody incompatibility or inactive reagents | Validate antibody with confirmed positive control; check reagent expiration dates |
| Non-specific Nuclear Staining | Antibody cross-reactivity | Validate with appropriate controls; this may occur in specific cell types (e.g., pancreatic alpha-cells) [10] |
| Inconsistent Results | Variable cell treatment conditions | Standardize apoptosis induction protocols; include internal controls in each experiment |
Stability Considerations: Researchers should note that active caspase-3 is rapidly degraded in cells, making detection challenging [11]. This degradation is dependent on the catalytic activity of the mature enzyme, as catalytically inactive mutants show increased stability. The use of caspase inhibitors can stabilize the active complex through protein-inhibitor interaction, potentially enhancing detection [11].
Research Reagent Solutions
The following table provides essential reagents and their specific applications for studying caspase-3 activation and activity:
Table 4: Essential Research Reagents for Caspase-3 Studies
| Reagent | Function | Application Notes |
|---|---|---|
| Cleaved Caspase-3 (Asp175) Antibody #9661 | Specific detection of activated caspase-3 | Recognizes p17/19 fragments; works in WB, IF, IHC, FC; species: H, M, R, Mk [10] |
| Caspase-3 (Cleaved Asp175) Antibody PA5-114687 | Alternative antibody for activated caspase-3 | Synthetic peptide immunogen; applications: WB, IHC, ICC/IF, FC; species: H, M, R [13] |
| Caspase-3 Selective Inhibitors (e.g., Z-DEVD-FMK) | Inhibition of caspase-3 activity | Blocks enzymatic activity and stabilizes active complex; useful for validation [11] |
| Fluorescent Caspase Substrates | Live-cell apoptosis detection | Enable real-time analysis of caspase activation; complementary to antibody methods [7] |
| Caspase-3 Deficient MEFs | Genetic control for specificity | Validates antibody specificity and function; enables complementation studies [12] |
The specific detection of active caspase-3 requires understanding its unique activation mechanism and employing validated reagents that distinguish the cleaved, active form from the full-length zymogen. The critical cleavage at Asp175 generates neoepitopes that can be targeted by specific antibodies, enabling precise monitoring of apoptosis execution in experimental systems. By implementing the protocols and validation strategies outlined in this document, researchers can confidently interpret caspase-3 activation data with minimal background and high specificity, advancing our understanding of apoptotic pathways in health and disease.
Why Low Background is Crucial for Accurate Apoptosis Quantification
In the study of programmed cell death, the accurate quantification of apoptosis is fundamental to research in cancer biology, neurobiology, and therapeutic development. Cleaved caspase-3 is a definitive marker of apoptotic commitment, serving as a key executioner caspase that proteolytically cleaves numerous cellular targets [14] [15]. However, the technical challenge of background interference often compromises data accuracy in detection methodologies, particularly immunofluorescence. High background signals can obscure specific staining, lead to false positives, and reduce the signal-to-noise ratio essential for precise quantification [7] [16]. This application note examines the critical importance of low background in apoptosis quantification and provides optimized protocols for cleaved caspase-3 immunofluorescence to ensure reliable experimental outcomes.
The Critical Impact of Background on Apoptosis Quantification
Consequences of Background Interference
Background staining in immunofluorescence creates significant analytical challenges that directly impact experimental validity:
False Positives and Reduced Specificity: Non-specific antibody binding or inadequate blocking can generate signals misinterpreted as positive apoptosis markers, leading to overestimation of apoptotic rates [7]. This is particularly problematic when quantifying low levels of apoptosis or subtle treatment effects.
Masked True Positive Signals: Weak but specific signals from genuine cleaved caspase-3 may be obscured by high background, resulting in false negatives and underestimation of apoptosis [7] [17]. This compromises the detection of biologically relevant changes in cell death.
Compromised Quantification and Reproducibility: High background noise reduces the signal-to-noise ratio, making accurate automated quantification unreliable and compromising reproducibility across experiments [16].
Evidence from Methodological Comparisons
Research demonstrates that background reduction directly enhances apoptosis detection accuracy. A landmark study redesigning hairpin oligonucleotide probes for ligase-based apoptosis detection substantially reduced background staining, transforming it into a "convenient and robust methodology" [16]. Similarly, novel fluorescent reporter systems employing split-GFP architectures with caspase cleavage sites (DEVD) have been engineered to minimize background fluorescence, enabling more precise real-time tracking of caspase dynamics [18].
Common Pitfalls in Cleaved Caspase-3 Detection
Multiple technical factors contribute to background interference in cleaved caspase-3 immunofluorescence:
Inadequate Blocking and Permeabilization: Insufficient blocking with serum or BSA permits non-specific antibody binding [7]. Incomplete permeabilization creates variable antibody access to intracellular epitopes.
Antibody Quality and Specificity: Antibodies that recognize non-target epitopes or improperly validated lots generate non-specific signals [7] [14]. Cross-reactivity with other caspases or cellular components is a frequent concern.
Sample Processing Artifacts: Autofluorescence from aldehyde fixation or endogenous fluorescent compounds can mimic specific signals [7]. Incomplete washing between steps leaves residual reagents that contribute to background.
Experimental Conditions: Excessive antibody concentrations or prolonged incubation times often increase non-specific binding [7] [19].
Optimized Low-Background Protocol for Cleaved Caspase-3 Immunofluorescence
Reagent Preparation
- Blocking Buffer: PBS/0.1% Tween 20 + 5% serum from the secondary antibody host species [7]
- Permeabilization Solution: PBS/0.1% Triton X-100 or 0.1% NP-40 [7]
- Antibody Dilution Buffer: Blocking buffer or 5% BSA in PBS-T [7] [15]
- Wash Buffer: PBS/0.1% Tween 20 [7]
Step-by-Step Procedure
Sample Preparation
- Culture cells on sterile coverslips or prepare tissue sections.
- Fix with 4% formaldehyde for 15-20 minutes at room temperature.
- Rinse three times with PBS [7].
Permeabilization
Blocking
Primary Antibody Incubation
Secondary Antibody Incubation
Mounting and Imaging
- Wash three times with PBS/0.1% Tween 20, 5 minutes each, protected from light.
- Drain liquid and mount with antifade mounting medium.
- Image with appropriate fluorescence microscopy filters [7].
Troubleshooting High Background
Excessive Background Staining: Ensure thorough washing between steps; use serum from secondary antibody host species for blocking; titrate antibody concentrations to optimal levels; include only necessary controls [7].
Weak Specific Signal: Check antigen preservation by optimizing fixation time; consider increasing primary antibody concentration; verify antibody compatibility with sample type [7].
Non-specific Nuclear Staining: This may occur in certain healthy cell types (e.g., pancreatic alpha-cells) and in rat and monkey samples; ensure antibody specificity and include appropriate controls [14].
Apoptosis Signaling Pathway and Detection Workflow
Apoptosis Signaling to Caspase-3 Activation
Experimental Workflow for Low-Background Detection
Low-Background Immunofluorescence Workflow
Quantitative Comparison of Apoptosis Detection Methods
Table 1: Performance Characteristics of Apoptosis Detection Methods
| Method | Background Concerns | Signal-to-Noise Ratio | Spatial Resolution | Quantification Ease |
|---|---|---|---|---|
| Cleaved Caspase-3 IF (Optimized) | Low (with proper optimization) | High | Excellent (single-cell) | Moderate to High |
| Western Blot | Moderate (non-specific bands) | Moderate | None (population average) | High |
| Flow Cytometry | Low to Moderate | Moderate | None | High |
| TUNEL Assay | High (non-specific DNA breaks) | Variable | Good | Moderate |
| Electron Microscopy | Low | High | Excellent | Low |
| Fluorescent Reporters (ZipGFP) | Very Low | High | Excellent | High [18] |
Table 2: Antibody-Based Cleaved Caspase-3 Detection Reagents
| Antibody | Recommended Dilution | Specificity | Applications | Cross-Reactivity |
|---|---|---|---|---|
| CST #9661 [14] | IF: 1:400 | Cleaved caspase-3 (Asp175) | WB, IHC, IF, FC | Human, Mouse, Rat, Monkey |
| Proteintech 68773-1-Ig [19] | IF: 1:500-1:2000 | Cleaved caspase-3 (p17/p19) | WB, IHC, IF, FC, IP | Human, Mouse, Rat |
| Abcepta AP63081 [20] | IF: 1:50-1:300 | Cleaved caspase-3 (p17, D175) | WB, IHC-P, IF | Human, Mouse, Rat |
Advanced Applications and Integrated Approaches
Real-Time Caspase Activity Monitoring
Novel fluorescent reporter systems enable dynamic tracking of caspase activation with minimal background. The ZipGFP system utilizes split-GFP fragments connected via a DEVD caspase cleavage motif, achieving high signal-to-noise ratio through fluorescence reconstitution only upon caspase-3/7 activation [18]. This approach permits real-time monitoring of apoptosis in both 2D and 3D culture systems, including spheroids and patient-derived organoids, while maintaining low background throughout extended imaging sessions.
Multiplexed Apoptosis Assessment
For comprehensive apoptosis evaluation, cleaved caspase-3 immunofluorescence can be combined with complementary assays:
- Mitochondrial Membrane Potential: JC-1 staining detects early apoptotic changes via flow cytometry [21].
- Phosphatidylserine Exposure: Annexin V binding identifies early apoptosis stages [18].
- Caspase Activity Assays: Fluorogenic substrates (DEVD-AMC) provide enzymatic activity quantification [15] [21].
- PARP Cleavage Detection: Western blot analysis of caspase substrate cleavage confirms apoptotic commitment [17] [15].
Essential Research Reagent Solutions
Table 3: Key Reagents for Low-Background Cleaved Caspase-3 Detection
| Reagent Category | Specific Examples | Function in Background Reduction |
|---|---|---|
| Primary Antibodies | Cleaved Caspase-3 (Asp175) #9661 [14]; Cleaved Caspase 3/P17/P19 (68773-1-Ig) [19] | Target-specific epitopes only; no recognition of full-length caspase-3 |
| Blocking Reagents | Normal serum from secondary antibody host species; 5% BSA [7] | Occupies non-specific binding sites to minimize off-target antibody attachment |
| Permeabilization Agents | Triton X-100 (0.1%); NP-40 (0.1%) [7] | Enables antibody access while preserving cellular architecture |
| Detection Systems | Fluorophore-conjugated secondary antibodies; ZipGFP caspase reporters [7] [18] | High signal-to-noise fluorophores; activation only upon caspase cleavage |
| Mounting Media | Antifade mounting media with DAPI [15] | Preserves fluorescence while counterstaining nuclei for reference |
Minimizing background interference is not merely a technical preference but a fundamental requirement for accurate apoptosis quantification. Through optimized protocols, rigorous validation, and appropriate controls, researchers can achieve the low-background detection essential for reliable assessment of cleaved caspase-3. The methodologies outlined herein provide a framework for enhancing data quality in apoptosis research, ultimately supporting more valid scientific conclusions in cell death studies and therapeutic development.
In cleaved caspase-3 immunofluorescence research, achieving high signal-to-noise ratio with low background is paramount for accurate assessment of apoptotic activity. Non-specific staining presents a significant challenge that can compromise data interpretation, particularly when working with complex biological samples like tissue sections or cultured cells undergoing apoptosis. This application note details common sources of artifactual staining and provides validated protocols to minimize background while preserving specific cleaved caspase-3 signal, enabling more reliable quantification of apoptosis in research and drug development settings.
The table below summarizes the primary causes of non-specific staining in immunofluorescence and their respective solutions, with particular emphasis on applications involving cleaved caspase-3 detection.
Table 1: Sources of Non-Specific Staining and Recommended Solutions
| Source | Description | Recommended Solution |
|---|---|---|
| Endogenous Immunoglobulins [22] | Endogenous Igs in tissue bind secondary antibodies, causing background. Critical in mouse-on-mouse or human-on-human studies. | Block with normal serum from secondary antibody species; use Fab fragment secondary antibodies [22]. |
| Hydrophobic/Ionic Interactions [23] | Hydrophobic/ionic forces cause non-specific antibody binding to proteins or tissue components. | Use protein blockers (BSA, serum); add mild detergents (Tween-20, Triton X-100); optimize ionic strength of buffers [23]. |
| Endogenous Enzyme Activity [22] | Endogenous peroxidases (in blood-rich tissues) or phosphatases (in kidney, intestine) react with chromogenic substrates. | Quench with 3% H2O2 (HRP) or 1 mM Levamisole (AP) prior to antibody incubation [22]. |
| Endogenous Biotin [23] [22] | Tissues with high mitochondrial activity (liver, kidney, spleen) contain endogenous biotin, binding streptavidin-based detection systems. | Perform sequential avidin then biotin blocking steps before primary antibody application [23]. |
| Autofluorescence [22] | Molecules like heme, collagen, elastin, NADH, and lipofuscin naturally emit light. Formalin fixation can also induce it. | Use chemical reagents (e.g., TrueVIEW, Sudan Black B); choose fluorophores in far-red spectrum; optimize filter sets [22]. |
| Cross-reactivity [22] | Primary or secondary antibodies bind to off-target epitopes or proteins, especially at high concentrations. | Titrate antibodies to optimal concentration; use pre-adsorbed secondary antibodies; include controls without primary antibody [22]. |
| Inadequate Blocking [7] [24] | Non-specific sites on the sample are not effectively blocked, leading to non-specific antibody binding. | Block with 2-10% BSA or normal serum from the secondary antibody host species for 1-2 hours [7] [24]. |
Experimental Protocols for Low-Background Cleaved Caspase-3 Immunofluorescence
Optimized Protocol for Cleaved Caspase-3 Detection in Cultured Cells
Materials Required:
- Primary antibody against cleaved caspase-3 (e.g., Cell Signaling Technology #9661) [25]
- Fluorescently labeled secondary antibody
- Prepared, fixed cell samples on coverslips
- PBS, Triton X-100, Tween-20
- Blocking buffer (PBS/0.1% Tween 20 + 5% appropriate serum)
- Bovine serum albumin (BSA)
- Mounting medium with antifade agents
Procedure:
- Sample Preparation and Fixation:
- Culture cells on poly-L-lysine coated coverslips to ensure adhesion.
- Fix cells with 4% paraformaldehyde in PBS for 10-20 minutes at room temperature [24].
- Wash three times with PBS for 5 minutes each.
Permeabilization:
Blocking Non-Specific Binding:
Primary Antibody Incubation:
- Dilute cleaved caspase-3 primary antibody in blocking buffer (e.g., 1:200 dilution as starting point) [7].
- Apply 100 μL to coverslips and incubate overnight at 4°C in a humidified chamber.
- Include a no-primary antibody control to assess background from secondary antibody.
Washing:
- Wash slides three times for 10 minutes each in PBS/0.1% Tween 20 at room temperature with gentle agitation [7].
Secondary Antibody Incubation:
- Dilute appropriate fluorescently labeled secondary antibody in PBS (e.g., 1:500) [7].
- Incubate coverslips for 1-2 hours at room temperature, protected from light.
- Wash three times in PBS/0.1% Tween 20 for 5 minutes, protected from light.
Mounting and Imaging:
- Drain liquid and mount coverslips in antifade mounting medium.
- Seal edges with clear nail polish if necessary.
- Image using appropriate fluorescence microscope settings with minimal exposure to prevent photobleaching.
Specialized Blocking Protocol for Tissue Sections
For tissue sections with high endogenous biotin or enzyme activity:
After permeabilization, quench endogenous peroxidase activity by incubating with 3% H2O2 in methanol for 15 minutes at room temperature [23].
For endogenous biotin blocking:
- Apply avidin solution for 15 minutes at room temperature.
- Wash briefly.
- Apply biotin solution for 15 minutes at room temperature.
- Wash thoroughly before proceeding to serum blocking [23].
Proceed with standard blocking and antibody incubation as described above.
Workflow Visualization
The following diagram illustrates the optimized workflow for low-background cleaved caspase-3 immunofluorescence, highlighting critical steps for minimizing non-specific staining:
The Scientist's Toolkit: Essential Reagents for Low-Background Caspase-3 IF
Table 2: Key Research Reagent Solutions for Cleaved Caspase-3 Immunofluorescence
| Reagent Category | Specific Examples | Function & Application Notes |
|---|---|---|
| Blocking Agents | Normal serum from secondary host, BSA, non-fat dry milk [23] [24] | Reduces non-specific hydrophobic/ionic interactions. Use serum matching secondary antibody species for best results. |
| Detergents | Triton X-100, Tween-20, Saponin, Digitonin [7] [24] | Permeabilization and reduction of hydrophobic interactions. Harsh detergents (Triton) for intracellular targets; mild (saponin) for membrane proteins. |
| Fixatives | 4% Paraformaldehyde, Methanol, Acetone [24] | Preserves morphology and antigenicity. PFA requires permeabilization; organic solvents fix and permeabilize simultaneously. |
| Quenching Reagents | 3% H22O2, 1 mM Levamisole, Avidin/Biotin blocking kits [23] [22] | Eliminates endogenous enzyme activity or biotin interference. Essential for chromogenic detection and tissues with high endogenous levels. |
| Antibodies | Cleaved Caspase-3 (Asp175) specific antibodies, pre-adsorbed secondary antibodies [25] [22] | Ensures specific recognition of activated caspase-3. Pre-adsorbed secondaries reduce cross-species reactivity. |
| Mounting Media | Antifade mounting media with DABCO, VECTASHIELD, commercial antifade products [26] | Presves fluorescence and reduces photobleaching. Essential for long-term storage and imaging. |
Advanced Troubleshooting for Persistent Background
When standard protocols yield high background in cleaved caspase-3 detection:
Antibody Titration: Perform checkerboard dilution assays to identify optimal primary and secondary antibody concentrations that maximize signal while minimizing background [7] [22].
Alternative Blocking Strategies: For challenging tissues, consider:
- Sequential blocking with protein blockers followed by serum
- Commercial protein-free blocking buffers designed for specific applications
- Addition of 0.1M glycine to blocking buffer to scavenge free aldehyde groups
Multiplexing Considerations: When co-staining cleaved caspase-3 with other markers:
- Use pre-adsorbed secondary antibodies to prevent cross-reactivity
- Select fluorophores with minimal spectral overlap
- Stagger primary antibody incubations by species when possible
Validation Controls: Always include:
- No-primary antibody control (assesses secondary antibody background)
- Isotype control (assesses non-specific Fc receptor binding)
- Positive control (apoptosis-induced cells) to confirm antibody functionality
Implementing these targeted strategies for minimizing non-specific staining will significantly enhance the reliability and interpretability of cleaved caspase-3 immunofluorescence data. By understanding the mechanisms behind common background sources and applying the appropriate countermeasures, researchers can achieve the low-background, high-specificity staining required for accurate apoptosis assessment in both basic research and drug development contexts.
Step-by-Step Low-Background Immunofluorescence Protocol for Cleaved Caspase-3
Within the context of cleaved caspase-3 immunofluorescence (IF) research, optimal sample preparation is not merely a preliminary step but a critical determinant for the success of low-background, high-fidelity experiments. The accurate localization and quantification of cleaved caspase-3, a key executioner protease in apoptosis, are profoundly influenced by the methods of fixation and permeabilization [6]. Inadequate techniques can lead to epitope masking, aberrant subcellular localization, high background noise, and ultimately, a misinterpretation of the apoptotic status of cells [27]. This application note provides a detailed, evidence-based protocol for fixation and permeabilization, specifically optimized for cleaved caspase-3 immunofluorescence with an emphasis on minimizing background signal, thereby ensuring reliable and reproducible data for researchers and drug development professionals.
Background and Principles
Caspase-3 is synthesized as an inactive zymogen that, upon activation during apoptosis, is cleaved into activated fragments. Immunofluorescence detection of this cleaved form provides a crucial snapshot of apoptotic activity within the spatial context of individual cells [6] [7]. The fundamental goal of sample preparation is to preserve this native spatial context while making the intracellular epitope accessible to antibodies.
The process involves a critical balance: fixation stabilizes cellular architecture and prevents post-collection degradation, while permeabilization renders the membrane permeable to antibodies without destroying the antigenicity of the target or causing excessive background from non-specific antibody binding [27] [28]. The choice of reagents and conditions for these steps is paramount, as over-fixation can mask the cleaved caspase-3 epitope, and harsh permeabilization can damage cellular structures and increase background [27].
Critical Experimental Parameters and Optimization
Fixation Methods
Fixation is the first and one of the most crucial steps. The chosen fixative must rapidly terminate all biochemical activity while preserving antigenicity.
Table 1: Comparison of Common Fixation Methods for Cleaved Caspase-3 IF
| Fixative | Mechanism | Optimal Condition | Advantages | Disadvantages | Recommendation for Caspase-3 |
|---|---|---|---|---|---|
| Aldehydes (e.g., 4% PFA) | Cross-linking proteins, stabilizing cellular structure. | 10-15 min at Room Temperature [28]. | Excellent preservation of ultrastructure; standard for most IF. | Can mask epitopes; may require antigen retrieval; requires thorough washing. | Recommended. The gold standard. Follow with careful permeabilization and blocking. |
| Methanol | Protein precipitation and lipid dissolution. | 5-15 min at -20°C [28]. | Simultaneously fixes and permeabilizes; can unmask some epitopes. | Can disrupt protein-lipid interactions (e.g., membranes); can destroy some antigens. | Use with caution. Validate with your specific antibody as it can alter caspase-3 antigenicity. |
| Acetone | Similar to methanol, precipitates proteins. | 5-15 min at -20°C. | Strong permeabilization; good for nuclear antigens. | Harsher than methanol; can make cells brittle; high background if not optimized. | Not generally recommended for cleaved caspase-3 without extensive validation. |
For cleaved caspase-3, 4% paraformaldehyde (PFA) is the most widely used and recommended fixative due to its superior structural preservation [28]. After fixation, it is critical to wash the sample thoroughly with PBS (3 times for 5 minutes each) to remove any residual fixative that could contribute to background autofluorescence [28].
Permeabilization Strategies
Permeabilization is required after aldehyde fixation to allow antibodies to access intracellular targets like cleaved caspase-3. The choice and concentration of detergent are key to balancing signal access and background.
Table 2: Comparison of Permeabilization Agents for Cleaved Caspase-3 IF
| Permeabilization Agent | Mechanism | Optimal Condition | Advantages | Disadvantages | Impact on Background |
|---|---|---|---|---|---|
| Triton X-100 | Non-ionic detergent, solubilizes lipids. | 0.1-0.5% for 5-15 min [7] [28]. | Strong and efficient; standard for many intracellular targets. | Can extract cellular components; may damage some protein complexes. | Moderate to High if overused. |
| Tween-20 | Non-ionic detergent, milder than Triton X-100. | 0.2% for 30 min [29]. | Milder action; effective for delicate epitopes. | Less efficient for dense structures; may require longer incubation. | Lower. Recommended for reducing background [29]. |
| Saponin | Cholesterol-dependent, creates pores in membranes. | 0.1-0.5% for 10-30 min [29]. | Reversible; gentler on protein-protein interactions. | Permeabilization is transient; must be included in all antibody steps. | Low. Good for membrane-associated proteins. |
| Digitonin | Cholesterol-specific, milder than Triton X-100. | 0.001-0.01% for 10-15 min. | Selective for plasma membrane; preserves organelle integrity. | Costly; concentration needs precise optimization. | Low. |
For cleaved caspase-3 immunofluorescence aiming for low background, Tween-20 is a highly effective permeabilizing agent. A study evaluating permeabilization methods for intracellular nucleic acid detection found that 0.2% Tween-20 incubated for 30 minutes provided maximum signal-to-noise ratios [29]. This principle translates well to protein immunofluorescence, as the milder action of Tween-20 is sufficient for antibody access while minimizing non-specific background.
Comprehensive Workflow Diagram
The following diagram illustrates the integrated workflow for sample preparation, highlighting the critical decision points and steps to achieve low-background staining.
Integrated Fixation and Permeabilization Workflow for Low-Background IF.
Caspase-3 Signaling Pathway Context
Understanding the role of cleaved caspase-3 within the apoptotic signaling pathways provides context for its detection. The following diagram outlines the key pathways leading to its activation.
Caspase-3 Activation Pathways in Apoptosis.
Detailed Protocol for Cleaved Caspase-3 Immunofluorescence
Materials and Reagents
Table 3: Research Reagent Solutions for Cleaved Caspase-3 IF
| Item | Function / Description | Example / Specifics |
|---|---|---|
| Primary Antibody | Specifically binds cleaved caspase-3. | Anti-cleaved Caspase-3 (Rabbit mAb). Must be validated for IF. |
| Fluorophore-conjugated Secondary Antibody | Binds primary antibody for detection. | e.g., Goat anti-Rabbit IgG (H+L) Cross-Adsorbed, conjugated to Alexa Fluor 488 [7] [30]. |
| Blocking Serum | Reduces non-specific antibody binding. | Use normal serum from the host species of the secondary antibody (e.g., Goat serum) [7] [28]. |
| Cross-Adsorbed Secondary Antibodies | Critical for background reduction in multiplexing. | Antibodies purified to remove cross-reactivity with immunoglobulins from other species [30]. |
| Mounting Medium with DAPI | Preserves sample and counterstains nuclei. | e.g., ibidi Mounting Medium with DAPI; low autofluorescence is key [28]. |
| Autofluorescence Quencher | Reduces background from endogenous fluorophores. | e.g., TrueBlack Lipofuscin Autofluorescence Quencher or Sudan Black B [27] [30]. |
Step-by-Step Application Protocol
Stage 1: Sample Preparation and Fixation
- Cell Culture: Plate cells on appropriate coverslip-bottom dishes or chamber slides and grow to 70-80% confluence. Maintain consistent cell density across experiments [28].
- Fixation: Aspirate culture medium and gently rinse cells with warm PBS. Add enough 4% PFA in PBS to cover cells and incubate for 10-15 minutes at room temperature [28].
- Washing: Carefully aspirate the PFA and wash the cells 3 times for 5 minutes each with ample PBS to remove all traces of fixative [28].
Stage 2: Permeabilization and Blocking
- Permeabilization: Incubate fixed cells with 0.2% Tween-20 in PBS for 30 minutes at room temperature [29]. For a quicker, stronger permeabilization, 0.1% Triton X-100 for 5-10 minutes can be used, but may increase background.
- Washing: Wash cells 3 times for 5 minutes with PBS.
- Blocking: Prepare a blocking buffer of PBS/0.1% Tween-20 supplemented with 5% serum from the species in which the secondary antibody was raised (e.g., Goat serum for a goat anti-rabbit secondary). Incubate cells with this buffer for 1-2 hours at room temperature in a humidified chamber to block non-specific binding sites [7] [28].
Stage 3: Immunostaining
- Primary Antibody Incubation: Prepare the primary antibody (e.g., anti-cleaved caspase-3 rabbit mAb) at the optimal dilution (e.g., 1:200) in the blocking buffer. Aspirate the blocking buffer from the cells, apply 100 µL of antibody solution, and incubate overnight at 4°C in a humidified chamber [7].
- Washing: The next day, retrieve the slides and wash 3 times for 10 minutes each with PBS/0.1% Tween-20 to remove unbound primary antibody.
- Secondary Antibody Incubation: Prepare the fluorophore-conjugated secondary antibody (e.g., Goat anti-Rabbit Alexa Fluor 488) at its recommended dilution (e.g., 1:500) in PBS. Apply to the cells and incubate for 1-2 hours at room temperature in a humidified chamber, protected from light [7].
- Final Washing: Wash the cells 3 times for 5 minutes each with PBS/0.1% Tween-20, protected from light.
Stage 4: Mounting and Imaging
- Mounting: Drain excess liquid from the slide. Apply a few drops of an anti-fade mounting medium containing DAPI and carefully lower a coverslip. Seal the edges if necessary for long-term storage [28].
- Imaging: Acquire images using a fluorescence or confocal microscope as soon as possible. Use consistent exposure settings across compared samples for quantitative assessments.
Troubleshooting and Validation
A well-optimized protocol must include controls and solutions for common issues, particularly background.
Table 4: Troubleshooting Guide for Low Background
| Problem | Potential Cause | Solution |
|---|---|---|
| High Background | Incomplete blocking; non-specific antibody binding; autofluorescence. | Use serum from the secondary antibody host for blocking [7]. Use cross-adsorbed secondary antibodies [30]. Include an autofluorescence quenching step (e.g., TrueBlack or Sudan Black B) after staining [27] [30]. |
| Weak or No Signal | Over-fixation masking epitopes; low antibody concentration; inefficient permeabilization. | Optimize fixation time. Titrate primary antibody to find optimal concentration. Ensure permeabilization agent and time are sufficient for the target. |
| Non-Specific Staining | Antibody cross-reactivity; over-concentration of antibodies. | Include a no-primary-antibody control. Validate antibody specificity. Ensure all washes are thorough. |
Essential Experimental Controls:
- Negative Control: Omit the primary antibody (use blocking buffer only) to identify non-specific binding of the secondary antibody.
- Positive Control: Use a cell line known to be undergoing apoptosis (e.g., treated with a known apoptosis inducer) to confirm the staining protocol is working.
- Specificity Control: Pre-incubate the primary antibody with a blocking peptide (if available) to compete for binding and confirm the signal is abolished.
Achieving high-quality, low-background cleaved caspase-3 immunofluorescence data is contingent upon a meticulously optimized sample preparation workflow. The combination of 4% PFA fixation followed by permeabilization with 0.2% Tween-20 provides an excellent balance of structural preservation, epitope accessibility, and minimal background. Adherence to the detailed protocol, incorporation of the recommended controls, and application of the provided troubleshooting strategies will empower researchers to generate reliable and quantitatively accurate data, thereby strengthening conclusions in apoptosis research and drug development.
Within the context of a broader thesis on cleaved caspase-3 immunofluorescence protocols with low background research, the selection of an appropriate primary antibody is a critical determinant of experimental success. Caspase-3 is a key executioner protease in apoptosis, and its activation requires proteolytic cleavage at aspartic acid residues, most notably after Asp175, to generate active fragments of 17 and 19 kDa [31] [32]. Immunofluorescence (IF) allows for the precise spatial visualization of this activation within individual cells, preserving vital morphological context [7]. However, the specificity and sensitivity of the antibody used are paramount to generating reliable, high-quality data with minimal background. This application note provides a structured comparison of commercially available cleaved caspase-3 antibodies and details a proven immunofluorescence protocol to guide researchers and drug development professionals in achieving optimal results.
Commercial Cleaved Caspase-3 Antibody Comparison
The table below summarizes key specifications for three well-characterized commercial antibodies that are validated for immunofluorescence and detect caspase-3 cleaved specifically at Asp175.
Table 1: Comparison of Commercial Cleaved Caspase-3 (Asp175) Antibodies
| Product Name | Supplier | Clone / Type | Reactivity | Recommended IF Dilution | Key Specificity |
|---|---|---|---|---|---|
| Cleaved Caspase-3 (Asp175) Antibody #9661 | Cell Signaling Technology | Rabbit Polyclonal | H, M, R, Mk | 1:400 [31] | Detects endogenous large fragment (17/19 kDa); does not recognize full-length caspase-3 [31]. |
| Cleaved Caspase-3 (Asp175) (D3E9) Rabbit mAb #9579 | Cell Signaling Technology | Rabbit Monoclonal (D3E9) | H, M | 1:1600 - 1:6400 [33] | Preferred for IF; recognizes caspase-3 only when cleaved at Asp175 [33]. |
| Caspase 3 (Cleaved Asp175) Polyclonal Antibody (PA5-114687) | Thermo Fisher Scientific | Rabbit Polyclonal | H, M, Rat | 1:100 - 1:500 [13] | Detects endogenous levels of the activated fragment; immunogen is a peptide around Asp175 [13]. |
Selection Guidance
- Monoclonal vs. Polyclonal: The monoclonal antibody (#9579) offers superior lot-to-lot consistency and often higher specificity for a single epitope, which can contribute to lower background. It also allows for higher working dilutions, making it more cost-effective over time [33] [34]. Polyclonal antibodies (#9661 and PA5-114687) may offer higher signal intensity as they recognize multiple epitopes, but can have greater batch variability and a higher risk of non-specific binding [34].
- Experimental Design: For multiplexing experiments, the high specificity of the monoclonal antibody is advantageous. The broader reactivity of the polyclonal antibodies (e.g., #9661 reacts with human, mouse, rat, and monkey) provides flexibility for cross-species studies [31] [13].
- Validation: All listed antibodies are validated for immunofluorescence. However, researchers should confirm specificity in their specific model system using appropriate positive and negative controls, such as cells treated with a known apoptosis inducer and untreated cells, respectively [7].
Detailed Immunofluorescence Protocol for Cleaved Caspase-3 Detection
This protocol is adapted from established immunofluorescence methods for caspases and optimized for low background, leveraging the recommended procedures from the antibody suppliers [7] [31] [13].
Materials and Reagents
Table 2: Research Reagent Solutions for Cleaved Caspase-3 Immunofluorescence
| Item | Function / Description | Example / Note |
|---|---|---|
| Primary Antibodies | Specifically binds cleaved caspase-3 at Asp175. | See Table 1 for options (e.g., #9579, #9661, PA5-114687). |
| Fluorophore-conjugated Secondary Antibody | Binds primary antibody; enables fluorescence detection. | Alexa Fluor conjugates (e.g., goat anti-rabbit IgG) are recommended for high brightness and photostability [7]. |
| Blocking Buffer | Reduces non-specific antibody binding to minimize background. | PBS with 5% serum from the secondary antibody host species (e.g., Goat Serum) and 0.1% Tween 20 [7]. |
| Permeabilization Solution | Allows antibodies to access intracellular antigens. | PBS with 0.1% Triton X-100 or NP-40 [7]. |
| Mounting Medium | Preserves fluorescence and supports imaging. | Use an anti-fade mounting medium. |
| Humidified Chamber | Prevents evaporation of small antibody volumes during incubation. | A sealed container with a moistened paper towel. |
Step-by-Step Procedure
- Sample Preparation and Fixation: Culture cells on glass coverslips. Induce apoptosis as required by your experimental design. Fix cells with 4% paraformaldehyde (PFA) in PBS for 15 minutes at room temperature. Wash three times with PBS.
- Permeabilization: Incubate samples in 0.1% Triton X-100 in PBS for 5-10 minutes at room temperature [7]. Wash three times with PBS.
- Blocking: Drain the slides and apply 200-500 µL of blocking buffer. Lay the slides flat in a humidified chamber and incubate for 1-2 hours at room temperature [7]. Rinse once with PBS.
- Primary Antibody Incubation:
- Dilute the selected cleaved caspase-3 antibody in blocking buffer according to the recommended dilution (see Table 1).
- Apply 100-200 µL of the diluted antibody to the samples, ensuring full coverage.
- Incubate in a humidified chamber overnight at 4°C for optimal specificity and signal-to-noise ratio [7].
- Washing: The following day, wash the samples three times with PBS/0.1% Tween 20 for 10 minutes each at room temperature with gentle agitation.
- Secondary Antibody Incubation:
- Dilute the fluorophore-conjugated secondary antibody (e.g., Alexa Fluor 488 goat anti-rabbit IgG) in PBS or blocking buffer (typically 1:500-1:1000).
- Apply the solution to the samples and incubate in a humidified chamber, protected from light, for 1-2 hours at room temperature [7].
- Final Washing and Mounting: Wash the samples three times with PBS for 5 minutes each, protected from light. Drain the liquid and mount the coverslips on glass slides using a suitable anti-fade mounting medium.
- Imaging: Observe the samples using a fluorescence microscope. Use appropriate filter sets for the fluorophore used. Include a negative control (no primary antibody) to assess background and non-specific signal from the secondary antibody.
Pathway Context and Experimental Workflow
The detection of cleaved caspase-3 sits within the broader context of the apoptotic signaling pathways. The following diagram illustrates the key pathways leading to caspase-3 activation.
Diagram 1: Caspase-3 Activation in Apoptosis.
The experimental workflow for detecting this key event via immunofluorescence is outlined below.
Diagram 2: Immunofluorescence Workflow.
Troubleshooting for Low Background
- High Background: Ensure thorough washing after each antibody incubation step. The use of blocking buffer with 5% serum from the secondary antibody host species is critical [7]. Titrate both primary and secondary antibody concentrations to find the optimal dilution that minimizes non-specific binding.
- Weak or No Signal: A weak signal may result from under-fixation, low antibody concentration, or poor antigen preservation. Try increasing the primary antibody concentration or optimizing the fixation time. Verify apoptosis induction with a positive control.
- Non-Specific Staining: Always include a no-primary-antibody control. Validate antibody specificity using knockout cell lines or caspase inhibitors if available. Ensure the secondary antibody is not cross-reacting with other proteins in the sample.
Selecting the right antibody is foundational for robust cleaved caspase-3 detection. The monoclonal antibody #9579 offers exceptional specificity and is highly recommended for sensitive immunofluorescence applications requiring low background. By following the detailed protocol and troubleshooting guidance provided, researchers can confidently generate reliable, high-quality data to advance their studies in apoptosis, cancer biology, and drug development.
In cleaved caspase-3 immunofluorescence protocols, achieving low background is paramount for obtaining reliable, publication-quality data in apoptosis research. Blocking and antibody incubation are interdependent critical steps that significantly influence assay sensitivity and specificity. Proper execution of these steps minimizes non-specific antibody binding and reduces background signals, thereby enhancing the detection of authentic caspase-3 activation events. This application note provides detailed methodologies and reagent solutions optimized specifically for cleaved caspase-3 immunofluorescence, enabling researchers to obtain precise spatial information about apoptotic processes within cellular contexts.
Principles of Background Reduction
Non-specific background in immunofluorescence staining for cleaved caspase-3 primarily arises from several sources. Fc receptor binding on cells can cause antibodies to bind non-specifically, particularly in immune cells and certain tissue types [35]. Hydrophobic and ionic interactions between antibodies and cellular components can lead to nonspecific adherence [35]. Endogenous enzymes such as peroxidases and phosphatases can generate signal when using chromogenic detection systems [36]. Autofluorescence from tissue components, particularly when using aldehyde fixatives like formalin, can create background signal that mimics specific staining [36]. Additionally, cross-reactivity of secondary antibodies with endogenous immunoglobulins presents a significant challenge, especially when working with mouse primary antibodies on mouse tissue (the "mouse-on-mouse" problem) [36] [35].
Mechanisms of Blocking
Effective blocking operates through multiple mechanisms to reduce these background sources. Protein-based blocking agents like normal serum, BSA, or casein occupy non-specific binding sites on the sample, preventing antibody attachment to these areas [36]. Serum blocking is particularly effective for Fc receptor blockade, as immunoglobulins in the serum bind to Fc receptors, preventing subsequent antibody binding [35]. For specific interference sources, targeted blocking methods include hydrogen peroxide treatment for endogenous peroxidases [36], levamisole for alkaline phosphatases [36] [35], and sequential avidin-biotin treatment for endogenous biotin [36]. The use of F(ab) fragments eliminates Fc-mediated binding and enables multiple labeling experiments where primary antibodies from the same species must be used [36].
Materials and Reagents
Research Reagent Solutions
Table 1: Essential Reagents for Background Reduction in Cleaved Caspase-3 Immunofluorescence
| Reagent Category | Specific Examples | Function and Application |
|---|---|---|
| Protein Blocking Agents | Normal serum from secondary antibody host species [36] [35], IgG-free BSA [35], Casein [36] | Blocks non-specific protein binding sites; serum is ideal for Fc receptor blocking |
| Detergents | Triton X-100 [7], Tween-20 [7] [35], NP-40 [7] | Permeabilization and reduction of hydrophobic interactions in buffers |
| Specific Blockers | Hydrogen peroxide (0.3%) [36], Levamisole [36] [35], Sodium borohydride [36] | Blocks endogenous enzymes; H2O2 for peroxidases, levamisole for phosphatases |
| Secondary Antibody Modifications | F(ab')2 fragments [35], Fab fragments [36] [35] | Eliminates Fc-mediated background; essential for mouse-on-mouse studies |
| Negative Controls | ChromPure purified proteins [35], Isotype controls [35] | Distinguishes specific from non-specific primary antibody binding |
| Autofluorescence Reducers | Pontamine sky blue, Sudan black [36] | Quenches natural tissue fluorescence that can mimic signal |
Buffer Formulations
Blocking Buffer: PBS/0.1% Tween 20 + 5% appropriate serum [7]. The serum should match the host species of the secondary antibody (e.g., goat serum for goat anti-rabbit secondary) [7] [36].
Antibody Diluent: PBS or TBS with 1-5% BSA or serum [35]. For sensitive applications, centrifuge working dilutions to remove aggregates that contribute to background [35].
Wash Buffer: PBS/0.1% Tween 20 [7]. The detergent concentration can be optimized between 0.05-0.1% to balance stringency with potential antigen preservation.
Protocols for Low-Background Cleaved Caspase-3 Immunofluorescence
Standardized Step-by-Step Protocol
Sample Preparation and Fixation:
- Culture cells on appropriate chambered slides or coverslips.
- Induce apoptosis using chosen treatment while including untreated controls.
- Fix cells with 4% paraformaldehyde in PBS for 15 minutes at room temperature.
- Rinse three times with PBS, 5 minutes each.
Permeabilization:
- Permeabilize fixed samples by incubating in PBS/0.1% Triton X-100 (0.1% NP-40 can be used instead) for 5-10 minutes at room temperature [7].
- Wash three times in PBS, for 5 minutes each at room temperature [7].
Blocking:
- Drain the slide and add 200 μL of blocking buffer (PBS/0.1% Tween 20 + 5% appropriate serum) [7].
- Lay the slides flat in a humidified chamber and incubate for 1-2 hours at room temperature [7].
- For tissues with high endogenous immunoglobulin, consider additional blocking with Fab fragments [35].
- For fluorescent detection, assess autofluorescence and treat with quenching dyes if necessary [36].
- Rinse once in PBS after blocking [7].
Primary Antibody Incubation:
- Add 100 μL of the primary antibody (anti-cleaved caspase-3) diluted in blocking buffer [7].
- Use suggested working concentrations from datasheets as starting point (typically 1:100 to 1:500 dilution) [7].
- Incubate slides in a humidified chamber overnight at 4°C [7].
- Include negative controls without primary antibody or with isotype control [7] [35].
Washing:
- Wash the slides three times, 10 minutes each in PBS/0.1% Tween 20 at room temperature [7].
Secondary Antibody Incubation:
- Drain slides and add 100 μL of appropriate fluorescently conjugated secondary antibody diluted 1:500 in PBS or blocking buffer [7].
- Use cross-adsorbed secondary antibodies when working with complex tissues [35].
- Lay the slides flat in a humidified chamber, protected from light, and incubate for 1-2 hours at room temperature [7].
- Wash three times in PBS/0.1% Tween 20 for 5 minutes, protected from light [7].
Mounting and Imaging:
- Drain the liquid, mount the slides in anti-fade mounting medium.
- Observe with a fluorescence microscope using appropriate filter sets.
Specialized Modifications
For Mouse Tissue with Mouse Primary Antibodies:
- Use F(ab) fragments of secondary antibodies to avoid binding to endogenous mouse IgG [36].
- Block endogenous immunoglobulins with Fab fragments specific to mouse IgG prior to primary antibody incubation [35].
- Consider using the FabuLight system where primary antibodies are Fab-labeled prior to incubation [35].
For Tissues High in Endogenous Biotin:
- Block endogenous biotin by incubating with avidin (to bind endogenous biotin) followed by free biotin (to block remaining avidin binding sites) [36].
- Alternatively, use polymer-based detection systems that don't rely on biotin-streptavidin chemistry [36].
For Tissues with High Autofluorescence:
- Treat samples with 0.1% sodium borohydride for 15 minutes after fixation to reduce aldehyde-induced autofluorescence [36].
- Use quenching dyes such as pontamine sky blue or Sudan black in the blocking step [36].
- Consider switching to chromogenic detection if autofluorescence cannot be adequately controlled [36].
Workflow and Pathway Visualization
Caspase-3 Detection Workflow - This workflow diagrams the sequential steps for low-background cleaved caspase-3 immunofluorescence, highlighting critical control requirements at each stage.
Apoptosis Signaling & Background Control - This diagram illustrates the caspase activation pathway in apoptosis alongside common background sources and their corresponding blocking solutions.
Troubleshooting and Quality Control
Troubleshooting Common Issues
Table 2: Troubleshooting Guide for Background Issues in Cleaved Caspase-3 Staining
| Problem | Potential Causes | Solutions |
|---|---|---|
| High Background Throughout Sample | Inadequate blocking | Extend blocking time to 2+ hours; increase serum concentration to 5-10%; ensure serum matches secondary antibody host species [7] [36] |
| Insufficient washing | Increase wash volume and duration; incorporate detergent in wash buffers [7] | |
| Antibody concentration too high | Titrate primary and secondary antibodies; reduce concentration [7] | |
| Specific Background Structures | Endogenous enzymes | Block peroxidases with 0.3% H2O2 for 10-15 min; block phosphatases with levamisole [36] |
| Endogenous biotin | Use sequential avidin-biotin blocking or switch to polymer-based detection [36] | |
| Fc receptor binding | Use F(ab')2 fragment secondary antibodies; include Fc receptor blocking with serum [35] | |
| Weak or No Signal | Over-blocking | Reduce blocking time or concentration; try different blocking reagents (BSA vs. serum) [36] |
| Inadequate antigen retrieval | Optimize antigen retrieval method (citrate buffer, pH, heating time) [15] | |
| Antibody too dilute | Concentrate primary antibody; check antibody expiration and storage conditions [7] | |
| High Autofluorescence | Aldehyde fixation | Treat with sodium borohydride; use pontamine sky blue or Sudan black [36] |
| Tissue intrinsic fluorophores | Consider chromogenic detection instead; use different fluorophores with emission in red spectrum [36] |
Experimental Controls
Proper experimental controls are essential for validating cleaved caspase-3 immunofluorescence results and distinguishing specific signal from background:
Negative Controls:
- No primary antibody control: Incubate with blocking buffer instead of primary antibody to detect secondary antibody background [7].
- Isotype control: Use an irrelevant IgG from the same species as the primary antibody at the same concentration [35].
- Unstained control: Omit both primary and secondary antibodies to assess autofluorescence.
Positive Controls:
- Apoptosis-induced cells: Treat cells with known apoptosis inducers (e.g., staurosporine) to generate positive signal.
- Tissue controls: Use tissue sections with known caspase-3 expression patterns.
Specificity Controls:
- Pre-absorption control: Pre-incubate primary antibody with excess antigen peptide.
- Knockdown/knockout validation: Use caspase-3 deficient cells or tissues when available.
Applications in Apoptosis Research
The optimized cleaved caspase-3 immunofluorescence protocol with minimal background enables researchers to accurately investigate apoptosis in diverse contexts. In cancer biology, it allows assessment of treatment-induced apoptosis and therapeutic efficacy [7]. For neurodegeneration studies, it facilitates the detection of low levels of apoptotic activity in neuronal tissues [7]. In drug discovery, it provides a reliable method for high-content screening of pro-apoptotic or anti-apoptotic compounds [7]. For developmental biology, it enables precise spatial mapping of apoptotic events during morphogenesis [7]. The low-background approach is particularly valuable when combining caspase-3 detection with other markers through multiplex immunofluorescence, allowing researchers to place apoptotic events in broader biological context [7] [15].
Recommended Dilutions and Conditions for Clean Signal Detection
Within the context of cleaved caspase-3 immunofluorescence (IF) research, achieving a clean signal with low background is paramount for accurate detection of apoptosis. The specificity of the signal is critically dependent on optimized antibody dilutions and stringent experimental conditions. This document provides application notes and protocols derived from current commercial antibodies and standardized methodologies to guide researchers in obtaining reliable, high-quality data on cleaved caspase-3 localization and expression.
Antibody Selection and Recommended Dilutions
Selecting a well-validated antibody and using it at an optimal concentration are the first critical steps toward a clean immunofluorescence signal. The table below summarizes key performance data for several high-quality cleaved caspase-3 antibodies.
Table 1: Commercial Cleaved Caspase-3 Antibodies for Immunofluorescence
| Vendor | Catalog Number | Clonality | Recommended IF Dilution | Specificity / Key Feature | Verified Reactivity |
|---|---|---|---|---|---|
| Proteintech | 25128-1-AP | Polyclonal | 1:50 - 1:500 [37] | Specific for cleaved fragments; does not recognize full-length caspase-3 [37] | Human, Mouse [37] |
| Abcam | ab32042 | Monoclonal (RabMAb) | 1:100 - 1:250 [38] | Highly sensitive for cleaved caspase-3; KO-validated [38] | Human [38] |
| Thermo Fisher | PA5-114687 | Polyclonal | 1:100 - 1:500 [13] | Detects fragment from cleavage adjacent to Asp175 [13] | Human, Mouse, Rat [13] |
| Cell Signaling Technology | 87938 | Monoclonal (Conjugate) | 1:50 (Flow Cytometry) [39] | Alexa Fluor 647 conjugate; detects 17/19 kDa fragment [39] | Human, Mouse, Rat, Monkey [39] |
For the best signal-to-noise ratio, it is recommended to titrate the antibody within the suggested range. A verified customer review for Proteintech's 25128-1-AP noted a superior clean signal at a 1:1000 dilution in Western blot, underscoring the value of empirical titration for each experimental system [37].
Core Immunofluorescence Protocol
The following protocol is adapted from standardized procedures for detecting caspases via immunofluorescence [7] and is designed to minimize background.
Materials and Reagents
- Primary Antibody: Choose from Table 1 (e.g., Proteintech 25128-1-AP or Abcam ab32042).
- Prepared Samples: Fixed cells (e.g., HeLa cells) on coverslips or in chamber slides [37] [7].
- Permeabilization Buffer: Phosphate-Buffered Saline (PBS) with 0.1% Triton X-100 or 0.1% NP-40 [7].
- Blocking Buffer: PBS with 0.1% Tween 20 and 5% serum from the host species of the secondary antibody [7].
- Wash Buffer: PBS or PBS with 0.1% Tween 20 (PBS-T) [7].
- Fluorescently-Labeled Secondary Antibody: e.g., Alexa Fluor-conjugated goat anti-rabbit IgG [7].
- Mounting Medium: Antifade mounting medium compatible with your fluorophores.
- Humidified Chamber: A sealed container with moist paper towels to prevent samples from drying out.
Step-by-Step Procedure
- Permeabilization: Incubate fixed samples in permeabilization buffer (PBS/0.1% Triton X-100) for 5 minutes at room temperature [7].
- Washing: Wash the samples three times in PBS, for 5 minutes each, at room temperature [7].
- Blocking: Drain the slide and apply enough blocking buffer to cover the sample. Incubate in a humidified chamber for 1-2 hours at room temperature to prevent non-specific antibody binding [7].
- Primary Antibody Incubation:
- Dilute the primary antibody in blocking buffer to the predetermined optimal concentration (see Table 1).
- Apply the diluted antibody to the sample.
- Incubate the slides in a humidified chamber overnight at 4°C for maximum specificity and signal [7].
- Post-Primary Wash: The next day, wash the slides three times in wash buffer (PBS/0.1% Tween 20), for 10 minutes each, at room temperature to remove unbound primary antibody [7].
- Secondary Antibody Incubation:
- Post-Secondary Wash: Wash the samples three times in wash buffer, for 5 minutes each, protected from light [7].
- Mounting and Visualization: Drain the liquid, apply a suitable mounting medium, and coverslip the samples. Observe with a fluorescence microscope using appropriate filter sets [7].
The Scientist's Toolkit: Research Reagent Solutions
Table 2: Essential Materials for Cleaved Caspase-3 Immunofluorescence
| Item | Function / Rationale | Example / Specification |
|---|---|---|
| Cleaved Caspase-3 Antibody | Specifically binds the activated (cleaved) form of caspase-3, enabling apoptosis detection. | Recombinant monoclonal antibodies (e.g., Abcam ab32042) offer high batch-to-batch consistency [38]. |
| Fluorophore-Conjugated Secondary Antibody | Binds the primary antibody, delivering a detectable signal for visualization. | Alexa Fluor conjugates are bright and photostable. Use one directed against the host of the primary antibody (e.g., goat anti-rabbit) [7]. |
| Blocking Serum | Reduces non-specific binding of antibodies to the sample, lowering background. Use serum from the secondary antibody host species [7]. | Normal goat serum, donkey serum, etc. |
| Methanol-free Formaldehyde | A cross-linking fixative that preserves cellular architecture and antigenicity without introducing high autofluorescence. | 4% Formaldehyde in PBS, prepared from fresh paraformaldehyde (PFA) or commercially available solutions [40]. |
| Permeabilization Agent | Creates pores in the cell membrane, allowing antibodies to access intracellular targets like cleaved caspase-3. | Detergents like Triton X-100 or NP-40 (0.1-0.25%) [7]. |
| Antifade Mounting Medium | Preserves fluorescence and prevents photobleaching during microscopy. | Commercially available media often contain DAPI for nuclear counterstaining. |
Workflow and Pathway Visualization
Experimental Workflow for Clean Caspase-3 IF
The following diagram outlines the key experimental steps and critical decision points for achieving low-background detection of cleaved caspase-3.
Caspase-3 in the Apoptotic Signaling Pathway
Cleaved caspase-3 functions as a key effector caspase in the execution phase of apoptosis. Its activation and role in cleaving cellular targets are illustrated below.
Troubleshooting for Low Background
A high background signal can compromise data integrity. The table below addresses common issues and provides solutions.
Table 3: Troubleshooting Common Background Problems
| Problem | Potential Cause | Recommended Solution |
|---|---|---|
| High Background Fluorescence | Inadequate blocking or washing; over-fixation. | Ensure blocking serum matches the secondary antibody host [7]. Increase wash times and volumes. Optimize fixation time to prevent epitope masking [40]. |
| Weak or No Specific Signal | Low antibody concentration; insufficient permeabilization; antigen degradation. | Titrate the primary antibody to a higher concentration. Validate permeabilization efficiency. Include a positive control (e.g., staurosporine-treated cells) [38]. |
| Non-Specific Staining | Antibody cross-reactivity; secondary antibody aggregation. | Include a no-primary-antibody control [7]. Use knockout-validated antibodies where possible [38]. Centrifuge the secondary antibody before use to remove aggregates. |
Cleaved caspase-3 (cC3) serves as a critical executioner protease in apoptosis, and its detection through immunofluorescence (IF) provides spatial and temporal insights into cell death across various experimental models [41] [42]. However, the transition from traditional 2D cultures to more physiologically relevant 3D models (spheroids and organoids) presents unique challenges for robust cC3 detection, including antibody penetration, background signal, and interpretation within complex structures [18] [43]. This Application Note details optimized protocols for quantifying apoptosis via cC3 immunofluorescence in 2D cultures, 3D spheroids, and patient-derived organoids (PDOs), emphasizing strategies to minimize background and ensure reliable data. We further integrate these protocols with advanced fluorescent biosensors and provide a framework for quantitative analysis in drug screening contexts.
Cleaved Caspase-3 Detection in Apoptosis Signaling
Upon apoptotic induction, caspase-3 is cleaved at aspartate residue 175, generating active fragments of 17 and 19 kDa that proteolyze cellular substrates, including PARP, leading to cell dismantling [41] [42]. The diagram below illustrates this key signaling pathway and the corresponding detection method via immunofluorescence.
Quantitative Comparison of Detection Method
The following table summarizes the key characteristics and performance metrics of cleaved caspase-3 detection across different cellular models.
Table 1: Quantitative Summary of cC3 Detection Across Model Systems
| Model System | Primary Application Context | Key Readout | Detection Sensitivity / Notes | Validation Methods |
|---|---|---|---|---|
| 2D Cell Cultures [7] [18] | Initial drug screening, mechanistic studies | % cC3-positive cells; fluorescence intensity | High sensitivity with optimized protocols; allows single-cell resolution | Western blot (cleaved PARP, cC3); Annexin V/PI flow cytometry [18] |
| 3D Spheroids [43] | Intermediate complexity tumor models, neurotoxicity | Caspase-3 fluorescence intensity normalized to viability marker | Consistent spatial apoptosis patterns; reveals heterogeneous core vs. periphery effects | Co-staining with thioflavin T (Aβ deposits in Alzheimer's models) [43] |
| Patient-Derived Organoids (PDOs) [18] [44] | Personalized drug screening, translational research | Apoptotic index (e.g., % cC3+ area/organoid); High-content imaging metrics | Closely mirrors patient response; heterogeneous intra-organoid signal requires robust analysis | Flow cytometry (Annexin V); IHC of cleaved caspase-3 in PDOX models [44] |
The Scientist's Toolkit: Key Research Reagent Solutions
Table 2: Essential Reagents for cC3 Immunofluorescence Across Models
| Reagent / Resource | Function in Protocol | Example Specifications / Notes |
|---|---|---|
| Anti-Cleaved Caspase-3 (Asp175) Antibody [41] | Primary antibody for specific cC3 detection in IF, IHC, WB. | Rabbit monoclonal; detects endogenous 17/19 kDa fragments; validated for human, mouse, rat. |
| Fluorescently-Labeled Secondary Antibody [7] | Amplifies signal for visualization of primary antibody binding. | Anti-rabbit IgG conjugated to Alexa Fluor 488, 555, or 647; use species-appropriate serum for blocking. |
| Permeabilization Buffer [7] | Enables antibody access to intracellular cC3 epitopes. | PBS with 0.1% Triton X-100 or 0.1% NP-40; critical for 3D models. |
| Blocking Buffer [7] | Reduces non-specific antibody binding to minimize background. | PBS/0.1% Tween 20 + 5% serum from secondary antibody host species. |
| Caspase-3/7 FRET Reporter (e.g., LSS-mOrange-DEVD-mKate2) [45] | Live-cell, real-time imaging of caspase activity via FLIM-FRET. | Cleavage of DEVD linker reduces FRET, increasing donor lifetime; ideal for 3D and in vivo. |
| ZipGFP Caspase-3/7 Reporter [18] | Live-cell, "switch-on" biosensor for caspase activation. | Split-GFP reconstitutes upon DEVD cleavage, providing low-background, irreversible signal. |
| VC3AI (Venus-based C3AI) [8] | Genetically encoded, cyclic caspase-3-like protease activity indicator. | Minimal background fluorescence; becomes fluorescent upon cleavage by DEVDases. |
Experimental Protocols
Core Immunofluorescence Protocol for Cleaved Caspase-3
This foundational protocol is adapted for fixed cells and must be optimized for penetration in 3D models [7].
Materials:
- Primary antibody: Cleaved Caspase-3 (Asp175) Antibody (#9661, Cell Signaling Technology) [41]
- Fluorescently-labeled secondary antibody (e.g., Goat Anti-Rabbit Alexa Fluor 488)
- Permeabilization buffer: PBS with 0.1% Triton X-100
- Blocking buffer: PBS/0.1% Tween 20 + 5% serum from the host species of the secondary antibody
- Mounting medium with DAPI
- Humidified chamber
Procedure:
- Fixation: Fix prepared samples (cells on slides, spheroids, or organoid sections) with 4% paraformaldehyde for 15-20 minutes at room temperature (RT).
- Permeabilization: Incubate samples in permeabilization buffer for 5 minutes at RT. For 3D spheroids and organoids, extend this time to 15-30 minutes and consider adding a mild detergent throughout antibody incubation steps to enhance penetration [43].
- Washing: Wash three times with PBS for 5 minutes each.
- Blocking: Drain the slide and apply 200 µL of blocking buffer. Incubate flat in a humidified chamber for 1-2 hours at RT.
- Primary Antibody Incubation: Apply 100 µL of the primary antibody (e.g., diluted 1:200 in blocking buffer based on initial optimization) [7]. Incubate overnight in a humidified chamber at 4°C. Include a no-primary-antibody control to assess background.
- Washing: The next day, wash the slides three times with PBS/0.1% Tween 20 for 10 minutes each at RT.
- Secondary Antibody Incubation: Apply 100 µL of the appropriate fluorescently-labeled secondary antibody (diluted 1:500 in PBS). Incubate in a humidified chamber, protected from light, for 1-2 hours at RT.
- Final Washing: Wash three times with PBS/0.1% Tween 20 for 5 minutes each, protected from light.
- Mounting and Imaging: Drain the liquid, mount the slides with an anti-fade mounting medium containing DAPI, and observe with a fluorescence or confocal microscope.
Model-Specific Optimizations and Live-Cell Alternatives
For 3D Spheroid and Organoid Imaging:
- Enhanced Permeabilization: Combining 0.5% Triton X-100 with 0.05% SDS can improve antibody penetration into the core of 3D structures without destroying morphology [43].
- Validation: Co-staining with markers like thioflavin T for Aβ deposits in Alzheimer's disease spheroid models can correlate cC3 activation with specific pathologies [43].
- High-Content Analysis: Use automated imaging systems to capture Z-stacks and 3D-render entire spheroids/organoids. Quantify the % cC3-positive area normalized to total DAPI area or a constitutive fluorescent marker (e.g., mCherry) to account for viability [18] [46].
Live-Cell Imaging with Caspase Reporters: For real-time, dynamic assessment of apoptosis without fixation, genetically encoded reporters are superior.
- FRET-based Reporters (e.g., LSS-mOrange-DEVD-mKate2): Caspase-3 cleavage disrupts FRET, which is best measured by Fluorescence Lifetime Imaging Microscopy (FLIM) for concentration-independent quantification, especially powerful in 3D and in vivo [45].
- Switch-on Reporters (e.g., ZipGFP): These split-GFP systems exhibit minimal background and irreversibly fluoresce green upon caspase-3/7-mediated cleavage, allowing historical tracking of apoptotic events in long-term experiments [18].
- Protocol Workflow: The diagram below outlines the key steps for implementing these live-cell biosensors.
Troubleshooting and Data Interpretation
Critical Consideration: Specificity of Cleaved Caspase-3 as an Apoptosis Marker A significant finding from recent research is that cC3 is not an exclusive marker of apoptosis, particularly in the central nervous system. Studies in intact rat spinal cord showed a vast discrepancy (500:1 to 5000:1) between cC3-positive cells and cells positive for cleaved PARP (cPARP), a more specific apoptotic marker. Many cC3-positive glial cells did not exhibit apoptotic morphology, suggesting non-apoptotic roles or the presence of inhibited forms of cC3 [42]. Therefore, for definitive apoptosis validation, especially in complex tissues, it is strongly recommended to pair cC3 detection with a second, more specific marker like cPARP [42].
Common Issues and Solutions:
- High Background: Ensure thorough washing; use high-quality, specific serum in blocking buffer; titrate primary and secondary antibodies to optimal concentrations [7].
- Weak Signal: Optimize fixation time to avoid over-fixation; increase primary antibody concentration and/or incubation time; verify antibody compatibility with the sample species [41] [7].
- Non-Specific Staining: Include rigorous controls (no primary antibody, caspase inhibitor like zVAD-FMK); validate antibody specificity using knockout cell lines if possible [18] [42].
- Heterogeneous Staining in 3D Models: This often reflects biological reality (e.g., hypoxic cores). Ensure adequate permeabilization and collect multiple Z-stacks for representative analysis.
Solving Common Cleaved Caspase-3 IF Problems: Artifacts, Background, and Specificity Issues
In cleaved caspase-3 immunofluorescence (IF), high background staining compromises data integrity by obscuring specific signal and leading to erroneous interpretation of apoptotic activity. This application note details the optimization of critical buffer formulations and washing protocols to suppress non-specific background while preserving robust detection of cleaved caspase-3. These optimized methods are essential for generating publication-quality, reliable data in apoptosis research, cancer biology, and therapeutic drug development.
The Scientist's Toolkit: Essential Reagents for Low-Background IF
The following table catalogs key reagents crucial for executing a low-background cleaved caspase-3 immunofluorescence protocol, based on cited protocols and product specifications.
Table 1: Key Research Reagent Solutions for Caspase-3 Immunofluorescence
| Reagent | Function/Description | Example Specification / Application Note |
|---|---|---|
| Anti-Cleaved Caspase-3 Primary Antibody | Specifically binds the activated fragment of caspase-3 (cleaved at Asp175) [47] [48]. | Rabbit monoclonal [48]; Recommended IF Dilution: 1:1600–1:6400 [48]. |
| Fluorophore-Conjugated Secondary Antibody | Binds the primary antibody for fluorescence detection. | e.g., Goat anti-rabbit Alexa Fluor 488 [7]. |
| Blocking Buffer | Reduces non-specific antibody binding by saturating reactive sites. | PBS/0.1% Tween 20 + 5% serum from the secondary antibody host species [7]. |
| Permeabilization Buffer | Enables antibody access to intracellular antigens by dissolving cellular membranes. | PBS with 0.1% Triton X-100 or 0.1% NP-40 [7] [49]. |
| Wash Buffer | Removes unbound antibodies and reagents to minimize background. | PBS/0.1% Tween 20 (PBS-T) [7] or PBS with 0.2% Triton X-100 [49]. |
| Mounting Medium | Preserves the sample and provides a suitable refractive index for microscopy. | Permanent or aqueous mounting medium [7]. |
Core Buffer Formulations: Composition and Preparation
Accurate preparation of buffer solutions is foundational for assay success. The tables below summarize standardized formulations for key buffers used in the protocol.
Table 2: Standardized Buffer Formulations for Immunofluorescence
| Buffer | Final Composition | Preparation & Storage |
|---|---|---|
| General IF Wash Buffer (PBS-T) | 1X PBS, 0.1% Tween 20 [7]. | Sterilize by filtration (0.22 µm). Store at room temperature for short-term use. |
| Alternative IF Wash / Blocking Buffer | 1X PBS, 1% BSA, 0.2% Triton X-100 [49]. | Sterilize by filtration (0.22 µm). Store at 4°C for up to 12 months [49]. |
| Blocking Buffer | 1X PBS, 0.1% Tween 20, 5% appropriate serum (e.g., goat serum) [7]. | Prepare fresh before use. |
| Permeabilization Buffer | 1X PBS, 0.1% Triton X-100 (or NP-40) [7]. | Prepare fresh before use. |
Optimized Immunofluorescence Protocol for Cleaved Caspase-3
This step-by-step protocol integrates optimized wash steps and buffer formulations to minimize background.
Sample Preparation and Fixation
- Fixation: Use prepared, fixed cell samples on slides. The specific fixative should be optimized for your cell type.
- Permeabilization: Incubate fixed samples in Permeabilization Buffer (PBS/0.1% Triton X-100) for 5 minutes at room temperature [7].
- Wash: Following permeabilization, wash the slides three times in PBS for 5 minutes each at room temperature [7].
Blocking
- Drain the slide and apply 200 µL of Blocking Buffer.
- Lay the slides flat in a humidified chamber and incubate for 1–2 hours at room temperature [7].
- After blocking, rinse the slides once in PBS [7].
- Critical Tip: Use serum from the host species of the secondary antibody for most effective blocking [7].
Primary Antibody Incubation
- Apply 100 µL of the primary antibody (e.g., Cleaved Caspase-3 (Asp175) Antibody #9579) diluted in blocking buffer at the optimized concentration (e.g., 1:1600–1:6400) [48].
- Incubate the slides in a humidified chamber overnight at 4°C [7].
- Critical Control: Always include a negative control slide where the primary antibody is omitted to assess background from the secondary antibody.
Secondary Antibody Incubation and Washes
- The following day, wash the slides three times, for 10 minutes each, in Wash Buffer (PBS/0.1% Tween 20) at room temperature [7]. This extended washing is critical for removing unbound primary antibody.
- Drain the slides and apply 100 µL of the appropriate fluorophore-conjugated secondary antibody diluted in PBS or blocking buffer (e.g., 1:500) [7].
- Incubate the slides in a humidified chamber, protected from light, for 1–2 hours at room temperature [7].
- Perform a final wash series: three times in PBS/0.1% Tween 20 for 5 minutes each, protected from light [7].
Mounting and Imaging
- Drain the liquid, apply a suitable mounting medium, and coverslip according to the manufacturer's protocol.
- Observe the slides with a fluorescence microscope, ensuring imaging settings are consistent between experimental and control samples.
Workflow and Troubleshooting
Experimental Workflow Diagram
The following diagram visualizes the key stages of the optimized immunofluorescence protocol and the primary causes of high background addressed at each step.
Troubleshooting High Background
Table 3: Troubleshooting Common Background Issues
| Problem | Potential Cause | Corrective Action |
|---|---|---|
| High Background Signal | Inadequate blocking. | Ensure use of 5% serum from the secondary antibody species in the blocking buffer [7]. |
| Insufficient washing after primary or secondary antibody incubation. | Implement extended washes (3 x 10 min) with PBS/0.1% Tween 20 after primary antibody incubation [7]. | |
| Non-specific antibody binding. | Validate antibody specificity; include a no-primary-antibody control [7] [47]. | |
| Weak Specific Signal | Low antibody concentration or poor antigen preservation. | Titrate the primary antibody to find the optimal concentration; optimize fixation conditions [7]. |
Meticulous attention to buffer composition and washing stringency is paramount for achieving high-fidelity, low-background detection of cleaved caspase-3 via immunofluorescence. By adhering to the optimized reagent formulations, protocol steps, and troubleshooting guidance outlined in this document, researchers can significantly enhance the specificity and reliability of their apoptosis assays. This optimization is a critical step toward generating robust, quantifiable data essential for advancing research in cell death mechanisms and therapeutic development.
Managing Nuclear Background in Specific Species and Cell Types
Cleaved caspase-3 is a critical biomarker for detecting apoptotic cells, but immunofluorescence (IF) detection is often complicated by non-specific nuclear background staining, particularly in specific species and cell types. This technical challenge can obscure accurate interpretation of apoptosis assays in research and drug development. Nuclear background arises from multiple factors, including antibody cross-reactivity, suboptimal fixation conditions, and insufficient blocking of endogenous components [50]. This application note provides detailed, evidence-based protocols to minimize nuclear background while preserving specific signal, enabling more reliable detection of cleaved caspase-3 across various experimental models.
Understanding the Specificity Challenge
The Cleaved Caspase-3 (Asp175) Antibody from Cell Signaling Technology (#9661) specifically detects the large fragment (17/19 kDa) of activated caspase-3 but notes that "non-specific labeling may be observed by immunofluorescence in specific sub-types of healthy cells in fixed-frozen tissues (e.g., pancreatic alpha-cells). Nuclear background may be observed in rat and monkey samples" [50]. This indicates inherent challenges in these specific models that require specialized protocols.
Similar cleaved caspase-3 antibodies from other manufacturers also report reactivity with human, mouse, and rat samples, confirming the widespread use across these species and the need for optimized protocols for each [20] [51]. The core challenge lies in distinguishing true caspase-3 activation from non-specific nuclear staining, which is particularly problematic when quantifying apoptosis in tissues with low baseline apoptosis rates.
Experimental Protocols for Background Reduction
Optimized Immunofluorescence Protocol for Cleaved Caspase-3
Materials Required
- Primary antibody against cleaved caspase-3 (e.g., Cell Signaling #9661, Proteintech 25128-1-AP, or Abcepta AP63081)
- Prepared, fixed cell or tissue samples on slides
- Triton X-100 or NP-40
- Phosphate-buffered saline (PBS)
- Blocking buffer (PBS/0.1% Tween 20 + 5% appropriate serum)
- Fluorescently labeled secondary antibodies
- Mounting medium with DAPI (for nuclear counterstaining)
- Humidified chamber
Detailed Procedure
Sample Preparation and Fixation
- Culture cells on chambered slides or prepare tissue cryosections (4-10 μm thickness)
- Fix with 4% paraformaldehyde for 15-20 minutes at room temperature
- Rinse three times with PBS for 5 minutes each
Permeabilization
- Permeabilize fixed samples by incubating in PBS/0.1% Triton X-100 (0.1% NP-40 can be used instead) for 5-10 minutes at room temperature [7]
- Wash three times in PBS for 5 minutes each
Blocking
- Drain the slide and add 200-500 μL of blocking buffer (PBS/0.1% Tween 20 + 5% serum from the host species of the secondary antibody) [7]
- Lay slides flat in a humidified chamber and incubate for 1-2 hours at room temperature
- Rinse once briefly in PBS
Primary Antibody Incubation
- Apply 100-200 μL of cleaved caspase-3 primary antibody diluted in blocking buffer
- Incubate slides in a humidified chamber overnight at 4°C
- Include a negative control without primary antibody to assess background
Washing
- Wash slides three times for 10 minutes each in PBS/0.1% Tween 20 at room temperature [7]
Secondary Antibody Incubation
- Apply 100-200 μL of appropriate fluorescent secondary antibody diluted 1:500-1:1000 in PBS
- Incubate in a humidified chamber, protected from light, for 1-2 hours at room temperature
- Wash three times in PBS/0.1% Tween 20 for 5 minutes each, protected from light
Mounting and Imaging
- Drain liquid and mount slides in anti-fade mounting medium, optionally with DAPI for nuclear counterstaining
- Observe with a fluorescence microscope using appropriate filter sets
Species-Specific Modifications
For rat and monkey samples where nuclear background is specifically noted [50]:
- Increase blocking time to 3-4 hours or overnight at 4°C
- Include an additional blocking step with 0.1-0.3 M glycine for 30 minutes to quench autofluorescence
- Consider using species-specific Fab fragment secondary antibodies to reduce Fc receptor-mediated background
- Test higher antibody dilutions (e.g., 1:800-1:1000 for Cell Signaling #9661) to optimize signal-to-noise ratio
For pancreatic alpha-cells and other challenging cell types:
- Reduce permeabilization time to 2-3 minutes to better preserve nuclear membrane integrity
- Include 1-5% bovine serum albumin (BSA) in the blocking buffer to reduce non-specific binding
Alternative Antigen Retrieval Method
Recent evidence suggests that pressure cooker-based antigen retrieval may be superior to proteinase K treatment for preserving antigenicity while reducing background [52]. This approach is particularly valuable when combining cleaved caspase-3 detection with other markers in multiplex assays.
Pressure Cooker Antigen Retrieval Protocol
- After deparaffinization and rehydration of FFPE sections, place slides in preheated sodium citrate buffer (10 mM, pH 6.0)
- Process in a decloaking chamber or pressure cooker at 95-100°C for 15-20 minutes
- Cool slides for 20-30 minutes at room temperature in the buffer
- Proceed with standard IF protocol from the permeabilization step
Troubleshooting Nuclear Background
Table 1: Troubleshooting Guide for Nuclear Background in Cleaved Caspase-3 Immunofluorescence
| Problem | Possible Cause | Solution | Preventive Measures |
|---|---|---|---|
| High nuclear background in rat/monkey samples | Non-specific antibody binding | Increase primary antibody dilution; extend blocking time | Use serum from secondary antibody host species in blocking buffer [7] |
| Pan-nuclear staining in negative controls | Inadequate blocking or secondary antibody cross-reactivity | Include additional blocking step with 5% serum; validate secondary antibody specificity | Pre-adsorb secondary antibody; include no-primary controls [7] |
| Speckled nuclear pattern | Antibody aggregation or precipitate formation | Centrifuge antibody solutions before use; filter through 0.2μm filter | Aliquot antibodies; avoid repeated freeze-thaw cycles |
| Variable background across cell types | Differential permeabilization | Optimize permeabilization time for each cell type | Standardize permeabilization conditions; validate with control cells |
| Persistent background after optimization | Endogenous fluorophores or autofluorescence | Include sodium borohydride treatment (1mg/mL for 30 min) to reduce autofluorescence | Use fresh paraformaldehyde; minimize fixation time |
Research Reagent Solutions
Table 2: Essential Research Reagents for Cleaved Caspase-3 Immunofluorescence
| Reagent Category | Specific Examples | Function | Protocol Notes |
|---|---|---|---|
| Primary Antibodies | Cell Signaling #9661 [50], Proteintech 25128-1-AP [51], Abcepta AP63081 [20] | Specifically detect activated caspase-3 (17/19 kDa fragments) | Species-specific validation required; optimal dilution varies by product |
| Blocking Reagents | Normal serum (species-matched to secondary host), BSA, glycine | Reduce non-specific antibody binding | Serum should match secondary antibody host species [7] |
| Permeabilization Agents | Triton X-100, NP-40, saponin | Enable antibody access to intracellular epitopes | Concentration and time critical for nuclear background control [7] |
| Detection Systems | Fluorophore-conjugated secondary antibodies (e.g., Alexa Fluor series) | Visualize primary antibody binding | Choose fluorophores with minimal tissue autofluorescence at emission wavelengths |
| Mounting Media | Anti-fade media with DAPI | Preserve fluorescence signal and counterstain nuclei | DAPI concentration should be optimized to avoid bleed-through |
Experimental Workflow Visualization
The following diagram illustrates the optimized workflow for cleaved caspase-3 immunofluorescence with integrated background reduction steps:
Validation and Quality Control
Effective management of nuclear background requires rigorous validation:
- Include Appropriate Controls: Always include both positive controls (apoptosis-induced cells) and negative controls (no primary antibody, caspase inhibitor-treated cells) [7] [18]
- Specificity Verification: Validate antibody specificity using:
- Caspase inhibitors (e.g., zVAD-FMK) to confirm caspase-dependent signal [18]
- siRNA knockdown of caspase-3
- Western blot correlation to confirm expected molecular weight
- Signal Quantification: Use image analysis software to quantify both specific signal and nuclear background, maintaining a signal-to-background ratio of at least 3:1 for reliable interpretation
Managing nuclear background in cleaved caspase-3 immunofluorescence requires a systematic approach addressing species-specific challenges and cell-type variations. The protocols outlined here, incorporating enhanced blocking strategies, optimized antigen retrieval, and rigorous validation, provide researchers with effective methods to reduce non-specific staining while preserving specific signal. Implementation of these techniques will enhance the reliability of apoptosis detection in diverse experimental systems, supporting more accurate interpretation of cell death mechanisms in basic research and drug development.
A detailed guide for researchers aiming to rescue elusive cleaved caspase-3 signals in immunofluorescence without compromising background levels.
Within the broader scope of optimizing a cleaved caspase-3 immunofluorescence protocol with low background, addressing a weak or absent signal is a critical challenge. The specific detection of cleaved caspase-3 (CC3) is a cornerstone assay in apoptosis research, cancer biology, and drug development for quantifying programmed cell death [53] [54]. A failed experiment due to a faint or missing signal can halt research progress. This application note provides a focused, detailed guide on two pivotal aspects for signal rescue: antigen retrieval and signal amplification. By systematically applying these troubleshooting strategies, researchers can significantly enhance the robust detection of this key apoptotic marker.
The Scientist's Toolkit: Key Reagent Solutions
The following table details essential reagents and materials frequently employed in optimizing cleaved caspase-3 immunofluorescence.
Table 1: Key Research Reagents for Cleaved Caspase-3 Immunofluorescence
| Reagent/Material | Function/Benefit in CC3 IF |
|---|---|
| Cleaved Caspase-3 (Asp175) Antibody #9661 | A well-characterized rabbit polyclonal antibody that detects the endogenous large fragment (17/19 kDa) of activated caspase-3; validated for IF, IHC, and WB [53]. |
| Cleaved Caspase-3 (Asp175) (D3E9) Rabbit mAb #9579 | A rabbit monoclonal antibody offering superior lot-to-lot consistency; preferred for immunofluorescence applications with high recommended dilutions (e.g., 1:1600 - 1:6400) [55]. |
| Fluorophore-conjugated Secondary Antibodies | Enables visualization of the bound primary antibody. Using antibodies cross-adsorbed against the host species of the primary antibody and conjugated to bright fluorophores (e.g., Alexa Fluor dyes) is crucial for high sensitivity and low background [7]. |
| Citrate-Based Antigen Retrieval Buffer (pH 6.0) | A commonly used solution for heat-induced epitope retrieval (HIER). The slightly acidic pH is effective for unmasking a wide range of antigens, including CC3 [56]. |
| Normal Donkey Serum | A common component of blocking buffers. Using serum from the host species of the secondary antibody (e.g., donkey) is recommended to effectively reduce non-specific binding and background [7] [54]. |
| Triton X-100 | A detergent used for permeabilizing fixed cells or tissues. It allows antibodies to access intracellular antigens like CC3 by dissolving cellular membranes [7] [54]. |
Making informed decisions during protocol optimization requires an understanding of established working parameters. The tables below summarize key quantitative data from commercial antibodies and experimental conditions.
Table 2: Antibody Application and Dilution Guidelines
| Antibody Specificity | Clone Type | Recommended IF Dilution | Key Specificity Note |
|---|---|---|---|
| Cleaved Caspase-3 (Asp175) [53] | Polyclonal | 1:400 | Detects activated caspase-3 fragment; does not recognize full-length protein. |
| Cleaved Caspase-3 (Asp175) (D3E9) [55] | Monoclonal | 1:1600 - 1:6400 | Preferred for IF; detects protein only when cleaved at Asp175. |
Table 3: Antigen Retrieval & Incubation Condition Parameters
| Protocol Step | Variable | Typical Range / Condition | Reference |
|---|---|---|---|
| Antigen Retrieval | Buffer pH | pH 6.0 (common), range pH 3-10 possible | [56] |
| Primary Antibody Incubation | Temperature & Duration | Overnight at 4°C | [7] [54] |
| Secondary Antibody Incubation | Temperature & Duration | 1-2 hours at room temperature or 6 hours at 4°C | [7] [54] |
Core Protocol: Optimized Antigen Retrieval and Amplification
This protocol assumes you have fixed, permeabilized, and blocked your samples (e.g., cells or tissue sections) as per standard immunofluorescence procedures [7] [56].
I. Heat-Induced Antigen Retrieval (HIER)
Antigen retrieval is often the most critical step for rescuing a signal from formalin-fixed, paraffin-embedded (FFPE) samples, as cross-linking during fixation can mask antibody epitopes.
Materials:
- Citrate-based antigen retrieval buffer, pH 6.0 (e.g., Vector Laboratories H-3300) [56]
- Slide-staining jars or coplin jars
- Heat source (water bath, steamer, or pressure cooker)
- Hot plate
Method:
- Dewax and Hydrate: If using FFPE sections, completely remove paraffin by immersing slides in xylene (or a xylene substitute), followed by a graded series of ethanol (100%, 95%, 70%) and finally distilled water [56].
- Prepare Retrieval Solution: Add 3.6 mL of 10x citrate-based antigen retrieval solution to 400 mL of distilled water in a suitable container to make 400 mL of 1x working solution [56].
- Heat the Solution: Pre-heat the antigen retrieval buffer to over 95°C using a water bath, steamer, or pressure cooker. Maintain this temperature consistently.
- Pressure Cooker: ~10 minutes at full pressure.
- Water Bath/Steamer: 20-30 minutes.
- Incubate Slides: Carefully place the slides into the pre-heated retrieval buffer. Ensure the tissue sections are fully immersed.
- Cool Down: After the heating period, remove the container from the heat source and allow it to cool at room temperature for 20-30 minutes. Do not cool on ice, as this may promote non-specific binding [56].
- Rinse: Gently rinse the slides twice with PBS or the permeabilization solution (PBS with 0.1% Triton X-100) for 5 minutes each [7] [54].
II. Signal Amplification via Antibody Optimization
If antigen retrieval alone is insufficient, optimizing antibody conditions can provide necessary signal amplification.
Materials:
- Primary antibody against cleaved caspase-3 (see Table 1)
- Fluorophore-conjugated secondary antibody
- Blocking buffer (e.g., PBS with 5% normal serum and 0.1% Tween-20) [7]
- Humidified chamber
Method:
- Apply Primary Antibody:
- Prepare the CC3 primary antibody at the recommended dilution (see Table 2) in an appropriate dilution buffer (e.g., 1% BSA in PBS).
- Apply 100-200 µL of the antibody solution to cover the sample on the slide.
- Place the slide in a humidified chamber to prevent evaporation and incubate overnight at 4°C. This extended, cold incubation enhances antibody binding and specificity [7] [54].
- Wash: The following day, wash the slides three times in PBS/0.1% Tween-20 for 10 minutes each at room temperature with gentle agitation [7].
- Apply Secondary Antibody:
- Prepare a fluorophore-conjugated secondary antibody (e.g., Goat Anti-Rabbit Alexa Fluor 488) at its optimal dilution (e.g., 1:500-1:1000) in buffer.
- Apply the solution to the sample and incubate in a humidified chamber, protected from light, for 1-2 hours at room temperature. For increased signal, incubation can be extended to 6 hours at 4°C [54].
- Final Washes and Mounting: Wash the slides three times in PBS/0.1% Tween-20 for 5 minutes each, protected from light. Perform a final rinse in PBS alone. Drain the liquid and mount the slides using an anti-fade mounting medium [7].
Troubleshooting Workflow Logic
The following diagram outlines the logical decision-making process for diagnosing and resolving weak or no signal issues, integrating the protocols described above.
Within the framework of research focused on optimizing a cleaved caspase-3 immunofluorescence protocol with low background, validating the specificity of the observed signal is paramount. Caspase-3, a critical executioner protease in apoptosis, is synthesized as an inactive zymogen and becomes activated through proteolytic cleavage at specific aspartic residues, such as Asp175 [57] [58]. Immunofluorescence detection of this cleaved form provides spatial resolution of apoptosis within tissues or cell cultures, but this strength is contingent upon the absolute specificity of the signal [7] [6]. Nonspecific antibody binding, background fluorescence, and non-apoptotic cellular events can confound results, leading to erroneous conclusions. This application note details the essential control experiments and the use of caspase inhibitors to unequivocally validate the specificity of cleaved caspase-3 detection, thereby ensuring data integrity in apoptosis research and drug discovery pipelines.
The Critical Role of Specificity Controls
The interpretation of any caspase-3 immunofluorescence experiment is incomplete without rigorous specificity controls. Antibody-based methods, while widely used, are susceptible to artifacts from off-target binding or inadequate assay conditions [6]. Furthermore, the activation of caspase-3 is part of a complex proteolytic cascade, and its detection does not always occur in isolation [6]. Implementing a suite of controls is therefore not optional but fundamental to confirming that the detected signal genuinely represents caspase-3 activation at the anticipated subcellular location.
The consequences of omitting these controls are significant. High background staining can lead to overestimation of apoptotic activity, while nonspecific binding can create false positive signals, compromising the validity of the entire dataset. For researchers in drug development, this can misdirect lead optimization or lead to incorrect conclusions about a compound's efficacy and mechanism of action. The controls outlined in the following sections are designed to systematically address and rule out these potential sources of error.
Essential Control Experiments
A comprehensive validation strategy incorporates several key control experiments, each designed to address a different type of potential false signal.
- No-Primary Antibody Control: This control assesses the background contribution of the secondary antibody and any endogenous fluorescence. The procedure is identical to the main protocol, except the incubation with the primary antibody is skipped, and the sample is incubated with blocking buffer alone [7]. A complete absence of signal in this control confirms that the fluorescence in test samples is not generated by non-specific binding of the secondary antibody.
- Negative Biological Control: Using untreated cells or cells from a tissue known not to be undergoing apoptosis establishes a baseline for non-apoptotic conditions. For instance, control slides with untreated Jurkat cells provide a reference for the background staining level in healthy cells, as opposed to etoposide-treated Jurkat cells which serve as a positive control for apoptosis [57]. The absence of cleaved caspase-3 signal in these cells validates the antibody's specificity for the apoptotic state.
- Positive Biological Control: This control verifies that the entire immunofluorescence protocol, from fixation to imaging, is functioning correctly. Samples from cells or tissues known to be undergoing apoptosis, such as etoposide-treated Jurkat cells [57] or cancer cells treated with a chemotherapeutic agent like carfilzomib [18], should show a robust and specific signal for cleaved caspase-3. The presence of this expected signal confirms the functionality of all reagents and procedures.
The logical relationship and purpose of these core controls within an experimental workflow are summarized in the diagram below.
Caspase Inhibitors as Tools for Specificity
Beyond standard controls, pharmacological caspase inhibitors provide a powerful, mechanism-based tool for validating the dependence of an observed signal on caspase enzymatic activity. The pan-caspase inhibitor Z-VAD-FMK is an irreversible inhibitor that forms a covalent bond with the catalytic cysteine residue in the active site of most caspases [58]. Its use in parallel with apoptosis induction can definitively demonstrate that the immunofluorescence signal is a direct consequence of caspase activation.
Protocol: Inhibitor-based Specificity Validation
This protocol outlines the use of Z-VAD-FMK to validate cleaved caspase-3 immunofluorescence signals in cell culture models.
Materials:
- Cells of interest grown on culture slides or coverslips.
- Apoptosis-inducing agent (e.g., chemotherapeutic drug, staurosporine).
- Pan-caspase inhibitor Z-VAD-FMK (e.g., dissolved in DMSO to a stock concentration of 20 mM).
- DMSO vehicle control.
- Materials for standard cleaved caspase-3 immunofluorescence [7].
Method:
- Cell Treatment:
- Pre-treatment (Recommended): Incubate cells with 20–50 µM Z-VAD-FMK for 1–2 hours prior to the application of the apoptotic stimulus. This pre-emptive blockade ensures caspases are inhibited as soon as they are activated.
- Co-treatment: Apply Z-VAD-FMK simultaneously with the apoptotic stimulus.
- In both cases, include a control group treated with an equal volume of DMSO vehicle alongside the apoptosis-inducing agent.
Apoptosis Induction: Treat cells with the chosen apoptotic agent for the required duration (e.g., 4–24 hours). Maintain the Z-VAD-FMK or DMSO vehicle in the culture medium throughout this period.
Immunofluorescence Staining: Process all treatment groups (Untreated, DMSO+Apoptosis inducer, Z-VAD-FMK+Apoptosis inducer) for cleaved caspase-3 immunofluorescence according to your established protocol [7]. This typically involves:
- Fixation (e.g., with 4% paraformaldehyde).
- Permeabilization (e.g., with 0.1% Triton X-100).
- Blocking (e.g., with 5% serum from the host species of the secondary antibody).
- Incubation with anti-cleaved caspase-3 primary antibody (e.g., overnight at 4°C).
- Incubation with fluorophore-conjugated secondary antibody (e.g., for 1–2 hours at room temperature, protected from light).
- Mounting and imaging.
Validation and Interpretation: A successful experiment will show a clear, strong fluorescence signal in the "DMSO + Apoptosis inducer" group, indicating effective apoptosis induction. Critically, the "Z-VAD-FMK + Apoptosis inducer" group should show a significant reduction or complete absence of the cleaved caspase-3 signal. This result confirms that the signal is specific and dependent on caspase activity. The effectiveness of Z-VAD-FMK in abrogating caspase-3 activation can be further corroborated by Western blot analysis for cleaved caspase-3 or its substrate, cleaved PARP [18].
Quantitative Data from Inhibitor Studies
The efficacy of caspase inhibitors is demonstrated through quantitative kinetic parameters. The table below summarizes data for the irreversible inhibitor Z-VAD-Fmk and a class of novel β-strand peptidomimetic irreversible inhibitors (Compound-1, etc.) against caspase-3 and caspase-8, illustrating the specificity that can be achieved with different inhibitor designs [58].
Table 1: Kinetic Parameters for Irreversible Caspase Inhibitors
| Inhibitor | Target Caspase | Inactivation Rate Constant (k~3~, s⁻¹) | Second-order Rate Constant (k~3~/K~I~, M⁻¹s⁻¹) | Experimental Context |
|---|---|---|---|---|
| Z-VAD-Fmk | Caspase-3 | (1.71 ± 0.07) × 10⁻³ | (2.40 ± 0.30) × 10² | Stopped-flow fluorescence assay with purified enzymes [58] |
| Z-VAD-Fmk | Caspase-8 | (1.43 ± 0.05) × 10⁻³ | (1.66 ± 0.20) × 10³ | Stopped-flow fluorescence assay with purified enzymes [58] |
| Compound-1 | Caspase-3 | (1.10 ± 0.04) × 10⁻³ | (1.70 ± 0.10) × 10³ | Stopped-flow fluorescence assay with purified enzymes [58] |
| Compound-1 | Caspase-8 | Extremely slow | Not determined | Stopped-flow fluorescence assay with purified enzymes [58] |
The data in Table 1 reveal important mechanistic differences. While Z-VAD-Fmk is a broad-spectrum inhibitor with similar inactivation rates against both caspase-3 and caspase-8, the peptidomimetic Compound-1 shows a strong selectivity, effectively inhibiting caspase-3 but not caspase-8 [58]. This highlights that inhibitor choice is critical, and Z-VAD-Fmk remains the preferred tool for pan-caspase inhibition in validation protocols.
Advanced Tools: Genetically Encoded Reporters
While inhibitor studies are essential for endpoint immunofluorescence, genetically encoded fluorescent reporters provide a complementary, real-time approach to monitor caspase activity directly in live cells. These biosensors are engineered proteins that undergo a fluorescence change—either a shift in intensity or a change in fluorescence resonance energy transfer (FRET)—upon cleavage by caspases.
- FRET-based Reporters: These consist of two fluorescent proteins (e.g., LSSmOrange and mKate2) linked by a sequence containing the caspase-3 cleavage motif DEVD. When the reporter is intact, FRET occurs. Upon caspase-3 activation and cleavage of the DEVD linker, FRET is reduced, leading to an increase in donor fluorescence [45]. This change can be quantified with high spatial and temporal resolution using fluorescence lifetime imaging microscopy (FLIM), which is independent of probe concentration and optical path length, making it ideal for 3D cultures and in vivo imaging [45].
- Switch-on Fluorescence Indicators (e.g., VC3AI): These reporters are designed to be non-fluorescent in their original state. They are cyclized chimeras that incorporate a caspase cleavage site. Cleavage by caspase-3 linearizes the protein, allowing it to fold into a functional, fluorescent structure, resulting in a dark-to-bright transition that marks apoptotic cells with high contrast [8].
The pathway and function of a FRET-based caspase sensor is illustrated below.
The Scientist's Toolkit: Key Reagent Solutions
Successful validation of caspase-3 specificity relies on a well-characterized set of reagents. The table below lists essential tools and their functions.
Table 2: Research Reagent Solutions for Caspase-3 Specificity Validation
| Reagent / Tool | Function & Role in Specificity Validation | Example & Key Characteristics |
|---|---|---|
| Pan-Caspase Inhibitor | Gold standard for confirming caspase-dependence of signal. Abrogation of signal upon co-treatment validates specificity. | Z-VAD-FMK: Irreversible, cell-permeable inhibitor that covalently modifies the catalytic cysteine [18] [58]. |
| Cleaved Caspase-3 Antibodies | Primary reagent for specific detection of the activated enzyme. | Anti-Caspase-3 (Asp175): Antibodies specific to the neo-epitope created by cleavage at Asp175 are widely used and validated [57]. |
| Positive Control Samples | Essential for verifying that the immunofluorescence protocol is working correctly. | Etoposide-treated Jurkat cells: Commercially available control slides provide a reliable positive signal [57]. |
| Fluorescent Reporter Constructs | Enable live-cell, real-time monitoring of caspase-3/7 activity, providing kinetic data complementary to fixed-cell IF. | FRET-based DEVD reporters (e.g., LSSmOrange-DEVD-mKate2): Cleavage disrupts FRET, measurable by FLIM [45]. Switch-on reporters (e.g., VC3AI): Cyclized, non-fluorescent until cleaved, offering low background [8]. |
| Caspase Substrates | Used in biochemical assays to measure caspase activity directly in cell lysates, corroborating imaging data. | Ac-DEVD-AMC: Fluorogenic substrate; cleavage releases the fluorescent AMC group. KM for caspase-3 is ~10 µM [59] [58]. |
Troubleshooting and Concluding Remarks
Even with a well-planned validation strategy, experiments can encounter challenges. A common issue is high background staining in immunofluorescence. This can often be mitigated by optimizing the concentration of the primary antibody, ensuring thorough washing steps, and using an appropriate blocking buffer (e.g., PBS/0.1% Tween 20 with 5% serum from the secondary antibody host species) [7]. If the signal is weak despite confirmed apoptosis, try increasing the primary antibody concentration or extending the incubation time. Always protect fluorescently labeled samples from light during secondary antibody incubation and subsequent steps to prevent photobleaching [7].
In conclusion, the confident detection of cleaved caspase-3 requires a multi-faceted approach that goes beyond a simple staining protocol. The integration of mandatory biological and technical controls, coupled with pharmacological inhibition using tools like Z-VAD-FMK, forms the bedrock of specificity validation. The advent of advanced, genetically encoded reporters further enriches this toolkit, allowing for real-time kinetic analyses in live cells. By rigorously applying these principles and reagents, researchers can ensure that their data on apoptotic activity are robust, reliable, and interpretable with high confidence, which is crucial for both basic research and the development of novel therapeutics.
Validating Your Results: Correlation with Other Apoptosis Assays and Future Technologies
Correlating with Western Blot for Cleaved Caspase-3 and PARP Cleavage
The detection of apoptosis, or programmed cell death, is a cornerstone of research in cancer biology and drug development. Cleaved caspase-3 and its substrate, Poly(ADP-ribose) polymerase (PARP), are well-established executioner markers of apoptosis [60]. While immunofluorescence (IF) offers superior spatial resolution for observing these events within individual cells, Western blot (WB) provides robust, quantitative confirmation of specific protein cleavage fragments. Correlating these two techniques ensures precise and reliable data interpretation, validating observations made via cleaved caspase-3 immunofluorescence with low background research. This protocol details methodologies for the parallel detection of cleaved caspase-3 and PARP cleavage, providing a framework for cross-validation that enhances the rigor of apoptosis assessment.
Background and Key Apoptotic Markers
During the execution phase of apoptosis, caspase-3 is activated by cleavage, which then proteolytically cleaves a multitude of cellular substrates, leading to the characteristic morphological changes of cell death [7]. One of the key and most well-characterized substrates of caspase-3 is PARP-1. Caspase-3 cleaves PARP-1 at the DEVD↓G sequence (after aspartic acid 214), separating its N-terminal DNA-binding domain (24 kDa fragment, PARP-124) from its C-terminal catalytic domain (89 kDa fragment, PARP-189) [60]. This cleavage event is considered an irreversible commitment to apoptosis and serves as a definitive biochemical marker.
The following diagram illustrates this central signaling pathway and the key cleavage events detected in these protocols:
Experimental Workflows for Correlation
To effectively correlate data from immunofluorescence and Western blot, experiments should be conducted in parallel using samples treated under identical conditions. The workflow below outlines the key steps for this correlated approach:
Detailed Methodologies
Cleaved Caspase-3 Immunofluorescence Protocol
This protocol is optimized for low-background, high-specificity detection of cleaved caspase-3 in fixed cells, preserving spatial information about apoptosis within a sample [7].
Materials Required:
- Prepared, fixed cell samples on slides
- Primary antibody against cleaved caspase-3
- Fluorescently-labeled secondary antibody (e.g., Alexa Fluor 488 conjugate)
- PBS
- Permeabilization buffer (PBS / 0.1% Triton X-100)
- Blocking buffer (PBS / 0.1% Tween 20 + 5% serum)
- Mounting medium
Step-by-Step Procedure [7]:
- Permeabilization: Incubate fixed samples in PBS/0.1% Triton X-100 for 5 minutes at room temperature.
- Washing: Wash slides three times in PBS, for 5 minutes each.
- Blocking: Drain the slide and add 200 µL of blocking buffer. Incubate in a humidified chamber for 1-2 hours at room temperature.
- Primary Antibody Incubation: Add 100 µL of the primary antibody (e.g., diluted 1:200 in blocking buffer) and incubate in a humidified chamber overnight at 4°C.
- Washing: Wash the slides three times for 10 minutes each in PBS/0.1% Tween 20.
- Secondary Antibody Incubation: Add 100 µL of the appropriate fluorescently-labeled secondary antibody (e.g., diluted 1:500 in PBS). Incubate protected from light for 1-2 hours at room temperature.
- Final Washes: Wash three times in PBS/0.1% Tween 20 for 5 minutes, protected from light.
- Mounting and Imaging: Drain the liquid, mount the slides with an appropriate mounting medium, and observe with a fluorescence microscope.
Western Blot Protocol for Detecting Cleaved Caspase-3 and PARP
This protocol provides a standard method for detecting cleavage fragments, with an option for a low-volume antibody incubation technique to conserve valuable reagents [61].
Materials Required:
- Cell lysates
- Primary antibodies: anti-cleaved caspase-3 and anti-PARP
- HRP-conjugated secondary antibodies
- Nitrocellulose (NC) or PVDF membrane
- SDS-PAGE gel
- Chemiluminescent substrate
- Optional for Sheet Protector (SP) Strategy: Sheet protector (common stationery item) [61]
Step-by-Step Procedure [62]:
- Sample Preparation: Prepare cell lysates with appropriate lysis buffer (e.g., RIPA buffer) and determine protein concentration.
- Gel Electrophoresis: Load 10-30 µg of protein per well and separate by SDS-PAGE.
- Protein Transfer: Transfer proteins from the gel to a nitrocellulose or PVDF membrane.
- Blocking: Incubate the membrane in 5% skim milk or BSA in TBST for 1 hour.
- Antibody Probing (Standard Method):
- Incubate membrane with primary antibody diluted in blocking buffer in a container with gentle agitation overnight at 4°C (typically requires ~10 mL solution).
- Wash membrane 3 times with TBST.
- Incubate with HRP-conjugated secondary antibody for 1 hour at room temperature.
- Antibody Probing (Sheet Protector Strategy for Antibody Conservation) [61]:
- After blocking, briefly blot the membrane on a paper towel to remove excess moisture.
- Place the membrane on a leaflet of a cropped sheet protector.
- Apply a small volume of primary antibody (20-150 µL, sufficient to cover the membrane) directly onto the membrane.
- Gently overlay the upper leaflet of the sheet protector, allowing the antibody to form a thin layer over the membrane.
- Incubate the "SP unit" at room temperature for 15 minutes to several hours. For long incubations, place in a sealed bag with a wet paper towel to prevent evaporation.
- Proceed to washing and secondary antibody incubation as in the standard method.
- Detection: Treat the membrane with chemiluminescent substrate and capture the image using a CCD camera or similar imaging system.
Data Interpretation and Correlation
Expected Band Sizes and IF Patterns
Table 1: Expected protein sizes and detection summaries for key apoptotic markers.
| Target Protein | Full-Length Size (kDa) | Cleaved Fragment(s) Size (kDa) | Key Feature in IF |
|---|---|---|---|
| Caspase-3 | 32-35 | 17 and 19 (large subunit) | Cytosolic localization; fluorescence intensifies in apoptotic cells [8]. |
| PARP-1 | 113-116 | 89 (catalytic fragment) and 24 (DNA-binding fragment) | Nuclear localization; loss of full-length signal and potential nuclear reorganization in apoptotic cells [60]. |
Quantitative Correlation of IF and WB Data
When correlating IF and WB data, the intensity of cleaved caspase-3 or cleaved PARP bands on the Western blot should correspond with the percentage of fluorescent-positive cells observed in immunofluorescence. For example, a treatment condition that results in 70% of cells being positive for cleaved caspase-3 via IF should show a correspondingly strong 17/19 kDa band on the Western blot, with a weak or absent full-length caspase-3 band. The table below provides a guide to expected correlations.
Table 2: Correlation guide between Immunofluorescence and Western Blot results.
| Immunofluorescence Observation | Expected Western Blot Result | Biological Interpretation |
|---|---|---|
| Low percentage of cleaved caspase-3 positive cells. | Faint bands for cleaved caspase-3 (17/19 kDa) and/or cleaved PARP (89 kDa). Strong full-length bands. | Low level of apoptosis. |
| High percentage of cleaved caspase-3 positive cells. | Intense bands for cleaved caspase-3 and cleaved PARP. Weakened or absent full-length PARP and caspase-3 bands. | Robust apoptosis induction. |
| Clear fluorescent signal, but no expected bands on WB. | Non-specific IF staining, antibody validation required for both techniques. | Inconclusive; requires protocol troubleshooting. |
The Scientist's Toolkit: Essential Research Reagents
Table 3: Key reagents and their functions in detecting apoptotic markers.
| Reagent / Assay | Function / Role in Apoptosis Detection |
|---|---|
| Anti-Cleaved Caspase-3 Antibody | Specifically binds the activated, large fragments (17/19 kDa) of caspase-3, serving as a direct marker of executioner caspase activity [7]. |
| Anti-PARP Antibody | Detects both full-length PARP-1 (113 kDa) and its large cleavage fragment (89 kDa). The ratio of full-length to cleaved PARP is a standard apoptosis metric [60]. |
| Caspase-3 Fluorescent Reporters (e.g., SFCAI, FRET-based) | Genetically encoded biosensors that become fluorescent upon caspase-3-mediated cleavage, allowing real-time monitoring of apoptosis in live cells [8] [9]. |
| Caspase Inhibitor (e.g., Z-DEVD-FMK) | A cell-permeable, irreversible inhibitor that specifically targets caspase-3-like proteases (DEVDases). Used as a critical control to confirm the caspase-dependency of observed cell death and cleavage events [8]. |
| Sheet Protector (SP) Strategy | A practical method to significantly reduce the volume of primary antibody required for Western blotting (to 20-150 µL), conserving valuable antibodies while maintaining sensitivity and specificity [61]. |
Troubleshooting Common Issues
- High Background in Immunofluorescence: Ensure thorough washing after each antibody incubation step. Use an appropriate blocking serum from the host species of the secondary antibody. Titrate the primary and secondary antibody concentrations to find the optimal dilution that minimizes background [7].
- Weak or No Signal in Western Blot: Check antibody specificity and concentration. For the sheet protector strategy, ensure the membrane does not dry out and that the antibody solution is evenly distributed. Increase incubation time or antibody concentration if necessary [61].
- Discrepancy Between IF and WB Results: Consider temporal differences; IF captures a snapshot in time, while WB reflects the population average. Ensure samples for both techniques are harvested and processed at the same time point post-treatment. Validate antibodies for both applications.
Integrating with Annexin V/PI Staining and Other Cell Death Markers
In cell death research, particularly within the context of studying cleaved caspase-3, relying on a single methodology can provide an incomplete picture. Annexin V/Propidium Iodide (PI) staining is a widely established flow cytometry-based method for detecting early and late apoptotic cells, alongside necrotic cells. However, to confirm the activation of the apoptotic executive pathway and provide mechanistic insight, integrating this method with a cleaved caspase-3 immunofluorescence protocol is a powerful strategy. This integrated approach allows researchers to not only identify dying cells but also to validate that death is occurring via the canonical apoptotic pathway, thereby reducing the potential for false positives from other forms of cell death and providing low-background, high-specificity confirmation.
This combination is especially valuable in drug development and cancer biology, where understanding the precise mechanism of action of therapeutic agents is crucial. For instance, recent research has highlighted that caspase-3 activation is directly responsible for cleaving specific substrates like the pyrimidine synthesis enzyme CAD, a necessary step for apoptosis induction by chemotherapeutic agents [63]. Correlating external phosphatidylserine (PS) exposure with internal caspase-3 activation provides a more robust and definitive assessment of apoptotic activity.
Key Markers and Their Biological Significance
Apoptosis is a multi-stage process characterized by specific biochemical events. By targeting different events in the cascade, a more complete and time-resolved understanding of cell death can be achieved. The table below summarizes the key markers used in an integrated apoptosis assay.
Table 1: Key Markers for a Multi-Parameter Apoptosis Assay
| Marker | Target/Method | Stage of Apoptosis Detected | Key Biological Readout |
|---|---|---|---|
| Annexin V | Binding to externalized PS on the cell membrane [64] | Early apoptosis (before loss of membrane integrity) | Loss of plasma membrane asymmetry |
| Propidium Iodide (PI) / 7-AAD | Intercalation into DNA of cells with compromised membranes [65] | Late apoptosis and necrosis | Loss of plasma membrane integrity and cell viability |
| Cleaved Caspase-3 | Antibody detection of activated caspase-3 (via immunofluorescence or flow cytometry) [66] | Mid-stage apoptosis (execution phase) | Activation of the key executioner caspase pathway |
| CAD Cleavage | Antibody detection of caspase-3-cleaved CAD [63] | Mid-to-late apoptosis (downstream execution) | Direct evidence of a critical caspase-3 substrate cleavage event |
The relationship between these markers forms a logical pathway that can be visualized to understand the experimental workflow and its biological basis.
Diagram 1: Temporal relationship between key apoptotic events and their corresponding detection assays. PS externalization is an early event, followed by caspase-3 activation and subsequent substrate cleavage (e.g., CAD), with membrane permeabilization occurring later.
The Scientist's Toolkit: Essential Reagents and Materials
Successful integration of these assays requires careful selection of reagents and controls. The following table outlines the core solutions needed for these experiments.
Table 2: Research Reagent Solutions for Integrated Apoptosis Detection
| Item | Function / Role | Key Considerations |
|---|---|---|
| Fluorochrome-conjugated Annexin V | Labels phosphatidylserine (PS) on the outer leaflet of the cell membrane [64]. | Available in multiple fluorophores (FITC, PE, APC); choose one compatible with your flow cytometer and other markers. |
| Viability Dye (PI or 7-AAD) | Distinguishes cells with intact vs. compromised membranes [65]. | PI is common, but 7-AAD is preferred with PE-conjugated Annexin V due to better spectral separation. |
| Antibody to Cleaved Caspase-3 | Specifically detects the activated, large fragment (17/19 kDa) of caspase-3 [66]. | Critical for confirming apoptotic pathway activation; validates Annexin V results. |
| 1X Annexin V Binding Buffer | Provides the optimal calcium-rich environment for Annexin V to bind to PS [64] [65]. | Must be calcium-rich and free of EDTA or other calcium chelators. |
| Fixable Viability Dye (FVD) | Allows for cell viability assessment prior to fixation and intracellular staining (e.g., for caspase-3) [64]. | Essential for multi-step protocols involving permeabilization. Avoid FVD eFluor 450 with Annexin V kits [64]. |
| Permeabilization Buffer | Allows antibodies to access intracellular targets like cleaved caspase-3 [7]. | Required after fixation for intracellular staining steps. |
| Unconjugated Annexin V | Serves as a blocking agent for a critical negative control to confirm staining specificity [65]. | Used to pre-block PS sites, demonstrating the specificity of the conjugated Annexin V signal. |
Detailed Experimental Protocols
Annexin V/PI Staining Protocol for Flow Cytometry
This protocol is designed for the simultaneous detection of PS externalization and membrane integrity in cell suspensions.
Materials:
- 1X PBS (cold)
- 1X Annexin V Binding Buffer (e.g., 0.1 M HEPES, pH 7.4; 1.4 M NaCl; 25 mM CaCl₂) [65]
- Fluorochrome-conjugated Annexin V (e.g., FITC, PE)
- Propidium Iodide (PI) Staining Solution or 7-AAD [65]
- Flow cytometer with appropriate laser and filter setup
Procedure:
- Harvest and Wash Cells: Harvest cells, gently dissociating to avoid mechanical damage. Wash cells once with cold 1X PBS and then once with 1X Binding Buffer [64].
- Resuspend Cells: Resuspend the cell pellet in 1X Binding Buffer at a concentration of 1 x 10⁶ cells/mL [64] [65].
- Stain with Annexin V: Transfer 100 µL of the cell suspension (~1 x 10⁵ cells) to a flow cytometry tube. Add 5 µL of fluorochrome-conjugated Annexin V. Gently vortex and incubate for 15 minutes at room temperature (20-25°C) in the dark [64] [65].
- Add Viability Dye: After incubation, add 5 µL of PI (or 7-AAD) to the tube. Gently mix and incubate for 5-15 minutes on ice or at room temperature, protected from light [64]. Do not wash the cells after this step.
- Analyze by Flow Cytometry: Add 400 µL of 1X Binding Buffer to the tube and analyze by flow cytometry immediately (within 1 hour) [65].
Critical Controls:
- Unstained cells: For autofluorescence and instrument setup.
- Annexin V single-stained control: For fluorescence compensation.
- PI single-stained control: For fluorescence compensation.
- Annexin V blocking control: Pre-incubate cells with an excess of unconjugated Annexin V (5-15 µg) for 15 minutes before adding the conjugated Annexin V. This should abolish the specific signal, confirming binding specificity [65].
Immunofluorescence Protocol for Cleaved Caspase-3 Detection
This protocol is for the detection of activated caspase-3 in fixed cells, providing spatial information and compatibility with microscopy.
Materials:
- Primary antibody against cleaved caspase-3 (e.g., Cleaved Caspase-3 (Asp175) Antibody #9661) [66]
- Fluorescently labeled secondary antibody
- Prepared, fixed cell samples on slides
- PBS, Triton X-100, Blocking buffer (PBS/0.1% Tween 20 + 5% serum) [7]
- Mounting medium
Procedure:
- Permeabilization: Permeabilize the fixed samples by incubating in PBS containing 0.1% Triton X-100 for 5 minutes at room temperature [7].
- Wash and Block: Wash the slides three times in PBS for 5 minutes each. Drain the slide and apply 200 µL of blocking buffer. Incubate in a humidified chamber for 1-2 hours at room temperature to reduce non-specific antibody binding [7].
- Primary Antibody Incubation: Apply 100 µL of the primary antibody (e.g., diluted 1:400 in blocking buffer for #9661) [66] to the sample. Incubate the slides in a humidified chamber overnight at 4°C [7].
- Wash and Secondary Antibody Incubation: The next day, wash the slides three times for 10 minutes each in PBS/0.1% Tween 20. Apply 100 µL of the appropriate fluorescent secondary antibody (e.g., diluted 1:500 in PBS) and incubate for 1-2 hours at room temperature, protected from light [7].
- Final Wash and Mounting: Wash the slides three times in PBS/0.1% Tween 20 for 5 minutes each, protected from light. Drain the liquid, mount the slides with an appropriate mounting medium, and observe with a fluorescence microscope [7].
Integrated Workflow for Combined Analysis
For a comprehensive analysis, the Annexin V/PI assay and cleaved caspase-3 staining can be performed sequentially or in parallel. The most straightforward approach is to run them as separate assays on aliquots of the same treated sample. However, advanced spectral flow cytometry or imaging flow cytometry allows for true multiplexing.
Diagram 2: A practical workflow for the integrated analysis of apoptosis using Annexin V/PI and cleaved caspase-3 staining on parallel samples.
Data Analysis and Interpretation
Flow Cytometry Gating and Quantification
Proper data analysis is critical for accurate interpretation. The initial steps involve eliminating technical artifacts to focus on the population of interest.
- Remove Doublets and Debris: Use forward scatter area (FSC-A) versus height (FSC-H) to gate on single cells. Then, use FSC versus side scatter (SSC) to gate on the main population of intact cells, excluding debris [67].
- Analyze Annexin V/PI Data: Create a dot plot of Annexin V fluorescence versus PI fluorescence. The quadrants are interpreted as follows [67]:
- Annexin V⁻/PI⁻ (Lower Left): Viable, non-apoptotic cells.
- Annexin V⁺/PI⁻ (Lower Right): Early apoptotic cells.
- Annexin V⁺/PI⁺ (Upper Right): Late apoptotic or necrotic cells.
- Annexin V⁻/PI⁺ (Upper Left): Typically indicates necrotic cells or a mechanical artifact.
- Quantify Cleaved Caspase-3: When analyzing cleaved caspase-3 by flow cytometry (on fixed/permeabilized cells), represent the data as a histogram. A clear shift in fluorescence intensity compared to the unstained or negative control indicates a positive population [67] [66]. The mean fluorescence intensity (MFI) can be a relative measure of caspase-3 activation levels.
Correlating Results from Both Assays
The power of this integrated approach lies in correlating the data from both protocols. The expected correlation is outlined in the table below.
Table 3: Correlation of Annexin V/PI and Cleaved Caspase-3 Staining Results
| Cell Population | Annexin V/PI Phenotype | Cleaved Caspase-3 Status | Biological Interpretation |
|---|---|---|---|
| Viable/Normal | Annexin V⁻ / PI⁻ | Negative | Healthy, non-apoptotic cells. |
| Early Apoptotic | Annexin V⁺ / PI⁻ | Positive (becoming positive) | Cells committed to the apoptotic pathway; PS is externalized and caspases are active, but the membrane is intact. |
| Late Apoptotic | Annexin V⁺ / PI⁺ | Positive | Cells in the final stages of apoptosis; caspases have been active and the membrane integrity is lost. |
| Necrotic / Other | Annexin V⁻ / PI⁺ | Negative | Primary necrotic cells or staining artifact; death occurred without caspase activation. |
A strong positive correlation between Annexin V binding and cleaved caspase-3 positivity confirms that cell death is occurring via classical apoptosis. A discrepancy, such as Annexin V positivity in the absence of cleaved caspase-3, could indicate alternative death pathways, PS externalization from non-apoptotic processes, or a technical issue, warranting further investigation. This multi-parametric validation is the cornerstone of high-quality, low-background research in cell death.
Comparison with Live-Cell Imaging and Fluorescent Reporter Systems
The study of dynamic cellular processes, such as apoptosis, has been revolutionized by advanced imaging and reporting technologies. While traditional endpoint assays like cleaved caspase-3 immunofluorescence provide valuable snapshots of cellular activity, they require cell fixation and lack temporal resolution [7]. Live-cell imaging techniques, utilizing both fluorescent and bioluminescent reporter systems, overcome these limitations by enabling real-time, kinetic observation of biological processes within living cells [68] [69]. This application note details these advanced methodologies, providing a direct comparison with fixed-cell immunofluorescence and presenting detailed protocols for implementing live-cell imaging to monitor caspase-3 activity, a key executioner protease in apoptosis.
Technical Comparison: Imaging and Reporter Modalities
Fundamental Principles and Mechanisms
Fluorescent Reporter Systems rely on external light excitation to illuminate fluorescent proteins or dyes. When exposed to specific wavelengths, these fluorophores absorb light energy and emit it at a longer, lower-energy wavelength, which is detected and used to create an image [70] [69]. Common applications include tracking protein localization, organelle dynamics, and gene expression.
Bioluminescent Reporter Systems generate light through an enzymatic reaction, typically between a luciferase enzyme (e.g., NanoLuc) and a substrate (e.g., luciferin) [70] [69]. This process does not require external excitation light, resulting in exceptionally low background signals.
Fixed-Cell Immunofluorescence is a endpoint technique where cells are first fixed (preserved) and permeabilized. Target proteins, such as cleaved caspase-3, are then stained using specific primary antibodies and fluorescently labeled secondary antibodies for visualization [7]. This method preserves spatial context but does not allow for observation over time.
Comparative Analysis of Key Characteristics
The table below summarizes the core attributes of each technology, highlighting their respective advantages and limitations.
Table 1: Comprehensive Comparison of Cellular Imaging and Reporter Modalities
| Feature | Fluorescent Reporters | Bioluminescent Reporters | Fixed-Cell Immunofluorescence |
|---|---|---|---|
| Signal Generation | External light excitation [70] | Enzymatic reaction (e.g., Luciferase + substrate) [70] | Antibody binding post-fixation [7] |
| Temporal Resolution | Real-time to near real-time [69] | Real-time, suitable for long-term kinetics [71] [69] | Endpoint/snapshot only [7] |
| Spatial Resolution | High (subcellular) [70] | Moderate | High (subcellular) [7] |
| Background Signal | Moderate to High (autofluorescence, light scatter) [70] | Very Low [70] | Variable (depends on antibody specificity and blocking) [7] |
| Multiplexing Capability | High (multiple colors) [70] [69] | Limited [70] | High (multiple antibody labels) [7] |
| Cellular Throughput | High (single-cell to population level) [68] | Typically population level, but advancing | High (single-cell) [7] |
| Phototoxicity/ Photobleaching | Yes, a significant concern [69] | Minimal to none [70] [69] | Not applicable (cells are fixed) |
| Sample Integrity | Living cells, but viability can be compromised over time by phototoxicity [69] | Living cells, minimal perturbation [70] [69] | Fixed (non-viable) cells [7] |
Experimental Protocols for Live-Cell Caspase-3 Activity Monitoring
Protocol 1: Using a Fluorogenic Caspase-3 Substrate (e.g., NucView 488)
This protocol utilizes a cell-permeable substrate that becomes fluorescent upon cleavage by active caspase-3, allowing for real-time visualization of apoptosis in live cells [71].
1. Cell Culture and Preparation:
- Culture cells (e.g., N19-oligodendrocyte cells) in appropriate media [71].
- Plate cells onto an uncoated glass coverslip placed in a 6-well plate at a density of 0.1 x 10^6 cells/mL in 2 mL of phenol-free media [71].
- Allow cells to grow overnight (16-20 hours) in a 34°C/5% CO2 incubator.
2. Live-Cell Imaging Chamber Setup:
- Assemble a magnetic live-cell imaging chamber, sterilizing it and tweezers with 70% ethanol [71].
- Remove the coverslip with plated cells from the 6-well plate using tweezers and place it cell-side-up into the chamber's bottom plate. Avoid letting the cells dry.
- Reuse 500 µL of media from the original well to minimize environmental stress on the cells.
- Assemble the chamber, place it in the incubator for 30 minutes to stabilize temperature and reduce focal drift during imaging.
3. Microscope Setup and Image Acquisition:
- Turn on the live-cell imaging system control box at least 1 hour prior to the experiment to ensure stage temperature stability [71].
- Configure microscope settings. For a Leica DMIRE2 system, typical settings might be:
- Brightfield: Lamp 2.5 V, exposure 240 ms.
- GFP Channel (for NucView 488 signal): Gain 140, exposure 500 ms [71].
4. Apoptosis Induction and Substrate Addition:
- Prepare aliquots of apoptosis inducers (e.g., 80 mM potassium chloride or 100 µM glutamate) and the light-sensitive NucView 488 substrate. Keep the substrate in the dark [71].
- Method A (Media Exchange): Use a peristaltic pump to replace the chamber media with new media containing the apoptosis inducer. Perform at least a 10x media exchange to ensure correct concentration.
- Method B (Direct Addition): Add 3 µL of NucView 488 substrate to 50 µL of a 10x stock of the apoptosis inducer. Mix by pipetting and add this mixture directly to the 500 µL of media in the culture chamber [71].
- Mix gently within the chamber.
5. Real-Time Data Collection:
- Begin time-lapse imaging immediately after treatment.
- Collect images at regular intervals (e.g., every 15-30 minutes) over the desired experimental timeframe (e.g., 24-48 hours).
- The emergence of green fluorescence within cell nuclei indicates caspase-3 activation and ongoing apoptosis.
Protocol 2: Using a Genetically Encoded Caspase-3 Sensor (e.g., ZipGFP-based Reporter)
This protocol involves using stable cell lines expressing a genetically encoded biosensor that fluoresces upon caspase-3/-7-mediated cleavage [72].
1. Generation of Stable Reporter Cell Lines:
- Generate a lentiviral vector encoding the caspase-3/-7 reporter. The construct typically consists of:
- A caspase-sensing element: A split GFP system where two fragments are tethered by a linker containing the DEVD caspase-3/-7 cleavage motif. Cleavage allows GFP reconstitution and fluorescence [72] [8].
- A constitutive fluorescent marker (e.g., mCherry) to identify successfully transduced cells and normalize for cell presence [72].
- Transduce the target cells with the lentiviral particles and select for stable expression using appropriate antibiotics.
2. Validation of Reporter Functionality:
- Treat stable reporter cells with a known apoptosis inducer (e.g., 1 µM carfilzomib) and a pan-caspase inhibitor (e.g., 20 µM zVAD-FMK) as a control [72].
- Validate apoptosis induction and reporter specificity via parallel assays like Western blotting for cleaved PARP and flow cytometry for Annexin V/PI staining [72].
3. Live-Cell Imaging of Reporter Cells:
- Plate the validated reporter cells in a multi-well plate or on a glass-bottom dish suitable for live-cell imaging.
- If using an endpoint substrate like the Nano-Glo Live Cell Substrate, add it to the media according to the manufacturer's instructions [69].
- Place the plate in a live-cell imaging system with environmental control (37°C, 5% CO2).
- Acquire time-lapse images using both the GFP (reporter signal) and RFP (constitutive marker) channels over the course of the experiment.
- Analyze the ratio of GFP-to-RFP fluorescence to quantify caspase activation dynamically.
The Scientist's Toolkit: Essential Reagents and Materials
Table 2: Key Research Reagent Solutions for Live-Cell Apoptosis Imaging
| Reagent/Material | Function/Application | Example Products / Notes |
|---|---|---|
| Fluorogenic Caspase Substrate | Cell-permeable probe that becomes fluorescent upon cleavage by active caspase-3/-7 for real-time apoptosis detection in live cells. | NucView 488 Caspase-3 Substrate [71] |
| Genetically Encoded Caspase Reporter | Stably expressed biosensor that provides a fluorescent readout of caspase-3/-7 activity, enabling long-term studies in specific cell lineages. | ZipGFP-based reporter, SFCAI (Switch-On Fluorescence-based Caspase-3-like protease Activity Indicator) [72] [8] |
| Bioluminescent Reporter Enzyme | Small, bright luciferase (e.g., NanoLuc) used as a genetic tag for low-background, long-term imaging of protein localization and dynamics. | NanoLuc Luciferase [69] |
| Live-Cell Sustaining Substrate | Provides sustained bioluminescent signal for extended kinetic analysis, lasting from several hours to days. | Nano-Glo Extended Live Cell Substrate [69] |
| Fluorescent Protein Tags | Used to create fusion proteins for tracking localization, interactions, and abundance of target proteins in live cells. | GFP, YFP, RFP, mCherry [68] [72] |
| Environmental Control Chamber | Maintains cells at optimal temperature, humidity, and CO2 levels during extended imaging sessions on a microscope stage. | Chamlide TC culture chamber, stage-top incubators [71] |
Conceptual Workflows and Signaling Pathways
The following diagrams illustrate the core principles of the reporter systems and the apoptotic signaling pathway they detect.
Figure 1: Fundamental mechanisms of fluorescent and bioluminescent reporter systems. Fluorescence requires external light excitation, while bioluminescence generates light via an internal enzymatic reaction [70] [69].
Figure 2: Core apoptosis detection pathway. An apoptotic stimulus triggers the activation of executioner caspases-3 and -7, which cleave the DEVD sequence in reporters, resulting in a measurable signal output [71] [72] [8].
The accurate detection of caspase activity is a cornerstone of apoptosis research, with direct implications for understanding cancer biology, neurodegenerative diseases, and therapeutic development. Traditional methods, particularly cleaved caspase-3 immunofluorescence, have provided valuable insights but are limited by their endpoint nature, inability to track dynamics in living cells, and challenges with background signal [7] [17]. Emerging technologies now enable real-time, high-resolution monitoring of caspase activation within physiologically relevant models. This application note details two transformative approaches: FRET-FLIM (Förster Resonance Energy Transfer coupled with Fluorescence Lifetime Imaging Microscopy) for quantifying molecular interactions, and genetically encoded fluorescent reporters for longitudinal tracking of caspase activity in live cells and complex 3D systems.
These advanced methodologies address critical gaps in traditional protocols by providing temporal resolution, spatial precision, and the capacity for multiplexed readouts within living samples, thereby offering deeper mechanistic insights into cell death pathways for research and drug discovery applications.
FRET-FLIM for Caspase Interaction Studies
Förster Resonance Energy Transfer (FRET) is a powerful technique for studying molecular interactions, such as caspase activation and substrate cleavage, based on non-radiative energy transfer between two fluorophores. FRET efficiency is highly sensitive to the distance between donor and acceptor molecules, effective within a range of 1-10 nanometers, making it a "molecular ruler" for biochemical reactions [73] [74].
- Principle and Advantages: When FRET is measured using FLIM, data quality and precision are significantly improved. The fluorescence lifetime of the donor molecule decreases when FRET occurs, and this lifetime is independent of fluorophore concentration, excitation intensity, or other environmental factors that affect intensity-based measurements. This makes FLIM-FRET self-calibrated and alleviates many shortcomings of intensity-based FRET measurements [74].
- Application to Caspase Studies: FRET-based caspase biosensors typically consist of donor and acceptor fluorescent proteins linked by a caspase cleavage sequence (e.g., DEVD). Upon caspase activation and cleavage of the linker, the FRET signal is diminished, providing a quantifiable measure of protease activity with high spatiotemporal resolution [73].
Genetically Encoded Real-Time Caspase Reporters
Recent advances in genetically encoded reporters have revolutionized apoptosis detection by enabling continuous monitoring of caspase activity in living systems. These systems utilize caspase-cleavable sequences engineered into fluorescent protein constructs.
- Dark-to-Bright Systems: The Caspase Activatable-GFP (CA-GFP) reporter features a hydrophobic quenching peptide that tetramerizes GFP and prevents chromophore maturation. Catalytic removal of the quenching peptide by active caspase fully restores fluorescence, resulting in a dark-to-bright transition with up to a 45-fold increase in fluorescent signal in bacteria and a 3-fold increase in mammalian cells [75].
- Bright-to-Dark Systems: An alternative approach involves mutagenesis-based insertion of the caspase-3 cleavage motif (DEVD) directly into the GFP structure. Upon caspase activation, the fluorescence is inactivated, creating a bright-to-dark switch. This system reportedly offers greater sensitivity for apoptosis detection compared to dark-to-bright reporters [76].
- ZipGFP-Based Platforms: A recently developed stable reporter system utilizes a split-GFP architecture with a caspase-3/-7-specific DEVD cleavage motif. Under basal conditions, forced proximity of β-strands prevents proper folding, minimizing background fluorescence. During apoptosis, caspase cleavage allows structural reassembly and rapid fluorescence recovery, providing a highly specific, irreversible signal for caspase activation [18].
Table 1: Comparison of Real-Time Caspase Reporter Technologies
| Reporter Type | Detection Mechanism | Signal Change | Key Advantages | Reported Sensitivity |
|---|---|---|---|---|
| FRET-Based | Cleavage separates donor/acceptor fluorophores | Decreased FRET efficiency | Compatible with existing FP fusions; quantitative | Highly sensitive to molecular distance |
| Dark-to-Bright (CA-GFP) | Caspase removal of quenching peptide | Fluorescence increase (up to 45-fold) | Very low background; robust activation signal | High signal-to-noise ratio |
| Bright-to-Dark | Caspase disruption of GFP structure | Fluorescence decrease | Simplified interpretation; high sensitivity | Greater than dark-to-bright systems [76] |
| ZipGFP Platform | Caspase-mediated reconstitution of split-GFP | Fluorescence increase | Minimal background; irreversible marking of apoptotic events | High spatiotemporal resolution [18] |
Experimental Protocols & Workflows
FRET-FLIM Protocol for Caspase Activity Detection
Objective: To quantify caspase-3 activation in live cells using FRET-FLIM methodology.
Materials Required:
- FRET Biosensor: Mammalian expression vector encoding a caspase-3 biosensor (e.g., SCAT3, mCherry-GFP-DEVD)
- Cell Culture Reagents: Appropriate cell line (e.g., HEK293, HeLa), culture medium, transfection reagent
- Imaging Equipment: Confocal microscope with FLIM capability, pulsed laser source, single photon counting detectors
- Analysis Software: FLIM analysis package (e.g., SPCImage, TauSense)
Procedure:
- Cell Preparation and Transfection:
- Seed cells in 35mm glass-bottom dishes at 50-60% confluence.
- Transfect with FRET biosensor construct using appropriate transfection reagent.
- Incubate for 24-48 hours to allow for protein expression.
Treatment and Control Setup:
- Divide transfected cells into experimental groups:
- Group 1: Untreated control (no apoptosis induction)
- Group 2: Apoptosis-induced (e.g., 1µM staurosporine for 2-6 hours)
- Group 3: Caspase inhibitor control (e.g., 20µM Z-VAD-FMK pretreatment)
- Incubate under appropriate conditions before imaging.
- Divide transfected cells into experimental groups:
FLIM Data Acquisition:
- Set microscope to time-domain FLIM mode using pulsed laser excitation.
- For GFP-based donors, use 470-480nm excitation and collect emission at 500-540nm.
- Acquire donor-only reference samples for lifetime calibration (τ).
- Collect FLIM data for all experimental groups using identical settings.
- For each sample, acquire sufficient photons (typically 1000-10,000 per pixel) to ensure accurate lifetime fitting.
Data Analysis and FRET Efficiency Calculation:
- Fit fluorescence decay curves to single or multi-exponential models.
- Calculate fluorescence lifetime (τ) for each pixel in the image.
- Determine FRET efficiency using the formula: [E = 1 - \frac{τ{DA}}{τD}] where (τ{DA}) is the donor lifetime in the presence of acceptor, and (τD) is the donor lifetime alone [74].
- Generate FRET efficiency maps and quantify population changes.
Troubleshooting Tips:
- Poor Signal-to-Noise: Ensure adequate expression levels and optimize photon collection.
- Lifetime Variability: Maintain consistent environmental conditions (temperature, pH) during imaging.
- Non-Specific Cleavage: Include caspase inhibitor controls to verify specificity.
Protocol for Real-Time Imaging Using ZipGFP Reporter
Objective: To monitor caspase-3/7 dynamics in real-time using the ZipGFP reporter system in 2D and 3D culture models.
Materials Required:
- ZipGFP Reporter Cells: Stable cell line expressing DEVD-ZipGFP with constitutive mCherry [18]
- Culture Systems: Standard tissue cultureware for 2D; Cultrex or Matrigel for 3D spheroids/organoids
- Live-Cell Imaging System: IncuCyte or similar with environmental control
- Apoptosis Inducers: Carfilzomib (1-10µM), oxaliplatin (100-500µM), or other relevant agents
- Caspase Inhibitor: zVAD-FMK (20-50µM) for control experiments
Procedure:
- Reporter Cell Culture:
- For 2D cultures: Seed ZipGFP reporter cells at 5-10×10³ cells/well in 96-well plates.
- For 3D spheroids: Embed reporter cells in Cultrex matrix per manufacturer's protocol.
- For organoid cultures: Maintain patient-derived organoids expressing the ZipGFP reporter.
Experimental Setup:
- Establish treatment groups in replicate:
- Vehicle control (DMSO)
- Apoptosis inducer (concentration optimized for cell type)
- Apoptosis inducer + caspase inhibitor (for specificity confirmation)
- Add proliferation dye (e.g., CellTrace) if studying apoptosis-induced proliferation.
- Establish treatment groups in replicate:
Live-Cell Imaging and Data Acquisition:
- Place culture plates in live-cell imaging system maintained at 37°C, 5% CO₂.
- Set image acquisition schedule (every 2-6 hours for 48-120 hours).
- Acquire images in both GFP (caspase activation) and mCherry (cell presence) channels.
- For 3D models, implement z-stacking to capture entire structure.
Image and Data Analysis:
- Quantify GFP fluorescence intensity normalized to mCherry signal.
- Track single-cell caspase activation events using automated segmentation.
- Calculate apoptosis kinetics: time to initiation, rate of propagation.
- For AIP studies, quantify proliferation dye dilution in neighboring cells.
Validation Steps:
- Confirm caspase specificity via Western blot for cleaved PARP and caspase-3 [18].
- Correlate with Annexin V/PI staining by flow cytometry at endpoint.
- In caspase-3 deficient MCF-7 cells, verify caspase-7-mediated activation [18].
Signaling Pathways and Experimental Workflows
The following diagrams illustrate the core signaling pathways and experimental workflows relevant to these emerging caspase detection techniques.
Caspase Activation Signaling Pathway
FRET-FLIM Caspase Biosensor Workflow
ZipGFP Reporter Mechanism
Research Reagent Solutions
Table 2: Essential Research Reagents for Advanced Caspase Detection
| Reagent/Category | Specific Examples | Function & Application | Key Features |
|---|---|---|---|
| FRET Biosensors | SCAT3, mCherry-GFP-DEVD | Caspase activity quantification via distance-dependent energy transfer | Ratiometric measurement; compatible with FLIM |
| Dark-to-Bright Reporters | Caspase Activatable-GFP (CA-GFP) [75] | Apoptosis detection via fluorescence activation | Low background; 45-fold signal increase |
| Bright-to-Dark Reporters | DEVD-inserted GFP [76] | Apoptosis detection via fluorescence quenching | High sensitivity; simplified design |
| Split GFP Systems | ZipGFP-based DEVD biosensor [18] | Real-time caspase monitoring in live cells | Minimal background; irreversible activation |
| Validation Antibodies | Cleaved Caspase-3 (Asp175) #9661 [77] | Specific detection of activated caspase-3 | Works in WB, IF, IHC, FC; multiple species |
| Caspase Inhibitors | zVAD-FMK (pan-caspase inhibitor) [18] | Experimental controls for specificity verification | Broad-spectrum inhibition; confirms caspase-dependent signals |
| Apoptosis Inducers | Carfilzomib, Oxaliplatin, Staurosporine [18] [76] | Positive controls for apoptosis induction | Well-characterized mechanisms; dose-dependent responses |
Application in Complex Model Systems
These emerging techniques show particular utility in physiologically relevant models that challenge traditional detection methods:
3D Spheroid and Organoid Cultures: The ZipGFP platform has been successfully applied to patient-derived pancreatic ductal adenocarcinoma (PDAC) organoids, enabling visualization of localized caspase activation within heterogeneous structures that would be inaccessible to endpoint immunofluorescence [18]. The system's sensitivity allows detection of asynchronous apoptosis events deep within 3D architectures.
Apoptosis-Induced Proliferation (AIP) Studies: Real-time reporters enable correlation of caspase activation with subsequent proliferative events in neighboring cells. By combining caspase reporters with proliferation dyes, researchers can track compensatory proliferation mechanisms that contribute to tumor repopulation following therapy [18].
Immunogenic Cell Death (ICD) Assessment: The ZipGFP platform supports multiplexed analysis by enabling simultaneous detection of caspase activation and surface calreticulin exposure via flow cytometry, facilitating comprehensive study of immunogenic signaling in dying cells [18].
Studies of Non-Lethal Caspase Activity: Advanced reporters like Caspase Tracker and CasExpress in Drosophila models have revealed cells that survive caspase activation (XPAC cells) after ionizing radiation, demonstrating how non-lethal caspase activity contributes to adult organ development and genome stability [78].
FRET-FLIM and real-time caspase reporters represent significant advancements over traditional cleaved caspase-3 immunofluorescence, offering unprecedented temporal resolution, minimal background, and compatibility with complex physiological models. These technologies enable researchers to move beyond static endpoint measurements to dynamic, single-cell analysis of apoptosis in action. The experimental protocols detailed herein provide frameworks for implementation across diverse research contexts, from basic mechanism studies to drug discovery applications. As these tools continue to evolve, they will undoubtedly yield deeper insights into the spatial and temporal regulation of cell death and its implications for health and disease.
Conclusion
Mastering cleaved caspase-3 immunofluorescence with low background requires careful attention to antibody selection, sample preparation, and protocol optimization. By understanding the foundational biology, implementing rigorous methodological controls, and systematically troubleshooting artifacts, researchers can achieve highly specific detection of apoptotic cells. The integration of this technique with complementary apoptosis assays and emerging real-time imaging technologies will further enhance our ability to study cell death dynamics in physiologically relevant models, accelerating drug discovery and fundamental research in cancer biology and neurodegenerative diseases.
References
- 1. Caspase-3 expression in tumorigenesis and prognosis of ... [https://www.oncotarget.com/article/20494/text/]
- 2. Emerging roles of caspase - 3 in apoptosis [https://pubmed.ncbi.nlm.nih.gov/10200555/]
- 3. The Novel Caspase-3 Substrate Gap43 is Involved in ... [https://www.sciencedirect.com/science/article/pii/S1535947620338366]
- 4. The caspase - 3 /GSDME signal pathway as a switch between... [https://www.nature.com/articles/s41420-020-00349-0?error=cookies_not_supported]
- 5. Caspase 3 Colorimetric Activity Assay Kit, DEVD [https://www.sigmaaldrich.com/KZ/en/product/mm/apt165?srsltid=AfmBOoqcrNoj4W_r2GwQWnKiv5MEi_GlPbyItuy17MGrblF3C4TuAQjw]
- 6. A Comprehensive Exploration of Caspase Detection Methods [https://pmc.ncbi.nlm.nih.gov/articles/PMC11121653/]
- 7. Protocol for detection of caspases using immunofluorescence [https://www.abcam.com/en-us/technical-resources/protocols/immunofluorescence-protocol-to-detect-caspases]
- 8. Visualization of caspase-3-like activity in cells using a ... [https://www.nature.com/articles/ncomms3157]
- 9. A Caspase-3 Reporter for Fluorescence Lifetime Imaging ... [https://pmc.ncbi.nlm.nih.gov/articles/PMC6025355/]
- 10. Cleaved Caspase-3 (Asp175) Antibody #9661 [https://www.cellsignal.com/products/primary-antibodies/cleaved-caspase-3-asp175-antibody/9661?srsltid=AfmBOoqvk77wUBOhtxGkm1fnat5JhpZZPQ8qJpiDBmFRSunNFC6Z9s3_]
- 11. Catalytic activity of caspase-3 is required for its degradation [https://pubmed.ncbi.nlm.nih.gov/14713960/]
- 12. The prodomain of caspase-3 regulates its own removal ... [https://www.nature.com/articles/s41420-019-0142-1]
- 13. Caspase 3 (Cleaved Asp175) Polyclonal Antibody [https://www.thermofisher.com/antibody/product/Caspase-3-Cleaved-Asp175-Antibody-Polyclonal/PA5-114687]
- 14. Cleaved Caspase-3 (Asp175) Antibody #9661 [https://www.cellsignal.com/products/primary-antibodies/cleaved-caspase-3-asp175-antibody/9661?srsltid=AfmBOoqLYUjsnx6arHJoBZo2qEC0mwwVagIwuq58kXTUXDman_1EOEfG]
- 15. Caspase Protocols in Mice - PMC - PubMed Central - NIH [https://pmc.ncbi.nlm.nih.gov/articles/PMC4084876/]
- 16. Substantial background reduction in ligase-based apoptosis ... [https://pubmed.ncbi.nlm.nih.gov/10631490/]
- 17. Assessment of Apoptosis by Immunohistochemistry to Active ... [https://pmc.ncbi.nlm.nih.gov/articles/PMC2664986/]
- 18. Integrated real-time imaging of executioner caspase ... [https://www.nature.com/articles/s41420-025-02662-y]
- 19. Cleaved Caspase 3/P17/P19 antibody (68773-1-Ig) [https://www.ptglab.com/products/Cleaved-Caspase-3-P17-Antibody-68773-1-Ig.htm?srsltid=AfmBOoqeEWjL53YjjIdQHw5UsDIy4WVkHs0Ep_-U_tGyziNafl4es6yD]
- 20. Cleaved-Caspase-3 p17 (D175) Polyclonal Antibody [https://www.abcepta.com/products/AP63081-Cleaved-Caspase-3-p17-D175-Polyclonal-Antibody]
- 21. Ceramide Synthase 6 Knockdown Suppresses after... Apoptosis [https://ar.iiarjournals.org/content/32/3/753]
- 22. 5 Sources Of Non-specific Staining And Background In IHC ... [https://vectorlabs.com/blog/5-sources-of-non-specific-staining-and-background-in-ihc-and-if/?srsltid=AfmBOoqTKSHFeYvC1_LgjOxWfmUT667NnvG1yj3vhT5eFJFCxo17XMyY]
- 23. ICC/IHC Non-Specific Binding / Staining Prevention Protocol [https://www.rndsystems.com/resources/protocols/preventing-non-specific-staining]
- 24. Immunocytochemistry protocol [https://www.abcam.com/en-us/technical-resources/protocols/icc-protocol]
- 25. Cleaved Caspase-3 (Asp175) Antibody (Alexa Fluor ® 488 ... [https://www.cellsignal.com/products/antibody-conjugates/cleaved-caspase-3-asp175-antibody-alexa-fluor-488-conjugate/9669?srsltid=AfmBOop07jZAJyFcfdIPntUyGfBe_6Wa79JDFmXbR3CD5YP6VDQK2tay]
- 26. An introduction to Performing Immunofluorescence Staining [https://pmc.ncbi.nlm.nih.gov/articles/PMC6918834/]
- 27. Ten Approaches That Improve Immunostaining: A Review of ... [https://pmc.ncbi.nlm.nih.gov/articles/PMC8836139/]
- 28. Immunofluorescence Staining | A Typical Workflow [https://ibidi.com/content/365-immunofluorescence-staining-a-typical-workflow]
- 29. Assessment of Different Permeabilization Methods ... [https://www.ajmb.org/Article?id=140]
- 30. Amplification and Background Reduction Techniques [https://fluorofinder.com/amplification-and-background-reduction-techniques/]
- 31. Cleaved Caspase-3 (Asp175) Antibody #9661 [https://www.cellsignal.com/products/primary-antibodies/cleaved-caspase-3-asp175-antibody/9661?srsltid=AfmBOorqCVmQr8vqz6ZYoW9JKXYN8YS9USNDtBht9LUDHNUbeirP6rVF]
- 32. A Comprehensive Exploration of Caspase Detection Methods [https://www.mdpi.com/1422-0067/25/10/5460]
- 33. Cleaved Caspase-3 (Asp175) (D3E9) Rabbit Monoclonal ... [https://www.cellsignal.com/products/primary-antibodies/cleaved-caspase-3-asp175-d3e9-rabbit-monoclonal-antibody/9579?srsltid=AfmBOorxP7y5_1vHcrUUfHfvOmDn0zA6N7GtQd4uVGu54Jrsjq8Heckn]
- 34. Antibody Guide [https://www.addgene.org/guides/antibodies/]
- 35. A guide to selecting control and blocking reagents. [https://www.jacksonimmuno.com/secondary-antibody-resource/technical-tips/controls-diluents-blocking/]
- 36. Blocking in IHC [https://www.abcam.com/en-us/technical-resources/guides/ihc-guide/blocking-in-ihc]
- 37. Cleaved Caspase 3 antibody (25128-1-AP) [https://www.ptglab.com/products/cleaved-Caspase-3-Antibody-25128-1-AP.htm?srsltid=AfmBOooJAPpL9pMiYvq1YPYwtk0U25XVEwB9T7ylpap5LauOR9Ub3-Iy]
- 38. Anti-Cleaved Caspase-3 antibody [E83-77] (AB32042) [https://www.abcam.com/en-us/products/primary-antibodies/cleaved-caspase-3-antibody-e83-77-ab32042]
- 39. Cleaved Caspase-3 (Asp175) (5A1E) Rabbit mAb (Alexa ... [https://awsprod-www.cellsignal.com/products/antibody-conjugates/cleaved-caspase-3-asp175-5a1e-rabbit-mab-alexa-fluor-174-647-conjugate/87938]
- 40. Immunohistochemistry (IHC): The Complete Guide [https://www.antibodies.com/applications/immunohistochemistry]
- 41. - Cleaved (Asp175) Antibody... | Cell Signaling Technology Caspase 3 [https://www.cellsignal.com/products/primary-antibodies/cleaved-caspase-3-asp175-antibody/9661]
- 42. - Cleaved is present in the majority of glial cells in the intact... caspase 3 [https://pmc.ncbi.nlm.nih.gov/articles/PMC10912154/]
- 43. A three‐dimensional spheroid co‐culture system of ... [https://pmc.ncbi.nlm.nih.gov/articles/PMC10280145/]
- 44. Screening of patient-derived organoids identifies mitophagy ... [https://pmc.ncbi.nlm.nih.gov/articles/PMC12047522/]
- 45. Fluorescence Lifetime Imaging of a Caspase-3 Apoptosis ... [https://pmc.ncbi.nlm.nih.gov/articles/PMC5729923/]
- 46. Protocol for drug screening of patient-derived tumor ... [https://www.sciencedirect.com/science/article/pii/S2666166722002878]
- 47. Cleaved Caspase-3 (Asp175) Antibody #9661 [https://www.cellsignal.com/products/primary-antibodies/cleaved-caspase-3-asp175-antibody/9661?srsltid=AfmBOorf8QyNFAcZ4rYpm8i820LaPTOT8g12X1UZ--JM022JI4t2fOQ_]
- 48. Cleaved Caspase-3 (Asp175) (D3E9) Rabbit Monoclonal ... [https://www.cellsignal.com/products/primary-antibodies/cleaved-caspase-3-asp175-d3e9-rabbit-monoclonal-antibody/9579?srsltid=AfmBOoobMmvMYWbiVWMs4RT4n4HakUaEdTlmibC9PASL5n2N9R_ZTs8Q]
- 49. Protocol for multiplex immunofluorescence imaging of mouse ... [https://pmc.ncbi.nlm.nih.gov/articles/PMC12224881/]
- 50. Cleaved Caspase-3 (Asp175) Antibody #9661 [https://www.cellsignal.com/products/primary-antibodies/cleaved-caspase-3-asp175-antibody/9661?srsltid=AfmBOopBhWBGCXmrYaSpVBawiQS3neait9yb8kVe5jeBUaSCqlWfWz9X]
- 51. Cleaved Caspase 3 antibody (25128-1-AP) [https://www.ptglab.com/products/cleaved-Caspase-3-Antibody-25128-1-AP.htm?srsltid=AfmBOoqlm6QHZlwZ2uo67oFporWU1N0AQrzD2TSd2erycqLQyhFsbeRs]
- 52. Harmonizing TUNEL with multiplexed iterative ... [https://pmc.ncbi.nlm.nih.gov/articles/PMC12146639/]
- 53. Cleaved Caspase-3 (Asp175) Antibody #9661 [https://www.cellsignal.com/products/primary-antibodies/cleaved-caspase-3-asp175-antibody/9661?srsltid=AfmBOopWwlke6zG6-DTQNo8beTJZPGfqTdPULDAdHLjo7lkvOKot3skG]
- 54. Detecting Caspase Activity in Drosophila Larval Imaginal ... [https://pmc.ncbi.nlm.nih.gov/articles/PMC4443691/]
- 55. Cleaved Caspase-3 (Asp175) (D3E9) Rabbit Monoclonal ... [https://www.cellsignal.com/products/primary-antibodies/cleaved-caspase-3-asp175-d3e9-rabbit-monoclonal-antibody/9579?srsltid=AfmBOoovf-DOkZmkKDSE2q8WUcJM32GbLNxQXtc5_tjgcVNh8Djz-ZC6]
- 56. Immunofluorescence Staining of Paraffin Sections Step by ... [https://www.frontiersin.org/journals/neuroanatomy/articles/10.3389/fnana.2020.582218/full]
- 57. SignalSlide® Cleaved Caspase-3 (Asp175) IHC Controls [https://www.cellsignal.com/products/experimental-controls/signalslide-cleaved-caspase-3-asp175-ihc-controls/8104?srsltid=AfmBOop9YI-sfW-qrBrBBN7L8_69j9bUCdieZAT_3bz7Wca4sXjQ16JZ]
- 58. Kinetic and structural characterization of caspase-3 and ... [https://www.sciencedirect.com/science/article/abs/pii/S1570963910001329]
- 59. Caspase Substrates and Inhibitors - PMC [https://pmc.ncbi.nlm.nih.gov/articles/PMC3721276/]
- 60. Poly(ADP-ribose) polymerase-1 and its cleavage products ... [https://pmc.ncbi.nlm.nih.gov/articles/PMC4013233/]
- 61. Sheet Protector Strategy for Western Blot to Reduce ... [https://pmc.ncbi.nlm.nih.gov/articles/PMC12462392/]
- 62. How to Read Western blot - TotalLab [https://totallab.com/resources/how-to-read-western-blot/]
- 63. Cleavage of CAD by caspase-3 determines the cancer cell ... [https://www.nature.com/articles/s41467-025-60144-2]
- 64. Annexin V Staining Protocol for Flow Cytometry [https://www.thermofisher.com/us/en/home/references/protocols/cell-and-tissue-analysis/protocols/annexin-v-staining-flow-cytometry.html]
- 65. Annexin V Staining Protocol [https://www.bdbiosciences.com/en-us/resources/protocols/annexin-v-staining-protocol]
- 66. Cleaved Caspase-3 (Asp175) Antibody #9661 [https://www.cellsignal.com/products/primary-antibodies/cleaved-caspase-3-asp175-antibody/9661?srsltid=AfmBOoqrWb8gs_ZgquBwVNz9RcmtxbzPaT-YACs1O8kzpwZRFes_sTYu]
- 67. Data analysis in flow cytometry [https://www.abcam.com/en-us/technical-resources/guides/flow-cytometry-guide/data-analysis-in-flow-cytometry]
- 68. Live cell imaging and systems biology - PMC [https://pmc.ncbi.nlm.nih.gov/articles/PMC2992103/]
- 69. Live Cell Imaging [https://www.promega.com/applications/imaging/live-cell-imaging/]
- 70. Bioluminescence vs. Fluorescence: Choosing the Right ... [https://www.promegaconnections.com/bioluminescence-fluorescence-choosing-the-right-assay-for-your-experiment/]
- 71. Monitoring Cleaved Caspase-3 Activity and Apoptosis of ... [https://pmc.ncbi.nlm.nih.gov/articles/PMC3462581/]
- 72. Integrated real-time imaging of executioner caspase dynamics ... [https://pmc.ncbi.nlm.nih.gov/articles/PMC12328661/]
- 73. Progress and Prospects in FRET for the Investigation of ... [https://www.mdpi.com/2079-6374/15/9/624]
- 74. What is FRET with FLIM (FLIM-FRET)? | Learn & Share [https://www.leica-microsystems.com/science-lab/life-science/what-is-fret-with-flim/]
- 75. Mechanism of a Genetically Encoded Dark-to-Bright ... [https://pmc.ncbi.nlm.nih.gov/articles/PMC3137071/]
- 76. Designing an apoptosis reporter by mutagenesis-based ... [https://www.sciencedirect.com/science/article/pii/S2090123225004795]
- 77. Cleaved Caspase-3 (Asp175) Antibody #9661 [https://www.cellsignal.com/products/primary-antibodies/cleaved-caspase-3-asp175-antibody/9661?srsltid=AfmBOoqHquRjuxvjllNAY2Bt-_G6cxH6CnZUvmSYFdkxuqavPMIY3H-D]
- 78. Ionizing radiation induces cells with past caspase activity ... [https://www.nature.com/articles/s41420-023-01769-4]