Beyond the Potential: Controlling for Mitochondrial Morphology in Accurate ΔΨm Interpretation
The mitochondrial membrane potential (ΔΨm) is a central parameter in cellular bioenergetics, serving as a key indicator of mitochondrial health and function in both physiological and pathological states.
Beyond the Potential: Controlling for Mitochondrial Morphology in Accurate ΔΨm Interpretation
Abstract
The mitochondrial membrane potential (ΔΨm) is a central parameter in cellular bioenergetics, serving as a key indicator of mitochondrial health and function in both physiological and pathological states. However, accurate interpretation of ΔΨm is critically confounded by concurrent changes in mitochondrial morphology, such as fission, fusion, and cristae remodeling. This article provides a comprehensive framework for researchers and drug development professionals, addressing the interplay between ultrastructure and ΔΨm. It covers foundational concepts, advanced methodological approaches for simultaneous measurement, strategies for troubleshooting artifacts, and validation techniques to ensure robust, physiologically relevant data. By integrating controls for morphological dynamics, this review aims to enhance the precision of mitochondrial functional assessment in disease models and therapeutic screening.
The Structural-Electrochemical Link: How Mitochondrial Architecture Governs ΔΨm
Core Concepts and FAQs
What is ΔΨm and why is it a core bioenergetic parameter?
The mitochondrial membrane potential (ΔΨm) is the electrical gradient across the inner mitochondrial membrane. It is a key component of the proton motive force that drives ATP synthesis by the F1Fo ATP synthase [1]. This potential is generated by the electron transport chain, which pumps protons from the mitochondrial matrix into the intermembrane space, creating an electrochemical gradient [2]. As the primary component of the proton-motive force, a robust ΔΨm is essential for energy conversion, mitochondrial calcium uptake, protein import, and the production of reactive oxygen species (ROS) [3] [1].
How do changes in mitochondrial morphology affect ΔΨm interpretation?
Mitochondria are dynamic organelles that undergo constant fission and fusion, processes that are closely linked to their metabolic function [4] [5]. Changes in morphology can directly influence ΔΨm. For instance, during T cell development, thymocytes at different stages show distinct mitochondrial morphologies: actively dividing triple-negative (TN) progenitors have fused mitochondria and high oxidative phosphorylation, while more differentiated double-positive (DP) cells exhibit fragmented mitochondria and lower energy metabolism [4]. Inhibiting mitochondrial fission disrupts this normal development, indicating a direct link between morphology, ΔΨm, and cellular function [4]. Therefore, when measuring ΔΨm, it is critical to account for the underlying mitochondrial structure, as fragmented and fused mitochondria may display different bioenergetic capacities.
What are the primary methods for measuring ΔΨm?
The most common method for determining ΔΨm involves using cationic, cell-permeable fluorescent dyes whose accumulation in the mitochondrial matrix is dependent on the membrane potential [3] [1]. These include TMRM (tetramethylrhodamine, methyl ester), TMRE (tetramethylrhodamine, ethyl ester), Rhodamine 123, and JC-1 [3]. The fluorescence intensity of these probes is proportional to ΔΨm, with a loss of potential resulting in leakage of the dye from the mitochondria and a decrease in fluorescence signal [3]. It is crucial to use low dye concentrations (e.g., 10-50 nM for TMRM) to avoid artifacts from auto-quenching [3].
What are common pitfalls when measuring ΔΨm and how can they be avoided?
Common pitfalls and their solutions are summarized in the table below.
Table: Common Troubleshooting Guide for ΔΨm Measurement
| Problem | Potential Cause | Solution |
|---|---|---|
| High background fluorescence/ Low signal-to-noise | Incomplete dye washout; non-specific dye binding. | Increase number of washes after loading [3]. |
| Fluorescence signal saturation | Dye concentration too high, leading to auto-quenching. | Titrate dye concentration to the lowest effective level (e.g., 20 nM TMRM) [3]. |
| Photobleaching | Excessive laser power or prolonged exposure during live imaging. | Use attenuated laser power (e.g., 1-5%), low resolution, and minimize exposure [3]. |
| Inconsistent results between experiments | Variations in cell type, loading conditions, or instrument settings. | Standardize protocol (dye concentration, incubation time, imaging settings) across all experiments [1]. |
| Difficulty interpreting signal change | Lack of internal control for maximal depolarization. | Validate assay by applying a mitochondrial uncoupler like FCCP (e.g., 1 μM) at the end of the experiment to collapse ΔΨm [3]. |
Key Experimental Protocols
Detailed Protocol: Measuring ΔΨm with TMRM in Live Cells
This protocol, adapted from a standardized methodology, details the steps for assessing ΔΨm using the fluorescent potentiometric probe TMRM in live cortical neurons [3]. It can be modified for other cell types.
Principle: TMRM is a cell-permeable, cationic dye that accumulates in the mitochondrial matrix in a ΔΨm-dependent manner. A loss of ΔΨm causes the dye to leak out, resulting in a loss of fluorescence intensity [3].
Reagents and Materials:
- TMRM (Tetramethylrhodamine, methyl ester)
- Anhydrous Dimethylsulfoxide (DMSO)
- Tyrode's Buffer (TB): 145 mM NaCl, 5 mM KCl, 10 mM Glucose, 1.5 mM CaCl2, 1 mM MgCl2, 10 mM HEPES; adjust pH to 7.4 with NaOH [3].
- FCCP (Carbonyl cyanide-p-trifluoromethoxyphenylhydrazone), as a mitochondrial uncoupler control.
Procedure:
- Stock Solution Preparation: Prepare a 10 mM stock solution of TMRM in anhydrous DMSO. Aliquot and store at -20°C, protected from light. Use within one month [3].
- Cell Preparation: Wash cultured cells (e.g., neurons) three times with Tyrode's Buffer [3].
- Dye Loading:
- Prepare a 20 nM working solution of TMRM by diluting the stock in TB.
- Incubate the cells with the TMRM working solution for 45 minutes in the dark at room temperature [3].
- Note: Do not wash the cells after incubation if using a non-quenching mode.
- Live Imaging:
- Mount the culture dish on the stage of a confocal laser scanning microscope.
- Use low laser power (e.g., 1%), low resolution (e.g., 256 x 256), and a detection gain just below saturation to minimize photobleaching [3].
- Excite TMRM at 514 nm and detect emission at 570 nm [3].
- Crucially, do not change these settings between experiments.
- Experimental Validation:
- Acquire baseline TMRM fluorescence images.
- Apply 1 μM FCCP to fully depolarize the mitochondria and record the subsequent decrease in TMRM fluorescence. This serves as a positive control for depolarization [3].
- Data Analysis:
- Use region of interest (ROI) tools to measure fluorescence intensities in mitochondrial regions.
- Subtract the average background intensity.
- Normalize the fluorescence intensity (ΔF) to the baseline (Fo) using the formula: ΔF = (F - Fo)/Fo x 100, where F is the fluorescence intensity at any time point [3].
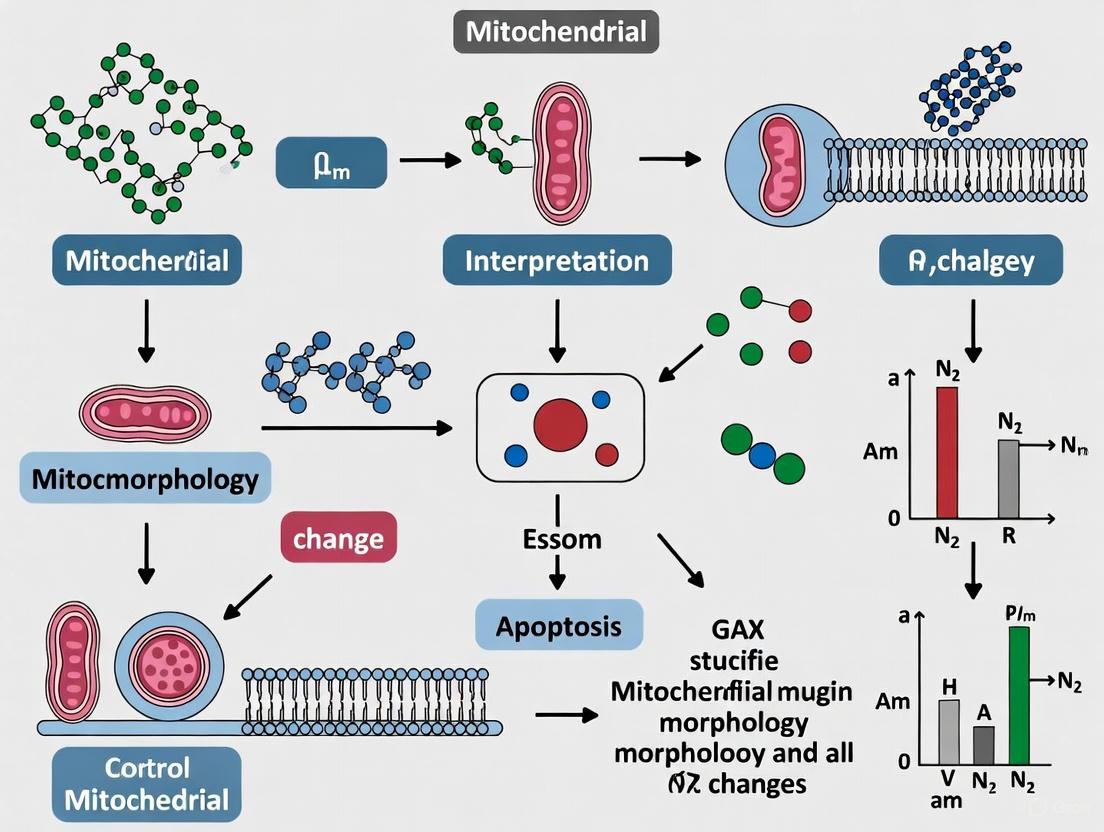
Workflow for Controlling Mitochondrial Morphology in ΔΨm Studies
Diagram Title: Integrating Morphology Assessment with ΔΨm Measurement
The Scientist's Toolkit: Research Reagent Solutions
Table: Essential Reagents for ΔΨm and Morphology Research
| Reagent | Function/Application | Key Considerations |
|---|---|---|
| TMRM / TMRE | Potentiometric fluorescent dye for measuring ΔΨm [3]. | Use low concentrations (10-50 nM) to avoid auto-quenching; measure change from baseline (ΔF) [3]. |
| FCCP | Protonophore uncoupler; collapses ΔΨm for assay validation [3]. | Standard positive control for depolarization (use at 1 μM) [3]. |
| Oligomycin | ATP synthase inhibitor; causes hyperpolarization of ΔΨm [1]. | Useful for assessing the contribution of ATP turnover to the proton leak. |
| MitoTracker Probes (e.g., MitoTracker Green) | Fluorescent dyes for labeling mitochondrial network, largely independent of ΔΨm [5]. | Used to assess mitochondrial mass and overall morphology [4]. |
| 2-Deoxy-D-glucose (2-DG) | Glycolysis inhibitor [4]. | Used to study metabolic flexibility and its impact on ΔΨm (e.g., at 750 mg/kg in vivo) [4]. |
| Drp1 Inhibitors (e.g., Mdivi-1) | Inhibits mitochondrial fission [4]. | Critical for probing the causal relationship between fragmented morphology and ΔΨm [4]. |
| JC-1 Dye | Ratiometric ΔΨm indicator; shifts from green (monomer) to red (J-aggregate) with higher potential [5] [3]. | Provides a built-in ratio for quantification, but can be more difficult to use than single-wavelength dyes [3]. |
Mitochondrial dynamics, the coordinated cycles of fission and fusion, are fundamental to maintaining mitochondrial health, distribution, and function [6]. These processes regulate critical cellular activities including energy production, metabolism, quality control, and programmed cell death [6] [7]. For researchers investigating mitochondrial membrane potential (Δψm), understanding and controlling for concomitant changes in mitochondrial morphology is paramount, as the same dynamics proteins that govern fission and fusion can directly influence Δψm interpretation [5] [8]. This guide provides troubleshooting resources to help researchers dissect these interconnected processes.
Troubleshooting Guides & FAQs
Common Experimental Challenges in Mitochondrial Dynamics Research
FAQ 1: My cellular imaging shows fragmented mitochondria, but my Δψm measurements are inconsistent. What could be wrong?
- Potential Issue: Assuming that fragmentation universally indicates dysfunction. While fission is often associated with damage, it is also a necessary part of normal mitochondrial quality control and cell division [6] [7]. Furthermore, the tools used to measure Δψm, such as the dye JC-1, can exhibit spectral shifts that are dependent on mitochondrial morphology and density, independent of the actual membrane potential [5].
- Solution: Correlate morphology with additional functional readouts.
- Perform a multi-parametric assay: Combine high-resolution imaging of mitochondrial morphology (e.g., using MitoTracker) with independent assessments of Δψm (e.g., TMRM) and cellular bioenergetics (e.g., Seahorse Analyzer) [5] [8].
- Control for morphology: When interpreting Δψm data, include experimental controls with known fragmented or fused mitochondrial networks to establish a baseline for how morphology affects your specific Δψm assay.
FAQ 2: I am overexpressing a fission/fusion protein, but I'm not seeing the expected morphological change. Why?
- Potential Issue: The activity of core dynamics GTPases (Drp1, Mfn1/2, OPA1) is heavily regulated by post-translational modifications (PTMs), not merely by their expression levels [6] [9]. The protein may be present but in an inactive state.
- Solution:
- Check for activation status: Use phospho-specific antibodies for key regulatory sites (e.g., Drp1 phosphorylation at S616 activates fission, while phosphorylation at S637 inhibits it) [9].
- Consider functional redundancy: In mammalian systems, Mfn1 can compensate for the loss of Mfn2 in fusion, and vice versa, which might mask the effect of manipulating a single protein [6].
FAQ 3: My high-content imaging analysis pipeline is misclassifying mitochondrial structures. How can I improve accuracy?
- Potential Issue: The image analysis parameters (e.g., thresholding, particle size) may not be optimized for your specific cell type or the degree of fragmentation/fusion in your experiment [10].
- Solution:
- Validate manually: Always compare the software's output with raw images for a subset of your data to check for accuracy.
- Leverage machine learning: Use tools like CellProfiler that can be trained with random forest classifiers to recognize "networked," "fragmented," or "swollen" mitochondria based on multiple features like area and Zernike shape descriptors, which improves classification robustness [10].
- Go 3D for connected networks: For highly tubular mitochondria, 2D analysis can be misleading. Use tools like MitoGraph, which analyzes 3D confocal z-stacks by converting the network into a skeletonized structure of nodes and edges, providing more accurate metrics for interconnectivity [10].
Table 1: Key Quantitative Parameters for Mitochondrial Morphology from Imaging
| Parameter | Description | Fragmented Network | Fused/Elongated Network |
|---|---|---|---|
| Aspect Ratio | Ratio of the major to minor axis of an individual mitochondrion. | Low (接近 1, round) | High (elongated) |
| Form Factor | Measures shape complexity; perimeter²/(4π × area). A perfect circle=1. | Low (接近 1) | Higher (>2 indicates branched structures) |
| Network Branchiness | Number of branches per mitochondrial unit. | Low | High |
| Mitochondrial Area | Average area of individual mitochondrial particles. | Small | Large |
| Interconnectivity | Degree to which mitochondria form a connected reticulum. | Low | High |
Table 2: Core Machinery of Mitochondrial Dynamics
| Protein | Primary Function | Key Regulators & Modifications |
|---|---|---|
| Drp1 | Master regulator of fission; oligomerizes into rings at constriction sites. | Activated by phosphorylation at S616 (CDK1, ERK); Inhibited by phosphorylation at S637 (PKA) [7] [9]. |
| Mfn1 & Mfn2 | GTPases that mediate Outer Mitochondrial Membrane (OMM) fusion. | Mfn2 also tethers mitochondria to the ER. Regulation via ubiquitination and recently discovered redox-sensitive cysteines in the IMS [6]. |
| OPA1 | Mediates Inner Mitochondrial Membrane (IMM) fusion and cristae structure. | Exists in long and short forms; proteolytic cleavage impairs fusion. Essential for maintaining cristae integrity and ΔΨm [7] [11]. |
| Mff, MiD49/51 | OMM adaptor proteins that recruit Drp1 to fission sites. | Levels and phosphorylation states regulate Drp1 recruitment efficiency [6] [7]. |
The Scientist's Toolkit: Research Reagent Solutions
Table 3: Essential Reagents for Investigating Mitochondrial Dynamics
| Reagent / Tool | Function / Application | Example Use in Experimentation |
|---|---|---|
| MitoTracker Dyes (e.g., Red CMXRos, Green FM) | Live-cell staining of mitochondria regardless of membrane potential. | Tracing overall mitochondrial morphology and network architecture over time [5]. |
| TMRM, JC-1, Rhod-123 | ΔΨm-sensitive fluorescent dyes. | Measuring mitochondrial membrane potential. Critical: Use in conjunction with morphology stains to control for morphology-based artifacts [5] [8]. |
| Mdivi-1 | Small-molecule inhibitor of Drp1 GTPase activity. | Chemical induction of mitochondrial elongation to study the effects of fused networks on ΔΨm and cell function [7]. |
| Phospho-specific Antibodies (e.g., anti-Drp1 pS616) | Detecting activation status of dynamics proteins. | Differentiating between total and active pools of Drp1 in Western blot or immunofluorescence, correlating PTMs with morphological states [9]. |
| MitoGraph / CellProfiler | Software for quantitative 3D/2D morphological analysis. | Automating the extraction of quantitative parameters (e.g., form factor, branch length) from large imaging datasets [10]. |
Detailed Experimental Protocols
Protocol 1: Correlative Analysis of Mitochondrial Morphology and Membrane Potential
Methodology: This protocol uses sequential staining and confocal microscopy to simultaneously assess morphology and Δψm in the same cell, which is crucial for controlling interdependence [5].
Cell Staining:
- Culture cells on glass-bottom dishes. For live cells, incubate with 50-100 nM MitoTracker Green FM (morphology stain, relatively Δψm-insensitive) in culture medium for 15-30 minutes at 37°C.
- Wash gently with pre-warmed PBS or medium.
- Incubate with 20-100 nM TMRM (Δψm-sensitive dye) for an additional 15-30 minutes at 37°C.
- Replace with fresh, dye-free medium for imaging.
Image Acquisition:
Image Analysis:
- Use MitoGraph for 3D mitochondrial networks or CellProfiler for 2D analysis [10].
- MitoGraph Pipeline: Input the 3D MitoTracker channel. The software generates skeletonized networks and calculates metrics like volume and branch length.
- Correlative Quantification: Overlay the morphology analysis with the TMRM intensity map. Calculate mean TMRM intensity per mitochondrial unit or within user-defined cellular regions.
Protocol 2: Assessing the Functional Impact of Dynamics via Cellular Bioenergetics
Methodology: This protocol uses a Seahorse XF Analyzer to measure the functional bioenergetic consequences of altered mitochondrial dynamics, providing context for Δψm data [5] [8].
Experimental Setup:
- Seed cells in a Seahorse XF96 cell culture microplate after inducing a specific morphological state (e.g., fission with CCCP, fusion with Mdivi-1).
- On the day of the assay, replace medium with Seahorse XF Base Medium supplemented with 1 mM pyruvate, 2 mM glutamine, and 10 mM glucose (pH 7.4).
Mitochondrial Stress Test:
- Sequentially inject modulators through the instrument ports:
- Port A: Oligomycin (1.5 µM) - inhibits ATP synthase, revealing ATP-linked respiration.
- Port B: FCCP (1.0 µM) - uncoupler, reveals maximal respiratory capacity.
- Port C: Rotenone & Antimycin A (0.5 µM each) - inhibit ETC complexes I and III, revealing non-mitochondrial respiration.
- Sequentially inject modulators through the instrument ports:
Data Interpretation:
- Key parameters: Basal Respiration, ATP-linked Respiration, Proton Leak, Maximal Respiration, and Spare Respiratory Capacity.
- Correlate with Morphology: A fragmented network often, but not always, correlates with reduced maximal respiration and spare capacity. This direct functional readout helps interpret whether morphological changes are adaptive or deleterious.
Signaling Pathways and Molecular Mechanisms
The following diagrams, generated using Graphviz DOT language, illustrate the core signaling pathways that regulate mitochondrial dynamics.
DOT Script 1: Mitochondrial Fission Signaling Pathway
Core Fission Regulation
This diagram outlines the primary signaling cascade controlling mitochondrial fission. The process is initiated at endoplasmic reticulum (ER)-mitochondria contact sites, where actin polymerization facilitates the initial constriction [6]. The central fission GTPase, Drp1, is regulated by opposing phosphorylation events: inhibitory phosphorylation at Ser637 by PKA, and activating phosphorylation at Ser616 by kinases like ERK and CDK1 [7] [9]. Activated Drp1 is recruited to the outer mitochondrial membrane by adaptors (Mff, MiD49/51), where it oligomerizes into constricting rings. The final scission event is completed by Dynamin 2 (Dnm2) [6].
DOT Script 2: Mitochondrial Fusion Signaling Pathway
Dual-Membrane Fusion Process
This diagram illustrates the two-step process of mitochondrial fusion. Outer membrane fusion is mediated by mitofusins (Mfn1 and Mfn2), which tether adjacent mitochondria through interactions of their GTPase domains [6]. Recent models indicate that disulfide bond formation between mitofusins in the intermembrane space, driven by redox signaling, promotes their oligomerization and fusion activity [6]. Following OMM fusion, the inner membrane GTPase OPA1, which exists in long and proteolytically processed short forms, mediates IMM fusion [7]. OPA1 is also critically important for maintaining the structure of cristae, the inner membrane folds where oxidative phosphorylation occurs, directly linking fusion dynamics to functional capacity and ΔΨm [7] [11].
FAQ: Mechanisms of Cristae Integrity
What are the primary molecular players maintaining cristae junction integrity? The structural integrity of cristae junctions is primarily maintained by a synergistic interaction between the dynamin-like GTPase OPA1 and the mitochondrial signature phospholipid cardiolipin [13] [14]. OPA1, in its long and short forms, oligomerizes at the cristae junctions, creating a narrow, defined barrier [13]. The mitochondrial contact site and cristae organizing system (MICOS) complex also plays a crucial role in establishing and maintaining these junctions, creating a diffusion barrier that separates the cristae lumen from the intermembrane space [15].
How does cardiolipin directly influence cristae morphology? Cardiolipin, with its unique conical shape and four acyl chains, preferentially localizes to regions of high membrane curvature, such as the cristae tips and junctions [15] [14]. This localization helps stabilize the intense curvature of these membranes. Furthermore, cardiolipin directly binds to and stabilizes the oligomeric forms of OPA1, which are essential for maintaining tight cristae junctions and preventing the release of pro-apoptotic factors from the intermembrane space [14] [16].
What happens to cristae structure when OPA1 proteolysis is dysregulated? Under normal conditions, OPA1 is cleaved by proteases like OMA1 and YME1L to balance long (L-OPA1) and short (S-OPA1) isoforms, both of which are necessary for fusion and cristae maintenance [13] [17]. Excessive or stress-induced proteolysis, particularly by OMA1, leads to an imbalance in OPA1 isoforms, resulting in cristae fragmentation, loss of mitochondrial membrane potential, and increased susceptibility to cytochrome c release, initiating apoptosis [13] [16].
Why is cristae integrity crucial for accurate Δψm interpretation? Cristae integrity is fundamental for accurate Δψm interpretation because the proton gradient that constitutes the Δψm is primarily established across the cristae membranes, not the inner boundary membrane [15]. Disorganized or fragmented cristae, often a consequence of OPA1 or cardiolipin defects, can lead to a premature collapse of the proton motive force even if the overall mitochondrial structure appears intact. This can cause researchers to misinterpret a localized cristae defect as a global loss of Δψm, confounding experimental results [15] [14].
Troubleshooting Guide: Common Experimental Challenges
Problem: Inconsistent OPA1 Banding Patterns on Western Blots
- Observation: Multiple bands or smearing when probing for OPA1, with variable ratios of long (L-OPA1) to short (S-OPA1) isoforms between experiments.
- Potential Cause: Inadequate sample preparation. OPA1 is highly sensitive to proteolysis. Standard RIPA buffer extraction may be insufficient to fully solubilize mitochondrial membrane proteins, leading to inconsistent results.
- Solution:
- Rapid Lysis: Isolate mitochondria and lyse them immediately in a pre-warmed, strong lysis buffer (e.g., containing 2-4% SDS) to denature proteases instantly.
- Inhibit Proteases: Supplement lysis and incubation buffers with a broad-spectrum protease inhibitor cocktail, including specific inhibitors for metalloproteases (like OMA1).
- Validate Antibodies: Ensure antibodies are validated for specific detection of OPA1 isoforms. Consider using OPA1-knockout cell lysates as a negative control.
Problem: Loss of Cardiolipin Signal or Aberrant Remodeling
- Observation: Reduced detection of mature, tetra-linoleoyl cardiolipin in assays like thin-layer chromatography or mass spectrometry, with an accumulation of its precursor, monolysocardiolipin (MLCL).
- Potential Cause: Disruption of the cardiolipin remodeling pathway. This is often seen in models of Barth Syndrome or due to oxidative stress, which upregulates the remodeling enzyme ALCAT1, leading to aberrant cardiolipin species prone to oxidation [18].
- Solution:
- Antioxidant Supplementation: Culture cells with antioxidants (e.g., MitoTEMPO, MitoQ) to minimize ROS-induced cardiolipin peroxidation and ALCAT1 activation.
- LC-MS/MS Analysis: Employ liquid chromatography-tandem mass spectrometry for precise quantification of cardiolipin species, as it provides superior sensitivity and specificity.
- Functional Assays: Correlate lipidomic data with functional assays, such as measuring the binding of fluorescently labeled annexin V or cytochrome c to externalized cardiolipin on the outer mitochondrial membrane as an indicator of mitochondrial stress [18] [16].
Problem: Discrepancy between Δψm and Functional Output
- Observation: Cells show a relatively normal Δψm when measured with potentiometric dyes (e.g., TMRE, JC-1) but exhibit clear defects in oxidative phosphorylation (e.g., reduced ATP production, oxygen consumption rate).
- Potential Cause: Uncoupling of the electron transport chain (ETC) at the cristae membrane. This can occur if cardiolipin is deficient or oxidized, impairing its ability to stabilize ETC supercomplexes ("respirasomes"). The proton gradient may be partially maintained but cannot be efficiently coupled to ATP synthesis [14].
- Solution:
- Profile ETC Complexes: Perform Blue Native (BN)-PAGE to analyze the assembly and stability of individual ETC complexes and supercomplexes.
- Multi-Parameter Assessment: Do not rely on Δψm alone. Integrate measurements with ATP production assays, Seahorse analysis (to measure glycolytic and mitochondrial respiration), and imaging of cristae structure via electron microscopy.
- Check for OXPHOS Subunits: Use western blotting to confirm the levels of nuclear and mitochondrial DNA-encoded OXPHOS subunits, as defects can arise from impaired protein import, which also depends on cardiolipin [14] [18].
Experimental Protocols & Methodologies
Protocol: Assessing OPA1 Isoforms and Cristae Morphology
This protocol provides a correlative analysis of OPA1 processing and ultrastructural changes.
Key Reagents:
- Digitonin: For selective permeabilization of the plasma membrane while leaving mitochondrial membranes intact.
- Protease Inhibitors (e.g., 1,10-Phenanthroline): Specifically inhibits metalloproteases like OMA1 to preserve L-OPA1.
- Primary Antibodies: Anti-OPA1 (for Western Blot), Anti-TOM20 (for imaging).
- Transmission Electron Microscopy (TEM) Fixative: e.g., 2.5% Glutaraldehyde in 0.1M Sodium Cacodylate buffer.
Methodology:
- Cell Fractionation & Lysis:
- Harvest cells and permeabilize with digitonin (e.g., 0.005% for 5 min on ice).
- Pellet the mitochondria by centrifugation at 10,000 x g for 10 min.
- Lyse the mitochondrial pellet in a pre-warmed SDS-lysis buffer containing 1,10-Phenanthroline. Incubate at 37°C for 5-10 min with vortexing.
- Western Blot Analysis:
- Separate proteins using a 4-12% Bis-Tris gradient gel.
- Transfer to a PVDF membrane and probe with OPA1 antibody. Quantify the band intensities of L-OPA1 and S-OPA1 isoforms.
- Electron Microscopy:
- Fix a separate pellet of isolated mitochondria in 2.5% glutularaldehyde overnight at 4°C.
- Process through osmium tetroxide, dehydration, and resin embedding.
- Cut ultrathin sections (70-90 nm) and stain with uranyl acetate and lead citrate.
- Image using TEM. Cristae morphology can be quantified by measuring cristae width, junction diameter, and the number of cristae per mitochondrial area using ImageJ software.
Protocol: Probing Cardiolipin-OPA1 Functional Interaction
This assay tests the functional dependence of OPA1 oligomerization on cardiolipin.
Key Reagents:
- Crosslinker (e.g., BS³): A membrane-impermeable crosslinker to stabilize protein oligomers.
- NAO (10-N-Nonyl Acridine Orange): A fluorescent dye that binds to cardiolipin; its fluorescence shifts upon binding, but note it can also bind to other phospholipids.
- Cytochrome c Release Assay Kit: To measure apoptosis induction.
Methodology:
- Chemical Crosslinking:
- Treat isolated mitochondria from control and cardiolipin-deficient (e.g., Tafazzin-knockdown) cells with BS³ (1-2 mM) on ice for 30 min.
- Quench the reaction with Tris-HCl.
- Analyze crosslinked products by non-reducing SDS-PAGE and Western Blot for OPA1. High molecular weight oligomers indicate stable OPA1 complexes.
- Cytochrome c Release Assay:
- Incubate mitochondria with a pro-apoptotic stimulus (e.g., recombinant tBid protein).
- Separate the mitochondrial pellet from the supernatant by centrifugation.
- Use an ELISA or Western Blot to detect cytochrome c in the supernatant. Increased release in cardiolipin-deficient mitochondria indicates compromised cristae junctions.
Data Presentation
Table 1: Quantitative Impact of OPA1 and Cardiolipin Dysregulation on Mitochondrial Parameters
Data compiled from experimental models of OPA1 mutation (e.g., ADOA) or cardiolipin deficiency (e.g., Barth Syndrome, TAZ KD). EM = Electron Microscopy; OCR = Oxygen Consumption Rate.
| Parameter | Control Conditions | OPA1 Dysregulation | Cardiolipin Deficiency | Measurement Technique |
|---|---|---|---|---|
| Cristae Junction Diameter | ~28 nm [15] | Increased (>40 nm) | Increased / Irregular | EM Tomography |
| L-OPA1 / S-OPA1 Ratio | ~1.5 - 2.0 [17] | Decreased (<0.5) | Decreased | Western Blot |
| Basal OCR | 100-150 pmol/min/μg | Decreased (~40-60%) | Decreased (~50-70%) | Seahorse XF Analyzer |
| ATP-Linked OCR | 60-80% of Basal OCR | Severely Decreased | Severely Decreased | Seahorse XF Analyzer |
| Cytochrome c Release (after tBid) | 10-20% of total | Markedly Increased (>50%) | Markedly Increased (>60%) | ELISA / Western Blot |
| ETC Supercomplex Assembly | Intact | Disrupted | Severely Disrupted | Blue Native PAGE |
Table 2: Research Reagent Solutions for Cristae Integrity Studies
A curated list of essential tools for investigating OPA1 and cardiolipin biology.
| Reagent / Tool | Function & Application | Key Considerations |
|---|---|---|
| Anti-OPA1 Antibody | Detects L and S isoforms via Western Blot; used in Immunoprecipitation. | Critical to use one validated for isoform detection. Check species reactivity. |
| MitoTEMPO / MitoQ | Mitochondria-targeted antioxidants. Reduces cardiolipin peroxidation, helps maintain its function. | Use in culture media; effective concentration typically 1-10 µM. |
| Digitonin | Selective plasma membrane permeabilization for mitochondrial isolation or protein accessibility studies. | Titration is crucial; optimal concentration varies by cell type. |
| NAO / TMRM | NAO: Binds cardiolipin (with caution for specificity). TMRM: Measures mitochondrial membrane potential (Δψm). | NAO fluorescence can be quenched upon cardiolipin oxidation. TMRM is a potentiometric dye. |
| BS³ Crosslinker | Membrane-impermeable crosslinker. Stabilizes OPA1 oligomers for analysis. | Quench with Tris buffer after reaction. Use fresh solution. |
| OMA1 Inhibitor (e.g., P1) | Specific inhibitor of the OMA1 protease. Prevents stress-induced cleavage of OPA1, preserving L-OPA1. | Useful for probing the effects of OPA1 imbalance. |
Signaling Pathways and Workflow Visualization
Cristae Integrity Maintenance Pathway
Experimental Workflow for Integrity Analysis
Troubleshooting Guide: Common Experimental Issues in ΔΨm Interpretation
Problem 1: Inconsistent ΔΨm readings in a seemingly homogeneous cell population.
- Potential Cause: Unaccounted heterogeneity in mitochondrial membrane potential (ΔΨm) is a natural phenomenon, particularly pronounced in cancer cells, and is not necessarily linked to the cell cycle. This heterogeneity is primarily modulated by intramitochondrial factors. [19]
- Solution:
- When comparing samples, ensure large sample sizes are used for statistical power.
- Use synchronized calibration protocols. A two-pronged microscopy approach using tetramethylrhodamine methyl ester (TMRM) can quantify both relative fluorescence and absolute ΔΨm values. [19]
- Avoid qualitative classification of mitochondria as simply "polarized" or "depolarized"; employ quantitative methods. [19]
Problem 2: Drug treatment fails to induce expected ΔΨm dissipation.
- Potential Cause: The proton motive force (PMF) has two components: the electrical potential (ΔΨ) and the chemical pH gradient (ΔpH). An inhibitor may target only one component, allowing the other to sustain the overall PMF. [20]
- Solution:
- Use a combination of dissipaters that target both ΔΨ and ΔpH. For example, in Staphylococcus aureus, combinations of ΔΨ and ΔpH dissipaters showed high synergistic effects. [20]
- Confirm the activity of your inhibitors. Positive controls like the ionophore CCCP (carbonyl cyanide 3-chlorophenylhydrazone) can be used to fully collapse the PMF. [21] [19]
Problem 3: Difficulty in distinguishing between fission/fusion effects and cristae remodeling effects on ΔΨm.
- Potential Cause: Fission/fusion and cristae shape are mechanistically linked but distinct processes. Fission can lead to cristae disruption independently of overall network fragmentation. [22]
- Solution:
- Implement correlated imaging. Use confocal microscopy to assess the mitochondrial network morphology (fission/fusion) and electron microscopy to analyze cristae ultrastructure. [10] [22]
- Monitor key regulatory proteins. For example, the cleavage of OPA1 (a fusion protein) leads to cristae opening, while its long form promotes cristae tightness. Similarly, dimerization of the F1Fo-ATP synthase is crucial for cristae shape. [23] [22]
Frequently Asked Questions (FAQs)
FAQ 1: Why is cristae shape so important for the proton motive force and ATP production? The cristae are the primary sites of oxidative phosphorylation (OXPHOS), housing the protein complexes responsible for the electron transport chain (ETC) and ATP synthase. [23] Their invaginated structure serves to:
- Increase Surface Area: This enlarges the membrane area available for the ETC and ATP synthase complexes. [23]
- Create a Specialized Compartment: The cristae compartment concentrates OXPHOS proteins and reduces the mean distance between them, creating favorable conditions for ATP production. [23]
- Trap Protons: The physical architecture of cristae helps to contain the proton gradient (PMF) more effectively than the inner boundary membrane, leading to a local, higher proton concentration that drives ATP synthesis. [23]
FAQ 2: How does mitochondrial fission directly impact the proton motive force? Fission, mediated by proteins like Drp-1, often leads to a fragmented mitochondrial network. [10] This fragmentation is frequently associated with:
- Cristae Destructuration: Fission events are coupled with remodeling of the inner membrane, often leading to the disassembly of cristae structures. [22]
- Loss of PMF: The disruption of cristae architecture compromises the efficiency of the ETC and the ability to maintain a strong proton gradient, ultimately leading to a reduction in ΔΨm and ATP production. [22] A fragmented network is often linked to enhanced glycolysis. [10]
FAQ 3: How does mitochondrial fusion support a high ΔΨm? Fusion, mediated by proteins like Mfn-1, Mfn-2 (outer membrane), and OPA1 (inner membrane), results in a well-developed, interconnected mitochondrial network. [10] This is associated with:
- Enhanced OXPHOS: Fused networks typically have a higher OXPHOS capacity. [10]
- Stable Cristae: The protein OPA1 is essential not only for membrane fusion but also for maintaining tight cristae junctions. This preserved cristae integrity is crucial for efficient PMF generation and maintenance. [23] [22]
FAQ 4: My research is in cancer cell metabolism. Why should I pay special attention to mitochondrial morphology? The mitochondrial network morphology can serve as a biomarker for the cancer cell metabolic status and response to antitumor treatments. [10] Cancer cells exhibit metabolic plasticity, and a shift toward a fragmented mitochondrial network is often associated with increased cancer cell proliferation, metastasis, and a glycolytic phenotype (Warburg effect). [10] Quantifying mitochondrial morphology can provide potential indicators for identifying these metabolic changes and drug responses. [10]
Table 1: Mitochondrial Morphology States and Their Functional Correlates
| Morphological State | Key Regulators | Impact on Cristae | Impact on ΔΨm / PMF | Associated Metabolic Phenotype |
|---|---|---|---|---|
| Fused/Networked | Mfn1/2, OPA1 (long form) | Tight, well-defined | High ΔΨm, efficient ATP production [10] [22] | Oxidative Phosphorylation (OXPHOS) [10] |
| Fragmented | Drp-1, Fis1 | Disrupted, swollen | Lower ΔΨm, reduced ATP production [10] [22] | Aerobic Glycolysis (Warburg effect) [10] |
| Condensed (Active) | ATP synthase dimers, OPA1 | Large intracristal space [23] | High PMF, high ATP output [23] | High energy demand (State III) [23] |
| Orthodox (Resting) | - | Compacted intracristal space [23] | Lower PMF, low ATP output [23] | Low energy demand (State IV) [23] |
Table 2: Effects of Pharmacological Inhibitors on ΔΨm and Morphology
| Reagent / Inhibitor | Primary Target | Effect on ΔΨm | Effect on Morphology | Key Experimental Consideration |
|---|---|---|---|---|
| Oligomycin | F1Fo-ATP synthase (Complex V) | Increases ΔΨm (inhibits consumption) [19] | Can promote swelling due to reversed operation of ATP synthase | Use to distinguish between ETC-driven and consumption-driven ΔΨm changes. [19] |
| Antimycin A | Complex III of ETC | Decreases ΔΨm (inhibits generation) [19] | Can induce fragmentation via energy depletion [10] | Confirms ETC dependency of ΔΨm. |
| CCCP | Ionophore (Uncoupler) | Collapses ΔΨm (dissipates H+ gradient) [19] | Can cause swelling; used to induce maximal fragmentation | Positive control for complete PMF dissipation. [21] [19] |
| Mdivi-1 | Drp-1 (Fission inhibitor) | Indirectly supports ΔΨm maintenance | Promotes network elongation | Use to test causal link between fission and ΔΨm loss. |
Experimental Protocols
Protocol 1: Quantitative Assessment of ΔΨm Heterogeneity using TMRM
This protocol is adapted from methods used to quantify intercellular heterogeneity of ΔΨm in human cancer cells. [19]
- Cell Preparation: Plate cells (e.g., HepG2, Huh7) in chambered plates or 35 mm imaging dishes.
- Dye Loading: Load cells with TMRM at a concentration of 200 nM for 30 minutes in a modified Hank's Balanced Salt Solution (HBSS) or complete growth media at 37°C, 5% CO₂.
- Equilibrium Maintenance: After washing, perform subsequent incubations and imaging with a maintenance concentration of TMRM (50 nM) to ensure equilibrium distribution of the fluorophore.
- Confocal Imaging: Image cells using a confocal microscope (e.g., Zeiss LSM 880) with a 63x oil immersion lens. Excite TMRM at 561 nm and detect emission at 590–610 nm.
- Absolute Calibration (Optional): For absolute ΔΨm values, use a two-pronged approach with time-lapse imaging of TMRM in non-quenching mode and a parallel measurement of plasma membrane potential (ΔΨp) using a dye like DiBAC₄(3). [19]
- Pharmacological Inhibition: After establishing a baseline, add inhibitors to probe mechanisms:
- Oligomycin (1-10 µM): To inhibit ATP synthase and assess ETC-dependent ΔΨm.
- Antimycin A (1-10 µM): To inhibit Complex III and collapse ETC-dependent ΔΨm.
- CCCP (1 µM): As a positive control for complete PMF dissipation. [19]
- Data Analysis: Analyze fluorescence intensity on a per-cell basis to quantify heterogeneity. Heterogeneity is confirmed if ΔΨm remains variable in synchronized cell populations and is reduced by inhibitors of the ETC or ATP synthase. [19]
Protocol 2: Correlating Network Morphology and Cristae State via Image Analysis
- Live-Cell Staining: Stain mitochondria in live cells using a fluorescent dye (e.g., MitoTracker Red, TMRM) for network analysis. [10]
- Confocal Imaging: Acquire 2D or 3D z-stack images using a confocal microscope.
- Network Morphology Quantification: Use automated analysis software to extract morphological features:
- CellProfiler: A flexible, open-source software with graphical interface. Pipelines can be built to classify mitochondria into networked, fragmented, and swollen types based on area, shape, and Zernike binary information. [10]
- MitoGraph: An open-source platform that automatically processes 3D images, turning mitochondrial networks into surfaces and node-and-edge structures (skeletons) for quantitative analysis of volume, length, and connectivity. [10]
- Correlated Electron Microscopy (for Cristae): Fix the same or parallel cell samples and process for transmission electron microscopy (TEM) to visualize cristae ultrastructure, including number, width, and junction geometry. [23] [22]
- Data Integration: Correlate the quantitative parameters from image analysis (e.g., degree of fragmentation) with the qualitative and quantitative assessment of cristae integrity from TEM.
Signaling Pathways and Experimental Workflows
Diagram Title: Interplay of Fission, Fusion, and Cristae on PMF
Diagram Title: Experimental Workflow for Morphology-PMF Studies
The Scientist's Toolkit: Research Reagent Solutions
Table 3: Essential Reagents and Tools for Mitochondrial Morphology and PMF Research
| Reagent / Tool | Function / Target | Key Application Notes |
|---|---|---|
| TMRM (Tetramethylrhodamine methyl ester) | Cationic fluorescent dye for quantifying ΔΨm. [19] | Use in non-quenching mode (low concentration) for quantitative measurements. Requires calibration and accounting for plasma membrane potential (ΔΨp) for absolute values. [19] |
| MitoTracker Probes (e.g., Red CMXRos) | Covalently labels mitochondria for network morphology analysis. [10] | Ideal for fixed-cell imaging or long-term live-cell tracking. Choice of specific dye depends on experimental needs (fixability, color). |
| Oligomycin | Inhibits F1Fo-ATP synthase (Complex V). [19] | Used to hyperpolarize ΔΨm by preventing proton consumption. Helps isolate ETC contribution to ΔΨm. [19] |
| CCCP | Proton ionophore (Uncoupler). [19] | Positive control for complete collapse of the PMF and maximal ΔΨm dissipation. [21] [19] |
| Antimycin A | Inhibits Complex III of the ETC. [19] | Used to collapse the ETC-dependent component of ΔΨm. Confirms ETC functionality. [19] |
| Mdivi-1 | Selective allosteric inhibitor of the mitochondrial fission protein Drp1. | Used to experimentally induce a fused network morphology and probe the causal effects of fission on ΔΨm and cristae structure. |
| CellProfiler | Open-source image analysis software for automated morphology quantification. [10] | User-friendly GUI. Effective for classifying mitochondrial subtypes (networked, fragmented) based on features like area and shape. [10] |
| MitoGraph | Open-source software for 3D analysis of mitochondrial networks. [10] | Converts 3D images into skeletal structures and surfaces. Provides quantitative data on volume, length, and connectivity. [10] |
Troubleshooting Guides and FAQs
Frequently Asked Questions
Q1: In my diabetic cardiomyopathy model, I am observing a loss of Δψm. How can I determine if this is a primary driver of pathology or a secondary consequence of overall metabolic dysfunction?
A1: Distinguishing cause from effect requires a multi-parametric assessment. A loss of Δψm can be a primary event or secondary to other insults. You should:
- Correlate with Morphology: Simultaneously analyze mitochondrial network structure. A primary defect in ETC complexes often leads to fragmented mitochondria, whereas fragmentation can also be a consequence of sustained low Δψm. Use high-resolution imaging (e.g., STED microscopy) to classify the mitochondrial morphology as fused, intermediate, or fragmented [5] [10].
- Measure Bioenergetic Capacity: Use a Seahorse Analyzer or similar respirometry system to profile cellular bioenergetics. Assess key parameters like basal respiration, ATP-linked respiration, proton leak, and maximal respiratory capacity. A concurrent decrease in Δψm and maximal respiration suggests a primary defect in the electron transport chain [5] [8].
- Check for Upstream Stressors: Evaluate markers of endoplasmic reticulum stress and oxidative stress, as these are highly implicated in diabetic cardiomyopathy and can directly impair Δψm [24].
Q2: My high-content imaging reveals significant heterogeneity in mitochondrial morphology and membrane potential within a single cell culture well. How should I control for this when interpreting my results?
A2: Mitochondrial heterogeneity is a biological reality, not noise. Your experimental design and analysis must account for it.
- Increase Sampling: Ensure you image and analyze a sufficient number of cells per condition (e.g., n > 50-100 cells) to capture the full distribution of mitochondrial phenotypes.
- Use Automated, Single-Cell Analysis: Employ automated image analysis pipelines in platforms like CellProfiler or ImageJ/Fiji to extract morphological and fluorescence intensity data on a per-cell basis. This allows you to correlate Δψm with morphology within individual cells rather than relying on well averages [10].
- Segment and Classify: Use tools like MitoGraph to convert 3D mitochondrial images into quantifiable networks (skeletons and surfaces). You can then classify mitochondria into sub-populations (e.g., networked, fragmented) based on objective parameters like aspect ratio, form factor, and branch length, and calculate the average Δψm for each class [10].
Q3: What are the best practices for ensuring my measurements of Δψm are not artifacts of the fluorescent dyes I am using?
A3: Dye-related artifacts are a common pitfall. Key controls include:
- Dye Concentration Titration: Always perform a dose-response curve to use the minimum dye concentration that gives a robust signal. High concentrations can artificially depolarize mitochondria.
- Validate with Inhibitors: Use pharmacological controls. Apply an uncoupler like FCCP to collapse Δψm completely; this should minimize the dye's signal. Conversely, using an ATP synthase inhibitor like oligomycin should hyperpolarize mitochondria and increase the signal.
- Use Ratiometric Dyes: Where possible, use ratiometric dyes like JC-1 or TMRM in a quench mode. JC-1, for instance, shifts its emission from green (monomer) to red (J-aggregates) as Δψm increases. The red/green ratio is independent of mitochondrial mass, dye loading, and photobleaching, providing a more reliable measure [5].
- Confirm Specific Localization: Co-stain with a mitochondrial marker (e.g., MitoTracker) that is not dependent on membrane potential to confirm the dye is localizing to mitochondria [5].
Troubleshooting Common Experimental Issues
Problem: Inconsistent readings of mitochondrial respiration using a Seahorse XF Analyzer in cardiac myocytes from a diabetic model.
- Potential Cause & Solution:
- Cell Preparation: Primary cardiomyocytes are delicate. Ensure isolation protocols are consistent and minimize mechanical and enzymatic stress. Check cell viability before the assay; it should be >90% [8].
- Substrate Selection: Diabetic cells often shift from glucose to fatty acid metabolism. The standard assay medium using only glucose may not reflect the true metabolic state. Supplement with palmitate or other relevant fatty acids to unmask respiratory defects [24] [8].
- Normalization: The most common source of variability. Do not normalize solely to protein concentration, as this can be affected by pathological hypertrophy. Perform cell counting in parallel wells or use a DNA-based normalization method for greater accuracy.
Problem: Poor-quality mitochondrial segmentation in confocal microscopy images, leading to unreliable morphological data.
- Potential Cause & Solution:
- Image Quality: The "garbage in, garbage out" principle applies. Optimize image acquisition to avoid over- and under-saturation. Use higher Z-stack resolution for 3D analysis [10].
- Thresholding: Global thresholding fails with uneven background fluorescence. Use adaptive or local thresholding algorithms available in CellProfiler or ImageJ [10].
- Tool Selection: Standard pipelines may not work for all cell types. For complex, tubular networks, tools like MitoGraph that use a percolation-based algorithm are more effective than those designed for punctate mitochondria [10].
Table 1: Key Mitochondrial Functional Parameters and Their Measurement Techniques
| Parameter | Measurement Technique | Key Output Metrics | Considerations for DCM/Neurodegeneration Research |
|---|---|---|---|
| Mitochondrial Membrane Potential (ΔΨm) | Fluorescent dyes (JC-1, TMRM, TMRE) [5] | Fluorescence intensity ratio (JC-1: red/green); Fluorescence intensity (TMRM) | Use ratiometric dyes to control for artifacts; assess heterogeneity per cell [5] [8]. |
| Cellular Bioenergetics | Seahorse XF Analyzer (Respirometry) [5] [8] | Oxygen Consumption Rate (OCR): Basal, ATP-linked, Maximal, Spare Capacity | Substrate flexibility is critical; test with glucose, glutamine, and fatty acids [8]. |
| Mitochondrial Morphology | Confocal/STED Microscopy + Image Analysis [5] [10] | Form Factor, Aspect Ratio, Branch Length, Network Classification (Fused/Fragmented) | High heterogeneity requires single-cell analysis; use automated pipelines (e.g., MitoGraph, CellProfiler) [10]. |
| Mitochondrial ROS | Fluorescent probes (MitoSOX Red) [5] [8] | Fluorescence intensity | MitoSOX is specific for superoxide; correlate with ΔΨm and antioxidant levels. |
| mtDNA Integrity & Copy Number | Quantitative PCR (qPCR) [5] [8] | mtDNA copy number (ratio of mtDNA to nuclear DNA gene); mtDNA damage | Changes often linked to altered bioenergetic capacity and can be an early disease marker. |
Table 2: Research Reagent Solutions for Mitochondrial Analysis
| Reagent / Kit | Primary Function | Specific Example & Notes |
|---|---|---|
| MitoTracker Probes (e.g., Red CMXRos, Green FM) | Labeling mitochondria in live or fixed cells for visualization [5] [10] | MitoTracker Red CMXRos is ΔΨm-dependent; MitoTracker Green is ΔΨm-independent (useful for mass). |
| JC-1 Dye | Ratiometric measurement of ΔΨm [5] | Shifts emission from green (~529 nm) to red (~590 nm) with increasing polarization. Preferred over single-wavelength dyes. |
| Seahorse XF Cell Mito Stress Test Kit | Profile key parameters of mitochondrial function in live cells [8] | Includes oligomycin, FCCP, and rotenone/antimycin A in a standardized, optimized kit. |
| MitoSOX Red Mitochondrial Superoxide Indicator | Selective detection of mitochondrial superoxide in live cells [5] | Excitation/emission ~510/580 nm. Critical for assessing oxidative stress in pathological models. |
| CellProfiler / MitoGraph Software | Automated, high-throughput analysis of mitochondrial morphology from images [10] | CellProfiler is GUI-based and versatile; MitoGraph is excellent for complex 3D network analysis. |
Experimental Protocols
Protocol 1: Integrated Analysis of Δψm and Morphology in Live Cells
Objective: To simultaneously quantify mitochondrial membrane potential and network morphology in a single cell population, controlling for heterogeneity.
Materials:
- Culture of target cells (e.g., H9c2 cardiomyocytes, neuronal cell lines)
- JC-1 dye or TMRM
- MitoTracker Green FM or other ΔΨm-independent dye
- Confocal or super-resolution microscope (e.g., STED)
- Imaging chamber with controlled CO₂ and temperature
- Analysis software (e.g., ImageJ/Fiji, CellProfiler, MitoGraph)
Methodology:
- Cell Preparation: Seed cells at an appropriate density on glass-bottom dishes 24-48 hours before the experiment.
- Dye Loading:
- For JC-1: Incubate cells with 2-5 µM JC-1 in culture medium for 15-30 minutes at 37°C. Rinse gently with pre-warmed PBS or imaging buffer.
- For TMRM: Load cells with 20-100 nM TMRM for 30 minutes. For quench mode, use a lower concentration (e.g., 10-30 nM) in the presence of verapamil to block dye export.
- Co-staining (Optional but Recommended): Co-stain with MitoTracker Green FM (50-200 nM) for the last 15 minutes of the incubation to label total mitochondrial mass independently of ΔΨm.
- Image Acquisition: Acquire Z-stack images using a confocal or STED microscope.
- For JC-1: Capture green emission channel (~529 nm) and red emission channel (~590 nm).
- For TMRM: Capture the TMRM signal and the MitoTracker Green signal in separate channels.
- Image Analysis:
- Pre-processing: Deconvolve images if necessary. Create a maximum intensity projection.
- Segmentation: Use the MitoTracker Green or the brightfield channel to create a mitochondrial mask. This avoids bias from ΔΨm-dependent dye intensity.
- Morphometry: Apply the mask to the morphological analysis pipeline. Calculate parameters like Form Factor, Aspect Ratio, and Branch Count using tools in ImageJ (e.g., MorphoLibJ) or MitoGraph.
- ΔΨm Quantification:
- For JC-1: Calculate the ratio of the mean fluorescence intensity in the red channel to the green channel within the mitochondrial mask for each cell.
- For TMRM: Measure the mean fluorescence intensity of TMRM within the mitochondrial mask for each cell.
- Data Correlation: Plot ΔΨm (ratio or intensity) against morphological parameters (e.g., Form Factor) on a per-cell basis to identify correlations.
Protocol 2: Assessment of Mitochondrial Bioenergetic Function in a Diabetic Cardiomyopathy Cell Model
Objective: To profile the mitochondrial respiratory function of cardiomyocytes under conditions mimicking diabetic lipotoxicity.
Materials:
- Seahorse XF Analyzer (e.g., XFe24 or XFe96)
- Seahorse XF Base Medium
- Seahorse XF Cell Mito Stress Test Kit (Oligomycin, FCCP, Rotenone/Antimycin A)
- Substrates: Glucose, Palmitate conjugated to BSA, Glutamine
- Cardiomyocyte cell line or primary cells
Methodology:
- Cell Culture & Substrate Optimization:
- Culture cells under standard conditions and then pre-incubate a subset with a pathophysiologically relevant concentration of palmitate (e.g., 0.4-0.6 mM) for 24-48 hours to induce lipotoxicity [24].
- On the day of the assay, seed cells into a Seahorse microplate at a optimized density.
- Assay Medium Preparation:
- Prepare Seahorse XF Base Medium supplemented with 1 mM Pyruvate, 2 mM Glutamine, and 10 mM Glucose for a "standard" condition.
- For a "diabetic" condition, supplement the medium with 0.5 mM Palmitate-BSA conjugate instead of or in addition to glucose.
- Sensor Cartridge Calibration: Hydrate the sensor cartridge in Seahorse XF Calibrant at 37°C in a non-CO₂ incubator overnight.
- Seahorse XF Mito Stress Test Execution:
- Replace cell culture medium with the pre-warmed assay media.
- Incubate the cell plate for 45-60 minutes in a non-CO₂ incubator.
- Load the stress test compounds into the injection ports of the hydrated sensor cartridge: Port A: Oligomycin, Port B: FCCP, Port C: Rotenone/Antimycin A.
- Run the Mito Stress Test program on the Seahorse XF Analyzer.
- Data Normalization & Analysis:
- Normalize the Oxygen Consumption Rate (OCR) data to cell count per well determined by a parallel assay.
- Calculate key parameters: Basal Respiration, ATP Production, Proton Leak, Maximal Respiration, and Spare Respiratory Capacity. Compare these parameters between control and palmitate-treated groups under both standard and diabetic substrate conditions.
Signaling Pathways and Experimental Workflows
Advanced Tools and Techniques: Simultaneously Probing Morphology and Membrane Potential
Core Principles of ΔΨm Measurement
What is mitochondrial membrane potential (ΔΨm) and why is it important?
The mitochondrial membrane potential (ΔΨm) is the electrical potential difference across the inner mitochondrial membrane, with the interior of the organelle being electronegative [25]. This electrochemical gradient is primarily generated by proton pumps during electron transport chain activity and serves as the driving force for ATP synthesis through oxidative phosphorylation [26] [27]. ΔΨm is an essential parameter of mitochondrial function and serves as a key indicator of cell health, as mitochondria are inherently involved in the apoptotic process [25]. During apoptosis, ΔΨm decreases due to the opening of mitochondrial permeability pores and loss of the electrochemical gradient [25].
How do fluorescent dyes like TMRE and JC-1 measure ΔΨm?
Both TMRE and JC-1 are lipophilic, cationic dyes that accumulate in active mitochondria due to the relative negative charge of the mitochondrial matrix [25] [26]. However, they operate on different fluorescence principles:
TMRE (Tetramethylrhodamine ethyl ester) is a cell-permeant, positively-charged dye that readily accumulates in active mitochondria in a potential-dependent manner [26]. Depolarized or inactive mitochondria have decreased membrane potential and fail to sequester TMRE, resulting in lower fluorescence intensity [26].
JC-1 (5,5,6,6'-tetrachloro-1,1',3,3' tetraethylbenzimi-dazoylcarbocyanine iodide) exhibits potential-dependent accumulation in mitochondria, indicated by a fluorescence emission shift from green (~529 nm) to red (~590 nm) [25]. In healthy cells with normal ΔΨm, JC-1 enters mitochondria and forms red fluorescent J-aggregates, while in apoptotic cells with diminished ΔΨm, JC-1 remains in the monomeric form and produces green fluorescence [25]. The red/green fluorescence intensity ratio is therefore a direct assessment of mitochondrial polarization state [25].
Table 1: Key Characteristics of TMRE and JC-1 Fluorescent Dyes
| Parameter | TMRE | JC-1 |
|---|---|---|
| Detection Method | Fluorescence intensity | Emission shift (red/green ratio) |
| Excitation/Emission | ~549/575 nm [26] | Monomer: 510/527 nm; J-aggregates: 585/590 nm [25] |
| Accumulation Mechanism | Potential-dependent uptake | Potential-dependent formation of J-aggregates |
| Key Advantage | Simpler quantification; suitable for kinetic studies [28] | Ratiometric measurement minimizes artifacts from dye concentration variations [25] |
| Reported Limitations | Potential fluorescence quenching at high concentrations [28] | Poor water solubility; slower membrane penetration [28] |
| Optimal Applications | Live-cell imaging, flow cytometry, plate reader assays [26] | Flow cytometry, endpoint measurements [25] [28] |
Essential Protocols and Methodologies
Standard JC-1 Staining Protocol for Flow Cytometry
Materials Required:
- JC-1 dye (lyophilized) (e.g., MitoProbe JC-1 Assay Kit, Thermo Fisher Scientific) [25]
- Carbonyl cyanide m-chlorophenyl hydrazone (CCCP) for positive control [25]
- Dimethyl sulfoxide (DMSO) [25]
- Phosphate-buffered saline (PBS) [25]
- Appropriate cell culture medium [25]
Procedure:
- Prepare a fresh 200 μM JC-1 dye stock solution by reconstituting lyophilized JC-1 with DMSO [25].
- For cells in suspension, wash cells with warm PBS (~37°C) and centrifuge at 400 × g for 5 minutes [25].
- Suspend cell pellet in 1 mL of fresh culture medium or PBS at approximately 1 × 10^6 cells/mL [25].
- Add 10 μL of 200 μM JC-1 dye (2 μM final concentration) and incubate at 37°C with 5% CO₂ for 15-30 minutes [25].
- For positive control, treat one sample with CCCP (50 μM final concentration) and incubate at 37°C for 5 minutes before staining [25].
- Wash all samples with 2 mL warm PBS and centrifuge for 5 minutes at 25°C at 400 × g [25].
- Analyze by flow cytometry equipped with a 488 nm excitation laser, using bandpass filters for fluorescein (530 nm) and phycoerythrin (585 nm) [25].
Standard TMRE Staining Protocol for Fluorescent Microscopy
Materials Required:
- TMRE dye (e.g., TMRE-Mitochondrial Membrane Potential Assay Kit, Abcam ab113852) [26]
- FCCP (carbonyl cyanide 4-(trifluoromethoxy) phenylhydrazone) for positive control [26]
- DMSO [26]
- PBS with 0.2% BSA [26]
Procedure:
- Prepare TMRE working solution in appropriate buffer (typically 100-500 nM) [26].
- For positive control, add FCCP (typically 10-100 μM) to control cells and incubate for 10 minutes before staining [26].
- For adherent cells (e.g., HeLa cells cultured on coverslips), incubate with TMRE working solution (e.g., 200 nM) for 20-30 minutes in culture media at 37°C [26].
- Wash cells briefly with PBS or PBS/0.2% BSA [26].
- For suspension cells, stain and wash as above, then transfer to a slide and immobilize under a coverslip for imaging [26].
- Image immediately using appropriate fluorescence filters (excitation/emission ~549/575 nm) [26].
- Note: TMRE is only suitable for live cells and is not compatible with fixation [26].
How should I select the appropriate detection instrument for my ΔΨm measurements?
The choice of detection instrument depends on your experimental needs regarding temporal resolution, throughput, and spatial information [28]:
Laser Scanning Confocal Microscopy (LSCM) is most suitable for detecting dynamic changes in ΔΨm and provides spatial resolution of mitochondrial localization [28]. It allows visual verification of mitochondrial morphology but has lower throughput than other methods [28].
Flow Cytometry enables high-throughput analysis of cell populations and is excellent for detecting heterogeneity in ΔΨm across cell populations [25] [28]. However, it provides no spatial information and is generally used for endpoint measurements rather than kinetics [28].
Fluorescence Plate Readers offer good throughput for screening applications and enable simultaneous analysis of multiple samples [25] [28]. They are well-suited for pharmacological studies and kinetic measurements, though without single-cell resolution [28].
Table 2: Comparison of Detection Instruments for ΔΨm Measurement
| Instrument | Temporal Resolution | Spatial Information | Throughput | Best Suited For |
|---|---|---|---|---|
| Laser Scanning Confocal Microscopy | High (for kinetics) | Excellent (subcellular) | Low | Dynamic measurements; morphological assessment [28] |
| Flow Cytometry | Medium | None | High | Population analysis; heterogeneity studies [25] [28] |
| Fluorescence Plate Reader | High (kinetics possible) | None | High | Screening; pharmacological studies [25] [28] |
Troubleshooting Common Experimental Issues
Why do I observe inconsistent JC-1 staining between experiments?
JC-1 has poor water solubility and requires careful preparation to ensure consistent results [28]. Always prepare fresh JC-1 stock solutions immediately before use and ensure the dye powder is completely dissolved in DMSO, with no aggregates visible [25]. Additionally, repeatedly calibrate the culture concentration in your experiment as JC-1 may require optimization for different cell types [28].
What causes unexpectedly high background fluorescence in TMRE staining?
High background in TMRE staining can result from several factors:
- Excessive dye concentration: TMRE can cause fluorescence quenching at high concentrations [28]. Titrate the dye concentration for your specific cell type.
- Insufficient washing: Ensure adequate washing with PBS/0.2% BSA after staining to remove unincorporated dye [26].
- Non-specific binding: Use appropriate controls (FCCP/CCCP) to distinguish specific from non-specific staining [25] [26].
- Carrier solvent fluorescence: Ensure all carriers, cleaners, and solvents are NDT-approved, as non-specific materials may fluoresce and create background [29].
How does mitochondrial morphology affect ΔΨm measurements?
Changes in mitochondrial morphology can significantly impact ΔΨm measurements and lead to misinterpretation [30]. Laser-induced damage during imaging can cause transformations in mitochondrial morphology, making it impossible to differentiate treatment effects from laser-induced artifacts [30]. Additionally, techniques with high-intensity illumination (like confocal microscopy) may cause photodamage and photobleaching, altering both morphology and membrane potential [28] [30]. Always include appropriate controls and validate that your imaging conditions don't induce morphological changes in control samples.
What are the key differences in sensitivity between TMRE and JC-1?
Comparative studies indicate that TMRE generally shows higher sensitivity than JC-1 for detecting ΔΨm changes, particularly in cardiac H9c2 cells during oxidative stress-induced mitochondrial injury [28]. TMRE is taken up by live cells more rapidly and reversibly, making it preferable for kinetic studies [28]. However, JC-1's rationetric measurement can be advantageous in situations where dye loading concentration varies between samples [25].
Research Reagent Solutions
Table 3: Essential Reagents for ΔΨm Measurements
| Reagent/Chemical | Function | Example Application |
|---|---|---|
| JC-1 Dye | Fluorescent potentiometric dye that forms J-aggregates at high ΔΨm | Monitoring apoptosis; mitochondrial viability assessment [25] |
| TMRE Dye | Cell-permeant cationic dye that accumulates in active mitochondria | Live-cell imaging; flow cytometry; high-throughput screening [26] |
| CCCP | Protonophore uncoupler; positive control for membrane depolarization | Validation of JC-1 staining specificity [25] |
| FCCP | Ionophore uncoupler of oxidative phosphorylation; positive control | Elimination of mitochondrial membrane potential for TMRE controls [26] |
| DMSO | Solvent for dye reconstitution | Preparation of stock dye solutions [25] |
| PBS with 0.2% BSA | Washing buffer | Removal of unincorporated dye after staining [26] |
Frequently Asked Questions (FAQs)
Can I use TMRE and JC-1 in combination with other fluorescent probes?
Yes, both TMRE and JC-1 can be used in multiparametric staining approaches [28]. However, careful consideration of spectral overlap is essential. For example, JC-1 has been successfully combined with the fluorescent nuclear acid stain TOTO-3 to discriminate intact, apoptotic, and necrotic/late apoptotic cells by flow cytometry [28]. Always verify compatibility through control experiments when establishing new multiparametric panels.
How critical are the incubation time and temperature for dye loading?
Incubation time and temperature are critical parameters that significantly impact dye loading [25] [26]. Standard protocols recommend incubation at 37°C with 5% CO₂ for 15-30 minutes [25]. Deviating from these conditions can lead to incomplete loading or excessive dye accumulation, both of which compromise data quality. Always include control samples to verify optimal staining conditions.
What are the most appropriate controls for ΔΨm experiments?
Essential controls include:
- Positive control: Cells treated with uncouplers (CCCP for JC-1; FCCP for TMRE) to dissipate ΔΨm and verify specificity of staining [25] [26].
- Untreated control: Cells without any treatment to establish baseline ΔΨm [25].
- Vehicle control: Cells treated with dye solvent (typically DMSO) alone to exclude solvent effects [25].
- Morphology control: Validation that experimental conditions themselves don't alter mitochondrial morphology independent of the treatment being tested [30].
Why is it important to consider mitochondrial morphology when interpreting ΔΨm data?
Mitochondrial morphology is intrinsically linked to function, and changes in morphology can both affect and reflect alterations in ΔΨm [30]. Techniques that induce morphological changes (e.g., through laser damage during imaging) can confound ΔΨm measurements, making it impossible to differentiate true treatment effects from artifacts [30]. Furthermore, discrete changes in mitochondrial morphology often accompany early stages of apoptosis and other cellular stresses, serving as important complementary data to ΔΨm measurements [30].
Troubleshooting Guide: Common Issues in Correlative Microscopy
Problem 1: Poor Contrast or Lack of Cellular Detail in SEM Image Stacks
- Question: Why are my cellular structures lacking detail and contrast in the final FIBSEM/SEM stack, making segmentation and analysis difficult?
- Answer: This is often due to suboptimal staining and embedding protocols during sample preparation. Inadequate heavy metal staining fails to provide sufficient electron density.
- Solution: Implement a robust freeze-substitution and staining protocol. A method that has proven successful involves high-pressure freezing followed by freeze-substitution in a solution containing 1% osmium tetroxide, 0.5% uranyl acetate, and 0.5% glutaraldehyde in acetone [31]. This combination enhances membrane contrast and preserves ultrastructure with minimal artifacts. Avoid protocols that lack paraformaldehyde or use reduced concentrations of uranium and osmium, as these produce poor staining and preservation [31].
Problem 2: Difficulty Locating Specific Features of Interest in the SEM Volume
- Question: I have identified a region of interest (e.g., a specific mitochondrion) using live-cell confocal microscopy, but I cannot reliably find it in the large-volume SEM dataset for correlation. What can I do?
- Answer: The challenge lies in accurate correlation between the light and electron microscopy data.
- Solution: Use intrinsic cellular structures as fiduciary landmarks. Lipid droplets, which are easily identifiable in both confocal and SEM images, can serve as excellent intrinsic markers for correlation without needing to add external fiducials [32]. Alternatively, incubating cells with inert, fluorescently labeled particles (e.g., 100 nm gold beads) can provide clear landmarks in both modalities [31]. For software-assisted correlation, develop or use automated image processing tools that register the confocal fluorescence volume to the SEM image stack using these landmarks [31].
Problem 3: Mitochondrial Swelling or Artifactual Morphology Changes
- Question: My samples show swollen mitochondria or other morphological artifacts that were not present in the live-cell imaging data. What is causing this?
- Answer: These artifacts can arise from chemical fixation or osmotic stress during sample preparation. Furthermore, in nanoparticle studies, mitochondrial swelling can be a genuine stress response to the treatment itself [32].
- Solution:
- For preparation artifacts: Prioritize high-pressure freezing over chemical fixation for initial preservation. This technique vitrifies water instantly, preventing ice crystal formation and better preserving native cellular ultrastructure [31] [5].
- For biological responses: Include appropriate controls. Compare treated samples with untreated controls that have undergone the exact same preparation protocol. This helps distinguish genuine biological stress responses (e.g., from nanoparticle uptake [32]) from preparation-induced artifacts.
Problem 4: Challenges in Automated Segmentation of Mitochondria from 3D-EM Stacks
- Question: Manually segmenting mitochondria from large 3D-SEM stacks is time-consuming. What tools are available for automated segmentation, and how reliable are they?
- Answer: Several open-source software packages are available, but their effectiveness depends on mitochondrial morphology and image quality.
- Solution: Utilize established image analysis pipelines. CellProfiler and MitoGraph are two widely used platforms [10].
- CellProfiler is versatile with a graphical interface and can classify mitochondria into networked, fragmented, and swollen types using morphological features like area and shape [10]. It typically requires co-staining of nuclei for analysis.
- MitoGraph is specifically designed for 3D mitochondrial networks. It processes 3D images to convert mitochondrial networks into surfaces and node-and-edge skeletons, allowing for quantification of volume, length, and connectivity [10]. It was initially designed for yeast but works well in mammalian cells like endothelial and kidney cells.
Frequently Asked Questions (FAQs)
General Workflow
Q: What is the core advantage of using a 3D Correlative Light and Electron Microscopy (3D-CLEM) workflow?
- A: 3D-CLEM unambiguously bridges functional dynamics observed in live cells (via fluorescence microscopy) with high-resolution 3D ultrastructural context (via FIBSEM), allowing researchers to precisely localize fluorescently tagged events, such as nanoparticle uptake, within a detailed cellular landscape [32].
Q: What are the key steps in a basic 3D-CLEM workflow?
- A: A standard workflow involves: 1) Live-cell confocal imaging of fluorescently labeled samples. 2) Chemical fixation or high-pressure freezing and freeze-substitution. 3) Heavy metal staining and resin embedding. 4) Trimming the resin block to the region of interest. 5) Acquisition of the 3D volume using FIBSEM. 6) Software-based correlation of the light and electron microscopy datasets [31] [32].
Sample Preparation
Q: Why is heavy metal staining critical for SEM in CLEM?
Q: Can I use my standard TEM preparation protocol for 3D FIBSEM?
- A: While similar, protocols for 3D FIBSEM often require optimization for larger, whole-cell samples. Staining penetration and block hardness are crucial to prevent artifacts like charging or uneven ablation during the ion milling process [31].
Data Analysis & Interpretation
Q: How can I quantify changes in mitochondrial morphology from my 3D datasets?
- A: After segmentation (using tools like MitoGraph or CellProfiler), key quantifiable parameters include: volume, surface area, form factor (complexity), aspect ratio (elongation), and mitochondrial interconnectivity [10]. Tracking these metrics over time or between conditions provides quantitative insight into mitochondrial dynamics.
Q: In the context of mitochondrial membrane potential (Δψm) research, why is it important to control for morphology?
- A: Mitochondrial structure and function are deeply intertwined. A fragmented mitochondrial network is often associated with different bioenergetic capacities and ROS production compared to a fused, networked one [5] [10]. Changes in Δψm could be a direct consequence of a morphological shift (e.g., fission) rather than the primary effect of the treatment being studied. Therefore, quantifying morphology is essential for the correct interpretation of Δψm data [10].
Experimental Protocol: A Detailed Workflow for 3D-CLEM
This protocol outlines the steps for correlative live-cell imaging and FIBSEM of mammalian cells, incorporating best practices for preserving mitochondrial morphology.
1. Live-Cell Confocal Microscopy:
- Culture cells in imaging-appropriate dishes.
- Transfer the dish to a confocal microscope equipped with an environmental chamber (37°C, 5% CO₂).
- Locate cells of interest and acquire high-resolution z-stacks of the fluorescent labels (e.g., for mitochondria, nanoparticles, or fiduciary beads) [31] [32]. Note: Precisely document the stage coordinates.
2. Sample Preparation for EM (High-Pressure Freezing & Freeze-Substitution):
- High-Pressure Freezing: Immediately after imaging, mix cells with a cryo-protectant like 20% BSA. Load a small volume (e.g., 0.7 μL) into a specimen planchette and vitrify using a high-pressure freezer (e.g., Leica EMPACT) [31].
- Freeze-Substitution:
- Transfer frozen samples to a freeze-substitution device (e.g., Leica AFS) pre-cooled to -90°C, containing a staining solution of 1% osmium tetroxide, 0.5% uranyl acetate, and 0.5% glutaraldehyde in acetone [31].
- Run a controlled warming program: Hold at -90°C for 7 hours; warm to -25°C at 2°C/hr; hold at -25°C for 12 hours; warm to 0°C at 2°C/hr; hold at 0°C for 3 hours [31].
- On ice, wash the samples with cold acetone 3 times for 40 minutes each to remove residual OsO₄.
- Resin Infiltration and Embedding:
- Infiltrate with a graded series of Embed-812 resin in acetone (e.g., 1:2, then 2:1 resin:acetone ratios), each step for several hours.
- Transfer to 100% resin, then bake in a 60°C oven for 24 hours to polymerize [31].
3. Region of Interest Location and Block Trimming:
- Under a stereomicroscope, carefully separate the polymerized resin block from the planchette.
- Using a razor blade and ultramicrotome, trim the resin block into a pyramid shape, exposing the cell layer of interest. The previously recorded confocal coordinates guide the trimming.
4. FIBSEM Data Acquisition:
- Mount the resin block on a SEM stub and sputter-coat with a thin metal layer to prevent charging.
- Load the sample into a dual-beam FIBSEM microscope.
- Use the confocal map to navigate to the approximate region. Use intrinsic features (like lipid droplets [32]) or fiduciary beads [31] for fine alignment.
- Set up an automated serial milling and imaging routine. A gallium ion beam is used to abrade away a thin layer of material (e.g., 10-20 nm), followed by imaging of the newly exposed block face with the electron beam. This cycle repeats, generating a stack of hundreds to thousands of images [31].
5. Image Processing and 3D Correlation:
- Registration: Use software tools to align the 3D confocal dataset with the FIBSEM image stack based on the fiduciary markers [31].
- Segmentation: Use automated (e.g., MitoGraph, CellProfiler) or manual tools to trace organelles of interest within the 3D EM volume [10].
- Analysis: Quantify morphological parameters and directly correlate the fluorescent signal from the confocal data with the ultrastructural context from the EM data.
Table 1: Key Parameters for Quantifying Mitochondrial Morphology from 3D Image Stacks [10]
| Parameter | Description | Interpretation |
|---|---|---|
| Volume (μm³) | The total 3D space occupied by a mitochondrion. | Indicates organelle size and bioenergetic capacity. |
| Surface Area (μm²) | The total area of the outer mitochondrial membrane. | Related to the capacity for metabolite exchange and interaction with other organelles. |
| Aspect Ratio | Ratio of the length of the major axis to the minor axis. | Measures elongation; a higher value indicates a more elongated, tubular mitochondrion. |
| Form Factor | (Perimeter²) / (4π × Area). A circle has a value of 1. | Measures complexity and branching; a higher value indicates a more complex, branched structure. |
| Interconnectivity | Derived from skeleton analysis; describes how networked individual mitochondria are. | A high degree of interconnectivity is often associated with a fused, networked state. |
Table 2: Staining Protocol Comparison for EM Contrast [31]
| Staining Solution Composition | Resulting Contrast & Preservation |
|---|---|
| 1% OsO₄, 0.5% Uranyl Acetate, 0.5% Glutaraldehyde in Acetone | High contrast, minimal artifacts. Recommended for high-resolution 3D imaging of whole mammalian cells. |
| Osmium & Uranyl Acetate with Glutaraldehyde (without BSA) | Variable results; may lead to poor preservation. |
| BSA with only 0.5% Uranyl Acetate (no OsO₄) | Poor staining and preservation; insufficient for detailed ultrastructural analysis. |
Research Reagent Solutions
Table 3: Essential Materials for 3D-CLEM Experiments
| Reagent / Material | Function / Application |
|---|---|
| MitoTracker Dyes (e.g., MitoTracker Red/Green) | Fluorescent live-cell staining of mitochondria for confocal microscopy [5] [10]. |
| Osmium Tetroxide (OsO₄) | Heavy metal stain that fixes and contrasts lipids, primarily membranes, for EM [31]. |
| Uranyl Acetate | Heavy metal stain that enhances contrast of nucleic acids and proteins for EM [31]. |
| Embed-812 Resin | A standard epoxy resin for embedding biological samples, providing stability for sectioning and FIBSEM [31]. |
| Gold Beads (e.g., 100 nm) | Inert, electron-dense particles that can be fluorescently labeled; used as external fiduciary markers for correlation [31]. |
| MitoGraph Software | Open-source tool for automated 3D analysis of mitochondrial morphology and networking from fluorescence image stacks [10]. |
| CellProfiler Software | Open-source platform for creating customized image analysis pipelines, including mitochondrial classification [10]. |
Workflow and Signaling Pathway Diagrams
3D-CLEM Experimental Workflow
Mitochondrial Dynamics and Function
Mitochondria are dynamic signaling organelles that actively transduce biological information, going beyond their traditional role as mere cellular powerhouses [33]. Their functional state, particularly measured by the Oxygen Consumption Rate (OCR), is intrinsically linked to their dynamic morphology. Mitochondria undergo constant morphological remodeling, transitioning between interconnected tubular networks and fragmented punctate structures, processes governed by fission and fusion [34]. Understanding this relationship is crucial for accurate interpretation of respirometry data, especially in research focused on mitochondrial membrane potential (ΔΨm). This technical support guide provides detailed methodologies and troubleshooting advice for researchers investigating the connection between mitochondrial respiratory function and morphological states, with particular emphasis on controlling for morphological variables in ΔΨm interpretation studies.
Essential Research Reagent Solutions
The table below details key reagents essential for conducting integrated respirometry and morphology studies.
Table 1: Key Research Reagents for Integrated Respirometry and Morphology Studies
| Reagent Name | Function/Application | Key Considerations |
|---|---|---|
| Oligomycin | ATP synthase inhibitor; distinguishes ATP-linked respiration from proton leak [35]. | Used in OCR stress tests; an increase in OCR after oligomycin can indicate compensatory mechanisms [36]. |
| FCCP/CCCP | Chemical uncouplers; collapse the proton gradient and stimulate maximum electron transport chain capacity [35] [37]. | Determines maximal respiratory capacity; titration is critical to avoid toxicity [36]. |
| Rotenone & Antimycin A | Inhibitors of Complex I and III, respectively; shut down mitochondrial respiration [35]. | Used to measure non-mitochondrial respiration; confirm complete inhibition for accurate baseline. |
| TMRM/TMRE | Fluorescent, cationic dyes for quantifying ΔΨm [19] [37]. | Used in non-quenching mode for quantitative measurements; loading concentration and time are critical. |
| JC-1 | Ratiometric fluorescent dye for ΔΨm; forms aggregates (red) at high potential and monomers (green) at low potential [38] [39]. | Provides a qualitative and quantitative measure; sensitive to changes but can be affected by intrinsic artifacts. |
| MitoTracker Probes | Cell-permeant dyes for labeling mitochondria in live cells, useful for morphological analysis [34]. | staining conditions must be optimized to avoid inducing mitochondrial stress. |
| MDIVI-1 | Inhibitor of mitochondrial fission [34]. | Used to experimentally control morphology and probe function of fused networks. |
| Mitochondrial Fusion Promoter M1 | Compound that promotes mitochondrial fusion [34]. | Used to experimentally control morphology and probe function of fused networks. |
Core Experimental Protocols
Protocol: Oxygen Consumption Rate (OCR) Measurement using a Seahorse XF Analyzer
This protocol is adapted for assessing mitochondrial function in intact cells and can be modified for isolated mitochondria [35] [40].
Key Applications:
- Generating bioenergetic profiles of cells.
- Investigating the mechanism of action of compounds affecting mitochondrial function.
- Assessing mitochondrial adaptation in different physiological or disease contexts.
Materials and Reagents:
- Seahorse XF Analyzer (e.g., XF24, XFp) and corresponding cell culture microplates [35].
- Assay Medium: Unbuffered DMEM (pH 7.4) or Mitochondrial Assay Solution (MAS) for isolated organelles [35] [40].
- Compound Injections: Typically, 1-4 µM Oligomycin, 0.5-2 µM FCCP, and 0.5-1 µM Rotenone/Antimycin A (concentrations must be optimized for each cell type) [35].
- Trypsin/EDTA for cell detachment.
- Hemacytometer or automated cell counter.
Detailed Methodology:
- Plate Coating: If required, coat the Seahorse microplate with an appropriate substrate (e.g., poly-D-lysine, collagen) and allow it to dry.
- Cell Seeding:
- Harvest cells and resuspend them in complete growth medium.
- Seed cells in the microplate at an optimized density (e.g., 20,000-80,000 cells per well for a 24-well plate) to form a uniform monolayer without over-confluence [35].
- Incubate the plate for 24-48 hours in a 37°C, 5% CO₂ incubator to allow for proper attachment.
- Sensor Cartridge Hydration:
- The day before the assay, load the sensor cartridge with XF Calibrant solution and incubate it overnight at 37°C in a non-CO₂ incubator.
- Assay Day Preparation:
- Prepare drug compounds in assay medium at 10X the final desired concentration.
- Load the ports of the hydrated sensor cartridge with the compounds.
- Replace the growth medium in the cell plate with assay medium (e.g., unbuffered DMEM, pH 7.4).
- Incubate the cell plate for 45-60 minutes in a non-CO₂ incubator at 37°C to allow temperature and pH equilibration.
- Instrument Run:
- Calibrate the sensor cartridge in the analyzer.
- Replace the utility plate with the cell culture plate to initiate the assay.
- The standard Mito Stress Test protocol involves sequential measurements: basal respiration (3-4 measurement cycles), followed by injections of Oligomycin, FCCP, and finally Rotenone/Antimycin A, with 3-4 measurement cycles after each injection [35].
Data Analysis: Key parameters are derived from the OCR trace:
- Non-Mitochondrial Respiration: OCR after Rotenone/Antimycin A.
- Basal Respiration: Last measurement before first injection minus Non-Mitochondrial Respiration.
- ATP-Linked Respiration: Last measurement before Oligomycin minus minimum rate after Oligomycin.
- Maximal Respiration: Maximum rate after FCCP minus Non-Mitochondrial Respiration.
- Spare Respiratory Capacity: Maximal Respiration minus Basal Respiration.
Protocol: Quantitative Analysis of Mitochondrial Morphology
This protocol describes using high-content imaging and analysis software like MitoRadar to quantify mitochondrial architecture [34].
Key Applications:
- Objectively classifying mitochondrial networks (e.g., tubular, fragmented).
- Generating "mito-signatures" as biomarkers of cellular health or stress.
- Correlating morphological states with functional parameters like OCR.
Materials and Reagents:
- High-content imaging system (e.g., confocal microscope like Opera Phenix) [34].
- Cell lines of interest (e.g., A549, U2OS).
- Live-cell fluorescent dyes (e.g., MitoTracker Deep Red FM) [34].
- Cell staining dyes (e.g., Hoechst 33342 for nuclei, CellMask Green for plasma membrane) [34].
- 96-well black polystyrene microplates for imaging.
Detailed Methodology:
- Cell Preparation:
- Cell Staining:
- Image Acquisition:
- Image live cells using a high-content confocal system (e.g., Opera Phenix with a 63x water immersion lens) [34].
- Acquire 5 fields per well to ensure a robust cell population for analysis.
- Laser power and exposure time should be optimized to maximize signal without saturation and to minimize photobleaching.
- Image Analysis with MitoRadar:
- Use the software's segmentation module, which employs deep learning, to detect cells, nuclei, and mitochondria [34].
- The software computes over 100 shape descriptors, providing a multiscale analysis from single mitochondria to population-level clusters.
- The output is a quantitative "mito-signature" that can be compared across experimental conditions.
Troubleshooting Guides & FAQs
Frequently Asked Questions (FAQs)
Q1: How do I decide between using isolated mitochondria versus intact cells for my respirometry experiments? The choice depends on your scientific question. Use isolated mitochondria when investigating mechanisms intrinsic to the organelle (e.g., electron transport chain complex activity, transporter function) or when studying tissues where primary cell isolation is difficult [36]. Use intact cells to study mitochondrial function in a more physiological context, including the effects of cell signaling, substrate uptake, and cytoplasmic enzyme activity [36]. For most studies on ΔΨm interpretation, intact cells are preferred as they maintain the native cellular environment.
Q2: Why is it critical to control for mitochondrial morphology when interpreting ΔΨm data? Mitochondrial morphology is tightly coupled to function. Fragmented networks are often associated with decreased OCR and reduced ΔΨm, while fused networks can support higher bioenergetic capacity [34]. If an experimental intervention (e.g., a drug) independently alters morphology, any observed change in ΔΨm could be a secondary consequence of the structural change rather than a direct effect on, for example, the electron transport chain. Therefore, simultaneous quantification of morphology is essential for accurate mechanistic interpretation.
Q3: What are the best practices for quantifying ΔΨm to avoid common artifacts?
- Use quantitative dyes correctly: For TMRM/TMRE, use the dye in non-quenching mode and at low concentrations to ensure distribution is governed by the Nernst equation [19].
- Account for plasma membrane potential (ΔΨp): The distribution of cationic dyes is influenced by both ΔΨm and ΔΨp. Using a ΔΨp indicator or ensuring dye equilibrium is critical for accurate ΔΨm measurement [19].
- Perform kinetic measurements: Use live-cell imaging platforms (e.g., Incucyte) to monitor ΔΨm in real-time, which captures transient changes and provides more information than single end-point measurements [37].
- Include controls: Always use control compounds like FCCP (depolarizer) and Oligomycin (hyperpolarizer) to validate your assay [37].
Q4: My basal OCR is low and I see no response to FCCP. What could be wrong?
- Low Cell Viability/Number: Ensure cells are healthy and seeded at an appropriate density.
- Improper FCCP Titration: FCCP has a narrow optimal concentration range. Too little will not uncouple, while too much is toxic. A titration experiment (e.g., 0.5-2 µM) is essential for each new cell type [36].
- Incorrect Assay Medium: The assay medium must be unbuffered for pH measurements and contain appropriate energy substrates (e.g., glucose, pyruvate). Using PBS or other substrate-free media will deplete cells of energy and suppress respiration.
Troubleshooting Common Problems
Table 2: Troubleshooting Guide for Respirometry and Morphology Experiments
| Problem | Potential Causes | Solutions |
|---|---|---|
| High Well-to-Well Variability in OCR | Inconsistent cell seeding density; bubbles in the microchamber during measurement; uneven cell attachment. | Use accurate cell counting methods; ensure a single-cell suspension when seeding; tap plate gently to dislodge bubbles after loading assay medium. |
| No Response to Oligomycin | ATP synthase is not inhibited; cells are not relying on oxidative phosphorylation for ATP. | Verify oligomycin stock concentration and activity; ensure injection ports are dispensing correctly; for highly glycolytic cells, the ATP-linked respiration may be low. |
| Excessive Cell Death After Assay | Toxicity from test compounds; osmotic shock from assay medium; prolonged time out of CO₂ incubator. | Titrate drug concentrations; ensure osmolarity of assay medium matches growth medium; minimize equilibration time outside the incubator. |
| Poor Segmentation in Morphological Analysis | Low signal-to-noise ratio in images; over-confluent cultures; dye concentration too high/low. | Optimize laser power and exposure time during acquisition; seed cells at lower density; perform a dye titration curve to find the optimal concentration. |
| Inconsistent ΔΨm Measurements | Dye not at equilibrium; ΔΨp changes are confounding results; dye quenching. | Follow established loading protocols for time and temperature [19]; use a ΔΨp-insensitive dye or control for ΔΨp; use lower dye concentrations to avoid quenching. |
Visualizing the Workflow and Relationships
Diagram 1: Interrelationship between key experimental variables in morpho-functional studies. An intervention affects both morphology and function, and integrated analysis is required to link them, while controlling for confounding variables.
Diagram 2: Integrated experimental workflow for correlative analysis. The process involves parallel measurement of function and morphology on matched samples, followed by integrated data analysis to establish a direct correlation.
The integrated analysis of mitochondrial membrane potential (ΔΨm) and morphology is crucial for advancing our understanding of mitochondrial function in health and disease. Research demonstrates that mitochondrial ultrastructure and bioenergetic function are intimately connected; for instance, cristae dissolution and disorganization directly impair oxidative phosphorylation (OXPHOS) activity [41]. Similarly, mitochondrial network fragmentation often precedes the collapse of ΔΨm during apoptotic signaling [42]. This protocol establishes a standardized framework for concurrent assessment, enabling researchers to control for morphological artifacts in ΔΨm interpretation and uncover authentic functional relationships.
The dynamic nature of mitochondrial structure necessitates simultaneous measurement, as morphology can change rapidly in response to experimental conditions or cellular stressors. This guide provides detailed methodologies for coordinated imaging, troubleshooting for common artifacts, and analytical approaches to deconvolve the complex interplay between structure and function.
Core Principles and Key Challenges
Foundational Concepts
The mitochondrial membrane potential (ΔΨm) represents the electrical gradient across the inner mitochondrial membrane, typically ranging from -108 mV to -158 mV in functioning mitochondria [43]. This potential is a central intermediate in oxidative energy metabolism, driving ATP synthesis and serving as a key indicator of mitochondrial health [44]. However, ΔΨm interpretation requires caution, as it exhibits a narrow dynamic range in coupled mitochondria and can be maintained through different metabolic states that may not reflect normal function [27].
Morphometric parameters provide essential structural context for interpreting ΔΨm measurements. Significant ultrastructural remodeling occurs in pathological states, including cristae dissolution, vacuolization, and changes in three-dimensional architecture [41]. Advanced imaging reveals that these morphological changes directly impact bioenergetic capacity by altering the surface area available for OXPHOS and the organization of electron transport chain complexes [5].
Common Technical Challenges
Table 1: Key Challenges in Coordinated ΔΨm and Morphometric Assessment
| Challenge | Impact on Data Interpretation | Potential Solutions |
|---|---|---|
| Dye-Dependent Artifacts | Non-Nernstian probe accumulation (e.g., JC-1 aggregates) distorts ΔΨm readings [43] | Use equilibrium-distributing dyes (TMRM) with proper quenching validation [27] |
| Morphology-Induced Artifacts | Fragmented networks show altered dye binding capacity independent of ΔΨm [42] | Normalize fluorescence to morphological parameters; use complementary assays |
| Temporal Disconnect | Sequential measurement fails to capture rapid structure-function coupling | Implement simultaneous imaging platforms; synchronize data acquisition |
| Sample Preparation Effects | Fixation alters both morphology and potential measurements | Correlate live-cell and fixed-cell readouts; optimize minimal processing |
Research Reagent Solutions
Table 2: Essential Reagents for Coordinated Mitochondrial Assessment
| Reagent Category | Specific Examples | Function & Application Notes |
|---|---|---|
| ΔΨm Indicators | TMRM, TMRE (equilibrium-distributing) [43] | Quantitative potential measurement in millivolts; suitable for long-term imaging with minimal toxicity |
| Morphology Reporters | Mito-ESq-635 [5], MitoTracker Green [5] | High-resolution structural imaging; Mito-ESq-635 enables STED nanoscopy of cristae dynamics |
| Fixation & Preservation | Glutaraldehyde (2.5%) [41] | Ultrastructural preservation for EM correlation; requires optimization to prevent potential collapse |
| Functional Modulators | Oligomycin, FCCP, high K+ medium [43] [27] | System validation and calibration; establish ΔΨm dynamic range and response capacity |
Integrated Experimental Workflow
Simultaneous Acquisition Protocol
The following workflow enables coordinated measurement of ΔΨm and morphological parameters:
Diagram 1: Experimental workflow for coordinated ΔΨm and morphometric imaging.
Step 1: Cell Culture and Treatment
- Culture H9c2 cardiomyoblasts or primary cortical neurons under standard conditions (37°C, 5% CO₂) [41] [43]
- For disease modeling, apply high-glucose conditions (30 mM for 48 hours) to induce diabetic cardiomyopathy-associated changes [41]
- Include appropriate controls (physiological glucose: 5 mM)
Step 2: Dual-Parameter Labeling
- Load cells with 20-50 nM TMRM in standard imaging buffer for 30 minutes at 37°C [43]
- Critical: Include 100 nM PMPI (bis-oxonol plasma membrane potential indicator) to control for plasma membrane potential (ΔΨP) contributions [43]
- Co-stain with 100 nM Mito-ESq-635 or MitoTracker Green for simultaneous morphology assessment [5]
- For super-resolution imaging, use Mito-ESq-635 due to superior photostability enabling 35 nm resolution over 50 minutes [5]
Step 3: Simultaneous Image Acquisition
- Acquire images using confocal microscopy (or STED for super-resolution)
- For dynamic studies, collect time-lapse images every 30-60 seconds
- Maintain temperature at 37°C with stage-top incubator
- Image Settings:
- TMRM: excitation 548 nm, emission 575 nm (quench mode)
- Mito-ESq-635: excitation 635 nm, emission 655 nm
- Z-stacks (0.2-0.5 μm steps) for 3D reconstruction
Step 4: System Validation
- Apply 1 μM FCCP to fully depolarize mitochondria (minimum ΔΨm control)
- Apply 1 μM oligomycin to hyperpolarize mitochondria (maximum ΔΨm control) [27]
- Validate morphological integrity through correlation with TEM on replicate samples
Quantitative Analysis Pipeline
Morphometric Parameter Extraction:
- Use CellProfiler or similar automated pipeline for feature extraction [42]
- Extract 3D parameters: Volume³ᴰ, Area³ᴰ, Anisotropy, Flatness, Elongation [41]
- Quantify cristae architecture: cristae score, count, width, gap size, junction width [41]
- Classify mitochondrial subpopulations using Random Forest algorithms (networked, fragmented, swollen) [42]
Absolute ΔΨm Quantification:
- Apply biophysical model accounting for ΔΨP, matrix:cell volume ratio, binding coefficients [43]
- Calculate absolute ΔΨm in millivolts using the formula: Where R, T, F have standard thermodynamic meanings
- Normalize measurements to mitochondrial volume using morphometric data
Data Integration:
- Employ fuzzy logic modeling to explore non-linear relationships between morphology and ΔΨm [42]
- Generate correlation matrices between morphometric parameters and bioenergetic function
- Perform regression analysis to identify structural predictors of functional decline
Troubleshooting Guide & FAQs
Common Experimental Issues
Q: Our TMRM fluorescence shows unexpected increases that don't correlate with functional changes. What could be causing this?
A: This may indicate artifactual hyperpolarization readings due to:
- Plasma membrane potential (ΔΨP) changes: Always measure ΔΨP concurrently with PMPI dye [43]
- Altered mitochondrial volume: Normalize fluorescence to morphometric volume measurements [42]
- Dye binding changes: In fragmented mitochondria, altered surface area can affect dye binding independent of ΔΨm [42]
- Solution: Implement the full biophysical model including ΔΨP, volume, and binding corrections [43]
Q: How can we distinguish genuine bioenergetic impairment from morphology-induced ΔΨm artifacts?
A: Employ a multi-parametric validation approach:
- Correlate with functional assays: Measure ATP production and oxygen consumption rate (OCR) in parallel [41] [27]
- Establish morphology-function correlation: In DCM models, fragmented mitochondria show both reduced ΔΨm and impaired Complex I/III/IV/V activities [41]
- Use pharmacological challenges: Apply FCCP - if ΔΨm fails to collapse, indicates measurement artifact rather than true hyperpolarization [27]
Q: Our morphometric classification doesn't align with visual assessment of mitochondrial networks. How can we improve accuracy?
A: This suggests suboptimal feature extraction in the automated pipeline:
- Validate segmentation: Manually verify mitochondrial boundaries in a subset of images
- Expand feature set: Include texture analysis (cristae patterns) and spatial distribution metrics [42]
- Improve classifier training: Use Random Forest with expert-validated training sets of at least 500 cells per condition [42]
- Implement 3D analysis: 2D sections often misrepresent complex mitochondrial networks [41]
Technical Optimization FAQs
Q: What is the optimal balance between resolution and phototoxicity for long-term live-cell imaging?
A: For most applications:
- Standard monitoring: Confocal microscopy with low laser power (0.5-1%) and 60x objective
- High-resolution demands: STED microscopy with Mito-ESq-635, limiting continuous acquisition to <30 minutes [5]
- Compromise approach: Alternate between high-resolution snapshots (every 5-10 minutes) and continuous lower-resolution monitoring
Q: How should we handle the significant cell-to-cell heterogeneity in mitochondrial populations?
A: Heterogeneity contains biologically relevant information - do not over-normalize:
- Single-cell analysis: Maintain single-cell resolution in all analyses [42]
- Subpopulation identification: Use clustering algorithms to identify distinct mitochondrial phenotypes within populations [42]
- Report distribution metrics: Include standard deviation and heterogeneity indices in addition to mean values
Q: Can we use these methods for tissue samples or in vivo applications?
A: With modifications:
- Tissue sections: Apply the same principles but account for tissue autofluorescence and limited dye penetration
- In vivo limitations: Absolute ΔΨm quantification is challenging; focus on relative changes validated with morphological correlates
- Correlative approaches: Combine with EM on fixed samples from the same model system [41]
Data Interpretation and Validation Framework
Establishing Causality
When interpreting coordinated datasets, distinguish between correlative relationships and causal mechanisms:
- Functional-structural coupling: In diabetic cardiomyopathy, ultrastructural remodeling (cristae dissolution) precedes and predicts bioenergetic failure [41]
- Dynamic reciprocity: Mitochondrial fragmentation can both result from and amplify ΔΨm collapse during apoptosis [42]
- Validation requirement: Support imaging findings with molecular interventions (e.g., Drp1 inhibition to prevent fragmentation) and functional assays (ATP production, OCR)
Quality Control Metrics
Implement these quality controls for reliable data:
- ΔΨm validation: Resting potential in neurons should be -139 ± 11 mV; significant deviations suggest measurement artifacts [43]
- Morphological integrity: Control mitochondria should show well-aligned, defined cristae without vacuolization [41]
- Dye performance: TMRM should show Nernstian distribution validated with K⁺ depolarization [43]
- Classification accuracy: Random Forest classifier should achieve >90% concordance with manual morphological classification [42]
This coordinated assessment protocol enables researchers to dissect the complex relationships between mitochondrial structure and function while controlling for the confounding effects of morphological changes on ΔΨm interpretation. Through simultaneous measurement and integrated analysis, you can uncover authentic bioenergetic phenotypes underlying physiological processes and disease states.
Accurately interpreting mitochondrial membrane potential (ΔΨm) is fundamental to understanding cellular health and disease. However, a significant challenge arises because ΔΨm is profoundly influenced by mitochondrial morphology. Structural abnormalities, such as the formation of megamitochondria and the loss of cristae, are common in disease states and can directly confound ΔΨm measurements. This technical guide addresses these pitfalls, providing frameworks and methods to ensure that interpretations of ΔΨm are made in the crucial context of ultrastructural analysis.
Frequently Asked Questions (FAQs)
FAQ 1: Why can't I rely solely on ΔΨm measurements as an indicator of mitochondrial health? ΔΨm is a useful but incomplete metric. A seemingly normal or high ΔΨm can be misleading if it is not considered alongside mitochondrial structure. In pathological conditions, distinct ultrastructural changes occur. For instance, research in diabetic cardiomyopathy (DCM) models has shown that alongside a collapse in ΔΨm, mitochondria exhibit cristae dissolution and disorganized arrangements [41]. Furthermore, the presence of megamitochondria has been documented in the same disease context [41]. If you only measured ΔΨm, you would miss these critical structural pathologies that are integral to the disease mechanism. Always correlate ΔΨm with structural data.
FAQ 2: What are the key mitochondrial ultrastructural changes I should control for? When interpreting ΔΨm, you must specifically control for the following morphological parameters:
- Cristae Integrity: This includes cristae count, width, junction width, and overall organization. Disrupted cristae are a hallmark of dysfunction [41] [5].
- Mitochondrial Size and Shape: Be aware of both fragmentation (a shift toward smaller, punctate mitochondria) and the formation of megamitochondria (abnormally large mitochondria) [41] [10].
- Overall Network Morphology: The balance between interconnected networks and fragmented individuals is regulated by fission and fusion dynamics [5] [10].
FAQ 3: Which experimental techniques are essential for a combined structural-functional assessment? A robust assessment requires an integrated methodology:
- ΔΨm Measurement: Use sensitive probes like LDS 698, TMRM, or JC-1 in live cells [45] [5].
- 3D Ultrastructural Analysis: Employ Scanning Electron Microscopy (SEM) with 3D reconstruction to visualize surface details and cristae architecture in a volumetric context [41].
- 2D Ultrastructural Analysis: Transmission Electron Microscopy (TEM) remains the gold standard for high-resolution 2D imaging of cristae and internal membrane structure [41] [46].
- Dynamic and Network Analysis: Use confocal or super-resolution microscopy (e.g., STED) with fluorescent tags (e.g., MitoTracker) to analyze fission/fusion dynamics and overall network morphology in live cells [5] [10].
Troubleshooting Guide: ΔΨm Interpretation Challenges
| Challenge | Root Cause | Solution & Control Strategy |
|---|---|---|
| Normal ΔΨm with impaired ATP production | Cristae loss or disorganization. This reduces the surface area for ATP synthase, uncoupling the membrane potential from its functional output [41] [5]. | Quantify cristae morphology via TEM. Measure ATP levels and OXPHOS complex activity concurrently with ΔΨm [41]. |
| Unexpectedly high ΔΨm readings | Proton leakage or ion channel dysfunction. This can hyperpolarize the membrane, but the energy is wasted and not used for ATP production [41]. | Assess proton leak kinetics (e.g., using an O2k system). Measure the oxygen consumption rate (OCR) linked to ATP production [41]. |
| Inconsistent ΔΨm signals within a cell population | Heterogeneous mitochondrial populations. The presence of a mix of megamitochondria, fragmented mitochondria, and healthy networks [41] [10]. | Use high-resolution imaging (confocal/STED) instead of bulk assays. Perform single-cell analysis to correlate the ΔΨm signal with the morphology of individual mitochondria [5] [10]. |
| Dye-specific artifacts in ΔΨm measurement | Probe limitations. Dyes like MitoTracker covalently bind and don't reflect dynamic changes; JC-1 can form aggregates and give nonspecific staining [45]. | Use more sensitive and dynamic probes like LDS 698. Validate findings with a second, mechanistically different dye and include proper controls (e.g., CCCP for depolarization) [45]. |
Experimental Protocols & Data Integration
Protocol: Correlative Assessment of ΔΨm and Cristae Integrity
This protocol outlines a method for directly linking membrane potential measurements with ultrastructural analysis in a disease model.
Materials:
- Cell culture or tissue samples (e.g., H9c2 cardiomyocytes, mouse myocardial tissue) [41].
- ΔΨm probe: LDS 698 (recommended for high sensitivity) or TMRM [45].
- Fixative: 2.5% glutaraldehyde in phosphate buffer.
- Access to Confocal Microscope and Scanning Electron Microscope (SEM).
Method:
- Induce Disease State: Treat cells with a high-glucose medium (e.g., 30 mM) to model diabetic stress [41].
- Stain Live Cells: Incubate with LDS 698 (e.g., 100 nM for 30 min) in standard culture conditions [45].
- Image ΔΨm: Capture fluorescence images using a confocal microscope. Quantify intensity and heterogeneity.
- Fix for EM: Immediately after imaging, fix the cells in 2.5% glutaraldehyde at 4°C overnight [41].
- Process for SEM: Dehydrate samples through a graded ethanol series, dry using a critical point dryer, and sputter-coat with a thin layer of metal [41].
- Acquire SEM Images: Image the same sample regions at high magnification (e.g., 10,000x) to visualize cristae ultrastructure.
- 3D Reconstruction (Optional): For volumetric analysis, use serial block-face SEM (SBF-SEM) to reconstruct mitochondrial volumes and internal structures [41].
Quantitative Ultrastructural Parameters to Measure
The table below summarizes key quantitative metrics for characterizing mitochondrial pathology, derived from studies on diabetic cardiomyopathy [41].
| Parameter | Measurement Technique | Significance in Disease Context (e.g., DCM) | Observed Change in DCM Model [41] |
|---|---|---|---|
| Cristae Junction Width | TEM / SEM | Widening indicates cristae remodeling and destabilization. | Increased |
| Cristae Score / Count | TEM / SEM | Reflects the integrity of the inner membrane and OXPHOS capacity. | Decreased |
| Mitochondrial Volume (Volume3D) | 3D SEM Reconstruction | Identifies swelling or the formation of megamitochondria. | Decreased (general population), but megamitochondria present |
| MAM Contact Site Length | TEM / SEM | Increased ER-mitochondria coupling, linked to Ca2+ dysregulation and apoptosis. | Increased |
| Aspect Ratio / Elongation | Confocal / SEM | Indicator of mitochondrial fusion/fusion balance. | Varies (increased in vitro HG cells) |
The Scientist's Toolkit: Research Reagent Solutions
| Reagent / Tool | Function / Application | Key Considerations |
|---|---|---|
| LDS 698 Probe [45] | Highly sensitive measurement of subtle ΔΨm dynamics in live cells. | Superior photostability and low cytotoxicity for long-term imaging; more sensitive than MitoTracker Red or JC-1. |
| MitoTracker Probes [5] [10] | Standard fluorescent labeling of mitochondria for network morphology analysis. | Some variants (e.g., MitoTracker Red FM) bind covalently and do not reflect subsequent ΔΨm changes. |
| Dyes for Functional Assays (JC-1, TMRM) [5] [45] | Conventional ΔΨm measurement via fluorescence shift (JC-1) or intensity (TMRM). | JC-1 can suffer from nonspecific staining; TMRM fluorescence can saturate, limiting dynamic range. |
| Antibodies for Dynamics Proteins (Mfn1/2, Opa1, p-Drp1) [41] | Western blot analysis to assess mitochondrial fission/fusion dynamics. | Provides molecular explanation for observed morphological changes (e.g., ↓Mfn1/Opa1 & ↑p-Drp1 = fission). |
| SEM & TEM [41] [5] | High-resolution imaging of mitochondrial ultrastructure, including cristae. | Essential for quantifying the structural parameters that confound ΔΨm interpretation. |
Visual Workflows: From Experiment to Interpretation
Experimental Workflow for Integrated Analysis
This diagram outlines the core-correlative workflow for conducting a robust study of mitochondrial function and structure.
Decision Framework for Interpreting ΔΨm
Use this flowchart to guide your interpretation of ΔΨm data when mitochondrial morphology is a variable.
Resolving Artifacts: A Troubleshooting Guide for Confounded ΔΨm Measurements
Why Mitochondrial Morphology Matters for Your ΔΨm Measurements
ΔΨm, the mitochondrial membrane potential, is a global indicator of mitochondrial function and is critically dependent on the integrity of the inner mitochondrial membrane (IMM) [19]. Mitochondria are not static bean-shaped organelles; they form a dynamic network that constantly undergoes fusion and fission, and their internal structure, particularly the cristae, is essential for efficient energy production [47] [48].
Changes in morphology are intrinsically linked to function. For example, a fragmented mitochondrial network with disorganized cristae is a hallmark of pro-inflammatory M1 macrophages and is associated with a reliance on glycolysis. In contrast, elongated mitochondria with well-defined cristae are characteristic of reparative M2 macrophages and support efficient oxidative phosphorylation (OXPHOS) [47]. When you measure ΔΨm without considering these underlying structural states, you risk significant data misinterpretation.
The table below summarizes how specific morphological defects can directly impact your ΔΨm readings.
Table 1: How Mitochondrial Morphology Skews ΔΨm Interpretation
| Morphological Defect | Impact on ΔΨm | Underlying Mechanism | Consequence for Data Interpretation |
|---|---|---|---|
| Fragmentation | Can artifactually elevate or depress ΔΨm | Altered proton gradient efficiency; increased uncoupling; changes in ETC supercomplex assembly [47] [10]. | A "high" ΔΨm may not indicate a healthy, coupled mitochondrion but could reflect a pathological state. |
| Cristae Disorganization | Falsely lowers ΔΨm measurement | Disrupts the physical proximity of ETC components and dissipates the proton motive force across the IMM [47]. | A low ΔΨm may be misattributed to ETC failure when the primary defect is structural. |
| Swelling | Leads to ΔΨm depolarization | Dilution of the proton gradient; rupture of the IMM; release of pro-apoptotic factors [49]. | Interprets as general dysfunction, but obscures the specific role of osmotic balance and permeability transition. |
Frequently Asked Questions & Troubleshooting Guides
How does a fragmented mitochondrial network affect ΔΨm, and how can I control for it?
The Problem: You observe a loss of ΔΨm in your model and assume it is due to inhibited electron transport chain (ETC) activity. However, the change could be driven by a shift in the mitochondrial dynamics toward fission, which is common in cancer cells and pro-inflammatory states [10].
The Solution:
- Quantify Morphology: Always couple your ΔΨm assays with a quantitative assessment of mitochondrial morphology. Use fluorescent dyes (e.g., MitoTracker) and image analysis software like CellProfiler or MitoGraph to calculate metrics such as aspect ratio (elongation) and form factor (complexity) [10].
- Pharmacological Validation: Use specific inhibitors of the fission machinery to confirm the link.
- Protocol: Pre-treat cells with Mdivi-1 (50-100 µM for 2-6 hours), a Drp-1 inhibitor, to force a fused network. Then, re-measure ΔΨm. If the ΔΨm loss is reversed or attenuated, it confirms that fragmentation was a major contributor [49].
Could disorganized cristae be the real reason for my low ΔΨm reading?
The Problem: You have ruled out fission/fusion imbalances, but your ΔΨm remains low. The issue may lie within the internal architecture of the mitochondria—the cristae.
The Solution:
- Indirect Assessment via OXPHOS Efficiency: Measure the oxygen consumption rate (OCR) specifically linked to ATP production. Severely disorganized cristae disrupt the proximity of ETC complexes and ATP synthase, leading to inefficient coupling and a low ΔΨm despite the presence of all ETC proteins [47].
- Direct Imaging (Gold Standard): Use transmission electron microscopy (TEM) to visualize cristae structure directly. This provides definitive evidence of cristae remodeling, such as dilation or loss of membrane folds, which correlates with the loss of ΔΨm [47].
My ΔΨm data shows high heterogeneity between cells. Is this technical noise or biology?
The Problem: Flow cytometry or microscopy reveals a wide distribution of ΔΨm values across your cell population, making it difficult to draw clear conclusions.
The Solution: This heterogeneity is likely real and biologically significant, especially in cancer cells [19].
- Absolute Calibration: Move beyond qualitative "high/low" assessments. Use a two-pronged microscopy approach with TMRM and a plasma membrane potential (ΔΨp) indicator like DiBAC₄(3). This allows for the calculation of absolute ΔΨm values in millivolts (mV), controlling for variations in ΔΨp that can affect dye uptake [19].
- Cell Cycle Synchronization: Determine if heterogeneity is cell cycle-dependent. Synchronize cells in G1, S, and G2 phases and re-measure ΔΨm. Studies show ΔΨm heterogeneity persists throughout the cycle, pointing to other intramitochondrial factors [19].
- Pharmacological Profiling: Treat the heterogeneous population with specific inhibitors.
- Protocol: Apply oligomycin (1-5 µM), an ATP synthase inhibitor. In highly polarized mitochondria, this will cause a hyperpolarization. Apply antimycin A (1-10 µM), a Complex III inhibitor, to induce maximal depolarization. The differential response of subpopulations to these inhibitors can reveal the functional basis of the heterogeneity [19].
How do I know if my ΔΨm dye is responding to potential or just accumulating due to morphology?
The Problem: Cationic dyes like TMRM can accumulate in mitochondria based on both ΔΨm and physical changes in membrane surface area or volume caused by swelling.
The Solution:
- Use a Quenching/De-quenching Protocol: Load cells with a high concentration of TMRM (e.g., 200 nM) to quench the signal. Upon mitochondrial depolarization (e.g., with FCCP/CCCP), the dye is released and fluorescence increases. This ratiometric method is less sensitive to mitochondrial mass [19].
- Validate with a ΔΨm-Independent Stain: Use a ΔΨm-independent stain (e.g., MitoTracker Green FM) to quantify mitochondrial mass in parallel. Normalize your TMRM signal to the mass signal to correct for differences in mitochondrial volume or density [10].
The Scientist's Toolkit
Table 2: Essential Reagents and Tools for Controlling Morphology in ΔΨm Studies
| Tool / Reagent | Function / Purpose | Key Consideration |
|---|---|---|
| MitoTracker Deep Red / Green FM | Fluorescent labeling of mitochondrial mass and network structure. | Green FM is mass-dependent; Deep Red is potential-dependent. Choose accordingly. |
| TMRM / Rhodamine 123 | Potentiometric dyes for measuring ΔΨm. | Use in non-quenching mode for quantitative imaging. Confirm dye distribution is at equilibrium [19]. |
| Mdivi-1 | Selective inhibitor of Drp-1, inhibits mitochondrial fission. | Used to experimentally promote a fused network and test the role of fragmentation. |
| Oligomycin & Antimycin A | Inhibitors of ATP synthase and Complex III, respectively. | Used to probe the contributions of ATP demand and ETC activity to ΔΨm. |
| CellProfiler | Open-source software for automated image analysis of morphology. | Ideal for high-throughput analysis of parameters like form factor and aspect ratio [10]. |
| MitoGraph | Open-source platform for 3D analysis of mitochondrial networks. | Converts mitochondrial images into skeletonized networks for graph-based quantification [10]. |
| Transmission Electron Microscopy (TEM) | Gold standard for visualizing cristae ultrastructure. | Requires specialized sample preparation but provides definitive structural data. |
Experimental Protocols & Workflows
Detailed Protocol: Coupling Absolute ΔΨm Measurement with Morphology Analysis
This protocol combines the quantitative method from [19] with morphological analysis from [10].
Materials:
- Cells cultured in appropriate chambered imaging slides
- TMRM (tetramethylrhodamine methyl ester)
- DiBAC₄(3) (bis-(1,3-dibutylbarbituric acid)trimethine oxonol)
- MitoTracker Green FM (or a mitochondrial-targeted fluorescent protein like mito-GFP)
- Confocal microscope with environmental control (37°C, 5% CO₂)
- Image analysis software (e.g., FIJI/ImageJ, CellProfiler)
Procedure:
- Dye Loading:
- Incubate cells with TMRM (200 nM) and DiBAC₄(3) (500 nM) in growth media for 30 minutes at 37°C to reach equilibrium [19].
- (Optional but recommended) Co-stain with MitoTracker Green FM (100 nM) for the last 20 minutes to label mitochondrial mass independently of ΔΨm.
- Image Acquisition:
- Replace the loading medium with a maintenance medium containing a lower concentration of TMRM (e.g., 50 nM) to maintain equilibrium.
- Acquire time-lapse images using confocal microscopy. Use appropriate laser lines and emission filters to avoid bleed-through between TMRM, DiBAC₄(3), and MitoTracker Green channels.
- Absolute ΔΨm Calculation:
- Follow the calibration method described in [19]. This involves measuring the fluorescence intensity of TMRM in the mitochondria and the cytoplasm, and the fluorescence of DiBAC₄(3) at the plasma membrane to account for ΔΨp.
- The Nernst equation is then used to calculate the absolute ΔΨm value:
ΔΨm = 61.5 * log([TMRM]_mito / [TMRM]_cyto) at 37°CThe concentration ratios are derived from the fluorescence intensity ratios after correcting for ΔΨp.
- Morphological Analysis:
- Use the MitoTracker Green channel for this analysis to avoid potential-dependent bias.
- In CellProfiler or FIJI, create a pipeline to:
- Segment the mitochondrial network.
- Skeletonize the binary image.
- Calculate key parameters: Aspect Ratio (major axis/minor axis, for elongation), Form Factor (perimeter²/(4π*area), for complexity), and Branch Count (for network interconnectedness) [10].
Pathway Diagram: Integrating Morphology and Membrane Potential
The following diagram illustrates the core signaling pathways that link mitochondrial morphology to ΔΨm, highlighting key control points and experimental interventions.
Diagram Title: Signaling pathways linking morphology to ΔΨm.
FAQs & Troubleshooting Guides
Q1: My Δψm measurements with TMRM are inconsistent between fragmented and fused mitochondrial states. What could be the cause? A1: This is a classic symptom of morphology-dependent dye artifact. In highly fused, interconnected networks, the dye can become trapped and concentrated, leading to artificially high fluorescence. In fragmented organelles, dye retention is lower, under-reporting the true Δψm. This is a redistribution artifact, not a true potential change.
- Troubleshooting Steps:
- Confirm Morphology: Use a morphology marker (e.g., Tom20 immunofluorescence) to correlate Δψm readings with network structure.
- Quench with CCCP: Add the uncoupler CCCP (e.g., 10 µM) at the end of the experiment. The residual fluorescence after quenching indicates non-potentiometric, trapped dye. A high residual signal suggests significant artifact.
- Switch to a Rationetric Dye: Use JC-1, which shifts from green (monomer) to red (J-aggregate) with increased Δψm. Calculate the red/green ratio, which is less sensitive to dye concentration and mitochondrial volume.
Q2: When I treat cells with a drug that causes mitochondrial fission, my JC-1 red/green ratio decreases. Does this always mean depolarization? A2: Not necessarily. The formation of J-aggregates (red fluorescence) is highly dependent on local dye concentration and physical constraints. In fragmented mitochondria, the internal physical environment may be altered, inhibiting proper J-aggregate formation even if the Δψm is intact.
- Troubleshooting Steps:
- Perform a CCCP Control: Treat a parallel sample with the fission-inducing drug AND CCCP. If the red/green ratio is the same as with CCCP alone, the drug likely causes true depolarization. If the ratio is higher than the CCCP control but lower than untreated cells, the result is ambiguous and likely confounded by morphology.
- Correlate with an Alternative Assay: Validate your findings with an independent method, such as the TMRM quenching assay or an assay using a fluorescent protein-based Δψm sensor (e.g., mito-CEPIA), which are less prone to these artifacts.
Q3: I observe high background fluorescence with TMRE that doesn't quench fully with an uncoupler. How can I minimize this? A3: This indicates non-specific binding of the dye to cellular components (e.g., membranes, proteins) or accumulation in acidic compartments like lysosomes.
- Troubleshooting Steps:
- Optimize Dye Concentration & Loading Time: Titrate the TMRE concentration (typically 20-200 nM) and loading time (15-30 min) to find the minimum required for a robust signal.
- Include a Wash Step: After loading, wash cells with dye-free buffer to remove excess extracellular and loosely bound dye.
- Use a Quenching Protocol: Implement a TMRM/TMRE quenching protocol using extracellular quenchers like cobalt chloride (CoCl₂) or manganese chloride (MnCl₂). These compounds quench the fluorescence of extracellular and plasma membrane-bound dye, leaving only the signal from mitochondrial dye.
Q4: How do I control for the effect of mitochondrial volume changes on Δψm dye fluorescence? A4: Changes in matrix volume can concentrate or dilute the dye, altering fluorescence intensity independent of Δψm.
- Troubleshooting Steps:
- Use Rationetric Dyes: As with JC-1, the ratio is less sensitive to volume changes than single-wavelength intensity.
- Measure Volume in Parallel: Use a fluorescent probe like calcein-AM (with cobalt quenching to isolate mitochondrial calcein) to simultaneously or sequentially measure mitochondrial volume.
- Normalize Data: If volume changes are confirmed, attempt to normalize Δψm fluorescence signals to the volume indicator signal, though this requires careful calibration.
Experimental Protocols
Protocol 1: TMRM Quenching Assay for Controlling Redistribution Artifacts
This protocol distinguishes potentiometric fluorescence from dye accumulation artifacts.
- Cell Preparation: Seed cells in an appropriate imaging dish.
- Dye Loading: Incubate cells with 50-100 nM TMRM in culture medium for 20-30 minutes at 37°C.
- Wash: Replace with fresh, dye-free pre-warmed buffer.
- Quenching Solution: Prepare an imaging buffer containing 100 µM CoCl₂ (or 1 mM MnCl₂).
- Baseline Image: Acquire a fluorescence image in standard buffer.
- Quench Image: Replace the buffer with the quenching solution and acquire an image immediately. The quencher will suppress all fluorescence from non-mitochondrial TMRM.
- Depolarization Control: Add 10 µM CCCP/FCCP and acquire a final image to confirm complete depolarization and establish background.
- Analysis: The quenched signal (Step 6) represents the genuine mitochondrial Δψm-dependent signal.
Protocol 2: Validating JC-1 Specificity with Uncoupler Controls
- Cell Preparation: Seed cells into multiple wells of a plate.
- Experimental Treatment: Treat cells with a reagent that alters morphology (e.g., 20 µM CCCP for fission, 1 µM Oligomycin for fusion) for a desired time.
- Dye Loading: Load all wells with 2 µM JC-1 for 20 minutes at 37°C.
- Wash: Wash twice with PBS or imaging buffer.
- Control Group: To one set of treated and untreated wells, add 10 µM CCCP for 5 minutes to fully depolarize mitochondria.
- Imaging: Image both green (Ex/Em ~514/529 nm) and red (Ex/Em ~585/590 nm) channels for all groups.
- Analysis:
- Calculate the mean red/green fluorescence ratio for each condition.
- Compare the ratio in treated vs. untreated cells.
- Crucially, compare the ratio in treated+CCCP vs. untreated+CCCP. If the depolarized ratios are identical, the treatment effect is likely real. If they differ, morphology is likely affecting J-aggregate formation.
Quantitative Data Summary
Table 1: Impact of Mitochondrial Morphology on Common Δψm Dyes
| Dye | Mechanism | Primary Artifact from Morphology Change | Recommended Control Experiment |
|---|---|---|---|
| TMRM / TMRE | Nernstian Distribution | Altered dye retention/redistribution (trapping in networks) | Quenching with extracellular CoCl₂/MnCl₂ |
| JC-1 | J-Aggregate Formation | Altered J-aggregation efficiency in fragmented organelles | Full depolarization with CCCP to compare residual ratios |
| Rhodamine 123 | Nernstian Distribution | Non-specific binding; less sensitive to subtle Δψm changes | Compare to TMRM; use with quenching protocols |
| MitoTracker Red CMXRos | Thiol-reactive (fixable) | Not a reliable Δψm indicator; accumulation is Δψm-dependent but irreversible | Do not use for dynamic Δψm measurements. Use only as a morphology marker. |
Table 2: Key Reagent Solutions for Controlling Dye Artifacts
| Reagent | Function | Typical Working Concentration |
|---|---|---|
| CCCP / FCCP | Protonophore uncoupler; completely depolarizes Δψm for control baseline. | 10-20 µM |
| Oligomycin | ATP synthase inhibitor; hyperpolarizes Δψm by inhibiting proton flux. | 1-10 µM |
| Cobalt Chloride (CoCl₂) | Fluorescence quencher for TMRM/TMRE; quenches extracellular and cytosolic dye. | 100 µM - 1 mM |
| Mdivi-1 | Drp1 inhibitor; used to induce mitochondrial fusion for control experiments. | 10-50 µM |
The Scientist's Toolkit
Table 3: Essential Research Reagents & Materials
| Item | Function / Explanation |
|---|---|
| TMRM / TMRE | Cationic, permeant dyes that distribute according to the Nernst equation. Ideal for dynamic, reversible measurements. |
| JC-1 | Rationetric dye that exhibits potential-dependent emission shift (green→red). Less sensitive to dye loading concentration. |
| Mito-SEPIA / CEPIA | Genetically encoded fluorescent protein-based Δψm sensors. Minimal artifact from morphology changes; requires transfection. |
| Anti-Tom20 Antibody | Immunofluorescence marker for the outer mitochondrial membrane, used to visualize and quantify mitochondrial morphology. |
| MitoTracker Green / Deep Red | Cell-permeant dyes that label mitochondria regardless of Δψm (in live cells). Useful as a morphology counterstain. |
Visualizations
Title: Workflow for Validating Dye Specificity
Title: Dye Artifact Mechanism in Altered Morphology
FAQ: Why is Normalization for Mitochondrial Morphology Critical in ΔΨm Research?
Why is it necessary to normalize ΔΨm measurements to mitochondrial mass or network parameters? The mitochondrial membrane potential (ΔΨm) is a key indicator of mitochondrial health and function. However, fluorescent dyes used to measure ΔΨm, such as TMRM, JC-1, or LDS 698, accumulate within mitochondria based on both the potential and the physical volume of the mitochondrial compartment [45] [27]. A change in fluorescence intensity could therefore signify a genuine change in bioenergetic status, or simply a change in the amount of mitochondrial material present in the cell. Without normalization, it is impossible to distinguish between these scenarios. Furthermore, mitochondrial function is intrinsically linked to its dynamic network morphology, which cycles between fused and fragmented states [50]. Proper normalization is therefore essential to accurately interpret what ΔΨm measurements reveal about underlying cellular physiology.
What are the consequences of failing to account for mitochondrial morphology? Failure to normalize can lead to a significant misinterpretation of data. For instance:
- False Positives/Negatives: An increase in ΔΨm dye fluorescence could be misinterpreted as mitochondrial "hyperpolarization" when it is actually due to an increase in mitochondrial mass or a change in network structure that enhances dye uptake [27].
- Masked Dysfunction: A genuine drop in ΔΨm could be masked by a concomitant increase in mitochondrial mass, leading to the false conclusion that bioenergetics are unaffected.
- Inconsistent Results: The inability to control for morphological variables contributes to poor reproducibility across experiments and laboratories.
Troubleshooting Guide: Common Issues in Data Normalization
Problem: Inconsistent results between technical replicates after inducing mitochondrial fragmentation.
- Potential Cause: The intervention used to fragment mitochondria (e.g., Drp1 overexpression, treatment with paraquat) may have independently altered the fluorescence properties of your ΔΨm dye or your mass marker [51] [50].
- Solution:
- Validate Tools: Use a chemical inducer of fission (e.g., CCCP) as a positive control to confirm that the normalization protocol responds appropriately to a known morphological perturbant.
- Multi-Parametric Assays: Employ a platform that allows simultaneous measurement of ΔΨm and mass in the same cell. This controls for well-to-well variability.
- Time-Series Analysis: If using a rapidly inducible system like iCMM, perform time-lapse imaging to track the temporal relationship between the morphological change and the fluorescence signals [52].
Problem: Poor correlation between mitochondrial mass and a housekeeping protein used for normalization.
- Potential Cause: Standard housekeeping proteins (e.g., β-actin, GAPDH) are used to normalize for total cellular protein, but their expression can vary with cell state and are not specific to mitochondria. They do not account for changes in the mitochondrial volume fraction within the cell.
- Solution: Use a direct measurement of mitochondrial mass. The preferred method is to use a mass-tracking dye (e.g., MitoTracker Green) or an antibody against a core mitochondrial protein (e.g., TOM20, VDAC) via immunofluorescence. This provides a spatially resolved, direct measure of mitochondrial content that can be quantified from the same images used for ΔΨm analysis [1].
Problem: High background or non-specific signal from fluorescent probes.
- Potential Cause: Dye concentration is too high, leading to aggregation and signal saturation, or the chosen dye has known off-target localization (e.g., JC-1 monomers in the cytosol) [45] [27].
- Solution:
- Titrate Dyes: Perform a dose-response curve for every new dye lot and cell type to determine the minimum concentration that provides a robust specific signal.
- Choose Probes Carefully: Consider dyes with superior properties. For example, LDS 698 has been reported to have low background fluorescence and high photostability for ΔΨm measurement [45].
- Include Controls: Always include a control with a mitochondrial uncoupler (e.g., FCCP) to quench ΔΨm and define the specific signal. Use a nuclear or lysosomal stain to check for non-specific localization.
Essential Experimental Protocols
Protocol 1: Simultaneous Measurement of ΔΨm and Mitochondrial Mass via Flow Cytometry
This protocol allows for the population-level quantification of normalized ΔΨm.
- Cell Preparation: Harvest and wash cells in a suitable buffer (e.g., PBS or culture media without serum).
- Staining:
- Resuspend cells in pre-warmed buffer containing a potentiometric dye (e.g., 20 nM TMRM or 50 nM LDS 698) and a mass-insensitive dye (e.g., 100 nM MitoTracker Green).
- Note: MitoTracker Green is not entirely potential-insensitive at high concentrations; use low concentrations and validate with uncoupler controls [1].
- Incubation: Incubate cells for 30 minutes at 37°C in the dark.
- Analysis:
- Wash cells and resuspend in fresh buffer.
- Analyze immediately on a flow cytometer.
- Use the following fluorophores: TMRM/LDS 698 (Ex/Em: ~488/575 nm) and MitoTracker Green (Ex/Em: ~490/516 nm). Ensure minimal spectral overlap using compensation controls.
- Data Normalization: For each cell, the normalized ΔΨm is calculated as the ratio of the fluorescence intensity of the potentiometric dye (TMRM/LDS 698) to the fluorescence intensity of the mass marker (MitoTracker Green). Analyze the median ratio across the population.
Protocol 2: Quantitative Image Analysis of Mitochondrial Network and ΔΨm
This protocol provides spatially resolved data, linking ΔΨm to network morphology in single cells.
- Cell Staining and Imaging:
- Plate cells on imaging-grade dishes.
- Stain with a ΔΨm-sensitive dye (e.g., TMRM, JC-1) and a mass/volume marker (e.g., MitoTracker Green, or immunofluorescence for TOM20).
- Acquire high-resolution confocal images using identical settings for all experimental groups.
- Image Segmentation and Analysis:
- Use automated image analysis software like CellProfiler, MitoGraph, or a custom Python/Matlab pipeline [10].
- Segmentation: Create a binary mask from the mass marker channel to identify the mitochondrial area.
- Morphometric Parameters: Calculate key parameters from the binary mask:
- Network Branching: Analyze the skeletonized network to count branches and endpoints.
- Aspect Ratio: Mean length-to-width ratio of mitochondrial fragments.
- Form Factor: (Perimeter²)/(4π × Area). A higher value indicates a more complex shape.
- Total Mitochondrial Area: The total pixel area occupied by the mask [51] [10].
- Data Integration and Normalization:
- The ΔΨm signal (from TMRM or JC-1 aggregates) is measured as the mean fluorescence intensity within the mitochondrial mask.
- Normalize ΔΨm Intensity: Divide the mean ΔΨm fluorescence intensity by the total mitochondrial area (from the mass marker) for each cell. This yields a mass-normalized ΔΨm value.
- Correlate with Morphology: Plot the normalized ΔΨm value against morphometric parameters (e.g., Form Factor) to investigate structure-function relationships.
The workflow below illustrates this integrated image analysis pipeline.
Research Reagent Solutions
Table 1: Essential Reagents for Mitochondrial Morphology and Function Studies.
| Reagent Category | Specific Examples | Function and Application Notes |
|---|---|---|
| ΔΨm-Sensitive Dyes | TMRM, JC-1, LDS 698 [45] [27] | Accumulate in mitochondria in a membrane potential-dependent manner. LDS 698 is noted for high sensitivity and low background. |
| Mass/Volume Markers | MitoTracker Green, Anti-TOM20 antibody [1] | Provide a fluorescence signal proportional to mitochondrial mass, largely independent of ΔΨm. Critical for normalization. |
| Fission Inducers | Paraquat, CCCP [51] [1] | Chemical tools to induce mitochondrial fragmentation for use as experimental controls. |
| Fusion Promoters | Mfn1/Mfn2 overexpression [51] [50] | Genetic tools to promote an interconnected mitochondrial network. |
| Image Analysis Software | CellProfiler, MitoGraph [10] | Open-source platforms for automated, high-throughput quantification of mitochondrial morphology and fluorescence. |
Advanced Analytical Framework
For a deeper investigation of network properties, moving beyond basic morphometrics to network theory is essential. The following workflow outlines this advanced analysis, which treats the mitochondrial network as a mathematical graph.
Table 2: Key Topological Parameters for Mitochondrial Network Analysis.
| Parameter | Description | Biological Interpretation | Impact on Normalization |
|---|---|---|---|
| Cluster Mass (s) Distribution [51] [53] | The probability distribution of finding a cluster of a given size (s). In healthy cells, it often follows a power law. | Indicates a scale-free, critical network. Fragmentation (fission) shifts the distribution toward smaller masses. | A shifted distribution suggests a fundamental change in network architecture that must be accounted for. |
| Giant Cluster Size (Nɡ/N) [51] [53] | The fraction of the entire network contained within the single largest connected cluster. | A large giant cluster indicates a highly fused, interconnected network. | A collapsing giant cluster during fission drastically reduces interconnectivity, which can affect dye equilibration. |
| Form Factor [10] | (Perimeter²)/(4π × Area). A measure of shape complexity. | A value of 1 indicates a perfect circle. Higher values indicate more elongated and complex structures. | A simple morphometric parameter that is highly sensitive to fragmentation and can be used as a covariate. |
By integrating these advanced network analysis techniques with standard fluorescence measurements, researchers can build a more robust and insightful framework for normalizing ΔΨm, ensuring that their conclusions about mitochondrial bioenergetics are based on a complete picture of the organelle's state.
Mitochondrial morphology, governed by the balanced processes of fission and fusion, is intrinsically linked to the organelle's health, function, and membrane potential (Δψm). The core proteins controlling these processes are Dynamin-Related Protein 1 (DRP1), the principal regulator of mitochondrial fission, and Mitofusin 2 (MFN2), a key mediator of outer mitochondrial membrane fusion [54] [7]. Changes in Δψm, a critical indicator of mitochondrial fitness and a driving force for ATP synthesis, can be a consequence of both alterations in mitochondrial morphology and other upstream cellular signals [44]. Therefore, to isolate the specific contribution of morphological changes to Δψm, researchers must employ precise pharmacological and genetic tools to modulate the fission and fusion machinery directly. This technical support center provides troubleshooting guides and detailed protocols for using DRP1 and MFN2 modulators in such experiments, ensuring accurate interpretation of your results within the broader context of mitochondrial function research.
Core Concepts: The Fission/Fusion Machinery and Δψm
The Key Proteins: DRP1 and MFN2
- DRP1 (Fission): A cytosolic GTPase that translocates to the outer mitochondrial membrane (OMM) where it oligomerizes and constricts the mitochondrion to execute fission. Its recruitment is regulated by receptors like MFF, MiD49, and MiD51 [54] [7]. DRP1 activity is finely tuned by post-translational modifications, including phosphorylation at Ser616 (activates fission) and Ser637 (inhibits fission) [7].
- MFN2 (Fusion): A GTPase embedded in the OMM that, along with its homolog MFN1, mediates the tethering and fusion of adjacent mitochondria. MFN2 is also involved in forming endoplasmic reticulum-mitochondria contacts, influencing calcium signaling and lipid transfer [54].
The Interplay with Mitochondrial Membrane Potential (Δψm)
The Δψm is the electrical component of the proton motive force used by ATP synthase to generate ATP [44]. Mitochondrial dynamics are crucial for maintaining Δψm:
- Fission facilitates the isolation of damaged mitochondrial segments for mitophagy, preventing the persistence of depolarized mitochondria in the network [7].
- Fusion allows content mixing, diluting damaged components (like mutated mtDNA) and maintaining a functionally competent network, which supports a stable Δψm [7]. Disruption of this balance often leads to Δψm dissipation, increased reactive oxygen species (ROS) production, and apoptosis [55]. The following diagram illustrates the core regulatory network and its functional outcomes that you will be investigating.
Diagram 1: Core regulatory network of mitochondrial morphology and its functional outcomes. PSM denotes Permeability Transition Pore Opening, a key event in apoptosis.
Research Reagent Solutions: A Toolbox for Modulating Morphology
The following table summarizes the key pharmacological and genetic tools used to control DRP1 and MFN2 activity, enabling the dissection of morphology-specific effects.
| Reagent Name | Type | Primary Target | Mechanism of Action | Key Considerations & Common Applications |
|---|---|---|---|---|
| Mdivi-1 [56] [57] | Small Molecule Inhibitor | DRP1 | Allosterically inhibits DRP1 GTPase activity, preventing its assembly and oligomerization, thus inhibiting fission. | Can protect against drug-induced toxicity and neuronal injury; use optimal concentration 10-50 µM; monitor for off-target effects on other dynamins. |
| Drpitor1 | Small Molecule Inhibitor | DRP1 | Potent and selective inhibitor of DRP1, blocks Drp1-dependent mitochondrial division. | Newer compound with high specificity; effective in low nanomolar range. |
| P110 | Peptide Inhibitor | DRP1 | A cell-permeable peptide that specifically inhibits the interaction between DRP1 and its receptor Fis1. | Enhances specificity by targeting a single protein-protein interaction; reduces off-target effects. |
| Dynasore | Small Molecule Inhibitor | DRP1 / Dynamin | A non-specific inhibitor of dynamin GTPases, including Drp1. | Has significant off-target effects on endocytic pathways due to inhibition of dynamin-1/2; not recommended for high-specificity studies. |
| siRNA/shRNA | Genetic Knockdown | DRP1 or MFN2 | Sequence-specific RNAi to deplete target protein expression. | Allows for sustained, potent knockdown; requires controls for off-target RNAi effects and efficient transfection. |
| MFN2-overexpression Plasmid | Genetic Overexpression | MFN2 | Increases MFN2 protein levels to promote mitochondrial fusion. | Can be used to rescue a fission-dominant phenotype or to study the effects of enhanced fusion. |
| MiD51/MiD49 Modulators | Genetic/Pharmacological | MiD51/MiD49 | Targeting DRP1 receptor proteins can alter fission. | Emerging area; provides an alternative to direct DRP1 inhibition. |
Experimental Protocols: Isolating Morphology's Role in Δψm Changes
Workflow for a Morphology Control Experiment
A robust experimental design to isolate the effect of morphology on Δψm involves a multi-step workflow, as outlined below.
Diagram 2: Generalized experimental workflow for isolating morphology's contribution.
Detailed Protocol: Using Mdivi-1 to Attenuate Drug-Induced Δψm Collapse
This protocol is adapted from studies on cisplatin (DDP) resistance in ovarian cancer cells, where inhibition of DRP1-dependent fission was shown to protect mitochondrial function [55].
Objective: To determine if preventing mitochondrial fission via Mdivi-1 can preserve Δψm in the face of a chemotherapeutic stressor.
Materials:
- Cell line of interest (e.g., SKOV3 ovarian cancer cells [55])
- Mdivi-1 (e.g., Tocris Bioscience #5148), dissolved in DMSO
- Cisplatin (or other cytotoxic drug)
- Δψm-sensitive fluorescent dyes (e.g., TMRM, JC-1)
- Confocal microscopy or flow cytometry equipment
- Cell culture reagents
Step-by-Step Methodology:
- Cell Seeding and Culture: Seed SKOV3 cells in appropriate culture vessels (e.g., 96-well plates for high-throughput imaging, 6-well plates for protein analysis) and allow them to adhere for 24 hours.
- Pre-treatment with Modulator: Pre-treat cells with Mdivi-1 (a common effective concentration is 50 µM [55] [57]) or an equivalent volume of DMSO vehicle control for 2-4 hours. This step pre-emptively shifts the mitochondrial equilibrium towards a more fused state before the challenge.
- Pathogenic Challenge: Co-treat the cells with a defined concentration of cisplatin (e.g., 1.00 mg/L as used in SKOV3 models [55]) for 24-48 hours in the continued presence of Mdivi-1 or DMSO.
- Validation of Morphological Change: Confirm the effect of Mdivi-1 on mitochondrial morphology. Fix cells and stain with a mitochondrial dye (e.g., MitoTracker Red) or transfect with a fluorescent protein targeted to mitochondria (e.g., mito-GFP). Image using confocal microscopy. Quantify morphology using parameters like Form Factor (complexity) and Aspect Ratio (length). Mdivi-1 should significantly increase these values, indicating mitochondrial elongation.
- Measurement of Δψm:
- Load cells with the potentiometric dye TMRM (e.g., 20-100 nM) in culture medium for 30 minutes at 37°C.
- For live-cell imaging, maintain TMRM in the buffer. For flow cytometry, analyze immediately after loading.
- Interpretation: A high TMRM fluorescence intensity indicates a hyperpolarized (more negative) Δψm, while a decrease in fluorescence indicates depolarization. Compare the TMRM signal between: DMSO-treated control, Mdivi-1 alone, Cisplatin + DMSO, and Cisplatin + Mdivi-1. A significantly higher signal in the "Cisplatin + Mdivi-1" group versus "Cisplatin + DMSO" demonstrates a protective effect conferred by inhibiting fission.
- Correlative Apoptotic Markers: To strengthen the link between morphology, Δψm, and cell fate, analyze apoptosis markers by Western blot. As shown in SKOV3/DDP cells, inhibition of fission can reduce the cleavage of caspase-3 and caspase-9 and expression of pro-apoptotic BAX [55].
Frequently Asked Questions (FAQs) & Troubleshooting
Q1: I used Mdivi-1 and confirmed mitochondrial elongation, but I see no significant change in Δψm under basal conditions. Is my experiment a failure?
A: Not necessarily. This is a common and important observation. Under non-stressed, basal conditions, the cell's bioenergetic and quality control systems are capable of compensating for morphological changes. The functional impact of modulating fission/fusion often becomes critical and apparent only during stress. Proceed to challenge your model (e.g., with oxidative stress, nutrient deprivation, or a toxic compound) to unmask the functional role of the morphological shift [55].
Q2: My MFN2 knockdown successfully fragmented mitochondria, but the Δψm dropped dramatically and cells died quickly. How can I isolate morphology's effect from outright toxicity?
A: This highlights a key challenge. Severe fragmentation can directly trigger apoptosis by promoting BAX activation and cytochrome c release [54]. To isolate the morphological effect:
- Use a Titratable System: Employ inducible knockdown systems (e.g., tetracycline-inducible shRNA) and use a low dose of inducer for a short time (e.g., 24-48h) to achieve partial, but not complete, knockdown.
- Monitor Early Time Points: Measure Δψm and image morphology at early time points post-knockdown, before widespread cell death occurs.
- Combine with Anti-Apoptotics: Consider co-expressing an anti-apoptotic protein like BCL-2 (as a control experiment) to determine if the Δψm loss is downstream of the apoptotic cascade initiated by fragmentation.
Q3: How can I be sure that my pharmacological modulator (e.g., Mdivi-1) is not affecting Δψm through an off-target effect independent of DRP1?
A: This is a critical control. The gold standard is to use multiple, distinct approaches to target the same protein.
- Genetic Corroboration: Use DRP1 knockdown (siRNA/shRNA) or dominant-negative DRP1 (e.g., DRP1 K38A) in a parallel experiment. If the same phenotype (e.g., protected Δψm) is observed with both pharmacological inhibition and genetic knockdown, it strongly supports an on-target effect.
- Use Specific Inhibitors: Newer, more specific inhibitors like P110 or Drpitor1 may have fewer off-target effects compared to first-generation compounds like Dynasore [57].
Q4: What are the best practices for quantitatively analyzing mitochondrial morphology in my images?
A: Manual classification is subjective and low-throughput. For robust quantification, use automated image analysis software. Key parameters to extract include:
- Area/Volume: Average size of individual mitochondria.
- Aspect Ratio: Ratio of the major to minor axis (measure of length).
- Form Factor: (Perimeter² / (4π * Area)). A value of 1 indicates a perfect circle; higher values indicate increased complexity and branching.
- Branch Length: The length of individual mitochondrial segments in a networked structure. Tools like ImageJ/Fiji (with plugins like MiNa or Mitochondria Analyzer), CellProfiler [10], and MitoGraph [10] are excellent, freely available options that can perform this analysis on 2D or 3D images.
Q5: In my neuronal cells, mitochondrial transport is crucial. How do I account for movement when measuring Δψm?
A: This is a complex but vital consideration in polarized cells.
- Use a Ratiometric Dye: Dyes like JC-1 form J-aggregates (red fluorescence) at high membrane potentials and monomers (green fluorescence) at low potentials. The red/green ratio is independent of mitochondrial mass, density, and, to a large extent, movement.
- Immobilize Mitochondria for Imaging: For precise, stationary measurements, you can treat cells with agents that gently disrupt microtubules (e.g., low-dose nocodazole) to halt transport before imaging. Be aware this is an additional perturbation.
- Live-Cell Imaging and Kymograph Analysis: Use high-speed confocal microscopy to simultaneously track mitochondrial movement (via a morphological marker like mito-GFP) and Δψm (via TMRM). Kymographs can then be used to correlate motility and Δψm in the same organelle over time.
Troubleshooting Guides
Table 1: Common Mitochondrial Staining Artifacts and Solutions
| Artifact Type | Potential Causes | Recommended Solutions & Optimization Strategies |
|---|---|---|
| Poor/No Staining | • Loss of mitochondrial membrane potential (ΔΨm)• Incompatible dye for sample type (e.g., using ΔΨm-sensitive dyes on fixed cells)• Incorrect dye concentration or loading time• Dye quenching or degradation | • Verify mitochondrial activity with a positive control (e.g., uncoupler treatment).• Use structural dyes (e.g., CytoPainter) or antibodies (e.g., COX IV) for fixed samples [58].• Titrate dye concentration and optimize loading time for each cell type.• Aliquot and store dyes properly; protect from light. |
| High Background/Non-Specific Staining | • Excessive dye concentration• Overloading incubation time• Incomplete washing• Dye aggregation | • Reduce dye concentration and/or loading time.• Increase number of washes with appropriate buffer.• Include dye solvent controls; use pluronic acids for hydrophobic dyes. |
| Uneven Staining | • Uneven dye distribution• Cell confluency too high• Precipitated dye | • Ensure dye solution is mixed thoroughly before and during application.• Plate cells at an appropriate, uniform density.• Filter or centrifuge dye stock solutions to remove precipitates. |
| Phototoxicity & Signal Bleaching | • High-intensity illumination• Prolonged or frequent exposure to excitation light | • Use low illumination intensity and shortest possible exposure times.• For live-cell imaging, use antioxidant-containing media [58].• Utilize a sensitive camera to detect low light levels. |
| Signal Misinterpretation | • Interpreting ΔΨm-sensitive dye intensity as mitochondrial mass• Spectral overlap in multiplexed experiments | • Use a structural dye in parallel to distinguish mass from activity [58].• Include controls (e.g., CCCP/FCCP) to collapse ΔΨm and validate signal [58].• Select fluorophores with minimal spectral overlap (e.g., far-red for mitochondria, green for nuclear marker) [58]. |
Table 2: Optimizing Key Assay Parameters
| Parameter | Considerations | Recommended Starting Range |
|---|---|---|
| Buffer Composition | • Phenol-red free media to reduce autofluorescence.• Include HEPES (e.g., 10-25 mM) for pH stability outside a CO₂ incubator.• Serum-free conditions during staining to prevent esterase activity and non-specific binding.• For live-cell assays, use antioxidant-containing media (e.g., with ascorbic acid) to mitigate phototoxicity [58]. | Phenol-red free HBSS or PBS, with 10-25 mM HEPES. |
| Dye Loading | • Temperature: 37°C for most dyes; optimize for specific probes.• Time: 15-30 minutes is typical; over-incubation can increase background.• Post-incubation stabilization: A 15-30 minute rest in dye-free buffer can improve signal-to-noise. | 15-45 minutes at 37°C. Titrate for each cell line. |
| Fixation (if applicable) | • Avoid methanol; use paraformaldehyde (e.g., 4%) to retain fluorescence of fixable dyes [58].• Fixation time: Over-fixation can quench fluorescence; 10-15 minutes at room temperature is often sufficient. | 4% PFA for 10-15 minutes at room temperature. |
| Imaging Parameters | • Exposure time: Use the minimum required for a clear signal.• Light intensity: Keep as low as possible.• Time-interval settings: Maximize time between acquisitions for live-cell imaging. | Start with low intensity and short exposures (e.g., 100-500 ms). |
Frequently Asked Questions (FAQs)
Q1: Why should I avoid using a membrane potential-sensitive dye like TMRE on fixed cells? Membrane potential-sensitive dyes rely on the active, electrochemical gradient across the inner mitochondrial membrane to accumulate within the organelle. The fixation process kills the cells and abolishes this membrane potential. Consequently, ΔΨm-sensitive dyes will not be retained and will wash out, resulting in little to no signal. For fixed cells, you must use structural dyes (e.g., CytoPainter Red/Green) that bind covalently to mitochondrial proteins or antibody-based markers like TOMM20 or COX IV [58].
Q2: My TMRE signal increases in my experiment. Does this mean I have more mitochondria? Not necessarily. An increase in the fluorescence intensity of a ΔΨm-sensitive dye like TMRE can indicate either an increase in mitochondrial mass or an increase in the mitochondrial membrane potential itself. To accurately interpret the result, you must include a control that distinguishes between these two possibilities. The best practice is to use a two-dye strategy: a ΔΨm-sensitive dye (e.g., TMRE) to report on activity and a potential-independent structural dye (e.g., Mitotracker Green, CytoPainter) to report on mass [58]. Alternatively, include a control treatment with an uncoupler (e.g., FCCP) that collapses the ΔΨm to validate the signal's origin.
Q3: How can I combine mitochondrial staining with immunostaining (multiplexing) without signal issues? Successful multiplexing requires careful planning of the workflow and fluorophores.
- Workflow: Perform live-cell mitochondrial staining first, followed by fixation, permeabilization, and then antibody staining [58].
- Fixation: Use paraformaldehyde instead of methanol, as methanol can destroy the fluorescence of many mitochondrial dyes [58].
- Fluorophore Selection: Many mitochondrial dyes emit in the red/far-red spectrum. Choose secondary antibodies for your immunofluorescence that are in spectrally distinct channels (e.g., green) to avoid bleed-through and crosstalk [58]. Always include single-stain controls to check for spectral overlap.
Q4: What are the best practices to minimize phototoxicity during live-cell imaging of mitochondria? Phototoxicity can damage mitochondria and alter their physiology, creating artifacts. To minimize it:
- Use the lowest possible light intensity for excitation.
- Keep exposure times as short as feasible.
- Reduce the frequency of image acquisition during time-lapse experiments.
- Use a sensitive camera (e.g., EMCCD or sCMOS) to detect weak signals without needing high light levels.
- Culture cells in media designed for live-cell imaging that contain antioxidants [58].
Experimental Protocols for Validation and Controls
Protocol 1: Validating ΔΨm-Sensitive Dye Specificity with an Uncoupler
This protocol is critical for confirming that the signal from dyes like TMRE, TMRM, or JC-1 is dependent on the mitochondrial membrane potential.
- Plate cells on an imaging-compatible dish and culture until they reach 60-80% confluency.
- Prepare the staining solution: Dilute the ΔΨm-sensitive dye in pre-warmed, serum-free, phenol-red free culture buffer (e.g., HBSS with HEPES) at the optimized working concentration.
- Load the dye: Replace the culture media with the dye solution. Incubate for 15-30 minutes at 37°C in the dark.
- Wash: Gently rinse the cells 2-3 times with fresh, pre-warmed buffer.
- Acquire baseline images: Acquire initial images of the fluorescence signal using your optimized imaging parameters.
- Apply uncoupler: Add a mitochondrial uncoupler, such as Carbonyl cyanide-p-trifluoromethoxyphenylhydrazone (FCCP) or Carbonyl cyanide m-chlorophenyl hydrazone (CCCP), directly to the dish at a final concentration of 5-10 µM. Mix gently.
- Acquire post-uncoupler images: After 5-10 minutes of incubation, acquire images again using the exact same imaging settings.
- Interpretation: A specific ΔΨm-dependent signal will show a rapid and significant loss of fluorescence intensity upon uncoupler addition. The remaining signal, if any, is non-specific background.
Protocol 2: Co-staining with Structural Dyes to Distinguish Mass from Activity
This protocol allows for the simultaneous assessment of mitochondrial membrane potential and morphology/mass.
- Plate cells as described in Protocol 1.
- Prepare co-staining solution: In pre-warmed, serum-free buffer, prepare a mixture containing both the ΔΨm-sensitive dye (e.g., TMRE) and a fixable, potential-independent structural dye (e.g., MitoTracker Green FM or CytoPainter Mitochondrial Stains). Note: Some dye combinations may require sequential staining; refer to manufacturer instructions.
- Load the dyes: Incubate cells with the dye mixture for 15-30 minutes at 37°C in the dark.
- Wash: Gently rinse the cells 2-3 times with fresh, pre-warmed buffer.
- Optional post-staining stabilization: Incubate for 15-30 minutes in dye-free buffer.
- Fixation (if required): For fixed-cell imaging, carefully add 4% paraformaldehyde in PBS and fix for 15 minutes at room temperature. Wash with PBS.
- Image acquisition: Image the cells, using appropriate filter sets for each dye. The structural dye will label all mitochondria, while the ΔΨm-sensitive dye will highlight only the active, polarized ones [58].
Experimental Workflow Visualization
The following diagram outlines a logical experimental workflow for a mitochondrial staining experiment, incorporating key decision points and controls to minimize artifacts.
The Scientist's Toolkit: Research Reagent Solutions
Table 3: Essential Reagents for Mitochondrial Staining Assays
| Reagent / Material | Function / Purpose | Example(s) |
|---|---|---|
| ΔΨm-Sensitive Dyes | Report on mitochondrial activity and health by accumulating in polarized mitochondria. Ideal for apoptosis studies and real-time functional assessment in live cells. | TMRE, TMRM, JC-1, Rhodamine 123 [58] |
| Structural / Potential-Independent Dyes | Label mitochondria regardless of membrane potential. Used for visualizing mitochondrial morphology, network structure, and mass. Essential for fixed samples. | MitoTracker Deep Red, CytoPainter Red/Green [58] |
| Fixable Dyes | Covalently bind to mitochondrial proteins, allowing the stain to be retained after fixation. Crucial for multiplexing with immunofluorescence. | Fixable MitoTracker probes (e.g., MitoTracker Red CMXRos), CytoPainter stains [58] |
| Mitochondrial Uncouplers | Collapse the proton gradient and abolish ΔΨm. Serves as a critical negative control to validate the specificity of ΔΨm-sensitive dyes. | FCCP, CCCP [58] |
| Antioxidant Media | Reduces phototoxicity and oxidative stress during live-cell imaging, helping to preserve native mitochondrial function. | Media supplements like ascorbic acid or commercial live-cell imaging media [58] |
| Antibody-Based Markers | Used for highly specific staining of mitochondria in fixed cells, often providing superior resolution for morphology. Excellent for co-localization studies. | Antibodies against TOMM20, COX IV, or other mitochondrial proteins [58] |
Ensuring Accuracy: Cross-Validation and Multi-Parameter Assessment of Mitochondrial Fitness
Frequently Asked Questions (FAQs)
Q1: My data shows a loss of ΔΨm, but ATP levels remain unchanged. What could explain this discrepancy? A loss of ΔΨm without a corresponding drop in ATP can indicate a shift in mitochondrial metabolism or function. Key factors to investigate include:
- Mitochondrial Morphology: A hyperfused mitochondrial network can enhance ATP production efficiency, potentially maintaining output even with a moderate drop in ΔΨm. Conversely, fragmented mitochondria may be less efficient [59] [10].
- Metabolic Plasticity: The cell may be compensating for reduced oxidative phosphorylation by upregulating glycolysis (the Warburg effect) to meet energy demands [10].
- Uncoupling: Mild uncoupling can dissipate the proton gradient (reducing ΔΨm) without inhibiting electron transport, and may even be a protective mechanism against excessive ROS production.
Q2: Why do I observe an increase in mtDNA copy number under conditions of high oxidative stress? An increase in mtDNA copy number can be a compensatory mechanism in response to oxidative damage. Research in yeast models has shown that reactive oxygen species (ROS) can directly regulate mtDNA replication. The base excision-repair enzyme Ntg1 creates double-stranded breaks at the replication origin (ori5) in response to oxidative modifications, which in turn initiates Mhr1-dependent rolling-circle replication to increase copy number [60]. This may be an adaptive response to ensure sufficient template for the biogenesis of functional mitochondria.
Q3: How can I reliably distinguish between increased ROS signaling and pathological ROS damage in my experiments? Distinguishing between physiological ROS signaling and pathological damage requires assessing multiple endpoints:
- Level and Duration: Low, transient ROS bursts often act as signals, while chronic, high-level ROS typically cause damage.
- Downstream Consequences: Measure markers of oxidative damage (e.g., lipid peroxidation, protein carbonylation) alongside ROS levels. The absence of significant damage suggests signaling roles.
- Functional Output: Assess whether the observed ROS correlate with adaptive cellular responses, such as the activation of antioxidant genes (e.g., via Nrf2 pathway) or the maintenance of mtDNA copy number, versus functional decline like reduced ATP production or induction of apoptosis [60] [61].
Q4: What is the most robust method for quantifying mitochondrial morphology in a high-throughput setting? For high-throughput analysis, automated image analysis pipelines are essential. The table below compares two common approaches [10]:
| Tool/Platform | Typical Application | Key Strengths | Key Limitations |
|---|---|---|---|
| CellProfiler | High-content screening of 2D/3D images in multiple cell lines. | User-friendly graphical interface; highly customizable pipelines; good for classifying morphology into categories (e.g., fragmented, swollen). | Less effective for extensive, interconnected networks; requires nuclear staining for cell segmentation. |
| MitoGraph | Detailed 3D analysis of mitochondrial networks. | Automatically converts 3D images into surfaces and skeletons; provides sophisticated metrics like volume and network connectivity. | Initially designed for yeast; requires post-processing with R or other tools for full data analysis. |
Q5: My experimental treatment induces rapid mitochondrial fragmentation. How can I determine if this fission is a cause or a consequence of the observed drop in ΔΨm? To establish causality, you need to experimentally modulate the fission process itself:
- Inhibit Fission: Use a pharmacological inhibitor of Drp1 (e.g., Mdivi-1) or employ genetic knockdown/knockout of Drp1 or its receptor Mff prior to your treatment. If the drop in ΔΨm is prevented, fission is likely a cause. If ΔΨm still drops, fission is probably a consequence [59] [10].
- Time-Course Analysis: Perform high-resolution, live-cell imaging to track both ΔΨm and morphology simultaneously. The event that occurs first (fragmentation or depolarization) provides strong evidence for causality.
Troubleshooting Guides
Problem: Inconsistent correlation between ΔΨm and ATP production rates. Potential Issue: Mitochondrial morphology is an uncontrolled variable, confounding the interpretation of ΔΨm.
Solution:
- Quantify Morphology: Implement a standardized imaging and analysis protocol to classify mitochondrial morphology alongside your functional assays. Use the tools described in the FAQ above [10].
- Control Genetics: Modulate the expression of core fission and fusion proteins. The following table outlines key reagents for this approach [59] [10]:
Research Reagent Solutions for Controlling Mitochondrial Dynamics
| Reagent | Type | Primary Function in Dynamics |
|---|---|---|
| Drp1 (DN) | Dominant-Negative Mutant | Inhibits GTPase activity, blocking mitochondrial fission. |
| Mdivi-1 | Small Molecule Inhibitor | Allosterically inhibits Drp1 GTPase activity, preventing fission. |
| Mfn1/2 siRNA | siRNA Knockdown | Silences mitofusins, inhibiting outer membrane fusion. |
| OPA1 siRNA | siRNA Knockdown | Silences OPA1, inhibiting inner membrane fusion. |
| Fis1/Mff siRNA | siRNA Knockdown | Silences fission protein receptors, reducing Drp1 recruitment. |
- Integrated Workflow: Follow the experimental logic below to systematically diagnose the relationship.
Problem: Elevated ROS levels with unclear impact on mtDNA integrity and copy number. Potential Issue: ROS can have dual, opposing effects on mtDNA, both damaging it and potentially stimulating its replication, leading to confusing results [60] [61].
Solution:
- Disentangle Pathways: Utilize specific models to separate damage from replication signaling. The Sod2 conditional knockout mouse model is highly relevant, as it elevates mitochondrial matrix ROS specifically, allowing study of its effects on oocyte quality and mtDNA [61].
- Measure Multiple Endpoints: Do not rely on a single metric. Concurrently assess:
- mtDNA Copy Number: By quantitative PCR.
- mtDNA Damage: By measuring mutation load or lesions.
- Functional Output: Levels of mtDNA-encoded mRNAs.
- Experimental Protocol: Assessing ROS-induced mtDNA Replication
- Model System: Utilize isolated mitochondria or a well-characterized cell model like the Sod2 CKO [60] [61].
- Treatment: Apply low, chronic doses of hydrogen peroxide (e.g., 0-100 µM) to mimic physiological oxidative stress versus acute, high doses that cause damage.
- Inhibition: Use RNAi to knock down key replication or repair factors (e.g., Ntg1, Mhr1 in yeast models) to test their necessity in the observed response [60].
- Analysis: Extract DNA and perform Southern blotting or long-range PCR to quantify mtDNA copy number and assess replication intermediates. The signaling relationship is summarized below.
Problem: High variability in manual classification of mitochondrial morphology. Potential Issue: Subjective and labor-intensive manual annotation leads to poor reproducibility and high inter-rater variability, a known challenge in biomedical image analysis [62].
Solution:
- Develop Robust Instructions: If using human annotators, create detailed labelling instructions that include multiple exemplary images of each morphological class (e.g., fused, fragmented, intermediate). Studies show that including pictures significantly boosts annotation quality compared to text-only descriptions [62].
- Adopt Automated Analysis: Transition to automated software pipelines (see FAQ #4) to remove subjectivity. These tools provide continuous, quantitative descriptors (e.g., aspect ratio, branch length, form factor) instead of discrete, subjective categories [10].
- Validation: Manually validate a subset of the automated analysis results to ensure the pipeline is correctly configured for your specific cell type and imaging conditions.
Table 1: Correlation of Mitochondrial Morphology with Functional Parameters
| Morphological State | Typical \u0394\u03a8m | ATP Production Efficiency | ROS Propensity | Associated Proteins (Activity) |
|---|---|---|---|---|
| Fused/Elongated | High | High (OXPHOS) | Lower | Mfn1/2 \u2191, OPA1 \u2191, Drp1 \u2193 |
| Fragmented | Variable/Low | Lower / Glycolysis | Higher | Drp1 \u2191, Fis1/Mff \u2191, Mfn1/2 \u2193, OPA1 \u2193 |
Table 2: Experimental Outcomes from Modulating Mitochondrial ROS
| Experimental Manipulation | Effect on mtDNA Copy Number | Effect on mtDNA Mutation Load | Key Supporting Evidence |
|---|---|---|---|
| Low/Chronic ROS | Increase (Compensatory) | No significant change | Yeast mitochondria & Sod2 CKO oocytes [60] [61] |
| High/Acute ROS | Decrease (Damage-induced loss) | Increase (Damage) | Various oxidative damage models |
Frequently Asked Questions (FAQs)
FAQ 1: Why is it necessary to consider mitochondrial morphology when interpreting ΔΨm data? Mitochondria are dynamic organelles, and their structure is intimately linked to their function. A change in morphology (e.g., from a fused network to a fragmented state) can directly alter cristae architecture and the distribution of the electron transport chain (ETC) complexes, thereby affecting the generation of the proton motive force that ΔΨm measures. Interpreting a ΔΨm value without structural context can be misleading, as similar ΔΨm readings may stem from different functional states. For instance, fragmented mitochondria may exhibit a high ΔΨm that is not coupled to efficient ATP synthesis [63] [5] [10].
FAQ 2: What are the common pitfalls when correlating data from different mitochondrial assays? A major pitfall is the lack of simultaneous measurement. If respiration, ΔΨm, and morphology are assessed in separate cell preparations or at different times, biological variation or differing cell states can obscure the true correlation. Furthermore, sample preparation for ultrastructural imaging (e.g., fixation for EM) can preclude subsequent functional assays on the same sample. Ensuring that cells are cultured and treated identically across all assays is critical for valid integration [5].
FAQ 3: My ΔΨm and respiration data seem to contradict each other. What could be the cause? This is a classic sign of uncoupling. A low ΔΨm with high oxygen consumption rate (OCR) can indicate a high proton leak across the inner mitochondrial membrane, where energy is dissipated as heat instead of being used for ATP production. Conversely, a high ΔΨm with low OCR might suggest ETC inhibition or a shift in energy metabolism. In both scenarios, assessing mitochondrial morphology can provide crucial clues, as fragmented mitochondria are often associated with increased uncoupling [5] [10].
Troubleshooting Guides
Problem 1: Inconsistent ΔΨm readings across experimental replicates.
- Identify the Problem: High variability in fluorescence intensity when using potentiometric dyes like JC-1 or TMRM.
- List Possible Explanations:
- Inconsistent dye loading: Variation in dye concentration, loading time, or temperature.
- Cell confluency and health: Differences in cell density or viability at the time of assay.
- Inadequate dye calibration: Failure to use uncouplers (e.g., FCCP) to validate the depolarization response.
- Morphological interference: Underlying changes in mitochondrial volume or network structure affecting dye aggregation or distribution [5].
- Collect Data & Eliminate Explanations:
- Check cell confluence and viability under a microscope prior to the assay.
- Review your lab notebook to confirm consistent dye loading protocols were followed.
- Run a FCCP titration curve to confirm the dye's dynamic range in your specific cell model.
- Check with Experimentation & Identify the Cause:
- Experiment: Fix cells immediately after the ΔΨm assay and stain with a morphology marker (e.g., anti-TOM20 antibody). Correlate the fluorescence variability with quantitative metrics of morphology (e.g., network branching, aspect ratio).
- Cause: The identified cause may be that variable mitochondrial fragmentation is leading to inconsistent dye sequestration and signal intensity, independent of the true membrane potential.
Problem 2: Discrepancy between high OCR and a fragmented mitochondrial network.
- Identify the Problem: Imaging reveals punctate, fragmented mitochondria, but Seahorse analysis shows a robust OCR, which is typically associated with a fused, networked state.
- List Possible Explanations:
- Compensatory glycolysis: The high OCR is masking a concurrent, and potentially dominant, glycolytic flux.
- Subpopulation analysis: The OCR is a bulk measurement from a whole well, while imaging may capture only a subset of cells.
- Functional fragmentation: The fragmentation is a physiological response to high energy demand or a specific signaling event, not a sign of dysfunction [10].
- Collect Data & Eliminate Explanations:
- Check the extracellular acidification rate (ECAR) from the Seahorse assay to assess glycolytic contribution.
- Ensure imaging is performed on a representative number of cells from the same culture conditions used for the Seahorse assay.
- Check with Experimentation & Identify the Cause:
- Experiment: Treat cells with a fusion-promoting agent (e.g., M1) and re-measure both OCR and morphology. Alternatively, use single-cell analysis techniques like a Seahorse Analytics kit to link metabolism and imaging in the same cell.
- Cause: The cell line may exhibit metabolic plasticity, utilizing both OXPHOS and glycolysis effectively despite a fragmented network, or the fragmentation may be transient and functional.
Problem 3: Poor-quality ultrastructural images that obscure cristae details.
- Identify the Problem: Transmission Electron Microscopy (TEM) images lack clear definition of the inner mitochondrial membrane and cristae.
- List Possible Explanations:
- Suboptimal fixation: Slow or inadequate penetration of fixatives (e.g., glutaraldehyde) leading to artifacts.
- Sample thickness: Sections are too thick for high-resolution imaging.
- Insufficient contrast: Inadequate staining with heavy metals (e.g., uranium and lead) [5].
- Collect Data & Eliminate Explanations:
- Review fixation protocol: ensure fresh fixatives are used and samples are processed promptly.
- Confirm sectioning thickness with the microtome setting.
- Check with Experimentation & Identify the Cause:
- Experiment: Prepare a new batch of samples with emphasis on rapid fixation and optimize staining times.
- Cause: The most likely cause is poor fixation quality, leading to swelling and loss of membranous details.
Experimental Protocols for the Integrated Triad
Protocol 1: Correlative Assessment of ΔΨm and Morphology in Live Cells This protocol allows for the simultaneous visualization of mitochondrial membrane potential and network structure.
- Cell Staining:
- Culture cells on glass-bottom dishes.
- Load cells with 100-200 nM Tetramethylrhodamine Methyl Ester (TMRM) in culture medium for 30 minutes at 37°C to measure ΔΨm.
- Co-stain with 100-200 nM MitoTracker Green FM for 15 minutes to label the mitochondrial network independently of membrane potential.
- Image Acquisition:
- Use a confocal microscope with a high-resolution objective (e.g., 63x/1.4 NA oil immersion).
- Acquire Z-stacks to capture the full 3D volume of the cells.
- For TMRM, use low laser power to avoid phototoxicity and ensure the signal is quench-mode for accurate ΔΨm assessment.
- Image Analysis:
- Use ImageJ/Fiji with plugins like MiNA to quantify mitochondrial morphology from the MitoTracker channel.
- Quantify TMRM fluorescence intensity (after background subtraction) as a relative measure of ΔΨm.
Protocol 2: Integrated Workflow for Respiration, ΔΨm, and Ultrastructure This sequential workflow is designed to maximize data correlation from a single cell population.
- Functional Assays (on live cells):
- Step A: Seahorse XF Analyzer. Seed cells in a XF24/96 cell culture microplate. Perform a Mitochondrial Stress Test to obtain basal OCR, ATP-linked respiration, proton leak, and maximal respiratory capacity.
- Step B: ΔΨm Measurement. Immediately following the Seahorse run, stain the cells from the same plate with a potentiometric dye (e.g., JC-1) and read fluorescence using a plate reader or perform live-cell imaging. Note: Validate that the Seahorse assay media changes do not interfere with the dye.
- Fixation for Ultrastructure:
- After functional measurements, immediately fix the cells in the microplate with 2.5% glutaraldehyde in 0.1 M sodium cacodylate buffer for at least 1 hour at 4°C.
- TEM Sample Preparation:
- Post-fix in 1% osmium tetroxide for 1 hour.
- Dehydrate through a graded ethanol series (50%, 70%, 90%, 100%).
- Embed in EPON resin and polymerize at 60°C for 48 hours.
- Section cells to 70-nm thickness using an ultramicrotome and collect sections on copper grids.
- Stain with uranyl acetate and lead citrate.
- TEM Imaging & Analysis:
- Acquire images at magnifications of 10,000x to 40,000x.
- Quantify cristae morphology (cristae density, width) and overall mitochondrial shape using image analysis software.
The Scientist's Toolkit: Research Reagent Solutions
Table 1: Essential Reagents for Mitochondrial Structure-Function Studies.
| Reagent | Function/Application | Key Considerations |
|---|---|---|
| JC-1 | Fluorescent dye for quantifying ΔΨm; exhibits potential-dependent shift from green (monomer) to red (J-aggregate) emission. | The red/green ratio is a robust indicator. Can be used in flow cytometry and microscopy. Sensitive to loading conditions [5]. |
| TMRM / TMRE | Cell-permeant potentiometric dyes that accumulate in mitochondria in a ΔΨm-dependent manner. | Often used in "quench" mode for accurate measurement. Ideal for time-lapse imaging due to lower phototoxicity [5] [10]. |
| MitoTracker Probes | Cell-permeant dyes that covalently bind to mitochondrial proteins, useful for tracking morphology and location. | MitoTracker Green FM is largely independent of ΔΨm, while MitoTracker Red CMXRos is ΔΨm-dependent. Choose based on the experimental need [5] [10]. |
| Oligomycin | ATP synthase inhibitor. Used in Seahorse assays to measure ATP-linked respiration. | Causes hyperpolarization of ΔΨm by blocking proton flow through ATP synthase. |
| FCCP | Proton ionophore that uncouples respiration from ATP synthesis, collapsing ΔΨm and driving OCR to its maximum. | Used to measure maximal respiratory capacity in Seahorse and to calibrate ΔΨm dyes. Requires titration for optimal use. |
| Anti-TOM20 / Anti-COX IV Antibodies | Immunofluorescence staining for mitochondrial outer (TOM20) and inner (COX IV) membranes. | Provides high-resolution structural data on fixed cells for network analysis and can be used to validate organelle identity in super-resolution imaging [5]. |
Table 2: Quantitative Parameters for the Gold Standard Triad.
| Assay Category | Key Parameter | Measurement Technique | Interpretation in an Integrated Context |
|---|---|---|---|
| Membrane Potential (ΔΨm) | Fluorescence Intensity (JC-1 red/green ratio or TMRM intensity) | Fluorescence Microscopy, Flow Cytometry, Plate Reader | High values indicate strong proton gradient; must be correlated with OCR to distinguish coupled state from ETC inhibition. |
| Respiration | Basal OCR, ATP-linked OCR, Maximal OCR, Proton Leak | Seahorse XF Analyzer | High OCR with low ΔΨm suggests uncoupling. Low OCR with high ΔΨm may indicate inhibition. Morphology can indicate adaptive (fusion) or pathological (fragmentation) states. |
| Ultrastructure & Morphology | Aspect Ratio, Form Factor, Network Branching (from fluorescence) | Confocal Microscopy, ImageJ (MiNA), CellProfiler | A fused network is associated with efficient OXPHOS. Fragmentation is linked to glycolysis, mitophagy, and cellular stress. |
| Cristae Density, Cristae Width (from TEM) | Transmission Electron Microscopy, Image Analysis | Dense, lamellar cristae are linked to high ETC efficiency. Disorganized or swollen cristae are hallmarks of dysfunction. |
Experimental Workflow and Signaling Relationships
The following diagram illustrates the core experimental workflow for implementing the Gold Standard Triad and the key signaling relationships that connect mitochondrial dynamics to function.
Mitochondrial membrane potential (ΔΨm) is a central parameter in cellular bioenergetics, generated by the electron transport chain and utilized for ATP production. Its interpretation, however, is complicated by the dynamic nature of mitochondria, which constantly undergo fusion and fission events that remodel their architecture. These morphological transitions are not merely structural but are intimately linked to mitochondrial function, influencing bioenergetics, calcium handling, and reactive oxygen species production. This technical support article provides a framework for researchers to control for mitochondrial morphology when interpreting ΔΨm measurements across different disease contexts, enabling more accurate assessment of mitochondrial health and function in experimental models.
Frequently Asked Questions (FAQs)
1. How does mitochondrial morphology directly affect ΔΨm measurements? Mitochondrial dynamics (fusion and fission) directly influence bioenergetic capacity. Fragmented mitochondrial networks typically exhibit reduced oxidative phosphorylation capacity and impaired calcium buffering, which can depolarize ΔΨm. Conversely, hyperfused networks may display hyperpolarization under some conditions. Critically, these morphology changes can either cause or result from ΔΨm alterations, creating interpretation challenges without proper controls [59] [50].
2. Why might ΔΨm interpretation differ between metabolic and genetic mitochondrial diseases? The primary distinction lies in the disease mechanisms and compensatory responses:
- In metabolic diseases (e.g., diabetes, NAFLD), ΔΨm alterations often represent physiological adaptations to nutrient excess, with morphology changes following metabolic remodeling.
- In genetic mitochondrial disorders, ΔΨm defects typically stem from direct impairment of OXPHOS components, with morphology changes representing pathological responses to energy deficiency. The stress response pathways activated also differ, with metabolic diseases showing more pronounced ROS signaling, while genetic disorders often trigger stronger integrated stress responses [59] [63] [64].
3. What are the key experimental controls for isolating morphology-specific effects on ΔΨm?
- Genetic controls: Express fission/fusion mutants (dominant-negative DRP1, OPA1 mutants) in wild-type and disease backgrounds.
- Pharmacological controls: Use dynamics modulators (Mdivi-1 for fission inhibition, FCCP as uncoupler control) at established concentrations.
- Time-course analyses: Distinguish primary ΔΨm defects from secondary morphological adaptations.
- Parallel respiration assays: Correlate ΔΨm with functional OXPHOS capacity [50] [64] [65].
Troubleshooting Guides
Problem: Inconsistent ΔΨm Measurements in Genetic Disease Models
Potential Cause #1: Heteroplasmy Level Variations
- Issue: In mtDNA mutation models, varying heteroplasmy levels cause different bioenergetic thresholds being reached.
- Solution:
- Pre-screen cell lines or animal tissues for heteroplasmy levels using qPCR or digital PCR.
- Use cytoplasmic hybrid (cybrid) cells with standardized heteroplasmy.
- Establish correlation between heteroplasmy percentage and both ΔΨm and morphology. Supporting Data*: Heteroplasmy must typically reach 80-90% to manifest biochemical defects, but this threshold varies by mutation and cell type [63].
Potential Cause #2: Compensatory Metabolic Shifts
- Issue: Cells may upregulate glycolysis to compensate for OXPHOS defects, indirectly affecting ΔΨm.
- Solution:
- Measure extracellular acidification rate (ECAR) as glycolysis indicator alongside ΔΨm.
- Culture cells in galactose medium to force mitochondrial ATP dependence.
- Inhibit glycolysis with 2-DG to unmask mitochondrial vulnerabilities.
- Expected Outcomes: Galactose medium will amplify ΔΨm differences between mutant and control cells [63] [8].
Problem: Confounding Morphology-ΔΨm Relationships in Metabolic Disease Models
Potential Cause #1: Nutrient-Induced Fragmentation
- Issue: High glucose and lipids promote fission, potentially lowering ΔΨm independently of intrinsic defects.
- Solution:
- Culture cells in physiological nutrient concentrations (5mM glucose, not 25mM).
- Differentiate acute (physiological) versus chronic (pathological) fragmentation using time-course experiments.
- Express pro-fusion proteins (Mfn2, OPA1) to rescue fragmentation and assess ΔΨm normalization.
- Technical Note: Chronic high glucose (≥72 hours) induces pathological fragmentation, while acute exposure (≤24 hours) may represent physiological regulation [59] [50].
Potential Cause #2: ROS-Mediated Dynamics
- Issue: Elevated ROS can both cause fragmentation and dissipate ΔΨm, creating circular causality.
- Solution:
- Treat with MitoTEMPO (mitochondrial-targeted antioxidant) to dissect ROS-specific effects.
- Measure mito-ROS concurrently with ΔΨm and morphology.
- Use redox-sensitive biosensors (roGFP) to quantify oxidative stress burden.
- Interpretation Guide: If antioxidant treatment normalizes both morphology and ΔΨm, ROS is likely the primary driver [50].
Quantitative Data Comparison Across Disease Models
Table 1: Characteristic ΔΨm and Morphology Patterns in Disease Models
| Disease Category | Typical ΔΨm Change | Morphology Shift | Key Molecular Mediators | Compensatory Mechanisms |
|---|---|---|---|---|
| Type 2 Diabetes | ↑ Hyperpolarization (early) ↓ Depolarization (late) | Progressive fragmentation | Reduced Mfn2, OPA1 processing; Increased DRP1 phosphorylation | Enhanced glycolysis, UCP3 upregulation |
| NAFLD/NASH | ↓ Depolarization | Extensive fragmentation | ROS-activated DRP1, Mff upregulation | β-oxidation induction, lipid droplet biogenesis |
| LHON | ↓ Depolarization | Mixed fragmentation | Complex I deficiency, increased fission | Glycolytic shift, mitophagy activation |
| Leigh Syndrome | ↓↓ Severe depolarization | Hyperfragmentation | SURF1 mutations, impaired fusion | Attempted biogenesis, metabolic reprogramming |
| Diabetic Cardiomyopathy | ↑ then ↓ Biphasic response | Fragmentation | Mfn2 downregulation, Fis1 overexpression | Substrate switching (glucose to fatty acids) |
Table 2: Technical Considerations for ΔΨm Measurement Across Models
| Method | Best For | Morphology Interference | Disease-Specific Considerations |
|---|---|---|---|
| TMRM/JC-1 Flow Cytometry | High-throughput screening | Moderate (fixation alters structure) | Metabolic diseases: account for lipid droplet accumulation Genetic diseases: consider cell size heterogeneity |
| Live-Cell TMRM Imaging | Single-cell dynamics | Low (enables parallel morphology analysis) | Use MitoTracker for structure reference; critical for fragmented networks |
| Seahorse XF Analysis | Bioenergetic profiling | High (requires intact cells) | Metabolic diseases: optimize nutrient conditions Genetic diseases: pre-test cell adhesion |
| UCP1 Uncoupling Control | Specific ΔΨm manipulation | Minimal off-target effects | Validated in C2C12; requires oleic acid for activation [64] [65] |
Experimental Protocols
Protocol 1: Concurrent ΔΨm and Morphology Assessment in Live Cells
Principle: Simultaneously quantify ΔΨm and mitochondrial network structure using dual-fluorescence imaging.
Reagents:
- TMRM (25-50 nM) for ΔΨm
- MitoTracker Green (100 nM) for morphology (ΔΨm-independent)
- HEPES-buffered imaging medium
- Oligomycin (1μg/mL) and FCCP (2μM) controls
Procedure:
- Seed cells on glass-bottom dishes at 50-70% confluence.
- Load with TMRM and MitoTracker Green for 30 minutes at 37°C.
- Wash twice and maintain in dye-free imaging medium.
- Acquire images using confocal microscopy with appropriate filter sets.
- Analyze ΔΨm as TMRM intensity normalized to cell area.
- Quantify morphology using ImageJ plugins:
- Mitochondrial Network Analysis (MiNA) macro
- Skeleton analysis for branch length and junctions
- Include oligomycin (hyperpolarization control) and FCCP (depolarization control) in each experiment.
Troubleshooting Notes:
- TMRM phototoxicity: Minimize laser power and exposure time.
- Morphology preservation: Avoid excessive cell manipulation during staining.
- Disease-specific optimization: Genetic models may require lower dye concentrations due to heightened sensitivity [66] [8].
Protocol 2: Dissecting Causality in Morphology-ΔΨm Relationships
Principle: Use inducible fission/fusion mutants to determine whether morphology changes drive ΔΨm alterations or vice versa.
Reagents:
- Doxycycline-inducible DRP1-K38A (fission-deficient) or Mfn2-expressing constructs
- Mdivi-1 (50μM) as pharmacological fission inhibitor
- SiRNA against Fis1 or Mff
Procedure:
- Establish disease model cells with inducible pro-fusion or fission-deficient constructs.
- Induce expression with doxycycline (1μg/mL) for 24-48 hours.
- Confirm morphology shift by immunostaining and image analysis.
- Measure ΔΨm using TMRM flow cytometry.
- Compare ΔΨm in:
- Uninduced disease cells
- Morphology-corrected disease cells
- Healthy control cells
- Perform reciprocal experiment: induce fragmentation in healthy cells and monitor ΔΨm kinetics.
Interpretation Framework:
- If morphology correction normalizes ΔΨm → morphology is upstream driver
- If morphology correction doesn't normalize ΔΨm → ΔΨm defect is primary
- If ΔΨm changes precede morphology shifts → ΔΨm is causative [59] [50].
Signaling Pathways and Logical Relationships
Diagram 1: Disease-specific pathways linking mitochondrial inputs to functional outcomes. Note the bidirectional relationship (dashed line) between morphology and ΔΨm that complicates interpretation.
Research Reagent Solutions
Table 3: Essential Research Tools for ΔΨm-Morphology Studies
| Reagent Category | Specific Examples | Primary Function | Disease Model Considerations |
|---|---|---|---|
| ΔΨm Indicators | TMRM, JC-1, TMRE | Quantitative ΔΨm measurement | TMRM preferred for metabolic studies due to minimal toxicity |
| Morphology Dyes | MitoTracker Green, Photoactivatable-GFP | Network structure visualization | MitoTracker useful for fixed cells; PA-GFP for live dynamics |
| Genetic Uncouplers | Inducible UCP1 [64] [65] | Specific ΔΨm dissipation without plasma membrane effects | Requires oleic acid co-treatment; superior to chemical uncouplers |
| Fission Inhibitors | Mdivi-1 (50-100μM), DRP1-K38A mutant | Experimental network elongation | Mdivi-1 has off-target effects at high concentrations |
| Fusion Promoters | Mfn2 overexpression, OPA1 constructs | Counter disease-related fragmentation | OPA1 processing affected in metabolic diseases |
| Morphology Analysis Tools | MiNA ImageJ macro, IMARIS, MiNA | Automated network quantification | Validate parameters for each disease model's baseline morphology |
Interpreting mitochondrial membrane potential (ΔΨm) is a cornerstone of cellular physiology and metabolic research. However, a prevalent and often overlooked confounding factor is the concurrent alteration in mitochondrial morphology. Mitochondria are highly dynamic organelles, and their structure—whether fragmented, fused, or reticulated—is intrinsically linked to their functional state [67]. A change in ΔΨm measurements can stem from a genuine shift in bioenergetic status or merely from an increase in the total mitochondrial mass within the cell without a functional change. Therefore, establishing robust baselines using healthy control models and controlling for morphological parameters is not a supplementary step but a fundamental requirement for the accurate interpretation of ΔΨm data. This guide provides targeted troubleshooting and foundational protocols to help researchers dissect this complex relationship.
Establishing Baselines: Key Parameters in Healthy Controls
A critical first step in any experiment investigating mitochondrial dysfunction is to establish the expected baseline morphology and function in healthy, untreated control cells. The table below summarizes key quantitative parameters that should be characterized in your control model system. Note that these values can vary significantly by cell type, underscoring the importance of establishing lab-specific baselines.
Table 1: Key Morphological and Functional Parameters for Healthy Control Models
| Parameter | Description | Typical Indicators in Healthy Controls | Technical Notes |
|---|---|---|---|
| Network Interconnectivity | Degree of fusion/fission balance; measures connectivity of the mitochondrial network. [68] | Cell-type specific; can range from highly interconnected to more fragmented under basal conditions. [67] | Quantified using image analysis software (e.g., MiA from Mito Hacker). [69] |
| Mitochondrial Number | The number of discrete mitochondrial objects per cell. [68] | Varies with cell type and energy demand. | An increase can indicate fission; a decrease may suggest fusion or mitophagy. [68] |
| Mean Mitochondrial Size/Perimeter | The average size of individual mitochondria. [68] | Varies with cell type. | A decrease in perimeter suggests fragmentation; an increase suggests elongation. [68] |
| Elongation | A measure of how rod-like or spherical individual mitochondria are. [68] | A mix of morphologies is typical. | High elongation values are associated with fused, interconnected networks. [68] |
| Basal ΔΨm | The resting mitochondrial membrane potential. [44] | Stable, cell-type specific negative potential. | Measured with potentiometric dyes like TMRM, TMRE, or JC-1. [70] [44] |
| Key Protein mRNA Levels | Expression of genes regulating biogenesis, dynamics, and quality control. [68] | Balanced expression of Ppargc1a (biogenesis), Mfn2 (fusion), Pink1/Parkin (mitophagy). | Imbalances can prefigure morphological changes. |
Core Experimental Protocols for Baseline Characterization
Protocol: Simultaneous Staining for Mitochondrial Morphology and Membrane Potential
Principle: Multiplexing a morphology stain with a potentiometric dye allows for the direct correlation of structure and function within the same cell. [70]
Materials:
- MitoTracker Green FM or Red FM: Accumulates in mitochondria largely independent of ΔΨm; useful as a morphology marker that is retained after fixation. [70]
- CellLight Mitochondria-GFP/RFP: Labels mitochondria via BacMam gene delivery, independent of functional state. [70]
- TMRM or TMRE: ΔΨm-sensitive dyes that accumulate in energized mitochondria; signal is lost upon depolarization. [70] [44]
- JC-1 Dye: A ΔΨm-sensitive probe that exhibits a potential-dependent shift in fluorescence from green (monomer, low ΔΨm) to red (J-aggregates, high ΔΨm), providing a rationetric measurement. [71]
Procedure:
- Cell Culture: Plate cells on appropriate imaging dishes and grow to 60-80% confluency.
- Staining:
- For live-cell imaging, incubate cells with a combination of MitoTracker Deep Red FM (e.g., 50 nM) and TMRM (e.g., 20 nM) in pre-warmed culture medium for 30-45 minutes at 37°C, protected from light.
- Alternatively, for a fixed-cell approach, transduce cells with CellLight Mitochondria-GFP 24-48 hours before imaging to label the network. Then, load cells with TMRM for the final 30 minutes of culture.
- Washing & Imaging: Gently wash cells twice with warm, dye-free culture medium or PBS. Image immediately in live-cell imaging solution using a confocal microscope with appropriate laser lines and filter sets.
- Analysis:
- Use the morphology channel (MitoTracker or CellLight) to quantify parameters like number, size, and interconnectivity using automated tools like Mito Hacker's MiA. [69]
- Analyze the TMRM fluorescence intensity, normalized to the morphology channel, to assess ΔΨm independent of mitochondrial mass. [70]
Protocol: High-Throughput Image Analysis with Mito Hacker
Principle: Automated tools like Mito Hacker enable unbiased, quantitative analysis of mitochondrial morphology at a single-cell level from multi-cell images, which is essential for generating robust baseline data. [69]
Materials:
- Multi-cell fluorescence images with mitochondria labeled (e.g., GFP/RFP channel) and nuclei stained (e.g., DAPI/Hoechst in blue channel).
- Mito Hacker software suite (Cell Catcher, Mito Catcher, MiA). [69]
Procedure:
- Cell Isolation (Cell Catcher): Input your multi-cell RGB image. The tool uses the nuclear stain to identify and separate individual cells, removing "ghost cells" (those without mitochondrial signal) to prevent false assignments. [69]
- Network Segmentation (Mito Catcher): Process the single-cell images. This tool uses the statistical distribution of pixel intensities to remove background noise and create a clean, binary mask of the mitochondrial network. [69]
- Morphometric Analysis (MiA): Input the binarized mitochondrial network. MiA will perform over 100 measurements, outputting data on parameters such as:
- Cell-level: Total mitochondrial area, network branch length.
- Mitochondria-level: Count, average perimeter, elongation, and form factor. [69]
The workflow for these core protocols is summarized in the diagram below.
The Scientist's Toolkit: Essential Reagents & Tools
Table 2: Key Research Reagent Solutions for Mitochondrial Studies
| Item Name | Function/Principle | Key Considerations |
|---|---|---|
| MitoTracker Probes (Green/Red/Deep Red) | Fluorescent dyes that stain mitochondria for morphology assessment; retained after fixation. [70] | MitoTracker Green is largely ΔΨm-independent; Red/Deep Red variants have some ΔΨm-dependence. |
| CellLight Mitochondria-GFP/RFP | BacMam-based fluorescent protein constructs that label the entire mitochondrial network, independent of ΔΨm. [70] | Ideal for long-term live-cell imaging and for normalizing potentiometric dye signals. |
| TMRM / TMRE | Cell-permeant, cationic fluorescent dyes that accumulate in active mitochondria in a ΔΨm-dependent manner. [70] [44] | Used in low concentrations for quantitative measurements. Can be used in quenching or non-quenching modes. |
| JC-1 | Rationetric ΔΨm probe. Emits green fluorescence (≈529 nm) at low potentials and red fluorescence (≈590 nm) at high potentials. [71] | The red/green ratio is a robust, concentration-independent measure of ΔΨm. More sensitive than single-wavelength dyes. |
| Mito Hacker Software Suite | A set of computational tools for automated, high-throughput analysis of mitochondrial morphology from 2D images. [69] | Comprises Cell Catcher (cell isolation), Mito Catcher (network segmentation), and MiA (morphometric analysis). |
| ATP Chemiluminescence Assay Kit | Measures cellular ATP levels via luciferase-based bioluminescence, a direct output of mitochondrial function. [71] | High sensitivity and throughput. Essential for correlating ΔΨm with energetic output. |
Troubleshooting Guide & FAQs
FAQ 1: My ΔΨm signal (e.g., TMRM intensity) has increased in my treatment group. Does this automatically mean the mitochondria are hyperpolarized and healthier?
Answer: Not necessarily. A common pitfall is interpreting an increase in fluorescent signal as hyperpolarization without controlling for morphology. You must first rule out that the treatment has not simply induced mitochondrial biogenesis or fusion, thereby increasing the total mitochondrial mass in the cell. A higher signal could be due to more mitochondria, not a higher potential per mitochondrion.
Troubleshooting Steps:
- Normalize the Signal: Quantify the ΔΨm dye intensity (e.g., TMRM) and normalize it to a ΔΨm-independent mitochondrial mass marker (e.g., MitoTracker Green or Citrine-Mito signal) on a per-cell or per-mitochondria basis. [70]
- Quantify Morphology: Use image analysis (e.g., Mito Hacker's MiA) to determine if the treatment increased the number or total area of mitochondria. [69]
- Cross-Validate: Correlate your findings with other functional assays, such as ATP production or OCR measurements, to confirm a genuine change in bioenergetic status. [71]
FAQ 2: I observe significant heterogeneity in mitochondrial morphology and ΔΨm between cells in my control population. Is this normal, and how should I account for it?
Answer: Yes, mitochondrial heterogeneity is a normal feature of cell populations and reflects differences in cell cycle stage, local microenvironment, and stochastic biological variation. [69] Ignoring this heterogeneity can lead to inaccurate conclusions.
Troubleshooting Steps:
- Increase 'N': Move from analyzing a handful of cells to dozens or hundreds. Use high-throughput tools like Mito Hacker that automate single-cell analysis to build a statistically powerful baseline distribution. [69]
- Single-Cell Analysis: Always analyze morphology and function at the single-cell level. Do not rely on bulk measurements from well-based assays (like plate readers) alone, as they mask cell-to-cell variation.
- Report Distribution: Present your data as scatter plots with means/medians or as frequency distribution histograms, rather than just bar graphs with error bars, to visually convey the heterogeneity.
FAQ 3: My positive control (e.g., FCCP/CCCP) successfully collapses ΔΨm, but the morphology of the mitochondria also changes dramatically to a highly fragmented state. How do I deconvolute these effects?
Answer: This is a classic example of the interplay between function and morphology. The uncoupler FCCP depolarizes mitochondria, which often activates the quality control system, leading to Drp1-mediated fission and mitophagy to remove the damaged organelles. [70] [67]
Troubleshooting Steps:
- Temporal Analysis: Perform a time-course experiment. The rapid depolarization from FCCP happens within seconds to minutes, while the fragmentation occurs over tens of minutes to hours. Imaging at early time points can help capture the pure ΔΨm effect.
- Inhibit Fission: Treat cells with a Drp1 inhibitor (e.g., Mdivi-1) prior to FCCP application. This can help you isolate the ΔΨm collapse (which will still occur) from the subsequent morphological change.
- Context is Key: Recognize that in this scenario, the fragmentation is a consequence of the functional change. Your experimental model might exhibit the reverse, where a primary morphological change drives the functional deficit.
The following diagram outlines a logical decision tree for troubleshooting ambiguous ΔΨm data.
Frequently Asked Questions (FAQs)
Q1: Why is it necessary to correct ΔΨm measurements for mitochondrial morphology? Mitochondria are dynamic organelles, and their morphology (from fused networks to fragmented puncta) is intrinsically linked to their functional state, including ΔΨm. A fragmented morphology is often associated with cellular stress, increased glycolysis, and can be a feature of certain cancer cells. Measuring ΔΨm without considering morphology can lead to misinterpretation. For instance, a drug might cause mitochondrial fragmentation and a consequent loss of ΔΨm. Without imaging, it is impossible to distinguish if the ΔΨm loss is a direct drug effect or a secondary consequence of morphological disruption. Correcting for morphology ensures that the ΔΨm value accurately reflects the organelle's bioenergetic health and not just its shape, leading to a more reliable prediction of drug efficacy [10] [72].
Q2: What are the best practices for simultaneously imaging ΔΨm and mitochondrial morphology in live cells? For live-cell imaging, use a combination of a potential-sensitive dye and a potential-independent structural dye. The cationic dye TMRM is excellent for quantifying ΔΨm, as its accumulation is dependent on the membrane potential. To visualize the entire mitochondrial network regardless of its activity, use a fixable structural dye like CytoPainter Red or Green. This two-dye strategy allows you to overlay the active, high-ΔΨm mitochondria (TMRM signal) onto the entire mitochondrial architecture (CytoPainter signal). This reveals if regions of the network are depolarized and helps correlate specific morphological states with their bioenergetic capacity [58].
Q3: We observe high variability in TMRM signal between cells. What could be the cause? High variability in TMRM fluorescence can stem from several sources. The primary cause is genuine biological heterogeneity in ΔΨm across a cell population. However, technical artifacts must be ruled out:
- Dye Loading and Conditions: Ensure consistent dye loading concentration, temperature, and incubation time across all samples.
- Instrument Settings: Maintain identical microscope laser power, gain, and exposure time for all image acquisitions.
- Cell Health and Confluence: Variations in cell health, cell cycle stage, or local cell density can affect ΔΨm.
- Morphological Differences: Cells with fragmented mitochondrial networks may show a different TMRM distribution compared to those with fused networks, even if the average ΔΨm per mitochondrion is similar. This underscores the need for morphology correction [58] [72].
Q4: How can we validate that a change in ΔΨm is a specific drug effect and not a general toxic response? To confirm specificity, include a suite of control experiments:
- Pharmacological Controls: Treat cells with known uncouplers (e.g., FCCP) to induce maximal ΔΨm collapse and with oligomycin to hyperpolarize mitochondria. This validates that your ΔΨm assay is functioning correctly.
- Viability Correlations: Correlate ΔΨm changes with direct cell viability and proliferation assays. A genuine therapeutic compound may alter ΔΨm without immediate cytotoxicity, whereas a general toxin often causes rapid ΔΨm loss followed by cell death. Research shows that genetic uncouplers like UCP1 can lower ΔΨm without inhibiting proliferation, unlike some chemical uncouplers which have off-target effects [64].
- Morphology Assessment: As per the core thesis, always assess morphology. A specific drug effect on a mitochondrial target may alter ΔΨm with or without a specific morphological shift, while generalized toxicity often leads to extreme and rapid fragmentation.
Troubleshooting Guides
Problem 1: Inconsistent or Weak ΔΨm Signal
| Symptom | Possible Cause | Solution |
|---|---|---|
| Faint TMRM fluorescence in all cells. | Incorrect dye concentration or incubation time. | Perform a dye titration to optimize loading. |
| Dye has degraded due to improper storage or age. | Aliquot and protect dyes from light; use fresh aliquots. | |
| Microscope settings are sub-optimal. | Use a positive control (e.g., untreated cells) to set gain and laser power. | |
| Signal is present but does not change with uncoupler (FCCP) treatment. | Dye concentration is too high, leading to signal saturation and quenching. | Titrate dye to a lower concentration. |
| Cells are unhealthy or largely depolarized at baseline. | Check cell health and viability before the experiment. |
Problem 2: ΔΨm Data Does Not Correlate with Drug Efficacy in Validation Assays
| Symptom | Possible Cause | Solution |
|---|---|---|
| A compound shows strong ΔΨm reduction in vitro but no efficacy in cell-based viability assays. | The ΔΨm reduction may be an off-target effect, not linked to the intended mechanism. | Use a genetically encoded tool like UCP1 [64] to specifically manipulate ΔΨm and test if the phenotypic effect is replicated. |
| The ΔΨm measurement was confounded by concurrent changes in mitochondrial mass or morphology. | Implement morphology correction: Quantify mitochondrial network parameters (e.g., using MitoGraph [10] or CellProfiler [10]) and normalize the ΔΨm signal to these structural metrics. | |
| Viable cells remain after treatment despite a complete loss of ΔΨm. | Cancer cells can switch to glycolytic metabolism for survival, making them resistant to ΔΨm-collapsing drugs. | Measure extracellular acidification rate (ECAR) as a proxy for glycolysis to confirm metabolic plasticity [64]. Consider combination therapies that target both oxidative phosphorylation and glycolysis. |
Experimental Protocols
Protocol 1: Simultaneous Live-Cell Imaging of ΔΨm and Mitochondrial Morphology
Principle: This protocol uses TMRM, a ΔΨm-sensitive dye, and a fixable, potential-independent dye (e.g., CytoPainter) to visualize the complete mitochondrial network [58].
- Cell Seeding: Seed cells onto glass-bottom imaging dishes 24-48 hours before the experiment.
- Dye Loading:
- Prepare imaging medium pre-warmed to 37°C.
- Load cells with both TMRM (e.g., 20-100 nM) and the structural dye (e.g., CytoPainter, as per manufacturer's instructions) for 20-30 minutes at 37°C, protected from light.
- Washing: Gently wash cells twice with warm, dye-free imaging medium.
- Image Acquisition: Place dishes on a pre-warmed microscope stage (37°C, 5% CO₂). Acquire images using appropriate laser lines and filters for the two dyes.
- Critical Step: Keep laser power and exposure time as low as possible to avoid phototoxicity and dye bleaching.
- Validation: At the end of the experiment, add the uncoupler FCCP (1-5 µM) and acquire a final set of images. The TMRM signal should dissipate, while the structural dye signal should remain.
Protocol 2: Quantifying Mitochondrial Morphology with MitoGraph
Principle: MitoGraph is an open-source software that converts 3D mitochondrial images into analyzable skeleton and surface structures, providing objective morphological data [10].
- Image Pre-processing: Use Fiji/ImageJ to perform background subtraction and ensure a good signal-to-noise ratio in your structural channel.
- MitoGraph Analysis:
- Input your 3D image stack (Z-stack) into MitoGraph.
- Run the analysis to generate two outputs: (a) a surface representation of the mitochondrial volume, and (b) a skeletonized representation of the network.
- Data Extraction: Use the accompanying R scripts or other tools to extract quantitative features from the MitoGraph output. Key parameters include:
- Network Branch Length: Average length of mitochondrial fragments.
- Network Volume: Total volume occupied by the mitochondrial network.
- Number of Branches: Indicator of fragmentation (higher count = more fragmented).
- Data Integration: Normalize the TMRM fluorescence intensity (from Protocol 1) by a morphological parameter such as network volume or branch length to calculate a "morphology-corrected ΔΨm."
Research Reagent Solutions
| Reagent / Tool | Function in Experiment | Key Consideration |
|---|---|---|
| TMRM / TMRE | Cationic, fluorescent dye used to measure mitochondrial membrane potential (ΔΨm). Accumulates in active mitochondria. | Potential-sensitive; signal lost upon depolarization. Not fixable. Use for live-cell imaging only [58] [72]. |
| CytoPainter (Red/Green) | Fixable, potential-independent fluorescent dye that stains mitochondrial structures regardless of activity. | Ideal for visualizing total mitochondrial mass and network morphology. Can be used in fixed cells and multiplexed with antibodies [58]. |
| MitoGraph | Open-source software platform for automated 3D analysis of mitochondrial morphology from fluorescence images. | Converts images into quantifiable networks (surfaces and skeletons). Excellent for high-throughput, objective analysis [10]. |
| CellProfiler | Open-source image analysis software with graphical interface for creating custom analysis pipelines. | Can be used to identify cells and quantify mitochondrial morphology and fluorescence intensity in a high-content manner [10]. |
| UCP1 (Genetic Tool) | Genetically encoded protein that can be induced to specifically dissipate ΔΨm, mimicking chemical uncouplers without some off-target effects. | Validated to lower ΔΨm to a similar extent as FCCP but without inhibiting cell proliferation, making it a cleaner tool for mechanistic studies [64]. |
| FCCP / Bam15 | Chemical uncouplers that collapse the proton gradient across the inner mitochondrial membrane, leading to full ΔΨm dissipation. | Used as a positive control to validate ΔΨm measurements. Titration is required as high concentrations can have off-target effects on proliferation [64]. |
Signaling Pathways and Experimental Workflows
Diagram 1: Morphology-Corrected ΔΨm Assay Workflow
Diagram 2: Mitochondrial Morphology & ΔΨm in Drug Response
Conclusion
Accurately interpreting the mitochondrial membrane potential (ΔΨm) is impossible without rigorous control for concurrent changes in mitochondrial morphology. This synthesis underscores that ΔΨm is not a standalone metric but is deeply intertwined with the organelle's dynamic architecture, from network fragmentation to inner membrane cristae integrity. The future of mitochondrial research and therapeutic development hinges on adopting integrated, multi-parametric approaches that concurrently measure function and form. Embracing these standardized frameworks will be crucial for deciphering complex disease mechanisms in areas like cardiometabolic and neurodegenerative disorders, and for accurately evaluating the efficacy of emerging mitochondria-targeted therapies, ultimately bridging the gap between in vitro findings and clinical success.
References
- 1. Guidelines on experimental methods to assess ... [https://www.nature.com/articles/s41418-017-0020-4]
- 2. Mitochondrial Quality Control and Cell Death [https://www.mdpi.com/1422-0067/26/22/11084]
- 3. Determination of Mitochondrial Membrane Potential and ... [https://pmc.ncbi.nlm.nih.gov/articles/PMC3143685/]
- 4. Mitochondrial dynamics and metabolic regulation control T ... [https://pmc.ncbi.nlm.nih.gov/articles/PMC10822881/]
- 5. Methods to Evaluate Changes in Mitochondrial Structure and ... [https://pmc.ncbi.nlm.nih.gov/articles/PMC10177605/]
- 6. Mitochondrial dynamics: overview of molecular mechanisms [https://pmc.ncbi.nlm.nih.gov/articles/PMC6056715/]
- 7. Mitochondrial dynamics in health and disease [https://www.nature.com/articles/s41392-023-01547-9]
- 8. Overview of methods that determine mitochondrial function ... [https://www.sciencedirect.com/science/article/pii/S0026049525001696]
- 9. Mitochondrial Dynamics: Fission and Fusion in Fate ... [https://www.frontiersin.org/journals/cell-and-developmental-biology/articles/10.3389/fcell.2020.580070/full]
- 10. Image Analysis of the Mitochondrial Network Morphology ... [https://www.frontiersin.org/journals/physics/articles/10.3389/fphy.2022.855775/full]
- 11. The Role of Mitochondrial Dysfunction and Dynamics in ... [https://pmc.ncbi.nlm.nih.gov/articles/PMC12467451/]
- 12. Research Resources and Facilities [https://www.mrc-mbu.cam.ac.uk/research-resources-and-facilities]
- 13. Mitochondrial Membrane Dynamics-Functional Positioning ... [https://pubmed.ncbi.nlm.nih.gov/30544804/]
- 14. Role of Cardiolipin in Mitochondrial Function and Dynamics in ... [https://pmc.ncbi.nlm.nih.gov/articles/PMC6678812/]
- 15. Cardiolipin and mitochondrial cristae organization - PMC [https://pmc.ncbi.nlm.nih.gov/articles/PMC5426559/]
- 16. The role of cardiolipin in mitochondrial dynamics and ... [https://www.nature.com/articles/s41419-025-07786-8]
- 17. The Balance of MFN2 and OPA1 in Mitochondrial ... [https://www.mdpi.com/2218-273X/15/3/433]
- 18. Role of Cardiolipin in Mitochondrial Signaling Pathways [https://www.frontiersin.org/journals/cell-and-developmental-biology/articles/10.3389/fcell.2017.00090/full]
- 19. Quantitative analysis of mitochondrial membrane potential ... [https://pmc.ncbi.nlm.nih.gov/articles/PMC7871195/]
- 20. Collapsing the Proton Motive Force to Identify Synergistic ... [https://www.sciencedirect.com/science/article/pii/S1074552113002731]
- 21. Maintenance and generation of proton motive force are ... [https://pmc.ncbi.nlm.nih.gov/articles/PMC10580908/]
- 22. Mitochondrial cristae remodeling: Mechanisms, functions, ... [https://www.sciencedirect.com/science/article/pii/S2772892725000598]
- 23. Mitochondrial Cristae Architecture and Functions [https://pmc.ncbi.nlm.nih.gov/articles/PMC8306996/]
- 24. Diabetic Cardiomyopathy: An Update on Emerging ... [https://pmc.ncbi.nlm.nih.gov/articles/PMC12060924/]
- 25. Analysis of the Mitochondrial Membrane Potential Using the Cationic... [https://pmc.ncbi.nlm.nih.gov/articles/PMC6343665/]
- 26. - TMRE Membrane Potential Assay Kit... | Abcam Mitochondrial [https://www.abcam.com/en-us/products/assay-kits/tmre-mitochondrial-membrane-potential-assay-kit-ab113852]
- 27. Measuring mitochondrial membrane potential | The EMBO ... [https://link.springer.com/article/10.1038/s44318-025-00632-9]
- 28. Commentary: The Effects of Different Fluorescent Indicators in ... [https://www.cardiologyresearchjournal.com/articles/commentary-the-effects-of-different-fluorescent-indicators-in-observing-the-changes-of-the-mitochondrial-membrane-potential-during-oxidative-stress-induced-mitochondrial-injury-of-cardiac-h9c2-cells.html]
- 29. How Brightness and Contrast Impact NDT Inspections [https://magnaflux.eu/en/Resources/Blog/How-Brightness-and-Contrast-Impact-NDT]
- 30. Characterization of mitochondrial dysfunction due to laser ... [https://www.nature.com/articles/s41598-022-15639-z]
- 31. Correlative 3D imaging of Whole Mammalian Cells with ... [https://pmc.ncbi.nlm.nih.gov/articles/PMC3210386/]
- 32. 3D correlative light and electron microscopy reveals the ... [https://www.sciencedirect.com/science/article/pii/S1549963425000735]
- 33. Perspective Mitochondrial signal transduction [https://www.sciencedirect.com/science/article/pii/S1550413122004594]
- 34. Quantitative assessment of mitochondrial morphology ... [https://pmc.ncbi.nlm.nih.gov/articles/PMC10690410/]
- 35. Measurement of Oxygen Consumption Rate (OCR) and ... [https://pmc.ncbi.nlm.nih.gov/articles/PMC8275291/]
- 36. A practical guide for the analysis, standardization, and ... [https://pmc.ncbi.nlm.nih.gov/articles/PMC9618452/]
- 37. Mitochondrial Membrane Potential Assay [https://www.sartorius.com/en/applications/life-science-research/live-cell-assays/mitochondrial-membrane-potential]
- 38. Comprehensive Guide to Mitochondrial Function Assays [https://www.elabscience.com/resources/cell-metabolism-technical-topics/1954?srsltid=AfmBOopX_3tKemnJY80iQLAXe9aIezbRJcfJYEvccYpb9ndZTDrHZhK5]
- 39. 2.14. Measurement of Mitochondria Membrane Potential ... [https://bio-protocol.org/exchange/minidetail?id=3226954&type=30]
- 40. High-throughput method for Oxygen Consumption Rate ... [https://bmcplantbiol.biomedcentral.com/articles/10.1186/s12870-023-04516-0]
- 41. Mitochondrial ultrastructural pathology in diabetic ... [https://pmc.ncbi.nlm.nih.gov/articles/PMC12345013/]
- 42. Multi-Parametric Analysis and Modeling of Relationships... | PLOS One [https://journals.plos.org/plosone/article?id=10.1371/journal.pone.0028694]
- 43. Quantitative measurement of mitochondrial membrane potential in... [https://pmc.ncbi.nlm.nih.gov/articles/PMC3448152/]
- 44. Mitochondrial membrane potential - PMC [https://pmc.ncbi.nlm.nih.gov/articles/PMC5792320/]
- 45. LDS 698: A highly sensitive probe for tracking ... [https://www.sciencedirect.com/science/article/abs/pii/S0006291X25011568]
- 46. Mitochondrial morphology in the mouse adrenal cortex [https://pmc.ncbi.nlm.nih.gov/articles/PMC10872515/]
- 47. Engineering Macrophage via Biomaterial-Mediated ... [https://pmc.ncbi.nlm.nih.gov/articles/PMC12623607/]
- 48. Mitochondrial networks through the lens of mathematics [https://pmc.ncbi.nlm.nih.gov/articles/PMC10347554/]
- 49. Mitochondrial dysfunction: mechanisms and advances in ... [https://www.nature.com/articles/s41392-024-01839-8]
- 50. Mitochondrial morphology transitions and functions [https://pmc.ncbi.nlm.nih.gov/articles/PMC3602821/]
- 51. Mitochondrial network complexity emerges from fission/ ... [https://www.nature.com/articles/s41598-017-18351-5]
- 52. Rapid manipulation of mitochondrial morphology in a living ... [https://www.sciencedirect.com/science/article/pii/S2667237521001004]
- 53. Universal dynamics of mitochondrial networks: a finite-size ... [https://pmc.ncbi.nlm.nih.gov/articles/PMC9556628/]
- 54. Mitochondrial Dynamics Proteins As Emerging Drug Targets [https://pmc.ncbi.nlm.nih.gov/articles/PMC9868082/]
- 55. Mitochondrial Dynamics Mediated by DRP1 and MFN2 ... [https://pmc.ncbi.nlm.nih.gov/articles/PMC8734405/]
- 56. Role of dynamin-related protein 1-dependent ... [https://www.sciencedirect.com/science/article/pii/S1043661824001956]
- 57. Pharmacological modulators of mitochondrial dynamics as ... [http://www.conditionmed.org/Data/View/8698]
- 58. What to consider before choosing a stain for mitochondria [https://www.abcam.com/en-us/stories/articles/choosing-a-mitochondrial-stain]
- 59. Mitochondrial Morphology in Metabolic Diseases - PMC [https://pmc.ncbi.nlm.nih.gov/articles/PMC3700066/]
- 60. Reactive oxygen species regulate DNA copy number in ... [https://pmc.ncbi.nlm.nih.gov/articles/PMC2647299/]
- 61. Maintaining mitochondrial DNA copy number mitigates ... [https://www.nature.com/articles/s42003-024-06888-x]
- 62. Labelling instructions matter in biomedical image analysis [https://www.nature.com/articles/s42256-023-00625-5]
- 63. Mitochondrial diseases: from molecular mechanisms to ... [https://www.nature.com/articles/s41392-024-02044-3]
- 64. Genetically encoded tool for manipulation of ΔΨm ... [https://pmc.ncbi.nlm.nih.gov/articles/PMC10793441/]
- 65. Genetically encoded tool for manipulation of ΔΨm ... [https://www.sciencedirect.com/science/article/abs/pii/S2451945625000972]
- 66. Mitochondrial membrane potential identifies cells with ... [https://pmc.ncbi.nlm.nih.gov/articles/PMC4747432/]
- 67. Alterations in mitochondrial morphology as a key driver of ... [https://pmc.ncbi.nlm.nih.gov/articles/PMC8447557/]
- 68. Alterations in Mitochondrial Morphology and Quality ... [https://www.mdpi.com/1422-0067/24/15/12485]
- 69. Mito Hacker: a set of tools to enable high-throughput ... [https://www.nature.com/articles/s41598-020-75899-5]
- 70. Tools to Study Mitochondrial Morphology and Function [https://www.thermofisher.com/us/en/home/references/newsletters-and-journals/bioprobes-journal-of-cell-biology-applications/bioprobes-72/bioprobes-72-mitochondrial-morphology-function.html]
- 71. Comprehensive Guide to Mitochondrial Function Assays [https://www.elabscience.com/resources/cell-metabolism-technical-topics/1954?srsltid=AfmBOooMWu4fo27hN_DAt1UTjDHw736Rcghak6SE3PkS5tzEub2jTcn7]
- 72. Mitochondrial dynamics regulate cell morphology in the ... [https://pmc.ncbi.nlm.nih.gov/articles/PMC11809207/]