Optimized Flow Cytometry Protocol for Cleaved Caspase-3: Strategies for High-Sensitivity, Low-Noise Apoptosis Detection
This article provides a comprehensive guide for researchers and drug development professionals on optimizing flow cytometry protocols for detecting cleaved caspase-3, a critical executioner of apoptosis.
Optimized Flow Cytometry Protocol for Cleaved Caspase-3: Strategies for High-Sensitivity, Low-Noise Apoptosis Detection
Abstract
This article provides a comprehensive guide for researchers and drug development professionals on optimizing flow cytometry protocols for detecting cleaved caspase-3, a critical executioner of apoptosis. Covering foundational principles, detailed methodological applications, advanced troubleshooting for signal preservation, and rigorous validation techniques, this resource addresses the key challenge of reducing background noise while maintaining high sensitivity. By integrating the latest advancements in blocking strategies, reagent selection, and multiparametric analysis, this protocol enables reliable quantification of apoptotic cells, essential for accurate assessment in cancer research, neurodegenerative disease studies, and therapeutic efficacy evaluations.
Understanding Cleaved Caspase-3: The Gold Standard Apoptosis Executioner and Flow Cytometry Principles
Caspase-3 is a crucial executioner protease in the apoptotic pathway, responsible for orchestrating the controlled dismantling of cellular components during programmed cell death [1]. As a member of the cysteine-aspartic acid protease (caspase) family, it is synthesized as an inactive 32 kDa zymogen (procaspase-3) that must undergo proteolytic processing to become active [1] [2]. This activation occurs through cleavage at specific aspartic residues, generating 17 kDa (p17) and 12 kDa (p12) subunits that dimerize to form the active enzyme [1]. The catalytic site of the mature caspase-3 involves the thiol group of Cys-163 and the imidazole ring of His-121, which work in concert to cleave peptide bonds after specific aspartic acid residues in target substrates [1].
Caspase-3 occupies a terminal position in the apoptotic cascade, with its activation leading to the hallmark features of apoptosis, including chromatin condensation, DNA fragmentation, and formation of apoptotic bodies [1]. It is activated by both extrinsic (death ligand) and intrinsic (mitochondrial) apoptotic pathways [1]. Beyond its well-established role in cell death, emerging evidence indicates that caspase-3 participates in other cellular processes, including embryonic development, hematopoietic stem cell differentiation, and tissue regeneration [1] [3]. Its detection serves as a reliable marker for identifying cells undergoing apoptosis, making it a valuable biomarker in both research and clinical contexts, including as an indicator of recent myocardial infarction when the p17 fragment is detected in bloodstream [1].
Caspase-3 Activation Pathways and Molecular Mechanisms
Structural Basis of Caspase-3 Activation
The transition of caspase-3 from an inactive zymogen to an active executor involves significant structural reorganization. In its procaspase form, caspase-3 exists as a dimer with virtually no enzymatic activity (<0.4% of the active protease) [4]. The activation mechanism requires cleavage of the intersubunit linker (IL) by initiator caspases (caspase-8, caspase-9, or caspase-10), which releases constraints on two active site loops (L2 and L2') and facilitates formation of the substrate-binding pocket [1] [4]. This cleavage occurs at specific aspartic residues, resulting in the production of large (p17) and small (p12) subunits that reassociate to form the active heterotetrameric enzyme [1].
The active caspase-3 enzyme features a characteristic structure composed of 12-stranded beta-sheets surrounded by alpha-helices, with two active sites positioned at opposite ends of the molecule [1]. Each active site is formed by residues from both the large and small subunits, though the essential catalytic residues (Cys-163 and His-121) are located on the p17 subunit [1]. Recent structural studies have revealed that mutations in the dimer interface (e.g., V266E) can activate procaspase-3 without proteolytic cleavage, demonstrating that conformational changes alone are sufficient to generate catalytic activity in certain circumstances [4]. This structural insight provides potential avenues for therapeutic intervention through allosteric modulation of caspase-3 activity.
Signaling Pathways Leading to Caspase-3 Activation
Caspase-3 activation occurs through two principal apoptotic pathways that converge on this key executioner protease:
The extrinsic pathway is initiated by extracellular death ligands (e.g., TNF-α, FasL, TRAIL) binding to cell surface death receptors [5]. This interaction leads to formation of the death-inducing signaling complex (DISC), which recruits and activates caspase-8 [5]. In type I cells, active caspase-8 directly cleaves and activates procaspase-3, while in type II cells, it engages the mitochondrial pathway through Bid cleavage to amplify the death signal [5].
The intrinsic pathway is triggered by diverse intracellular stresses including DNA damage, oxidative stress, and growth factor deprivation [5]. These stimuli cause mitochondrial outer membrane permeabilization, resulting in cytochrome c release into the cytosol [5]. Cytochrome c binds to Apaf-1 and, in the presence of ATP/dATP, promotes formation of the apoptosome complex, which recruits and activates caspase-9 [5]. Active caspase-9 then directly processes and activates caspase-3 [5].
Once activated, caspase-3 cleaves numerous cellular substrates, including structural proteins (e.g., nuclear lamins), DNA repair enzymes (e.g., PARP), and cell cycle regulators, leading to the characteristic morphological changes of apoptosis [1]. Additionally, active caspase-3 can participate in feedback amplification by further processing other executioner caspases and even initiator caspases under certain conditions [5].
Detection Methods and Technical Applications
Flow Cytometry-Based Detection of Active Caspase-3
Flow cytometry provides a powerful approach for detecting active caspase-3 at the single-cell level, allowing researchers to quantify apoptotic cells within heterogeneous populations. The following protocol details the standard procedure for intracellular staining and detection of active caspase-3 by flow cytometry:
Materials Required:
- Cells of interest (e.g., Jurkat cells for validation)
- Inducer of apoptosis (e.g., 4-6 μM camptothecin for 4 hours) [6]
- Fixation/Permeabilization solution (e.g., BD Cytofix/Cytoperm) [2] [6]
- Wash buffer (e.g., BD Perm/Wash buffer) [2] [6]
- Antibody against active caspase-3 (e.g., PE Rabbit Anti-Active Caspase-3, Clone C92-605) [2]
- Flow cytometer with appropriate laser and filter configuration
Detailed Protocol:
- Induction of Apoptosis: Treat cells with an appropriate apoptotic inducer. For Jurkat cells, treatment with 4-6 μM camptothecin for 4 hours at 37°C effectively induces apoptosis [6]. Include untreated controls for baseline comparison.
Cell Harvesting and Washing: Collect approximately 1×10^6 cells per sample and wash twice with cold 1X PBS to remove media components [6].
Fixation and Permeabilization: Resuspend cell pellets in 0.5 mL BD Cytofix/Cytoperm solution and incubate for 20 minutes on ice [2] [6]. This step preserves cell structure while allowing antibody access to intracellular epitopes.
Antibody Staining: Wash fixed cells twice with BD Perm/Wash buffer, then resuspend in 100 μL of the same buffer containing 20 μL of anti-active caspase-3 antibody [6]. Incubate for 30 minutes at room temperature, protected from light.
Final Processing and Analysis: Wash stained cells with 1.0 mL BD Perm/Wash buffer, resuspend in 0.5 mL of buffer, and analyze by flow cytometry [6]. Use appropriate gating strategies to identify positive populations based on fluorescence intensity compared to untreated controls.
Critical Considerations:
- Antibody Specificity: The recommended antibody (Clone C92-605) specifically recognizes the active form of caspase-3 (heterodimer of 17 and 12 kDa subunits) and does not recognize the procaspase form [2].
- Controls: Always include unstained cells, isotype controls, and untreated cells to establish background signal and proper gating boundaries.
- Cell Viability: The fixation/permeabilization process results in cell death, so this protocol cannot be combined with viability dyes that require intact cell membranes.
- Optimization: Antibody concentration and incubation times may require optimization for different cell types or experimental conditions.
Advanced Detection Methodologies
Beyond conventional flow cytometry, several advanced methods have been developed for detecting caspase-3 activity with improved sensitivity, temporal resolution, or spatial information:
Fluorescence Lifetime Imaging and Phasor Analysis: This approach utilizes FRET-based bioprobes containing caspase-3 cleavage sequences (DEVD) between donor and acceptor fluorophores [3]. During apoptosis, caspase-3 activation cleaves the linker, reducing FRET efficiency and altering fluorescence lifetime [3]. When combined with phasor analysis, this method enables quantitative assessment of caspase-3 activation kinetics at single-cell resolution [3].
Real-Time Live-Cell Imaging with Genetic Reporters: Fluorescent reporter systems enable dynamic tracking of caspase-3 activity in living cells [7]. One advanced platform utilizes a ZipGFP-based caspase-3/7 reporter, where caspase cleavage of a DEVD motif allows GFP reconstitution and fluorescence recovery [7]. This system permits continuous monitoring of apoptotic events in both 2D and 3D culture systems, including spheroids and patient-derived organoids [7].
Multiparameter Flow Cytometry: Active caspase-3 detection can be combined with other apoptotic markers (e.g., Annexin V for phosphatidylserine exposure, PI for membrane integrity) to stage apoptotic progression and distinguish between different cell death modalities [7]. This approach provides comprehensive information about death trajectories in heterogeneous cell populations.
Research Reagent Solutions
Table 1: Essential Reagents for Caspase-3 Detection by Flow Cytometry
| Reagent/Kit | Specificity | Application | Key Features |
|---|---|---|---|
| PE Rabbit Anti-Active Caspase-3 [2] | Active caspase-3 (p17/p12 heterodimer) | Intracellular staining for flow cytometry | Does not recognize procaspase-3; validated for human and mouse cells |
| FITC Active Caspase-3 Apoptosis Kit [6] | Active caspase-3 | Flow cytometry-based apoptosis detection | Complete kit including fixation/permeabilization buffers |
| BD Cytofix/Cytoperm Solution [2] [6] | N/A | Cell fixation and permeabilization | Preserves intracellular epitopes while allowing antibody penetration |
| BD Perm/Wash Buffer [2] [6] | N/A | Washing and antibody dilution | Maintains cell integrity during intracellular staining procedures |
| ZipGFP Caspase-3/7 Reporter [7] | Caspase-3/7 activity | Live-cell imaging | Minimal background fluorescence; irreversible activation upon cleavage |
Quantitative Data and Experimental Considerations
Table 2: Caspase-3 Activation Parameters and Detection Limits
| Parameter | Typical Values/Ranges | Detection Method | Technical Considerations |
|---|---|---|---|
| Procaspase-3 Molecular Weight | 32 kDa [1] [2] | Western blot | Inactive precursor form |
| Active Subunit Sizes | 17 kDa and 12 kDa [1] [2] | Western blot, immunostaining | Heterodimer forms active enzyme |
| Optimal Cleavage Motif | DEVDG [1] | Fluorogenic assays | Asp-Glu-Val-Asp-Gly sequence |
| Time to Detection Post-Induction | 2-6 hours [2] [6] | Flow cytometry | Varies by cell type and inducer strength |
| Typical Apoptotic Population | 30-70% with strong inducers [2] [6] | Flow cytometry | Camptothecin (4 μM, 4 hr) induces ~35% positivity in Jurkat cells |
| Inhibition by zVAD-FMK | Complete suppression [7] [4] | All detection methods | Pan-caspase inhibitor control |
Troubleshooting and Technical Optimization
Successful detection of active caspase-3 requires careful attention to potential technical challenges. The following table addresses common issues and recommended solutions:
Table 3: Troubleshooting Guide for Caspase-3 Detection
| Problem | Potential Causes | Recommended Solutions |
|---|---|---|
| High Background Signal | Inadequate blocking; insufficient washing; antibody concentration too high | Use appropriate serum from secondary antibody host species; increase wash steps and durations; titrate antibody to optimal concentration [8] |
| Weak or No Signal | Low apoptosis induction; poor antibody penetration; epitope degradation | Include positive control (camptothecin-treated Jurkat cells); optimize permeabilization conditions; verify fixation timing and methods [8] |
| High Cell Loss | Excessive centrifugation; harsh permeabilization | Reduce centrifugation speed and duration; optimize permeabilization time and reagent concentrations [6] |
| Inconsistent Results Between Experiments | Variable cell numbers; inconsistent treatment timing; instrument variation | Standardize cell counting methods; synchronize treatment schedules; perform regular flow cytometer calibration and quality control [9] |
| Poor Separation of Positive and Negative Populations | Weak apoptosis induction; suboptimal antibody titration | Increase inducer concentration or duration; perform antibody titration curve with positive and negative controls [2] |
Critical Experimental Considerations:
Sample Fixation Timing: Fix cells promptly after apoptosis induction to capture transient activation states. Delayed fixation may miss early caspase-3 activation events or allow post-apoptotic secondary necrosis.
Permeabilization Optimization: Different cell types may require optimization of permeabilization conditions. While standard protocols recommend 0.1% Triton X-100 or NP-40 [8], some delicate primary cells may require gentler detergents or shorter incubation times.
Multiparametric Analysis: For comprehensive apoptosis assessment, combine active caspase-3 detection with other markers such as Annexin V (phosphatidylserine exposure), propidium iodide (membrane integrity), or mitochondrial markers [7]. This approach enables discrimination between early apoptosis, late apoptosis, and necrotic cell death.
Kinetic Considerations: Caspase-3 activation is a dynamic process. The optimal detection window varies by cell type and apoptotic stimulus. Time-course experiments are recommended to establish the peak activation period for specific experimental conditions.
Inhibitor Controls: Include caspase inhibitor controls (e.g., zVAD-FMK) to confirm the specificity of detected signals [7] [4]. This is particularly important when working with novel apoptotic inducers or when characterizing caspase-independent cell death pathways.
The protocols and methodologies described herein provide a robust framework for detecting caspase-3 activation in apoptotic cells, with particular emphasis on flow cytometry-based approaches that enable quantitative assessment at single-cell resolution. When properly optimized and controlled, these techniques yield reliable data that advance our understanding of apoptotic mechanisms and facilitate drug discovery efforts targeting cell death pathways.
Caspase-3 is the primary executioner protease responsible for the coordinated dismantling of the cell during apoptosis. Its activation requires proteolytic processing of an inactive zymogen into stable p17 and p12 subunits, which assemble into an active heterotetramer. This article delineates the structural transformation that generates the cleaved caspase-3 (CC3) p17/p12 fragment, establishes its specificity as a definitive apoptotic marker, and provides detailed application notes for its precise detection in flow cytometry, with an emphasis on minimizing background noise in complex multi-color panels.
Apoptosis, or programmed cell death, is a fundamental process essential for development, tissue homeostasis, and the elimination of damaged cells. The caspase family of cysteine-aspartic proteases represents the central mediators of this process. Among them, caspase-3 is the critical executioner caspase, responsible for the majority of proteolytic cleavage events that characterize the apoptotic demise of a cell [10]. It is either partially or totally responsible for the proteolytic cleavage of many key proteins, such as the nuclear enzyme poly (ADP-ribose) polymerase (PARP) [10]. The activation of caspase-3 is a tightly regulated event, serving as a point of no return in the apoptotic pathway. Detection of its activated form, cleaved caspase-3 (CC3), is therefore considered a reliable and specific marker for identifying cells that are undergoing, or have undergone, apoptosis [9].
Structural Insights into Caspase-3 Activation
The transition of caspase-3 from an inactive proenzyme to a potent protease involves a precise structural rearrangement centered on cleavage at specific aspartic acid residues.
The Proenzyme and Proteolytic Processing
The inactive caspase-3 zymogen exists as a dimer. Each monomer consists of a pro-domain and large (p17) and small (p12) subunits. Activation is triggered by initiator caspases (e.g., caspase-8 or -9), which cleave the zymogen at two conserved aspartic acid residues: Asp175 and Asp28 [10] [11]. This processing liberates the large (p17) and small (p12) subunits from the pro-form.
Formation of the Active Heterotetramer
Following cleavage, two p17 and two p12 subunits assemble to form the active heterotetrameric complex (p17/p12)₂ [12]. This complex is the mature executioner enzyme. The p17 subunit contains the central beta-sheet that forms the core of the enzyme, while both p17 and p12 contribute to the formation of the active site. The cleavage at Asp175, in particular, is critical for forming the mature large fragment and is the epitope recognized by many highly specific antibodies [10] [11].
Specificity of the p17/p12 Fragment
The structural rearrangement that creates the p17/p12 heterotetramer generates a unique neo-epitope that is absent in the full-length, inactive proenzyme. Antibodies developed against sequences surrounding the cleavage site at Asp175 can therefore specifically bind to the activated form of caspase-3 without cross-reacting with the zymogen or other cleaved caspases [10] [11]. This forms the biochemical basis for the specificity of CC3 as an apoptosis marker. Furthermore, the active complex is rapidly degraded in cells, and its stabilization often requires interaction with inhibitors, underscoring its transient and active-state-specific nature [12].
The following diagram illustrates this activation process and the key cleavage event that generates the specific marker.
Detection Methodologies and Application Notes
The specificity of CC3 antibodies enables researchers to detect apoptotic cells across various experimental formats. The choice of methodology depends on the required throughput, spatial context, and need for quantification.
Comparison of Primary Detection Platforms
The table below summarizes the key methodologies for detecting cleaved caspase-3, highlighting their applications and specific reagents.
| Method | Key Reagent / Kit | Principle | Best Application Context |
|---|---|---|---|
| Western Blotting | Cleaved Caspase-3 (Asp175) Western Detection Kit #9660 [10] | Antibody detection of p17/p12 fragments on membranes. | Biochemical confirmation of caspase-3 activation in bulk cell lysates. |
| Immunohistochemistry (IHC) | SignalStain Cleaved Caspase-3 (Asp175) IHC Detection Kit #8120 [11] | Immunoperoxidase-based staining of tissue sections. | Spatial localization of apoptotic cells in the morphological context of tissue. |
| Flow Cytometry | Anti-Cleaved Caspase-3 (Asp175) Antibody [9] | Intracellular staining with fluorescently conjugated antibodies. | Quantitative, single-cell analysis of apoptosis in heterogeneous cell populations. |
| Live-Cell Imaging | Genetically Encoded FRET or Switch-On Biosensors (e.g., VC3AI, ZipGFP) [7] [13] | Caspase-mediated cleavage restores fluorescence. | Real-time kinetic tracking of caspase-3/7 activity in live cells, including 3D models. |
Advanced Real-Time Imaging Platforms
Recent advances have led to the development of sophisticated reporter systems for dynamic apoptosis studies. One such platform utilizes a lentiviral-based, stable reporter system featuring a ZipGFP-based caspase-3/-7 biosensor [7]. In this design, a split-GFP is tethered by a linker containing the caspase-specific DEVD cleavage motif. In healthy cells, the forced proximity prevents GFP folding, resulting in minimal background. Upon caspase activation, cleavage at the DEVD site separates the strands, allowing GFP to refold and produce a strong, irreversible fluorescent signal [7]. This system is particularly powerful for long-term imaging in complex 3D cultures like spheroids and patient-derived organoids, and can be coupled with constitutive mCherry expression to normalize for cell presence [7].
An alternative design is the switch-on fluorescence-based caspase-3-like activity indicator (SFCAI), such as VC3AI [13]. This genetically encoded indicator is cyclized using a split intein, constraining the fluorescent protein (Venus) in a non-fluorescent state. Cleavage by caspase-3-like proteases linearizes the protein, restoring fluorescence. This system offers an extremely low background and high signal-to-noise ratio upon activation [13].
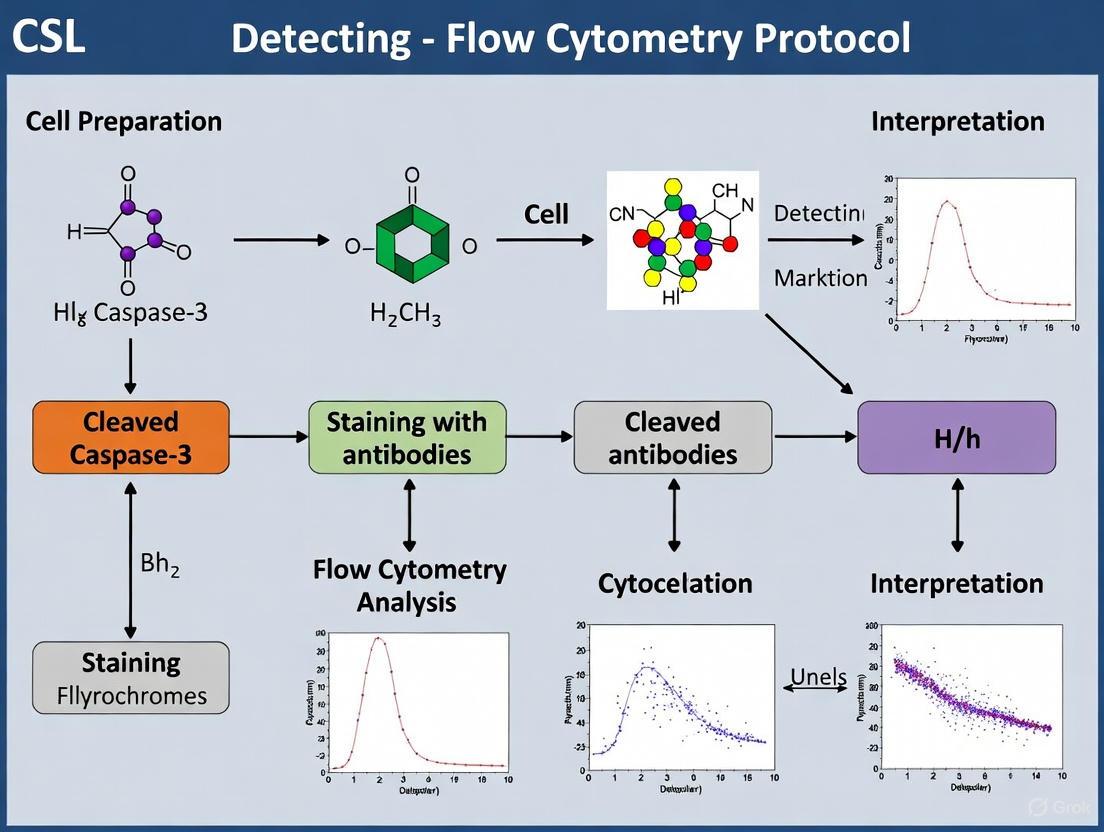
The workflow for utilizing these tools in a flow cytometry context is summarized below.
Flow Cytometry Protocol for Cleaved Caspase-3 Detection with Low Background
This protocol is optimized for the specific and sensitive detection of intracellular cleaved caspase-3 by flow cytometry, with an emphasis on minimizing background signal in a multi-color panel.
Sample Preparation and Staining
- Apoptosis Induction: Treat cells with your chosen apoptotic stimulus (e.g., chemotherapeutic agents, UV irradiation). Include an untreated negative control and a population treated with a known apoptosis inducer (e.g., staurosporine) as a positive control.
- Cell Harvest and Wash: Harvest cells, wash once in cold PBS, and count.
- Fixation: Resuspend cell pellet in 1–4% formaldehyde in PBS and incubate for 10–20 minutes at room temperature. Fixation stabilizes the CC3 epitope.
- Permeabilization: Centrifuge cells, remove supernatant, and resuspend thoroughly in ice-cold 90–100% methanol. Incubate for at least 30 minutes on ice or at -20°C. Methanol ensures robust membrane permeabilization for antibody access to the intracellular target.
- Staining:
- Wash cells twice in a flow cytometry staining buffer (e.g., PBS with 1–5% FBS).
- Aliquot cells into tubes for each staining condition.
- Resuspend cells in staining buffer containing the anti-cleaved caspase-3 (Asp175) antibody [9]. Critical: Perform a titration experiment for each new antibody lot to determine the optimal concentration that maximizes the signal-to-noise ratio.
- Incubate for 30–60 minutes at room temperature in the dark.
- Wash cells twice with staining buffer to remove unbound antibody.
- (If using a directly conjugated primary antibody, proceed to analysis. If using an unlabeled primary, incubate with a fluorochrome-conjugated secondary antibody at this stage, then wash).
Panel Design and Noise Reduction Strategies
Integrating CC3 detection into a multi-color panel requires careful planning to avoid spectral overlap and false positives.
- Know Your Cytometer: Understand the laser and filter configuration of your flow cytometer. Match the emission spectrum of your chosen CC3 antibody conjugate to an available detector [14].
- Fluorophore Selection: CC3 is an intracellular protein with variable abundance. To ensure clear detection of positive cells, conjugate the anti-CC3 antibody to a bright fluorophore such as PE or APC [14]. Avoid using bright fluorophores for highly expressed antigens to prevent spillover.
- Spectral Overlap and Compensation:
- Use fluorochrome combinations with minimal emission spectrum overlap (e.g., FITC and APC is a good combination, while FITC and PE requires more careful compensation) [14].
- Always run single-color compensation controls stained with each fluorophore used in the panel. The control cells should be at least as bright as your test sample [14].
- Properly set compensation ensures that fluorescence is detected only in its intended channel, which is critical for accurate identification of the CC3-positive population.
Data Acquisition and Analysis
- Acquisition: Run samples on the flow cytometer. Collect a sufficient number of events to robustly analyze rare populations if necessary.
- Gating Strategy:
- Use forward and side scatter to gate on the viable cell population, excluding debris and dead cells (which may show non-specific staining).
- Plot the fluorescence intensity of the CC3 channel. The negative control sample should be used to set the threshold for positivity.
- The percentage of CC3-positive cells in the treated samples is a quantitative measure of apoptosis [9].
The Scientist's Toolkit: Essential Research Reagent Solutions
| Item / Reagent | Function / Role in Apoptosis Research |
|---|---|
| Anti-Cleaved Caspase-3 (Asp175) Antibody | The primary tool for specific detection of the activated p17 fragment by WB, IHC, and Flow Cytometry [10] [11] [9]. |
| Caspase-3/-7 Fluorogenic/Biomolecular Probes (e.g., DEVD-based) | Substrates (like ZipGFP reporters [7] or FRET probes [3] [13]) for real-time, kinetic assessment of caspase enzyme activity in live or fixed cells. |
| Pan-Caspase Inhibitor (e.g., zVAD-FMK) | A critical control reagent that broadly inhibits caspase activity, used to confirm the caspase-dependency of an observed apoptotic phenotype [7]. |
| Specific Caspase-3/7 Inhibitor (e.g., zDEVD-FMK) | A more selective control inhibitor used to verify the specific role of caspase-3/7 in the signaling pathway being studied [13]. |
| Annexin V Conjugates | Used in conjunction with CC3 staining to detect an earlier apoptotic event—phosphatidylserine externalization—providing a multi-parametric assessment of cell death [7]. |
| Propidium Iodide (PI) or 7-AAD | Viability dyes that exclude by cells with intact membranes, allowing the discrimination of late apoptotic and necrotic cells in a flow cytometry panel. |
The cleavage of caspase-3 to generate the stable p17/p12 heterotetramer is a decisive biochemical event in the commitment to apoptotic cell death. The structural specificity of this cleavage, particularly at Asp175, provides a unique and reliable biomarker that can be exploited with high-affinity antibodies and sophisticated biosensors. The protocols and guidelines outlined here, especially for flow cytometry, empower researchers to detect this marker with high specificity and low background, enabling precise quantification of apoptosis in complex experimental systems, from basic research to drug discovery pipelines.
The ability to detect and quantify intracellular proteins, such as cleaved caspase-3, has revolutionized cellular analysis in apoptosis research, immunology, and drug development. Flow cytometry provides a powerful platform for this analysis, enabling multi-parametric detection at single-cell resolution. The accurate detection of intracellular epitopes depends critically on two fundamental sample preparation steps: fixation and permeabilization. Fixation preserves cellular architecture and stabilizes protein structures by cross-linking or precipitating cellular components, while permeabilization renders the cell membrane permeable to antibodies, allowing access to intracellular targets [15]. For researchers investigating cleaved caspase-3 as a definitive marker of apoptosis, optimizing these steps is essential to generate high-quality, low-noise data that accurately reflects the physiological state of the cells [9]. This application note details established methodologies and best practices for intracellular protein detection, with particular emphasis on protocols suitable for caspase analysis.
Critical Principles of Fixation and Permeabilization
Fixation Methods and Reagents
Fixation is the crucial first step that halts cellular metabolism and preserves the state of intracellular proteins at the time of sample collection. The choice of fixative can significantly impact epitope preservation and subsequent antibody recognition.
- Aldehyde-Based Fixatives (e.g., Formaldehyde/PFA): These fixatives work by creating covalent cross-links between proteins, thereby stabilizing the cellular structure. A concentration of 1-4% formaldehyde is commonly used for 15-20 minutes on ice [15]. This method is considered mild and is generally preferred for many intracellular antigens, including cleaved caspase-3, as it preserves light scatter properties and surface markers effectively.
- Organic Solvent Fixatives (e.g., Methanol, Acetone): These agents function by precipitating proteins and dissolving lipids. Methanol fixation (typically 90%) involves incubating cells for 10 minutes at -20°C, while acetone is used for 10-15 minutes on ice [15]. Methanol is particularly effective for unmasking certain phosphorylated epitopes and nuclear antigens, and it offers the advantage of allowing fixed samples to be stored at -20°C for extended periods [16].
The selection of fixative must be empirically determined for each target protein, as the cross-linking nature of aldehydes can sometimes mask antibody binding sites, while the precipitating action of organic solvents can alter cell morphology and light scatter properties [15].
Permeabilization Agents and Mechanisms
Following fixation, permeabilization is required to disrupt the lipid bilayer and allow fluorescently-labeled antibodies to access the intracellular compartment. The choice of permeabilizing agent depends on the localization of the target protein and the fixation method used.
Table 1: Comparison of Common Permeabilization Agents
| Permeabilization Agent | Mechanism of Action | Common Concentrations | Ideal For | Considerations |
|---|---|---|---|---|
| Saponin | Creates pores in membranes by complexing with cholesterol [15]. | 0.2-0.5% in PBS [15] | Cytosolic antigens, soluble nuclear antigens; allows subsequent surface staining [17]. | Mild action; pores can re-seal, requiring the agent to be present in all antibody incubation and wash steps [15]. |
| Triton X-100 | Non-ionic detergent that dissolves lipid membranes [15]. | 0.1-1% in PBS [15] | Robust permeabilization, nuclear antigens [15]. | Harsh; can lyse cells with prolonged incubation and degrade light scatter properties [17]. |
| Methanol | Precipitates proteins and dissolves lipids [15]. | 50-90% [16] | Nuclear antigens, phospho-epitopes (unmasking) [16]. | Alters light scatter and can destroy some epitopes; check fluorochrome compatibility [17]. |
| Tween 20 | Mild non-ionic detergent [15]. | 0.2-0.5% in PBS [15] | Cytosolic antigens facing the plasma membrane [15]. | Weaker permeabilization, may not be sufficient for nuclear targets. |
Sequential Staining for Combined Surface and Intracellular Markers
Many experimental designs require the simultaneous detection of cell surface markers and intracellular proteins to fully characterize specific cell populations. In such cases, a specific sequence must be followed to prevent artifactual results. The recommended workflow is to first stain for cell surface markers on live, unfixed cells, then fix the cells to immobilize the bound antibodies and preserve internal structures, and finally permeabilize the cells before staining for intracellular targets [18] [15]. Staining surface markers after fixation and permeabilization is not advised, as these processes can alter surface antigen epitopes and negatively impact antibody binding [17].
Detailed Experimental Protocols
Comprehensive Protocol for Detecting Cleaved Caspase-3
This protocol is adapted from established methods for the flow cytometric detection of cleaved caspase-3, a key executioner protease in apoptosis and a reliable marker for dying cells [9]. The steps are optimized to minimize background noise.
A. Solutions and Reagents
- FoxP3/Transcription Factor Staining Buffer Set (Fixation/Permeabilization Concentrate, Diluent, and Permeabilization Buffer) [18] or equivalent.
- Flow Cytometry Staining Buffer (PBS with 0.5-1% BSA) [19] [20].
- Antibody: Anti-cleaved caspase-3 (specific for the cleaved fragment), fluorochrome-conjugated.
- Viability Dye: Fixable viability dye (e.g., Ghost Dye, 7-AAD, DAPI) [18] [15].
- Fc Receptor Blocking Reagent (e.g., human IgG, mouse anti-CD16/CD32, or serum) [19] [15].
B. Step-by-Step Procedure
- Sample Preparation: Harvest and wash cells in staining buffer. For tissues, generate a single-cell suspension. Use ~0.5-1 x 10^6 cells per test [18] [15].
- Viability Staining (Optional but Recommended): Resuspend cell pellet in staining buffer containing a fixable viability dye. Incubate in the dark for the recommended time, then wash. This step is critical for excluding dead cells, which are prone to nonspecific antibody binding [15].
- Surface Staining (If Required): Resuspend cells in staining buffer containing pre-titrated antibodies against surface markers of interest. Incubate for 30 minutes in the dark at room temperature or on ice. Wash with 2 mL of staining buffer to remove unbound antibody [19] [20].
- Fixation: Thoroughly resuscent the cell pellet in 1 mL of FoxP3/Transcription Factor Fixation/Permeabilization working solution (prepared as per kit instructions). Mix well to ensure a single-cell suspension and prevent clumping. Incubate for 30-60 minutes at room temperature in the dark [18].
- Permeabilization Wash: Pellet cells by centrifugation. Discard the supernatant and wash the cells twice with 1-2 mL of 1X FoxP3/Transcription Factor Permeabilization Buffer. This step both permeabilizes the cells and removes residual fixative [18].
- Intracellular Staining: Resuspend the fixed and permeabilized cell pellet in 100 µL of permeabilization buffer containing the pre-titrated anti-cleaved caspase-3 antibody. Incubate for 1 hour at room temperature in the dark [18].
- Final Washes: Wash cells twice with 2 mL of permeabilization buffer to remove unbound primary antibody.
- Data Acquisition: Resuspend the final cell pellet in 200-500 µL of staining or permeabilization buffer. Filter the cell suspension through a mesh if necessary and acquire data on a flow cytometer [18].
The Scientist's Toolkit: Essential Research Reagents
Table 2: Key Reagents for Intracellular Flow Cytometry
| Reagent | Function | Example Products/Catalog Numbers |
|---|---|---|
| Fixation/Permeabilization Kit | Provides optimized, matched buffers for fixing and permeabilizing cells for transcription factor/intracellular cytokine staining. | FoxP3/Transcription Factor Staining Buffer Set (#43481) [18] |
| Permeabilization Buffer | A detergent-based buffer used during wash and antibody incubation steps after fixation to maintain membrane permeability. | FoxP3/Transcription Factor Permeabilization Buffer (10X) (#68751) [18] |
| Flow Cytometry Staining Buffer | An isotonic buffer (PBS with protein stabilizer) for washing cells, diluting antibodies for surface staining, and resuspending cells for acquisition. | Flow Cytometry Staining Buffer (#FC001) [19] |
| Fc Receptor Block | Blocks nonspecific binding of antibodies via Fc receptors on immune cells, reducing background signal. | Human IgG, Mouse anti-CD16/CD32, Sera [19] [15] |
| Fixable Viability Dye | Distinguishes live from dead cells prior to fixation; essential for excluding dead cells that cause high background. | Ghost Dye Violet 510 (#59863) [18], 7-AAD, DAPI [15] |
| RBC Lysis Buffer | Lyses red blood cells in whole blood or spleen samples to isolate leukocytes for analysis. | Human/Mouse Lyse Buffer (#FC002/#FC003) [19] |
Optimization and Troubleshooting for Low-Noise Research
Achieving a high signal-to-noise ratio is paramount for the confident detection of cleaved caspase-3, particularly in weakly positive populations or in complex samples like patient-derived organoids [7].
Antibody Titration and Controls
- Antibody Titration: Always titrate the anti-cleaved caspase-3 antibody to determine the optimal concentration that provides the strongest specific signal with the lowest background. Using too much antibody is a common source of high background noise [20].
- Critical Controls: Include the following controls in every experiment to properly interpret your data and define positive populations [21] [22]:
- Unstained Cells: To assess cellular autofluorescence.
- Isotype Control: Cells stained with an irrelevant antibody of the same isotype and fluorochrome as the specific antibody. This helps identify nonspecific Fc receptor-mediated binding.
- Fluorescence Minus One (FMO) Control: Cells stained with all antibodies except the one of interest (anti-cleaved caspase-3). This is the gold standard for setting gates and distinguishing positive from negative populations in multicolor panels [22].
Addressing Common Problems
- High Background Signal:
- Ensure adequate washing after fixation and antibody incubation steps.
- Titrate antibodies and use an Fc receptor blocking step.
- Use a fixable viability dye to exclude dead cells.
- Verify that the fluorochrome is compatible with your permeabilization method (see Table 3) [17].
- Weak or No Signal:
- Confirm that the fixation and permeabilization steps were performed correctly and in the correct order.
- Check antibody specificity and whether the target epitope is sensitive to the chosen fixative. Consider testing methanol or acetone fixation for epitope unmasking [15] [16].
- Ensure the permeabilization agent is appropriate for the target's subcellular localization (e.g., harsh detergents like Triton X-100 for nuclear antigens) [15].
- Loss of Cell Population or Poor Scatter Characteristics:
- Avoid over-fixing, as this can make cells fragile and increase autofluorescence.
- High concentrations of methanol (>50%) can degrade light scatter properties; consider using a lower concentration [16].
- Handle cells gently during centrifugation and resuspension to prevent mechanical disruption.
Table 3: Fluorochrome Compatibility with Methanol Permeabilization
| Methanol Sensitive | Methanol Resistant |
|---|---|
| FITC | PE |
| eFluor 450 | APC |
| eFluor 660 | Alexa Fluor 647 |
| Alexa Fluor 488 | |
| PerCP | |
| All Tandem Dyes | [17] |
Within the context of advanced flow cytometry protocols for low-noise research, the detection of cleaved caspase-3 has emerged as a superior methodological approach for identifying apoptotic cells. This application note details the significant advantages of cleaved caspase-3 detection, emphasizing its exceptional specificity as a direct marker of executioner caspase activation and its capacity for early apoptosis detection, which precedes many morphological changes. We provide a comprehensive comparison against traditional apoptosis assays, structured quantitative data tables, and detailed experimental protocols for flow cytometry. Furthermore, we include validated reagent solutions and pathway visualizations to support researchers and drug development professionals in implementing this targeted approach to accurately monitor programmed cell death.
Apoptosis, or programmed cell death, is a fundamental biological process crucial for development, tissue homeostasis, and the pathogenesis of numerous diseases, including cancer and neurodegenerative disorders [23] [24]. Caspases, a family of cysteine-dependent aspartate-specific proteases, are central mediators of apoptosis. Among them, caspase-3 is the primary executioner protease, responsible for cleaving a vast array of cellular substrates that lead to the characteristic biochemical and morphological hallmarks of apoptosis [23] [25]. Caspase-3 is synthesized as an inactive zymogen (procaspase-3) and undergoes proteolytic cleavage at specific aspartic acid residues to form the active enzyme, which consists of large (p20) and small (p10) subunits [25] [24].
The detection of cleaved caspase-3 represents a significant advancement over traditional apoptosis assays. Unlike methods that identify secondary consequences of cell death, such as DNA fragmentation or plasma membrane alterations, cleaved caspase-3 detection directly measures the activation of a key enzymatic driver of the apoptotic process [26]. This direct measurement offers enhanced specificity and allows for earlier detection of apoptosis, making it particularly valuable for high-content screening, pharmacological testing, and basic research aimed at understanding cell death mechanisms [23] [7]. This document will elaborate on these advantages and provide detailed protocols for its detection in the context of low-noise flow cytometry research.
Comparative Advantages of Cleaved Caspase-3 Detection
The selection of an apoptosis assay is critical for data accuracy and biological relevance. The table below summarizes how cleaved caspase-3 detection compares to other commonly used methods.
Table 1: Comparison of Cleaved Caspase-3 Detection with Other Apoptosis Assays
| Assay Method | Target / Principle | Key Advantages | Key Limitations |
|---|---|---|---|
| Cleaved Caspase-3 Detection | Direct immuno-detection of the activated caspase-3 enzyme [24]. | High specificity for apoptosis; early-stage detection; quantifiable by flow cytometry and IHC; distinguishes initial from late apoptosis [26] [27]. | Does not measure upstream initiator caspase activity; requires cell permeabilization for intracellular staining. |
| DNA Fragmentation (TUNEL) | Detects DNA strand breaks in late apoptosis [26]. | Widely established; labels a classic hallmark of apoptosis. | Can detect non-apoptotic DNA damage (e.g., necrosis); later stage event [26]. |
| Annexin V Staining | Binds to phosphatidylserine (PS) exposed on the outer leaflet of the plasma membrane [27]. | Detects early-stage apoptosis before membrane integrity loss. | Cannot distinguish between apoptosis and other forms of PS-exposing cell death; requires careful interpretation with viability dyes [27]. |
| Morphological Analysis | Microscopic identification of cell shrinkage, chromatin condensation, and apoptotic bodies [23]. | Provides direct visual confirmation of apoptosis. | Subjective; time-consuming; not suitable for high-throughput analysis [23]. |
Specificity for Apoptosis
A primary advantage of cleaved caspase-3 detection is its high degree of specificity for the apoptotic process.
- Direct Mechanism Marker: It directly measures the proteolytic activation of a central executioner caspase, a defining event in the apoptosis cascade [24]. This minimizes false positives from non-apoptotic cell death, such as necrosis, which may also result in positive signals in TUNEL or Annexin V assays [26].
- Correlation with Apoptotic Indices: A comparative study demonstrated an excellent correlation (R=0.89) between apoptotic indices obtained using activated caspase-3 immunohistochemistry and another caspase-cleavage target, cleaved cytokeratin 18, confirming its reliability as a specific apoptotic marker [26].
Early Detection Capability
The activation of caspase-3 occurs upstream of the irreversible morphological and biochemical changes that characterize the final stages of apoptosis.
- Position in Apoptotic Cascade: Caspase-3 activation is an early execution-phase event, preceding DNA fragmentation and the loss of plasma membrane integrity [27]. This allows researchers to identify cells committed to apoptosis at an earlier, more defined stage.
- Temporal Advantage: In live-cell imaging and flow cytometry, the cleavage of caspase-3-specific substrates or the detection of the activated protein itself provides a real-time or near-real-time snapshot of apoptosis initiation, enabling dynamic studies of cell death kinetics [3] [7].
Diagram 1: Caspase-3 activation is an early event in the apoptotic cascade, occurring before DNA fragmentation and PS externalization targeted by other assays.
The Scientist's Toolkit: Key Reagent Solutions
Successful detection of cleaved caspase-3, particularly in sensitive flow cytometry applications, relies on a suite of specific reagents. The following table outlines essential tools for these experiments.
Table 2: Key Research Reagents for Cleaved Caspase-3 Detection
| Reagent / Tool | Function / Principle | Application Notes |
|---|---|---|
| Anti-Cleaved Caspase-3 Antibodies | Monoclonal or polyclonal antibodies that specifically bind the activated (cleaved) form of caspase-3, but not the procaspase [24]. | Essential for IHC, Western blot, and flow cytometry. Conjugation to fluorochromes like FITC or PE enables direct detection by flow cytometry. |
| Fluorogenic Caspase Substrates (e.g., PhiPhiLux G1D2) | Cell-permeable peptides containing the DEVD caspase-3/7 cleavage sequence and a fluorophore that becomes fluorescent upon cleavage [27]. | Allows live-cell analysis of caspase activity by flow cytometry. The G1D2 variant is FITC-like, excitable at 488 nm. |
| FRET-Based Biosensors (e.g., ZipGFP-DEVD) | Genetically encoded sensors where caspase-3 cleavage separates a FRET pair or allows GFP reconstitution, leading to a fluorescence shift [3] [7]. | Ideal for real-time, long-term kinetic studies in live cells (e.g., using IncuCyte or time-lapse microscopy). |
| CellEvent Caspase-3/7 Green | A non-fluorescent substrate containing a DEVD sequence attached to a DNA-binding dye. Cleavage allows dye entry into the nucleus and DNA binding, producing bright green fluorescence [28]. | A no-wash, live-cell reagent suitable for high-content screening and multiplexing. Signal survives fixation. |
| Caspase Inhibitors (e.g., zVAD-FMK, DEVD-FMK) | Irreversible, cell-permeable peptides that covalently bind and inhibit caspase activity [7]. | Crucial as negative controls to confirm the specificity of the caspase-dependent signal. |
| Annexin V Conjugates & Viability Dyes (PI, 7-AAD) | Annexin V binds externalized PS; DNA dyes like PI and 7-AAD stain cells with compromised membranes [27]. | Used in multiparametric panels with caspase-3 detection to distinguish early apoptotic (Casp-3+/Annexin V+/PI-) from late apoptotic/necrotic cells (Casp-3+/Annexin V+/PI+). |
Detailed Experimental Protocols
Protocol: Multiparametric Analysis of Apoptosis by Flow Cytometry Using a Fluorogenic Substrate
This protocol leverages the PhiPhiLux G1D2 fluorogenic substrate for caspase-3/7 activity, combined with Annexin V and a viability dye for a comprehensive view of cell death stages [27].
Materials:
- PhiPhiLux G1D2 substrate (OncoImmunin)
- PE- or APC-conjugated Annexin V
- Propidium Iodide (PI) or 7-AAD
- Complete cell culture medium
- Wash Buffer: Dulbecco's PBS (with calcium and magnesium) supplemented with 2% FBS
- Flow cytometer equipped with a 488 nm laser (and a red laser for APC)
Procedure:
- Induce Apoptosis: Treat cells with your apoptotic agent and include appropriate controls (untreated and, if possible, a caspase inhibitor control).
- Harvest and Wash: Harvest cells (using gentle dissociation like Accutase for adherent cells to preserve membrane integrity) and wash once with Wash Buffer.
- Stain with PhiPhiLux:
- Resuspend the cell pellet (0.5-1 x 10^6 cells) in 50 µL of Wash Buffer.
- Add the PhiPhiLux G1D2 substrate at the recommended dilution (typically 1:100 to 1:500).
- Incubate for 60 minutes at 37°C in the dark.
- Wash Cells: Add 1 mL of Wash Buffer, centrifuge, and carefully remove the supernatant to reduce background fluorescence.
- Stain with Annexin V and Viability Dye:
- Resuspend the cell pellet in 100 µL of Annexin V Binding Buffer.
- Add the recommended amount of PE- or APC-conjugated Annexin V and PI (e.g., 1 µg/mL final concentration) or 7-AAD.
- Incubate for 15 minutes at room temperature in the dark.
- Acquire Data by Flow Cytometry:
- Within 1 hour, add 400 µL of Binding Buffer and analyze on the flow cytometer.
- Use the following guide for fluorochrome setup:
- PhiPhiLux G1D2: FITC channel (~530/30 nm)
- Annexin V-PE: PE channel (~585/42 nm) or Annexin V-APC: APC channel (~660/20 nm)
- PI: PerCP-Cy5-5 or equivalent channel (~695/40 nm); 7-AAD: PerCP-Cy5-5 or equivalent channel (~655/20 nm)
Data Analysis:
- Create a biparametric plot of PhiPhiLux (Caspase-3/7 activity) vs. Annexin V.
- Gate the population to exclude PI-positive (necrotic) cells for early apoptosis analysis.
- Identify distinct populations:
- Viable: PhiPhiLux low / Annexin V low
- Early Apoptotic: PhiPhiLux high / Annexin V high / PI low
- Late Apoptotic/Secondary Necrotic: PhiPhiLux high / Annexin V high / PI high
Protocol: Real-Time Live-Cell Imaging of Caspase-3/7 Activation
This protocol uses the CellEvent Caspase-3/7 Green reagent or a stable FRET-based reporter for kinetic studies in live cells [28] [7].
Materials:
- CellEvent Caspase-3/7 Green reagent (Thermo Fisher) OR stable cell line expressing a caspase-3/7 biosensor (e.g., ZipGFP-DEVD-mCherry)
- Appropriate live-cell imaging medium
- Nuclear stain (e.g., Hoechst 33342), if needed
- Live-cell imaging system (e.g., IncuCyte, ImageXpress Micro)
Procedure with CellEvent Reagent:
- Seed Cells: Seed cells in a multi-well plate (e.g., 96-well) suitable for imaging and allow them to adhere overnight.
- Treat and Stain: Induce apoptosis with your therapeutic agent. Add CellEvent Caspase-3/7 Green reagent at a final concentration of 2-5 µM directly to the culture medium.
- Image:
- Place the plate in the pre-warmed (37°C, 5% CO₂) live-cell imager.
- Acquire images automatically at regular intervals (e.g., every 30-60 minutes) over 24-48 hours using a FITC/GFP filter set to detect green fluorescence from apoptotic cells.
- Analyze Data:
- Use integrated software algorithms to quantify the number of green-fluorescent objects (apoptotic cells) or total fluorescence intensity per well over time.
Procedure with Stable FRET Reporter Cell Line:
- Generate/Use Reporter Cells: Utilize a stable cell line expressing a constitutively active fluorophore (e.g., mCherry) and a caspase-3/7-activatable GFP reporter [7].
- Image: After treatment, image cells over time using channels for both mCherry (cell presence/viability marker) and GFP (caspase activation).
- Analyze Data: Calculate the GFP/mCherry ratio for each cell or field of view. A rising ratio indicates caspase-3/7 activation. This internal normalization corrects for well-to-well variability and cell loss.
Diagram 2: A generalized workflow for multiparametric analysis of apoptosis using flow cytometry, integrating caspase-3 activity with Annexin V binding and viability staining.
The detection of cleaved caspase-3 provides a powerful and specific means to assess apoptotic activity, offering distinct advantages over methods that target downstream events. Its capacity for early detection and high specificity makes it an indispensable tool for modern cell death research, particularly in applications requiring low background noise and high precision, such as flow cytometry and high-content screening. The detailed protocols and reagent solutions outlined in this application note provide a robust framework for researchers to accurately quantify apoptosis, thereby enhancing the reliability of data in drug discovery, toxicology, and basic mechanistic studies.
Step-by-Step Protocol: From Cell Preparation to Data Acquisition for Low-Noise Caspase-3 Detection
Apoptosis, or programmed cell death, is an orchestrated process crucial for development, tissue homeostasis, and disease pathogenesis. The caspase family of cysteine proteases serves as the central executioner of apoptosis, with caspase-3 being the primary effector protease responsible for the majority of proteolytic cleavage events during the final stages of cell death [9]. Consequently, the detection of activated caspase-3 is considered a highly reliable marker for identifying cells undergoing apoptosis [9] [3].
Flow cytometric analysis of cleaved caspase-3 provides a powerful, quantitative approach for measuring apoptosis at the single-cell level. However, the accuracy and sensitivity of this detection hinge critically on the rigorous selection and optimization of key reagents, particularly primary antibody specificity and fluorophore conjugates. This application note details a standardized protocol for the detection of cleaved caspase-3 by flow cytometry, with a specific focus on optimizing the use of Alexa Fluor 488-conjugated antibodies to achieve high signal-to-noise ratios and reproducible results in drug development research.
Technical Principles and Reagent Selection
Caspase-3 as an Apoptotic Marker
Caspases typically exist in healthy cells as inactive zymogens. Upon initiation of apoptosis, they undergo proteolytic cleavage and activation. Activated caspase-3 cleaves cellular substrates at specific aspartic acid residues, leading to the characteristic biochemical and morphological changes of apoptosis [9]. While cleaved caspase-3 fragments can be detected by Western blot, flow cytometry allows for the quantification of these events in individual cells using antibodies that specifically recognize the cleaved form, providing a robust snapshot of apoptotic frequency within a heterogeneous population [9].
The Scientist's Toolkit: Essential Research Reagents
Selecting the appropriate reagents is fundamental to a successful flow cytometry experiment. The table below outlines the key materials required for the detection of cleaved caspase-3.
Table 1: Research Reagent Solutions for Cleaved Caspase-3 Flow Cytometry
| Reagent Category | Specific Example | Function and Critical Feature |
|---|---|---|
| Primary Antibody | Anti-Cleaved Caspase-3 (specific for cleaved fragment) | Specifically binds to the caspase-3-derived cleavage fragment generated during apoptosis; must be validated for flow cytometry [9]. |
| Fluorophore-Conjugated Secondary Antibody | Goat Anti-Mouse IgG (Alexa Fluor 488) | Binds to the primary antibody; Alexa Fluor 488 offers high brightness, photostability, and pH insensitivity, making it ideal for sensitive detection [29] [30]. |
| Viability Probe | Fixable Viability Dye (e.g., amine-reactive dye) | Distinguishes live from dead cells; dead cells exhibit high nonspecific antibody binding and must be excluded from analysis for accurate cleaved caspase-3 quantification [31]. |
| Blocking Buffer | Fc Receptor Blocking Buffer / Monocyte Blocker | Reduces nonspecific antibody binding via Fc receptors, a common source of background noise, especially in innate immune cells [31]. |
| Staining Buffer | PBS with BSA or FBS | Provides a protein-rich medium for antibody incubations and cell washes to minimize nonspecific sticking. |
| Fixation/Permeabilization Buffer | Commercial formaldehyde-based fixative and saponin-based permeabilization buffer | Preserves cell structure and allows antibodies to access the intracellular cleaved caspase-3 antigen. |
Optimizing the Fluorophore Conjugate: Alexa Fluor 488
For sensitive detection of cleaved caspase-3, the choice of fluorophore is critical. Alexa Fluor 488 is an excellent choice due to its well-characterized properties:
- Brightness: It is one of the brightest green-fluorescing dyes, outperforming similar dyes like FITC and Cy2, which is essential for detecting the often modest levels of intracellular cleaved caspase-3 [30].
- Photostability: It maintains signal intensity over time, allowing for longer observation and analysis periods without significant signal decay [30].
- pH Insensitivity: Its fluorescence remains high over a broad pH range (pH 4–10), making it robust across various staining and fixation conditions [30].
- Water Solubility: This property helps prevent antibody aggregation and precipitation, ensuring consistent staining performance [30].
Conjugate Optimization: When using a secondary antibody conjugate, such as a Goat Anti-Mouse IgG2a (Alexa Fluor 488), it is crucial to titrate the reagent. A final dilution in the range of 1:500 to 1:2000 typically yields acceptable results, but the optimal dilution should be determined empirically for each assay to maximize the stain index and minimize background [29].
Methodology: Detailed Protocol for Cleaved Caspase-3 Detection
Experimental Workflow
The following diagram illustrates the complete experimental workflow for detecting cleaved caspase-3 in apoptotic cells, from sample preparation to data analysis.
Diagram 1: Cleaved Caspase-3 Staining Workflow.
Step-by-Step Protocol
Step 1: Cell Preparation and Viability Staining
- Harvest cells (e.g., from culture or tissue) and wash once with cold PBS.
- Resuspend the cell pellet in PBS at a concentration of 1-5 x 10^6 cells/mL.
- Critical Step: Add a fixable viability dye (e.g., an amine-reactive dye) according to the manufacturer's instructions. Incubate for 20-30 minutes on ice in the dark. This step is crucial for excluding dead cells, which are a major source of non-specific binding and can have altered autofluorescence, leading to unmixing errors in analysis [31].
Step 2: Fixation and Permeabilization
- Wash cells twice with cold PBS to remove unbound viability dye.
- Fix cells using a commercial formaldehyde-based fixative (e.g., 4% paraformaldehyde in PBS) for 15-20 minutes at room temperature.
- Wash cells twice with a permeabilization wash buffer.
- Permeabilize cells using a saponin-based buffer for 10-15 minutes at room temperature to allow intracellular access for the antibody.
Step 3: Fc Receptor Blocking
- Critical Step: Resuspend the cell pellet in permeabilization buffer containing an Fc receptor blocking reagent. Incubate for 10-15 minutes at room temperature. This step is essential for reducing false-positive signals from non-specific antibody binding, particularly when working with immune cells like monocytes and B cells [31].
Step 4: Immunostaining for Cleaved Caspase-3
- Without washing, add the primary antibody (anti-cleaved caspase-3) directly to the cell suspension. The antibody should be titrated beforehand in the same buffer system.
- Vortex gently and incubate for 60 minutes at room temperature in the dark.
- Wash cells twice with permeabilization buffer to remove unbound primary antibody.
- Resuspend cells in permeabilization buffer containing the fluorophore-conjugated secondary antibody (e.g., Goat Anti-Mouse IgG Alexa Fluor 488, at the pre-determined optimal dilution). Incubate for 30-60 minutes at room temperature in the dark.
- Wash cells twice with permeabilization buffer, then resuspend in PBS or a suitable flow cytometry staining buffer for acquisition.
Step 5: Flow Cytometric Data Acquisition and Analysis
- Acquire data on a flow cytometer equipped with a blue (488 nm) laser and a standard FITC/Alexa Fluor 488 filter set (e.g., 530/30 BP).
- Gating Strategy:
- Gate on single cells based on FSC-A vs. FSC-H.
- Within single cells, gate on viability dye-negative (live) cells.
- Analyze the cleaved caspase-3 signal (Alexa Fluor 488) within the live cell population. Use appropriate negative controls (e.g., unstained cells, fluorescence-minus-one (FMO) controls) to set the positive gate [32].
Advanced Applications and Techniques
Multiplex Panel Design
For more complex immunophenotyping experiments, cleaved caspase-3 detection can be incorporated into a multicolor panel. Adherence to core panel design principles is paramount for success.
Table 2: Key Principles for Multicolor Flow Cytometry Panel Design
| Principle | Rationale | Practical Application |
|---|---|---|
| Match Antigen Abundance to Fluorophore Brightness | Maximizes staining index (signal-to-background). | Use bright fluorophores like PE or BV421 for low-abundance antigens. Cleaved caspase-3, often of moderate abundance, pairs well with bright fluorophores like Alexa Fluor 488 [31]. |
| Minimize Spectral Overlap in Co-expressed Markers | Reduces spillover spreading error, which distorts data and impedes clear population resolution. | Avoid assigning fluorophores with heavy spectral overlap to antibodies for markers expressed on the same cell population. Utilize panel design tools to calculate complexity index [31]. |
| Employ a Viability Probe and Blockers | Enhances data quality by reducing non-specific signal from dead cells and Fc receptors. | Always include a viability dye and relevant blocking buffers (Fc block, monocyte blocker) as standard practice [31]. |
Caspase-3 Activity Measurement via FRET
Beyond immunodetection of the cleaved protein, caspase-3 activation can be measured functionally using Förster Resonance Energy Transfer (FRET)-based bioprobes. These probes consist of a donor fluorophore (e.g., GFP) and an acceptor fluorophore (e.g., Alexa Fluor 546) linked by a caspase-3 recognition peptide sequence. Upon caspase-3 activation and cleavage of the peptide, FRET is abolished, leading to a measurable increase in donor fluorescence and a decrease in acceptor fluorescence. This change can be detected using advanced techniques like time-resolved flow cytometry (TRFC), which measures fluorescence lifetimes and can provide a quantitative, concentration-independent measure of FRET efficiency and caspase-3 activity [3]. The signaling pathway and detection principle are summarized below.
Diagram 2: Caspase-3 Activation and FRET-Based Detection.
The reliable quantification of apoptosis via cleaved caspase-3 detection is a cornerstone of cellular response analysis in basic research and drug development. The protocol detailed herein underscores that rigorous reagent selection—prioritizing high-specificity primary antibodies and optimized bright, stable conjugates like Alexa Fluor 488—is the foundation for a robust and sensitive assay. By integrating critical steps such as viability staining, Fc receptor blocking, and adherence to multicolor panel design principles, researchers can significantly reduce background noise and obtain high-quality, reproducible data that accurately reflects the apoptotic status of their experimental models.
In flow cytometric analysis of intracellular targets such as cleaved caspase-3, the sample preparation process presents a critical technical challenge: achieving sufficient cellular permeabilization for antibody access while maintaining structural integrity and antigen preservation. This balance is particularly crucial for low-noise research where signal specificity directly impacts data interpretation and experimental conclusions. Proper fixation stabilizes cellular structures and immobilizes antigens, while subsequent permeabilization creates openings in membrane structures allowing antibodies to reach intracellular epitopes. The following application note provides detailed methodologies and optimization strategies for robust detection of cleaved caspase-3 while minimizing background signal in flow cytometry applications.
Theoretical Framework: Principles of Cellular Fixation and Permeabilization
Fixation Methods and Mechanisms
Fixation represents the first critical step in intracellular staining workflows, serving to preserve cellular architecture and prevent degradation of labile epitopes. The primary function of fixation is to crosslink cellular components, thereby immobilizing intracellular antigens while maintaining light scatter properties essential for flow cytometric analysis.
Table 1: Common Fixation Methods for Intracellular Flow Cytometry
| Fixative | Mechanism of Action | Optimal Concentration | Incubation Conditions | Compatible Antigens |
|---|---|---|---|---|
| Paraformaldehyde (PFA) | Protein cross-linking via methylene bridges | 1-4% in PBS | 15-20 minutes on ice | Most intracellular proteins, including cleaved caspase-3 |
| Methanol | Protein precipitation and dehydration | 90% in water | 10 minutes at -20°C | Phospho-epitopes, some nuclear antigens |
| Acetone | Protein precipitation and lipid dissolution | 100% | 10-15 minutes on ice | Cytoskeletal proteins, select nuclear antigens |
Paraformaldehyde (1-4%) represents the most commonly used fixative for cleaved caspase-3 detection, providing excellent epitope preservation while maintaining cellular morphology [15]. Methanol fixation, while effective for certain phospho-epitopes, may denature some caspase-3 epitopes and is generally not recommended for this application without extensive validation [15].
Permeabilization Strategies
Following fixation, permeabilization creates membrane pores sufficient for antibody penetration while maintaining cellular integrity. The choice of permeabilizing agent depends on target antigen localization and sensitivity.
Table 2: Permeabilization Agents and Applications
| Detergent | Mechanism | Concentration Range | Incubation | Suitable Antigen Localization |
|---|---|---|---|---|
| Saponin | Cholesterol extraction from membranes | 0.1-0.5% in PBS | 10-15 minutes at room temperature | Cytoplasmic antigens, granules |
| Triton X-100 | Lipid bilayer dissolution | 0.1-1% in PBS | 10-15 minutes at room temperature | Nuclear antigens, cytoskeletal proteins |
| Tween-20 | Mild membrane disruption | 0.1-0.5% in PBS | 10-15 minutes at room temperature | Cytoplasmic face of membrane antigens |
| NP-40 | Similar to Triton X-100 | 0.1-0.5% in PBS | 10-15 minutes at room temperature | Nuclear antigens |
For cleaved caspase-3 detection, saponin-based permeabilization systems often provide optimal results as they create reversible pores that maintain sufficient protein structure for antibody recognition [33]. Harsher detergents like Triton X-100 may be necessary for nuclear antigens but can increase background fluorescence for cytoplasmic targets [15].
Experimental Workflows for Cleaved Caspase-3 Detection
Comprehensive Staining Protocol
The following integrated protocol combines optimal practices from multiple methodological sources for specific detection of cleaved caspase-3 with minimal background signal.
Workflow for intracellular detection of cleaved caspase-3
Stage 1: Sample Preparation (20 minutes)
Harvesting: Gently dissociate adherent cells using enzymatic (trypsin replacement) or non-enzymatic methods appropriate for your cell type. Avoid over-digestion which can artificially activate caspases [34].
Washing: Centrifuge cell suspension at 200-350 × g for 5 minutes at 4°C. Discard supernatant and resuspend pellet in ice-cold PBS containing 2-10% fetal calf serum (FCS) [15].
Cell Counting and Viability Assessment: Determine cell concentration and ensure viability exceeds 90% for optimal results. Adjust concentration to 0.5-1 × 10^6 cells/mL in suspension buffer [15].
Stage 2: Viability Staining (Time varies by dye)
Dye Selection: Choose a viability dye with emission spectrum non-overlapping with your detection fluorophores. DNA-binding dyes like 7-AAD or DAPI work well for unfixed cells [15].
Staining Protocol: Incubate cells with viability dye according to manufacturer's instructions, typically 10-20 minutes at 4°C in the dark [15].
Washing: Centrifuge at 200 × g for 5 minutes at 4°C. Remove supernatant and resuspend in cold suspension buffer [15].
Stage 3: Surface Staining (30-60 minutes)
Fc Receptor Blocking: Resuspend cell pellet in blocking solution containing 2-10% normal serum from the same species as your detection antibodies, or use specific Fc block reagents (e.g., anti-CD16/CD32 for mouse cells) [35]. Incubate 15-30 minutes at 4°C.
Surface Marker Staining: Add fluorochrome-conjugated antibodies against surface markers of interest. For highly multiplexed panels, include Brilliant Stain Buffer to prevent dye-dye interactions [35]. Incubate 30-60 minutes at 4°C in the dark.
Washing: Wash twice with cold FACS buffer (PBS with 2-10% FCS) [35].
Stage 4: Fixation and Permeabilization (45-60 minutes)
Fixation: Resuspend cell pellet in 1-4% paraformaldehyde in PBS. Incubate 15-20 minutes on ice. Paraformaldehyde concentration and time require optimization for different antigens but 4% for 15 minutes serves as a good starting point for cleaved caspase-3 [15].
Washing: Centrifuge at 200 × g for 5 minutes at 4°C. Discard supernatant and wash twice with suspension buffer to remove residual fixative [15].
Permeabilization: Resuspend cell pellet in permeabilization buffer containing 0.1-0.5% saponin. For cleaved caspase-3, which is a cytoplasmic protein, saponin provides sufficient access while maintaining cellular morphology. Incubate 10-15 minutes at room temperature [33]. Note: Saponin-mediated permeabilization is reversible, so cells must be maintained in permeabilization buffer during subsequent antibody incubation steps [33].
Stage 5: Intracellular Staining (90 minutes)
Intracellular Fc Blocking: Following permeabilization, add a second Fc receptor blocking step as permeabilization exposes additional Fc receptors. Use 1μg IgG per 10^6 cells and incubate 15 minutes at room temperature [33].
Antibody Incubation: Add titrated amount of anti-cleaved caspase-3 antibody (clone D3E9 Rabbit mAb is validated for flow cytometry). Incubate 30 minutes at room temperature in the dark [36] [33].
Washing: Wash twice with permeabilization buffer to maintain permeabilized state during washing [33].
Secondary Detection (if using unconjugated primary): For unconjugated primary antibodies, incubate with appropriate fluorochrome-conjugated secondary antibody for 20-30 minutes in the dark. Wash twice with permeabilization buffer [33].
Stage 6: Analysis
Resuspension: Resuspend final cell pellet in 200-400μL FACS buffer for acquisition [33].
Controls: Include appropriate controls: unstained cells, isotype controls, fluorescence minus one (FMO) controls, and positive/negative induction controls [34].
Optimization Strategies for Low-Noise Research
Blocking Optimization for Signal-to-Noise Enhancement
Non-specific antibody binding represents a significant source of background noise in intracellular flow cytometry. Implementing strategic blocking protocols substantially improves signal-to-noise ratios for cleaved caspase-3 detection.
Table 3: Blocking Reagents and Applications
| Blocking Reagent | Mechanism | Optimal Concentration | Application Timing |
|---|---|---|---|
| Normal Serum (host-matched) | Competes for Fc receptor binding | 2-10% in buffer | Pre-surface and pre-intracellular staining |
| Fc Block (anti-CD16/CD32) | Directly blocks Fcγ receptors | 0.5-1μg/10^6 cells | Pre-surface staining |
| Protein Block (BSA, FCS) | Reduces non-specific protein binding | 2-10% in buffer | Throughout protocol in buffers |
| Tandem Dye Stabilizer | Prevents tandem dye degradation | 1:1000 dilution | In staining buffer and storage buffer |
For cleaved caspase-3 detection in immune cells, implement a dual blocking strategy: first before surface staining with species-matched serum, and again after permeabilization with Fc block reagents [35]. This approach addresses both surface and intracellular Fc receptors exposed during permeabilization.
Caspase-3 Specific Considerations
Cleaved caspase-3 presents unique challenges for detection as it exists in relatively low abundance compared to surface markers and requires careful preservation of conformational epitopes. The D3E9 rabbit monoclonal antibody recognizes a cleavage-specific epitope that may be sensitive to over-fixation or harsh permeabilization conditions [36]. Methanol-based fixation should be avoided unless specifically validated for your application, as it may denature the epitope recognized by many cleaved caspase-3 antibodies [15].
The Scientist's Toolkit: Essential Research Reagents
Table 4: Key Reagents for Cleaved Caspase-3 Flow Cytometry
| Reagent Category | Specific Examples | Function | Optimization Tips |
|---|---|---|---|
| Fixatives | 4% Paraformaldehyde, BD Cytofix | Preserves cellular structure and antigen integrity | Test 1-4% concentrations; avoid prolonged fixation |
| Permeabilizers | Saponin, Triton X-100, Tween-20 | Enables antibody access to intracellular targets | Saponin recommended for cytoplasmic targets |
| Blocking Reagents | Normal Serum, Fc Block, BSA | Reduces non-specific antibody binding | Use host-matched serum to primary antibody |
| Antibodies | Cleaved Caspase-3 (D3E9) Rabbit mAb | Specific detection of apoptotic cells | Titrate for optimal signal:noise; validate with induced controls |
| Buffer Systems | PBS, FACS Buffer, Perm/Wash Buffers | Maintain pH and osmolarity during processing | Include saponin in all steps after permeabilization |
| Viability Dyes | 7-AAD, DAPI, Fixable Viability Dyes | Exclude dead cells from analysis | Choose dye compatible with fixation and laser lines |
Troubleshooting Common Challenges
High Background Fluorescence
- Cause: Inadequate blocking of Fc receptors or non-specific antibody binding.
- Solution: Implement dual blocking strategy with both serum and specific Fc block reagents [35]. Include isotype controls and titrate all antibodies.
Weak or Absent Signal
- Cause: Over-fixation destroying epitopes or insufficient permeabilization.
- Solution: Reduce fixation time or concentration. Validate with alternative permeabilization agents (e.g., Triton X-100 instead of saponin) [15].
Poor Cell Recovery
- Cause: Excessive centrifugation force or inadequate washing.
- Solution: Use consistent centrifugation at 300-500 × g and ensure complete resuspension between steps [34].
Altered Light Scatter Properties
- Cause: Over-fixation or inappropriate permeabilization conditions.
- Solution: Optimize fixation time and concentration. Note that permeabilization will affect light scatter profiles; adjust gating strategy accordingly [15].
Robust detection of cleaved caspase-3 by flow cytometry requires meticulous optimization of fixation and permeabilization conditions balanced with strategic blocking approaches. The protocols outlined herein provide a framework for achieving high-specificity detection with minimal background signal, enabling reliable assessment of apoptosis in diverse experimental systems. As caspase detection methodologies continue to evolve with novel fluorescent reporters and detection platforms [7] [37], the fundamental principles of appropriate cellular preservation remain cornerstone to generating quantitatively accurate data in low-noise research environments.
Within the context of cleaved caspase-3 flow cytometry for low-noise research, a meticulously optimized staining protocol is paramount. Achieving high signal-to-noise ratios is essential for accurately detecting this key executioner protease during apoptosis, where non-specific binding can obscure critical findings. This application note provides a detailed, step-by-step protocol focusing on the precise optimization of antibody dilution, incubation parameters, and wash steps to ensure highly specific and reproducible detection of cleaved caspase-3, thereby supporting robust drug development and mechanistic studies.
The Scientist's Toolkit: Essential Reagents and Materials
The following table catalogues the essential reagents and materials required for a high-quality flow cytometry staining procedure, specifically formulated to minimize background noise.
Table 1: Key Research Reagent Solutions for Flow Cytometry Staining
| Item | Function/Description |
|---|---|
| Fc Receptor Blocking Reagent [19] [38] | Critical for reducing non-specific antibody binding. Can be purified antibodies (e.g., anti-CD16/32) or normal serum from the host species of the primary antibodies. |
| Flow Cytometry Staining Buffer [19] [39] | Typically phosphate-buffered saline (PBS) supplemented with protein (e.g., 0.5-2% BSA or FBS) and optionally sodium azide. The protein blocks non-specific interactions. |
| Fixative Solution [15] | Stabilizes cell structure and preserves antigens. Common fixatives include 1-4% Paraformaldehyde (PFA) or 90% Methanol. Choice depends on target antigen sensitivity. |
| Permeabilization Solution [15] | Disrupts the cell membrane to allow antibody access to intracellular targets like cleaved caspase-3. Options include mild (Saponin) or harsh (Triton X-100) detergents. |
| Viability Dye [39] [15] | Enables exclusion of dead cells, which are a major source of non-specific binding and high background. Can be DNA-binding dyes (7-AAD) or fixable viability stains (FVS). |
| Fluorochrome-Conjugated Antibodies [38] | Antibodies specific to the target of interest (e.g., cleaved caspase-3) and conjugated to a fluorescent dye. Must be titrated for optimal performance. |
| Red Blood Cell (RBC) Lysis Buffer [19] [15] | Required for whole blood samples to lyse red blood cells that would otherwise interfere with the analysis of nucleated cells. |
Optimized Staining Protocol for Low-Noise Detection
This protocol is designed for the detection of intracellular targets like cleaved caspase-3 and incorporates critical steps to preserve signal fidelity.
Sample Preparation and Viability Staining
Proper sample preparation is the critical first step to ensure high-quality data and minimize artifacts.
- Single-Cell Suspension: Harvest cells and prepare a single-cell suspension. For tissues, this may require mechanical disaggregation and enzymatic digestion. Filter the suspension through a 40-70 µm nylon mesh to remove clumps and debris [38].
- Cell Washing: Wash cells three times in an isotonic phosphate buffer (e.g., PBS) supplemented with 0.5-1% BSA by centrifugation at 350-500 x g for 5 minutes. This removes contaminating serum components and culture medium [19] [15].
- Cell Counting and Viability Assessment: Determine total cell count and ensure viability is 90-95% or higher. Low viability can significantly increase background noise [15] [38].
- Viability Staining: Resuspend the cell pellet in a protein-free buffer like PBS and incubate with a fixable viability dye according to the manufacturer's instructions. This must be done prior to fixation. After staining, wash cells once with a protein-containing buffer to eliminate unbound dye [39] [15].
Fc Receptor Blocking
Incubate cells with an Fc receptor blocking reagent for 15-60 minutes at room temperature or 4°C to prevent non-specific antibody binding [19] [15] [38]. Common reagents include purified anti-FcR antibodies (e.g., anti-CD16/32), normal serum, or commercial blocking solutions. Do not wash out the blocking reagent before proceeding to the next step [19].
Cell Surface Staining (Optional)
If co-staining for cell surface markers, add titrated, fluorescently-conjugated antibodies directly after Fc blocking. Incubate for 20-30 minutes at 2-8°C in the dark [19] [38] [40]. Low temperatures help prevent antibody internalization.
Fixation and Permeabilization for Intracellular Targets
For cleaved caspase-3 detection, fixation and permeabilization are essential. The choice of method can impact epitope integrity and background.
- Fixation: Pellet cells and resuspend in fixative. Common protocols include:
- Washing: Wash cells twice with suspension buffer after fixation [15].
- Permeabilization: Resuspend the fixed cell pellet in an appropriate permeabilization buffer and incubate for 10-15 minutes at room temperature [15].
- Mild detergents (e.g., Saponin, Tween 20): Suitable for cytoplasmic antigens or the cytoplasmic face of the plasma membrane.
- Harsh detergents (e.g., Triton X-100, NP-40): Required for nuclear antigen staining as they dissolve the nuclear membrane.
Intracellular Staining for Cleaved Caspase-3
This is the core step for detecting the target of interest.
- Antibody Incubation: Add the titrated, fluorescently-conjugated anti-cleaved caspase-3 antibody to the cells in permeabilization buffer. Incubate for 20-30 minutes at 2-8°C in the dark [15] [38].
- Washing: Perform 2-3 wash steps with 2 mL of flow cytometry staining buffer or permeabilization buffer to remove unbound antibody thoroughly. Centrifuge at 350-500 x g for 5 minutes between washes [19] [15] [38].
Data Acquisition
Resuspend the final cell pellet in 200-400 µL of staining buffer for analysis on the flow cytometer [19] [40]. Filter the sample immediately before acquisition to prevent clogging [38].
Optimization of Critical Parameters
The following quantitative data summarizes key variables that require empirical testing to achieve the lowest background and strongest specific signal.
Table 2: Optimization of Antibody Dilution and Incubation Conditions
| Parameter | Recommended Starting Point | Optimization Range | Impact on Data Quality |
|---|---|---|---|
| Antibody Titration [39] [38] [40] | Manufacturer's suggested concentration. | Serial dilutions (e.g., 1:50 to 1:800). | Determines optimal signal-to-noise ratio; under-concentration causes weak signal, over-concentration increases background. |
| Incubation Temperature [38] [40] | 2-8°C (on ice). | Room temperature (15 min) to 1 hour on ice. | Lower temperatures reduce internalization and non-specific binding. Some antibodies may require specific conditions. |
| Incubation Time [19] [40] | 30 minutes. | 15 minutes to 1 hour. | Insufficient time lowers signal; excessive time can increase non-specific binding. |
| Number of Washes [15] [38] | 2 washes post-antibody staining. | 1 to 3 washes. | Insufficient washing leaves unbound antibody, increasing background. Excessive washing may lead to cell loss. |
| Centrifugation Speed & Time [19] [15] | 350-500 x g for 5 minutes. | 300-600 x g for 5-7 minutes. | Optimized for adequate cell pelleting without causing excessive stress or damage to the cells. |
Experimental Workflow and Gating Strategy
The following diagram illustrates the complete experimental workflow for intracellular cleaved caspase-3 staining, from sample preparation to data analysis.
Flowchart of Intracellular Staining Protocol
Essential Controls for Valid Data Interpretation
Appropriate controls are non-negotiable for accurate data interpretation and gating, especially in low-noise applications.
- Unstained Control: Cells processed without any antibodies to measure autofluorescence [38].
- Isotype Control: Cells stained with an antibody of the same isotype and conjugation as the primary antibody but with irrelevant specificity. Helps assess non-specific Fc-mediated binding [19] [38].
- Fluorescence Minus One (FMO) Control: For multicolor panels, this control contains all antibodies except one. It is crucial for accurate gating, particularly for dim populations and when dealing with spectral spillover [38].
- Compensation Controls: Cells or beads stained singly with each fluorochrome used in the panel. These are mandatory for multicolor experiments to correct for spectral overlap [38].
- Biological Controls: Include known positive and negative cell populations to validate the staining and functionality of the antibody against cleaved caspase-3 [38].
This detailed application note underscores that a rigorous, optimized staining procedure is the foundation of reliable cleaved caspase-3 detection in flow cytometry. By systematically implementing the recommended practices for antibody titration, incubation conditions, wash steps, and controls, researchers can achieve the low-noise data essential for confident interpretation in apoptosis research and drug development.
In flow cytometry, the accuracy of data is heavily dependent on the specificity of antibody binding. Non-specific binding occurs when an antibody binds to a cell through mechanisms other than the intended antigen-epitope interaction, leading to increased background fluorescence and compromised data interpretation [41]. This phenomenon is particularly problematic in sensitive applications, such as the detection of cleaved caspase-3 in apoptotic cells, where signal-to-noise ratio is critical for reliable results [9]. The principal causes of non-specific binding include excess antibody concentration, interactions between antibody Fc regions and cellular Fc receptors, the "stickiness" of non-viable cells, and insufficient protein content in staining buffers [41] [42]. Understanding and mitigating these factors through systematic blocking protocols is therefore a prerequisite for high-quality flow cytometry data, especially in low-noise research contexts.
Core Mechanisms of Non-Specific Binding
Fc Receptor-Mediated Binding
Fc receptors (FcRs) are membrane-bound proteins expressed on the surface of various immune cells, including neutrophils, monocytes, macrophages, B cells, natural killer cells, and some T-cell subsets [41]. Their physiological role is to bind the constant Fc region of antibodies, linking the humoral and cellular immune responses. In flow cytometry, however, this specific biological function becomes a significant source of technical artifact. The Fc regions of many staining antibodies can bind to these Fc receptors with high affinity, leading to false-positive signals and misidentification of cell populations [41] [43]. This problem is exacerbated when studying immune cells that express high levels of Fc receptors, such as monocytes and macrophages [43]. Crucially, Fc receptor binding is not strictly species-specific; FcRs from one species can frequently bind antibodies from other species to varying degrees, making this a cross-species concern in experimental design [42].
Non-Fc-Mediated Binding
Beyond Fc receptor interactions, several other mechanisms contribute to non-specific background staining:
- Electrostatic and Hydrophobic Interactions: Antibodies can stick to cells via charge-based (ionic) or hydrophobic interactions with cell surface components, independent of their antigen-binding sites [42].
- Cellular "Stickiness": Non-viable cells are particularly problematic due to their damaged membranes, which expose intracellular components like DNA that avidly bind antibodies and other proteins [41] [42]. This makes dead cells a major source of high background fluorescence.
- Insufficient Protein in Buffer: When washing and staining solutions lack sufficient protein content, antibodies themselves may non-specifically adhere to cell surfaces and even to the tube plastic [41]. The inclusion of proteins like Bovine Serum Albumin (BSA) or serum in buffers helps saturate these non-specific binding sites.
- Artifactual Antibody Interactions: In some cases, antibodies can interact with each other rather than with cellular targets. This is particularly documented with mouse IgG2 antibodies, where interactions can be mediated by the plasma complement protein C1q [41].
The diagram below illustrates the primary causes of non-specific binding and their corresponding solutions.
Fc Receptor Blocking Strategies
Blocking Reagents and Mechanisms
Effective Fc receptor blocking is achievable through several complementary approaches, each with distinct mechanisms and applications. The choice of strategy depends on the experimental system, available reagents, and the need for compatibility with subsequent staining procedures.
Table: Fc Receptor Blocking Strategies
| Strategy | Mechanism of Action | Recommended Use |
|---|---|---|
| Specific Fc Blocking Antibodies (e.g., anti-CD16/32 clone 2.4G2 for mouse cells) [42] [43] | Monoclonal antibody that specifically binds to and blocks common Fcγ receptors (CD16 and CD32). | Gold standard for blocking mouse Fcγ receptors on immune cells; highly specific. |
| Excess Unlabeled Immunoglobulin (e.g., mouse, rat, or human IgG) [42] [43] | Saturates Fc receptors with non-specific IgG, preventing binding of labeled antibodies. | Broad-spectrum blocking; useful when specific Fc block is unavailable; cost-effective. |
| Fab or F(ab')₂ Fragment Antibodies [42] [44] | Uses antibodies lacking the Fc region entirely, eliminating the possibility of FcR binding. | Ideal for critical applications with high FcR expression; requires purchase or generation of fragment antibodies. |
| Unconjugated Isotype Antibody [42] | Saturates Fc receptors with an antibody of the same species and isotype as the staining antibody. | Practical for multi-color panels; blocks FcR and other non-specific sites simultaneously. |
Critical Considerations for Fc Blocking
Successful implementation of Fc blocking requires attention to several key details. First, fetal bovine serum (FBS), commonly included in staining buffers, contains too low a concentration of IgG to effectively block Fc receptors and should not be relied upon for this purpose [43]. Second, the blocking reagent should be left in the staining mixture during the antibody incubation step to maintain continuous receptor saturation [43]. Third, researchers should note that specific Fc blocking antibodies like the mouse-specific 2.4G2 are directed against specific Fc receptor subtypes (e.g., FcγRII and FcγRIII) and will not block all Fc receptors [42]. Finally, the effectiveness of any Fc blocking protocol should be validated using isotype controls, though these controls are not recommended for gating purposes [43].
Comprehensive Protocol for Blocking and Staining
This integrated protocol combines Fc blocking with other essential steps to minimize non-specific binding during cell surface staining for flow cytometry, with particular attention to applications like cleaved caspase-3 detection [45].
Reagent Preparation
- FACS Buffer: Phosphate-buffered saline (PBS) supplemented with 1% Bovine Serum Albumin (BSA) or 5-10% Fetal Bovine Serum (FBS) [45]. Note: FBS is for providing protein, not for Fc blocking.
- Fc Blocking Solution: Dilute purified anti-Fc receptor antibody (e.g., clone 2.4G2 for mouse cells) or species-matched IgG in FACS buffer. A typical dilution for 2.4G2 is 1:50 [45].
- Antibody Cocktails: Prepare labeled antibodies in FACS buffer at pre-titrated concentrations.
- Viability Dye: Select a fixable viability dye compatible with your flow cytometer and fixation protocol (e.g., 7-AAD, propidium iodide, or SYTOX AADvanced) [41] [46].
Step-by-Step Staining Procedure
Cell Preparation: Harvest and wash cells to create a single-cell suspension. Adjust cell concentration to 1-5 × 10⁶ cells/mL in ice-cold FACS Buffer. Maintain cells on ice or at 4°C throughout the procedure to prevent antigen internalization [45].
Viability Staining (Optional but Recommended): Resuspend the cell pellet in an appropriate dilution of viability dye and incubate according to the manufacturer's instructions. Wash cells once with FACS buffer [41].
Fc Blocking: (Critical Step)
Antibody Staining:
- Add pre-titrated, labeled antibody directly to the tube containing the cells and Fc block.
- Incubate for at least 30 minutes in the dark, either on ice or at room temperature (optimize for your antigen).
Washing and Fixation:
- Wash cells 2-3 times with ice-cold FACS Buffer by centrifugation (e.g., 300-500 × g for 5 minutes at 4°C).
- Resuspend the final cell pellet in 200-500 μL of FACS Buffer for immediate acquisition.
- For delayed analysis, fix cells in 1-4% paraformaldehyde for 10-15 minutes at room temperature, then wash and resuspend in PBS [45].
The complete workflow, integrating these crucial steps, is visualized below.
Application-Specific Optimization for Cleaved Caspase-3 Detection
The detection of cleaved caspase-3, a key executioner protease in apoptosis, requires special considerations to maintain low background and high specificity, particularly as it involves intracellular staining which increases the potential for non-specific binding [9].
Special Considerations for Intracellular Staining
When detecting cleaved caspase-3, the staining procedure involves an additional fixation and permeabilization step to allow antibody access to the intracellular target. This process increases cell autofluorescence and non-specific antibody binding. To mitigate this:
- Extend Blocking: The benefits of Fc blocking and protein supplementation extend to intracellular staining. It is recommended to include unconjugated antibody in the intracellular staining cocktail to saturate non-specific sites exposed during permeabilization [42].
- Titrate the Caspase-3 Antibody: For the cleaved caspase-3 antibody (e.g., Asp175), manufacturers often provide a starting dilution (e.g., 1:50 [47]), but optimal signal-to-noise ratio should be confirmed through titration against the specific cell type being studied.
- Control for Viability: Apoptotic cells undergo membrane changes and can become "sticky." Using a fixable viability dye that remains stable after permeabilization is crucial to exclude late apoptotic and necrotic cells that contribute disproportionately to background [41] [46].
Alternative Detection Method
As an alternative to antibody-based detection, fluorogenic substrate assays are available. The CellEvent Caspase-3/7 Green Detection Reagent is a cell-permeant substrate that is cleaved by activated caspase-3 and -7, producing a bright green fluorescent signal upon DNA binding [46]. This kit includes a SYTOX AADvanced dead cell stain to differentiate live, apoptotic, and dead cells. A key advantage is that the assay can be performed on live cells without washing or fixation, reducing handling artifacts [46].
The Scientist's Toolkit: Essential Reagents for Low-Noise Flow Cytometry
Table: Key Reagents for Blocking and Background Reduction
| Reagent | Function/Purpose | Key Considerations |
|---|---|---|
| Anti-CD16/CD32 (clone 2.4G2) [42] [43] | Specific Fc block for mouse FcγRII and FcγRIII. | The gold standard for blocking mouse immune cells; does not block all Fc receptor classes. |
| Species-Specific IgG [42] [43] | Polyclonal IgG to saturate all Fc receptor types non-specifically. | A broad-spectrum alternative to specific Fc block; use purified immunoglobulin, not serum. |
| Bovine Serum Albumin (BSA) [41] [45] | Carrier protein added to buffers (0.5-1%) to saturate non-specific binding sites on cells and plastic. | Essential component of FACS buffer; reduces hydrophobic and charge-based interactions. |
| Fixable Viability Dyes [41] [46] | DNA-binding dyes that penetrate dead cells with compromised membranes. | Allows for exclusion of dead cells during analysis; choose dyes compatible with fixation. |
| Cleaved Caspase-3 (Asp175) Antibody [9] [47] | Specifically detects the activated large fragment (17/19 kDa) of caspase-3. | Requires intracellular staining after fixation/permeabilization; critical marker for apoptosis. |
| CellEvent Caspase-3/7 Green Reagent [46] | Fluorogenic substrate for live-cell detection of caspase-3/7 activity. | No washing/fixation required; compatible with multiplexing; includes a dead cell stain. |
| F(ab) or F(ab')₂ Fragment Antibodies [42] [44] | Antibodies engineered to lack the Fc region, preventing Fc receptor binding. | The most effective solution to eliminate Fc-mediated binding; may not be available for all targets. |
Implementing robust blocking protocols is not merely a technical detail but a fundamental requirement for generating high-fidelity data in flow cytometry, particularly in sensitive applications like apoptosis detection via cleaved caspase-3. The synergistic application of Fc receptor blocking, antibody titration, viability staining, and proper buffer formulation systematically minimizes non-specific binding. This approach ensures that the resulting data accurately reflect biological reality rather than technical artifacts, thereby strengthening the validity of research conclusions in both basic science and drug development contexts.
Accurate detection of cleaved caspase-3, a critical mediator of apoptosis, via flow cytometry requires meticulous instrument configuration and compensation setup to minimize background noise and spectral spillover. Proper configuration ensures high sensitivity for distinguishing subtle biological signals in drug discovery research, particularly when analyzing rare cell populations or low-abundance targets. This application note provides detailed protocols for optimizing flow cytometer settings and establishing rigorous compensation controls to achieve high-fidelity, low-noise data for cleaved caspase-3 analysis.
Instrument Configuration for Low-Noise Acquisition
Optimal instrument configuration establishes the foundation for sensitive detection of cleaved caspase-3 by maximizing signal-to-noise ratio and ensuring measurement reproducibility.
Laser and Optical Filter Configuration
Configure lasers and optical filters to match the excitation and emission spectra of your fluorophores while minimizing spectral overlap [14]. The key steps include:
- Identify Instrument Capabilities: Determine the number of lasers, laser wavelengths, and available optical filters on your flow cytometer [22] [14]. Common lasers for apoptosis panels include violet (405 nm), blue (488 nm), and red (633-640 nm) lasers.
- Verify Filter Alignment: Ensure emission filters are properly aligned to capture the peak emission of your fluorophores while excluding spillover from other channels [22].
- Laser Power Optimization: Use sufficient laser power to excite dim fluorophores without causing excessive background autofluorescence.
Table 1: Example Optical Configuration for Cleaved Caspase-3 Detection
| Laser Line | Fluorophore | Emission Filter (nm) | Primary Application |
|---|---|---|---|
| 488 nm | FITC | 530/40 | Cleaved Caspase-3 |
| 488 nm | PE | 575/25 | Secondary Marker |
| 405 nm | BV421 | 450/50 | Cell Identity Marker |
| 633 nm | APC | 660/20 | Viability Stain |
Photomultiplier Tube (PMT) Voltage Calibration
Proper PMT voltage settings are crucial for sensitive detection of cleaved caspase-3:
- Use Reference Particles: Calibrate PMT voltages using fluorescent reference particles with NIST-assigned Equivalent Reference Fluorophore (ERF) values [48].
- Set Optimal Voltage: Apply the minimum voltage required to resolve negative and positive populations clearly [48].
- Daily Calibration: Perform calibration at the beginning of each acquisition session to maintain consistency [22].
Threshold and Acquisition Rate Settings
Configure threshold settings and acquisition rates to capture relevant cellular events while excluding debris:
- Set Appropriate Threshold: Use forward scatter (FSC) or side scatter (SSC) threshold to exclude small debris and electronic noise [22].
- Optimize Acquisition Rate: Maintain a event rate below 1,000-2,000 events/second to minimize coincidence (doublet) detection [15].
- Define Total Events: Collect sufficient events for statistical significance, particularly for rare populations; a minimum of 10,000 events per sample is recommended, with higher numbers (100,000+ events) for rare cell subsets [22].
Compensation Controls for Spectral Overlap Correction
Fluorophore emission spectra often overlap into multiple detection channels, requiring mathematical correction (compensation) to ensure accurate quantification [49] [14].
Principles of Compensation
Compensation is a mathematical process that corrects for spectral spillover, where fluorescence from one fluorophore is detected in another channel [49] [22]. Proper compensation ensures that the signal in each detector originates primarily from its intended fluorophore [49].
Compensation Control Setup
Implement rigorous compensation controls using either single-stained cells or compensation beads:
- Use Identical Reagents: Compensation controls must use the same fluorescent reagents (same conjugates, same lots) as experimental samples [49].
- Match Biological Matrix: Use the same cell type as experimental samples or compensation beads with matched autofluorescence characteristics [49] [50].
- Ensure Adequate Signal Intensity: The positive population in compensation controls must be at least as bright as the experimental samples [49].
Table 2: Compensation Control Specifications
| Control Type | Composition | Application | Critical Quality Parameters |
|---|---|---|---|
| Single-Stained Cells | Cells stained with single fluorophore-conjugated antibody | Measuring spillover in complex cellular backgrounds | Autofluorescence matching experimental samples; Bright positive population |
| Antibody Capture Beads | Synthetic beads binding antibody Fc regions | Standardized compensation without cellular variability | Lot-to-lot consistency; Low background fluorescence |
| Cellular Beads (e.g., ArC, ViaComp) | Beads specifically designed for viability dyes | Compensation for amine-reactive viability dyes | Appropriate surface chemistry for specific dyes |
Practical Compensation Guidelines
Follow these practices to establish accurate compensation:
- Compensation Hierarchy: Compensate from the far-red end of the spectrum stepwise down to lower wavelengths [14].
- Avoid Problematic Combinations: Avoid fluorophore combinations with high emission overlap (e.g., APC and PE-Cy5) [14].
- Validation Criteria: Compensation is correctly set when the median fluorescence intensity of negative and positive populations are equal in the spillover channel [49] [14].
Diagram 1: Compensation Setup Workflow - This diagram illustrates the systematic approach to establishing accurate compensation for flow cytometry experiments.
Experimental Protocol: Cleaved Caspase-3 Detection with Low Background
This protocol outlines a comprehensive procedure for detecting intracellular cleaved caspase-3 with minimal background signal, incorporating proper instrument configuration and compensation controls.
Sample Preparation and Staining
- Step 1: Cell Harvesting - Harvest cells and wash with cold PBS containing 5-10% fetal calf serum [15]. Centrifuge at 200 × g for 5 minutes at 4°C [15].
- Step 2: Viability Staining - Resuspend cell pellet in viability dye solution (e.g., fixable viability dye eFluor 506). Incubate for 20 minutes at 4°C in the dark. Wash twice with flow cytometry buffer [15] [50].
- Step 3: Surface Marker Staining - Resuspend cells in FcR blocking reagent (e.g., human IgG or anti-CD16/CD32) for 10-15 minutes. Add fluorophore-conjugated surface marker antibodies without washing. Incubate for 30 minutes at 4°C in the dark. Wash twice with flow cytometry buffer [15] [50].
- Step 4: Fixation and Permeabilization - Fix cells with 1-4% paraformaldehyde for 15-20 minutes on ice. Wash twice with permeabilization buffer. Permeabilize cells with 0.1% Triton X-100 for 10-15 minutes at room temperature [15].
- Step 5: Intracellular Staining - Add fluorophore-conjugated cleaved caspase-3 antibody. Incubate for 60 minutes at room temperature in the dark. Wash twice with permeabilization buffer, then resuspend in flow cytometry buffer for acquisition [15].
Compensation Control Preparation
Prepare compensation controls in parallel with experimental samples:
- Single-Color Controls - For each fluorophore used in the panel (including viability dyes), prepare separate tubes containing either compensation beads or cells stained with only that fluorophore [49] [50].
- Bead-Based Controls - For amine-reactive viability dyes, use specifically designed compensation beads (e.g., ArC beads from ThermoFisher, ViaComp beads from Slingshot) [49].
- Unstained Control - Prepare an unstained sample for autofluorescence assessment and background subtraction [50].
Data Acquisition with Proper Instrument Settings
- Step 1: Instrument Startup and Quality Control - Power up the flow cytometer and perform quality control using reference beads to ensure laser alignment and fluidics stability [48].
- Step 2: PMT Voltage Optimization - Using unstained cells, adjust PMT voltages to place the negative population on-scale in all detectors [48] [22].
- Step 3: Compensation Matrix Setup - Acquire single-color compensation controls using the same instrument settings as experimental samples. Apply compensation matrix to correct for spectral overlap [49] [22].
- Step 4: Experimental Sample Acquisition - Acquire experimental samples, collecting a minimum of 10,000 events per sample. For rare populations, collect 100,000+ events to ensure statistical significance [22].
- Step 5: Data Verification - Continuously monitor data quality during acquisition. If abnormalities appear, pause and prepare fresh compensation controls to re-run in the same session [49].
Diagram 2: Data Acquisition Workflow - This diagram outlines the sequential steps for acquiring high-quality cleaved caspase-3 data with proper compensation.
The Scientist's Toolkit: Research Reagent Solutions
Table 3: Essential Research Reagents for Cleaved Caspase-3 Flow Cytometry
| Reagent Category | Specific Examples | Function in Experiment | Key Considerations |
|---|---|---|---|
| Viability Dyes | Fixable viability dyes eFluor 506, 7-AAD, DRAQ7 | Distinguish live/dead cells; exclude dead cells from analysis | Choose cell-impermeable dyes for unfixed cells; match fluorescence channel to panel design [15] [50] |
| Compensation Beads | Antibody capture beads, ArC beads, ViaComp beads | Generate single-color controls for accurate compensation | Ensure beads match antibody binding characteristics; use beads specifically designed for viability dyes [49] |
| FcR Blocking Reagents | Human IgG, mouse anti-CD16/CD32, goat serum | Reduce nonspecific antibody binding through Fc receptors | Essential for samples containing monocytes, macrophages, or FcR-expressing cells [15] [50] |
| Fixation/Permeabilization Reagents | Paraformaldehyde, methanol, saponin-based buffers | Preserve cell structure and enable antibody access to intracellular targets | Methanol may destroy some epitopes; optimize concentration for cleaved caspase-3 detection [15] |
| Reference Calibration Particles | AccuCheck ERF Reference Particles, NIST-traceable standards | Instrument calibration and performance tracking | Use particles with assigned ERF values for quantitative comparisons across experiments [48] |
| Biological Controls | Knock-out cell lines, stimulated cells | Verify antibody specificity and assay performance | Use caspase-3 induced cells as positive control; include biological negative controls [50] |
Proper instrument configuration and compensation controls are fundamental for generating reliable, low-noise data in cleaved caspase-3 flow cytometry experiments. By implementing the detailed protocols outlined in this application note, researchers can achieve accurate quantification of apoptosis signaling in drug discovery applications. Rigorous attention to compensation practices, combined with appropriate instrument calibration, ensures detection sensitivity specifically required for measuring intracellular cleaved caspase-3 while minimizing background interference.
Advanced Troubleshooting: Solving Common Noise Problems and Enhancing Signal-to-Noise Ratio
In flow cytometry-based detection of cleaved caspase-3, background noise presents a significant challenge that can compromise data accuracy, particularly when studying rare cell populations or subtle apoptotic events. Background fluorescence primarily originates from two principal sources: non-specific binding of reagents and cellular autofluorescence. Non-specific binding occurs when antibodies or dyes interact with cellular components through mechanisms unrelated to their intended target specificity [51]. Simultaneously, autofluorescence arises from the natural emission of light by endogenous biological molecules within cells [52]. For researchers investigating apoptosis through cleaved caspase-3 detection, effectively mitigating these noise sources is essential for achieving the sensitivity required to distinguish authentic biological signals from experimental artifacts. This application note provides a structured framework for identifying, quantifying, and minimizing background noise to enhance data quality in flow cytometry experiments.
Non-Specific Binding Mechanisms
Non-specific binding represents a major contributor to background noise in flow cytometry, occurring through several distinct mechanisms as detailed in the table below.
Table 1: Mechanisms and Characteristics of Non-Specific Binding
| Mechanism | Description | Affected Cell Types |
|---|---|---|
| Fc Receptor Binding | Antibodies bind to Fc receptors on cells via Fc region, independent of antigen specificity [35] [51] | Immune cells (monocytes, macrophages, dendritic cells, B cells) |
| Hydrophobic Interactions | Fluorophores with hydrophobic characteristics interact with cellular membranes [51] | All cell types, particularly pronounced with certain dyes |
| Electrostatic Interactions | Charged fluorophores (e.g., FITC) bind to cellular components via charge interactions [51] | All cell types, especially problematic for intracellular staining |
| Dye-Dye Interactions | Fluorophores interact with each other, creating aberrant signals [35] | All cell types when multiple dyes are used |
| Cellular Stickness | Dead or dying cells non-specifically absorb antibodies and dyes [51] | Apoptotic, necrotic, or mechanically damaged cells |
The impact of Fc receptor-mediated binding is particularly relevant for caspase-3 research, as apoptosis studies frequently involve immune cells expressing various Fc receptors. Additionally, the "cellular stickiness" of dead and dying cells presents a circular challenge in apoptosis assays, where the biological process being measured inherently increases non-specific binding [51].
Autofluorescence and Interfering Substances
Cellular autofluorescence originates from endogenous fluorophores such as flavin coenzymes (FAD, FMN), nicotinamide adenine dinucleotide (NADH), and lipofuscin [52] [51]. This background signal is characterized by broad excitation and emission spectra, typically spanning the blue to green wavelengths, which can significantly overlap with common fluorophores like FITC and PE. The intensity of autofluorescence varies considerably by cell type and metabolic state, with certain specialized cells (e.g., macrophages, neutrophils, and pancreatic cells) exhibiting inherently higher levels. Furthermore, experimental treatments, cell culture conditions, and fixation protocols can alter autofluorescence intensity, creating variable background across samples [51].
Optimized Blocking and Staining Protocol
The following protocol provides a systematic approach to minimize non-specific binding for high-parameter flow cytometry, incorporating specific considerations for cleaved caspase-3 detection.
Surface Staining Protocol
Materials:
- Mouse serum (Thermo Fisher, cat. no. 10410)
- Rat serum (Thermo Fisher, cat. no. 10710C)
- Tandem stabilizer (BioLegend, cat. no. 421802)
- Brilliant Stain Buffer (Thermo Fisher, cat. no. 00‐4409‐75) or BD Horizon Brilliant Stain Buffer Plus (BD Biosciences, cat. no. 566385)
- FACS buffer (PBS with 0.5-1% BSA and optional 2-5 mM EDTA)
- Sterilin clear microtiter plates, 96-well V-bottom (Fisher Scientific, cat. no. 1189740) [35]
Procedure:
- Prepare blocking solution according to the formulation below.
- Dispense cells into V-bottom, 96-well plates for staining, using standardized cell numbers to minimize batch effects.
- Centrifuge plates at 300 × g for 5 minutes at 4°C or room temperature and carefully remove supernatant.
- Resuspend cell pellets in 20 µl blocking solution per well.
- Incubate 15 minutes at room temperature in the dark.
- Prepare surface staining master mix while blocking proceeds.
- Add 100 µl surface staining mix to each sample and mix thoroughly by pipetting.
- Incubate 60 minutes at room temperature in the dark.
- Wash with 120 µl FACS buffer, centrifuge at 300 × g for 5 minutes, and discard supernatant.
- Repeat wash with 200 µl FACS buffer.
- Resuspend samples in FACS buffer containing tandem stabilizer at 1:1000 dilution.
- Acquire samples on flow cytometer promptly [35].
Table 2: Blocking Solution Formulation
| Reagent | Dilution Factor | Volume for 1-ml Mix |
|---|---|---|
| Mouse serum | 3.3 | 300 µl |
| Rat serum | 3.3 | 300 µl |
| Tandem stabilizer | 1000 | 1 µl |
| Sodium azide (10%)* | 100 | 10 µl |
| FACS buffer | Remaining volume | 389 µl |
*Sodium azide may be omitted for short-term use [35].
Intracellular Staining for Cleaved Caspase-3
For intracellular detection of cleaved caspase-3, additional blocking steps are essential after cell permeabilization:
- Complete surface staining as described above, using fixable viability dyes to exclude dead cells.
- Fix cells according to your preferred protocol (typically 1-4% paraformaldehyde).
- Permeabilize cells using appropriate permeabilization buffer (e.g., with saponin or Triton X-100).
- Apply a second blocking step using the same blocking solution formulation to address newly exposed epitopes.
- Proceed with intracellular antibody staining against cleaved caspase-3 using titrated antibody concentrations.
- Include specific controls for intracellular staining, such as isotype controls and fluorescence-minus-one (FMO) controls [35] [53].
Research Reagent Solutions
The following table outlines essential reagents for minimizing background noise in flow cytometry experiments, with particular application to cleaved caspase-3 detection.
Table 3: Key Reagents for Background Reduction
| Reagent | Function | Application Notes |
|---|---|---|
| Species-Matched Sera | Blocks Fc receptor-mediated binding [35] [51] | Use normal serum from same species as detection antibodies |
| Fc Block (CD16/32) | Specifically blocks Fcγ receptors [51] | Critical for immune cell staining; clone 2.4G2 for mouse cells |
| Brilliant Stain Buffer | Prevents dye-dye interactions [35] | Essential for panels containing polymer dyes ("Brilliant" dyes) |
| Tandem Stabilizer | Prevents degradation of tandem dyes [35] | Maintains signal integrity during acquisition |
| Fab/F(ab')₂ Fragments | Eliminates Fc-mediated binding [51] | Ideal for high-sensitivity applications but not universally available |
| Bovine Serum Albumin (BSA) | Blocks non-specific protein binding sites [52] | Standard component of FACS buffer (0.5-1%) |
| DNAse Enzyme | Reduces stickiness from released DNA [51] | Particularly useful when working with fragile or apoptotic cells |
| Fixable Viability Dyes | Identifies and permits exclusion of dead cells [51] | Crucial for apoptosis studies to reduce "cellular stickiness" |
Experimental Workflow for Noise Reduction
The following diagram illustrates the comprehensive experimental workflow for minimizing background noise in flow cytometry applications, incorporating the key steps described in this application note:
Controls and Validation Strategies
Implementing appropriate controls is essential for distinguishing specific signal from background noise in cleaved caspase-3 detection.
Essential Control Experiments
- Isotype Controls: Antibodies of the same isotype but irrelevant specificity help assess non-specific Fc-mediated binding [22] [51].
- Fluorescence-Minus-One (FMO) Controls: Samples containing all antibodies except one identify spectral spreading errors and proper gating boundaries [22].
- Biological Negative Controls: Include cell populations known to lack cleaved caspase-3 expression to establish baseline fluorescence [22].
- Unstained Controls: Cells without any fluorescent antibodies measure autofluorescence levels [22].
- Compensation Controls: Single-stained samples for each fluorophore ensure proper compensation for spectral overlap [22].
- Vehicle Controls: For dye-based assays, include samples treated with dye vehicle alone to identify dye-related artifacts [54].
Implementation in Apoptosis Studies
For cleaved caspase-3 detection specifically:
- Use non-apoptotic cells as biological negative controls
- Include cells treated with a known apoptosis inducer as positive controls
- For kinetic studies, include untreated cells at each time point to account for time-dependent autofluorescence changes
- When using caspase activity probes, include inhibitor controls to confirm specificity
Effective management of background noise through systematic blocking protocols, appropriate reagent selection, and comprehensive control strategies is fundamental to obtaining reliable flow cytometry data for cleaved caspase-3 detection. The methods outlined in this application note provide a standardized approach to enhance signal-to-noise ratio, thereby improving the sensitivity and specificity of apoptosis measurements. As flow cytometry continues to evolve toward higher parameter panels, these foundational practices become increasingly critical for generating reproducible, publication-quality data that accurately reflects biological reality.
Optimization of Blocking Reagents and Antibody Titration for Maximum Specificity
In the context of apoptosis research, specifically the detection of cleaved caspase-3 by flow cytometry, achieving maximum signal-to-noise ratio is paramount for accurate quantification. Non-specific antibody binding and suboptimal reagent concentrations can obscure the detection of authentic biological signals, leading to inaccurate conclusions about cell death mechanisms. This application note provides detailed protocols for two fundamental optimization procedures: the use of blocking reagents to minimize off-target interactions and antibody titration to determine optimal staining concentrations. These methods are essential for researchers, scientists, and drug development professionals requiring high-fidelity data from flow cytometry assays, particularly when working with low-abundance intracellular targets like cleaved caspase-3.
Strategic Planning and Reagent Selection
Research Reagent Solutions
The following table details essential reagents for optimizing flow cytometry assays, particularly for cleaved caspase-3 detection in apoptotic cells.
| Reagent | Function | Application Notes |
|---|---|---|
| Normal Sera (e.g., Mouse, Rat) | Blocks Fc receptor-mediated non-specific binding on immune cells [35]. | Use serum from the host species of your antibodies. Avoid if staining for immunoglobulins from the same species [35]. |
| Tandem Stabilizer | Prevents degradation of tandem dye conjugates, reducing erroneous signal misassignment [35]. | Particularly important for human cells; can be omitted for mouse cells. Breakdown is higher on monocytes [55]. |
| Brilliant Stain Buffer | Prevents dye-dye interactions between polymer-based fluorophores (e.g., Brilliant Violet dyes) [35]. | Contains PEG, which also reduces non-specific binding in samples from PEG-vaccinated donors [35]. |
| Fc Block (Purified CD16/32 Antibody) | Specifically blocks common low-affinity Fc receptors [56]. | Can be used as an alternative to normal serum for more targeted Fc receptor blockade. |
| Fixation/Permeabilization Buffers | Enables intracellular access for antibodies against cleaved caspase-3 [9]. | Fixing cells before staining with tandem dyes can reduce breakdown [55]. |
| Cleaved Caspase-3 Specific Antibody | Specifically recognizes the activated, cleaved fragment of caspase-3 [9]. | A critical marker for cells undergoing or that have undergone apoptosis. |
The Role of Blocking and Titration in Apoptosis Detection
For cleaved caspase-3 detection, the target population is often a subset of the total cells, and the protein fragments may be present in low quantities. Without proper blocking, non-specific binding can create a high background, masking the true positive signal. Similarly, antibody excess can lead to non-specific binding and increased spillover, while insufficient antibody will fail to saturate all cleaved caspase-3 epitopes, resulting in weak signal and underestimation of apoptotic cells [56]. The combination of optimized blocking and precise titration is therefore the foundation for a sensitive and specific apoptosis assay.
Protocol 1: Optimized Blocking for High-Parameter Flow Cytometry
This protocol provides a generalized, optimized approach to minimize non-specific interactions for both surface and intracellular staining, which is directly applicable to assays detecting cleaved caspase-3 [35].
Materials
- Mouse Serum (e.g., Thermo Fisher, cat. no. 10410)
- Rat Serum (e.g., Thermo Fisher, cat. no. 10710C)
- Tandem Stabilizer (e.g., BioLegend, cat. no. 421802)
- Brilliant Stain Buffer (e.g., Thermo Fisher, cat. no. 00‐4409‐75) or BD Horizon Brilliant Stain Buffer Plus
- FACS Buffer (PBS containing 1-2% FBS or BSA)
- Cells of interest (e.g., treated cells for apoptosis induction)
- Antibodies (e.g., surface markers, cleaved caspase-3 antibody)
- Fixation/Permeabilization Kit (for intracellular staining)
Surface Staining Workflow
The following diagram outlines the key steps for performing surface staining with optimized blocking.
Prepare Blocking Solution: Create a solution as detailed in the table below. Sodium azide can be omitted for short-term use [35].
Table: Blocking Solution Formulation
Reagent Dilution Factor Volume for 1 mL Mouse Serum 3.3 300 µL Rat Serum 3.3 300 µL Tandem Stabilizer 1000 1 µL Sodium Azide (10%) 100 10 µL FACS Buffer - 389 µL Cell Preparation: Dispense cells into a V-bottom 96-well plate. Centrifuge at 300 × g for 5 minutes and decant the supernatant [35].
- Blocking: Resuspend the cell pellet in 20 µL of the prepared blocking solution. Incubate for 15 minutes at room temperature in the dark [35].
- Prepare Staining Mix: While blocking, prepare the surface antibody master mix. For a 1 mL mix, include 300 µL of Brilliant Stain Buffer, 1 µL of Tandem Stabilizer, your titrated antibodies, and top up with FACS buffer [35]. Brilliant Stain Buffer Plus can be used at a 4x lower volume [35].
- Staining: Add 100 µL of the surface staining mix directly to the cells (without washing out the blocking solution). Mix by pipetting and incubate for 1 hour at room temperature in the dark [35].
- Washing: Wash the cells by adding 120 µL of FACS buffer, centrifuging, and discarding the supernatant. Repeat this wash with 200 µL of FACS buffer [35].
- Sample Acquisition: Resuspend the cells in FACS buffer containing Tandem Stabilizer at a 1:1000 dilution. Proceed to acquisition on a flow cytometer [35].
Intracellular Staining for Cleaved Caspase-3
For cleaved caspase-3 staining, which requires access to the intracellular compartment, follow the surface staining protocol above, then proceed with fixation and permeabilization according to the manufacturer's instructions. After permeabilization, an additional blocking step is highly recommended. The permeabilization process exposes a vast array of intracellular epitopes, and blocking with normal serum or a protein block at this stage can significantly reduce non-specific antibody binding and improve the signal-to-noise ratio for cleaved caspase-3 detection [35]. After this second blocking step, proceed with staining using the antibody against cleaved caspase-3 [9].
Protocol 2: Antibody Titration for Optimal Resolution
Titration is the process of determining the antibody concentration that provides the highest signal-to-noise ratio, defined by the Stain Index (SI). The optimal titer saturates all binding sites with minimal excess antibody, which minimizes non-specific binding and spillover spread [56].
Materials
- Antibody to be titrated
- Cells expressing the target antigen (for cleaved caspase-3, use apoptosis-induced cells)
- Negative control cells (unstained and/or fluorescence minus one, FMO)
- Flow staining buffer
- V-bottom 96-well plates
- Centrifuge with plate adapters
Titration Workflow
The following diagram illustrates the process for performing a combinatorial antibody titration.
Prepare Antibody Dilutions:
- Determine the stock concentration of your antibody. If it is provided in µg/mL, a common starting point is 1000 ng/test. If provided in µL/test, start at double the recommended volume/test [56].
- In a 96-well plate, perform a series of 2-fold serial dilutions in staining buffer. An 8-12 point titration is recommended [56].
Cell Staining:
- Resuspend your cells (including a positive control, like apoptosis-induced cells, and a negative control) at 2 × 10^6 cells/mL in staining buffer [56].
- Aliquot the same number of cells into each well of a new V-bottom plate. Centrifuge and remove the supernatant.
- Add the pre-prepared antibody dilutions to the cell pellets, mixing well.
- Complete the staining and washing steps as outlined in your standard protocol (e.g., Protocol 1).
Data Analysis and Optimal Titer Selection:
- Acquire the samples on a flow cytometer.
- For each dilution, record the Median Fluorescence Intensity (MFI) of the positive and negative populations.
- Calculate the Stain Index (SI) for each dilution using the formula [57] [56]:
SI = (Median Fluorescence Positive - Median Fluorescence Negative) / (2 × rSD Negative)where rSD is the robust Standard Deviation of the negative population. - Plot the SI values against the antibody concentration. The optimal titer is the concentration that yields the highest SI, indicating the best separation between positive and negative populations [56].
Table: Example Titration Data for Antibody Selection
| Antibody Dilution | MFI Positive | MFI Negative | rSD Negative | Stain Index (SI) |
|---|---|---|---|---|
| 1:50 | 45,000 | 1,500 | 800 | 27.2 |
| 1:100 | 40,000 | 800 | 450 | 43.6 |
| 1:200 | 32,000 | 550 | 300 | 52.5 |
| 1:400 | 25,000 | 450 | 250 | 49.0 |
| 1:800 | 18,000 | 400 | 220 | 40.0 |
| 1:1600 | 10,000 | 380 | 210 | 22.9 |
In this example, the dilution of 1:200 provides the highest Stain Index and should be selected as the optimal titer.
Troubleshooting and Technical Notes
- Combinatorial Titration: For high-parameter panels, non-overlapping antibodies (fluorophores on different lasers with minimal spectral overlap) can be titrated together in groups of 4-5 to dramatically reduce the number of samples and time required [57].
- Tandem Dye Stability: Tandem dye breakdown is not purely chemical and is more pronounced on monocytes than lymphocytes. When designing panels, assign tandem dyes to antigens on post-fixation T-cell markers if possible, as fixation largely abolishes this breakdown [55].
- Buffer Titration: Brilliant Stain Buffers are mildly fluorescent. It is recommended to titrate these buffers down to 1/2 or 1/4 of the recommended volume for cost savings and to reduce potential background fluorescence [55].
- Revalidation: Antibody titers must be re-established for each new lot of antibody, for different sample types (e.g., whole blood vs. PBMCs), and when changing staining protocols or instruments, as performance can vary significantly [56].
The accurate detection of intracellular targets, such as cleaved caspase-3, by flow cytometry is a cornerstone of high-quality apoptosis research and drug development. The crucial steps of cell fixation and permeabilization directly determine the success of these assays, as they control antibody access to intracellular epitopes while preserving cellular integrity and antigenicity. Inadequate protocols lead to high background noise, loss of sensitive epitopes, and artifactual results that compromise data interpretation. This application note provides detailed, optimized protocols for fixation and permeabilization, specifically contextualized for cleaved caspase-3 detection, to enable reliable, low-noise measurement of this critical apoptosis executioner.
Critical Reagent Selection and Optimization
The choice of fixatives and permeabilization agents must be tailored to the specific intracellular target and its subcellular localization. The table below summarizes the primary options and their optimal applications.
Table 1: Fixation and Permeabilization Reagents for Intracellular Staining
| Reagent Type | Specific Examples & Concentrations | Mechanism of Action | Optimal Use Cases | Key Considerations & Pitfalls |
|---|---|---|---|---|
| Fixatives | 1-4% Paraformaldehyde (PFA) [15] | Crosslinks proteins, preserving cellular structure. | General purpose; surface markers & many intracellular targets. | Over-fixation can mask epitopes; standard for surface antigen preservation. |
| 90% Methanol [15] [58] | Precipitates proteins and lipids. | Phosphoproteins, nuclear antigens; compatible with long-term storage at -80°C. | Drasticly alters light scatter; can destroy sensitive epitopes and fluorophores [59] [58]. | |
| 100% Acetone [15] | Precipitates proteins. | Cytoskeletal, viral, and some enzyme antigens. | Also permeabilizes cells; not suitable for polystyrene/plastic tubes [15]. | |
| Permeabilization Detergents | Harsh Detergents (Triton X-100, NP-40; 0.1-1%) [15] | Partially dissolves nuclear and cellular membranes. | Best for nuclear antigens, including some transcription factors. | Can lyse cells with extended incubation; alters light scatter profiles [15]. |
| Mild Detergents (Saponin, Tween 20; 0.2-0.5%) [15] [58] | Creates pores in membranes without dissolving lipids. | Cytoplasmic antigens, soluble nuclear antigens, and secreted proteins like cytokines. | Pores are reversible; permeabilization buffer must be present in all subsequent steps [58]. |
Fluorophore Stability Considerations
The chemical resistance of fluorophores is a critical, often overlooked, factor in panel design. Methanol fixation, while useful for certain antigens, can destroy the signal of many common dyes. The table below categorizes common fluorophores based on their methanol tolerance.
Table 2: Methanol Compatibility of Common Fluorophores
| Methanol Sensitive | Methanol Resistant |
|---|---|
| FITC [58] | PE [58] |
| eFluor 450 [58] | APC [58] |
| eFluor 660 [58] | |
| Alexa Fluor 488 [58] | |
| Alexa Fluor 647 [58] | |
| PerCP [58] | |
| All Tandem Dyes [58] |
Detailed Experimental Protocols
Standard Two-Step Protocol for Cytoplasmic Proteins (e.g., Cleaved Caspase-3)
This protocol is recommended for the detection of cleaved caspase-3, a cytoplasmic protein, and is compatible with simultaneous analysis of cell surface markers [60].
Workflow Diagram:
Materials Required:
- Intracellular Fixation & Permeabilization Buffer Set (e.g., Thermo Fisher, cat. no. 88-8824) [60]
- Flow Cytometry Staining Buffer
- Directly conjugated antibodies against surface markers and cleaved caspase-3
- 12x75 mm round-bottom test tubes or 96-well U-bottom plates
- (Optional) Fixable Viability Dye (e.g., eFluor series)
Step-by-Step Procedure [60]:
- Sample Preparation: Prepare a single-cell suspension in a 12x75 mm tube. Determine cell count and viability, which should ideally be 90-95% [15]. Centrifuge at ~200-600 x g for 5 minutes and decant the supernatant.
- Viability Staining (Optional but Recommended): Resuspend the cell pellet in a diluted Fixable Viability Dye and incubate according to the manufacturer's instructions. Wash the cells twice with suspension buffer (e.g., PBS with 5-10% FCS) to remove unbound dye [15] [60].
- Surface Marker Staining: Resuspend the cell pellet in an appropriate volume of staining buffer containing pre-titrated antibodies against cell surface markers (e.g., CD3, CD4). Incubate for 20-60 minutes on ice or at 4°C in the dark. Wash twice with staining buffer to remove unbound antibody.
- Fixation: After the last wash, thoroughly resuspend the cell pellet in the residual buffer (approx. 100 µL). Add 100 µL of IC Fixation Buffer, vortex gently to mix, and incubate for 20-60 minutes at room temperature in the dark.
- Permeabilization: Add 2 mL of 1X Permeabilization Buffer to the tube and centrifuge at 400-600 x g for 5 minutes. Discard the supernatant. Repeat this wash step once.
- Intracellular Staining: Resuspend the fixed and permeabilized cell pellet in 100 µL of 1X Permeabilization Buffer. Add the pre-titrated antibody against cleaved caspase-3. Incubate for 20-60 minutes at room temperature in the dark.
- Final Washes: Add 2 mL of 1X Permeabilization Buffer, centrifuge, and discard the supernatant. Repeat this wash step one more time.
- Data Acquisition: Resuspend the final cell pellet in an appropriate volume of Flow Cytometry Staining Buffer. Analyze on a flow cytometer, ensuring that the instrument is calibrated and the viability dye and cleaved caspase-3 signal are compensated correctly.
Specialized Workflow for Fragile Antigens and Fluorophores
For targets or fluorophores that are highly sensitive to methanol or harsh detergents, a multi-pass flow cytometry approach using optical cell barcoding can be employed. This technique allows for the measurement of sensitive surface markers and fluorescent proteins before destructive fixation and permeabilization steps, with data from sequential measurements combined for each cell [59].
Workflow Diagram:
The Scientist's Toolkit: Essential Research Reagents
Table 3: Key Reagent Solutions for Cleaved Caspase-3 Flow Cytometry
| Reagent / Kit | Function | Specific Example / Component |
|---|---|---|
| FcR Blocking Reagent | Blocks non-specific antibody binding via Fc receptors, reducing background. | Normal Goat Serum, Human IgG, or anti-CD16/CD32 antibody [15]. |
| Fixable Viability Dyes | Distinguishes live from dead cells; dead cells bind antibodies non-specifically. | LIVE/DEAD Fixable Stains, 7-AAD, DAPI (for live cells) [15] [60]. |
| Commercial Buffer Kits | Provides optimized, standardized buffers for reproducible fixation/permeabilization. | Intracellular Fixation & Permeabilization Buffer Set [60]; Foxp3/Transcription Factor Staining Buffer Set [60]. |
| Protein Transport Inhibitors | Traps secreted proteins (e.g., cytokines) inside the cell for detection. | Brefeldin A, Monensin [58] [60]. |
| Methanol-Resistant Fluorophores | Fluorophores that retain signal after harsh methanol fixation. | PE, APC [58]. |
Troubleshooting and Artifact Prevention
Mitigating Pre-Analytical Variables
- Cell Handling: To prevent cell damage, avoid bubbles, vigorous vortexing, and excessive centrifugation during preparation [15]. Maintain cells on ice where possible and use ice-cold buffers.
- Concentration and Aggregation: Use a recommended cell concentration of 0.5–1 x 10^6 cells/mL to avoid clogging the instrument and "swarm detection" (coincidence), where multiple particles are detected as one event [15] [61]. For submicron particles like synaptosomes, proper dilution and the use of fluorescence triggering over forward scatter (FSC) can help control for coincidence [61]. Particle aggregation is a pervasive problem that can be reduced by using specific buffers like sucrose/EDTA/tris (SET) instead of PBS [61].
- Gating Adjustments: Fixation and permeabilization alter the light scatter properties of cells. Therefore, gating strategies established on live cells may need to be adjusted for fixed/permeabilized samples. Always include a stained, fixed, and permeabilized control for setting gates [15] [58].
Optimizing Antibody Staining
- Staining Order: For combined surface and intracellular staining, always stain surface markers first, as fixation and permeabilization can alter surface antigen epitopes and affect antibody binding [58].
- Antibody Titration: Antibodies must be titrated under the exact fixation and permeabilization conditions used in the final assay. The optimal concentration is the one that gives the best signal-to-noise ratio.
- Controls: Essential controls for a cleaved caspase-3 assay include:
- Unstained, fixed/permeabilized cells: For background autofluorescence.
- Isotype control, fixed/permeabilized cells: For non-specific antibody binding.
- Stimulated (e.g., with apoptosis inducer) and unstimulated cell populations: For defining positive and negative populations.
By adhering to these detailed protocols and carefully considering the selection of reagents, researchers can significantly minimize artifacts and signal loss, thereby obtaining robust and reliable data for cleaved caspase-3 activity in their flow cytometry studies.
Strategies for Preserving Labile Signals and Preventing Fluorophore Degradation
In high-parameter flow cytometry, particularly for detecting sensitive targets like cleaved caspase-3, the preservation of labile signals and prevention of fluorophore degradation are critical for data quality. Non-specific antibody interactions, tandem dye degradation, and suboptimal handling can compromise assay sensitivity, increasing background noise and obscuring authentic biological signals. This application note provides detailed strategies and optimized protocols to enhance signal-to-noise ratio, ensuring reliable detection of low-abundance targets in flow cytometry-based research and drug development.
Understanding Signal Degradation in Flow Cytometry
The integrity of flow cytometry data can be compromised by several sources of non-specific binding and signal degradation. Fc receptor-mediated binding represents a particularly problematic interaction in immunological assays. These receptors provide natural binding partners for immunoglobulins independent of variable domain specificity, with dissociation coefficients around 10⁻⁶ molar for low-affinity receptors CD16 and CD32. High-affinity CD64 (FcγRI) can meaningfully impact assays using monoclonal IgG antibodies [35].
Dye-dye interactions present another significant challenge, especially in high-parameter panels. Fluorophores including Brilliant dyes, NovaFluors, and Qdots are prone to these interactions, potentially leading to correlated emission patterns and erroneous signal assignment. Tandem dyes—comprised of multiple fluorophore molecules—are particularly susceptible to breakdown into constituent parts, causing signals to be misassigned to alternative markers and resulting in biological misinterpretation [35].
Impact on Cleaved Caspase-3 Detection
For cleaved caspase-3 detection, these degradation pathways present special challenges. As an intracellular target requiring cell fixation and permeabilization, caspase-3 assays involve additional processing steps that can exacerbate fluorophore instability. The low abundance of activated caspase-3 in non-apoptotic contexts further necessitates optimized signal preservation strategies to distinguish authentic activation from background noise [62] [7].
Optimized Blocking and Staining Strategies
Comprehensive Blocking Formulations
Effective blocking requires a multi-faceted approach addressing both biological and chemical sources of degradation. The following optimized blocking solution has been validated for high-parameter flow cytometry applications including intracellular staining [35]:
Table 1: Components of Optimized Blocking Solution
| Reagent | Dilution Factor | Volume for 1-mL Mix | Primary Function |
|---|---|---|---|
| Mouse Serum | 3.3 | 300 µL | Blocks mouse Fc receptors |
| Rat Serum | 3.3 | 300 µL | Blocks rat Fc receptors |
| Tandem Stabilizer | 1000 | 1 µL | Prevents tandem dye degradation |
| Sodium Azide (10%) | 100 | 10 µL | Prevents microbial growth (optional for short-term) |
| FACS Buffer | Remaining volume | 389 µL | Diluent and wash buffer |
This formulation addresses multiple degradation pathways simultaneously. Normal sera from the host species of staining antibodies block Fc receptor-mediated binding, while tandem stabilizers specifically protect vulnerable dye conjugates. For panels containing SIRIGEN "Brilliant" or "Super Bright" polymer dyes, Brilliant Stain Buffer should be incorporated at up to 30% (v/v) to prevent dye-dye interactions [35].
Figure 1: Strategic Approach to Mitigate Non-Specific Binding. This diagram outlines the primary sources of non-specific binding in flow cytometry and the corresponding reagent-based solutions to mitigate each issue.
Surface Staining Protocol with Signal Preservation
The following step-by-step protocol integrates blocking strategies directly into the staining workflow:
Basic Protocol 1: Surface Staining with Signal Preservation [35]
Cell Preparation: Dispense cells into V-bottom, 96-well plates. Centrifuge for 5 minutes at 300 × g (4°C or room temperature) and remove supernatant.
Blocking: Resuspend cells in 20 µL blocking solution (Table 1). Incubate 15 minutes at room temperature in the dark.
Staining Master Mix Preparation: Prepare surface staining mix containing:
- Tandem stabilizer at 1:1000 dilution
- Brilliant Stain Buffer (up to 30% v/v)
- Fluorophore-conjugated antibodies at predetermined optimal concentrations
- FACS buffer to remaining volume
Staining: Add 100 µL surface staining mix to each sample. Mix by pipetting. Incubate 1 hour at room temperature in the dark.
Washing: Wash with 120 µL FACS buffer. Centrifuge 5 minutes at 300 × g and discard supernatant. Repeat with 200 µL FACS buffer.
Signal Preservation: Resuspend samples in FACS buffer containing tandem stabilizer at 1:1000 dilution.
Acquisition: Acquire samples on flow cytometer immediately or store temporarily in stabilization buffer.
This protocol emphasizes maintaining tandem dye integrity throughout the process, with stabilizer included in both blocking and final resuspension buffers. For caspase-3 detection and other intracellular targets, proceed to the intracellular staining protocol following surface staining completion.
Intracellular Staining for Cleaved Caspase-3
Intracellular targets like cleaved caspase-3 require additional steps to maintain signal quality after permeabilization:
Basic Protocol 2: Intracellular Staining [35] [63]
Fixation: Following surface staining, fix cells using formaldehyde-based fixatives. CAUTION: Perform in fume hood due to paraformaldehyde content.
Permeabilization: Permeabilize cells using detergents like Triton X-100 or saponin. Triton X-100 permeabilizes both plasma and intracellular membranes (nuclear, mitochondrial), while saponin only permeabilizes the plasma membrane and is reversible.
Intracellular Blocking: Apply additional blocking step after permeabilization using the same blocking solution formulation (Table 1). Incubate 15 minutes at room temperature.
Intracellular Staining: Prepare intracellular antibody master mix containing tandem stabilizer and target antibodies (e.g., cleaved caspase-3). Incubate 30-60 minutes at room temperature in the dark.
Washing and Preservation: Wash twice with permeabilization buffer, then resuspend in FACS buffer with tandem stabilizer for acquisition.
For methanol-sensitive fluorophores (e.g., PE, APC), avoid methanol fixation and use formaldehyde fixation followed by detergent permeabilization instead [63].
The Scientist's Toolkit: Essential Reagents
Table 2: Key Research Reagent Solutions for Signal Preservation
| Reagent Category | Specific Examples | Function | Application Notes |
|---|---|---|---|
| Fc Blocking Reagents | Normal serum (mouse, rat), CD16/CD32 antibodies | Blocks Fc receptor binding | Use serum from antibody host species; essential for hematopoietic cells |
| Tandem Stabilizers | Commercial tandem stabilizers | Prevents degradation of tandem fluorophores | Include in all staining and storage buffers; critical for overnight staining |
| Dye Interaction Blockers | Brilliant Stain Buffer, PEG-based buffers | Prevents dye-dye interactions | Essential for Brilliant Violet dyes; also helps with PEG immunity background |
| Fixation Reagents | Formaldehyde, commercial fixation kits | Pres cellular structure and antigens | Formaldehyde preferred for most applications; preserves fluorescence |
| Permeabilization Agents | Triton X-100, saponin, commercial kits | Enables antibody intracellular access | Triton for nuclear targets; saponin for cytoplasmic targets |
| Viability Dyes | Fixable viability dyes (Ghost Dyes) | Identifies and excludes dead cells | Use fixable dyes for intracellular work; superior to PI/7-AAD after fixation |
Fluorophore Selection and Panel Design
Strategic Fluorophore Assignment
Proper panel design is crucial for minimizing signal degradation and spillover:
- Assign bright fluorophores to low-abundance markers like cleaved caspase-3
- Place sensitive tandem dyes on highly expressed markers to minimize exposure time
- Avoid combining multiple fluorophores from the same family that may interact
- For intracellular panels, verify fluorophore stability under fixation and permeabilization conditions [63]
Spectral Flow Cytometry Considerations
Spectral flow cytometry offers advantages for signal preservation through full-spectrum capture and advanced unmixing algorithms. The technology enables:
- Extraction of autofluorescence signals using linear unmixing algorithms
- Improved resolution of low-abundance markers through sensitive detectors
- Reduced sample consumption through high-parameter single-tube assays
- Enhanced detection sensitivity for targets like cleaved caspase-3 [64]
Figure 2: Workflow for Integrated Surface and Intracellular Staining. This experimental workflow diagram highlights critical signal preservation steps (green) and key technical considerations (red) for maintaining fluorophore integrity during cleaved caspase-3 detection.
Troubleshooting and Quality Control
Monitoring Fluorophore Degradation
Implement these quality control measures to detect signal degradation:
- Regular monitoring of tandem dye performance using control beads
- Comparison of fluorescence distribution in positive and negative populations
- Assessment of spillover spreading matrices for increased values indicating degradation
- Validation of cleaved caspase-3 signal specificity using caspase inhibitors [62]
Optimizing Signal-to-Noise Ratio
For low-abundance targets like cleaved caspase-3:
- Titrate all antibodies to determine optimal concentration for maximal separation
- Include fluorescence-minus-one (FMO) controls to establish gating boundaries
- Use high-sensitivity detection systems with enhanced photon collection
- Employ reference controls for batch-to-batch consistency in longitudinal studies [35] [65]
Implementing comprehensive signal preservation strategies is essential for reliable detection of labile signals in flow cytometry, particularly for critical low-abundance targets like cleaved caspase-3. By addressing Fc receptor blocking, dye-dye interactions, and tandem fluorophore stability through optimized protocols, researchers can significantly improve signal-to-noise ratio and data quality. The integrated approaches presented here provide a foundation for robust assay performance in basic research and drug development applications.
Accurate detection of cleaved caspase-3 by flow cytometry serves as a critical biomarker for identifying cells undergoing apoptosis, providing essential insights for drug development studies focused on cellular response to therapeutic agents [9]. However, achieving high-fidelity data with excellent signal-to-noise ratios presents significant technical challenges that can compromise experimental outcomes. This application note provides a structured troubleshooting framework to address the most common issues in cleaved caspase-3 flow cytometry, specifically poor signal resolution and high background staining, within the context of low-noise research applications. We present standardized protocols, quantitative data presentation standards, and visual workflows to enable researchers to systematically identify and resolve these technical barriers, thereby enhancing data quality and reproducibility in apoptosis research.
Technical Challenges and Systematic Solutions
Problem Diagnosis and Resolution Table
The following table summarizes the primary technical challenges, their potential causes, and recommended solutions for cleaved caspase-3 flow cytometry protocols.
Table 1: Comprehensive Troubleshooting Guide for Cleaved Caspase-3 Flow Cytometry
| Problem | Possible Causes | Recommended Solutions |
|---|---|---|
| Weak or No Signal | Inadequate fixation/permeabilization [66] | Use ice-cold 90% methanol added drop-wise while vortexing for homogeneous permeabilization [66]. |
| Low target expression [66] | Optimize treatment conditions to ensure measurable caspase-3 induction; include a positive control [66]. | |
| Intracellular access issues [67] | For intracellular targets, ensure adequate permeabilization. Use low molecular weight fluorochromes for better mobility [67]. | |
| Instrument laser misalignment [67] | Perform alignment with calibration beads; service instrument if necessary [67]. | |
| High Background Staining | Excessive antibody concentration [66] [67] | Titrate antibodies to determine optimal concentration; reduce amount if background is high. |
| Non-specific antibody binding [66] | Block with BSA, Fc receptor blockers, or normal serum from the host species of the primary antibody [66]. | |
| Presence of dead cells [66] | Use a viability dye (e.g., PI, 7-AAD, or fixable viability dyes) to gate out dead cells during analysis [66]. | |
| Inadequate washing [67] | Increase wash steps; add mild detergent (e.g., Tween, Triton) to wash buffers to maintain permeabilization and remove trapped antibody [67]. | |
| Suboptimal Scatter Properties | Cell clumping [67] | Create a single-cell suspension by gentle pipetting; filter cells through a nylon mesh before running [67]. |
| Poor fixation [66] | Ensure proper formaldehyde concentration (e.g., 4%) and use methanol-free formaldehyde to prevent intracellular protein loss [66]. | |
| High Event Rate/ Background Noise | Cell debris or lysed cells [67] | Avoid violent vortexing or high-speed centrifugation; ensure samples are fresh and properly prepared [67]. |
| High sample concentration [67] | Dilute sample to an appropriate concentration (e.g., 1x10^5 to 1x10^6 cells/mL) [67]. |
Visual Troubleshooting Workflow
The following decision tree provides a systematic pathway for diagnosing and resolving the most common flow cytometry issues encountered when detecting cleaved caspase-3.
Standardized Protocols for Reliable Detection
Optimized Protocol for Cleaved Caspase-3 Detection
This protocol outlines the specific steps for quantifying apoptosis by flow cytometric detection of cleaved caspase-3, incorporating troubleshooting insights to minimize noise [9] [66].
Sample Preparation and Staining
- Induction and Harvest: Induce apoptosis in cells using your chosen treatment. Harvest approximately 1-2 x 10^6 cells per sample, washing them with ice-cold PBS containing 2% FBS [27].
- Fixation: Resuspend the cell pellet in 4% methanol-free formaldehyde and incubate for 10-15 minutes at room temperature. Methanol-free formaldehyde is critical to prevent premature permeabilization and loss of intracellular proteins [66].
- Permeabilization: Centrifuge cells and thoroughly remove the fixative. Permeabilize by adding 1 mL of ice-cold 90% methanol drop-wise to the cell pellet while gently vortexing. Incubate on ice for at least 30 minutes. This method ensures homogeneous permeabilization and prevents hypotonic shock to the cells [66].
- Intracellular Staining: Wash cells twice with a wash buffer (e.g., PBS with 1% BSA). Stain cells with an antibody specific for cleaved caspase-3, following the manufacturer's recommended dilution. Incubate for 60 minutes at room temperature or overnight at 4°C, protected from light.
- Washing and Analysis: Perform two additional washes to remove unbound antibody. Resuspend cells in a suitable buffer for flow cytometric analysis.
Multiparametric Apoptosis Analysis Workflow
For a more comprehensive view of cell death, cleaved caspase-3 detection can be combined with other apoptotic markers. The workflow below integrates caspase activation with phosphatidylserine externalization and membrane integrity assessment, providing a powerful, multi-faceted view of the apoptotic process [27].
The Scientist's Toolkit: Essential Research Reagents
The following table details key reagents and their optimized applications for cleaved caspase-3 flow cytometry, ensuring reliable and reproducible results.
Table 2: Key Research Reagent Solutions for Cleaved Caspase-3 Flow Cytometry
| Reagent Category | Specific Examples | Function and Application Notes |
|---|---|---|
| Fixation Agents | 4% Methanol-free Formaldehyde [66] | Preserves cellular architecture and cross-links proteins. Methanol-free prevents loss of intracellular antigens. |
| Permeabilization Agents | Ice-cold 90% Methanol, Saponin, Triton X-100 [66] | Creates pores in membranes for antibody access. Ice-cold methanol added drop-wise is optimal for nuclear targets like cleaved caspase-3. |
| Viability Dyes | Propidium Iodide (PI), 7-AAD, Fixable Viability Dyes (e.g., eFluor) [66] [27] | Distinguishes live from dead cells. Use fixable dyes for intracellular staining to gate out dead cells that cause non-specific binding. |
| Blocking Agents | Bovine Serum Albumin (BSA), Normal Serum, Fc Receptor Blocking Reagents [66] | Reduces non-specific antibody binding, crucial for lowering background staining. |
| Apoptosis Detection Reagents | Anti-Cleaved Caspase-3 Antibodies, PhiPhiLux G1D2 substrate, Annexin V conjugates (PE, APC) [9] [27] | PhiPhiLux is a fluorogenic substrate for caspase-3/7; Annexin V detects PS externalization. Enable multiparametric analysis. |
| DNA Staining Dyes | Propidium Iodide (PI), 7-AAD, DAPI [66] [27] | Assesses cell cycle status or acts as a viability probe. 7-AAD is a good far-red alternative to PI. |
Data Presentation and Analysis Standards
Adhering to standardized data presentation guidelines is fundamental for ensuring the clarity, reproducibility, and scientific rigor of flow cytometric data, particularly in a low-noise research context [68].
- Graphical Presentation: All quantitative information should be derived from statistical analyses presented alongside the graphics, either as numerical annotations on the figures or in the accompanying text. Researchers should never rely on readers to make quantitative estimates from graphs alone [68].
- Gating Strategy: An example of the gating approach used to identify the population of interest must be shown. This is typically displayed as a sequence of dot plots demonstrating how debris, dead cells, and undesired subpopulations were excluded, and the target population was delineated [68].
- Statistical Analysis: Flow cytometric measurements should be reduced to summary statistics, such as the geometric mean or median fluorescence intensity (MFI) of the stained population. Reporting the percentage of cells positive for cleaved caspase-3 within a clearly defined parent population is standard practice [68].
- Control Samples: The presentation of appropriate controls is critical for data interpretation. Essential controls for cleaved caspase-3 experiments include unstained cells, an untreated/unstimulated control, and a positive control (e.g., cells treated with a known apoptosis inducer) to validate the staining protocol and instrument settings [66].
Effective troubleshooting of cleaved caspase-3 flow cytometry hinges on a meticulous and systematic approach to sample preparation, staining, and instrument operation. By implementing the optimized protocols, standardized data presentation methods, and reagent solutions detailed in this guide, researchers can significantly enhance the quality and reliability of their apoptosis data. This structured framework empowers scientists and drug development professionals to overcome the common challenges of poor signal resolution and high background, thereby generating robust, low-noise data critical for advancing research in cellular biology and therapeutic development.
Method Validation and Integration: Ensuring Reproducibility and Correlating with Apoptosis Endpoints
The flow cytometric detection of cleaved caspase-3 serves as a critical biomarker for identifying cells undergoing apoptosis, providing essential insights in diverse fields including immunology, cancer biology, and drug development. This application note details comprehensive validation techniques for establishing the specificity, sensitivity, and reproducibility of a cleaved caspase-3 flow cytometry assay, with particular emphasis on protocols optimized for low background noise and high-resolution detection. The methods outlined herein are framed within broader research objectives aimed at quantifying apoptotic events with high precision, even in complex cellular environments and rare cell populations.
Assay Performance Validation
Rigorous validation against established methodologies confirms the performance characteristics of the cleaved caspase-3 flow cytometry assay. The data below summarize key benchmark findings.
Table 1: Performance Benchmarking of Cleaved Caspase-3 Flow Cytometry Assay
| Comparison Metric | Reference Method | Caspase-3 Cleavage Assay Performance |
|---|---|---|
| Sensitivity | 51Cr-release assay | Markedly higher sensitivity [69] |
| Detection Limit | HLA tetramer/pentamer staining | Comparable sensitivity; detects CTL function at antigen-specific T-cell frequencies of ≤1:15,000 [69] |
| Specificity | Intracellular cytokine staining (e.g., IFN-γ) | Comparable specificity and precision [69] |
| Early Apoptosis Detection | Annexin V / DiOC6(3) staining | Detects caspase activation earlier than phosphatidylserine exposure or mitochondrial membrane potential dissipation [70] |
The Scientist's Toolkit: Research Reagent Solutions
The following reagents are essential for implementing a high-quality, low-noise cleaved caspase-3 flow cytometry assay.
Table 2: Key Research Reagents for Cleaved Caspase-3 Flow Cytometry
| Reagent | Function / Rationale | Specific Example / Note |
|---|---|---|
| Anti-Cleaved Caspase-3 (PE-labeled) | Primary detection antibody; specifically recognizes the activated, cleaved form of caspase-3 and not the proenzyme [9]. | Reactive against both human and mouse forms [69]. |
| Cell Tracker Dye (Far Red) | Labels target cells for identification in co-culture cytotoxicity assays; prevents spectral overlap with caspase-3 detection [69]. | DDAO-SE (CellTrace Far Red DDAO-SE), emitting in the FL4 channel [69]. |
| Fc Receptor Blocking Reagent | Reduces non-specific antibody binding, a primary source of background noise, by blocking Fc receptors on immune cells [35]. | Normal serum from the host species of the staining antibodies (e.g., rat serum for mouse samples stained with rat antibodies) [35]. |
| Tandem Dye Stabilizer | Prevents degradation of tandem fluorophore conjugates, which can cause erroneous signal spillover and increased background [35]. | Critical for panels containing Brilliant Violet or similar polymer dyes [35]. |
| Brilliant Stain Buffer | Mitigates dye-dye interactions between polymer fluorophores in highly multiplexed panels, improving signal fidelity [35]. | Contains polyethylene glycol (PEG), which also reduces non-specific binding [35]. |
Experimental Protocols
Basic Protocol: Surface and Intracellular Staining for Cleaved Caspase-3
This optimized protocol integrates steps to minimize non-specific binding and preserve signal integrity [35].
- Sample Preparation: Dispense cells into a V-bottom 96-well plate. Centrifuge at 300 × g for 5 minutes and decant the supernatant.
- Fc Receptor Blocking: Resuspend the cell pellet in 20 µL of blocking solution (e.g., containing 10% normal mouse serum, 10% normal rat serum, and 0.1% sodium azide in FACS buffer). Incubate for 15 minutes at room temperature in the dark [35].
- Surface Staining: Prepare a master mix of fluorescently-conjugated surface antibodies in FACS buffer, supplemented with 30% Brilliant Stain Buffer and tandem dye stabilizer. Add 100 µL of this mix directly to the cells without washing. Incubate for 1 hour at room temperature in the dark [35].
- Fixation and Permeabilization: Wash cells twice with 200 µL FACS buffer. Fix and permeabilize cells using a commercial fixation/permeabilization kit according to the manufacturer's instructions.
- Intracellular Staining (Cleaved Caspase-3): (Optional) Perform an additional intracellular blocking step with the same blocking solution for 15 minutes. Stain with the anti-cleaved caspase-3 antibody (e.g., PE-conjugated) diluted in permeabilization buffer for 30-60 minutes at room temperature in the dark [69].
- Acquisition: Wash cells twice with 200 µL FACS buffer or permeabilization buffer. Resuspend in FACS buffer containing tandem stabilizer and acquire data on a flow cytometer [35].
Protocol for Specificity Validation
- Caspase Inhibition Control: Pre-treat a portion of cells with a pan-caspase inhibitor such as zVAD-FMK (e.g., 20-50 µM) for 1-2 hours prior to inducing apoptosis [7]. Process alongside untreated apoptotic cells.
- Induction of Apoptosis: Induce apoptosis in the remaining cells using a validated stimulus (e.g., 1 µM Staurosporine for 4-6 hours or a relevant chemotherapeutic agent).
- Staining and Analysis: Stain both the inhibitor-treated and untreated apoptotic cells for cleaved caspase-3 following the basic protocol. Specificity is confirmed by a strong signal in apoptotic cells and a significant reduction or absence of signal in the inhibitor-treated population [7].
Protocol for Sensitivity and Reproducibility Assessment
- Cell Dilution Series: To determine the limit of detection, create a dilution series of apoptotic cells in non-apoptotic cells. For example, generate samples with 1%, 0.1%, and 0.01% apoptotic cells.
- Replicate Sampling: Prepare multiple technical replicates (n≥3) for each point in the dilution series to assess intra-assay variability. Repeat the experiment across different days with freshly prepared samples to determine inter-assay variability.
- Data Analysis: Acquire a high number of events (e.g., >1,000,000 total cells) for the low-frequency samples. The limit of detection is the lowest frequency at which the cleaved caspase-3-positive population is clearly distinguishable from the negative control. Calculate the coefficient of variation (CV) between replicates to quantify reproducibility [71].
Workflow and Signaling Pathways
Experimental Workflow for Low-Noise Caspase-3 Detection
The following diagram illustrates the core procedural workflow, highlighting key steps for noise reduction.
Caspase-3 in Apoptotic Signaling Pathways
This diagram contextualizes the role of cleaved caspase-3 within the broader apoptotic signaling network.
Accurately detecting apoptosis is fundamental to cancer research, therapeutic development, and understanding fundamental cellular processes. No single method provides a complete picture; confidence in results is greatly increased through the use of complementary assays that detect different biochemical hallmarks of programmed cell death. This application note details the correlation between three cornerstone techniques: Western Blot for detecting specific protein cleavages, Annexin V staining for identifying early plasma membrane alterations, and the analysis of PARP cleavage, a key executioner caspase substrate. Framed within research on optimizing a low-noise flow cytometry protocol for cleaved caspase-3, this document provides validated protocols and data interpretation guidelines to robustly confirm apoptotic events.
The Apoptotic Signaling Pathway and Key Biomarkers
Apoptosis is orchestrated by a family of cysteine proteases called caspases, which are synthesized as inactive zymogens (procaspases) and activated through proteolytic cleavage during the cell death signal [72]. The process can be triggered via the extrinsic (death receptor) pathway or the intrinsic (mitochondrial) pathway, ultimately converging on the activation of executioner caspases, primarily caspase-3 and caspase-7 [73]. Caspase-3 is responsible for the majority of proteolytic cleavage events during apoptosis [9]. One of its critical substrates is Poly (ADP-ribose) polymerase (PARP), a nuclear enzyme involved in DNA repair. During apoptosis, caspase-3 cleaves the 116 kDa full-length PARP into characteristic 89 kDa and 26 kDa fragments [73]. This cleavage event inactivates PARP, preventing futile DNA repair attempts and conserving cellular ATP for the apoptosis process [73]. Another early apoptotic hallmark is the translocation of phosphatidylserine (PS) from the inner to the outer leaflet of the plasma membrane. This externalized PS can be detected by its high-affinity binding to Annexin V, providing a marker for early-stage apoptosis before membrane integrity is lost [74].
The following diagram illustrates the core apoptotic pathway and the biomarkers detected by the assays discussed in this note.
Comparative Analysis of Apoptosis Assays
The following table summarizes the core characteristics, outputs, and correlations of the three key apoptosis assays.
Table 1: Comparative Analysis of Complementary Apoptosis Assays
| Assay | Target / Principle | Key Readout | Apoptotic Stage Detected | Key Advantages | Key Limitations |
|---|---|---|---|---|---|
| Western Blot for Cleaved Caspase-3 | Cleaved (activated) form of caspase-3 via specific antibodies [9]. | Presence of cleaved caspase-3 band (~17/19 kDa). | Mid-stage; confirms commitment to apoptosis [73]. | High specificity, confirms caspase activation, semi-quantitative. | Semi-quantitative, requires cell lysis, lacks single-cell resolution. |
| Western Blot for PARP Cleavage | Cleavage of full-length PARP (116 kDa) by caspase-3 [73]. | Ratio of cleaved PARP (89 kDa) to full-length PARP (116 kDa). | Mid-stage; confirms downstream caspase-3 activity [75]. | Direct readout of executioner caspase activity, well-characterized. | Same as above; does not distinguish between caspases-3 and -7. |
| Annexin V Staining | Externalization of phosphatidylserine (PS) on the outer plasma membrane [74]. | Percentage of Annexin V-positive cells (typically by flow cytometry). | Early-stage; precedes loss of membrane integrity [73]. | Detects early apoptosis, live-cell capability, single-cell resolution. | Not exclusive to apoptosis; can occur in other processes like ferroptosis [73]. Requires viability dye (e.g., PI) to exclude necrotic cells. |
Correlation of Assay Data in Experimental Contexts
The interplay between these assays provides a powerful multi-parametric validation of apoptosis. A robust apoptotic response typically shows a strong correlation: an increase in Annexin V-positive cells should coincide with, or slightly precede, the appearance of cleaved caspase-3 and its cleavage product, cleaved PARP, in Western blot analysis [73] [75].
However, a key application of these complementary assays is to investigate non-canonical cell death pathways. For instance, research on LL-37-induced cytotoxicity in osteoblast-like cells demonstrated positive Annexin V staining and TUNEL assay results, yet no caspase-3 or PARP cleavage was observed. This profile defined a caspase-independent apoptotic pathway [74]. Similarly, studies on homocysteine and copper-induced cardiomyocyte death revealed that the pan-caspase inhibitor zVAD-fmk only partially rescued cell viability, despite clear caspase-3 and PARP cleavage. This indicated the simultaneous induction of both caspase-dependent apoptosis and another, caspase-independent form of cell death (autosis) [76].
These cases underscore that a disconnect between Annexin V positivity and PARP/caspase-3 cleavage is not necessarily a failed experiment, but potentially evidence of a complex or alternative cell death mechanism.
Detailed Experimental Protocols
Protocol A: Flow Cytometry for Cleaved Caspase-3
This protocol enables the quantification of cells containing activated caspase-3, providing a direct and specific measure of mid-stage apoptosis at the single-cell level [9].
- Key Reagents: Anti-cleaved caspase-3 antibody, cell permeabilization buffer, fluorescently-labeled secondary antibody (if using an indirect method), flow cytometry staining buffer.
- Procedure:
- Induction and Harvest: Induce apoptosis in cultured cells. Harvest both adherent and suspended cells to avoid bias. Include an unstained control and a non-induced control.
- Fixation and Permeabilization: Wash cells with PBS and fix with 4% paraformaldehyde for 10-15 minutes at room temperature. Centrifuge and thoroughly wash with PBS. Permeabilize cells using a buffer containing a mild detergent (e.g., 0.1% Triton X-100 or commercial saponin-based buffers) for 10-15 minutes.
- Staining: Centrifuge and resuspend cell pellet in flow cytometry staining buffer. Add the primary antibody specific for cleaved caspase-3 at the manufacturer's recommended dilution. Incubate for 60 minutes at room temperature or overnight at 4°C. Wash cells twice to remove unbound antibody.
- Secondary Staining (if applicable): If the primary antibody is not directly conjugated, resuspend cells in staining buffer containing the appropriate fluorescently-labeled secondary antibody. Incubate for 30-60 minutes at room temperature in the dark. Wash twice.
- Analysis: Resuspend cells in PBS and analyze immediately on a flow cytometer. Use the unstained and non-induced controls to set voltage gates and determine the positive signal threshold.
Protocol B: Western Blot for PARP and Caspase-3 Cleavage
This method confirms the biochemical events of apoptosis by detecting the cleavage of both an initiator (caspase-3) and a key substrate (PARP) [73] [75].
- Key Reagents: RIPA Lysis Buffer, protease and phosphatase inhibitors, BCA Protein Assay Kit, SDS-PAGE gel, antibodies against PARP, cleaved caspase-3, and a loading control (e.g., GAPDH, β-actin).
- Procedure:
- Cell Lysis: Lyse cells in RIPA buffer supplemented with protease and phosphatase inhibitors. Incubate on ice for 15-30 minutes, then centrifuge at high speed to pellet debris.
- Protein Quantification: Determine protein concentration of the supernatant using the BCA assay. Normalize all samples to the same concentration.
- Gel Electrophoresis and Transfer: Denature protein samples in Laemmli buffer, load equal amounts of protein onto an SDS-PAGE gel, and separate by electrophoresis. Transfer proteins from the gel to a PVDF or nitrocellulose membrane.
- Immunoblotting: Block the membrane with 5% non-fat milk or BSA in TBST for 1 hour. Incubate with primary antibodies (e.g., anti-PARP, anti-cleaved caspase-3, anti-β-actin) diluted in blocking buffer overnight at 4°C. Wash the membrane and incubate with an appropriate HRP-conjugated secondary antibody for 1 hour at room temperature.
- Detection: Develop the blot using enhanced chemiluminescence (ECL) substrate and image with a digital imager. The apoptotic samples will show bands for cleaved caspase-3 (~17/19 kDa) and cleaved PARP (89 kDa), in addition to the full-length proteins.
Protocol C: Annexin V / Propidium Iodide (PI) Staining
This protocol identifies cells in the early stages of apoptosis (Annexin V+/PI-) and distinguishes them from late apoptotic/necrotic cells (Annexin V+/PI+) [74] [73].
- Key Reagents: Annexin V binding buffer, Fluorescently-conjugated Annexin V, Propidium Iodide (PI) solution.
- Procedure:
- Cell Harvest: Gently harvest cells to avoid mechanical induction of apoptosis. Wash cells once with cold PBS.
- Staining: Resuspend the cell pellet (~1x10^5 - 1x10^6 cells) in Annexin V binding buffer. Add fluorescently-conjugated Annexin V and PI according to the manufacturer's instructions.
- Incubation: Incubate the cells for 15-20 minutes at room temperature in the dark.
- Analysis: Gently vortex the cells and analyze by flow cytometry within 1 hour. Use unstained and single-stained controls to compensate for fluorescence spillover and set quadrants.
Integrated Experimental Workflow
The following diagram outlines a recommended workflow for sequentially applying these assays to a single experiment, from treatment to final analysis, ensuring comprehensive data collection.
The Scientist's Toolkit: Essential Research Reagents
Table 2: Key Reagent Solutions for Apoptosis Detection
| Item | Function / Application |
|---|---|
| Anti-Cleaved Caspase-3 Antibody | Specifically detects the activated form of caspase-3 in Western Blot and flow cytometry; a definitive marker of apoptotic commitment [9] [73]. |
| Anti-PARP Antibody | Detects both full-length (116 kDa) and the large caspase-derived fragment (89 kDa) of PARP in Western Blot, serving as a key indicator of executioner caspase activity [73] [75]. |
| Recombinant Annexin V, Conjugated | Binds to externalized phosphatidylserine for detection of early apoptotic cells by flow cytometry or microscopy [74]. |
| Propidium Iodide (PI) | A membrane-impermeant viability dye that stains nucleic acids in cells with compromised plasma membranes; used with Annexin V to distinguish early from late apoptosis/necrosis [73]. |
| Pan-Caspase Inhibitor (e.g., zVAD-FMK) | A cell-permeable, broad-spectrum caspase inhibitor used as a control to confirm the caspase-dependency of the observed cell death [7] [76]. |
| Apoptosis-Inducing Positive Control (e.g., Carfilzomib, Staurosporine) | A reliable inducer of apoptosis used to validate the performance of apoptosis assays and reagents in a specific cell model [7]. |
The comprehensive analysis of apoptosis, particularly through the detection of cleaved caspase-3, provides crucial insights into cellular health, drug mechanisms, and disease pathology in both research and drug development. Caspase-3 activation represents a key commitment point in the apoptotic cascade, serving as a central executioner protease that cleaves numerous cellular substrates [70]. When studied in isolation, however, caspase-3 activation provides an incomplete picture of cellular fate. The integration of caspase-3 detection with simultaneous assessment of mitochondrial function and cell membrane integrity enables researchers to capture the multidimensional nature of cell death processes and reveals critical interactions between different apoptotic pathways.
Multiparametric flow cytometry has emerged as a powerful methodology for simultaneously investigating these interconnected cellular events at single-cell resolution. Modern cytometers equipped with multiple lasers and sophisticated detection systems now permit the design of complex panels that can quantify caspase-3 activation alongside key mitochondrial parameters and viability markers within heterogeneous cell populations [77]. This integrated approach is particularly valuable for identifying transitional cell states and understanding the sequence of molecular events following apoptotic stimuli, especially in the context of drug screening and mechanistic studies where multiple cell death pathways may be activated simultaneously.
Panel Design Fundamentals and Strategic Planning
Understanding Instrument Configuration and Fluorochrome Selection
Successful multiparametric panel design begins with thorough knowledge of your flow cytometer's configuration. The number of available lasers, their wavelengths, and the specific filter sets installed determine the feasible complexity of your panel [14]. For a panel targeting caspase-3, mitochondrial markers, and viability dyes, a minimum of three lasers (blue [488 nm], red [633-640 nm], and violet [405 nm]) is recommended to accommodate the necessary fluorochromes while minimizing spectral overlap.
The strategic pairing of antigen abundance with fluorochrome brightness represents perhaps the most critical consideration in panel design. Table 1 outlines recommended pairings for the core parameters in this integrated apoptosis panel. Low-abundance targets like cleaved caspase-3 require the brightest fluorochromes available on your system, whereas highly expressed structural antigens can be detected with dimmer fluorochromes [14]. This brightness hierarchy ensures optimal resolution of biologically significant but potentially subtle signals from background autofluorescence.
Table 1: Recommended Antigen-Fluorochrome Pairings for Integrated Apoptosis Panel
| Cellular Parameter | Specific Marker | Recommended Fluorochrome | Expression Level | Rationale |
|---|---|---|---|---|
| Caspase-3 Activation | Cleaved Caspase-3 | PE, APC | Low | Maximizes detection sensitivity for this key apoptotic indicator |
| Mitochondrial Function | ΔΨm (MMP) | TMRE, JC-1 | Variable | Bright probes needed for dynamic range |
| Viability | Membrane Integrity | 7-AAD, Ethidium Homodimer | N/A | Compatible with fixation if needed |
| Mitochondrial Mass | TOMM20 | FITC, PerCP-Cy5.5 | Medium-High | Dimmer fluorochromes sufficient for abundant proteins |
| Apoptotic Marker | Phosphatidylserine | Annexin V-BV421 | Variable | Good brightness with minimal spillover |
When combining multiple fluorochromes, several problematic combinations should be avoided due to significant spectral overlap that complicates compensation. Specifically, the combination of APC and PE-Cy5 should be avoided due to their substantial emission spectrum overlap [14]. Similarly, PerCP and 7-AAD represent a suboptimal combination when measured with standard filter sets due to their similar emission profiles [14]. Advanced instrumentation with spectral detection capabilities can overcome some of these limitations, but for conventional flow cytometers, careful fluorochrome selection remains essential.
Key Research Reagent Solutions
Table 2: Essential Reagents for Integrated Apoptosis Analysis
| Reagent Category | Specific Examples | Primary Function | Detection Method |
|---|---|---|---|
| Caspase-3 Detection | Anti-cleaved caspase-3 antibodies (PE, APC conjugates); FRET-based caspase-3 substrates | Specific detection of activated caspase-3 | Flow cytometry, fluorescence lifetime imaging [3] [70] |
| Mitochondrial Probes | TMRE, JC-1 (ΔΨm); MitoTracker Green (mass); Anti-4HNE antibody (lipid peroxidation) | Assessment of mitochondrial health and function | Multiparametric flow cytometry [77] [78] |
| Viability Indicators | Ethidium homodimer; 7-AAD; Annexin V conjugates | Discrimination of live, dead, and apoptotic cells | Flow cytometry with viability gating [77] [79] |
| Compensation Controls | UltraComp compensation beads; singly stained cell controls | Accurate correction of spectral overlap | Flow cytometry compensation setup [14] |
Detailed Experimental Protocol
Sample Preparation and Staining Procedure
The following protocol has been optimized for the simultaneous detection of cleaved caspase-3, mitochondrial membrane potential (ΔΨm), and viability in mammalian cell cultures, particularly relevant for drug screening applications.
Day 1: Cell Treatment and Harvest
- Treatment Application: Seed cells at appropriate density (typically 2-5×10^5 cells/mL) and apply experimental treatments (e.g., chemotherapeutic agents, targeted compounds) for predetermined timepoints. Include appropriate controls (untreated, vehicle-only, and apoptosis-induced positive controls).
- Cell Harvest: Gently dislodge adherent cells using non-enzymatic dissociation buffers when possible to preserve surface epitopes. Enzymatic detachment with trypsin may alter certain epitopes and should be standardized if used.
- Wash and Count: Centrifuge cells at 300 × g for 5 minutes and resuspend in ice-cold PBS. Perform accurate cell counting and adjust concentration to 1-2×10^7 cells/mL in staining buffer.
Day 1: Staining Procedure
- Viability Staining First: Aliquot 100 μL of cell suspension (1×10^6 cells) into staining tubes. Add viability dye (e.g., ethidium homodimer [77] or 7-AAD) at predetermined optimal dilution. Incubate for 10-15 minutes at room temperature protected from light.
- Surface Staining (if applicable): Without washing, add antibodies against surface markers (if included in panel). Incubate for 20-30 minutes on ice protected from light.
- Fixation and Permeabilization: Centrifuge at 400 × g for 5 minutes and carefully decant supernatant. Fix cells using 4% paraformaldehyde for 15 minutes at room temperature. Centrifuge and permeabilize using ice-cold 90% methanol or commercial permeabilization buffers for intracellular antigen detection. Methanol fixation/permeabilization is particularly effective for caspase-3 detection [70].
- Intracellular Staining: Wash cells twice with permeabilization wash buffer. Resuspend in 100 μL of wash buffer and add anti-cleaved caspase-3 antibodies (PE or APC conjugated) and mitochondrial markers (if using antibodies rather than functional probes). Incubate for 30-60 minutes at room temperature protected from light.
- Mitochondrial Functional Probes: For mitochondrial membrane potential assessment using TMRE or JC-1, these probes are typically added to live cells prior to fixation. Alternatively, they can be added after permeabilization with potential reduced signal intensity.
- Final Wash and Resuspension: Wash cells twice with flow cytometry staining buffer and resuspend in 300-500 μL of buffer for acquisition. Store at 4°C protected from light if not acquiring immediately (within 24 hours recommended).
Flow Cytometry Acquisition and Quality Control
- Instrument Setup: Start with properly calibrated cytometer using standardized beads according to manufacturer instructions. Create acquisition template with appropriate detectors for all fluorochromes in the panel.
- Compensation Controls: Prepare single-stained controls for each fluorochrome used in the panel. These can be compensation beads or cells with known expression of the target. For cleaved caspase-3, use cells with confirmed caspase-3 activation (apoptosis-induced) stained singly with the anti-cleaved caspase-3 antibody.
- Voltage Optimization: Adjust PMT voltages using unstained and singly stained controls to ensure optimal signal separation while maintaining populations on scale.
- Compensation Matrix: Apply compensation using the single-stained controls, verifying that compensated samples show minimal spillover between channels.
- Acquisition: Collect a minimum of 10,000 events per sample for robust population analysis, increasing to 50,000-100,000 events for rare population detection. Use low flow rates (100-300 events/second) for improved signal resolution and doublet discrimination.
- Gating Strategy: Implement sequential gating as illustrated in Figure 1 to exclude debris, doublets, and non-viable cells before analyzing caspase-3 and mitochondrial parameters.
Figure 1: Sequential Gating Strategy for Integrated Apoptosis Analysis. This workflow ensures clean population identification by progressively excluding debris, doublets, and non-viable cells before analyzing critical apoptotic parameters.
Advanced Applications and Detection Methodologies
Alternative Caspase-3 Detection Methods
Beyond antibody-based detection of cleaved caspase-3, several sophisticated methodological approaches offer unique advantages for specific applications:
FRET-Based Bioprobes and Phasor Analysis Fluorescence Resonance Energy Transfer (FRET)-based bioprobes utilize caspase-3 cleavable sequences positioned between donor and acceptor fluorophores. During apoptosis, caspase-3 activation cleaves the sequence, disrupting FRET and altering the fluorescence lifetime of the donor [3]. When combined with time-resolved flow cytometry, this approach enables quantitative assessment of caspase-3 activity through phasor analysis, which plots phase and modulation data to create distinctive "lifetime fingerprints" for different enzymatic states [3]. This methodology provides several advantages over intensity-based measurements, including independence from fluorophore concentration and reduced susceptibility to spectral overlap artifacts.
Stable Fluorescent Reporter Systems Recent advances in live-cell imaging have led to the development of stable fluorescent reporter systems such as the ZipGFP-based caspase-3/-7 reporter. This genetically encoded biosensor utilizes a split-GFP architecture with a caspase-cleavable DEVD motif [7]. Under basal conditions, the separated GFP fragments cannot form functional fluorophores, but upon caspase-3/-7 activation, cleavage allows spontaneous reassembly into fluorescent GFP. This system provides irreversible, time-accumulating signals that permanently mark cells that have experienced caspase activation, making it particularly valuable for long-term live-cell imaging studies in both 2D and 3D culture systems [7].
Data Analysis Approaches for Multidimensional Data
The complexity of multiparametric flow cytometry data demands sophisticated analysis approaches beyond conventional two-dimensional gating:
Traditional Sequential Gating The established approach involves progressive population refinement through a series of two-dimensional plots, as illustrated in Figure 1. While intuitive and widely implemented, this method becomes increasingly cumbersome with higher parameter counts and may fail to identify cell populations distributed across multiple dimensions.
Dimensionality Reduction Algorithms Advanced computational techniques such as t-Distributed Stochastic Neighbor Embedding (t-SNE) and Uniform Manifold Approximation and Projection (UMAP) effectively reduce high-dimensional data to two or three dimensions while preserving neighborhood relationships [78]. These algorithms visualize complex population structures that might remain hidden in traditional gating approaches, revealing transitional states during apoptosis progression.
Automated Clustering Approaches Tools like FlowSOM (Flow Self-Organizing Maps) enable unsupervised identification of cell populations within high-dimensional cytometry data [78]. These algorithms automatically detect distinct cellular states based on simultaneous expression patterns across all measured parameters, providing objective, reproducible population identification that complements researcher-driven gating strategies.
Table 3: Comparison of Data Analysis Methods for Multiparametric Apoptosis Data
| Analysis Method | Key Principle | Advantages | Limitations | Best Application Context |
|---|---|---|---|---|
| Traditional Gating | Sequential population refinement via 2D plots | Intuitive, widely understood, maintains biological context | Subjective, misses complex populations, time-consuming | Initial panel validation, focused hypothesis testing |
| Dimensionality Reduction | Projection of high-D data to 2D/3D while preserving structure | Reveals hidden populations, visualizes complex relationships | Computational intensity, potential overinterpretation | Exploratory analysis, heterogeneous samples |
| Automated Clustering | Unsupervised algorithm-based population identification | Objective, reproducible, handles high parameter counts | Black box nature, requires validation | Large datasets, comprehensive population mapping |
Troubleshooting and Technical Considerations
Optimization Strategies for Challenging Samples
Successful implementation of this integrated apoptosis panel requires careful attention to potential technical challenges:
Minimizing Spectral Overlap Significant spectral overlap between fluorochromes represents the most common obstacle in multiparametric panel design. Several strategies can mitigate this issue:
- Employ tandem dyes carefully, noting that they may exhibit instability and require validation
- Stagger antibody additions during staining rather than adding all antibodies simultaneously
- Implement compensation controls using cells or beads stained with each individual fluorochrome
- Consider spreading bright fluorochromes across different laser lines to minimize spillover
Addressing Caspase-3 Detection Sensitivity The typically low abundance of cleaved caspase-3 presents particular detection challenges:
- Titrate anti-cleaved caspase-3 antibodies extensively using positive and negative controls
- Compare multiple fixation/permeabilization methods to optimize epitope preservation
- Include FRET-based activity probes as complementary detection approach [3]
- Use bright fluorochromes (PE, APC) rather than dimmer alternatives (FITC) for caspase-3 detection
Preserving Mitochondrial Function During Processing Mitochondrial parameters, particularly membrane potential, are highly sensitive to processing conditions:
- Minimize processing time between cell harvesting and analysis
- Maintain consistent temperature conditions throughout staining
- Include CCCP-treated controls to validate ΔΨm probe functionality
- Consider plate-based staining to reduce manipulation-induced artifacts
Validation and Quality Control Measures
Rigorous validation ensures the reliability and reproducibility of your multiparametric apoptosis data:
Panel Validation
- Biological controls: Include known apoptosis inducers (e.g., staurosporine, camptothecin) and caspase inhibitors (zVAD-FMK) to validate expected response patterns [7]
- Single stain controls: Confirm each marker's staining pattern in isolation before full panel implementation
- Compensation verification: Ensure proper compensation using single-stained controls that match experimental samples in brightness and autofluorescence
Instrument Quality Control
- Daily calibration using standardized beads to ensure consistent laser alignment and fluidics
- PMT voltage tracking to monitor detector performance over time
- Standardized acquisition settings across experimental replicates
Figure 2: Temporal Relationships in Apoptosis Pathways. This schematic illustrates the typical sequence of molecular events following apoptotic stimulation, highlighting how multiparametric flow cytometry can capture transitional cellular states.
The integration of caspase-3 detection with mitochondrial markers and viability dyes in a multiparametric flow cytometry panel provides a comprehensive systems-level view of apoptosis that transcends the limitations of single-parameter assessments. This approach enables researchers to capture the dynamic complexity of cell death processes, identify transitional cellular states, and elucidate subtle mechanistic relationships between different apoptotic pathways. The strategic panel design principles, optimized protocols, and advanced analysis methods detailed in this application note provide a robust framework for implementing this powerful methodology in both basic research and drug discovery contexts. As flow cytometry technology continues to evolve with increased parameter capabilities and more sophisticated analysis algorithms, this integrated approach will undoubtedly yield ever-deeper insights into the fundamental processes governing cellular fate.
Caspase-3 serves as a critical executioner protease in apoptosis, with its activation representing a definitive marker of programmed cell death [9] [80]. Detection of activated caspase-3 provides researchers with a powerful tool for investigating cell death mechanisms in various contexts, including cancer biology, neurodegeneration, and drug development [37] [81]. The selection of an appropriate detection method significantly influences the reliability, context, and depth of experimental findings. This analysis provides a comprehensive comparison between flow cytometry and other established techniques for caspase-3 detection, offering detailed protocols and practical guidance for researchers working in low-noise research environments where specificity and sensitivity are paramount.
Caspase-3 in Apoptotic Signaling Pathways
Caspase-3 functions as a key effector in the caspase cascade, responsible for the majority of proteolytic cleavage events during apoptosis [9]. It is typically activated through either the extrinsic (death receptor) or intrinsic (mitochondrial) pathways, culminating in the cleavage of cellular substrates and the characteristic morphological changes of apoptosis [37]. The proteolytic activation of caspase-3 involves cleavage at specific aspartic acid residues, particularly within a conserved DEVD sequence, converting the inactive zymogen (p32) into active fragments (p17/p12) [80] [81]. This activation process presents a specific molecular target for detection methodologies.
Comparative Analysis of Detection Methods
The following table summarizes the key characteristics, applications, advantages, and limitations of major caspase-3 detection methodologies:
Table 1: Comprehensive comparison of caspase-3 detection methods
| Method | Detection Principle | Key Applications | Advantages | Limitations |
|---|---|---|---|---|
| Flow Cytometry | Antibody-based or fluorogenic substrate detection in single-cell suspension [9] [27] | Quantitative analysis of heterogeneous cell populations; multiparametric cell death analysis [70] [27] | High-throughput capability; multiparametric analysis; quantitative population data [70] | Loss of spatial information; requires single-cell suspension [8] |
| Immunofluorescence | Antibody-based detection in fixed cells with fluorescent secondary antibodies [8] | Spatial localization in cultured cells or tissues; co-localization studies [8] | Preserves cellular architecture; subcellular localization; visually intuitive [8] | Semi-quantitative; lower throughput; fixed samples only [8] |
| Western Blotting | Protein separation and antibody-based detection of cleaved fragments [9] | Confirmatory analysis; detection of cleavage fragments; mechanism studies [9] | Well-established; detects specific fragments; equipment widely available [9] | Population average only; no single-cell data; semi-quantitative [9] |
| Live-Cell Imaging (FRET/Reporter) | Genetically encoded biosensors (e.g., split-GFP, FRET-based) [7] [82] | Real-time kinetics in live cells; dynamic processes; single-cell tracking [7] | Temporal resolution; kinetic data; live cell tracking [7] | Requires genetic manipulation; potential phototoxicity; equipment cost [7] |
| Molecular Imaging (PET/SPECT) | Radiolabeled caspase-3 tracers (e.g., isatin sulfonamides) for in vivo detection [81] | Preclinical therapeutic monitoring; in vivo apoptosis tracking [81] | Non-invasive in vivo application; clinical translation potential [81] | Low spatial resolution; radioactive handling; transient target expression [81] |
Quantitative Performance Characteristics
Table 2: Analytical performance and resource requirements
| Method | Sensitivity | Temporal Resolution | Spatial Information | Throughput | Implementation Complexity |
|---|---|---|---|---|---|
| Flow Cytometry | High (single-cell detection) [70] | Minutes to hours (endpoint or kinetic) [27] | Limited (cellular) | High (thousands of cells/second) [27] | Moderate |
| Immunofluorescence | Moderate to high [8] | Hours (fixed endpoint) [8] | High (subcellular) [8] | Low to moderate | Low to moderate |
| Western Blotting | Moderate (population average) [9] | Hours (endpoint) [9] | None | Low | Low |
| Live-Cell Imaging | High (single-cell) [7] | High (seconds to minutes) [7] | High (subcellular) [7] | Moderate | High |
| Molecular Imaging | Low to moderate (limited by resolution) [81] | Hours to days [81] | Low (anatomical) | Low | Very high |
Detailed Methodologies
Flow Cytometry-Based Detection Protocols
Antibody-Based Detection of Cleaved Caspase-3
This protocol utilizes specific antibodies that recognize the activated (cleaved) form of caspase-3, providing high specificity for apoptotic cells [9] [80].
*Materials and Reagents:
- Primary Antibody: Anti-cleaved caspase-3 antibody (e.g., rabbit monoclonal) [8]
- Secondary Antibody: Fluorescently-labeled secondary antibody (e.g., Alexa Fluor 488 conjugate) [8]
- Permeabilization Buffer: PBS with 0.1% Triton X-100 or NP-40 [8]
- Blocking Buffer: PBS/0.1% Tween 20 with 5% serum from secondary antibody host species [8]
- Staining Buffer: PBS with 2% fetal bovine serum [27]
- Fixation Buffer: 4% paraformaldehyde in PBS
*Procedure:
- Cell Preparation: Harvest and wash cells in cold PBS. For suspension cells, proceed directly to fixation. For adherent cells, dislodge using gentle enzymatic or non-enzymatic methods to preserve cell surface integrity.
- Fixation and Permeabilization: Fix cells in 4% paraformaldehyde for 15 minutes at room temperature. Centrifuge and resuspend in permeabilization buffer for 5 minutes [8].
- Blocking: Centrifuge cells and resuspend in blocking buffer. Incubate for 1-2 hours at room temperature to reduce non-specific binding [8].
- Primary Antibody Staining: Wash cells once with PBS. Resuspend in primary antibody diluted in blocking buffer (typical dilution 1:200). Incubate overnight at 4°C in a humidified chamber [8].
- Secondary Antibody Staining: Wash cells three times with PBS/0.1% Tween 20 (10 minutes each). Resuspend in appropriate secondary antibody diluted in PBS (typical dilution 1:500). Incubate for 1-2 hours at room temperature, protected from light [8].
- Analysis: Wash cells three times with PBS/0.1% Tween 20 (5 minutes each). Resuspend in appropriate flow cytometry buffer and analyze using a flow cytometer with excitation compatible with the fluorophore used [8].
Fluorogenic Substrate-Based Detection
This approach utilizes cell-permeable fluorogenic substrates that become fluorescent upon cleavage by activated caspase-3/7, enabling detection without antibody staining [27] [83].
*Materials and Reagents:
- Caspase-3/7 Substrate: PhiPhiLux G1D2 or TF2-DEVD-FMK [27] [83]
- Viability Dye: Propidium iodide (PI) or 7-aminoactinomycin D (7-AAD) [27] [83]
- Assay Buffer: Compatible buffer provided with commercial kits or Dulbecco's PBS with calcium and magnesium [27]
- Positive Control: Apoptosis inducer (e.g., 20 μM camptothecin or 1 μM staurosporine) [83]
- Inhibitor Control: pan-caspase inhibitor (e.g., Z-VAD-FMK) [83]
*Procedure:
- Cell Preparation: Harvest cells gently to minimize mechanical induction of apoptosis. Wash once with assay buffer and resuspend at 1×10^6 cells/mL in assay buffer.
- Substrate Loading: Add fluorogenic caspase substrate at manufacturer's recommended concentration (e.g., 10 μM for PhiPhiLux). Incubate for 60 minutes at 37°C in the dark [27].
- Viability Staining: Add viability dye (e.g., PI at 1 μg/mL or 7-AAD at recommended concentration) and incubate for 5-10 minutes on ice [27] [83].
- Analysis: Analyze by flow cytometry without washing to prevent leakage of cleaved substrate. Use 488 nm excitation with detection in FL1 (FITC/GFP channel) for caspase signal and FL2 or FL3 for PI/7-AAD [27].
Complementary Caspase-3 Detection Protocols
Immunofluorescence Microscopy Protocol
*Procedure:
- Sample Preparation: Culture cells on glass coverslips. Induce apoptosis and fix with 4% paraformaldehyde for 15 minutes [8].
- Permeabilization and Blocking: Permeabilize with PBS/0.1% Triton X-100 for 5 minutes. Wash three times with PBS for 5 minutes each. Block with 5% appropriate serum in PBS/0.1% Tween 20 for 1-2 hours [8].
- Antibody Staining: Incubate with primary antibody against cleaved caspase-3 (diluted 1:200 in blocking buffer) overnight at 4°C. Wash three times with PBS/0.1% Tween 20, 10 minutes each. Incubate with fluorescent secondary antibody (diluted 1:500 in PBS) for 1-2 hours at room temperature, protected from light [8].
- Imaging: Wash three times with PBS/0.1% Tween 20, mount with anti-fade mounting medium, and image using a fluorescence microscope with appropriate filter sets [8].
Live-Cell Reporter Imaging Protocol
*Procedure:
- Reporter Cell Generation: Stably express caspase-3 biosensor (e.g., ZipGFP with DEVD cleavage motif or DEVD-inserted GFP mutant) in target cells [7] [82].
- Image Acquisition: Plate reporter cells in appropriate imaging chambers. Induce apoptosis and acquire time-lapse images using a live-cell imaging system with environmental control (37°C, 5% CO₂) [7].
- Data Analysis: Quantify fluorescence intensity changes over time using image analysis software. For FRET-based sensors, calculate emission ratio changes; for split-GFP systems, monitor fluorescence dequenching [7].
Research Reagent Solutions
Table 3: Essential reagents for caspase-3 detection
| Reagent Category | Specific Examples | Function and Application |
|---|---|---|
| Antibody-Based Reagents | Anti-cleaved caspase-3 antibodies [8] | Specific recognition of activated caspase-3 for flow cytometry, immunofluorescence, and western blot |
| Fluorogenic Substrates | PhiPhiLux G1D2 [27], TF2-DEVD-FMK [83] | Cell-permeable caspase-3/7 substrates that become fluorescent upon cleavage for flow cytometry |
| Live-Cell Reporters | ZipGFP-DEVD [7], DEVD-inserted GFP mutants [82] | Genetically encoded biosensors for real-time caspase-3 activity monitoring in live cells |
| Viability Indicators | Propidium iodide, 7-AAD [27] [83] | Membrane integrity dyes to distinguish apoptotic from necrotic cells |
| Annexin V Conjugates | PE- or APC-conjugated annexin V [27] | Detection of phosphatidylserine externalization for multiparametric apoptosis analysis |
| Caspase Inhibitors | Z-VAD-FMK (pan-caspase) [7] [83] | Specific caspase inhibition for experimental controls and mechanism studies |
| Molecular Imaging Probes | Isatin sulfonamide radiotracers [81] | Radiolabeled compounds for in vivo caspase-3 detection via PET/SPECT imaging |
Method Selection Guidance
Context-Dependent Method Recommendations
The optimal caspase-3 detection method depends on specific research questions and experimental constraints:
- For High-Throughput Screening: Flow cytometry with fluorogenic substrates provides rapid, quantitative analysis of thousands of cells, ideal for drug screening and kinetic studies [27] [83].
- For Spatial Localization Studies: Immunofluorescence offers subcellular resolution, enabling researchers to investigate compartment-specific caspase activation and heterogeneous responses in tissues [8].
- For Real-Time Kinetic Analysis: Live-cell imaging with genetically encoded reporters (e.g., ZipGFP) allows continuous monitoring of caspase activation dynamics in individual cells [7].
- For In Vivo Applications: Molecular imaging with radiolabeled caspase-3 probes enables non-invasive monitoring of apoptosis in live animals, with potential for clinical translation [81].
- For Multiparametric Cell Death Analysis: Flow cytometry enables simultaneous detection of caspase activation with other apoptosis markers (annexin V, viability dyes), providing comprehensive death mechanism characterization [27].
Optimization Strategies for Low-Noise Research
- Minimizing Background in Flow Cytometry: Include appropriate controls (unstained, secondary antibody-only), titrate antibodies carefully, and use viability dyes to exclude necrotic cells [27].
- Enhancing Specificity: Validate antibody specificity using caspase inhibitors (e.g., Z-VAD-FMK) and genetic models (e.g., caspase-3 deficient cells) [7] [83].
- Multiparametric Verification: Combine multiple complementary methods (e.g., flow cytometry with western blotting) to confirm findings and address methodological limitations [9] [70].
Flow cytometry represents a powerful tool for caspase-3 detection, particularly when high-throughput, quantitative analysis of heterogeneous cell populations is required. Its ability to perform multiparametric analysis provides distinct advantages over other methods, though the loss of spatial information remains a limitation. The optimal experimental approach often involves complementary use of multiple detection methodologies, leveraging the unique strengths of each technique to provide comprehensive insights into caspase-3 activation and apoptotic processes. Selection should be guided by specific research questions, required resolution (temporal and spatial), and available resources, with flow cytometry serving as a cornerstone methodology for quantitative apoptosis assessment in low-noise research environments.
Caspase-3 is a critical executioner protease that becomes activated during the early stages of apoptosis, responsible for the majority of proteolytic cleavage events that characterize programmed cell death [3] [9] [84]. It is synthesized as an inactive 32 kDa pro-enzyme that undergoes proteolytic processing into active 17 kDa and 12 kDa subunits, which associate to form the functional enzyme [85]. Detection of this cleaved, active form of caspase-3 provides a specific and reliable marker for identifying cells undergoing apoptosis, making it a valuable tool for research in cancer biology, immunology, and drug development [9] [84].
The flow cytometry-based detection of cleaved caspase-3 requires careful attention to quality control measures due to the intracellular location of the target and the potential for background signal. This application note details optimized protocols and quality control strategies for detecting cleaved caspase-3 with high specificity and low background noise, enabling researchers to accurately quantify apoptosis in diverse cell populations.
Key Research Reagent Solutions
The following table catalogues essential reagents required for the flow cytometric analysis of cleaved caspase-3, with a focus on validated tools that facilitate low-noise research.
Table 1: Essential Research Reagents for Cleaved Caspase-3 Flow Cytometry
| Reagent Type | Specific Example | Function & Importance in Quality Control |
|---|---|---|
| Anti-Cleaved Caspase-3 Antibody | Cleaved Caspase-3 (Asp175) Antibody (Alexa Fluor 488 Conjugate) #9669 [84] | Specifically detects the large fragment (17/19 kDa) of activated caspase-3; conjugated directly to a fluorophore to simplify staining and minimize non-specific binding. |
| Alternative Conjugation Antibody | BD Horizon BV650 Rabbit Anti-Active Caspase-3 (Clone C92-605) [85] | Offers flexibility for multicolor panels; the BV650 dye is excited by a violet laser and detected with a 660/20-nm filter, helping to avoid spectral overlap. |
| Fixation/Permeabilization Kit | BD Cytofix/Cytoperm Fixation/Permeabilization Solution Kit [85] | Essential for intracellular staining; preserves cell structure while allowing antibodies to access intracellular epitopes. Standardized kits ensure consistent results. |
| Viability Dye | Propidium Iodide (PI), 7-AAD, or Fixable Viability Dyes [86] | Critical for excluding dead cells from analysis, which often exhibit high non-specific antibody binding and can contribute significantly to background noise. |
| Blocking Reagent | Fc Receptor Blocking Reagents, BSA [87] | Minimizes non-specific antibody binding via Fc receptors, a key step for improving the signal-to-noise ratio, especially in high-parameter flow cytometry. |
| Compensation Beads | Anti-Rabbit Compensation Beads | Used with antibody-conjugated reagents to accurately set compensation for spectral overlap in multicolor experiments, improving population resolution [86]. |
Experimental Protocol for Cleaved Caspase-3 Staining
This protocol outlines a detailed methodology for the flow cytometric detection of cleaved caspase-3 in cultured cells, such as Jurkat cells or bone marrow-derived macrophages, incorporating key steps to minimize background noise.
Cell Preparation and Induction of Apoptosis
- Cell Culture: Maintain and treat cells according to experimental design. A common positive control involves treating cells (e.g., Jurkat cells) with 4 µM camptothecin for 4 hours to induce apoptosis [85].
- Harvesting: Gently dislodge adherent cells using trypsin or non-enzymatic cell dissociation solutions, and collect all cells into a single-cell suspension [88].
- Washing: Centrifuge the cell suspension at 200 × g for 4-5 minutes and wash the pellet once with cold Dulbecco's Phosphate-Buffered Saline (DPBS) [85].
Fixation and Permeabilization
This critical step preserves the intracellular architecture and allows the antibody to access the cleaved caspase-3 protein.
- Fixation: Resuspend the cell pellet thoroughly in BD Cytofix/Cytoperm solution. Incubate for 20 minutes at room temperature [85].
- Washing: Centrifuge the cells and carefully decant the supernatant. Wash the cells by resuspending them in 1-2 mL of BD Perm/Wash Buffer (or similar permeabilization wash buffer) [85]. This wash step is crucial for removing excess fixative and reducing background.
Intracellular Staining and Controls
- Antibody Staining: Resuspend the fixed and permeabilized cell pellet in BD Perm/Wash Buffer. Add the pre-titrated volume of fluorescently-conjugated cleaved caspase-3 antibody (e.g., 5 µL per 100 µL experimental sample containing 1 × 10^6 cells) [85]. Vortex gently and incubate for 30-60 minutes at room temperature, protected from light.
- Critical Controls: Include the following controls in every experiment for proper data interpretation and gating:
- Unstained Control: Cells that are fixed and permeabilized but not stained with the antibody.
- Uninduced Control: Cells that have not been treated with an apoptosis inducer.
- Fluorescence Minus One (FMO) Control: Cells stained with all antibodies in the panel except the anti-cleaved caspase-3 antibody. This control is essential for accurately setting the positive/negative boundary gate, especially for low-expression populations or in multicolor panels [86].
- Isotype Control (Optional): An antibody with the same IgG isotype and fluorophore conjugation as the cleaved caspase-3 antibody, but with irrelevant specificity. This helps identify non-specific binding, though the FMO control is generally preferred [86].
Data Acquisition
- Final Wash: After staining, centrifuge the cells and wash them once with BD Perm/Wash Buffer. Resuspend the final pellet in a suitable sheath fluid or buffer for flow cytometry analysis.
- Instrument Setup: Prior to sample acquisition, perform compensation using compensation beads or cells stained singly with each fluorophore used in the panel to correct for spectral overlap [86].
Quality Control: Gating Strategies and Data Interpretation
A rigorous gating strategy is fundamental to accurately identify the specific population of cells positive for cleaved caspase-3 while excluding artifacts and non-specifically stained cells.
Sequential Gating Strategy for Low-Noise Data
The following workflow diagram illustrates the stepwise gating logic used to isolate cleaved caspase-3 positive cells from a heterogeneous sample.
- Gate on Intact Cells (R1): Create a plot of Forward Scatter-Area (FSC-A) versus Side Scatter-Area (SSC-A). FSC-A correlates with cell size, and SSC-A with internal complexity/granularity. Draw a region (R1) around the population of intact cells, excluding debris and subcellular particles which appear as events with very low FSC-A [86].
- Exclude Doublets (R2): From the R1-gated population, create a plot of FSC-Height (FSC-H) versus FSC-A. Single cells will form a diagonal population where height and area are proportional. Draw a tight region (R2) around this population to exclude cell doublets or multiplets, which have a higher FSC-A for a similar FSC-H and can skew quantitative results [86].
- Gate on Viable Cells (R3): From the R2-gated single cells, create a plot of FSC-A versus the viability dye (e.g., PI or a fixable dye). Viable cells will be negative for the viability dye. Draw a region (R3) around this negative population. This step is critical as dead/dying cells can bind antibodies non-specifically, contributing significantly to background noise [86].
- Analyze Cleaved Caspase-3 Expression: Using the R3-gated (viable, single, intact cells) population, plot the fluorescence intensity of the cleaved caspase-3 antibody channel. Use the FMO control to correctly set the threshold between negative and positive cells [86]. Cells undergoing apoptosis will appear as a distinct positive population.
Data Interpretation Guidelines
The histogram is the primary tool for interpreting the final result of cleaved caspase-3 staining, allowing for clear distinction between negative and positive populations.
Table 2: Key Controls for Data Interpretation and Troubleshooting
| Control | Purpose in Data Interpretation | Indicator of Success |
|---|---|---|
| Uninduced Control | Establishes the baseline autofluorescence and background signal of cells not undergoing apoptosis. | A single, low-fluorescence intensity peak. |
| FMO Control | Defines the precise boundary for positive signal in the cleaved caspase-3 channel, accounting for background from all other fluorophores in the panel and cellular autofluorescence. | The positive gate for cleaved caspase-3 is set such that the FMO control shows ≤1% positive events [86]. |
| Apoptosis-Induced Sample | Demonstrates the specific signal from cleaved caspase-3. The histogram should show a clear shift in fluorescence intensity compared to the controls. | A distinct second population with higher fluorescence intensity than the FMO and uninduced controls. |
| Compensation Controls | Corrects for the spillover signal from one fluorescent detector into another. | The median fluorescence intensity (MFI) of a fluorophore is identical in the positive and negative populations when viewed in a detector for a different fluorophore. |
Advanced Techniques and Future Directions
While immunodetection with cleaved caspase-3 antibodies is a robust and widely adopted method, alternative and complementary techniques exist. FRET (Förster Resonance Energy Transfer)-based bioprobes can be used to measure caspase-3 activity in live cells. These probes contain a fluorophore pair connected by a caspase-3-cleavable peptide linker. Upon cleavage, the loss of FRET can be detected as a change in fluorescence lifetime, which is measurable via time-resolved flow cytometry. This method provides a direct functional readout of enzyme activity and is less dependent on probe concentration, potentially offering a different dimension of quantitative analysis [3].
The protocols and quality control measures outlined herein provide a solid foundation for the reliable detection of cleaved caspase-3 by flow cytometry. Adherence to these guidelines, particularly the use of proper gating strategies and controls like FMOs, will enable researchers to generate high-quality, low-noise data essential for confident interpretation of apoptotic events in their experimental systems.
Conclusion
The optimized flow cytometry protocol for cleaved caspase-3 detection provides researchers with a robust framework for high-sensitivity apoptosis measurement with minimal background noise. By integrating foundational understanding with meticulous methodological execution, advanced troubleshooting approaches, and rigorous validation standards, this protocol enables precise quantification of apoptotic activity—a capability crucial for advancing biomedical research. The ability to reliably detect cleaved caspase-3 has far-reaching implications for understanding disease mechanisms, particularly in cancer therapeutics where monitoring treatment-induced apoptosis is essential. Future directions should focus on adapting these methods for increasingly complex multiparametric panels, developing standardized protocols for clinical specimen analysis, and creating novel caspase-specific reagents that further enhance specificity while reducing technical variability. As single-cell analysis technologies evolve, these optimized detection strategies will continue to provide critical insights into cellular responses to therapeutic interventions across diverse research and clinical applications.
References
- 1. Caspase 3 - Wikipedia [https://en.wikipedia.org/wiki/Caspase_3]
- 2. BD Pharmingen™ PE Rabbit Anti- Active Caspase-3 [https://www.bdbiosciences.com/en-us/products/reagents/flow-cytometry-reagents/research-reagents/single-color-antibodies-ruo/pe-rabbit-anti-active-caspase-3.561011]
- 3. Evaluation of Caspase‐3 Activity During Apoptosis with ... [https://pmc.ncbi.nlm.nih.gov/articles/PMC7738394/]
- 4. A constitutively active and uninhibitable caspase-3 zymogen efficiently induces apoptosis - PMC [https://pmc.ncbi.nlm.nih.gov/articles/PMC2805924/]
- 5. Caspase Functions in Cell Death and Disease - PMC [https://pmc.ncbi.nlm.nih.gov/articles/PMC3683896/]
- 6. FITC Active Caspase-3 Apoptosis Kit [https://www.bdbiosciences.com/en-us/products/reagents/flow-cytometry-reagents/research-reagents/panels-multicolor-cocktails-ruo/fitc-active-caspase-3-apoptosis-kit.550480]
- 7. Integrated real-time imaging of executioner caspase ... [https://www.nature.com/articles/s41420-025-02662-y]
- 8. Protocol for detection of caspases using immunofluorescence [https://www.abcam.com/en-us/technical-resources/protocols/immunofluorescence-protocol-to-detect-caspases]
- 9. Detecting Cleaved Caspase-3 in Apoptotic Cells by Flow ... [https://pubmed.ncbi.nlm.nih.gov/27803251/]
- 10. Cleaved Caspase-3 (Asp175) Western Detection Kit #9660 [https://www.cellsignal.com/products/primary-antibodies/apoptosis-marker-cleaved-caspase-3-asp175-western-detection-kit/9660?srsltid=AfmBOoobbBgFeiuD3hXhXh97CUINwdbYU06QodXotdl4EHf11vAUny6P]
- 11. SignalStain® Cleaved Caspase-3 (Asp175) IHC Detection Kit [https://www.cellsignal.com/products/primary-antibodies/apoptosis-marker-cleaved-caspase-3-asp175-ihc-detection-kit/8120?srsltid=AfmBOoonKOGd94FFeGafUMe93KzZ3crKxmP2zeOf3MG8Y3lp-VWnrE6a]
- 12. Catalytic activity of caspase-3 is required for its degradation [https://www.nature.com/articles/4401360]
- 13. Visualization of caspase-3-like activity in cells using a ... [https://www.nature.com/articles/ncomms3157]
- 14. Designing a multicolor flow cytometry panel [https://www.abcam.co.jp/primary-antibodies/multicolor-flow-cytometry-panel-design]
- 15. | Abcam Flow Cytometry Protocol [https://www.abcam.com/en-us/technical-resources/protocols/flow-cytometry-for-intracellular-and-extracellular-targets]
- 16. Whole blood fixation and permeabilization with red blood... protocol [https://pubmed.ncbi.nlm.nih.gov/16080188/]
- 17. Perm Flow Method: Intracellular... | Boster Bio Cytometry Fixation [https://www.bosterbio.com/protocol-and-troubleshooting/flow-cytometry-optimization/perm-fixation-method]
- 18. , FoxP3/Transcription Factor Flow and... Cytometry Fixation [https://www.cellsignal.com/learn-and-support/protocols/protocol-foxp3-transcritption]
- 19. Flow Cytometry Protocol for Cell Surface Markers [https://www.rndsystems.com/resources/protocols/flow-cytometry-protocol-staining-membrane-associated-proteins-suspended-cells]
- 20. Surface Marker Analysis by Flow Cytometry [https://www.thermofisher.com/us/en/home/references/protocols/neurobiology/neurobiology-protocols/surface-marker-analysis-by-flow-cytometry.html]
- 21. Data analysis in flow cytometry [https://www.abcam.com/en-us/technical-resources/guides/flow-cytometry-guide/data-analysis-in-flow-cytometry]
- 22. Publishing flow cytometry data - PMC [https://pmc.ncbi.nlm.nih.gov/articles/PMC2822558/]
- 23. A Comprehensive Exploration of Caspase Detection Methods [https://pmc.ncbi.nlm.nih.gov/articles/PMC11121653/]
- 24. Cleaved Caspase-3: A Marker of Programmed Cell Death [https://www.novusbio.com/antibody-news/antibodies/caspase-3-a-marker-of-programmed-cell-death?srsltid=AfmBOopAF6NH7L0Un-6lMetN2nGVTLO1ocpgf3oCH1Buwdp-5SauU_K2]
- 25. Paradoxical roles of caspase-3 in regulating cell survival ... [https://pmc.ncbi.nlm.nih.gov/articles/PMC9106709/]
- 26. Comparison of immunohistochemistry for activated ... [https://pubmed.ncbi.nlm.nih.gov/12533835/]
- 27. Multiparametric Analysis of Apoptosis by Flow Cytometry ... [https://www.creative-diagnostics.com/multiparametric-analysis-of-apoptosis-by-flow-cytometry-protocol.htm]
- 28. No-Wash Imaging of Apoptosis: CellEvent Caspase 3/7 ... [https://www.thermofisher.com/us/en/home/references/newsletters-and-journals/bioprobes-journal-of-cell-biology-applications/bioprobes-issues-2011/bioprobes-64-april-2011/cellevent-caspase-3-7-green-detection-reagent-april-2011.html]
- 29. Goat Anti-Mouse IgG2a Antibody (Alexa Fluor ® 488 ... [https://www.cellsignal.com/products/secondary-antibodies/goat-anti-mouse-igg2a-antibody-alexa-fluor-488-conjugate/94207?srsltid=AfmBOorkY0v8qfYyOQykzVSQYTQg4q71ncnKXRvvCVCjPVtSlg0VUDry]
- 30. Alexa Fluor conjugated secondary antibodies [https://www.abcam.com/en-us/technical-resources/product-overview/alexa-fluor-secondary-antibodies]
- 31. Spectral Panel Design [https://fluorofinder.com/spectral-panel-design-2/]
- 32. Principles of Advanced Flow Cytometry: A Practical Guide [https://pmc.ncbi.nlm.nih.gov/articles/PMC10802916/]
- 33. (IC) Intracellular Staining Flow Cytometry Protocol Using ... [https://www.rndsystems.com/resources/protocols/flow-cytometry-protocol-staining-intracellular-molecules-using-detergents]
- 34. Flow Cytometry Protocols for Surface and Intracellular Antigen ... [https://pmc.ncbi.nlm.nih.gov/articles/PMC4396953/]
- 35. Optimization of the Blocking and Signal Preservation ... [https://pmc.ncbi.nlm.nih.gov/articles/PMC12462741/]
- 36. Protocol Compatibility Table for Immune Signaling and ... [https://www.cellsignal.com/learn-and-support/reference-tables/flow-protocol-compatibility?srsltid=AfmBOoqtwNjrRXIz0vdlfM-w3H3WRy1lS-8_DCZx19XAPX_4W0vI9b6Q]
- 37. A Comprehensive Exploration of Caspase Detection Methods [https://www.mdpi.com/1422-0067/25/10/5460]
- 38. Flow Cytometry: A Comprehensive Guide to Staining Protocols [https://www.clyte.tech/post/how-to-do-flow-cytometry-a-comprehensive-guide-to-staining-protocols?srsltid=AfmBOooWXza9DMTgE59UAnB1P-332rXL_-FdtKerP1VI8cXQUl7a0nS6]
- 39. 7 Tips for Optimizing Your Flow Cytometry Experiments [https://www.bdbiosciences.com/en-us/learn/science-thought-leadership/blogs/optimizing-tips-flow-cytometry-experiments]
- 40. Protocol for FACS Staining and Considerations for Gating [https://www.stemcell.com/protocol-for-facs-staining.html]
- 41. What causes non-specific antibody binding and how can it ... [https://www.cytometry.org/web/q_view.php?id=153&filter=Analysis%20Techniques]
- 42. Artifacts and non-specific staining in flow cytometry, Part I [https://sanguinebio.com/pbmc-basics/artifacts-and-non-specific-staining-in-flow-cytometry-part-i/?srsltid=AfmBOorjjvG0zQBMTMMGgoIEgHzFCA-BOA-gMCE6zvyn-mu5mJofP55z]
- 43. Fc Blocking - McGovern Medical School - UTHealth Houston [https://med.uth.edu/imm/flow-cytometry-services/protocols-and-guidelines/fc-blocking/]
- 44. How to reduce non-specific reactions [https://www.mblbio.com/bio/g/support/method/nonspecific-reaction-reduction.html]
- 45. FACS Cell Surface staining Protocol - Flow Cytometry [https://wp.uthscsa.edu/flow-cytometry/resource/facs-cell-surface-staining-protocol/]
- 46. CellEvent™ Caspase-3/7 Green Flow Cytometry Assay Kit [https://www.thermofisher.com/order/catalog/product/C10427]
- 47. Cleaved Caspase-3 (Asp175) Antibody (Alexa Fluor ® 488 ... [https://www.cellsignal.com/products/antibody-conjugates/cleaved-caspase-3-asp175-antibody-alexa-fluor-488-conjugate/9669?srsltid=AfmBOopiCwztaTq7Td2_yOtTaLXFXaKsLIaTAWLH4kGeoeL0j-cyveOA]
- 48. Controls, Compensation and Calibration Information [https://www.thermofisher.com/st/en/home/life-science/cell-analysis/flow-cytometry/flow-cytometry-learning-center/controls-compensation-calibration-information.html]
- 49. Compensation in Flow Cytometry [https://fluorofinder.com/compensation-flow-cytometry/]
- 50. Recommended controls for flow cytometry [https://www.abcam.com/en-us/technical-resources/guides/flow-cytometry-guide/recommended-controls-for-flow-cytometry]
- 51. Flow Cytometry (FACS) Recommendations for Background ... [https://www.sinobiological.com/category/fcm-facs-background-control]
- 52. Optimization | Cytometry [https://cytometry.mlsascp.com/optimization.html]
- 53. Antibodies for Immunocytochemistry (ICC) [https://www.creative-diagnostics.com/antibodies-for-immunocytochemistry-icc.htm]
- 54. Non‐Specific Particle Formation During Extracellular Vesicle ... [https://pmc.ncbi.nlm.nih.gov/articles/PMC12087298/]
- 55. Optimisation of blocking during flow cytometry [https://www.listonlab.uk/blog/2025/9/25/optimisation-of-blocking-during-flow-cytometry.html]
- 56. The Power of Reagent Titration in Flow Cytometry [https://www.mdpi.com/2073-4409/13/20/1677]
- 57. Combinatorial Antibody Titrations - UChicago Voices [https://voices.uchicago.edu/ucflow/2024/02/27/combinatorial-antibody-titrations/]
- 58. Flow Cytometry Perm Fixation Method [https://www.bosterbio.com/protocol-and-troubleshooting/flow-cytometry-optimization/perm-fixation-method?srsltid=AfmBOopYH-7iVPl-pIU8Wi4ZUGYPsfHluxmBmAcRv_ZOCW3IN3UfAkzy]
- 59. Overcoming fixation and permeabilization challenges in ... [https://pmc.ncbi.nlm.nih.gov/articles/PMC11343140/]
- 60. Staining Intracellular Antigens for Flow Cytometry [https://www.thermofisher.com/us/en/home/references/protocols/cell-and-tissue-analysis/protocols/staining-intracellular-antigens-flow-cytometry.html]
- 61. Critical Analysis of Particle Detection Artifacts in Synaptosome Flow ... [https://www.eneuro.org/content/6/3/ENEURO.0009-19.2019]
- 62. Nonapoptotic caspase-3 guides C1q-dependent synaptic ... [https://pmc.ncbi.nlm.nih.gov/articles/PMC11754728/]
- 63. Staining Strategies for Intracellular Flow Cytometry [https://fluorofinder.com/staining-strategies-for-intracellular-flow-cytometry/]
- 64. Beyond the Limits: How Is Spectral Flow Cytometry ... [https://www.mdpi.com/2073-4409/14/13/997]
- 65. Flow Cytometry Support—Getting Started [https://www.thermofisher.com/us/en/home/technical-resources/technical-reference-library/cell-analysis-support-center/flow-cytometry-support/flow-cytometry-support-getting-started.html]
- 66. Flow Cytometry Troubleshooting Guide [https://www.cellsignal.com/learn-and-support/troubleshooting/flow-cytometry-troubleshooting-guide?srsltid=AfmBOoq8LCeMHJxepx40NTjUI1pdVFC3gzSXQmpEOrbnXdlFZYmQ95Lq]
- 67. Flow cytometry training Part 4: troubleshooting [https://go.myabcam.com/flow-cytometry-training-part-4?elqTrackId=f09542b33cab497596a3b1ced3116acf&elq=00000000000000000000000000000000&elqaid=2057&elqat=2&elqCampaignId=&elqak=8AF5587109FEACBC7CE2A4DC0121794B2BC979AED0F3B1C0DA87BA1BA3437B9834C7]
- 68. Guidelines for the Presentation of Flow Cytometric Data [https://www.sciencedirect.com/science/article/abs/pii/S0091679X04750104]
- 69. A sensitive flow cytometry-based cytotoxic T-lymphocyte ... [https://www.sciencedirect.com/science/article/abs/pii/S0022175905001754]
- 70. Flow cytometry detection of caspase 3 activation in ... [https://pubmed.ncbi.nlm.nih.gov/10805935/]
- 71. Optimized flow cytometric protocol for the detection of ... [https://www.sciencedirect.com/science/article/pii/S2215016120302259]
- 72. Programmed cell death detection methods - PubMed Central [https://pmc.ncbi.nlm.nih.gov/articles/PMC9308588/]
- 73. Apoptosis antibodies: Tools for cell death detection [https://www.abcam.com/en-us/knowledge-center/antibodies/apoptosis-antibodies]
- 74. LL-37-induced caspase-independent apoptosis is ... [https://www.sciencedirect.com/science/article/pii/S0196978120301819]
- 75. Cleavage of CAD by caspase-3 determines the cancer cell ... [https://www.nature.com/articles/s41467-025-60144-2]
- 76. Induction of apoptosis and autosis in cardiomyocytes by ... [https://www.nature.com/articles/s41420-022-00870-4]
- 77. Multiparametric Flow Cytometry for Determination of ... [https://pubmed.ncbi.nlm.nih.gov/37672491/]
- 78. Multidimensional data analysis algorithms facilitate and ... [https://www.sciencedirect.com/science/article/pii/S0093691X25001190]
- 79. | PPTX Flow cytometry [https://www.slideshare.net/slideshow/flow-cytometry-46618943/46618943]
- 80. Flow cytometric detection of activated caspase-3 - PubMed [https://pubmed.ncbi.nlm.nih.gov/18175811/]
- 81. Molecular Imaging of Apoptosis: The Case of Caspase-3 ... [https://pmc.ncbi.nlm.nih.gov/articles/PMC8069194/]
- 82. Designing an apoptosis reporter by mutagenesis-based ... [https://www.sciencedirect.com/science/article/pii/S2090123225004795]
- 83. Caspase-3/7 Activity Flow Cytometry Kit, Green| STEMCELL Technologies [https://www.stemcell.com/products/caspase-3-7-activity-flow-cytometry-kit-green.html]
- 84. Cleaved Caspase-3 (Asp175) Antibody (Alexa Fluor ® 488 ... [https://www.cellsignal.com/products/antibody-conjugates/cleaved-caspase-3-asp175-antibody-alexa-fluor-488-conjugate/9669?srsltid=AfmBOopa08r9eJ08oxddHLlBnvOzjAErPkrfFTOya1I4hbjCeyp_gZbh]
- 85. BD Horizon™ BV650 Rabbit Anti- Active Caspase-3 [https://www.bdbiosciences.com/en-us/products/reagents/flow-cytometry-reagents/research-reagents/single-color-antibodies-ruo/bv650-rabbit-anti-active-caspase-3.564096]
- 86. Considerations for Flow Cytometry Gating | FACS Analysis [https://www.stemcell.com/considerations-for-facs-gating.html]
- 87. Optimization of the Blocking and Signal Preservation ... [https://pubmed.ncbi.nlm.nih.gov/40996492/]
- 88. Measuring Caspase Activity Using a Fluorometric Assay or ... [https://www.jove.com/t/64745/measuring-caspase-activity-using-fluorometric-assay-or-flow]