Optimizing PARP-1 Western Blotting: A Complete Guide to Blocking Conditions for Reproducible Results
This article provides a comprehensive guide for researchers and drug development professionals on establishing optimal blocking conditions for PARP-1 western blotting.
Optimizing PARP-1 Western Blotting: A Complete Guide to Blocking Conditions for Reproducible Results
Abstract
This article provides a comprehensive guide for researchers and drug development professionals on establishing optimal blocking conditions for PARP-1 western blotting. It covers the foundational biology of PARP-1 and its post-translational modifications that influence antibody binding, detailed methodological protocols for blocking buffer selection and preparation, systematic troubleshooting for common issues like high background and weak signal, and rigorous validation strategies to ensure antibody specificity and data reproducibility. The content synthesizes current methodologies and validation standards to address the unique challenges in detecting PARP-1, a critical protein in DNA damage response and cancer biology.
Understanding PARP-1 Complexity: Molecular Biology and Epitope Challenges for Immunodetection
PARP-1 Structure, Function, and Relevance in Biomedical Research
Poly(ADP-ribose) polymerase-1 (PARP-1) is a highly evolutionary conserved nuclear enzyme that plays critical functions in numerous biological processes, most notably in the DNA damage response and repair. As the most abundant and well-characterized member of the PARP family, PARP-1 catalyzes the transfer of ADP-ribose units from nicotinamide adenine dinucleotide (NAD+) to a large array of acceptor proteins, including histones, transcription factors, and itself—a process known as poly(ADP-ribosyl)ation [1]. This post-translational modification serves as a crucial signaling mechanism that regulates DNA repair, maintains genomic integrity, and influences gene transcription. The pivotal role of PARP-1 in cellular homeostasis has made it a significant target for cancer therapeutics, particularly through PARP inhibitors that exploit synthetic lethality in homologous recombination-deficient tumors [2]. This technical resource centers on optimizing detection methodologies, with particular emphasis on western blot protocols within the broader context of PARP-1 research.
Core Knowledge: PARP-1 Fundamentals
Frequently Asked Questions
What is the primary function of PARP-1? PARP-1's primary function is as a DNA damage sensor and responder. Upon detecting DNA strand breaks, it catalyzes the addition of poly(ADP-ribose) chains (PAR) to itself and other nuclear proteins. This automodification facilitates DNA repair by recruiting additional repair factors to damage sites and modulating chromatin structure [1] [2].
What happens to PARP-1 during apoptosis? During apoptosis, PARP-1 is cleaved by caspases into two characteristic fragments: an 89-kDa C-terminal fragment that retains catalytic activity and a 24-kDa N-terminal DNA-binding fragment. This cleavage event is considered a hallmark of apoptosis and serves to preserve cellular energy by inactivating PARP-1's NAD+-consuming function [3] [4].
Why is PARP-1 important in cancer research? PARP-1 is crucial in cancer research because PARP inhibitors selectively kill tumor cells with defective homologous recombination repair (such as BRCA-mutated cancers) through synthetic lethality. These inhibitors not only block PARP-1's catalytic activity but also "trap" PARP-1 on chromatin, creating cytotoxic lesions that require homologous recombination for repair [2].
What are the key post-translational modifications of PARP-1? Beyond automodification, PARP-1 undergoes several regulatory post-translational modifications including SUMOylation by PIAS4, ubiquitylation by RNF4, and serine ADP-ribosylation. These modifications regulate PARP-1's removal from chromatin and its function in DNA repair [5] [2].
What is the molecular weight of PARP-1 and its cleavage products? Full-length PARP-1 has a theoretical molecular weight of approximately 113 kDa, though it typically runs at 113-116 kDa on SDS-PAGE due to post-translational modifications. The apoptotic cleavage fragment appears at approximately 89 kDa [6] [3] [4].
Troubleshooting PARP-1 Western Blots
Common Experimental Issues & Solutions
Issue 1: Weak or No Signal Detection
- Potential Causes: Insufficient protein loading, inefficient transfer, inappropriate antibody concentration, or excessive membrane blocking.
- Solutions: Load 20-50 µg of whole cell lysate per lane; verify transfer efficiency with Ponceau S staining; optimize antibody concentrations using suggested dilutions as starting points (typically 1:500-1:10,000 for primary antibodies); consider reducing blocking time or using alternative blocking agents [6] [7] [3].
Issue 2: Non-Specific Bands
- Potential Causes: Antibody cross-reactivity, incomplete blocking, or protein degradation.
- Solutions: Include PARP-1 knockout cell controls where possible; ensure fresh protease inhibitors are used in lysis buffer; optimize blocking conditions (5% non-fat milk in TBST for 1 hour at room temperature is standard); verify antibody specificity using recombinant PARP-1 if available [6] [3].
Issue 3: High Background
- Potential Causes: Excessive antibody concentration, insufficient washing, or non-optimal blocking.
- Solutions: Increase number and duration of washes (3×5 minutes with TBST minimum); titrate down antibody concentration; extend blocking time or try BSA-based blocking solutions; ensure appropriate secondary antibody specificity [7].
Issue 4: Unable to Detect Cleaved PARP-1 (89 kDa Fragment)
- Potential Causes: Insufficient apoptotic induction, cleavage fragment instability, or inappropriate gel percentage.
- Solutions: Include positive controls (e.g., cells treated with apoptosis inducers); use fresh samples and avoid repeated freeze-thaw cycles; employ 8-12% acrylamide gels for optimal resolution of 89 kDa fragment; ensure antibody recognizes C-terminal epitope (required for detecting 89 kDa fragment) [3] [4].
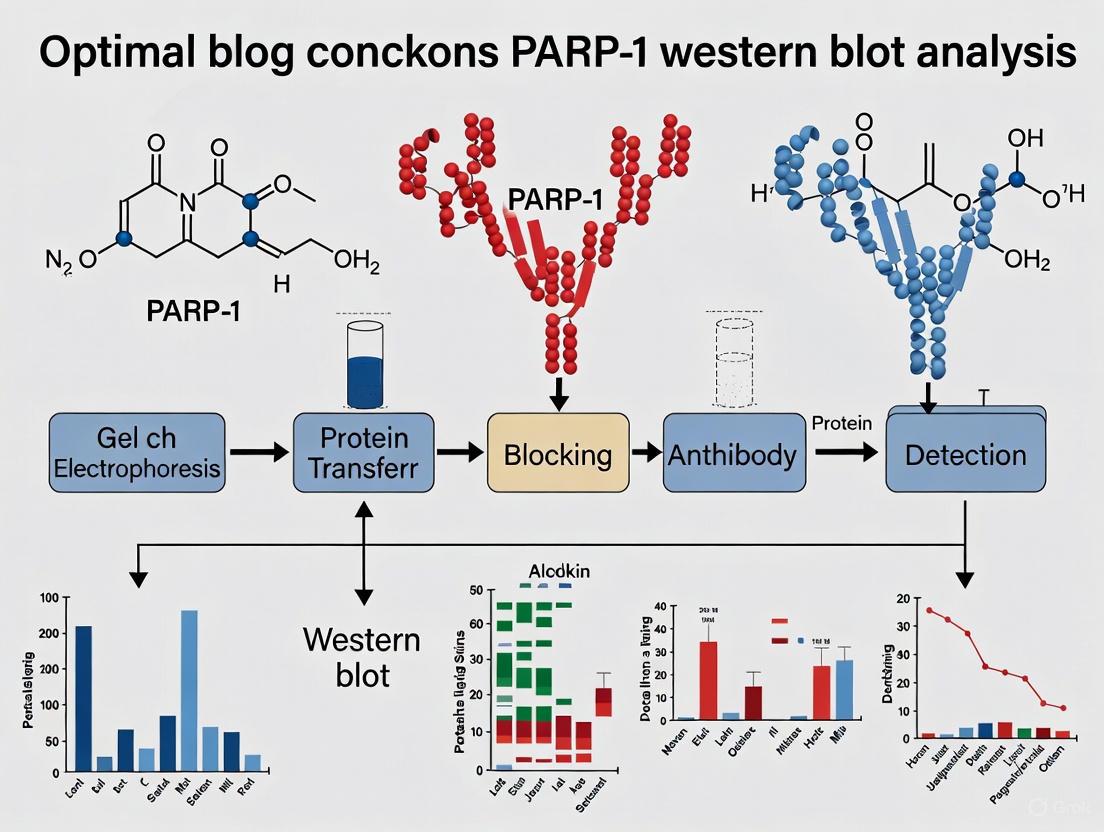
Optimizing Blocking Conditions for PARP-1 Western Blots
The blocking step is critical for reducing background and improving signal-to-noise ratio in PARP-1 detection. The table below summarizes evidence-based blocking conditions:
Table: Optimal Blocking Conditions for PARP-1 Western Blot
| Blocking Agent | Concentration | Incubation Conditions | Effective For | Key Considerations |
|---|---|---|---|---|
| Non-fat skim milk | 5% in TBST | 1 hour, room temperature with agitation | General PARP-1 detection | Cost-effective; may contain phosphatases that interfere with phospho-specific antibodies |
| BSA | 3-5% in TBST | 1 hour, room temperature with agitation | Phosphorylation studies | More consistent than milk; preferred for detecting post-translational modifications |
| Sheet Protector Method | 5% skim milk or BSA | 15 min - 2 hours, room temperature, no agitation needed | Antibody conservation | Uses minimal antibody volume (20-150 µL); enables rapid processing [7] |
Recent methodological advances demonstrate that effective blocking and antibody incubation can be achieved using the sheet protector strategy, which utilizes minimal antibody volumes (20-150 µL) while maintaining sensitivity and specificity comparable to conventional methods. This approach allows for room temperature incubation without agitation and can significantly reduce detection time to minutes rather than hours [7].
Research Reagent Solutions
Table: Essential Reagents for PARP-1 Research
| Reagent | Specific Example | Function/Application | Key Features |
|---|---|---|---|
| PARP-1 Antibodies | Anti-PARP1 (ab227244) [6] | Western blot, IP, IHC, IF, ChIP | Rabbit polyclonal; detects 113 kDa full-length and 89 kDa cleaved PARP-1 |
| PARP-1 Antibodies | PARP1 (13371-1-AP) [3] | WB, IHC, IF/ICC, IP, FC, ChIP | Rabbit polyclonal to C-terminal region; recognizes full-length and cleavage fragments |
| PARP-1 Antibodies | PARP-1 (ALX-210-302) [4] | WB, ICC, IHC, IP | Does not cross-react with PARP-2; detects 116 kDa and 85 kDa fragments |
| PARP Inhibitors | Talazoparib | PARP trapping studies | Strong PARP trapper; used to study trapped PARP1 complexes [2] |
| PARP Inhibitors | PJ34 | Catalytic inhibition | Used to study PARP-1 enzymatic function without strong trapping [1] |
| Positive Control for Apoptosis | Staurosporine [8] | Induces PARP-1 cleavage | Validated apoptosis inducer for cleaved PARP-1 detection |
| DNA Damage Inducers | Hydrogen Peroxide (H₂O₂) [1] [5] | PARP-1 activation studies | Induces oxidative stress and PARP-1 activation |
| Specialized Buffers | RIPA Buffer [7] [8] | Protein extraction | Effective for nuclear protein extraction including PARP-1 |
Experimental Protocols
Protocol 1: Western Blot Detection of PARP-1 Using Conventional Method
Sample Preparation
- Culture cells (HeLa, HEK-293, or other relevant cell lines) to 70-80% confluence.
- Harvest cells and lyse using RIPA buffer supplemented with protease inhibitors.
- Determine protein concentration using BCA assay.
- Prepare samples with 2× loading buffer (contain SDS and reducing agent) and denature at 95°C for 5 minutes [7] [8].
Gel Electrophoresis and Transfer
- Use 8-12% SDS-PAGE gels for optimal resolution of PARP-1 (113 kDa) and its 89 kDa cleavage fragment.
- Load 20-50 µg of total protein per lane alongside pre-stained protein markers.
- Perform electrophoresis at 80V through stacking gel, 120V through resolving gel.
- Transfer to nitrocellulose membrane (0.2 µm pore size) using semi-dry or wet transfer systems [7] [3].
Blocking and Antibody Incubation
- Block membrane with 5% non-fat milk in TBST for 1 hour at room temperature with gentle agitation.
- Incubate with primary antibody diluted in blocking buffer (1:500-1:5000 depending on antibody) overnight at 4°C with agitation [6] [3].
- Wash membrane 3×5 minutes with TBST.
- Incubate with HRP-conjugated secondary antibody (1:5000-1:10000) for 1 hour at room temperature.
- Wash 3×5 minutes with TBST before detection with chemiluminescent substrates [7].
Protocol 2: Sheet Protector Method for Antibody Conservation
Special Materials
- Sheet protector (standard office supply)
- Nitrocellulose membrane with transferred proteins
- Primary antibody at working concentration
Procedure
- After protein transfer and Ponceau S staining (optional), block membrane conventionally.
- Briefly rinse membrane in TBST and blot excess liquid with filter paper.
- Place membrane on a sheet protector leaflet.
- Apply minimal antibody solution (20-150 µL depending on membrane size) directly onto membrane.
- Carefully overlay with second sheet protector leaflet, allowing antibody to spread evenly as a thin layer.
- Incubate at room temperature for 15 minutes to 2 hours (no agitation needed).
- Proceed with washing and secondary antibody incubation as in conventional protocol [7].
PARP-1 Signaling Pathways
PARP-1 Activation and DNA Repair Pathway
PARP-1 Regulation of Transcription Factor Sp1
Advanced Research Applications
PARP-1 in DNA Replication and Okazaki Fragment Processing
Recent research has revealed that PARP-1 auto-modification plays a critical role in DNA replication beyond its canonical DNA repair function. PARP-1 automodification controls replication fork speed and ensures faithful Okazaki fragment maturation. Specifically, auto-modification deficient PARP1 mutants cause replication stress and synthetic lethality when combined with FEN1 inhibition, highlighting PARP-1's essential function in DNA replication [9].
PARP-1 as a Therapeutic Target
The development of PARP inhibitors represents a landmark achievement in targeted cancer therapy. These inhibitors work through dual mechanisms: catalytic inhibition preventing DNA repair, and PARP trapping that creates cytotoxic DNA-protein crosslinks. Recent advances include the development of brain-penetrant PARP inhibitors like AZD9574, with corresponding 18F-labeled PET ligands enabling in vivo visualization of PARP-1 distribution [10] [2]. Understanding the cellular processing of trapped PARP1—through sequential SUMOylation, ubiquitylation, and p97 ATPase-mediated removal—provides insights into both drug mechanisms and resistance development [2].
PARP-1 remains a multifaceted nuclear enzyme with fundamental roles in DNA damage response, transcription regulation, and cell death pathways. Successfully studying this dynamic protein requires careful methodological consideration, particularly in detection techniques like western blotting where optimization of blocking conditions, antibody selection, and sample preparation significantly impact experimental outcomes. The integration of traditional approaches with innovative methods like the sheet protector technique for antibody conservation provides researchers with robust tools to advance our understanding of PARP-1 biology and its therapeutic applications in human disease.
Within the context of optimizing blocking conditions for PARP-1 western blot research, understanding its post-translational modifications (PTMs) is paramount. PARP-1 is a nuclear enzyme that catalyzes the addition of ADP-ribose units from NAD+ onto target proteins, including itself, a process known as poly(ADP-ribosyl)ation (PARylation) [1]. This extensive, negatively charged polymer can dramatically alter the structure and function of PARP-1. For researchers detecting PARP-1 via immunoassays, this auto-modification presents a significant challenge: the bulky PAR chains can sterically hinder antibody access to their target epitopes, leading to reduced signal intensity or false-negative results [1] [11]. This guide provides troubleshooting advice and FAQs to help you navigate these specific issues, ensuring reliable detection of both modified and unmodified PARP-1 forms.
Troubleshooting Guides
Problem: Loss of PARP-1 Signal in Western Blot After DNA Damage
Question: Why does my PARP-1 western blot signal decrease or disappear in samples treated with DNA-damaging agents like hydrogen peroxide (H₂O₂)?
Answer: The signal loss is likely due to extensive PARP-1 auto-ADP-ribosylation. Upon DNA damage, PARP-1 is activated and adds large, branched chains of poly(ADP-ribose) (PAR) onto itself. This massive, negatively charged polymer can:
- Sterically block the antibody's access to its binding epitope on PARP-1 [1] [11].
- * Alter the protein's electrophoretic mobility*, causing it to smear or shift to a higher apparent molecular weight, which may move it out of the expected detection range.
Solution:
- Enzymatic Removal of PAR: Treat your cell lysates with Poly(ADP-ribose) glycohydrolase (PARG). PARG cleaves the PAR chains from proteins, restoring the antibody's ability to bind to its epitope [11].
- Inhibit PARP Activity: Pre-treat cells with a PARP catalytic inhibitor (e.g., Talazoparib, PJ34) before applying the DNA-damaging agent. This prevents the initial auto-ADP-ribosylation, preserving the native state of PARP-1 for antibody binding [1] [11].
Table 1: Troubleshooting PARP-1 Signal Loss After DNA Damage
| Observation | Primary Cause | Solution 1 | Solution 2 |
|---|---|---|---|
| Weak or absent PARP-1 signal at expected size after H₂O₂ treatment | Auto-ADP-ribosylation sterically hinders antibody binding [1] [11] | Treat lysate with PARG enzyme to remove PAR chains [11] | Pre-treat cells with a PARP inhibitor (e.g., Talazoparib) to block PARylation [1] [11] |
| PARP-1 signal appears as a high molecular weight smear | Extensive PARylation alters electrophoretic mobility | Treat lysate with PARG enzyme to collapse the smear to a discrete band [11] | Use an antibody specifically validated for detecting PARylated proteins [11] |
Problem: Different PARP-1 Antibodies Show Variable Results
Question: Why do I get different results when using different PARP-1 antibodies on the same sample?
Answer: The variability stems from the distinct epitopes that antibodies recognize and the impact of PTMs on those specific regions.
- Epitope Location: An antibody targeting the N-terminal DNA-binding domain may be unaffected by C-terminal automodification, whereas an antibody against the C-terminal catalytic domain might be directly blocked [1] [12].
- PTM Interference: As described above, auto-ADP-ribosylation is a major confounder. Furthermore, cleaved PARP-1 is a hallmark of apoptosis. Many commercial antibodies are specific to the cleaved form (e.g., detecting a ~25 kDa fragment) and will not bind to full-length PARP-1 [13].
Solution:
- Consult Antibody Datasheets: Carefully review the immunogen sequence and any validation data in knockout cell lines to understand what specific form of PARP-1 (full-length, cleaved, a particular domain) the antibody detects [13] [12].
- Use a Binary Validation Model: Validate your antibody's performance in a controlled system. Compare samples with induced PARylation (H₂O₂ treatment) and inhibited PARylation (PARP inhibitor). A specific antibody should show a dynamic change in signal under these conditions, which can be rescued by PARG treatment [11].
Table 2: Guide to PARP-1 Antibody Specificity
| Antibody Target | Impact of Auto-ADP-ribosylation | Key Consideration | Suggested Validation Method |
|---|---|---|---|
| C-terminal Domain | High - likely to cause steric hindrance [1] | Best for detecting inactive or basal PARP1 | Confirm loss of signal after H₂O₂ treatment and recovery with PARG [11] |
| N-terminal Domain | Lower - further from automodification site | May detect PARP1 even when heavily PARylated | Check if signal is retained after DNA damage |
| Cleavage Site (e.g., D214/215) | Minimal | Specific for apoptotic cells; does not recognize full-length PARP1 [13] | Validate with apoptosis-inducing agents (e.g., Staurosporine); confirm ~25 kDa band [13] |
Frequently Asked Questions (FAQs)
FAQ 1: How can I specifically detect only the ADP-ribosylated form of PARP-1?
Answer: To specifically detect the PAR modification itself, use a well-validated antibody that recognizes the ADP-ribose polymer (PAR). These antibodies are "modification-specific" and do not bind to the unmodified PARP-1 protein. Their specificity should be confirmed by demonstrating that the signal is induced by DNA damage (e.g., H₂O₂) and abolished by co-treatment with a PARP inhibitor or PARG enzyme [11].
FAQ 2: My experimental treatment is known to induce PARP-1 cleavage. How can I optimize my western blot to detect both full-length and cleaved PARP-1?
Answer:
- Antibody Selection: Use an antibody that binds to an epitope located in the N-terminal ~24 kDa fragment of PARP-1. This allows a single antibody to detect both the full-length protein (~116 kDa) and the large cleavage fragment (~89 kDa) [12].
- Gel Conditions: Ensure you use a high-quality SDS-PAGE gel with appropriate separation in the range of 25 kDa to 130 kDa. Run your samples alongside a pre-stained protein ladder to accurately identify the bands corresponding to full-length and cleaved PARP-1.
- Experimental Controls: Always include a positive control for apoptosis, such as cells treated with Staurosporine, to confirm the appearance of the cleaved fragment [13].
FAQ 3: Are there any special considerations for blocking buffers when working with PARP-1 antibodies?
Answer: While standard blocking buffers (e.g., 5% BSA or non-fat dry milk) are often sufficient, the high negative charge of the PAR polymer can cause non-specific interactions. If you encounter high background when trying to detect PARylated proteins, consider:
- Increasing the stringency of your wash buffers.
- Testing different blocking agents (e.g., BSA may be preferable over milk in some cases).
- Including Tween-20 in your blocking and wash buffers to reduce non-specific binding.
Experimental Protocols
Protocol 1: Inducing and Inhibiting PARylation for Antibody Validation
This protocol is essential for validating antibody performance in the context of PARP-1 auto-modification [11].
- Cell Culture: Seed HeLa or other relevant cells in 6-well plates.
- Treatment:
- Group 1 (Untreated Control): Culture with standard medium.
- Group 2 (PARylation Induced): Treat with 500 µM H₂O₂ in medium for 10-15 minutes.
- Group 3 (PARylation Inhibited): Pre-treat with 1 µM Talazoparib for 1 hour, then co-treat with 500 µM H₂O₂ for 10-15 minutes.
- Lysate Preparation: Aspirate medium, wash cells with cold PBS, and lyse directly in 2X Laemmli SDS-PAGE sample buffer.
- PARG Treatment (Optional): For a subset of Group 2 lysates, incubate with recombinant PARG enzyme (following manufacturer's instructions) prior to loading the gel to confirm specificity.
- Western Blotting: Perform standard SDS-PAGE and western blotting using your anti-PARP-1 antibody.
Interpretation: A specific antibody will show a altered signal (loss, smearing, or shift) in Group 2, which is prevented in Group 3 and can be rescued by PARG treatment.
Protocol 2: Flow Cytometric Assessment of Cellular PARylation Capacity
This protocol allows for quantification of PAR formation in individual cells, providing an orthogonal method to western blotting [14].
- Cell Preparation: Isolate PBMCs or harvest Jurkat T-cells.
- Fixation/Permeabilization: Fix cells with 100% ethanol for 10 min on ice to stabilize them.
- PARP Reaction: Resuspend cells in a reaction buffer containing:
- Activation Buffer: with activator DNA oligonucleotide (to maximally stimulate PARP-1) and NAD+ (substrate).
- Inhibitor Control: Include a sample with a PARP inhibitor (e.g., 3-aminobenzamide, IC50 ~40 µM).
- Second Fixation: Fix cells with formaldehyde to prevent loss of automodified PARP-1 from chromatin.
- Immunostaining: Stain cells with a primary anti-PAR antibody, followed by a fluorescently labeled secondary antibody.
- Flow Cytometry: Analyze cells using a flow cytometer. Gate on the mononuclear cell population and measure the Mean Fluorescence Intensity (MFI), which corresponds to the cellular PARylation capacity.
The Scientist's Toolkit: Research Reagent Solutions
Table 3: Essential Reagents for Studying PARP-1 PTMs
| Reagent / Tool | Function / Role | Example & Key Feature |
|---|---|---|
| PARP Catalytic Inhibitors | Blocks PARP enzyme activity, preventing auto-ADP-ribosylation; used as a critical control [1] [11]. | Talazoparib: FDA-approved, also acts as a PARP "trapper" [11]. PJ34: A well-known research-grade inhibitor used to demonstrate Sp1 binding improvement [1]. |
| PAR Degrading Enzyme | Removes PAR chains from proteins; confirms antibody specificity and rescues epitope access [11]. | PARG (Poly(ADP-ribose) Glycohydrolase): Cleaves PAR chains down to ADP-ribose monomers [11]. |
| Anti-PAR Antibody | Directly detects the poly(ADP-ribose) polymer itself, independent of the protein carrier [11]. | Mono/Poly ADP-Ribose (D9P7Z) Rabbit mAb #89190: Validated to detect both MAR and PAR, species-agnostic [11]. |
| Anti-Cleaved PARP1 Antibody | Specifically detects the apoptotic fragment of PARP-1, not the full-length protein [13]. | Anti-Cleaved PARP1 [E51] (ab32064): Rabbit monoclonal antibody detecting the ~25 kDa fragment; knockout-validated [13]. |
| PARP1 Fluorescent Inhibitor | Used as an imaging agent to detect PARP1 expression levels in cells and tissues based on target binding [15]. | PARPi-FL: A fluorescent olaparib analogue for quantitative PARP1 detection in diagnostic and research applications [15]. |
| DNA Damaging Agent | Induces DNA strand breaks, leading to PARP-1 activation and auto-ADP-ribosylation [1] [11]. | Hydrogen Peroxide (H₂O₂): Induces oxidative DNA damage and PARP-1 activation via JNK1 translocation [11]. Staurosporine: Induces apoptosis and PARP-1 cleavage; used as a positive control for cleaved PARP-1 antibodies [13]. |
Core Principles of Blocking
What is the primary function of a blocking step in immunoassays?
The blocking step is critical for preventing nonspecific antibody binding by occupying all potential reactive sites on the tissue sample or membrane before antibody incubation. If blocking is omitted or inadequate, antibodies and other detection reagents may bind to sites not related to specific antibody-antigen reactivity through simple adsorption, charge-based interactions, hydrophobic interactions, and other non-specific mechanisms [16].
What are the key mechanisms of non-specific binding that blocking addresses?
Non-specific binding occurs through several mechanisms [16] [17]:
- Fc Receptor Binding: Fc regions of antibodies can bind to Fc receptors on immune cells (neutrophils, monocytes, macrophages, B-cells, NK cells, and some T-cell subsets)
- Charge Interactions: Antibodies can bind to surfaces and proteins through electrostatic interactions
- Hydrophobic Binding: Non-polar interactions can cause antibodies to stick nonspecifically
- Dead Cell Binding: Non-viable cells become "sticky" due to exposed DNA from damaged membranes
- Protein Adsorption: Simple adsorption to any protein-reactive surfaces
Troubleshooting Guide: Blocking-Related Issues
Why am I experiencing high background staining in my Western blots?
High background frequently results from suboptimal blocking conditions. The table below outlines common causes and solutions:
| Problem | Possible Causes | Recommended Solutions |
|---|---|---|
| High Background | Antibody concentration too high | Decrease concentration of primary and/or secondary antibody [18] |
| Incompatible blocking buffer | Avoid milk with avidin-biotin systems (milk contains biotin); for phosphoproteins, avoid phosphate-based buffers like PBS and phosphoprotein-containing blockers like milk; use BSA in TBS instead [18] | |
| Insufficient blocking | Increase blocking protein concentration; optimize blocking time (≥1 hour RT or overnight at 4°C); add 0.05% Tween 20 to blocking buffer [18] | |
| Insufficient washing | Increase wash number/volume; add 0.05% Tween 20 to wash buffer [18] | |
| Weak or No Signal | Antigen masked by blocking buffer | Decrease protein concentration in blocking buffer; try different blocking buffers [18] |
| Buffer contains sodium azide | Do not use sodium azide with HRP-conjugated antibodies (inhibits HRP) [18] |
How can I prevent non-specific antibody binding in flow cytometry?
For flow cytometry applications, consider these specific issues [17]:
- Fc Receptor Interference: Use Fc blocking reagents containing recombinant protein derived from immunoglobulin
- Dead Cells: Include viability dyes (7-AAD, propidium iodide) to exclude non-viable cells
- Protein-Deficient Solutions: Ensure washing and staining solutions contain protein (BSA or FBS)
- Artifactual Antibody Interactions: Avoid mouse IgG2 antibodies or remove plasma prior to antibody addition
Blocking Buffer Selection Guide
What are the different types of blocking buffers and their optimal applications?
The table below compares common blocking agents and their performance characteristics:
| Blocking Agent | Concentration | Ideal Applications | Limitations |
|---|---|---|---|
| Normal Serum | 1-5% (w/v) | General IHC; when matched to secondary antibody species [16] | Not recommended for phosphoprotein detection [18] |
| Bovine Serum Albumin (BSA) | 1-5% (w/v) | Phosphoprotein detection; general purpose [18] | May not be stringent enough for some antibodies [19] |
| Non-Fat Dry Milk | 1-5% (w/v) | General Western blotting; minimizes non-specific background [18] [19] | Contains biotin (unsuitable for avidin-biotin systems); contains phosphoproteins (unsuitable for phospho-detection) [18] |
| Commercial Protein-Free Blockers | Manufacturer's recommendation | Sensitive applications; standardized conditions [16] | Cost; may require protocol optimization |
What is the recommended blocking protocol for PARP-1 Western blotting?
For PARP-1 research, follow these specific guidelines [19] [4]:
- Blocking Buffer: Use 5% non-fat dry milk in TBST (Tris-Buffered Saline with 0.1% Tween-20) for general detection
- Blocking Time: 1 hour at room temperature or overnight at 4°C
- Antibody Dilution: Prepare antibodies in the same blocking buffer used for blocking
- Special Considerations: For phosphorylated PARP-1 forms, test both BSA and milk-based blockers as performance may vary
Experimental Protocol: Optimized Blocking for PARP-1 Western Blotting
Materials Needed
- Blocking Buffer: 5% non-fat dry milk in TBST (20 mM Tris-HCl, pH 7.6, 137 mM NaCl, 0.1% Tween-20)
- Transfer Membrane: Nitrocellulose or PVDF
- Primary Antibody: PARP-1 specific antibody (e.g., Enzo ALX-210-302) [4]
- Secondary Antibody: HRP-conjugated antibody specific to host species of primary antibody
- Wash Buffer: TBST
Step-by-Step Procedure
- Post-Transfer Processing: Following protein transfer, briefly rinse membrane in TBST
- Blocking Incubation: Incubate membrane in 5% non-fat dry milk/TBST with gentle agitation for 1 hour at room temperature
- Primary Antibody: Dilute PARP-1 antibody in fresh blocking buffer (recommended: 1:4,000 for Enzo ALX-210-302) [4]
- Membrane Incubation: Incubate membrane with primary antibody solution with gentle agitation for 1-3 hours at room temperature or overnight at 4°C
- Washing: Wash membrane 3× for 5 minutes each with TBST
- Secondary Antibody: Dilute HRP-conjugated secondary antibody in blocking buffer (typically 1:2,000-1:10,000)
- Incubation: Incubate membrane with secondary antibody for 1 hour at room temperature with gentle agitation
- Final Washes: Wash membrane 3× for 5 minutes each with TBST
- Detection: Proceed with appropriate detection method
Expected Results
Proper blocking should yield clean detection of PARP-1 at ~116 kDa and its apoptosis-induced cleavage fragment at ~85 kDa with minimal background staining [4].
Visualization of Blocking Mechanisms
Blocking Mechanism Overview - This diagram illustrates how blocking proteins occupy non-specific binding sites, preventing false signals and ensuring specific antibody-antigen detection.
The Scientist's Toolkit: Essential Research Reagents
| Reagent | Function | Application Notes |
|---|---|---|
| PARP-1 Specific Antibody [4] | Detects PARP-1 protein and cleavage fragments | Use at 1:4,000 dilution for WB; detects ~116 kDa full length and ~85 kDa cleavage fragment |
| Non-Fat Dry Milk [18] [19] | Blocking agent for general Western blotting | 5% in TBST; avoid for avidin-biotin systems and phosphoprotein detection |
| Bovine Serum Albumin (BSA) [18] [17] | High-purity blocking protein | Ideal for phosphoprotein detection; use in TBS instead of PBS for alkaline phosphatase conjugates |
| Normal Serum [16] | Species-specific blocking | Use serum from secondary antibody species; 1-5% concentration |
| Tween-20 Detergent [18] | Reduces background interference | Use at 0.05% in blocking and wash buffers; higher concentrations may interfere with binding |
| Fc Blocking Reagent [17] [20] | Prevents Fc-mediated binding | Essential for flow cytometry with immune cells; contains recombinant immunoglobulin fragments |
| Protease Inhibitor Cocktail [19] | Prevents protein degradation | Essential for maintaining PARP-1 integrity during sample preparation |
Advanced Blocking Strategies
How can I address persistent non-specific binding?
For challenging applications, consider these advanced strategies:
Fc Region Removal [20]:
- Pepsin Digestion: Creates F(ab')₂ fragments for SH group labeling
- Papain Digestion: Produces Fab fragments for NH₂ group labeling
- Benefits: Eliminates Fc receptor binding; reduces false positives from rheumatoid factors
Heterophilic Antibody Blockers [20]:
- HAMA Blockers: Contain antibodies against human anti-mouse antibodies
- Application: Pre-mix sample with IgG from the secondary antibody species
- Benefit: Reduces false positives in clinical samples
Dual Blocking Strategies:
- Combine protein blockers with detergent additives (0.05% Tween-20)
- Use sequential blocking with different mechanisms (e.g., serum followed by BSA)
- Include specific inhibitors for problematic interactions (e.g., Fc blockers)
What are the critical validation steps for blocking optimization?
Always validate your blocking protocol by [16] [19]:
- Testing multiple blocking buffers with your specific antibody-antigen pair
- Including both positive and negative controls
- Monitoring signal-to-noise ratio rather than absolute signal strength
- Testing for cross-reactivity in blocking buffer by incubating antibodies with clean membrane
- Using the same blocking buffer for both blocking and antibody dilution when possible
Poly(ADP-ribose) polymerase-1 (PARP-1) is a 113-kDa nuclear enzyme that plays critical functions in numerous biological processes, including DNA repair, maintenance of genomic integrity, and regulation of gene transcription [1] [21]. Its primary function is to catalyze the transfer of ADP-ribose units from nicotinamide adenine dinucleotide (NAD+) to a large array of acceptor proteins, including histones, transcription factors, and PARP-1 itself (a process known as auto-poly(ADP-ribosyl)ation) [1]. The PARP-1 protein possesses a modular domain structure that dictates its function, with each domain serving specific roles in DNA binding, protein-protein interactions, and catalytic activity [22]. Understanding this domain architecture is fundamental for selecting antibodies that target specific regions or modifications of PARP-1 for various research applications.
PARP-1 Domain Organization and Key Functional Regions
PARP-1 contains several functionally distinct domains that can be targeted for immunological detection:
- DNA-Binding Domain (DBD): Contains three zinc finger domains that recognize DNA structure rather than specific sequences, particularly single-strand breaks (SSBs) or double-strand breaks (DSBs) [22].
- Automodification Domain (AMD): Contains lysine residues that act as poly(ADP-ribose) (PAR) acceptors for auto-ADP-ribosylation [22].
- BRCT Domain: A protein interaction domain of unknown specific function, though it has been shown to be required for immunoglobulin gene conversion [22].
- WGR/Catalytic Domain (WGR/Cat): Catalyzes PAR formation when the DBD is bound to DNA [22].
A key feature of PARP-1 is its cleavage during apoptosis at the conserved caspase cleavage site (DEVD214) located within the DBD, which separates the N-terminal DNA-binding domain (24 kDa) from the C-terminal catalytic domain (89 kDa) [23] [24]. This cleavage event serves as an important marker of programmed cell death.
Research Reagent Solutions: Essential Tools for PARP-1 Research
Table 1: Key Research Reagents for PARP-1 Epitope Characterization
| Reagent Type | Specific Example/Clone | Target Epitope/Application | Research Purpose |
|---|---|---|---|
| PARP-1 Monoclonal Antibody | Clone 123 [12] | C-terminal region of human PARP | General PARP-1 detection in WB, IHC, IP |
| PARP-1 Polyclonal Antibody | #9542 [23] | Caspase cleavage site | Detection of full-length (116 kDa) and cleaved (89 kDa) PARP-1 |
| Cleaved PARP-1 Monoclonal Antibody | SP276 [25] | Cleaved PARP-1 fragments (27/125 kDa) | Specific apoptosis detection |
| PARP-1 Colorimetric Assay Kit | BPS Bioscience #80580 [26] | PARP-1 enzymatic activity | Functional PARP-1 activity measurement and inhibitor screening |
| PARP-1 siRNA | sc-29437 [21] | PARP-1 mRNA knockdown | Gene silencing studies |
| Mouse anti-PARP-1 (IHC) | sc-8007 [21] | Nuclear PARP-1 | Immunohistochemical applications |
Antibody Selection Guide: Targeting Specific PARP-1 Domains and Modifications
Domain-Specific Antibody Applications
When selecting antibodies for PARP-1 research, consider these critical parameters based on your experimental goals:
Full-length PARP-1 Detection: Antibodies such as PARP Antibody #9542 that target the caspase cleavage site are ideal for detecting both full-length PARP-1 (116 kDa) and the large fragment (89 kDa) resulting from caspase cleavage [23]. These antibodies are particularly useful for monitoring PARP-1 integrity during cell death studies.
Apoptosis-Specific Detection: For specific detection of apoptosis, Anti-Cleaved PARP1 antibody [SP276] recognizes the cleaved PARP-1 fragments (27 kDa and 125 kDa) that appear during programmed cell death [25]. This antibody is knockout-validated, ensuring specificity.
Functional Domain Studies: Antibodies targeting specific domains like the C-terminal region (Clone 123) are valuable for studying PARP-1's catalytic function and interactions [12]. The BRCT domain-specific antibodies are useful for investigating PARP-1's role in immunoglobulin gene conversion [22].
Enzymatic Activity Assessment: For functional studies beyond simple detection, the PARP1 Colorimetric Assay Kit enables direct measurement of PARP-1 enzymatic activity, which is crucial for inhibitor screening and kinetic studies [26].
PARP-1 Cleavage Products and Their Detection
Table 2: PARP-1 Cleavage Products and Their Biological Significance
| PARP-1 Form | Molecular Weight | Detection Method | Biological Significance | Recommended Antibody |
|---|---|---|---|---|
| Full-length PARP-1 | 116 kDa [23] | Western Blot, ICC/IF | DNA repair, transcription regulation | #9542 [23] |
| Caspase-cleaved Fragment (Large) | 89 kDa [23] | Western Blot, IHC | Apoptosis marker | #9542 [23] |
| Caspase-cleaved Fragment (Small) | 24 kDa [24] | Western Blot (specialized) | Apoptosis marker | SP276 [25] |
| Caspase-cleaved Fragments (Alternative) | 27/125 kDa [25] | Western Blot, IHC-P | Apoptosis marker | SP276 [25] |
| Uncleavable PARP-1 Mutant | 116 kDa [24] | Western Blot | Research on cleavage-independent functions | Custom antibodies |
Experimental Protocols for PARP-1 Epitope Characterization
Western Blot Analysis for PARP-1 Detection and Cleavage
Protocol Objective: To detect full-length and cleaved PARP-1 in cell lysates under normal and apoptotic conditions.
Materials and Reagents:
- PARP Antibody #9542 (Cell Signaling Technology) [23]
- Anti-Cleaved PARP1 antibody [SP276] (Abcam) [25]
- Cell lysis buffer (RIPA buffer recommended)
- Protease inhibitor cocktail
- SDS-PAGE gel (8-12% gradient recommended)
- PVDF or nitrocellulose membrane
- ECL or similar detection reagent
Methodology:
- Cell Lysate Preparation: Harvest cells and lyse in RIPA buffer supplemented with protease inhibitors. For apoptosis induction, treat cells with 3 μM staurosporine for 24 hours [25].
- Protein Quantification: Determine protein concentration using BCA or similar assay.
- SDS-PAGE: Load 20-50 μg of protein per lane and separate using appropriate percentage gel [25].
- Membrane Transfer: Transfer proteins to membrane using standard wet or semi-dry transfer methods.
- Blocking: Block membrane with 5% BSA or non-fat milk in TBST for 1 hour at room temperature.
- Primary Antibody Incubation:
- Secondary Antibody Incubation: Incubate with appropriate HRP-conjugated secondary antibody for 1 hour at room temperature.
- Detection: Develop using ECL reagent and visualize with chemiluminescence imaging system.
Troubleshooting Notes:
- For cleaved PARP-1 detection, include positive controls (apoptotic cells) to verify antibody performance [25].
- Optimal results for SP276 antibody require primary incubation for 1 hour at room temperature rather than overnight at 4°C [25].
- For full-length PARP-1 detection, avoid overexposure to detect the 89 kDa fragment when present.
Immunohistochemical Detection of PARP-1 in FFPE Tissues
Protocol Objective: To detect PARP-1 expression in formalin-fixed, paraffin-embedded (FFPE) tissue sections.
Materials and Reagents:
- Mouse anti-PARP1 antibody (sc-8007, Santa Cruz Biotechnology) [21]
- VECTASTAIN Elite ABC kit (Vector Laboratories) [21]
- 3,3'-diaminobenzidine tetrahydrochloride (DAB) substrate
- Mayer's hematoxylin counterstain
Methodology:
- Tissue Section Preparation: Cut 4-μm-thick sections from FFPE tissue blocks.
- Deparaffinization and Rehydration: Deparaffinize in xylene and dehydrate through graded ethanol series.
- Antigen Retrieval: Heat sections in 10 mM citrate buffer (pH 6.0) for 40 minutes at 95°C using an autoclave or pressure cooker [21].
- Endogenous Peroxidase Blocking: Incubate with 0.3% H₂O₂ in methanol for 30 minutes.
- Non-specific Binding Blocking: Block with horse serum for 20 minutes using the VECTASTAIN Elite ABC kit.
- Primary Antibody Incubation: Incubate with mouse anti-PARP1 antibody (1:50 dilution) overnight at 4°C in a moist chamber [21].
- Detection: Process with VECTASTAIN Elite ABC kit according to manufacturer's instructions.
- Visualization: Develop with DAB plus H₂O₂ for 2.5 minutes [21].
- Counterstaining: Counterstain with Mayer's hematoxylin, dehydrate, and mount.
Scoring and Interpretation:
- Evaluate PARP-1 expression by intensity of nuclear staining in cancer cells
- Scoring scale: 0 (none), 1 (weak), 2 (moderate), 3 (strong) [21]
- Consider expression high when scores are 2 or 3, low when 0 or 1 [21]
Frequently Asked Questions (FAQs) and Troubleshooting Guides
Antibody Selection and Specificity Issues
Q: How do I select the appropriate antibody for detecting PARP-1 cleavage during apoptosis?
A: For apoptosis detection, we recommend antibodies that specifically recognize the cleaved fragments of PARP-1. Anti-Cleaved PARP1 antibody [SP276] is ideal as it detects the 27 kDa and 125 kDa fragments that appear during caspase-mediated cleavage [25]. For general PARP-1 detection that includes both full-length and cleaved forms, PARP Antibody #9542 recognizes both the 116 kDa full-length and 89 kDa cleaved fragment [23]. Always include appropriate controls: untreated cells for baseline PARP-1 and cells treated with apoptosis inducers (e.g., staurosporine) as positive controls for cleavage.
Q: What could cause non-specific bands in my PARP-1 western blots?
A: Non-specific bands can result from several factors:
- Antibody Concentration: High antibody concentration may cause non-specific binding. Titrate your antibody to find the optimal dilution [23] [25].
- Incomplete Blocking: Ensure sufficient blocking time (at least 1 hour) with 5% BSA or non-fat milk.
- Protein Overloading: Reduce protein load to 20-50 μg per lane [25].
- Cross-reactivity: Verify species reactivity of your antibody. Many PARP-1 antibodies cross-react with human, mouse, and rat samples [12] [23].
- Validation: Use PARP-1 knockout cell lines as negative controls when possible to confirm antibody specificity [25].
Experimental Optimization and Technical Challenges
Q: Why is my PARP-1 immunohistochemical staining weak or inconsistent?
A: Weak IHC staining can be improved by:
- Antigen Retrieval Optimization: Extend heating time in citrate buffer (up to 40 minutes at 95°C) [21].
- Antibody Incubation Conditions: For IHC, primary antibody incubation overnight at 4°C often yields better results than shorter room temperature incubations [21].
- Antibody Dilution: For mouse anti-PARP1 (sc-8007), use 1:50 dilution in IHC applications [21].
- Positive Controls: Include known PARP-1 positive tissues (e.g., tonsil tissue) to verify protocol performance [21].
Q: How can I measure PARP-1 enzymatic activity rather than just protein levels?
A: To assess PARP-1 function directly, use the PARP1 Colorimetric Assay Kit [26]. This kit measures PARP-1 activity by coating histone proteins on a 96-well plate, then incubating with biotinylated NAD+ mix, PARP-1 enzyme, and activated DNA template. The signal generated is proportional to PARP-1 activity and is detected colorimetrically. This method is particularly useful for screening PARP-1 inhibitors and studying enzyme kinetics [26].
Data Interpretation and Biological Significance
Q: What is the biological significance of different PARP-1 cleavage fragments?
A: PARP-1 cleavage fragments have distinct biological functions:
- The 24 kDa fragment (PARP-124) and uncleavable PARP-1 (PARP-1UNCL) confer protection from ischemic damage in neuronal models [24].
- The 89 kDa fragment (PARP-189) is cytotoxic and induces higher NF-κB activity [24].
- Cleavage between Asp214 and Gly215 separates the DNA-binding domain (24 kDa) from the catalytic domain (89 kDa), inhibiting PARP-1's DNA repair function while promoting apoptosis [23] [24].
- The appearance of the 89 kDa and 24 kDa fragments is widely accepted as a hallmark of apoptosis [24].
Q: How does PARP-1 influence transcription factor activity, and how can I study these interactions?
A: PARP-1 regulates transcription through multiple mechanisms:
- Direct PARylation: PARP-1 catalyzes addition of PAR to transcription factors like Sp1, reducing its DNA binding capacity [1].
- Physical Interaction: PARP-1 physically associates with Sp1 in a DNA-independent manner, as shown by co-immunoprecipitation assays [1].
- Chromatin Remodeling: PARP-1 influences chromatin structure through PARylation of histones [1] [27]. To study these interactions, use co-immunoprecipitation with antibodies targeting specific PARP-1 domains (e.g., Clone 123 for C-terminal interactions) [12], and functional assays to measure transcription factor binding and promoter activity.
Proven Protocols: Step-by-Step Guide to Blocking Buffer Selection and Application for PARP-1
For researchers investigating DNA damage response proteins like PARP-1, western blotting represents an indispensable technique for detecting protein expression, post-translational modifications, and subcellular localization. The specificity of this detection hinges critically on the effective reduction of non-specific antibody binding through an optimal blocking step. Choosing an inappropriate blocking agent can lead to excessive background noise, masked target signals, or false-positive results, ultimately compromising data reliability in critical drug development research. This technical guide provides a comparative analysis of bovine serum albumin (BSA), non-fat dry milk (NFDM), and specialty blocking agents, with a specific focus on their application in PARP-1 research. We present troubleshooting advice and detailed protocols to help scientists navigate the complexities of blocking buffer selection and optimization, ensuring the highest quality data in their experimental outcomes.
Technical Comparison of Major Blocking Agents
The selection of a blocking agent is a system-dependent choice, influenced by the target protein, primary antibody characteristics, and detection system. The table below summarizes the key properties, advantages, and limitations of the most common blocking agents used in research settings.
Table 1: Comprehensive Comparison of Western Blot Blocking Agents
| Blocking Agent | Optimal Concentration | Key Advantages | Primary Limitations | Ideal Use Cases |
|---|---|---|---|---|
| Non-Fat Dry Milk (NFDM) | 1-5% in TBST or PBST [28] [29] | Cost-effective; readily available; contains multiple proteins (casein, whey) for comprehensive blocking; provides low background with many antibodies [30] [31] [29]. | Contains intrinsic biotin and phosphoproteins; can mask some antigens; not suitable for phosphoprotein or biotin-streptavidin detection systems [30] [29]. | Routine detection of non-phosphorylated, high-abundance targets; cost-sensitive labs [31]. |
| Bovine Serum Albumin (BSA) | 2-3% in TBST or PBST [29] | Free of phosphoproteins and biotin; superior for detecting phosphoproteins and in streptavidin-biotin systems; often provides higher sensitivity for low-abundance targets [30] [29]. | Generally a weaker blocker than milk, which can result in more non-specific binding and higher background; more expensive than milk [30] [31] [29]. | Phosphoprotein detection (e.g., PARP-1 activity studies); assays using streptavidin-biotin systems; detecting low-abundance proteins [30] [29]. |
| Purified Casein | As per manufacturer (e.g., 1% solution) | Single-protein buffer minimizes cross-reactivity; high-performance replacement for milk; effective in reducing background where milk fails [29]. | More expensive than traditional milk or BSA blockers [30] [29]. | When milk causes high background or masks antigen-antibody binding [29]. |
| Specialty Commercial Blockers | Varies by product | Often optimized for specific applications (e.g., fluorescence); serum- and biotin-free; can block quickly (<15 min); provide consistent performance [29]. | Highest cost among blocking agents; proprietary formulations [30] [29]. | Fluorescent western blotting; challenging antibody-antigen pairs; standardizing protocols across a lab [29]. |
Optimizing Blocking for PARP-1 Research
PARP-1 is a critical nuclear protein involved in DNA repair and other cellular processes, and its study often involves complex scenarios such as detecting its translocation to the cytoplasm or its post-translational modifications [32] [33]. The choice of blocker can significantly impact these results.
Key Experimental Considerations
- Detecting Phospho-Epitopes or Using Biotin-Streptavidin Systems: When studying PARP-1 in the context of DNA damage signaling, BSA is the unequivocal recommendation. Non-fat milk contains inherent phosphoproteins and biotin, which can cause high background or false-positive signals in these applications [30] [29].
- Maximizing Sensitivity for Low-Abundance Targets: While BSA is a weaker blocker that can sometimes lead to higher background, this same property can increase the detection sensitivity for low-abundance proteins by reducing the masking of antigen-antibody binding [29]. For rare targets, testing both BSA and a specialty purified protein blocker is advised.
- Balancing Cost and Performance for Routine Detection: If your PARP-1 experiment does not involve phospho-detection and the antibody performs well, 5% non-fat milk in TBST is a excellent, cost-effective choice that provides strong blocking and low background [31].
Troubleshooting Common Issues (FAQs)
Table 2: Troubleshooting Guide for Blocking Issues in Western Blotting
| Problem | Potential Causes | Recommended Solutions |
|---|---|---|
| High Background | Inadequate blocking; blocker incompatible with antibody; detergent concentration too low [29]. | Increase blocking agent concentration or duration; switch blocking agent (e.g., milk to BSA or a specialty blocker); add 0.05-0.2% Tween-20 to buffers [29]. |
| Weak or No Signal | Blocker is masking the antigen; antibody is weak [29]. | Switch to a weaker blocker like BSA; use a specialty blocker designed for high sensitivity; increase antibody concentration or exposure time [29]. |
| Non-Specific Bands | Incomplete blocking; non-specific antibody binding [30] [29]. | Optimize blocking conditions; test different blocking agents (casein can be effective); ensure antibody specificity by using validated controls. |
| High Background in Fluorescent Westerns | Auto-fluorescent contaminants in buffers; detergents like Tween-20 can auto-fluoresce [29]. | Use high-quality, filtered buffers; employ detergent-free blocking buffers specifically designed for fluorescent applications [29]. |
FAQ: I'm concerned about phosphatases in milk degrading my phospho-signal. Should I always avoid it?
Not necessarily. While this is a theoretical concern, in-house tests at major antibody suppliers like Cell Signaling Technology (CST) show that when milk buffer is prepared fresh and used daily, it does not significantly degrade phospho-signals for many targets. In fact, CST recommends 5% milk for most of their antibodies, including phospho-specific ones, because it often provides a superior signal-to-noise ratio compared to BSA [31]. The key is to use milk fresh.
FAQ: Can the blocking agent affect the detection of PARP-1 translocation studies?
Yes. Research investigating PARP-1 translocation from the nucleus to the cytoplasm, such as during microglia activation, relies on clean, specific bands for both nuclear and cytoplasmic fractions [32]. A blocker that causes high background (a common issue with BSA) or masks the antigen can obscure these critical results. The workflow for optimizing such an experiment is summarized in the diagram below.
Essential Protocols and Reagents
Standard Protocol for Blocking and Antibody Incubation
This is a generalized protocol for western blotting after protein transfer to a PVDF or nitrocellulose membrane. Always refer to your primary antibody datasheet for specific recommendations.
- Blocking: Immediately after transfer, incubate the membrane in 5% non-fat dry milk or 2-3% BSA in TBST (Tris-Buffered Saline with 0.1% Tween-20) for 1 hour at room temperature with gentle agitation [31] [32] [29].
- Primary Antibody Incubation: Dilute the primary antibody against PARP-1 in the recommended buffer (often the same as your blocking buffer or a similar protein-containing solution). Incubate the membrane for 1-2 hours at room temperature or overnight at 4°C with agitation.
- Washing: Wash the membrane 3-5 times for 5 minutes each with TBST to remove unbound antibody.
- Secondary Antibody Incubation: Dilute the HRP- or fluorescence-conjugated secondary antibody in the same buffer used for the primary antibody. Incubate for 1 hour at room temperature with agitation.
- Washing: Repeat the washing step as in #3.
- Detection: Proceed with chemiluminescent or fluorescent detection according to your system's instructions.
The Scientist's Toolkit: Key Research Reagent Solutions
Table 3: Essential Materials for Western Blot Blocking Optimization
| Reagent / Material | Function / Purpose | Example Recommendations |
|---|---|---|
| Non-Fat Dry Milk | A cost-effective, mixed-protein blocking agent for general use. | Store-bought powdered milk; Clarified and stabilized commercial versions (e.g., Pierce Clear Milk) for longer shelf-life [29]. |
| Bovine Serum Albumin (BSA) | A purified protein blocker essential for phospho-studies and biotin-based systems. | Use high-quality, purified BSA fractions to ensure consistency and low background [29]. |
| Purified Casein | A single-protein blocker effective as a high-performance milk replacement. | Commercial casein solutions (e.g., Blocker Casein) to avoid variability of homemade preparations [29]. |
| Specialty Blocking Buffers | Optimized formulations for challenging applications like fluorescence or rapid blocking. | StartingBlock (PBS or TBS) for general optimization; Blocker FL for fluorescent westerns [29]. |
| PVDF or Nitrocellulose Membrane | The solid support to which transferred proteins are bound. | Ensure membrane is fully activated (especially PVDF) in methanol before use. |
| TBST / PBST Buffer | The standard wash and dilution buffer; Tween-20 detergent reduces non-specific binding. | Typical Tween-20 concentration is 0.1%. Weaker antibodies may require 0.05% to prevent stripping [29]. |
The following diagram provides a strategic pathway for selecting the most appropriate blocking agent based on your experimental goals.
In PARP-1 research, where accurate detection is paramount for understanding DNA damage response and evaluating therapeutic inhibitors like olaparib and talazoparib [34] [35] [33], the blocking step is not a mere formality but a critical determinant of success. There is no universal "best" blocking agent; the optimal choice is dictated by the specific experimental context. For phospho-specific work related to PARP-1 function, BSA is typically necessary, while for routine, high-abundance PARP-1 detection, non-fat milk offers a robust and economical solution. When standard blockers fail, specialty commercial formulations provide a viable path to clean, reproducible data. We encourage researchers to empirically validate their blocking conditions, using this guide as a starting point, to ensure the clarity and reliability of their western blot data in the demanding field of DNA damage response and drug development.
FAQs on Blocking Buffer Selection and Optimization
1. What is the fundamental difference between TBS and PBS, and when should I choose one over the other for PARP-1 western blotting?
The core difference lies in their chemical composition. Tris-Buffered Saline (TBS) consists of Tris base and sodium chloride, while Phosphate-Buffered Saline (PBS) contains phosphate salts [36]. Your choice is critical for specific applications:
- Use TBS-based buffers when detecting phosphoproteins or when using alkaline phosphatase (AP)-conjugated antibodies, as phosphate in PBS can interfere with these applications [36] [37].
- PBS-based buffers are generally interchangeable with TBS for many other targets, but it is recommended to empirically test both for your specific PARP-1 antibody to optimize results [36].
2. Why is my background signal high, and how can I reduce it?
High background is often a sign of insufficient blocking or non-specific antibody binding. Here are the primary causes and solutions [18] [36] [38]:
- Antibody Concentration Too High: Titrate your primary and/or secondary antibody to find the optimal, lower concentration.
- Incompatible Blocking Buffer: If detecting phosphorylated proteins, do not use milk-based blockers as they contain phosphoproteins. Switch to Bovine Serum Albumin (BSA) [18] [37].
- Insufficient Blocking: Increase the concentration of your blocking agent (e.g., up to 5-10%), extend the blocking time to 1 hour at room temperature or overnight at 4°C, or try a different blocking agent like casein [18] [36].
- Insufficient Washing: Increase the number and volume of washes with TBST or PBST (containing 0.1% Tween-20) [18].
3. I am getting a weak or no signal for PARP-1. What steps should I take?
A weak signal can originate from several steps in the workflow [18] [38]:
- Antibody Issues: The antibody concentration may be too low, or the antibody may have lost activity. Increase the antibody concentration or test a fresh aliquot. For low-abundance targets, incubate the primary antibody overnight at 4°C [38].
- Transfer Efficiency: Confirm that your proteins have transferred successfully from the gel to the membrane by using Ponceau S staining or a reversible protein stain kit [18].
- Blocking Buffer Interference: The blocking agent might be masking your epitope. Reduce the concentration of the blocking buffer or switch from milk to BSA, which can offer higher sensitivity for some targets [36] [37].
- Antigen Availability: Ensure sample preparation has not destroyed the antigenicity of PARP-1. Avoid using sodium azide in buffers if using HRP-conjugated antibodies, as it inhibits HRP activity [18].
4. What are the advantages of using BSA over non-fat dry milk for blocking?
The choice between BSA and milk depends on your experimental goals. The table below summarizes key considerations [36] [37]:
| Blocking Agent | Benefits | Considerations for PARP-1 Research |
|---|---|---|
| Bovine Serum Albumin (BSA) | - Ideal for detecting phosphoproteins [18] [36].- Compatible with biotin-streptavidin detection systems [37].- Can offer higher sensitivity for low-abundance proteins [37]. | - Recommended for general PARP-1 detection and essential for studies involving PARP-1 phosphorylation. |
| Non-Fat Dry Milk | - Inexpensive and effective for general use [36] [37].- Reduces background noise well for many targets. | - Contains phosphoproteins and biotin, which can cause high background in phospho-specific or streptavidin-based assays [37].- May mask some antigens, reducing detection sensitivity [37]. |
5. Can I use a minimal antibody volume for my PARP-1 western blots?
Yes, innovative methods like the Sheet Protector (SP) Strategy have been developed to drastically reduce antibody consumption. This technique uses a common stationery sheet protector to distribute a small volume of antibody (20–150 µL for a mini-gel membrane) as a thin layer over the membrane. This method is comparable in sensitivity and specificity to conventional methods and offers additional advantages such as room temperature incubation and faster detection times [7].
Troubleshooting Guide: Common Issues and Solutions
This guide helps you diagnose and resolve common problems in your western blot.
| Problem | Possible Cause | Recommended Solution |
|---|---|---|
| High Background | Incompatible blocking buffer (e.g., milk for phosphoproteins) [18]. | Switch to BSA or a commercial, serum-free blocking buffer [36] [37]. |
| Antibody concentration too high [18]. | Titrate primary and secondary antibodies to lower concentrations. | |
| Insufficient washing [38]. | Increase wash number/duration; use TBST/PBST with 0.05-0.1% Tween-20 [18] [36]. | |
| Weak or No Signal | Low antibody concentration or activity [38]. | Increase antibody concentration; use fresh antibody; extend incubation time (e.g., overnight at 4°C) [38]. |
| Inefficient protein transfer [18]. | Confirm transfer with Ponceau S or reversible protein stain; check membrane orientation and transfer time [18]. | |
| Blocking buffer masking the epitope [36]. | Reduce blocking agent concentration or switch blocking agents (e.g., milk to BSA) [36]. | |
| Non-specific Bands | Antibody cross-reactivity [18]. | Check antibody specification for western blot validation; optimize antibody concentration [18]. |
| Sample degradation [38]. | Use fresh lysates; always include protease inhibitors [38]. | |
| Insufficient blocking [36]. | Increase blocking buffer concentration or blocking time [36]. |
Experimental Protocols for Key Methodologies
Protocol 1: Preparation of Standard TBS- and PBS-Based Blocking Buffers
This protocol provides recipes for standard blocking buffers used in western blotting [36].
TBS-Based Blocking Buffer (5% BSA)
- Ingredients:
- 5.0 g Bovine Serum Albumin (BSA)
- 100 mL 1X Tris-Buffered Saline (TBS)
- 0.1 mL Tween-20 (optional, for 0.1% final concentration)
- Procedure:
- Add BSA to approximately 80 mL of 1X TBS and stir gently to dissolve. Avoid vigorous mixing to prevent foaming.
- If using, add Tween-20.
- Bring the final volume to 100 mL with 1X TBS.
- Filter the solution through a 0.45 µm filter to remove any particulate matter. Store at 4°C for short-term use.
- Ingredients:
PBS-Based Blocking Buffer (5% Non-Fat Dry Milk)
- Ingredients:
- 5.0 g Non-fat dry milk
- 100 mL 1X Phosphate-Buffered Saline (PBS)
- 0.1 mL Tween-20 (optional, for 0.1% final concentration)
- Procedure:
- Gradually add the non-fat dry milk to 80 mL of 1X PBS while stirring.
- If using, add Tween-20.
- Adjust the volume to 100 mL with 1X PBS.
- Filter the solution if necessary. Store at 4°C and prepare fresh every 1-2 days.
- Ingredients:
Protocol 2: Sheet Protector (SP) Strategy for Minimal Antibody Volume Incubation
This advanced protocol can reduce primary antibody consumption by over 98% compared to conventional methods [7].
Post-Blocking Preparation:
- After blocking and washing the membrane, transiently immerse it in TBST to remove excess blocking buffer.
- Thoroughly blot the membrane on a clean paper towel to absorb residual moisture. The membrane should be semi-dry.
Assembly of the SP Unit:
- Place the prepared membrane on a leaflet of a cropped sheet protector.
- Apply the calculated minimal volume of primary antibody working solution (e.g., 20-150 µL for a mini-gel membrane) directly onto the membrane surface.
- Gently lower the upper leaflet of the sheet protector onto the membrane. The antibody solution will disperse over the membrane as a thin layer via surface tension.
Incubation:
- For incubations longer than 2 hours, place the sealed SP unit on a wet paper towel and seal it inside a zipper bag to prevent evaporation.
- Incubate at the desired temperature (room temperature or 4°C) for the required time without agitation.
Post-Incubation:
- Carefully open the sheet protector and retrieve the membrane.
- Proceed with standard TBST washing steps and secondary antibody incubation in a container with agitation.
Visualization of Western Blot Workflow and Buffer Selection
This diagram illustrates the key decision points in the western blot workflow, emphasizing the critical role of blocking buffer selection for successful detection of PARP-1.
The Scientist's Toolkit: Key Research Reagent Solutions
This table lists essential reagents and their functions for optimizing PARP-1 western blotting.
| Research Reagent | Function & Application in PARP-1 Research |
|---|---|
| Bovine Serum Albumin (BSA) | A purified protein blocking agent ideal for detecting phosphoproteins and for use with biotin-streptavidin systems, minimizing background in PARP-1 studies [36] [37]. |
| Sheet Protector (SP) | A common stationery item used in the SP strategy to distribute minimal volumes of antibody over the membrane, drastically reducing antibody consumption [7]. |
| Protease Inhibitors | Essential additives in lysis buffer to prevent protein degradation during sample preparation, preserving the integrity of PARP-1 and other targets [38]. |
| Phosphatase Inhibitors | Crucial for preserving the phosphorylation state of proteins when studying post-translational modifications of PARP-1 [38]. |
| Ponceau S Stain | A reversible stain used to quickly visualize protein bands on a membrane after transfer, confirming successful and even transfer before proceeding to blocking [18]. |
| HRP-Conjugated Secondary Antibodies | Enzymatically conjugated antibodies used for chemiluminescent detection of the primary antibody bound to PARP-1 [7] [18]. |
| Chemiluminescent Substrate | A reagent that produces light upon reaction with HRP, enabling the visualization and quantification of the PARP-1 signal on film or a digital imager [7]. |
FAQs and Troubleshooting Guides
What are the fundamental factors to optimize in a blocking procedure?
The core factors to optimize are the type of blocking agent, its concentration, the incubation time, and the temperature. The optimal combination depends on your specific antibody-antigen pair and the detection method.
- Blocking Agent: Common agents include BSA, non-fat dry milk, and specialty fish gel solutions. BSA is often preferred for phospho-specific antibodies or when using biotin-avadin systems, as non-fat dry milk contains endogenous biotin and phosphoproteins that can cause interference [18] [39].
- Concentration: Standard blocking buffers typically use a 5% (w/v) concentration of BSA or non-fat dry milk in TBST [40].
- Time and Temperature: A standard protocol involves blocking for 1 hour at room temperature. However, background issues can sometimes be resolved by increasing the blocking time or performing the incubation overnight at 4°C [41] [18].
How do I troubleshoot high background on my PARP-1 blot?
High background is a common issue where the signal obscures your specific bands. The table below outlines common causes and solutions related to the blocking and antibody steps.
| Possible Cause | Specific Issue with PARP-1 | Recommended Solution |
|---|---|---|
| Insufficient Blocking | Non-specific sites on membrane not covered. | Increase blocking time to 1 hour at RT or overnight at 4°C; ensure adequate volume [41] [18]. |
| Incompatible Blocking Buffer | Phosphoproteins in milk may interfere. | Use BSA instead of milk, especially for phospho-detection [18]. |
| Antibody Concentration Too High | Primary or secondary antibody binds non-specifically. | Titrate antibodies to find optimal dilution; use serial dilution for precision [41]. |
| Insufficient Washing | Unbound antibodies remain on membrane. | Increase number and volume of washes post-primary and post-secondary antibody; use TBST with 0.05% Tween 20 [41] [42]. |
Why is there a weak or no signal for my target protein after blocking?
A weak or absent signal can be frustrating. While blocking is crucial to prevent background, over-blocking or using an incompatible buffer can sometimes mask your antigen.
- Antigen Masking: The protein of interest might be physically obscured by the blocking agent. Try decreasing the concentration of protein in your blocking buffer or switching the blocking agent (e.g., from milk to BSA or a specialty fish gel blocker) [18] [39].
- Inefficient Transfer: If the protein wasn't efficiently transferred from the gel to the membrane, no amount of optimization will help. After blotting, stain your membrane with a reversible stain like Ponceau S to verify successful transfer and equal loading across all lanes [18] [39].
- Antibody Issues: Confirm that your primary and secondary antibodies are active and compatible. The secondary antibody must be raised against the host species of the primary antibody [42].
Experimental Protocol: Optimizing Your Blocking Conditions
This protocol provides a structured method to empirically determine the best blocking conditions for your PARP-1 research.
Materials and Reagents
- Membrane: Nitrocellulose or PVDF [40] [42].
- Blocking Agents: BSA (Fraction V), non-fat dry milk (e.g., Blotto), and/or a specialty fish gel buffer [39].
- Buffers: 1X TBST (Tris-Buffered Saline with 0.1% Tween 20) [40].
- Antibodies: Validated primary antibody against PARP-1 and a compatible HRP-conjugated secondary antibody [42].
- Detection System: High-sensitivity chemiluminescent substrate [42].
Step-by-Step Procedure
- Prepare Membrane: After protein transfer, briefly rinse the membrane in deionized water to remove transfer buffer residues [42].
- Prepare Blocking Buffers: Create at least three different blocking buffers for testing:
- Buffer A: 5% non-fat dry milk in TBST.
- Buffer B: 5% BSA in TBST.
- Buffer C: A commercial, specialty blocking buffer like fish gel solution.
- Segment Membrane: If possible, cut your blot into strips, each containing identical loaded samples (including a PARP-1 positive control and molecular weight markers).
- Block: Incubate each membrane strip in a different blocking buffer for 1 hour at room temperature with gentle agitation [40].
- Incubate with Antibodies:
- Wash and Detect:
Workflow Diagram for Optimization
Research Reagent Solutions
The following table details essential reagents for optimizing your western blot blocking procedure, with specific considerations for PARP-1 research.
| Reagent | Function in Blocking | Key Considerations |
|---|---|---|
| Bovine Serum Albumin (BSA) | Blocks non-specific binding sites on the membrane. | Preferred for phospho-specific antibodies and biotin-avidin systems; less likely to contain cross-reactive proteins [18] [39]. |
| Non-Fat Dry Milk | A low-cost, general-purpose blocking agent. | Avoid with biotin-avidin systems (contains biotin) and with some phospho-antibodies (contains phosphoproteins) [18] [39]. |
| Fish Gelatin Blockers | Serves as an alternative protein source for blocking. | Less likely to cross-react with antibodies of mammalian origin, reducing background [39]. |
| Casein-Based Blockers | Protein derived from milk, used in specialized buffers. | Can provide lower backgrounds than milk or BSA; also recommended for biotin-avidin systems [39]. |
| Tris-Buffered Saline with Tween 20 (TBST) | Base wash and dilution buffer; Tween 20 helps reduce non-specific binding. | Standard concentration is 0.05% - 0.1% Tween 20; higher concentrations may strip antibodies [40] [18]. |
Advanced Troubleshooting: Resolving Persistent Issues
My background is still high after optimizing blocking. What else can I check?
- Confirm Antibody Specificity: Ensure your primary antibody is specific for PARP-1. Non-specific bands can appear as a high, diffuse background. Check the manufacturer's datasheet for validated applications and known cross-reactivity [41] [18].
- Check Membrane Handling: Always handle membranes with clean gloves or forceps. Any contamination, or allowing the membrane to dry out during the process, can create high background signals [18].
- Substrate Over-Exposure: Even with perfect blocking, overexposing your blot during detection can saturate the signal and create a high-background appearance. Reduce film exposure time or use your imager's auto-exposure function [18].
Special Considerations for Detecting Phosphorylated and ADP-Ribosylated PARP-1
Within the framework of establishing optimal blocking conditions for PARP-1 western blot research, this guide addresses the specific challenges in detecting its phosphorylated and ADP-ribosylated forms. PARP-1 is a multifunctional nuclear enzyme involved in DNA repair, transcriptional regulation, and cell death, and its activity is often assessed through these post-translational modifications [1] [8]. Accurate detection is crucial for researchers and drug development professionals studying PARP-1's role in cellular pathways and the mechanism of PARP inhibitors. The technical support center below provides targeted troubleshooting and FAQs to navigate the common pitfalls associated with these experiments.
Troubleshooting Guide: FAQs and Solutions
FAQ 1: Why do I get nonspecific or diffuse bands when detecting phosphorylated PARP-1?
Nonspecific bands often arise from antibody-related issues or suboptimal sample preparation, which can be exacerbated when detecting specific modifications.
- Possible Cause: Antibody concentration is too high [18] [41].
- Solution: Titrate both your primary and secondary antibodies. Perform a dilution series to find the concentration that provides a strong specific signal with minimal background [18] [43].
- Possible Cause: Excess protein loaded on the gel [18] [41].
- Solution: Reduce the total amount of protein loaded per lane. For mini-gels, a maximum of 10–15 μg of cell lysate per lane is often recommended [18].
- Possible Cause: Protein degradation or presence of different protein subtypes [41].
- Solution: Always use fresh protease and phosphatase inhibitors during sample preparation to prevent degradation [43]. Boil samples for 10 minutes in SDS-PAGE sample buffer to disrupt protein multimers [41].
FAQ 2: Why is my signal for ADP-ribosylated PARP-1 weak or absent?
A weak signal can result from inefficient transfer, low antigen availability, or issues with the detection method itself.
- Possible Cause: Poor or incomplete transfer of proteins from the gel to the membrane [44] [43].
- Solution: Confirm transfer efficiency by staining your membrane with a reversible protein stain like Ponceau S after the transfer [44] [43]. For large proteins like PARP-1 (∼116 kDa), consider a wet transfer method with a longer transfer time [43].
- Possible Cause: The ADP-ribosylation modification may mask the antigenic site, or the epitope may be damaged during sample preparation [18].
- Solution: Optimize blocking conditions. If using a protein-based blocker like milk or BSA, try decreasing its concentration, as it can sometimes mask the target antigen [18]. Ensure sample preparation does not destroy antigenicity; some proteins cannot be run under reducing conditions [18].
- Possible Cause: Insufficient antigen present [18].
- Solution: Increase the amount of protein loaded onto the gel. For low-abundance targets, you may also need to increase the primary antibody concentration or extend the incubation time to overnight at 4°C [18].
FAQ 3: How can I reduce high background on my PARP-1 western blots?
High background is typically caused by non-specific antibody binding and can be managed by optimizing blocking and washing steps.
- Possible Cause: Incompatible or insufficient blocking buffer [18].
- Solution: When detecting phosphoproteins, avoid phosphate-based buffers like PBS and phosphoprotein-containing blockers like milk. Instead, use BSA in Tris-buffered saline for blocking [18]. Ensure blocking is performed for at least 1 hour at room temperature or overnight at 4°C [18] [41].
- Possible Cause: Concentration of primary and/or secondary antibody is too high [18] [41].
- Solution: Decrease the concentration of the primary and/or secondary antibody. Run a dilution series to find the optimal balance between signal and background [18].
- Possible Cause: Insufficient washing [41] [44].
- Solution: Increase the number and duration of washing steps after antibody incubations. Add Tween 20 to the wash buffer to a final concentration of 0.05% to help remove unbound antibodies [18] [44].
Experimental Protocols for Key PARP-1 Studies
Protocol 1: Detecting PARP-1 and Sp1 Interactions via Co-immunoprecipitation
This protocol is based on methods used to study the physical interaction between PARP-1 and the transcription factor Sp1 [1].
- Cell Culture and Lysis: Culture embryonic fibroblast cell lines (e.g., PARP-1+/+ and PARP-1-/-). Lyse the cells using an appropriate lysis buffer (e.g., RIPA buffer) supplemented with a protease inhibitor cocktail.
- Immunoprecipitation: Incubate the cell lysates with an antibody specific to PARP-1 or Sp1. Use protein A/G beads to pull down the antibody-protein complex.
- Washing: Wash the beads extensively with lysis buffer to remove non-specifically bound proteins.
- Elution and Analysis: Elute the bound proteins by boiling in SDS-PAGE sample buffer. Analyze the eluates by western blotting using antibodies against PARP-1 and Sp1 to confirm interaction.
Protocol 2: Subcellular Fractionation to Monitor PARP-1 Translocation
This protocol is adapted from studies investigating the cytoplasmic translocation of PARP-1 in microglia upon LPS stimulation [45].
- Cell Stimulation: Treat microglia cells (e.g., BV2 cells or primary microglia) with 50 ng/mL LPS for 6-12 hours to induce activation. Include controls with PARP inhibitors like ABT-888 if studying inhibition.
- Fractionation: Lyse cells gently with a buffer containing 0.02% Triton X-100. Centrifuge at a low speed to separate the cytosolic fraction (supernatant) from the nuclear pellet.
- Nuclear Lysis: Resuspend the nuclear pellet in RIPA buffer to extract nuclear proteins.
- Western Blotting: Use antibodies against PARP-1 to detect its presence in both cytosolic and nuclear fractions. Use markers like Lamin A/C for the nuclear fraction and GAPDH for the cytosolic fraction to confirm fractionation purity.
Data Presentation Tables
Table 1: Troubleshooting Phosphorylated PARP-1 Detection
| Problem | Possible Cause | Recommended Solution |
|---|---|---|
| Nonspecific Bands | High antibody concentration | Titrate primary and secondary antibodies [18] [41] |
| Protein overloading | Load 10-15 μg of cell lysate per lane on a mini-gel [18] | |
| Protein degradation | Use fresh protease/phosphatase inhibitors [41] [43] | |
| Weak Signal | Inefficient transfer | Verify with Ponceau S staining; use wet transfer for large proteins [44] [43] |
| Low antigen availability | Increase protein load; optimize antibody concentration [18] | |
| High Background | Inadequate blocking | Use BSA in TBS for phospho-proteins; block for >1 hour [18] |
| Insufficient washing | Increase wash number/duration; use 0.05% Tween-20 [18] [44] |
Table 2: Essential Research Reagent Solutions for PARP-1 Studies
| Reagent | Function in PARP-1 Research | Example or Note |
|---|---|---|
| PARP Inhibitors (e.g., ABT-888, PJ34) | Inhibit PARP-1 enzymatic activity; used as tools to study PARP-1 function in pathways [1] [45]. | ABT-888 is a potent PARP-1/2 inhibitor used in microglia studies [45]. |
| Phosphatase & Protease Inhibitors | Preserve post-translational modifications like phosphorylation and prevent protein degradation during sample prep [41] [45]. | Critical for detecting phosphorylated PARP-1. |
| LPS (Lipopolysaccharide) | A potent activator of microglia; used to study PARP-1's cytoplasmic translocation and non-nuclear functions [45]. | Used at 50 ng/mL to activate microglia [45]. |
| SDS-PAGE Sample Buffer | Denatures proteins for gel electrophoresis; can be used to disrupt protein multimers [41]. | Boiling for 10 minutes is recommended [41]. |
| PVDF Membrane | Serves as the solid support for immobilizing proteins after transfer for western blotting [45]. | Compatible with various staining and detection methods. |
Signaling Pathways and Workflow Visualizations
Diagram 1: PARP-1 signaling and cellular outcomes. This diagram illustrates the nuclear and cytoplasmic pathways of PARP-1, highlighting its role in transcription regulation and microglia activation.
Diagram 2: PARP-1 Western Blot Workflow. A simplified workflow highlighting critical steps where optimization is key for successful detection of PARP-1 and its modifications.
FAQs and Troubleshooting Guides
Why is the choice of diluent important for my PARP-1 Western blot?
The diluent, the solution used to dilute your primary and secondary antibodies, is critical because it stabilizes the antibody and can enhance or hinder its specific binding to your target protein. An optimal diluent prevents non-specific binding, which is essential for obtaining a clean signal with low background, especially when detecting specific forms of PARP-1 like the cleaved 89 kDa fragment, a key apoptosis marker [46].
What is the best diluent for my PARP-1 antibody?
The ideal diluent depends on your primary antibody and experimental conditions. There is no universal solution, but common and effective choices are based on TBST (Tris-Buffered Saline with Tween 20) with an added blocking agent.
The table below summarizes the two most common blocking agents used in diluent preparation:
Table 1: Comparison of Common Blocking Agents for Diluent Preparation
| Blocking Agent | Recommended Concentration | Best For | Advantages | Limitations |
|---|---|---|---|---|
| BSA (Bovine Serum Albumin) | 1-5% in TBST | Phosphoprotein detection (e.g., phospho-specific antibodies); general use; avidin-biotin systems [47] | Low background; no endogenous biotin; often recommended in commercial antibody protocols [13] | Can be more expensive than milk |
| Non-Fat Dry Milk | 1-5% in TBST | General use for many antibodies | Inexpensive; effective for reducing non-specific binding | Contains casein and biotin, which can cause high background with phospho-specific antibodies or certain detection systems [47] |
For PARP-1 specifically, many validated protocols use diluents based on these components. For instance, the PARP1 Polyclonal Antibody (13371-1-AP) is often used with a diluent containing 5% BSA in TBST [48].
Can I use my blocking buffer as the antibody diluent?
Yes, this is a very common and often successful practice. Using the same blocking buffer (e.g., 5% BSA in TBST) for both blocking the membrane and diluting the antibodies ensures consistency. However, some researchers prefer to use a fresh, clean solution of the blocking agent for the antibody diluent to avoid any potential interference from proteins that may have leached from the membrane during the blocking step.
What are the common problems caused by suboptimal diluent preparation and how do I fix them?
Many Western blot issues originate from diluent and blocking conditions. Here is a troubleshooting guide for common problems:
Table 2: Troubleshooting Guide for Diluent and Blocking-Related Issues
| Problem | Potential Cause Related to Diluent/Blocking | Solutions |
|---|---|---|
| High Background [47] [49] | Insufficient blocking; wrong blocking agent; too high antibody concentration in diluent. | - Ensure thorough blocking (at least 1 hour at room temperature).- Switch from milk to BSA, especially for phosphoproteins.- Titrate your antibody to find the optimal dilution. |
| Weak or No Signal [47] | Over-blocking masking the epitope; sodium azide in diluent quenching HRP. | - Test a different blocking agent (BSA vs. milk).- Ensure no sodium azide is present in buffers used with HRP-conjugated antibodies. |
| Non-Specific Bands [47] [49] | Polyclonal antibodies in diluent recognizing multiple epitopes; suboptimal diluent. | - Use a monoclonal antibody if available for higher specificity.- Ensure the diluent is correctly formulated and the antibody is titrated. |
What is a standard protocol for blocking and antibody incubation for PARP-1?
Below is a generalized workflow and a specific example protocol you can adapt.
Diagram 1: Western Blot Antibody Incubation Workflow.
Example Protocol Using a Validated PARP-1 Antibody [48] [13] [46]:
- Blocking: After transferring the protein to a PVDF membrane, block the membrane with 5% BSA in TBST for 1 hour at room temperature with gentle agitation.
- Primary Antibody Incubation: Prepare the primary antibody (e.g., PARP1 Polyclonal Antibody, 13371-1-AP, recommended dilution 1:1000-1:8000 for WB) in 5% BSA in TBST. Incubate the membrane with the antibody solution overnight at 4°C with gentle agitation [48].
- Note: Alternative cleaved PARP antibodies like ab32064 are used at a 1:1000-1:10000 dilution in 5% NFDM/TBST, highlighting the need to follow datasheet recommendations [13].
- Washing: Wash the membrane three times for 5-10 minutes each with ample TBST.
- Secondary Antibody Incubation: Prepare the HRP-conjugated secondary antibody in 5% BSA in TBST (a common starting dilution is 1:2000-1:10000). Incubate for 1 hour at room temperature with gentle agitation.
- Washing: Wash the membrane three times for 5-10 minutes each with TBST.
- Detection: Proceed with chemiluminescent detection using a substrate like SuperSignal West Pico PLUS [50].
The Scientist's Toolkit: Research Reagent Solutions for PARP-1 Western Blotting
Table 3: Key Reagents for PARP-1 Western Blotting
| Reagent | Function | Example Products & Notes |
|---|---|---|
| Primary Antibodies | Binds specifically to PARP-1 protein. | Total PARP-1: PARP (46D11) Rabbit mAb #9532 [46]; PARP1 Polyclonal Antibody 13371-1-AP [48].Cleaved PARP-1: Anti-Cleaved PARP1 [E51] (ab32064) [13]. |
| Blocking Agents | Reduces non-specific antibody binding to the membrane. | BSA (often preferred) or Non-Fat Dry Milk. Choice depends on the antibody [47]. |
| Diluent Buffer Base | Provides a stable ionic and pH environment for antibody binding. | 1X TBST (Tris-Buffered Saline with 0.1% Tween-20) is standard. |
| Transfer Buffer | Mediates protein movement from gel to membrane during electrophoresis. | Tris-Glycine buffer with 20% methanol or Bis-Tris transfer buffer, depending on gel system [51]. |
| Detection Substrate | Generates light signal for visualizing the target protein band. | Chemiluminescent substrates like SuperSignal West Pico PLUS [50]. |
| Positive Control Lysate | Verifies antibody performance and experimental workflow. | Lysates from cells known to express PARP-1 (e.g., HeLa, Jurkat) or cells induced to undergo apoptosis (for cleaved PARP-1) [48] [13]. |
Troubleshooting PARP-1 Blots: Solving High Background, Weak Signal, and Non-Specific Bands
Troubleshooting Guide: High Uniform Background
A high, uniform background signal across the entire membrane is a common issue that can obscure your results and complicate data interpretation. The table below outlines the primary causes and their respective solutions.
Table 1: Troubleshooting High Uniform Background
| Primary Cause | Root of the Problem | Recommended Remedial Actions |
|---|---|---|
| Antibody Concentration Too High [18] [52] | Excess antibody leads to non-specific binding across the membrane. | - Titrate both primary and secondary antibodies to find the optimal dilution [18] [52].- For a new antibody, test a range of concentrations below and above the manufacturer's recommendation [52]. |
| Inadequate Blocking [18] [44] | Non-specific binding sites on the membrane are not sufficiently occupied, allowing antibodies to bind everywhere. | - Optimize blocking conditions: Use a 1-5% solution of BSA or non-fat dry milk for at least one hour at room temperature [52] [44].- Ensure freshness: Always prepare blocking buffer fresh, as bacterial growth can cause high background [52].- Choose the right blocker: Avoid milk (which contains biotin and phosphoproteins) with avidin-biotin systems or when detecting phosphoproteins; use BSA in Tris-buffered saline instead [18]. |
| Insufficient Washing [18] [44] | Unbound antibodies remain on the membrane, contributing to a general background signal. | - Increase wash volume and frequency [18] [44].- Add a detergent: Include 0.05% Tween 20 in your wash buffer (TBST) to improve removal of unbound reagents [18] [52]. |
| Improper Membrane Handling [18] [52] | Membrane drying or physical damage creates sites for non-specific binding. | - Keep the membrane fully submerged in liquid at all times during incubations and washes [18].- Always handle the membrane with clean gloves or forceps to avoid contamination and damage [18] [52]. |
| Incompatible Detection Reagents [18] | The chemical reaction during detection is too strong or uneven. | - Reduce substrate concentration or incubation time [18].- Remove excess substrate by gently wicking it away with a lab wipe before imaging [52].- Ensure sodium azide is not present in buffers when using HRP-conjugated antibodies, as it inhibits HRP activity [18]. |
Frequently Asked Questions (FAQs)
Q1: Why should I consider switching from milk to BSA as a blocking agent for my PARP-1 Western blots?
Milk contains casein, a phosphoprotein, and biotin. These can interact with phospho-specific antibodies or avidin-biotin detection systems, leading to increased non-specific background [18] [52]. BSA is a purer protein source and is highly recommended for detecting post-translationally modified proteins or when using avidin-biotin complexes. For general PARP-1 detection, if you encounter high background with milk, BSA in TBS (TBST) is an excellent alternative [18].
Q2: My background is still high after optimizing antibody concentration and blocking. What is a more aggressive washing strategy I can try?
If standard TBST washing is insufficient, you can employ a high-salt wash as a more stringent step. Washing with a buffer containing an elevated concentration of NaCl (e.g., 300-500 mM) can disrupt weaker, non-specific ionic interactions between antibodies and the membrane without affecting the specific antigen-antibody binding [52]. This step can be performed after the primary or secondary antibody incubation, followed by a standard TBST wash.
Q3: How can I systematically determine if the high background is coming from my primary or secondary antibody?
You can perform a simple secondary antibody-only control experiment.
- Run your gel and transfer as usual.
- Block the membrane following your standard protocol.
- Omit the primary antibody and incubate the membrane only with the secondary antibody.
- Proceed with washing and detection.
If a high background appears, the issue originates from the secondary antibody or the detection system. If the background is clean, the problem is likely with the primary antibody concentration, its specificity, or the blocking conditions [52].
Experimental Protocol: Establishing Optimal Blocking Conditions for PARP-1
The following protocol is adapted from a published PARP-1 automodification study and general best practices, providing a solid foundation for obtaining clean results [50].
Methodology:
- Sample Preparation: Resolve your PARP-1 protein samples (e.g., from HEK293 cell lysates or in vitro reactions) using SDS-PAGE [53] [50].
- Transfer: Transfer the proteins from the gel to a PVDF membrane using a standard wet transfer system [50].
- Membrane Activation: Prior to use, activate the PVDF membrane by soaking it in 100% methanol for 1-2 minutes, followed by equilibration in transfer buffer [52].
- Blocking (Comparative Step): Cut the membrane into strips, each containing your molecular weight marker and sample lanes. Block each strip with one of the following for 1 hour at room temperature with agitation:
- Strip A: 5% Non-fat dry milk in TBST.
- Strip B: 5% BSA in TBST.
- Strip C: A commercial blocking buffer designed for Western blotting (e.g., Thermo Scientific SuperBlock T20 Blocking Buffer).
- Strip D: 1% BSA in TBST [50].
- Antibody Incubation:
- Prepare the primary anti-PARP-1 antibody (e.g., from Abcam) dilutions in the respective blocking buffers used in Step 4 [53] [18].
- Incubate the membrane strips with the primary antibody. A good starting point is to incubate at 4°C overnight for optimal specificity and lower background [18] [52].
- Wash all strips 3 times for 5-10 minutes with a large volume of TBST.
- Incubate with the appropriate HRP-conjugated secondary antibody, diluted in the corresponding blocking buffer.
- Wash again 3-5 times for 5-10 minutes with TBST.
- Detection: Develop the blot using a chemiluminescent substrate (e.g., SuperSignal West Pico PLUS) and image [50].
Expected Outcome: This experiment will allow you to directly compare the signal-to-noise ratio for PARP-1 under different blocking conditions, enabling you to select the optimal buffer for your specific antibody and sample type.
Visual Guide: Troubleshooting High Background
The diagram below outlines a logical, step-by-step workflow for diagnosing and resolving a high uniform background on your Western blots.
The Scientist's Toolkit: Research Reagent Solutions
Table 2: Essential Reagents for PARP-1 Western Blotting
| Reagent | Function in Protocol | Application Note |
|---|---|---|
| BSA (Bovine Serum Albumin) | A highly purified blocking agent. Ideal for detecting phosphoproteins and for use with avidin-biotin systems. | Preferred over milk for PARP-1 blots, especially when studying its phosphorylation or automodification [18] [50]. |
| PVDF Membrane | A durable membrane with high protein binding capacity. | Must be activated in methanol before use. Its durability makes it suitable for stripping and re-probing [52]. |
| Tween 20 | A mild, non-ionic detergent. | Adding 0.05% to buffers (TBST) reduces surface tension and helps wash away non-specifically bound antibodies, lowering background [18] [52]. |
| PARP-1 Antibody | A primary antibody that specifically binds to the PARP-1 protein. | Use antibodies validated for Western blotting (e.g., from Abcam [53]). Always titrate to find the optimal concentration. |
| HRP-Conjugated Secondary Antibody | An enzyme-linked antibody that binds the primary antibody for detection. | Must be raised against the host species of the primary antibody. Titration is crucial to prevent high background [18] [52]. |
| Chemiluminescent Substrate | A reagent that produces light upon reaction with HRP, enabling film or digital imaging. | Use a sensitivity-appropriate substrate (e.g., SuperSignal West Pico PLUS [50]). Optimize concentration and exposure time [18]. |
Poly(ADP-ribose) polymerase-1 (PARP-1) is a critical nuclear enzyme involved in DNA repair, transcription regulation, and cell death signaling [1]. Its detection via western blot is fundamental for research in cancer biology and drug development, particularly with the rise of PARP inhibitors in therapeutic applications [54]. However, researchers often encounter the frustrating issue of weak or no signal when attempting to detect PARP-1. This challenge can stem from the enzyme's complex regulatory mechanisms, including its ability to interact with and modify transcription factors like Sp1, and its variable expression levels across different cell types and conditions [1]. This guide, framed within the broader context of optimizing blocking conditions for PARP-1 research, provides targeted troubleshooting strategies to overcome sensitivity issues and achieve robust, reproducible detection of this pivotal protein.
Troubleshooting Guide: Weak or No Signal
A weak or absent signal for PARP-1 can derail an experiment. The following table systematically addresses the most common causes and solutions.
Table 1: Troubleshooting Weak or No PARP-1 Signal
| Problem Area | Potential Cause | Recommended Solution |
|---|---|---|
| Antibodies | Incompatible primary and secondary antibodies [55]. | Verify host species and IgG type compatibility. |
| Inactive or expired antibody [56] [57]. | Perform a dot blot to check antibody activity. Use a positive control (e.g., a cell line known to express PARP-1). | |
| Insufficient antibody concentration [18] [57]. | Titrate the primary antibody to find the optimal concentration; consider a 2-4 fold increase from the starting dilution [57]. | |
| Sample & Antigen | Insufficient PARP-1 protein loaded [18] [56]. | Increase total protein load (e.g., 20-30 μg per lane) [57]. For low-abundance targets, enrich via immunoprecipitation [56]. |
| Protein degradation [56] [57]. | Use fresh samples and add protease inhibitors to the lysis buffer to prevent degradation. | |
| PARP-1 not expressed in the sample [55]. | Include a positive control to confirm the presence of the target protein. | |
| Transfer Efficiency | Unsuccessful transfer to membrane [18] [56]. | Check for correct transfer stack orientation and ensure no air bubbles are trapped. Use Ponceau S staining to visualize transfer efficiency. |
| Protein passed through membrane (low MW) [18]. | For low molecular weight isoforms or fragments, reduce transfer time and use a smaller pore size membrane (0.22 μm) [56]. | |
| Detection | Inactive detection substrate [55]. | Prepare fresh chemiluminescent substrate and check expiration dates. |
| Insufficient exposure time [57]. | Increase film or imager exposure time to capture faint signals. | |
| Buffer Contamination | Presence of sodium azide [18] [57]. | Avoid sodium azide in buffers with HRP-conjugated antibodies, as it inhibits HRP activity. |
Frequently Asked Questions (FAQs)
Q1: My positive control shows a band, but my sample lanes do not. What could be wrong? This typically indicates that there is insufficient PARP-1 antigen in your sample lanes. Solutions include increasing the amount of protein loaded, using a protein enrichment technique like immunoprecipitation, or verifying that your cell or tissue type expresses PARP-1 at detectable levels under your experimental conditions [56] [55]. Also, ensure your sample preparation includes protease inhibitors to prevent degradation.
Q2: I've verified my transfer was successful with Ponceau S, but I still get no signal. What should I check next? Focus on your antibody incubation steps. First, confirm that your primary antibody is specific for the species of your sample and has been validated for western blotting. Second, ensure your secondary antibody is compatible and functional. Finally, check that your detection reagents are fresh and active, and that you are allowing sufficient exposure time for signal capture [55] [57].
Q3: Could my blocking buffer be causing a weak signal? Yes, over-blocking or using an incompatible blocking buffer can mask the epitope and prevent antibody binding. If you are using high concentrations of milk or BSA, try reducing the concentration, shortening the blocking time, or switching to an alternative blocking agent [56]. For phosphoprotein detection, avoid milk-based blockers [18].
Q4: Why is understanding PARP-1's interaction with Sp1 relevant for its detection? Research has shown that PARP-1 can physically interact with and poly(ADP-ribosyl)ate the transcription factor Sp1, which in turn regulates the PARP-1 gene promoter [1]. This creates a complex feedback loop that can influence PARP-1 protein levels in the cell. Understanding this relationship is crucial when designing experiments, as cellular stress or DNA damage that activates PARP-1 can subsequently alter its own expression, potentially affecting detection.
Experimental Protocols for Enhanced Detection
Protocol 1: Optimized Western Blot for PARP-1 Detection
This protocol incorporates key steps to maximize the sensitivity and specificity for detecting PARP-1.
Sample Preparation:
- Lyse cells in a suitable RIPA buffer supplemented with fresh protease inhibitors.
- Determine protein concentration accurately using a Bradford or BCA assay.
- Prepare samples in Laemmli buffer, heat at 70°C for 10 minutes (instead of boiling) to avoid proteolysis and aggregation [56].
- Load 20-30 μg of total protein per lane as a starting point, adjusting as needed [57].
Gel Electrophoresis:
- Use a 8-12% Tris-Glycine gel for separating full-length PARP-1 (~116 kDa).
- Run gel at a constant voltage (e.g., 100-120V) to prevent "smiling" bands and ensure even heating.
Transfer:
- Use a wet transfer system for higher resolution, especially for high molecular weight proteins [56].
- Activate PVDF membrane in 100% methanol for 1 minute.
- Transfer at 100V for 60-90 minutes in a cold room or with an ice pack.
- Verify transfer efficiency by staining the membrane with Ponceau S.
Blocking and Antibody Incubation:
- Block the membrane with 5% BSA in TBST for 1 hour at room temperature. BSA is preferred over milk for its lower propensity for proteolytic activity and compatibility with phospho-specific antibodies [18].
- Incubate with primary antibody diluted in blocking buffer overnight at 4°C with gentle agitation [56].
- Wash 3 times for 5-10 minutes each with TBST.
- Incubate with HRP-conjugated secondary antibody (in blocking buffer) for 1 hour at room temperature.
- Wash 3 times for 5-10 minutes each with TBST.
Detection:
- Use a high-sensitivity chemiluminescent substrate.
- For very low abundance PARP-1, consider a substrate like SuperSignal West Femto [18].
- Image with a system capable of detecting weak signals, trying multiple exposure times.
Protocol 2: Co-immunoprecipitation (Co-IP) to Study PARP-1 Interactions
This protocol, based on methods used in PARP-1 research, allows for the study of PARP-1's protein partners, such as Sp1 [1].
- Prepare Cell Lysate: Lyse cells in a non-denaturing lysis buffer (e.g., containing NP-40 or Triton X-100) with protease inhibitors.
- Pre-clear Lysate: Incubate lysate with Protein A/G beads for 30-60 minutes to reduce non-specific binding.
- Immunoprecipitation: Incubate the pre-cleared lysate with an anti-PARP-1 antibody (or control IgG) overnight at 4°C with gentle rotation.
- Capture Complexes: Add Protein A/G beads and incubate for 2-4 hours at 4°C to capture the antibody-protein complexes.
- Wash Beads: Pellet beads and wash 3-4 times with ice-cold lysis buffer to remove unbound proteins.
- Elute Proteins: Elute bound proteins by boiling the beads in 2X Laemmli buffer for 5-10 minutes.
- Analysis: Analyze the eluted proteins by western blotting to detect PARP-1 and its potential interacting partners (e.g., Sp1).
Visualizing the Workflow: From Problem to Solution
The following diagram outlines a logical, step-by-step process for diagnosing and resolving a "no signal" problem, integrating the key recommendations from this guide.
PARP-1 Regulation and Detection Interplay
The molecular biology of PARP-1 itself presents unique challenges for its detection. The diagram below illustrates the key regulatory feedback loop involving PARP-1 and Sp1, which can influence protein levels and detection.
The Scientist's Toolkit: Key Research Reagent Solutions
Table 2: Essential Reagents for PARP-1 Western Blotting
| Reagent | Function | Key Considerations for PARP-1 |
|---|---|---|
| Protease Inhibitors | Prevents degradation of PARP-1 during sample prep. | Essential for maintaining protein integrity. Always use a fresh cocktail. |
| BSA Blocking Buffer | Blocks nonspecific sites on the membrane. | Preferred over milk for better compatibility and lower background [18]. |
| High-Affinity PARP-1 Antibody | Specifically binds to the PARP-1 protein. | Validate using PARP-1 knockout cell lysates as a negative control. |
| HRP-Conjugated Secondary Antibody | Enables detection of the primary antibody. | Ensure host species compatibility. Avoid sodium azide in storage buffers. |
| High-Sensitivity ECL Substrate | Generates light signal for detection. | Required for detecting low-abundance PARP-1. Use fresh reagents. |
| PVDF Membrane | Binds proteins after transfer. | Offers high protein-binding capacity and strength. Must be activated in methanol [49]. |
| Ponceau S Stain | Reversibly stains proteins on the membrane. | Critical for a quick and easy verification of successful protein transfer [55]. |
FAQ: Addressing Common Non-Specific Band Concerns
What are the primary causes of non-specific or diffuse bands in western blotting? Non-specific bands most commonly result from antibody cross-reactivity, excessive protein loading, or high antibody concentration. Other factors include sample degradation, insufficient washing, or suboptimal blocking conditions [18] [41].
How can I determine if non-specific bands are due to antibody cross-reactivity? Perform a BLAST search to check for shared epitopes, use a different cell line or tissue known to express your target, or try a monoclonal antibody instead of a polyclonal one, as monoclonal antibodies offer greater specificity [41].
Why do I see different banding patterns between different cell passages? Frequent cell passaging can lead to gradual changes in protein expression profiles, including the emergence of new splice variants or modified proteins that share similar epitopes with your target. Run original and current cell line samples in parallel to identify passage-dependent changes [41].
Troubleshooting Multiple Non-Specific Bands
Multiple non-specific bands on your western blot membrane indicate that your detection antibodies are binding to proteins other than your target. The table below summarizes the primary causes and corresponding solutions for this common issue.
Table 1: Comprehensive Guide to Troubleshooting Non-Specific Bands
| Cause of Non-Specific Bands | Specific Solutions | Additional Technical Notes |
|---|---|---|
| Antibody Concentration Too High | Reduce primary and/or secondary antibody concentration; perform antibody titration [18] [41]. | Optimal dilution varies by antibody; use a reagent gradient to determine ideal concentration [43]. |
| Excess Protein Loaded | Reduce the amount of total protein loaded per lane [18] [41]. | For mini-gels, do not exceed 10-15 μg of cell lysate per lane [18]. |
| Antibody Cross-reactivity | Use antibodies validated for western blotting; switch to monoclonal antibodies; use affinity-purified antibody [18] [41]. | Check manufacturer's datasheet for validated applications and known cross-reactivity. |
| Sample Degradation | Use fresh sample preparation; add protease inhibitor cocktail to lysis buffer [18] [41]. | Perform lysis at 4°C or on ice to minimize degradation [43]. |
| Insufficient Washing | Increase number and volume of washes; add 0.05% Tween 20 to wash buffer [18] [41]. | Avoid excessive Tween 20 concentration as it can strip proteins from membrane [18]. |
| Suboptimal Blocking | Increase blocking time; optimize choice of blocking agent; ensure adequate protein concentration in block [18] [41]. | Block for at least 1 hour at room temperature or overnight at 4°C [18]. |
| Multimer Formation | Boil protein sample for 10 minutes in SDS-PAGE sample buffer before loading to disrupt multimers [41]. | For heat-sensitive proteins, try incubation at 70°C for 10-20 minutes or 37°C for 30-60 minutes [43]. |
Experimental Protocols for Optimal Specificity
Antibody Titration Protocol
Determining the optimal antibody concentration is crucial for minimizing non-specific binding while maintaining strong signal for your target band.
- Prepare Membrane Strips: Load your protein sample evenly across a wide lane or multiple lanes. After transfer, cut the membrane into vertical strips, each containing your sample [43].
- Apply Antibody Gradients: Incubate each membrane strip with a different dilution of your primary antibody (e.g., 1:100, 1:500, 1:1000, 1:5000) [43].
- Standard Detection: Use the same secondary antibody concentration and detection method for all strips.
- Analysis: Identify the antibody dilution that provides the strongest target signal with the cleanest background and least non-specific bands.
Optimized Blocking and Washing Protocol for PARP-1
Specific blocking conditions are particularly important for nuclear proteins like PARP-1 to reduce non-specific interactions.
- Blocking Solution: Use 5% BSA in Tris-buffered saline (TBS) with 0.05% Tween 20 for 1 hour at room temperature or overnight at 4°C [18].
- Antibody Incubation: Prepare primary and secondary antibody dilutions in blocking solution (BSA in TBS with 0.05% Tween 20) [18].
- Washing Steps: Wash membrane 3-5 times for 5 minutes each with TBS containing 0.05% Tween 20 (TBST) after both primary and secondary antibody incubations [18] [41].
- Special Considerations for Phosphoproteins: When detecting phosphorylated proteins or using avidin-biotin systems, avoid milk-based blocking buffers as they can cause high background [18].
Research Reagent Solutions for PARP-1 Western Blotting
The table below outlines essential reagents and their specific functions for successful PARP-1 detection with minimal non-specificity.
Table 2: Key Research Reagents for PARP-1 Western Blotting
| Reagent | Function | Specific Application Notes |
|---|---|---|
| PARP-1 Monoclonal Antibody (clone 123) | Specific detection of PARP-1 protein | Recommended dilution: 1-3 µg/mL for western blot; detects C-terminal region of human PARP [12]. |
| Protease Inhibitor Cocktail | Prevents protein degradation during sample preparation | Essential for maintaining PARP-1 integrity; add fresh to lysis buffer [41] [43]. |
| BSA Blocking Buffer | Reduces non-specific antibody binding | Preferred over milk for PARP-1 studies, especially when detecting phosphoproteins [18]. |
| Tween 20 Detergent | Surfactant that reduces background in wash buffers | Use at 0.05% concentration in both blocking and wash buffers [18]. |
| Prestained Protein Markers | Molecular weight reference for PARP-1 (116 kDa) | Use markers compatible with western imaging; verify transfer efficiency [18]. |
| SDS-PAGE Sample Prep Kit | Removes interfering substances from samples | Eliminates excess salts and detergents that cause streaking and distorted bands [18]. |
Troubleshooting Workflow Diagram
Antibody Optimization Diagram
By systematically addressing these factors and implementing the optimized protocols outlined above, researchers can significantly improve the specificity of their PARP-1 western blots, resulting in cleaner, more interpretable data for their research and drug development applications.
Correcting Speckled or Swirled Background Patterns Caused by Handling Issues
FAQ: Identifying and Troubleshooting Handling-Related Background Patterns
Q1: What do specific background patterns on my western blot indicate about handling issues? Specific, non-uniform background patterns are often direct visual clues of technical errors during the handling of your blot. The table below summarizes how to diagnose and correct these common issues.
Table 1: Troubleshooting Speckled and Swirled Background Patterns
| Background Pattern | Primary Cause | Corrective Action |
|---|---|---|
| White circles/ovals | Air bubbles trapped between the membrane and gel during transfer [43]. | Ensure the "sandwich" is properly assembled by rolling a serological pipette or test tube over its surface with firm pressure to displace air [43]. |
| Dark splotches or patches | Dirty transfer equipment, degraded or improperly mixed blocking buffer, or insufficient rocking during incubation steps [43]. | Clean transfer cassettes and trays thoroughly; always prepare fresh blocking buffer and ensure it is fully dissolved; use consistent and continuous agitation in all incubation and washing steps [43]. |
| Overall high background | Insufficient blocking time or concentration; membrane handled with ungloved hands [43]. | Increase blocking time to a minimum of 1 hour; ensure the blocking buffer concentration is appropriate; always handle membranes with clean forceps or gloved hands. |
Q2: How can improper handling affect my PARP-1 blot specifically? PARP-1 is a ubiquitous nuclear protein, and its detection can be challenging due to its abundance and the presence of proteolytic fragments [58]. Handling issues like those above can obscure the specific bands for full-length PARP-1 (~116 kDa) and its cleavage products (e.g., ~89 kDa and ~24 kDa), which are critical for interpreting experimental outcomes in apoptosis and other cellular processes [58]. A clean background is essential for accurately quantifying these species.
Experimental Protocol: A Method to Eliminate Handling-Related Background
The following protocol is designed to systematically prevent the handling issues that lead to speckled and swirled backgrounds, with particular attention to steps critical for PARP-1 analysis.
Title: Optimized Western Blot Handling Protocol for Low-Background PARP-1 Detection
Objective: To transfer proteins and immunodetect PARP-1 with minimal, uniform background by eliminating technical handling errors.
Materials:
- Membrane: Nitrocellulose or PVDF [59] [60].
- Transfer System: Wet or semi-dry transfer apparatus [43].
- Blocking Buffer: 5% non-fat milk or BSA in TBST*.
- Antibody Diluent: TBST or a commercial antibody diluent.
- Primary Antibody: Validated anti-PARP-1 antibody.
- Secondary Antibody: HRP- or fluorescence-conjugated, specific to the host species of the primary antibody.
*Note: Consult the antibody datasheet, as some PARP-1 antibodies perform better with specific blocking agents [43].
Methodology:
- Gel and Membrane Preparation:
- After electrophoresis, carefully equilibrate the gel in transfer buffer as per standard protocol.
- Cut one corner of the membrane (e.g., top-left) for consistent orientation throughout the experiment [43].
Transfer Assembly (Critical Step to Prevent Air Bubbles):
- Submerge all components (filter papers, gel, membrane) in transfer buffer.
- Assemble the transfer "sandwich" on a flat, submerged surface to prevent air introduction.
- Use a clean test tube or a dedicated roller to firmly roll across the entire surface of the sandwich, applying steady pressure to squeeze out all air bubbles [43].
Post-Transfer Handling:
- After transfer, disassemble the cassette and immediately place the membrane in a clean container with Ponceau S stain or a reversible protein stain to confirm efficient and uniform transfer [43].
Blocking and Antibody Incubations:
- Incubate the membrane with an adequate volume of freshly prepared blocking buffer for at least 1 hour at room temperature with continuous rocking [43].
- Dilute primary and secondary antibodies in the recommended diluent.
- Ensure the membrane is fully submerged and agitated during all incubation and washing steps to ensure even coverage and prevent localized high background [43].
Experimental Workflow and Diagnostic Pathway
The following diagram illustrates the key steps and decision points in the optimized handling protocol to prevent background patterns.
The Scientist's Toolkit: Research Reagent Solutions
Table 2: Essential Reagents for Flawless Membrane Handling
| Item | Function | Considerations for PARP-1 Research |
|---|---|---|
| Nitrocellulose or PVDF Membrane | Solid support for immobilizing transferred proteins [59] [60]. | Pore size is critical: use 0.45 µm for PARP-1 (~116 kDa); for small cleavage fragments (<15 kDa), a 0.2 µm pore size prevents blow-through [43]. |
| Transfer Buffer | Medium for protein migration from gel to membrane. | Add methanol/SDS per protocol. Adjust alcohol/SDS ratios to optimize transfer of PARP-1 and its fragments [43]. |
| Blocking Agent (e.g., BSA, Non-Fat Dry Milk) | Coats the membrane to prevent non-specific antibody binding [59]. | Use a high-quality, freshly prepared solution. Some phospho-specific antibodies require BSA [59]. |
| Clean Forceps | For safe, contamination-free membrane handling. | Essential for avoiding fingerprint oils and contaminants that cause dark splotches [43]. |
| Ponceau S Stain | Reversible stain for visual confirmation of uniform protein transfer [43]. | A quick, critical quality control step before proceeding to immunodetection [43]. |
PARP-1 Western Blot Troubleshooting Guide
Weak or No Signal for Low-Abundance PARP-1
| Problem | Possible Cause | Recommended Solution | Expected Outcome |
|---|---|---|---|
| Weak or no signal on blot | Inefficient transfer to membrane [18] | - Stain gel post-transfer to check efficiency.- Use prestained markers to monitor transfer.- Increase transfer time/voltage.- For low MW antigens (<50 kDa), add 20% methanol to transfer buffer [18]. | Clear detection of full-length (113 kDa) and cleaved (89 kDa) forms [61] [6]. |
| Insufficient antigen (low PARP-1 abundance) [18] | - Load more total protein (e.g., 20-30 μg per lane [6]).- Concentrate sample if needed.- Use high-sensitivity chemiluminescent substrate (e.g., SuperSignal West Femto [18]). | Enhanced signal for low-copy-number targets. | |
| Antigen masked by blocking buffer [18] | - Decrease protein concentration in blocking buffer.- Test alternative blockers (e.g., BSA instead of milk). | Improved antibody access to antigen. | |
| Low antibody concentration or affinity [18] | - Increase primary antibody concentration (e.g., 1:500 to 1:1000 for ab227244 [6]).- Perform dot blot to verify antibody activity. | Stronger, specific signal. |
Non-Specific Bands and High Background
| Problem | Possible Cause | Recommended Solution | Expected Outcome |
|---|---|---|---|
| Non-specific or diffuse bands | Antibody concentration too high [18] | - Titrate primary antibody to find optimal dilution.- Reduce concentration of HRP-conjugated secondary antibody. | Sharper, specific bands at 113 kDa and 89 kDa. |
| Too much protein loaded [18] | - Reduce total protein load per lane (do not exceed 0.5 μg per band recommendation [18]). | Reduced background and non-specific bands. | |
| Multiple bands | Proteolytic degradation | - Add fresh protease inhibitors during lysis.- Keep samples on ice.- Avoid repeated freeze-thaw cycles. | Clear primary bands without lower MW degradation products. |
| High background | Insufficient blocking [18] | - Block for at least 1 hour at room temperature or overnight at 4°C.- Use blocking buffer with 0.05% Tween 20.- For phosphoproteins, use BSA in TBS instead of milk [18]. | Clean background with minimal non-specific staining. |
| Insufficient washing [18] | - Increase wash volume and frequency.- Add 0.05% Tween 20 to wash buffer. | Reduced background noise. |
Optimizing Detection of Modified PARP-1 Forms
| Problem | Possible Cause | Recommended Solution | Expected Outcome |
|---|---|---|---|
| Difficulty detecting cleaved PARP-1 (89 kDa) | Cleavage fragments not well transferred | - For 89 kDa fragment, optimize transfer time to retain efficiency.- Use PVDF membrane for better retention. | Clear detection of both full-length and cleaved PARP-1 [61] [6]. |
| Smearing or unusual bands | PARP-1 aggregation or DNA contamination [18] | - Shear genomic DNA by sonication or pass lysate through fine-gauge needle.- Add Benzonase to digest nucleic acids. | Reduced viscosity and improved band resolution. |
| Inconsistent cleavage detection | Sample preparation inducing artifacts | - Standardize apoptosis induction controls.- Include positive control (e.g., cisplatin-treated HCT116 cells [6]). | Consistent detection of PARP-1 cleavage in experimental samples. |
Frequently Asked Questions (FAQs)
Q1: What are the expected molecular weights for PARP-1 and its cleavage products in Western blot?
A1: Full-length PARP-1 migrates at approximately 113-116 kDa [61] [6]. During apoptosis, caspase cleavage generates a characteristic 89 kDa fragment (and a 24 kDa fragment not typically detected in standard Western blots) [61] [6]. Always include molecular weight markers and positive controls for both forms.
Q2: How can I enhance sensitivity for detecting low-abundance PARP-1 without increasing background?
A2: Implement a multi-pronged approach: (1) Use high-affinity, validated antibodies at optimal concentration [18] [6]; (2) Employ signal amplification systems such as high-sensitivity chemiluminescent substrates [18]; (3) Optimize blocking conditions by testing different buffers (BSA-based often superior to milk for low-abundance targets) [18]; (4) Ensure efficient transfer by validating with reversible protein stains [18].
Q3: My PARP-1 blots show multiple non-specific bands. How can I confirm the specific band is PARP-1?
A3: Several validation strategies can be employed: (1) Knockdown validation: Use siRNA/shRNA to reduce PARP-1 expression; the specific band should diminish [6]. (2) Genetic knockout controls: Compare signals in PARP-1+/+ and PARP-1-/- cells if available [1]. (3) Immunoprecipitation validation: Pre-clear lysate with PARP-1 antibody before Western blotting [6]. (4) Compare with known positive control lysates (e.g., HeLa, 293T cells) [6].
Q4: What are the key considerations for detecting PARP-1 cleavage during apoptosis?
A4: To reliably detect PARP-1 cleavage: (1) Sample collection timing is critical - harvest cells when apoptosis is active but not complete. (2) Use antibodies recognizing the C-terminal region that can detect both full-length and the 89 kDa fragment [61]. (3) Include appropriate controls: Untreated cells (full-length only) and cells induced to undergo apoptosis (e.g., with cisplatin [6]). (4) Ensure proper lysis conditions to preserve cleavage fragments without degradation.
Q5: How does PARP-1 modification affect its function and detection?
A5: PARP-1 undergoes several modifications that impact its function:
- Auto-PARylation: PARP-1 can add poly(ADP-ribose) chains to itself, which may alter its electrophoretic mobility [1].
- Cleavage: Caspase-mediated cleavage during apoptosis inactivates PARP-1 and serves as an apoptosis marker [61] [6].
- Transcription factor interactions: PARP-1 physically interacts with and PARylates transcription factors like Sp1, reducing their DNA binding activity [1].
These modifications can be studied using specific inhibitors (e.g., PJ34) or by manipulating PARP-1 expression [1] [62].
Experimental Protocols for PARP-1 Research
Protocol: Optimized Western Blot for PARP-1 and Cleavage Products
Sample Preparation
- Lysis: Use RIPA buffer supplemented with fresh protease inhibitors (e.g., 1 mM PMSF, protease inhibitor cocktail) and 1-2 μM PARP inhibitor to prevent auto-PARylation during processing.
- Protein Quantification: Perform BCA assay to standardize protein loading.
- Loading: Load 20-30 μg of total protein per lane [6]. Include positive controls for full-length and cleaved PARP-1.
Gel Electrophoresis
- Gel Type: 7.5-10% SDS-PAGE gels provide optimal resolution for PARP-1 [6].
- Running Conditions: Run at 80V through stacking gel, then 100-120V through resolving gel until dye front reaches bottom.
Transfer
- Membrane: PVDF recommended for better retention of proteins.
- Conditions: Semi-dry transfer at 18V for 60 minutes [6] or wet transfer at 100V for 60-90 minutes on ice.
Blocking and Antibody Incubation
- Blocking: Use 5% non-fat dry milk or 3% BSA in TBST for 1 hour at room temperature [6].
- Primary Antibody: Incubate with anti-PARP-1 antibody at appropriate dilution (e.g., 1:1000-1:5000 [6]) in blocking buffer overnight at 4°C.
- Washing: 3×10 minutes with TBST.
- Secondary Antibody: Species-appropriate HRP-conjugated antibody at 1:10000 dilution [6] in blocking buffer for 1 hour at room temperature.
Detection
- Enhanced Chemiluminescence: Use high-sensitivity ECL substrate.
- Exposure Time: Start with 30 seconds and adjust as needed.
Protocol: Validating PARP-1 Antibody Specificity
Immunoprecipitation Followed by Western Blot
- Immunoprecipitation: Use 2-4 μg of PARP-1 antibody [6] and 1-3 mg of total protein lysate.
- Incubation: Rotate overnight at 4°C.
- Bead Capture: Add protein A/G beads and incubate 2-4 hours.
- Washing: Wash beads 3-4 times with lysis buffer.
- Elution: Use 2× Laemmli buffer, boil for 5 minutes.
- Western Blot: Analyze by standard Western blot procedure.
Knockdown Validation
- Transfection: Transfect cells with PARP-1-specific siRNA or non-targeting control.
- Harvest: Collect cells 48-72 hours post-transfection.
- Analysis: Compare PARP-1 levels in control versus knockdown samples by Western blot.
PARP-1 Signaling and Regulation Pathways
PARP-1 Regulation and Downstream Effects
This diagram illustrates the key regulatory pathways involving PARP-1. Upon DNA damage, PARP-1 becomes activated and catalyzes PARylation, which can inhibit transcription factors like Sp1 [1] and C/EBPβ [62]. Under conditions of severe damage, apoptosis is triggered leading to caspase-mediated cleavage and inactivation of PARP-1 [61] [6].
Research Reagent Solutions
| Reagent | Function/Application | Key Features |
|---|---|---|
| Anti-PARP1 Antibody (13371-1-AP) [61] | Detection of PARP-1 in WB, IHC, IF, IP | - Recognizes C-terminal region (667-1014 aa)- Detects full-length (113 kDa) and cleaved (89 kDa) forms- Validated in human, mouse, rat samples |
| Anti-PARP1 Antibody (ab227244) [6] | Detection of PARP-1 in WB, IP, IHC-P, ICC/IF, ChIP | - Rabbit polyclonal- Works well for human, mouse, rat samples- Optimal dilution: 1:500-1:10000 for WB |
| PARP Inhibitor PJ34 [1] [62] | Chemical inhibition of PARP activity | - Enhances Sp1 DNA binding when inhibiting PARP-1 [1]- Promotes adipogenesis when inhibiting PARP-1 [62] |
| PARP Inhibitor BYK204165 [62] | Selective PARP-1 inhibition | - Promotes adipogenesis in cell models [62] |
| PARPi-FL [63] | PARP1-targeted fluorescent imaging | - Small molecule (620 Da)- BODIPY-FL conjugated to olaparib- Used for specific nuclear labeling and tumor imaging |
Validating Your Results: Ensuring Specificity, Reproducibility, and Assay Reliability
For researchers investigating cellular processes like DNA repair and cell death, the Western blot is a fundamental technique for analyzing poly(ADP-ribose) polymerase 1 (PARP-1). However, the reproducibility of this method hinges on the implementation of rigorously characterized controls. Proper controls are not merely procedural steps; they are critical for verifying the specificity of your antibody, the integrity of your experimental conditions, and the validity of your final data. This guide provides detailed protocols and troubleshooting advice to establish robust positive, negative, and loading controls for your PARP-1 Western blot experiments, ensuring reliable and interpretable results.
The Critical Role of Controls in PARP-1 Western Blotting
Well-characterized antibody reagents are the cornerstone of reproducible research findings [64]. In Western blotting, the performance of your primary antibody is heavily influenced by the assay context, meaning an antibody validated for one application or set of conditions may not perform optimally in yours. Furthermore, PARP-1 presents specific challenges, including its multiple isoforms, post-translational modifications, and cleavage during apoptosis, which can result in multiple bands or unexpected band sizes on your blot.
Implementing the controls outlined below allows you to:
- Confirm that your primary antibody is specifically recognizing PARP-1 and not cross-reacting with other proteins.
- Verify that a negative result (e.g., no band) is due to the biological absence of the protein and not a failure of your experimental protocol.
- Ensure that observed band size shifts (e.g., cleavage fragments) are genuine and not artifacts of protein degradation.
- Normalize your data accurately to account for variations in sample loading and transfer efficiency.
Essential Controls and Their Implementation
Positive Controls
A positive control is a sample known to contain the PARP-1 protein. It confirms that your immunodetection protocol worked correctly and provides a reference for the expected molecular weight.
Recommended Positive Controls:
- Cell Line Lysates: Use whole-cell lysates from cell lines that robustly express PARP-1.
- Overexpression Lysates: Lysates from cells transiently or stably overexpressing PARP-1 can serve as strong positive controls but should be used with caution as high expression levels may not reflect physiological conditions [64].
Implementation Protocol:
- Selection: Choose a cell line that endogenously expresses PARP-1. Common examples include HeLa (human cervical cancer), MCF7 (human breast cancer), and 293T (human embryonic kidney) cells [65] [13].
- Preparation: Culture the cells and prepare a whole-cell lysate using a standard RIPA buffer protocol.
- Aliquoting: Prepare a large, single batch of lysate, determine its protein concentration, and store it in single-use aliquots at -80°C to ensure consistency across multiple experiments.
- Inclusion: Load 10-20 µg of the positive control lysate on every gel you run.
Negative Controls
A negative control is a sample known to lack the PARP-1 protein. It is essential for confirming that the band you see in your experimental samples is due to specific antibody binding to PARP-1 and not non-specific interaction.
The Gold Standard: Genetic Knockout (KO) Controls The most rigorous negative control is a lysate from a cell line in which the PARP1 gene has been genetically knocked out [64] [13].
Implementation Protocol:
- Sourcing KO Lysates: Several commercial suppliers and academic repositories offer PARP-1 KO cell lines. The HAP1 PARP-1 KO cell line is a well-characterized example [13].
- Validation: When you obtain a KO cell line, validate it by running a Western blot alongside the wild-type (WT) control. You should observe a band at the expected molecular weight (~113-117 kDa) in the WT lane and no band in the KO lane.
- Troubleshooting Non-Specific Bands: If you observe bands in the KO lane, this indicates non-specific antibody binding. In this case, you must optimize your antibody dilution, try a different blocking buffer, or select a different antibody validated for specificity using KO samples.
Table: Summary of Essential Controls for PARP-1 Western Blotting
| Control Type | Purpose | Recommended Material | Expected Result |
|---|---|---|---|
| Positive Control | Verify immunodetection protocol works | HeLa, MCF7, or 293T cell lysate [13] | A clear band at ~113-117 kDa |
| Negative Control (KO) | Confirm antibody specificity | PARP-1 knockout HAP1 cell lysate [13] | No band at ~113-117 kDa |
| Cleavage Control | Validate apoptosis & antibody performance | Staurosporine-treated Jurkat or HeLa cell lysate [13] | Full-length band (113-117 kDa) and cleavage fragment (~25 kDa or ~89 kDa) |
| Loading Control | Normalize for protein loading | GAPDH, Actin, or Tubulin | Consistent band intensity across all lanes |
Cleavage Controls for Apoptosis Studies
PARP-1 is a key target of caspases during apoptosis, cleaving the 113-117 kDa full-length protein into fragments of ~89 kDa and ~25 kDa. Using a cleavage control is crucial for studies involving DNA-damaging agents or other apoptotic inducers.
Implementation Protocol:
- Induction of Apoptosis: Treat apoptosis-prone cells, such as Jurkat (human T-cell leukemia) or HeLa cells, with a known inducer. A common method is treatment with 1-3 µM Staurosporine for 3-24 hours [13].
- Lysate Preparation: Prepare lysates from both treated and untreated cells.
- Blotting: Include these lysates on your gel. When probed with an antibody against full-length PARP-1, you should see a reduction in the full-length band and the appearance of the ~89 kDa fragment in the treated sample. Antibodies specific to the cleavage site (e.g., ab32064) will detect the ~25 kDa fragment [13].
Loading Controls
A loading control is a probe for a ubiquitously and constitutively expressed protein used to normalize signal intensity across all lanes, correcting for differences in total protein loading and transfer efficiency.
Common Loading Controls for PARP-1 Blots:
- GAPDH (37 kDa)
- Beta-Actin (42 kDa)
- Alpha-Tubulin (55 kDa)
Implementation Protocol:
- Probing: The blot can be stripped and re-probed, or better yet, the membrane can be cut horizontally to allow simultaneous probing for PARP-1 (high molecular weight) and the loading control (lower molecular weight).
- Analysis: Use densitometry software to quantify the band intensity of both PARP-1 and the loading control. The PARP-1 signal should be divided by the loading control signal for each lane to generate a normalized value.
Experimental Protocol: Validating a PARP-1 Antibody Using KO Controls
This step-by-step protocol is adapted from standardized validation data [13].
Materials:
- Wild-type (WT) HAP1 cell lysate
- PARP-1 knockout (KO) HAP1 cell lysate
- Primary antibody: Rabbit monoclonal [E51] to PARP-1 (ab32064) or equivalent KO-validated antibody
- Secondary antibody: HRP-conjugated Goat anti-Rabbit IgG
- SDS-PAGE gel (4-20% gradient recommended)
- Nitrocellulose or PVDF membrane
- Blocking buffer: 5% non-fat dry milk (NFDM) in TBST
- TBST wash buffer
- Chemiluminescent substrate
Method:
- Sample Preparation: Dilute 20 µg of both WT and KO HAP1 lysates in Laemmli buffer.
- Gel Electrophoresis: Load the samples on an SDS-PAGE gel and run at constant voltage until the dye front reaches the bottom.
- Western Transfer: Transfer proteins from the gel to a membrane using a wet or semi-dry transfer system.
- Blocking: Incubate the membrane in 5% NFDM/TBST for 1 hour at room temperature.
- Primary Antibody Incubation: Incubate the membrane with the anti-PARP-1 antibody diluted (e.g., 1/10,000 in 5% NFDM/TBST) overnight at 4°C with gentle agitation [13].
- Washing: Wash the membrane 3-4 times for 5 minutes each with TBST.
- Secondary Antibody Incubation: Incubate with the HRP-conjugated secondary antibody diluted (e.g., 1/20,000 in 5% NFDM/TBST) for 1 hour at room temperature.
- Washing: Repeat the washing step as in #6.
- Detection: Develop the blot using a chemiluminescent substrate and image it.
Expected Results: A valid result will show a clear band at approximately 113-117 kDa in the WT lane and no band at that size in the KO lane. The presence of a band in the KO lane indicates non-specific binding and necessitates protocol optimization or a new antibody.
Research Reagent Solutions
Table: Key Reagents for PARP-1 Western Blotting
| Reagent | Function / Note | Example / Specification |
|---|---|---|
| Recombinant PARP1 Protein | Positive control; calibration standard | >90% purity, 117 kDa, Human full-length (1-1014 aa) [66] |
| PARP1 Knockout Cell Lysate | Gold-standard negative control | HAP1 or A549 PARP1 KO cell lines [13] |
| Anti-Cleaved PARP1 Antibody | Detects apoptotic cleavage fragment | Rabbit monoclonal [E51], detects ~25 kDa fragment [13] |
| HRP-conjugated Secondary Antibody | Signal detection | Used at 1/20,000 dilution for high sensitivity [13] |
| Blocking Buffer | Reduces non-specific binding | 5% Non-Fat Dry Milk (NFDM) in TBST [13] |
Frequently Asked Questions (FAQs)
Q1: My positive control works, but my experimental samples show no signal. What could be wrong? This suggests a problem with your experimental samples, not your protocol.
- Confirm Protein Concentration: Re-quantify your experimental samples. Degradation during repeated freeze-thaw cycles can also lead to signal loss.
- Check for PARP-1 Expression: Consult databases like the Human Protein Atlas or the Cancer Cell Line Encyclopedia (CCLE) to verify that your cell or tissue type is known to express PARP-1 [64].
- Optimize Lysis Conditions: Ensure your lysis buffer is effective at extracting nuclear proteins. Sonication or more stringent buffers may be necessary.
Q2: I see multiple bands in my Western blot. Does this mean my antibody is non-specific? Not necessarily. While non-specific binding is one cause, multiple bands can also reflect biological reality with PARP-1.
- Consider Cleavage: If you are working with cells under stress or treated with cytotoxic agents, the lower bands could be apoptotic cleavage fragments (~89 kDa, ~25 kDa).
- Consider Isoforms and PTMs: PARP-1 can have splice variants and is heavily post-translationally modified (e.g., poly(ADP-ribosyl)ation), which can alter its migration [67] [68].
- Action: Always run a KO control alongside. If the extra bands disappear in the KO lane, they are specific. If they persist, they are non-specific and require optimization of antibody dilution or blocking conditions.
Q3: What is the best way to normalize my PARP-1 Western blot data?
- Use a Valid Loading Control: GAPDH, Actin, or Tubulin are standard. Choose one that is not affected by your experimental conditions.
- Avoid Overexpression Lysates: Do not use lysates from cells overexpressing PARP-1 as the only positive control for normalization, as the ultra-high signal can distort quantitative analysis [64].
- Confirm Linearity: Perform a dilution series of a control sample to ensure that the detection method is in the linear range for both PARP-1 and your loading control.
Q4: How can I minimize batch-to-batch variation in my antibodies?
- Purchase Recombinant Antibodies: Recombinant antibodies are produced from a defined DNA sequence, offering superior batch-to-batch consistency compared to traditional polyclonal antibodies [64].
- Buy in Bulk: Purchase a large enough quantity of a single lot number to complete a full project.
- Validate Every New Lot: When a new lot is required, perform a side-by-side comparison with the old lot using your standard positive and negative controls to ensure performance is equivalent.
PARP-1 Western Blot Control Workflow
The following diagram illustrates the logical workflow for establishing and troubleshooting controls in a PARP-1 Western blot experiment.
In PARP-1 western blot research, confirming antibody specificity is not just a recommended step but a fundamental requirement for generating reliable and interpretable data. A primary challenge researchers face is the potential for non-specific antibody binding, which can lead to misleading conclusions about protein expression, cleavage, and modification. Genetic validation, utilizing knockout cell lines, provides the most rigorous method to confirm that an observed signal truly originates from the target protein. Within the context of optimizing blocking conditions, this validation becomes even more crucial, as different blocking buffers can influence background noise and mask or enhance non-specific bands. This guide provides detailed troubleshooting advice and protocols for employing PARP1 knockout cell lines to unequivocally verify antibody performance, ensuring the accuracy of your experimental outcomes.
The Validation Workflow: From Theory to Practice
Core Concept and Signaling Pathway
The following diagram illustrates the fundamental logic of using a genetic knockout to test antibody specificity. In a Wild-Type (WT) cell line, the antibody may bind to both the specific target (PARP1) and other non-specific proteins. In a Knockout (KO) cell line, the genuine target signal disappears, confirming the antibody's specific binding, while any remaining bands are revealed as non-specific.
Detailed Experimental Protocol
This workflow provides a step-by-step methodology for using a PARP1 knockout cell line to validate an antibody for Western Blotting.
Key Research Reagent Solutions
The following table details essential reagents used in the genetic validation of PARP1 antibodies, based on commercially available and well-characterized tools.
Table 1: Key Research Reagents for PARP1 Antibody Validation
| Reagent Name | Supplier / Catalog No. | Key Feature / Function | Validation Data Provided |
|---|---|---|---|
| PARP1 Knockout MCF7 Cell Line | BPS Bioscience #82690 [69] | CRISPR/Cas9-generated knockout of human PARP1 in a breast cancer cell line; supplied as >1 x 10^6 cells/vial. | Genomic sequencing & Western Blot confirmation of PARP1 absence [69]. |
| PARP (46D11) Rabbit mAb | Cell Signaling Technology #9532 [70] | Rabbit monoclonal antibody detecting total full-length PARP1 (116 kDa) and its 89 kDa cleavage fragment; does not cross-react with PARP2/3. | Specificity shown by knockout validation (implied); reactivity in Human, Mouse, Rat, Monkey; applications: WB, IP [70]. |
| PARP1 Polyclonal Antibody | Proteintech 13371-1-AP [71] | Rabbit polyclonal antibody recognizing the C-terminal region of PARP1; detects full-length and cleaved forms. | Validated in WB, IHC, IF; reactivity with Human, Mouse, Rat; user reviews confirm detection of full-length and 89 kDa fragment [71]. |
| Recombinant PARP1 Protein | Various (e.g., Immunogen for Antibodies) [71] | Purified PARP1 protein used as a positive control or as an immunogen. Serves as a critical reference for band size. | Key for confirming the expected molecular weight (~113-116 kDa) and as a positive control in Western Blots. |
Expected Results and Data Interpretation
When the validation experiment is performed correctly, the Western Blot results will clearly demonstrate the specificity (or lack thereof) of the antibody. The table below summarizes the expected outcomes.
Table 2: Interpreting Western Blot Results from a Knockout Validation Experiment
| Band Observed | Presence in Wild-Type (WT) Lysate | Presence in PARP1 Knockout (KO) Lysate | Interpretation |
|---|---|---|---|
| ~116 kDa | Yes | No | Specific signal for full-length PARP1. This validates the antibody for detecting the intact protein [70] [71]. |
| ~89 kDa | Yes (e.g., during apoptosis) | No | Specific signal for the caspase-cleaved fragment of PARP1. This validates the antibody for detecting apoptosis [70]. |
| Any other band | Yes | Yes | Non-specific binding. The antibody is binding to an unknown protein that is not PARP1. Optimize conditions or choose another antibody [47]. |
| ~116 kDa | Yes | Yes | Non-specific binding. The primary band is not PARP1. The antibody is not suitable for detecting PARP1. |
Frequently Asked Questions (FAQs) & Troubleshooting
Q1: My positive control (wild-type lysate) shows a weak or absent PARP1 band. What should I check?
- Antibody Quality and Concentration: First, confirm you have used the correct secondary antibody host species (e.g., anti-rabbit for a rabbit primary) [47]. Titrate your primary antibody concentration; the dilution on the datasheet is a starting point. If the antibody is old, test it on a known positive control [47] [18].
- Blocking Conditions: Over-blocking can sometimes mask epitopes. If using milk, which contains casein and biotin, try switching to BSA, especially when detecting phosphoproteins [47] [18].
- Transfer Efficiency: For high molecular weight proteins like PARP1 (116 kDa), inefficient transfer is common. After transfer, stain the gel with Coomassie to see if protein remains. Consider adding 0.01-0.05% SDS to your transfer buffer to help pull large proteins out of the gel [47] [18].
- Buffer Contamination: Ensure your wash and blocking buffers do not contain sodium azide, as it inhibits HRP-conjugated secondary antibodies. Make fresh buffers if necessary [47].
Q2: The background in my blot is high, making it difficult to interpret the knockout results. How can I reduce it?
- Optimize Blocking: Ensure sufficient blocking time (at least 1 hour at room temperature or overnight at 4°C). Use a compatible blocking buffer; BSA is often superior to milk for reducing background, particularly with phospho-specific antibodies [18].
- Adjust Antibody Concentration: High concentrations of primary or secondary antibody are a common cause of high background. Titrate down your antibody dilutions [47] [18].
- Increase Washing Stringency: Perform more thorough washes (e.g., 5-6 washes for 5-10 minutes each) with TBST (Tris-Buffered Saline with 0.05% Tween 20) after antibody incubations [47].
- Use Clean Buffers and Equipment: Filter buffers through a 0.45 µm filter and use clean incubation trays to remove particulates that cause speckled backgrounds [47].
Q3: I see multiple bands in both the WT and KO lanes. Does this mean my antibody is completely non-specific?
- Not necessarily. Multiple bands can be due to several factors:
- Protein Degradation: If the bands are smeared or below the expected size, it may indicate proteolysis. Always use fresh protease inhibitors during lysis [18].
- Post-Translational Modifications (PTMs): PARP1 can be modified (e.g., poly-ADP-ribosylation), which can shift its apparent molecular weight. A well-validated specific antibody like 46D11 will still show these shifts, but they should be absent in the KO lane [70] [71].
- Non-Specific Binding: If the extra bands are present with equal intensity in the WT and KO lanes, they represent non-specific cross-reactivity. You can try increasing the stringency of your washes (e.g., with a higher salt concentration) to reduce this binding [47] [49].
Q4: Beyond the knockout validation, what other controls can I use to support my findings?
- Knockdown Control: Use siRNA or shRNA to transiently knock down PARP1 expression as complementary evidence.
- Positive Control Lysate: Include a lysate from a cell line known to express PARP1 at high levels (e.g., HeLa cells) to confirm the assay is working [71].
- Loading Control: Always probe for a housekeeping protein (e.g., Actin, GAPDH) to ensure equal protein loading across all lanes [47].
- Secondary Antibody-Only Control: Omit the primary antibody to rule out any non-specific signal from the secondary antibody [47].
Orthogonal validation is a critical strategy in life science research that involves cross-referencing antibody-based results with data obtained using non-antibody-based methods. This approach is essential for verifying antibody validation data and identifying any effects or artifacts directly related to the antibody in question. For researchers studying PARP-1, a nuclear enzyme involved in DNA repair and gene transcription, implementing robust orthogonal validation ensures that Western blot data accurately reflects biological reality rather than methodological artifacts. Within the context of optimizing blocking conditions for PARP-1 Western blot research, orthogonal methods provide independent confirmation that your observed results stem from specific antibody-antigen interactions rather than non-specific binding or other experimental confounders.
Key Orthogonal Validation Strategies
Table 1: Orthogonal Validation Methods for PARP-1 Western Blot Research
| Validation Method | Core Principle | Key Application in PARP-1 Research | Data Correlation Approach |
|---|---|---|---|
| Genetic Validation | Modifying target protein expression through genetic techniques | Confirm PARP-1 antibody specificity using knockout cells | Compare signal intensity in PARP-1+/+ vs. PARP-1-/- cells [1] [64] |
| Transcriptomic Analysis | Comparing protein expression data with RNA sequencing information | Verify PARP-1 protein levels correspond with mRNA expression data | Mine databases like CCLE, BioGPS, or Human Protein Atlas [72] [64] |
| Independent Antibody Validation | Using different antibody-based assays to cross-verify results | Confirm PARP-1 detection across multiple platforms | Correlate Western blot data with IHC or immunofluorescence patterns [73] |
| Mass Spectrometry | Direct protein identification through proteomic analysis | Validate PARP-1 identity in Western blot bands | Compare staining pattern and protein size with MS results [73] [2] |
| Functional Assays | Linking protein detection to biological activity | Connect PARP-1 detection with enzymatic activity | Correlate band intensity with functional outputs in response to stressors [74] |
Detailed Experimental Protocols
Genetic Validation for PARP-1 Specificity
Genetic validation represents the gold standard for confirming antibody specificity in Western blotting [64]. This method is particularly valuable for PARP-1 research due to the availability of PARP-1 knockout models.
Protocol:
- Cell Line Selection: Obtain embryonic fibroblast cell lines from both normal mice (PARP-1+/+) and PARP-1 knockout mice (PARP-1-/-) [1].
- Sample Preparation: Prepare crude nuclear extracts from both cell lines using identical protocols to ensure comparability.
- Western Blot Analysis: Run parallel Western blots with your optimized blocking conditions using the same PARP-1 antibody dilution on both extracts.
- Result Interpretation: The PARP-1 antibody should produce a strong band at the expected molecular weight (approximately 113 kDa) in PARP-1+/+ cells and show absent or dramatically reduced signal in PARP-1-/- cells [1].
- Control Measures: Include loading controls (e.g., β-actin) to ensure equal protein loading across lanes.
This approach was successfully implemented in PARP-1 research, where it helped confirm that suppression of PARP-1 expression in knockout cells altered the expression and DNA binding properties of transcription factors like Sp1 [1].
Transcriptomic Correlation for PARP-1 Expression
Correlating Western blot data with transcriptomic information provides independent verification of protein expression patterns through mRNA-level data.
Protocol:
- Data Mining: Access public databases such as The Cancer Genome Atlas (TCGA), Expression Atlas, or the Human Protein Atlas to obtain RNA expression data for PARP-1 across different cell lines or tissues [64].
- Cell Line Selection: Select cell lines with documented varying levels of PARP-1 mRNA expression for Western blot analysis.
- Parallel Analysis: Perform Western blots under your optimized blocking conditions using cell lysates from the selected cell lines.
- Data Correlation: Compare the protein band intensity from Western blots with the normalized mRNA expression data from transcriptomic databases.
- Validation: Confirm that cell lines with high PARP-1 mRNA expression show strong Western blot signals, while those with low mRNA expression show correspondingly weaker signals.
This method is particularly useful for PARP-1 research, as studies have identified single nucleotide polymorphisms that affect PARP-1 mRNA levels and secondary structure [75].
Mass Spectrometry Confirmation
Migration capture mass spectrometry validation compares Western blot results with direct protein identification through proteomic analysis.
Protocol:
- Sample Preparation: Separate proteins via SDS-PAGE as for standard Western blotting.
- Parallel Processing: Instead of transferring to a membrane for immunodetection, excise the band at the expected molecular weight for PARP-1 (approximately 113 kDa).
- In-Gel Digestion: Subject the excised gel piece to tryptic digestion following standard proteomics protocols.
- LC-MS/MS Analysis: Analyze the resulting peptides using liquid chromatography coupled with tandem mass spectrometry.
- Protein Identification: Search the resulting spectra against protein databases to identify proteins present in the excised band.
- Validation: Confirm that PARP-1 is the predominant protein identified in the band of interest.
This approach has been valuable in PARP-1 research, particularly in studies identifying PARP-1-interacting proteins through techniques like rapid immunoprecipitation mass spectrometry of endogenous proteins (RIME) [2].
Troubleshooting Common Validation Issues
FAQ: Addressing Discrepancies in Orthogonal Validation
Q: What should I do if my PARP-1 Western blot shows a clear band in knockout cells despite genetic validation?
A: This typically indicates antibody non-specificity. First, ensure your knockout cells are truly PARP-1 deficient by validating with an alternative antibody or method. If non-specificity is confirmed, optimize your blocking conditions further. Research indicates that improper blocking buffer selection significantly impacts antibody performance [64]. Try alternative blocking agents such as BSA instead of milk, or include 0.05% Tween 20 in your blocking buffer to minimize non-specific binding [18] [76].
Q: How do I handle situations where PARP-1 protein levels don't correlate with mRNA expression data?
A: Discrepancies between protein and mRNA levels can arise from post-transcriptional regulation, protein degradation, or differences in protein half-life. Before questioning your Western blot results:
- Verify RNA and protein samples were prepared from the same cell passage and conditions.
- Check for protein degradation in your samples by including protease inhibitors during lysate preparation [76].
- Consider that PARP-1 expression is related to cell proliferation rather than DNA synthesis, with mRNA more abundant in the G1 phase [1].
- Utilize additional validation methods, such as genetic silencing, to confirm your results [73].
Q: My orthogonal validation methods are producing conflicting results. Which should I trust?
A: When validation methods conflict, consider the following:
- Genetic validation (knockout controls) generally provides the most definitive evidence of antibody specificity [64].
- Review the limitations of each method - transcriptomic data doesn't account for post-translational regulation, and mass spectrometry may detect low-abundance interacting proteins.
- Ensure all methods are performed with appropriate controls and optimized conditions.
- When studying PARP-1, consider its known post-translational modifications, including poly(ADP-ribosyl)ation, which can affect migration [1].
Research Reagent Solutions for PARP-1 Studies
Table 2: Essential Reagents for PARP-1 Western Blot and Validation Experiments
| Reagent Category | Specific Examples | Function in PARP-1 Research | Considerations for Orthogonal Validation |
|---|---|---|---|
| Validated Antibodies | Monoclonal anti-PARP-1 antibodies | Specific detection of PARP-1 protein | Choose antibodies validated for multiple applications; recombinant antibodies show less batch variation [64] |
| Cell Line Models | PARP-1+/+ and PARP-1-/- embryonic fibroblasts | Genetic controls for antibody specificity | Ensure authenticated sources; document passage numbers [1] |
| Protease Inhibitors | PMSF, leupeptin, protease inhibitor cocktails | Prevent PARP-1 degradation during extraction | PARP-1 is susceptible to proteolysis; always use fresh inhibitors [76] |
| Positive Control Lysates | Cell lines with known high PARP-1 expression | Verification of antibody performance | MCF-7 breast cancer cells often show elevated PARP-1 expression [72] |
| Chromatin Fractionation Kits | Subcellular fractionation reagents | Study PARP-1 trapping on chromatin | Essential for investigating PARP inhibitor mechanisms [2] |
| DNA Damage Inducers | Hydrogen peroxide, methyl methanesulfonate (MMS) | Activate PARP-1 for functional studies | Use to test PARP-1 response to oxidative stress [1] [74] |
Visual Experimental Workflows
Orthogonal Validation Workflow for PARP-1 Western Blot
This workflow illustrates the iterative process of orthogonal validation, where Western blot results must be consistent across multiple independent validation methods before antibody specificity can be confirmed.
Relationship Between PARP-1 Detection Methods in Orthogonal Validation
This diagram shows how different detection methods relate to PARP-1 protein analysis and converge to provide comprehensive orthogonal validation of Western blot results.
Assessing Inter-Lot and Inter-Batch Antibody Variability
In research focused on DNA damage repair mechanisms, the detection of Poly(ADP-ribose) polymerase-1 (PARP-1) via Western blot is a fundamental technique. PARP-1 is a 116 kDa nuclear enzyme that plays critical functions in many biological processes, including DNA repair and gene transcription, and its cleavage to an 89 kDa fragment is a key marker of apoptosis [77] [1]. Achieving specific and reproducible results requires optimal blocking conditions to minimize background and prevent non-specific antibody binding. This guide addresses how inter-lot and inter-batch variability of antibodies can impact these conditions and provides targeted troubleshooting strategies to ensure reliable PARP-1 detection.
Troubleshooting Guides & FAQs
Frequently Asked Questions (FAQs)
Q1: What is inter-lot and inter-batch antibody variability, and why does it matter for my PARP-1 research? Antibody variability refers to the differences in performance between different production lots or batches of the same antibody product. These differences can arise from changes in animal immunization, purification processes, or conjugation efficiency. For PARP-1 research, this variability can directly impact the sensitivity and specificity of your Western blots, leading to inconsistent detection of the full-length (116 kDa) or cleaved (89 kDa) forms of the protein [77] [78]. This is particularly critical when studying subtle changes in PARP-1 expression or cleavage in response to DNA-damaging agents or PARP inhibitors.
Q2: How can I tell if my high background is due to a new antibody lot or suboptimal blocking? High background caused by a new antibody lot often manifests as a general, even haze across the membrane or new non-specific bands. In contrast, insufficient blocking might cause high background primarily in the areas surrounding your sample lanes [18]. To isolate the variable, test the new antibody lot on a membrane with a known positive control (e.g., a cell lysate with confirmed PARP-1 expression) that worked well with the previous lot, while strictly maintaining your standard blocking and washing protocols.
Q3: My new antibody lot shows no signal for PARP-1. What are the first steps I should take? Begin by verifying your experimental workflow:
- Positive Control: Ensure you are using a validated positive control, such as a whole cell extract from HeLa cells, which is known to express PARP-1 [78].
- Protein Transfer: Confirm efficient transfer by staining your membrane with a reversible protein stain like Ponceau S [7].
- Antibody Dilution: Check the recommended dilution on the new product datasheet. A new lot may require a different optimal dilution [78].
Q4: Can I reuse diluted antibody solutions to save a costly new lot? Reusing diluted antibody is not recommended. The antibody is less stable after dilution, and the dilution buffer is prone to microbial or fungal contamination, which can degrade antibody performance and lead to unreliable results. Always use freshly prepared dilutions for optimal and consistent outcomes [78].
Step-by-Step Troubleshooting Guide
This guide helps diagnose and resolve common issues linked to antibody variability.
| Problem | Possible Cause Linked to Antibody Variability | Recommended Solutions |
|---|---|---|
| High Background | New antibody lot has a higher optimal concentration | Decrease concentration of primary and/or secondary antibody [18]. |
| Incompatible blocking buffer with new antibody characteristics | Avoid milk with phosphoprotein detection; use BSA in TBS for phospho-proteins. Test different blocking buffers (e.g., milk vs. BSA) [18] [78]. | |
| Weak or No Signal | New antibody lot has lower affinity or requires a different dilution | Increase antibody concentration. Ensure the antibody is specific for your target species (e.g., human, mouse, rat) [78]. |
| Insufficient antigen present; new lot may be less sensitive | Load more protein (20-30 µg per lane for whole cell extracts is a good starting point) [78]. | |
| Multiple Bands or Non-specific Binding | New antibody lot may have different cross-reactivity profiles | Check the antibody's specificity information on the product webpage. Multiple bands could indicate reactivity with other PARP isoforms or post-translationally modified forms of PARP-1 [78]. |
| Excess protein loaded for the new antibody's sensitivity | Reduce the amount of protein loaded per lane [18] [78]. |
Experimental Protocols for Validation
Protocol: Validating a New Antibody Lot for PARP-1
This protocol is designed to systematically compare the performance of a new antibody lot against a previously validated one.
1. Sample Preparation:
- Prepare a single, large batch of HeLa cell lysate (or another relevant cell line known to express PARP-1) using RIPA buffer supplemented with fresh protease and phosphatase inhibitors [78].
- Determine protein concentration using a BCA assay [7]. Aliquot and store at -70°C to avoid freeze-thaw cycles.
2. Gel Electrophoresis and Transfer:
- Load a series of protein amounts (e.g., 10 µg, 20 µg, 30 µg) of the same lysate batch onto an SDS-PAGE gel to create a standard curve.
- Include a pre-stained protein molecular weight marker.
- Perform wet transfer to a 0.2 µm nitrocellulose membrane at 70V for 2 hours at 4°C. For high molecular weight proteins like PARP-1 (116 kDa), reducing methanol content to 5-10% can improve transfer efficiency [78].
3. Blocking and Antibody Incubation:
- Divide the membrane into strips, each containing the standard curve of protein loads.
- Block all membranes with 5% non-fat dry milk in TBST for 1 hour at room temperature with agitation [78].
- Incubate one set of strips with the old, validated antibody lot at its known optimal dilution.
- Incubate a parallel set of strips with the new antibody lot at the same dilution, as well as at slightly higher and lower dilutions (e.g., ± 50%).
- Antibody Conservation Tip: Use the sheet protector (SP) strategy to minimize antibody consumption during this validation. For a mini-gel membrane, 20–150 µL of antibody solution is sufficient. Place the membrane on a sheet protector, apply the antibody solution, and overlay with the top leaflet to distribute the solution evenly. Incubate at room temperature [7].
- Wash and incubate with the appropriate HRP-conjugated secondary antibody.
4. Detection and Analysis:
- Develop the blot using a chemiluminescent substrate. Compare the signal intensity, background, and specificity between the old and new lots at each protein load and dilution.
- The new lot should be considered validated if it produces a similar signal-to-noise ratio for the specific PARP-1 bands (116 kDa and/or 89 kDa) at a comparable dilution.
Protocol: The Sheet Protector (SP) Strategy for Antibody Conservation
This innovative method drastically reduces the volume of antibody required, which is invaluable when testing and optimizing new antibody lots.
Key Steps and Workflow:
The following diagram illustrates the key steps in the Sheet Protector strategy for efficient antibody incubation.
Method Details:
- After blocking, briefly immerse the membrane in TBST and blot residual moisture with a paper towel to achieve a semi-dry state.
- Place the membrane on a cropped sheet protector leaflet.
- Apply the minimally required volume of antibody working solution directly onto the membrane. The volume can be calculated based on membrane size, for example, 20–150 µL for a 4.5 cm-long nitrocellulose membrane [7].
- Gently place the upper leaflet over the membrane. The surface tension will create a thin, even layer of antibody solution.
- Incubate the "SP unit" at room temperature. For incubations over 2 hours, place the sealed SP unit on a wet paper towel inside a zipper bag to prevent evaporation.
- Proceed with standard washing and detection steps. This method achieves sensitivity and specificity comparable to conventional methods while saving time and reagents [7].
Data Presentation: Key Research Reagent Solutions
The following table details essential materials and their functions for PARP-1 Western blotting, based on protocols and troubleshooting guides.
Table 1: Key Research Reagents for PARP-1 Western Blotting
| Item | Function / Rationale | Example & Specification |
|---|---|---|
| PARP-1 Antibody | Detects endogenous levels of full-length PARP1 (116 kDa) and its caspase-cleaved fragment (89 kDa). Validating each new lot is crucial. | e.g., PARP Antibody #9542; Reactivity: Human, Mouse, Rat, Monkey [77]. |
| Protease Inhibitors | Prevents proteolytic degradation of PARP-1, especially the cleavage that is not apoptosis-related, during sample preparation. | Protease Inhibitor Cocktail (100X) or PMSF. Include in lysis buffer [78]. |
| Blocking Buffer | Reduces non-specific binding of antibodies to the membrane, which is critical for managing background from different antibody lots. | 5% non-fat dry milk in TBST is standard. For phospho-proteins or high background, test 5% BSA in TBST [18] [78]. |
| Transfer Buffer | Facilitates the movement of proteins from the gel to the membrane. Optimization is key for high MW proteins like PARP-1. | 25mM Tris, 192mM Glycine, 20% Methanol. For PARP-1 (116 kDa), consider reducing methanol to 5-10% to improve transfer [78]. |
| Chemiluminescent Substrate | Generates light signal upon reaction with the HRP-conjugated secondary antibody for protein detection. | For low-abundance targets or weak signals, use maximum sensitivity substrates (e.g., SuperSignal West Femto) [18]. |
Visual Guide: Troubleshooting Decision Pathway
The flowchart below provides a logical pathway for diagnosing and addressing problems when a new antibody lot fails to perform as expected.
Comparative Performance Analysis of Commercial PARP-1 Antibodies
The accurate detection of Poly(ADP-ribose) polymerase 1 (PARP-1) via western blotting is fundamental to research in DNA damage response, cell death pathways, and cancer biology. PARP-1 is a nuclear enzyme with a calculated molecular weight of 113 kDa that migrates at approximately 113-116 kDa on SDS-PAGE, though it can be proteolytically cleaved to an 89 kDa fragment during apoptosis [79]. Within the broader context of optimizing PARP-1 research, the blocking step—the process of saturating non-specific protein-binding sites on the membrane—proves to be a critical determinant of experimental success. Inadequate blocking leads to high background and non-specific bands, while excessive or inappropriate blocking can mask epitopes and diminish specific signal [36]. This technical support center addresses common challenges and provides optimized protocols to ensure reliable and reproducible PARP-1 detection, with a particular emphasis on selecting optimal blocking conditions.
Troubleshooting PARP-1 Western Blots
This section provides a targeted guide to diagnosing and resolving the most frequent issues encountered when detecting PARP-1.
Weak, Faint, or Absent Signal
| Possible Cause | Solution |
|---|---|
| Incomplete Transfer | Confirm transfer efficiency by reversible membrane staining (e.g., Ponceau S) or gel staining post-transfer [18] [43]. For high MW proteins like full-length PARP-1 (113-116 kDa), add 0.01–0.05% SDS to the transfer buffer to facilitate movement from the gel [18]. |
| Low Antibody Affinity or Concentration | Increase the concentration of the primary or secondary antibody. For the PARP-1 antibody (13371-1-AP), users report success with dilutions ranging from 1:500 to 1:2,500 for western blot [79]. Perform a dot blot to check antibody activity [18]. |
| Insufficient Antigen | Load more protein (e.g., 25-50 µg per lane). Use a positive control, such as a cell lysate known to express PARP-1 (e.g., HeLa, Jurkat) [79]. |
| Antigen Masked by Blocking Buffer | Decrease the concentration of protein in the blocking buffer. Test alternative blocking agents like BSA instead of milk, as milk may contain phosphatases and other proteins that can interfere [18] [36]. |
| Sodium Azide Contamination | HRP-conjugated antibodies are inhibited by sodium azide. Ensure no azide is present in buffers used with HRP-based detection systems [18] [80]. |
High Background
| Possible Cause | Solution |
|---|---|
| Antibody Concentration Too High | Titrate both primary and secondary antibodies to find the optimal dilution that provides a strong specific signal with minimal background [18] [41] [80]. |
| Incompatible or Inefficient Blocking Buffer | Do not use milk with avidin-biotin systems. For phosphoprotein detection or with alkaline phosphatase (AP)-conjugated antibodies, avoid phosphate-based buffers (PBS); use BSA in Tris-buffered saline (TBS) instead [18]. Increase blocking time to at least 1 hour at room temperature or overnight at 4°C [18]. |
| Insufficient Washing | Increase the number and volume of washes. Include 0.05% Tween 20 in the wash buffer (TBST) to reduce weak non-specific binding [18] [81]. |
| Overloaded Protein | Reduce the total amount of protein loaded per lane. For most mini-gels, do not exceed 10-15 µg of total cell lysate per lane [18] [41]. |
Non-Specific or Extra Bands
| Possible Cause | Solution |
|---|---|
| Non-Specific Antibody Binding | Reduce the concentration of the primary antibody. Use monospecific or affinity-purified antibodies [80]. The PARP-1 antibody 13371-1-AP is a polyclonal antibody, making titration crucial [79]. |
| Protein Degradation | PARP-1 is susceptible to proteolytic cleavage, which can generate additional bands (e.g., ~89 kDa apoptotic fragment). Use fresh samples and add a broad-spectrum protease inhibitor cocktail during lysis [41] [79] [80]. |
| Incomplete Reduction | Incomplete breaking of disulfide bonds can cause high-order aggregates. Use fresh reducing agents (e.g., DTT, β-mercaptoethanol) in the sample buffer and boil samples for 5-10 minutes [81]. |
| Cross-reactive Secondary Antibody | Run a control blot with the secondary antibody alone (omitting the primary). If bands develop, choose a different, highly cross-adsorbed secondary antibody [81] [80]. |
Diffuse or Smeared Bands
| Possible Cause | Solution |
|---|---|
| Too Much Protein Loaded | Reduce the amount of total protein loaded on the gel [18] [80]. |
| Poor Gel Resolution | Ensure the gel is not overheated during electrophoresis. Run the gel at a lower voltage or use a cooling system [41]. |
| Viscous Samples (DNA Contamination) | Genomic DNA contamination can cause viscosity, leading to smearing. Shear the DNA by sonicating the lysate before loading [18]. |
Experimental Protocols for Optimal PARP-1 Detection
Standard Protocol for PARP-1 Western Blotting
Sample Preparation:
- Lyse cells in a suitable RIPA or Laemmli buffer supplemented with a protease inhibitor cocktail. Keep samples on ice.
- For PARP-1, boiling at 95°C may promote aggregation; as an alternative, heat samples at 70°C for 10 minutes to avoid proteolysis while ensuring denaturation [18] [43].
- Briefly sonicate lysates to shear genomic DNA and reduce viscosity.
- Centrifuge at >12,000 x g for 10 minutes to pellet insoluble material.
Gel Electrophoresis:
- Load 10-30 µg of total protein per lane alongside a prestained protein ladder.
- Electrophorese at 100-150V until the dye front nears the bottom. Use cooling if necessary to prevent "smiling" bands.
Transfer:
- For wet transfer, assemble the gel-membrane stack, ensuring no air bubbles are trapped.
- Transfer to a nitrocellulose or PVDF membrane. For PVDF, pre-wet in 100% methanol.
- Transfer conditions: 100V for 1 hour or 30V overnight at 4°C. For full-length PARP-1 (113 kDa), standard transfer is usually sufficient.
Blocking and Antibody Incubation:
- Blocking: Incubate the membrane in a suitable blocking buffer for 1 hour at room temperature with agitation. For general PARP-1 detection, 5% BSA or non-fat dry milk in TBST is effective. However, consult the table in Section 3.2 for specific recommendations.
- Primary Antibody: Incubate with anti-PARP-1 antibody diluted in blocking buffer. For antibody 13371-1-AP, a starting dilution of 1:1,000 is recommended, with successful results reported between 1:500 and 1:2,500 [79]. Incubate for 1 hour at room temperature or overnight at 4°C for enhanced sensitivity.
- Washing: Wash the membrane 3 times for 5-10 minutes each with TBST.
- Secondary Antibody: Incubate with an HRP-conjugated anti-rabbit secondary antibody, diluted in blocking buffer or TBST, for 1 hour at room temperature.
- Washing: Repeat the washing step as above.
Detection:
- Develop the blot using a enhanced chemiluminescence (ECL) substrate suitable for the sensitivity required.
- Image the blot using a CCD imager or X-ray film.
Optimized Blocking Conditions for PARP-1
The choice of blocking buffer is application-specific. Below is a summary of recommended conditions based on the search results and product data.
| Application | Recommended Blocking Buffer | Rationale and Notes |
|---|---|---|
| General PARP-1 Detection | 5% Non-Fat Dry Milk in TBST | A cost-effective and general-purpose blocker. Provides good signal-to-noise for most applications [36]. |
| Phospho-specific or AP-conjugated Antibodies | 3-5% BSA in TBST | BSA lacks phosphoproteins and caseins found in milk, which can cause background. TBS is preferred over PBS with AP-conjugates [18] [36]. |
| Biotin-Streptavidin Systems | 3-5% BSA in TBST | Non-fat dry milk contains endogenous biotin, which will lead to extremely high background in these systems [18] [80]. |
| High Background with Milk/BSA | Casein or Commercial Blockers | Casein provides a different protein profile. Commercial blockers (e.g., StartingBlock, SuperBlock) are optimized for low background [18] [36]. |
Visualizing the PARP-1 Western Blot Workflow and Troubleshooting Logic
The following diagram illustrates the key decision points in the western blot process, highlighting stages where blocking conditions are most critical for PARP-1 detection.
PARP-1 Western Blot and Troubleshooting Workflow
Frequently Asked Questions (FAQs)
Q1: What is the expected molecular weight for PARP-1, and what do lower bands indicate? A1: Full-length PARP-1 migrates at approximately 113-116 kDa. A prominent band around 89 kDa is the classic cleavage fragment generated by caspases during apoptosis. Bands at other molecular weights may indicate alternative cleavage by proteases like calpains or cathepsins, or non-specific binding. Always include a positive control for apoptosis (e.g., a treated cell lysate) to help with interpretation [79].
Q2: Why should I avoid using milk as a blocker in some PARP-1 experiments? A2: Non-fat dry milk is not recommended when 1) using phospho-specific antibodies, as milk contains phosphoproteins that can cause high background; 2) using avidin-biotin detection systems, because milk contains endogenous biotin; or 3) using primary antibodies raised in goat or sheep, as milk proteins can be cross-reactive. In these cases, BSA is a safer and more effective alternative [18] [36] [80].
Q3: My transfer was successful (Ponceau S confirmed), but I still see no PARP-1 signal. What should I do? A3: First, confirm antibody functionality with a dot blot or a known positive control lysate. Second, titrate your primary antibody; a higher concentration or longer incubation (overnight at 4°C) may be needed. Third, ensure your detection reagents are fresh and active by testing the secondary antibody directly with substrate. Finally, verify that your blocking buffer is not masking the PARP-1 epitope by testing a different blocker like BSA [81] [80].
Q4: How can I minimize background specifically for fluorescent western blotting of PARP-1? A4: For fluorescent detection, use TBS-based buffers instead of PBS, as phosphate can increase autofluorescence. Choose blocking buffers specifically formulated for fluorescence, which often contain minimal fluorescent contaminants. Ensure all incubation and wash steps are performed with agitation to ensure even coverage and reduce background splotches [18] [36].
The Scientist's Toolkit: Essential Reagents for PARP-1 Research
| Item | Function in PARP-1 Research |
|---|---|
| Protease Inhibitor Cocktail | Prevents proteolytic degradation of PARP-1 during sample preparation, preserving the full-length protein and preventing the appearance of artifactual cleavage bands [79] [43]. |
| PARP-1 Antibody (e.g., 13371-1-AP) | A well-validated polyclonal antibody for detecting full-length and cleaved PARP-1 in WB, IHC, and IF. Key for apoptosis studies [79]. |
| BSA (Bovine Serum Albumin) | A versatile blocking agent essential for experiments involving phospho-detection, biotin-streptavidin systems, or when milk gives high background [36] [80]. |
| Prestained Protein Ladder | Allows visual tracking of electrophoresis and transfer progress, and provides molecular weight estimation to confirm the size of PARP-1 bands [18] [43]. |
| Ponceau S Stain | A reversible stain used to quickly confirm successful and uniform protein transfer to the membrane before proceeding with blocking and antibody incubation [81] [43]. |
| HRP-Conjugated Secondary Antibody | Used with ECL substrates for high-sensitivity detection of PARP-1. Ensure it is specific to the host species of the primary antibody and is highly cross-adsorbed to minimize background [81]. |
| Enhanced Chemiluminescence (ECL) Substrate | A detection reagent for HRP. Use standard sensitivity for abundant targets and high-sensitivity substrates for low-abundance PARP-1 or cleavage fragments [18] [79]. |
| PARP Inhibitor (e.g., Olaparib, PJ34) | Pharmacological tool used as a positive control in experiments studying PARP-1 function, cleavage, and DNA damage response pathways [82]. |
Conclusion
Optimal blocking is a foundational step for successful PARP-1 western blotting, directly influencing signal-to-noise ratio, antibody specificity, and overall data reproducibility. This guide synthesizes a systematic approach from understanding PARP-1's molecular complexity to implementing validated protocols. Mastering these techniques is crucial for accurate interpretation of PARP-1 expression and modification, which has significant implications for basic cancer research, drug development, and the evaluation of PARP inhibitor therapies. Future directions include adapting these principles for automated capillary-based western systems and developing blockers specifically designed for complex post-translationally modified targets like PARP-1.
References
- 1. Regulation of poly(ADP-ribose) polymerase-1 (PARP-1) gene ... [https://pmc.ncbi.nlm.nih.gov/articles/PMC2175517/]
- 2. The ubiquitin-dependent ATPase p97 removes cytotoxic ... [https://www.nature.com/articles/s41556-021-00807-6]
- 3. PARP1 antibody (13371-1-AP) [https://www.ptglab.com/products/PARP1-Antibody-13371-1-AP.htm?srsltid=AfmBOoqZS6z2hprt5YmtEnjwngnMax3bCuykwzWOYEe7dVk1GwJT3Itx]
- 4. PARP-1 polyclonal antibody [https://www.enzo.com/product/parp-1-polyclonal-antibody/]
- 5. Serine ADPr on histones and PARP1 is a cellular target of ... [https://www.nature.com/articles/s41589-025-01974-5]
- 6. Anti-PARP1 antibody (ab227244) [https://www.abcam.com/en-us/products/primary-antibodies/parp1-antibody-ab227244]
- 7. Sheet Protector Strategy for Western Blot to Reduce ... [https://pmc.ncbi.nlm.nih.gov/articles/PMC12462392/]
- 8. 1-independent Apoptosis-inducing Factor (AIF) Release ... [https://pmc.ncbi.nlm.nih.gov/articles/PMC2857103/]
- 9. PARP1 auto-modification promotes faithful Okazaki ... [https://www.sciencedirect.com/science/article/pii/S1097276525007476]
- 10. Imaging poly(ADP-ribose) polymerase-1 (PARP1) in vivo ... [https://www.sciencedirect.com/science/article/pii/S2211383525003260]
- 11. How to Detect the ADP-Ribosylation PTM Using a PARylation ... [https://blog.cellsignal.com/validating-a-monoclonal-antibody-adp-ribosylation-ptm]
- 12. PARP1 Monoclonal Antibody (123) (436400) [https://www.thermofisher.com/antibody/product/PARP1-Antibody-clone-123-Monoclonal/436400]
- 13. Anti-Cleaved PARP1 antibody [E51] (ab32064) [https://www.abcam.com/en-us/products/primary-antibodies/cleaved-parp1-antibody-e51-ab32064]
- 14. Flow-cytometric assessment of cellular poly(ADP-ribosyl)ation ... [https://pmc.ncbi.nlm.nih.gov/articles/PMC1564410/]
- 15. Validation of the use of a fluorescent PARP1 inhibitor for the ... [https://pmc.ncbi.nlm.nih.gov/articles/PMC7136849/]
- 16. Blocking Strategies for IHC [https://www.thermofisher.com/us/en/home/life-science/protein-biology/protein-biology-learning-center/protein-biology-resource-library/pierce-protein-methods/blocking-strategies-ihc.html]
- 17. What causes non-specific antibody binding and how can it ... [https://www.cytometry.org/web/q_view.php?id=153&filter=Analysis%20Techniques]
- 18. Western Blot Troubleshooting [https://www.thermofisher.com/us/en/home/life-science/protein-biology/protein-biology-learning-center/protein-gel-electrophoresis-information/western-blot-troubleshooting.html]
- 19. Western Blotting Troubleshooting Guide [https://www.cellsignal.com/learn-and-support/troubleshooting/western-blot-troubleshooting-guide?srsltid=AfmBOorKc0iaEGiyj2yoWXK_sunZDFuSh1cTIQGskPL66P3gSmwS5DMo]
- 20. How to reduce non-specific reactions [https://www.mblbio.com/bio/g/support/method/nonspecific-reaction-reduction.html]
- 21. Poly (ADP-ribose) polymerase-1 inhibition decreases ... - PMC [https://pmc.ncbi.nlm.nih.gov/articles/PMC5529935/]
- 22. Correction: The BRCT Domain of PARP-1 Is Required for ... [https://journals.plos.org/plosbiology/article?id=10.1371/journal.pbio.1002621]
- 23. PARP Antibody #9542 [https://www.cellsignal.com/products/primary-antibodies/parp-antibody/9542?srsltid=AfmBOooQ72ecBlV6CToXA3iNS4YpikoOEu7xLtoRZS4dmdPjKi4bVmi8]
- 24. Poly(ADP-ribose) polymerase-1 and its cleavage products ... [https://pmc.ncbi.nlm.nih.gov/articles/PMC4013233/]
- 25. Anti-Cleaved PARP1 antibody [SP276] (ab225715) [https://www.abcam.com/en-us/products/primary-antibodies/cleaved-parp1-antibody-sp276-ab225715]
- 26. PARP1 Colorimetric Assay Kit [https://bpsbioscience.com/parp1-colorimetric-assay-kit-80580]
- 27. Poly(ADP-ribose) Polymerase 1 (PARP1) restrains MyoD- ... [https://www.nature.com/articles/s41598-020-72155-8]
- 28. - Non Dry Fat (NFDM) Solution for Milk Blocking Western Blots [https://www.sigmaaldrich.com/US/en/support/calculators-and-apps/non-fat-dry-milk-solution]
- 29. Blocking Buffers for Western Blot and ELISA [https://www.thermofisher.com/br/en/home/life-science/protein-biology/protein-biology-learning-center/protein-biology-resource-library/pierce-protein-methods/blocking-buffers-western-blot-elisa.html]
- 30. Reducing Non-Specific Binding in Western Blots: Blocking ... [https://synapse.patsnap.com/article/reducing-non-specific-binding-in-western-blots-blocking-agent-comparison]
- 31. Milk or BSA? How to Choose a Blocking Protein for Western Blot [https://blog.cellsignal.com/tech-tips-video-milk-or-bsa-choosing-a-blocking-protein-for-western-blot]
- 32. Frontiers | Vesicular translocation of PARP - 1 to cytoplasm causes... [https://www.frontiersin.org/journals/cellular-neuroscience/articles/10.3389/fncel.2024.1363154/full]
- 33. Targeting PARP1: A Promising Approach for Next- ... [https://pmc.ncbi.nlm.nih.gov/articles/PMC12162764/]
- 34. Tumor-targeted top1 inhibitor delivery with optimized parp ... [https://www.nature.com/articles/s41467-025-64509-5]
- 35. Targeting FEN1/EXO1 to enhance efficacy of PARP ... [https://www.sciencedirect.com/science/article/pii/S1936523325000683]
- 36. Western blot blocking: Best practices [https://www.abcam.com/en-us/knowledge-center/western-blot/western-blot-blocking-methods]
- 37. Blocking Buffers for Western Blot and ELISA [https://www.thermofisher.com/us/en/home/life-science/protein-biology/protein-biology-learning-center/protein-biology-resource-library/pierce-protein-methods/blocking-buffers-western-blot-elisa.html]
- 38. Western Blot Troubleshooting Guide [https://www.bio-techne.com/resources/protocols-troubleshooting/western-blotting-troubleshooting]
- 39. Guide to Western Blot Reagents [https://www.rockland.com/resources/guide-to-western-blot-reagents/?srsltid=AfmBOoqpENDiAaeiiaZQL8xMye84t8Hlmsxt3Nj1a-nPgwKMgTisAxy7]
- 40. Western Blotting Protocol [https://www.cellsignal.com/learn-and-support/protocols/protocol-western?srsltid=AfmBOoq8Gt3n6SfPUUz0zx8DL1AR2E1t8SlyIkE1BvMoDoUkUqGq8e-V]
- 41. What went wrong? A Western Blot Troubleshooting Guide [https://precisionbiosystems.com/western-blot-troubleshooting-guide/]
- 42. Western Blot Protocols and Recipes [https://www.thermofisher.com/us/en/home/life-science/protein-biology/protein-biology-learning-center/protein-gel-electrophoresis-information/western-blot-protocols.html]
- 43. Troubleshooting and Optimizing a Western Blot [https://blog.addgene.org/troubleshooting-and-optimizing-a-western-blot]
- 44. Western Blot Troubleshooting Guide - TotalLab [https://totallab.com/resources/western-blot-troubleshooting-guide/]
- 45. Vesicular translocation of PARP-1 to cytoplasm causes ADP ... [https://pmc.ncbi.nlm.nih.gov/articles/PMC10999663/]
- 46. PARP (46D11) Rabbit Monoclonal Antibody #9532 [https://www.cellsignal.com/products/primary-antibodies/parp-46d11-rabbit-monoclonal-antibody/9532?srsltid=AfmBOoqNeCOAy8oe0tQfvDfHqD_Y1ZOt48IRIxfJCuHuxTZb6XzRiN25]
- 47. The 8 Western Blot Failures and How to Prevent Them (2025 ... [https://wildtypeone.substack.com/p/the-8-western-blot-failures-and-how?utm_campaign=post&triedRedirect=true]
- 48. PARP1 antibody (13371-1-AP) [https://www.ptglab.com/products/PARP1-Antibody-13371-1-AP.htm?srsltid=AfmBOor9jC5PNV5Xykl6_-tqyGR-506faneSsPmyGY5w1hztEq3ZwAgv]
- 49. Western Blot Troubleshooting: 10 Common Problems and ... [https://synapse.patsnap.com/article/western-blot-troubleshooting-10-common-problems-and-solutions]
- 50. Western blotting analysis of PARP1 and PARP10 [https://bio-protocol.org/exchange/minidetail?id=10340569&type=30]
- 51. Transfer Buffers for Western Blotting [https://www.thermofisher.com/us/en/home/life-science/protein-biology/protein-assays-analysis/western-blotting/transfer-proteins-western-blot/transfer-buffers-western-blot.html]
- 52. 5 Tips for Reducing Non-specific Signal on Western Blots [https://www.biossusa.com/blogs/news/5-tips-for-reducing-non-specific-signal-on-western-blots?srsltid=AfmBOoo2MulOLiV-qqqfrl59jU9cFkRHtCEp_p8c2NKbDyCuPD5u1vob]
- 53. PARP1 genomics: chromatin immunoprecipitation ... [https://pmc.ncbi.nlm.nih.gov/articles/PMC3164790/]
- 54. Design, synthesis and biological evaluation of dual ... [https://www.sciencedirect.com/science/article/pii/S0753332224013714]
- 55. Western blot troubleshooting: no signal - Blog [https://www.arp1.com/blog/post/western-blot-troubleshooting-no-signal.html]
- 56. Western Blot Troubleshooting: Weak/No Signal & Other [https://www.ptglab.com/support/western-blot-protocol/western-blot-troubleshooting-weak-no-signal-other/?srsltid=AfmBOoqOhDVfdZOCj7GVVKwitp5rbGquxr4fwJ8C0SD2RkEQZbnPx8rC]
- 57. 101 Western Blot Troubleshooting Tips & Tricks [https://www.assaygenie.com/western-blot-troubleshooting-guide?srsltid=AfmBOordCWkhrh55ZGMMTpAKNkdqlH5lwJWJ2dA8lXpcozoACG99sJF9]
- 58. Poly(ADP-ribose) polymerase-1 and its cleavage products ... [https://www.sciencedirect.com/science/article/pii/S0167488913004242]
- 59. Western blot protocol [https://www.abcam.com/en-us/technical-resources/protocols/western-blot]
- 60. Protein purification and analysis: next generation Western ... [https://pmc.ncbi.nlm.nih.gov/articles/PMC6810642/]
- 61. PARP1 antibody (13371-1-AP) [https://www.ptglab.com/products/PARP1-Antibody-13371-1-AP.htm?srsltid=AfmBOooz4cEiv_nxfAniMSK4E6Ye2PTsHMyROareCaPfXalJM3_hdxU3]
- 62. PARP-1 Controls the Adipogenic Transcriptional Program by ... [https://pmc.ncbi.nlm.nih.gov/articles/PMC5258183/]
- 63. Combined PARP1-Targeted Nuclear Contrast and ... [https://jnm.snmjournals.org/content/63/6/912]
- 64. Antibody validation for Western blot: By the user, for the user [https://pmc.ncbi.nlm.nih.gov/articles/PMC6983856/]
- 65. PARP1 (NM_001618) Human Recombinant Protein [https://www.origene.com/catalog/proteins/recombinant-proteins/tp307085-parp1-nm-001618-human-recombinant-protein]
- 66. Recombinant human PARP1 protein (Active) (ab271649) [https://www.abcam.com/en-us/products/proteins-peptides/recombinant-human-parp1-protein-active-ab271649]
- 67. Mechanistic Rationale for Inhibition of Poly(ADP-Ribose) ... [https://pmc.ncbi.nlm.nih.gov/articles/PMC3113473/]
- 68. Serine-linked PARP1 auto-modification controls PARP ... [https://www.nature.com/articles/s41467-021-24361-9]
- 69. PARP1 Knockout MCF7 Cell line [https://bpsbioscience.com/parp1-knockout-mcf7-cell-line-82690]
- 70. PARP (46D11) Rabbit Monoclonal Antibody #9532 [https://www.cellsignal.com/products/primary-antibodies/parp-46d11-rabbit-monoclonal-antibody/9532?srsltid=AfmBOorU7haqg35ox9YVVMltUhZ_cR04r4hcSc6AZ3QhRiGWzQ8dqTKy]
- 71. PARP1 antibody (13371-1-AP) [https://www.ptglab.com/products/PARP1-Antibody-13371-1-AP.htm?srsltid=AfmBOorBMyEsdO-oeEVONtMJyvD7ili9gnoOx9_r4Wj_4nEQm-SWS1_A]
- 72. Hallmarks of Antibody Validation: Orthogonal Strategy [https://www.cellsignal.com/about-us/approach-validation-principles/orthogonal-data?srsltid=AfmBOop7B6BWuXAPjeNsKORjMZFlwasQr8WvcwLXZ-K-z72irY70yXm3]
- 73. How to Validate Antibodies with Western Blot on a Budget [https://www.neobiotechnologies.com/resources/antibody-validation-western-blot/?srsltid=AfmBOoqz4jTic-bUy-rrPajD_pmug9P7F-mv6DUKDbfpf-FzAG-gozYV]
- 74. PARP-1 inhibition influences the oxidative stress response ... [https://www.sciencedirect.com/science/article/pii/S2213231716300222]
- 75. A single nucleotide variant of human PARP1 determines ... [https://www.nature.com/articles/s41698-020-0113-2]
- 76. Western Blotting Troubleshooting Guide [https://www.cellsignal.com/learn-and-support/troubleshooting/western-blot-troubleshooting-guide?srsltid=AfmBOorQdJ1HSSpTrCYZxxkfTo2166xvVJTqJ0thgdHb3OTeioElRC8D]
- 77. PARP Antibody #9542 [https://www.cellsignal.com/products/primary-antibodies/parp-antibody/9542?srsltid=AfmBOoqRF1boxtvk0BJH6er8Q1n89NUWhsHTVFdcWSSbgU-Bamg1_p0N]
- 78. Western Blotting Troubleshooting Guide [https://www.cellsignal.com/learn-and-support/troubleshooting/western-blot-troubleshooting-guide?srsltid=AfmBOor6k9nT1h04gPVW36nXwJ6x1si7FA-JsdV-xRHNhHfj354UQJvY]
- 79. PARP1 antibody (13371-1-AP) [https://www.ptglab.com/products/PARP1-Antibody-13371-1-AP.htm?srsltid=AfmBOoo9l-TZovFGCY7kD35faMQA-yQx1HJVWBj8AoKslyUHFnYu7lNR]
- 80. Western Blot Troubleshooting Guide [https://www.rndsystems.com/resources/technical/troubleshooting-guide-western-blot]
- 81. Western blot troubleshooting guide! [https://www.jacksonimmuno.com/secondary-antibody-resource/technical-tips/western-blot-trouble-shooting/]
- 82. ROS-induced DNA damage and PARP-1 are required for ... [https://pmc.ncbi.nlm.nih.gov/articles/PMC3391023/]