Resolving Cleaved Caspase-3 Background Staining: A Researcher's Guide from Fundamentals to Advanced Troubleshooting
This article provides a comprehensive guide for researchers and drug development professionals on resolving the pervasive challenge of cleaved caspase-3 background staining.
Resolving Cleaved Caspase-3 Background Staining: A Researcher's Guide from Fundamentals to Advanced Troubleshooting
Abstract
This article provides a comprehensive guide for researchers and drug development professionals on resolving the pervasive challenge of cleaved caspase-3 background staining. Covering foundational principles, methodological applications across IHC, IF, and flow cytometry, advanced troubleshooting techniques, and validation strategies, we synthesize current best practices to ensure specific and reliable apoptosis detection. By addressing both common pitfalls and complex scenarios, this resource aims to enhance data quality in cancer research, neurodegeneration studies, and drug screening applications, ultimately supporting more accurate biological interpretation and clinical correlations.
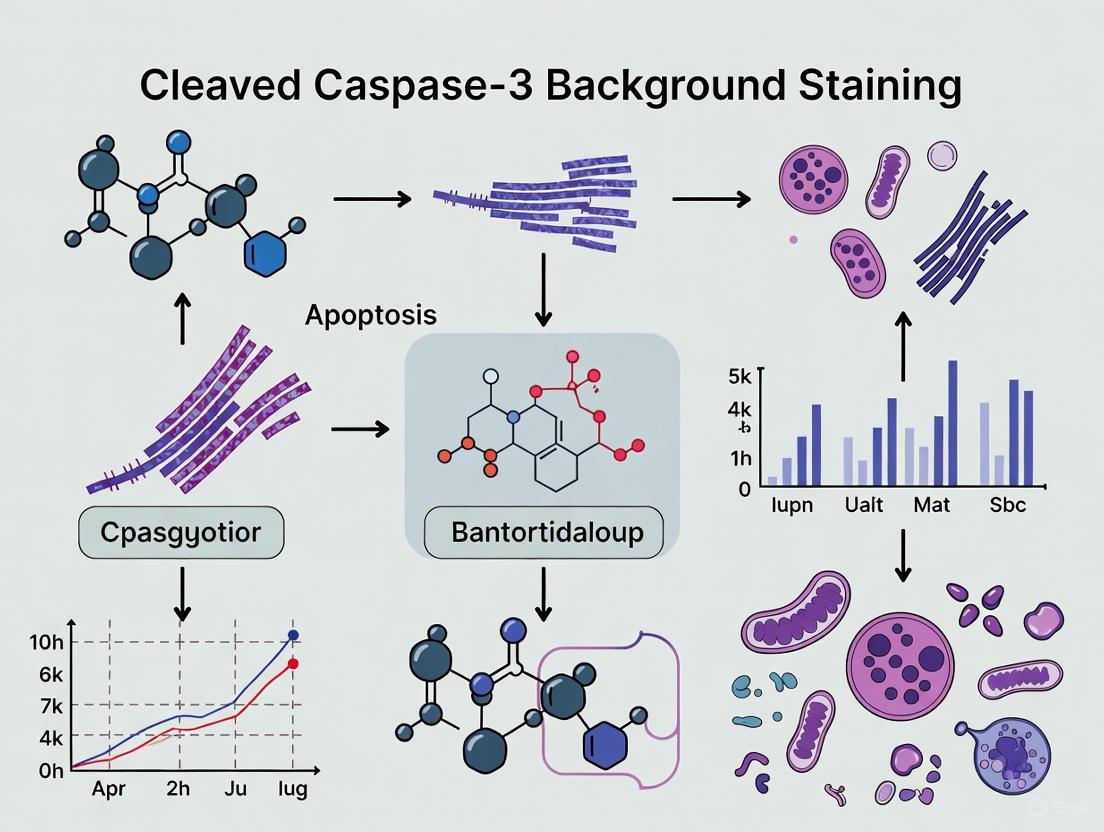
Understanding Cleaved Caspase-3 Biology and Background Staining Sources
Caspase-3, a cysteine-aspartic protease, has long been recognized as a key executioner caspase in the terminal phase of apoptosis. However, emerging research reveals a more complex picture, demonstrating that this enzyme also plays paradoxical roles in regulating cell survival, proliferation, and differentiation in viable cells [1]. This dual functionality presents both challenges and opportunities for researchers studying fundamental biological processes and developing therapeutic interventions for cancer, neurodegenerative disorders, and inflammatory diseases. Within the context of resolving cleaved caspase-3 background staining research, understanding these dual roles is essential for accurate experimental design and data interpretation. This technical support center provides comprehensive troubleshooting guides, detailed protocols, and reagent solutions to address the specific challenges faced by researchers investigating the complex biology of caspase-3.
Molecular Mechanisms and Signaling Pathways
Caspase-3 in Programmed Cell Death Pathways
Caspase-3 serves as a crucial convergence point in programmed cell death (PCD) pathways, integrating signals from both intrinsic and extrinsic apoptotic cascades [2]. As an effector caspase, it proteolytically cleaves numerous cellular substrates, leading to the systematic dismantling of the dying cell. Key structural and regulatory proteins targeted by caspase-3 include PARP (disrupting DNA repair), lamin proteins (destabilizing the nuclear envelope), and ICAD (releasing CAD to trigger DNA fragmentation) [1] [2]. The cleavage of these substrates results in characteristic morphological changes of apoptosis, including cell shrinkage, chromatin condensation, and formation of apoptotic bodies.
Beyond its canonical role in apoptosis, caspase-3 also participates in other PCD pathways. It cleaves various gasdermin (GSDM) family members, potentially triggering pyroptosis—a highly inflammatory form of cell death—when it processes GSDME [2]. Additionally, caspase-3 can cleave GSDMB and GSDMD at non-canonical sites, which may surprisingly suppress pyroptosis under certain conditions [2]. This functional diversity highlights the context-dependent nature of caspase-3 activities and underscores the importance of precise experimental detection and measurement.
Non-Apoptotic Functions of Caspase-3
Accumulating evidence indicates that caspase-3 regulates critical cellular processes beyond cell death, including proliferation, differentiation, and cellular quality control [1]. These non-apoptotic functions often involve sublethal, localized caspase-3 activity that triggers specific signaling cascades without committing the cell to full apoptosis. For instance, during apoptosis-induced proliferation (AIP), dying cells actively stimulate the division of neighboring surviving cells through caspase-3-dependent release of mitogenic factors such as epidermal growth factors and interleukin-6 [3].
The molecular basis for these dual roles may be evolutionary in nature. Caspase-3 shares ancestry with yeast caspase-like genes, suggesting it may have retained functions from its ancestral precursor while acquiring new roles in more complex multicellular organisms [1]. This evolutionary perspective provides a framework for understanding how caspase-3 can participate in such seemingly contradictory processes.
The following diagram illustrates the dual role of caspase-3 in cellular fate decisions:
Technical Support: Troubleshooting Guides and FAQs
Frequently Asked Questions on Caspase-3 Detection
Q1: Why do I observe high background staining when detecting cleaved caspase-3 by immunofluorescence?
High background typically results from insufficient blocking or over-permeabilization of samples. Ensure proper blocking with 5% serum from the secondary antibody host species for 1-2 hours at room temperature [4]. Optimize permeabilization conditions by testing different concentrations of Triton X-100 (0.1-0.3%) or NP-40, and limit permeabilization time to 5-15 minutes [4]. Additionally, validate antibody specificity using appropriate controls, including caspase-3-deficient cell lines like MCF-7, which lack functional caspase-3 [3] [1].
Q2: What could cause multiple bands in my caspase-3 western blot?
Multiple bands may indicate protein degradation, alternative splicing, or post-translational modifications. Caspase-3 can be processed to different intermediate forms during activation [1]. To address this, always prepare fresh samples with adequate protease inhibitors (PMSF, leupeptin, or commercial inhibitor cocktails) [5]. Consider that alternative splicing generates a short isoform (caspase-3s) that migrates differently [1]. Translation modifications like phosphorylation or ubiquitination can also alter electrophoretic mobility [5].
Q3: How can I distinguish between apoptotic and non-apoptotic caspase-3 activity?
This challenging distinction requires multiparametric single-cell analysis. Implement live-cell imaging with caspase activity reporters alongside viability markers [3] [6]. The intensity, duration, and subcellular localization of caspase-3 activation determine functional outcomes. For non-apoptotic roles, activity is typically transient, localized, and sublethal [1]. FRET-based biosensors enable real-time monitoring of caspase-3 dynamics in single living cells, allowing correlation of activation kinetics with cell fate decisions [6].
Q4: Why does my flow cytometry analysis show discordance between caspase-3 activation and Annexin V binding?
This temporal discordance reflects the sequence of apoptotic events. Caspase-3 activation typically precedes phosphatidylserine externalization (detected by Annexin V) in many cell types [3]. Additionally, certain non-apoptotic cellular processes can cause phosphatidylserine exposure independent of caspase activation. Use multiple complementary assays and establish time-course experiments to resolve kinetic relationships in your specific experimental system.
Troubleshooting Common Experimental Issues
Table 1: Troubleshooting Caspase-3 Detection Methods
| Problem | Possible Causes | Solutions |
|---|---|---|
| Weak or no signal in Western blot | Low protein expression, inefficient transfer, poor antibody sensitivity | Load at least 20-30 μg total protein; verify transfer efficiency with Ponceau S; use fresh ECL reagents; test antibody dilution (1:500-1:1000) [7] [5] |
| Multiple non-specific bands | Incomplete cleavage, protein degradation, antibody cross-reactivity | Add fresh protease inhibitors; optimize protein extraction; use higher specificity monoclonal antibodies; include positive controls [5] |
| High background in immunofluorescence | Insufficient blocking, over-fixation, antibody concentration too high | Optimize blocking conditions (1-2 hours with 5% serum); reduce primary antibody concentration; include no-primary controls [4] |
| Poor resolution in flow cytometry | Sample processing issues, improper gating, low expression | Include viability dyes to exclude dead cells; use caspase inhibitor controls; validate gating strategy with isotype controls [3] |
| Inconsistent results between techniques | Different detection principles, sample preparation variability | Use complementary methods (IF, WB, flow cytometry) on same samples; standardize sample processing; include shared positive controls [3] [4] |
Research Reagent Solutions
Essential Reagents for Caspase-3 Research
Table 2: Key Research Reagents for Caspase-3 Detection
| Reagent Category | Specific Examples | Applications & Functions |
|---|---|---|
| Antibodies | Anti-Caspase-3 (cleaved specific); Anti-PARP (cleaved); Annexin V conjugates | Detect active caspase-3 and downstream targets; identify apoptotic cells [4] [7] |
| Fluorescent Reporters | DEVD-based FRET biosensors; ZipGFP caspase-3/7 reporter; mCherry constitutively expressed reporters | Real-time visualization of caspase activity in live cells; normalization controls [3] [6] |
| Inhibitors | zVAD-FMK (pan-caspase); DEVD-FMK (caspase-3/7 specific); Q-VD-OPh | Confirm caspase-dependent processes; establish specificity of activation [3] |
| Detection Kits | Annexin V/PI apoptosis detection; Caspase-3 activity assays; LDH cytotoxicity kits | Multiparametric cell death analysis; quantitative activity measurement [3] [8] |
| Cell Lines | Caspase-3 deficient MCF-7; Stable reporter lines; Patient-derived organoids | Model validation; physiological relevance; control for antibody specificity [3] [1] |
Experimental Protocols and Methodologies
Western Blot Protocol for Cleaved Caspase-3 Detection
This protocol provides a standardized method for detecting caspase-3 and its cleaved forms by western blotting, adapted from established methodologies [7] [5].
Materials Required:
- Primary antibody against caspase-3 (e.g., NB500-210)
- HRP-conjugated secondary antibody
- Lysis buffer with protease inhibitors (e.g., PMSF, leupeptin, or commercial cocktails)
- Transfer buffer: 25mM Tris, 192mM glycine, 20% methanol
- Blocking buffer: 5% non-fat dry milk in TBST
- Enhanced chemiluminescence (ECL) detection reagents
Procedure:
- Sample Preparation: Lysate cells in appropriate buffer with fresh protease inhibitors. For activation studies, treat cell extracts with 5 mM dATP at 37°C for 15-30 minutes to promote caspase activation in vitro [7].
- Gel Electrophoresis: Load 20-30 μg of protein per lane on a 10-15% SDS-polyacrylamide gel. Run at constant voltage until adequate separation is achieved.
- Protein Transfer: Transfer proteins to nitrocellulose membrane using wet transfer system at 70V for 2 hours at 4°C. For high molecular weight proteins, reduce methanol to 5-10% and extend transfer time to 3-4 hours [5].
- Blocking: Incubate membrane in blocking buffer (5% non-fat dry milk in TBST) for 3 hours at room temperature with gentle shaking.
- Primary Antibody Incubation: Incubate membrane with anti-caspase-3 antibody diluted 1:500-1:1000 in blocking buffer for 60 minutes at room temperature [7].
- Washing: Wash membrane three times for 15 minutes each with TBST.
- Secondary Antibody Incubation: Incubate with HRP-conjugated secondary antibody diluted in blocking buffer for 60 minutes at room temperature.
- Detection: Wash membrane as before, then develop using ECL reagents according to manufacturer's instructions.
Troubleshooting Notes:
- For weak signals: Increase protein loading to 50-100 μg for modified targets; optimize antibody concentration; extend exposure time.
- For multiple bands: Include protease inhibitors; use fresh samples; consider alternative splicing isoforms.
- For high background: Test different blocking buffers (BSA vs. milk); optimize antibody dilution; increase wash stringency.
Immunofluorescence Protocol for Caspase-3 Localization
This protocol enables spatial localization of caspase-3 activation within individual cells, preserving morphological context [4].
Materials Required:
- Primary antibody against caspase-3 (e.g., ab32351)
- Fluorescently labeled secondary antibody (e.g., Alexa Fluor 488 conjugate)
- Permeabilization buffer: PBS with 0.1% Triton X-100
- Blocking buffer: PBS/0.1% Tween 20 with 5% serum from secondary antibody host species
- Mounting medium with DAPI
- Humidified chamber
Procedure:
- Sample Preparation: Culture cells on glass coverslips. After treatments, fix cells with appropriate fixative (typically 4% paraformaldehyde for 15 minutes at room temperature).
- Permeabilization: Incubate fixed samples in permeabilization buffer for 5 minutes at room temperature.
- Washing: Wash three times with PBS for 5 minutes each.
- Blocking: Drain slides and add 200 μL blocking buffer. Incubate in humidified chamber for 1-2 hours at room temperature.
- Primary Antibody Incubation: Add 100 μL primary antibody diluted 1:200 in blocking buffer. Incubate in humidified chamber overnight at 4°C.
- Washing: The next day, wash slides three times for 10 minutes each with PBS/0.1% Tween 20.
- Secondary Antibody Incubation: Add 100 μL appropriate secondary antibody diluted 1:500 in PBS. Incubate in humidified chamber protected from light for 1-2 hours at room temperature.
- Mounting: Wash three times in PBS/0.1% Tween 20 for 5 minutes protected from light. Drain liquid, mount slides with mounting medium, and observe with fluorescence microscope.
Critical Steps for Success:
- Always include controls: no primary antibody, isotype control, and known positive samples.
- Protect fluorescent conjugates from light during all incubation and washing steps.
- Optimize permeabilization for your specific cell type—over-permeabilization can damage cellular architecture while under-permeabilization reduces antibody access.
Live-Cell Imaging of Caspase-3 Dynamics
Advanced imaging techniques enable real-time monitoring of caspase-3 activity in living cells, providing kinetic information that endpoint assays cannot capture [3] [6].
Materials Required:
- Caspase-3/7 reporter cells (stable expression of DEVD-based biosensor)
- Time-lapse live-cell imaging system with environmental control
- Appropriate culture vessels for imaging
- Proliferation dyes for tracking cell division
- Caspase inhibitors for validation (zVAD-FMK, DEVD-CHO)
Procedure:
- Reporter System Selection: Utilize stable cell lines expressing caspase-3/7 reporters based on DEVD cleavage motifs, such as the ZipGFP system, which provides low background and irreversible fluorescence upon activation [3].
- Experimental Setup: Plate reporter cells in appropriate density and allow to adhere. Include constitutive fluorescent marker (e.g., mCherry) for normalization and viability assessment.
- Image Acquisition: Acquire images at regular intervals (e.g., every 30-60 minutes) over the experimental timeframe (typically 24-80 hours). Maintain optimal environmental conditions (37°C, 5% CO2) throughout imaging.
- Data Analysis: Quantify fluorescence intensity changes over time. Use automated analysis to track individual cells and correlate caspase activation with morphological changes and cell fate decisions.
Applications:
- Apoptosis Kinetics: Measure timing and synchrony of caspase activation in response to stimuli.
- Heterogeneity Analysis: Identify subpopulations with differential caspase responses.
- Apoptosis-Induced Proliferation: Track compensatory proliferation in neighboring cells following apoptotic events [3].
The following workflow diagram illustrates the integrated experimental approach for studying caspase-3:
Advanced Applications and Integrated Analysis
Caspase-3 in 3D Model Systems
The development of caspase reporter systems compatible with three-dimensional culture models represents a significant advance in apoptosis research. Stable reporter cells have been successfully adapted to both 3D spheroids and patient-derived organoids (PDOs), enabling real-time visualization of apoptotic events within complex, physiologically relevant environments [3]. In these systems, caspase activation can be monitored in response to various therapeutic agents, capturing the spatial heterogeneity of treatment responses that would be missed in traditional 2D cultures.
For example, in patient-derived pancreatic ductal adenocarcinoma (PDAC) organoids, localized caspase-3/7 activation following carfilzomib treatment demonstrates how certain cells within the organoid structure remain resistant while others undergo apoptosis [3]. This application is particularly valuable for therapeutic screening and mechanistic studies of treatment resistance in cancer models that better recapitulate in vivo physiology.
Multiplexed Caspase Activity Monitoring
Recent technological advances enable simultaneous monitoring of multiple caspases in single living cells using spectrally separated anisotropy-based FRET biosensors [6]. This approach allows researchers to track the activation kinetics of initiator caspases (caspase-8 and -9) alongside effector caspase-3 within the same cell, providing unprecedented insight into the temporal hierarchy of apoptotic signaling events.
The implementation of three spectrally distinct FRET biosensors (TagBFP-x-Cerulean, mCitrine-x-mCitrine, and mCherry-x-mKate2) enables multiparametric analysis of caspase network activation, revealing that caspase-3 consistently reaches maximum activity before caspase-8 in TNF-α-stimulated cells [6]. This integrated approach helps resolve the complex interplay between different caspase activation pathways and their functional consequences in individual cells.
Detection of Immunogenic Cell Death
Caspase-3 activation participates in immunogenic cell death (ICD), a specialized form of apoptosis that stimulates adaptive immune responses [3]. A key feature of ICD is the pre-apoptotic exposure of calreticulin (CALR) on the cell surface, which acts as an "eat me" signal for dendritic cells and macrophages. Integrated reporter systems that simultaneously track caspase activation and CALR exposure enable researchers to distinguish immunogenic from non-immunogenic apoptosis, with significant implications for cancer immunotherapy development [3].
This application is particularly relevant for evaluating the efficacy of chemotherapeutic agents and identifying treatments that not only kill cancer cells but also stimulate antitumor immunity. The combination of real-time caspase imaging with endpoint CALR detection by flow cytometry provides a comprehensive platform for ICD assessment in both 2D and 3D culture systems [3].
In the context of cleaved caspase-3 immunostaining, background staining and non-specific antibody binding present significant challenges that can compromise experimental validity. These artifacts arise from multiple technical sources, including endogenous enzymes, non-specific protein interactions, and antibody cross-reactivity. For researchers investigating apoptosis in drug development, distinguishing true caspase-3 activation from background signal is essential for accurate data interpretation. This guide provides troubleshooting methodologies specifically framed within caspase-3 research to help scientists identify and resolve the most common sources of background interference.
Endogenous Enzyme Activity
Problem: Endogenous peroxidases or phosphatases present in tissues can react with chromogenic substrates (e.g., DAB), generating precipitate and high background signal without antibody presence. This is particularly problematic in blood-rich tissues (spleen, liver, kidney) commonly analyzed for apoptosis [9] [10].
Solutions:
- Peroxidase Quenching: Incubate tissue sections with 3% H₂O₂ in methanol or water for 15 minutes at room temperature prior to primary antibody incubation [10].
- Phosphatase Inhibition: Use levamisole to inhibit endogenous alkaline phosphatase activity when using AP-based detection systems [10].
- Validation Test: Incubate a control tissue section with detection substrate alone (no antibodies) to confirm endogenous enzyme activity [10].
Endogenous Biotin Interference
Problem: Tissues with high mitochondrial activity (kidney, liver, certain tumors) contain significant endogenous biotin, which binds to avidin- or streptavidin-based detection systems, creating widespread background [9] [10].
Solutions:
- Biotin Blocking: Use sequential avidin and biotin blocking steps before primary antibody application [10].
- Alternative Reagents: Use streptavidin or NeutrAvidin instead of avidin, as they are not glycosylated and won't bind to endogenous lectins [10].
- Detection System Selection: Consider enzyme polymer-based detection systems that eliminate avidin-biotin chemistry [10].
Fc Receptor-Mediated Binding
Problem: Fc receptors on immune cells (macrophages, monocytes, neutrophils) can bind the Fc portion of antibodies, leading to non-specific staining patterns that can be misinterpreted as positive caspase-3 signal [11].
Solutions:
- Fc Blocking: Pre-incubate tissues with purified immunoglobulin G (IgG) or normal serum from the same host species as the secondary antibody to occupy Fc receptors [11] [12].
- Specialized Reagents: Use commercial Fc receptor blocking reagents specifically formulated for challenging tissues rich in macrophages and monocytes [12].
- Antibody Fragments: Use F(ab′)2 antibody fragments instead of whole IgG molecules when available [13].
Antibody Cross-Reactivity
Problem: Primary or secondary antibodies may bind to off-target epitopes through specific (shared epitopes) or non-specific (ionic/hydrophobic) interactions, creating false-positive signals [9] [14].
Solutions:
- Antibody Titration: Perform chessboard titration of primary antibody to determine optimal concentration that provides strong specific signal with minimal background [14].
- Buffer Optimization: Add NaCl (0.15-0.6 M) to antibody diluents to reduce ionic interactions [10].
- Cross-Adsorption: Use secondary antibodies that have been cross-adsorbed against immunoglobulins from other species to minimize cross-reactivity [10].
Autofluorescence
Problem: Naturally occurring molecules in tissues (NADPH, flavins, lipofuscin, heme groups) emit fluorescence upon light excitation, masking true caspase-3 immunofluorescence signal [11] [9].
Solutions:
- Signal Validation: Analyze unstained tissue sections to determine baseline autofluorescence levels [11].
- Fluorophore Selection: Use fluorescent markers emitting in near-infrared wavelengths (Alexa Fluor 647, 680, 750) that don't compete with common autofluorescence spectra [10].
- Quenching Treatments: Treat tissues with dyes that quench autofluorescence, including Pontamine sky blue, Sudan black, or Trypan blue [10].
- Fixative Optimization: Reduce aldehyde-induced autofluorescence by treating with sodium borohydride (1 mg/mL in PBS) [10].
Table 1: Summary of Background Sources and Their Solutions
| Background Source | Detection Method Affected | Primary Solutions |
|---|---|---|
| Endogenous Enzymes | Chromogenic (DAB, etc.) | H₂O₂ quenching, Levamisole treatment |
| Endogenous Biotin | Avidin-Biotin Systems | Sequential blocking, Streptavidin alternatives |
| Fc Receptor Binding | Both Chromogenic & Fluorescence | Fc blocking reagents, Normal serum |
| Antibody Cross-Reactivity | Both Chromogenic & Fluorescence | Antibody titration, Buffer optimization |
| Autofluorescence | Fluorescence | Fluorophore selection, Chemical quenching |
Experimental Protocols for Caspase-3 Background Resolution
Comprehensive Blocking Protocol for Cleaved Caspase-3 IHC
This protocol is optimized for cleaved caspase-3 immunostaining in formalin-fixed paraffin-embedded (FFPE) tissues, incorporating specific steps to minimize background:
Materials:
- Tissue sections (4-5 µm) on charged slides
- Primary antibody: Anti-cleaved caspase-3 (validated for IHC)
- Detection system: HRP-based with DAB substrate
- Blocking reagents: Normal serum, BSA, avidin/biotin blocking solutions
- Buffers: PBS, TBS, antibody dilution buffer
Procedure:
- Deparaffinization and Rehydration:
- Incubate slides at 60°C for 20 minutes
- Clear in xylene (3 changes, 5 minutes each)
- Rehydrate through graded ethanol series (100%, 95%, 70%) to distilled water
Antigen Retrieval:
- Perform heat-induced epitope retrieval in 10 mM sodium citrate buffer (pH 6.0)
- Heat in microwave or pressure cooker for 10-20 minutes
- Cool slides for 30 minutes at room temperature
Endogenous Enzyme Blocking:
- Incubate with 3% H₂O₂ in methanol for 15 minutes at room temperature [10]
- Rinse with distilled water followed by PBS (2 changes, 5 minutes each)
Comprehensive Protein Blocking:
- Apply normal serum from secondary antibody host species (2-10% in PBS)
- Incubate for 1 hour at room temperature in a humidified chamber
- Optional: Include 0.1% Triton X-100 for enhanced penetration if needed [15]
Avidin/Biotin Blocking (if using ABC systems):
- Apply avidin solution for 15 minutes, rinse with PBS
- Apply biotin solution for 15 minutes, rinse with PBS [10]
Primary Antibody Incubation:
- Apply optimally titrated cleaved caspase-3 antibody in dilution buffer
- Incubate overnight at 4°C in a humidified chamber
- Include negative control with non-immune IgG at same concentration
Detection and Visualization:
- Apply species-appropriate secondary antibody for 30-60 minutes at room temperature
- Develop with DAB substrate according to manufacturer's instructions
- Counterstain with hematoxylin, dehydrate, clear, and mount
Troubleshooting Notes:
- If background persists, increase normal serum concentration to 10% or extend blocking time to 2 hours [10]
- For persistent endogenous biotin, extend biotin blocking to 30 minutes per step [10]
- Reduce primary antibody concentration if specific cellular localization is unclear [14]
Antibody Titration Protocol for Optimal Signal-to-Noise
Principle: Determining the optimal primary antibody concentration is crucial for maximizing specific caspase-3 signal while minimizing background [14].
Procedure:
- Prepare a dilution series of cleaved caspase-3 antibody (e.g., 1:50, 1:100, 1:200, 1:500, 1:1000) in antibody dilution buffer.
- Apply each dilution to adjacent tissue sections known to express cleaved caspase-3 (positive control) and tissues lacking expression (negative control).
- Process all sections simultaneously using the same detection parameters.
- Evaluate staining intensity and background using a standardized scoring system.
- Select the dilution that provides strong specific staining in positive cells with minimal background in negative tissue.
Table 2: Troubleshooting Caspase-3 Staining Problems
| Problem | Possible Causes | Recommended Actions |
|---|---|---|
| High general background | Primary antibody too concentratedInsufficient blockingEndogenous enzymes active | Titrate primary antibodyIncrease blocking serum to 10%Verify H₂O₂ quenching step |
| Specific cellular background | Fc receptor bindingCross-reactive epitopes | Use Fc blocking reagentsTry different caspase-3 antibody clone |
| Nuclear background | Over-counterstainingAutofluorescence | Reduce hematoxylin timeUse Sudan black for fluorescence |
| Uneven staining | Inconsistent washingAntibody aggregation | Ensure adequate wash volumeCentrifuge antibody before use |
Visual Guide to Background Mechanisms and Solutions
Diagram 1: Background staining causes and solution pathways. This flowchart illustrates the relationship between common background sources and appropriate resolution strategies for cleaved caspase-3 immunostaining.
Research Reagent Solutions
Table 3: Essential Reagents for Background Troubleshooting
| Reagent Category | Specific Examples | Primary Function | Application Notes |
|---|---|---|---|
| Blocking Sera | Normal goat serum, Normal donkey serum | Blocks non-specific protein binding and Fc receptors | Use serum from secondary antibody species; 2-10% in PBS [16] |
| Enzyme Blockers | 3% H₂O₂ in methanol, Levamisole | Quenches endogenous peroxidase/phosphatase | Apply for 15 min before primary antibody [10] |
| Biotin Blockers | Avidin/Biotin blocking solutions | Saturates endogenous biotin binding sites | Essential for ABC systems; sequential application [10] |
| Fc Blockers | Species-specific IgG, Commercial Fc blocks | Blocks Fc receptor binding on immune cells | Critical for tissues rich in macrophages [11] |
| Detergents | Triton X-100, Tween-20 | Reduces hydrophobic interactions, improves penetration | 0.1-0.5% in PBS; concentration affects morphology [16] |
| Alternative Detectors | Polymer-based enzyme systems | Eliminates avidin-biotin background | Useful when endogenous biotin is problematic [10] |
Frequently Asked Questions
Q1: Are protein blocking steps always necessary for cleaved caspase-3 immunostaining? A: While some studies suggest blocking may be unnecessary for certain fixed tissues [13], most researchers include blocking steps for cleaved caspase-3 due to its typically low expression levels. We recommend empirical testing: process parallel sections with and without blocking to determine necessity for your specific tissue and fixation conditions.
Q2: How can I distinguish true cleaved caspase-3 staining from non-specific background? A: True caspase-3 staining should show:
- Specific subcellular localization (primarily cytoplasmic)
- Expected cellular patterns (specific cell types in apoptosis)
- Appropriate morphological context (cells showing apoptotic morphology)
- Dose-response to apoptosis inducers
- Elimination with specific blocking peptides
- Consistency across multiple detection methods [15]
Q3: What are the most effective controls for caspase-3 experiments? A: Essential controls include:
- Positive control: Tissue with known caspase-3 activation (e.g., treated cell pellets)
- Negative control: Isotype-matched IgG at same concentration as primary antibody
- Method control: Omission of primary antibody (secondary only)
- Specificity control: Pre-absorption with caspase-3 peptide antigen
- Biological controls: Tissues from caspase-3 knockout animals when available [15] [12]
Q4: Why do I see high background specifically in macrophage-rich tissues? A: Macrophages express high levels of Fc receptors that bind antibody Fc regions, creating extensive background. Solutions include:
- Using F(ab′)2 antibody fragments instead of whole IgG
- Extended Fc receptor blocking (up to 2 hours)
- Commercial Fc receptor blocking reagents specifically formulated for macrophages [11] [12]
Q5: How does fixation time affect cleaved caspase-3 staining and background? A: Prolonged fixation can:
- Mask epitopes, reducing specific signal
- Increase autofluorescence (with aldehydes)
- Alter protein conformation, creating new non-specific binding sites Optimal fixation for caspase-3 is typically 18-48 hours in formalin; avoid extended fixation beyond this period [13] [17].
Core Concepts and Temporal Dynamics of Non-Apoptotic Caspase-3
Non-apoptotic caspase-3 activation represents a precisely regulated, transient signaling event distinct from the sustained activation observed in programmed cell death. In immune cells, this process facilitates critical cellular functions without triggering apoptosis.
Key Characteristics of Non-Apoptotic vs. Apoptotic Caspase-3 Activation:
| Feature | Non-Apoptotic Activation | Apoptotic Activation |
|---|---|---|
| Activation Level | Localized, sublethal, and transient [18] [19] | Global, high-level, and sustained [20] |
| Spatial Organization | Compartmentalized (e.g., presynapses, specific cytosolic domains) [19] | Cell-wide, with predominant nuclear localization [18] |
| Duration | Transient (peaks within hours/days and resolves) [18] [21] | Progressive until cell death is complete [20] |
| Primary Function | Signaling, plasticity, pruning, and cellular differentiation [19] [22] | Execution of programmed cell death [20] |
| Key Readouts | Spine loss, synaptic dysfunction, phagocytosis signaling [18] [19] | DNA fragmentation, phosphatidylserine exposure, membrane blebbing [20] |
Quantitative Temporal Dynamics in Research Models: The table below summarizes the transient nature of non-apoptotic caspase-3 activation observed in key studies.
| Experimental Model | Peak Activation Time | Key Measurable Outcome | Resolution/Decline |
|---|---|---|---|
| CD8+ T Cells (in vivo) [21] | Day 3 post-infection | >80% of antigen-specific T cells show elevated active caspase-3 | Basal levels by day 7; undetectable during contraction phase |
| Striatal Neurons (6-OHDA lesion) [18] | 5 days post-lesion | 1.75-fold increase in caspase-3 immunostaining vs. intact side | Steady decline observed by 28 days post-lesion |
| T Cell (in vitro stimulation) [21] | Within 24 hours of antigen stimulation | Significant increase in active caspase-3 correlated with proliferation marker Ki67 | Not specified in available excerpt |
Figure 1: Signaling Pathway of Non-Apoptotic Caspase-3 in Immune and Neural Cells. This pathway, integrating insights from T cell and microglial studies, shows how antigen stimulation can lead to transient caspase-3 activation through mitochondrial signaling, resulting in various non-apoptotic functional outcomes [21] [19].
Troubleshooting Guide: Resolving Cleaved Caspase-3 Background Staining
FAQ: How can I distinguish specific cleaved caspase-3 signal from high background in immunofluorescence?
High background staining is a frequent challenge when detecting transient, low-level caspase-3 activation. The table below outlines common issues and evidence-based solutions.
| Problem | Possible Cause | Solution | Validated Experimental Outcome |
|---|---|---|---|
| No Staining or Low Signal | Antibody not validated for IF; low concentration; intracellular target inaccessible [23] | Titrate antibody (start ~1 µg/mL); validate for IF; use permeabilization protocol [4] | Successful detection of cleaved caspase-3 in striatal iSPNs and presynapses [18] [19] |
| High Background/ Non-specific Staining | Autofluorescence; secondary antibody cross-reactivity; over-concentration [23] | Use autofluorescence quenchers (e.g., TrueBlack); include secondary-only controls; optimize blocking [23] | Clean signal achieved in DA-denervated striatum with low background on intact side [18] |
| Inconsistent Results Between Experiments | Transient nature of activation; fixation variability [18] [21] | Standardize fixation timing post-stimulus; include positive controls (e.g., staurosporine-treated cells) [4] | Peak caspase-3 activation consistently observed at 5 days post-6-OHDA lesion [18] |
FAQ: What controls are essential for validating non-apoptotic caspase-3 staining?
The following workflow diagram outlines the critical control experiments required to confirm the specificity of your cleaved caspase-3 immunofluorescence staining.
Figure 2: Essential Control Strategy for Non-Apoptotic Caspase-3 Staining. This workflow outlines critical controls to implement for validating staining specificity, including pharmacological inhibition and apoptosis confirmation assays [18] [4] [19].
Detailed Experimental Protocols
Protocol 1: Immunofluorescence Detection of Cleaved Caspase-3 in Fixed Cells
This protocol is adapted from established methodologies [4] and optimized for detecting transient caspase-3 activation, as demonstrated in striatal SPNs and presynaptic terminals [18] [19].
Materials:
- Primary antibody against cleaved caspase-3 (e.g., ab32351)
- Fluorescently-labeled secondary antibody (e.g., goat anti-rabbit Alexa Fluor 488)
- Prepared, fixed samples on slides
- Triton X-100 or NP-40
- PBS
- Blocking buffer (PBS/0.1% Tween 20 + 5% serum from secondary antibody host species)
- Mounting medium with antifade (e.g., EverBrite Mounting Medium)
- Humidified chamber
Step-by-Step Procedure:
- Permeabilization: Incubate fixed samples in PBS/0.1% Triton X-100 for 5 minutes at room temperature [4].
- Washing: Wash slides three times in PBS, for 5 minutes each at room temperature.
- Blocking: Drain the slide and add 200 µL of blocking buffer. Incubate slides flat in a humidified chamber for 1-2 hours at room temperature. Rinse once in PBS afterward. Note: Using serum from the secondary antibody host species is critical to reduce background [23].
- Primary Antibody Incubation: Apply 100 µL of primary antibody diluted in blocking buffer (suggested starting dilution 1:200). Incubate slides in a humidified chamber overnight at 4°C.
- Washing: The next day, wash slides three times for 10 minutes each in PBS/0.1% Tween 20 at room temperature.
- Secondary Antibody Incubation: Apply 100 µL of appropriate secondary antibody diluted in PBS (suggested starting dilution 1:500). Incubate in a humidified chamber, protected from light, for 1-2 hours at room temperature.
- Final Washes: Wash slides three times in PBS/0.1% Tween 20 for 5 minutes each, protected from light.
- Mounting: Drain liquid, mount slides with an antifade mounting medium, and image with a fluorescence microscope.
Technical Notes:
- Inhibitor Validation: For critical validation, include a condition pre-treated with a pan-caspase inhibitor such as Q-VD-OPh (10 mg/kg in vivo) [18] or Z-DEVD-FMK (10 µM in vitro) [19], which should significantly reduce signal.
- Fixation: Optimal fixation is crucial for preserving antigen integrity and preventing translocation. Standardize the time between stimulus and fixation across experiments due to the transient nature of activation.
Protocol 2: Pharmacological Inhibition of Non-Apoptotic Caspase-3 In Vivo
This protocol is based on the successful prevention of dendritic spine loss and synaptic deficits in a Parkinson's disease model through systemic caspase inhibition [18].
Materials:
- Pan-caspase inhibitor: Q-VD-OPh (preferred due to higher specificity and lower toxicity [18])
- Appropriate vehicle solution (e.g., DMSO followed by dilution in saline)
- Animal model of interest (e.g., 6-OHDA-lesioned mice for Parkinson's study)
Procedure:
- Preparation: Prepare Q-VD-OPh solution fresh before administration.
- Dosage and Administration: Administer Q-VD-OPh systemically (e.g., subcutaneous injection) at a dose of 10 mg/kg [18].
- Treatment Schedule: To cover the critical window of transient activation, administer the inhibitor twice daily for 5 days following the initial lesion or stimulus [18].
- Validation: Confirm inhibition efficacy by comparing cleaved caspase-3 immunostaining or Western blot signals between treated and vehicle-control groups.
The Scientist's Toolkit: Key Research Reagents
Essential reagents for studying non-apoptotic caspase-3 activation, as cited in the literature.
| Reagent / Tool | Function / Application | Example Use in Research |
|---|---|---|
| Q-VD-OPh [18] | Broad-spectrum, pan-caspase inhibitor; prevents caspase-mediated spine loss and synaptic deficits. | Systemic treatment (10 mg/kg) prevented spine loss and LTD deficits in iSPNs of Parkinsonian mice without affecting dopaminergic degeneration [18]. |
| Z-DEVD-FMK [19] | Cell-permeable caspase-3/-7 inhibitor; blocks activity-dependent caspase-3 activation at presynapses. | Used at 10 µM in vitro to inhibit CNO-induced caspase-3 activation in hM3Dq-expressing neurons [19]. |
| Anti-Cleaved Caspase-3 Antibodies [18] [4] [19] | Detect activated caspase-3 via IF, WB; identifies localization in specific subcellular compartments. | Immunostaining revealed caspase-3 activation in striatal cell bodies, processes, and along iSPN dendrites 5 days post-6-OHDA lesion [18]. |
| FRET-Based Caspase Sensors (e.g., mSCAT3) [19] [24] | Genetically encoded biosensors for real-time, live-cell imaging of caspase-3 activity dynamics. | synaptophysin-mSCAT3 enabled real-time observation of activity-dependent caspase-3 activation at individual presynapses [19]. |
| Caspase-3/-7 Reporter Cell Lines [3] | Stable cell lines expressing caspase-activatable fluorescent biosensors (e.g., ZipGFP) for high-content screening. | Enabled dynamic tracking of apoptotic events and apoptosis-induced proliferation at single-cell resolution in 2D and 3D cultures [3]. |
FAQs on Antibody Validation
What constitutes proper antibody validation and why is it critical for research?
Proper antibody validation is the process of demonstrating that an antibody is specific, selective, and reproducible for its intended application and experimental context [25]. This is critical because antibodies are among the most frequently used tools in basic and clinical research, yet what is stated on the label does not always correspond to what is in the tube [25]. Without rigorous validation, researchers risk generating false positive or false negative results, which directly contributes to the reproducibility crisis in life sciences [26]. For clinical applications, such as cancer diagnostics, improperly validated antibodies can directly impact patient management decisions and therapeutic choices [25].
Why might my cleaved caspase-3 antibody produce high background in immunofluorescence?
High background staining with cleaved caspase-3 antibodies in immunofluorescence can result from several factors:
- Inadequate blocking or washing: Insufficient blocking with serum or insufficient washing steps can leave unbound antibodies that cause non-specific staining [4] [27].
- Antibody concentration too high: Excessive antibody concentration can lead to non-specific binding [28].
- Fc receptor binding: In some cell types, antibodies may bind non-specifically to Fc receptors rather than to their target epitope [29].
- Cell health issues: The presence of dead cells, which often exhibit autofluorescence and non-specific antibody binding, can significantly increase background [27] [29].
- Over-fixation: Fixing cells for too long can damage epitopes and increase autofluorescence [28].
Troubleshooting Guides
High Background Staining in Immunofluorescence
| Potential Cause | Solution |
|---|---|
| Inadequate blocking | Use 5% appropriate serum from the secondary antibody host species for 1-2 hours [4]. |
| High antibody concentration | Titrate antibody to find optimal dilution; use the lowest concentration that provides specific signal [28]. |
| Fc receptor binding | Include an Fc receptor blocking step prior to primary antibody incubation [29]. |
| Presence of dead cells | Include a viability dye in your staining panel to gate out dead cells during analysis [29]. |
| Insufficient washing | Increase wash steps, duration, or include mild detergent (0.1% Tween-20) in wash buffers [27]. |
| Antibody cross-reactivity | Validate antibody specificity using knockout controls or independent antibodies [30] [31]. |
Weak or No Signal in Immunofluorescence
| Potential Cause | Solution |
|---|---|
| Low antigen expression | Use a bright fluorophore (e.g., PE, Alexa Fluor 647) paired with the secondary antibody [29]. |
| Insufficient permeabilization | Optimize permeabilization with 0.1% Triton X-100 or saponin-based buffers [4] [29]. |
| Antibody concentration too low | Titrate antibody to find optimal concentration; check datasheet for recommended starting dilution [28]. |
| Antigen inaccessibility | For intracellular targets like cleaved caspase-3, ensure proper fixation and permeabilization [29]. |
| Photobleaching | Protect fluorophores from light during staining and storage [29]. |
| Improfixation | Avoid over-fixation; typically 10-15 minutes with 4% paraformaldehyde is sufficient [28]. |
Antibody Validation Strategies and Methodologies
Critical Antibody Validation Methods
Comprehensive antibody validation requires multiple complementary approaches, as no single method is sufficient to confirm specificity [30] [26]. The International Working Group for Antibody Validation (IWGAV) recommends several key strategies:
Genetic validation (knockout/knockdown) is often considered the gold standard for Western blot validation, where the antibody should show no signal in cells where the target gene has been deleted or silenced [26] [31]. For cleaved caspase-3, this could involve using caspase-3 knockout cells or siRNA-mediated knockdown.
Orthogonal validation compares antibody-based results with non-antibody methods, such as mass spectrometry or mRNA expression data [30] [31]. The expression patterns should correlate across multiple samples with different expression levels.
Independent antibody validation uses two or more antibodies targeting different, non-overlapping epitopes on the same protein [30] [31]. For cleaved caspase-3, this might involve antibodies targeting different regions of the cleaved protein.
Recombinant expression validation involves expressing the target protein (e.g., cleaved caspase-3) in a cell line that normally doesn't express it, confirming that the antibody signal appears only after expression [31].
Capture MS validation uses mass spectrometry to confirm the identity and size of the protein detected by the antibody [31].
Detailed Protocol: Caspase Immunofluorescence with Validation Controls
This protocol is adapted from established immunofluorescence methods with additional validation controls specifically for caspase detection [4]:
Materials Required:
- Primary antibody against cleaved caspase-3
- Validated secondary antibody conjugated to bright fluorophore (e.g., Alexa Fluor 488)
- Prepared, fixed cell samples on slides
- Triton X-100 or NP-40
- PBS buffer
- Blocking buffer (PBS/0.1% Tween 20 + 5% serum matching secondary antibody host)
- Mounting medium
- Humidified chamber
Procedure:
- Permeabilize fixed samples with PBS/0.1% Triton X-100 for 5 minutes at room temperature
- Wash three times in PBS, 5 minutes each
- Block with 200μL blocking buffer for 1-2 hours at room temperature in humidified chamber
- Incubate with primary antibody diluted in blocking buffer (start with 1:200 dilution) overnight at 4°C
- Critical control: Include a no-primary-antibody control
- Validation control: If available, include caspase-3 knockout cells
- Wash three times with PBS/0.1% Tween 20, 10 minutes each
- Incubate with secondary antibody (1:500 in PBS) for 1-2 hours at room temperature, protected from light
- Wash three times with PBS/0.1% Tween 20, 5 minutes each, protected from light
- Mount slides and image with fluorescence microscope
Apoptosis Signaling and Caspase Activation Pathway
Research Reagent Solutions for Caspase Detection
| Reagent Category | Specific Examples | Function in Caspase Detection |
|---|---|---|
| Validated Primary Antibodies | Anti-cleaved caspase-3, caspase-9 | Specifically detects activated caspases; must be validated for specific application [30] |
| Bright Fluorophores | Alexa Fluor 488, PE, APC | Amplifies signal for low-abundance targets like cleaved caspases [29] |
| Permeabilization Agents | Triton X-100, Saponin, Tween-20 | Enables antibody access to intracellular caspases [4] [29] |
| Blocking Reagents | Normal serum, BSA, Fc receptor blockers | Reduces non-specific binding and background [29] |
| Validation Controls | Knockout cells, isotype controls, peptide blocks | Confirms antibody specificity and assay reliability [30] [31] |
| Cell Health Indicators | Viability dyes (PI, 7-AAD, Annexin V) | Distinguishes apoptotic from necrotic cells; reduces false positives [29] |
Additional Technical Considerations
Understanding Caspase Biology in Apoptosis
Caspases are cysteine-dependent proteases that play crucial roles in programmed cell death (apoptosis) [20]. The human caspase family includes initiator caspases (caspase-2, -8, -9, -10) and executioner caspases (caspase-3, -6, -7) [20]. Caspase-3 is a key executioner protease responsible for the final stages of apoptosis, cleaving various cellular substrates [20]. Caspases are initially synthesized as inactive zymogens and undergo proteolytic cleavage at specific aspartic acid residues to become activated [20]. During apoptosis, caspase-3 is cleaved by initiator caspases, generating the active cleaved caspase-3 fragment that serves as a definitive marker of apoptosis execution.
Addressing Antibody Reproducibility Issues
Antibody reproducibility remains a significant challenge in research. A study demonstrated that different lots of the same monoclonal antibody could show completely different staining patterns (nuclear versus membranous/cytoplasmic) with very poor correlation (R² = 0.038) [25]. To address this:
- Document lot numbers meticulously for all experiments
- Test new antibody lots side-by-side with previous lots before transitioning
- Consider recombinant antibodies which offer better lot-to-lot consistency compared to traditional monoclonal or polyclonal antibodies [26]
- Maintain consistent experimental conditions including fixation methods, antigen retrieval, and detection systems [25]
Proper antibody validation is not merely a technical formality but a fundamental requirement for generating reliable, reproducible scientific data, particularly when studying dynamic processes like apoptosis through cleaved caspase-3 detection.
High background staining is a pervasive challenge in biomedical research, particularly in sensitive applications like detecting cleaved caspase-3 during apoptosis. This technical artifact can obscure true biological signals, leading to both false-positive and false-negative conclusions. In clinical and drug development contexts, such misinterpretations can ultimately affect diagnostic accuracy and therapeutic evaluation. This guide provides targeted troubleshooting strategies to resolve background issues, ensuring the reliability of your caspase-3 data and the validity of your research conclusions.
Caspase-3 is a key effector protease in apoptosis, cleaving cellular proteins after aspartic acid residues in the DEVD sequence [3] [32]. Its activation is a critical biomarker for programmed cell death in research areas from cancer therapy to neurodegenerative diseases.
Accurate detection is paramount, as background staining can mimic true signal. The diagram below illustrates the core principle of a caspase activity reporter, where background can arise from incomplete separation of fluorescent proteins or non-specific reporter activation.
Troubleshooting Guide: Resolving High Background Staining
The table below summarizes the primary causes of high background and their solutions.
Table 1: Troubleshooting High Background in Cleaved Caspase-3 Detection
| Problem | Possible Causes | Recommended Solutions |
|---|---|---|
| High Background / Non-Specific Staining | Inadequate blocking of cells [4]. | Extend blocking time; use 5% serum from secondary antibody host species [4]. |
| Non-specific antibody binding or cross-reactivity [4]. | Include appropriate negative controls; validate antibody specificity. | |
| Non-specific binding to Fc receptors on cells (e.g., monocytes) [33]. | Block Fc receptors prior to staining using BSA, specific blocking reagents, or normal serum [33]. | |
| Antibody concentration is too high [33]. | Titrate antibody to find optimal concentration [33]. | |
| Presence of dead cells [33]. | Use a viability dye to gate out dead cells during analysis [33]. | |
| Incomplete washing steps [4]. | Increase number and duration of washes; ensure thorough aspiration [4]. | |
| Weak or No Signal | Low antigen (caspase-3) expression [33]. | Use a bright fluorophore (e.g., PE, APC) for detection [34]. |
| Inadequate fixation/permeabilization [33]. | Optimize protocol for formaldehyde concentration and ice-cold methanol permeabilization [33]. | |
| Fluorophore is bleached or degraded [27]. | Protect fluorophores from light during all steps [27]. | |
| High Signal in All Channels (Autofluorescence) | Certain cell types (e.g., neutrophils) are inherently autofluorescent [33]. | Use fluorophores emitting in red channels (e.g., APC); use bright fluorophores to overpower background [33]. |
| Cells are over-fixed [27]. | Optimize fixation time and formaldehyde concentration [27]. |
Advanced Strategy: Flow Cytometry Panel Design
For multicolor flow cytometry experiments, proper panel design is critical to minimize background from spectral overlap.
Table 2: Fluorochrome Selection Guide to Minimize Spectral Overlap
| Fluorochrome | Target Expression | Brightness | Good Combination With | Poor Combination With |
|---|---|---|---|---|
| FITC | High | Medium | APC (mild compensation) [34] | PE (moderate overlap) [34] |
| PE | Low | High | FITC (with compensation) [34] | - |
| APC | Low | High | FITC (mild compensation) [34] | PE-Cy5 (high overlap) [34] |
| PerCP | High | Low | - | 7-AAD (moderate overlap, poor combination) [34] |
Key Principles:
- Know Your Instrument: Understand your cytometer's lasers and filters to select compatible fluorophores [34].
- Match Brightness to Expression: Use the brightest fluorophores (e.g., PE, APC) for low-abundance targets like cleaved caspase-3, and dimmer fluorophores for highly expressed antigens [34] [33].
- Minimize Spectral Overlap: Choose fluorophores with minimal emission spectrum overlap to reduce compensation errors [34] [35]. Always use single-stain controls to set compensation correctly [34].
Standardized Experimental Protocols
Protocol 1: Immunofluorescence Detection of Cleaved Caspase-3
This protocol is designed for detecting caspases in fixed cells using fluorescent antibodies, preserving spatial context [4].
Materials:
- Primary antibody against cleaved caspase-3
- Fluorescently conjugated secondary antibody
- PBS, Triton X-100, serum for blocking, mounting medium
- Humidified chamber
Steps:
- Permeabilization: Incubate fixed samples in PBS with 0.1% Triton X-100 for 5 minutes at room temperature [4].
- Washing: Wash slides three times in PBS, 5 minutes each [4].
- Blocking: Drain slides and apply blocking buffer (PBS/0.1% Tween 20 + 5% serum). Incubate in a humidified chamber for 1-2 hours at room temperature [4].
- Primary Antibody Incubation: Apply primary antibody diluted in blocking buffer. Incubate overnight at 4°C in a humidified chamber [4].
- Washing: Wash slides three times in PBS/0.1% Tween 20, 10 minutes each [4].
- Secondary Antibody Incubation: Apply fluorescently conjugated secondary antibody diluted in PBS. Incubate for 1-2 hours at room temperature, protected from light [4].
- Final Washing: Wash slides three times in PBS/0.1% Tween 20 for 5 minutes, protected from light [4].
- Mounting: Drain liquid, mount with an appropriate medium, and image with a fluorescence microscope [4].
Protocol 2: Using a Fluorescent Reporter for Real-Time Caspase-3/-7 Dynamics
Genetically encoded reporters allow for live-cell imaging of caspase activation, capturing kinetic data not possible with fixed-endpoint assays [3].
Workflow Overview:
Key Advantages:
- Real-time kinetics: Track the precise timing of caspase activation in single cells [3].
- Spatial information in 3D models: Monitor apoptosis in physiologically relevant models like spheroids and organoids [3].
- Multiplexing: Can be combined with constitutive markers (e.g., mCherry) for cell tracking and other dyes to detect phenomena like apoptosis-induced proliferation [3].
The Scientist's Toolkit: Research Reagent Solutions
Table 3: Essential Materials for Caspase-3 Background Resolution
| Item | Function | Example/Note |
|---|---|---|
| Caspase-3/-7 Reporter System | Live-cell, real-time imaging of executioner caspase activity [3]. | ZipGFP-based biosensor with DEVD cleavage motif; includes constitutive mCherry marker [3]. |
| FRET-FLIM Caspase-3 Reporter | Quantifies caspase-3 activity in live cells and in vivo; independent of probe concentration [32]. | LSS-mOrange-DEVD-mKate2 construct; measured by Fluorescence Lifetime Imaging Microscopy (FLIM) [32]. |
| Fc Receptor Blocking Reagent | Reduces non-specific antibody binding, a major source of background [33]. | Bovine Serum Albumin (BSA), normal serum, or commercial Fc blocking buffers [33]. |
| Viability Dye | Distinguishes live from dead cells; dead cells are a primary source of non-specific staining [33]. | Propidium Iodide (PI), 7-AAD, or fixable viability dyes for use with fixed cells [33]. |
| Bright Fluorophores (PE, APC) | Detects low-abundance targets like cleaved caspase-3 with high signal-to-background [34]. | Use for low-expression antigens; dimmer fluorophores (e.g., FITC) are suitable for high-abundance targets [34]. |
| Single-Stain Compensation Controls | Essential for correcting spectral overlap in multicolor flow cytometry [34]. | Use compensation beads or cells stained with a single antibody conjugate [34]. |
Frequently Asked Questions (FAQs)
Q1: My negative control shows staining. How do I determine if it's background or real signal? A: Systematically review your controls. Ensure you have a true negative control (no primary antibody) and an unstained control (cells only). If staining persists in the no-primary control, it suggests autofluorescence or non-specific secondary antibody binding. If autofluorescence is suspected, switch to red-shifted fluorophores like APC [33]. If non-specific binding is the issue, enhance your blocking steps and titrate your antibodies [33] [4].
Q2: I am using flow cytometry. My caspase-3 positive population is not distinct from the negative. What should I do? A: This is often a fluorophore brightness issue. Caspase-3 may be expressed at low levels. Re-stain your sample using a brighter fluorophore conjugate (e.g., PE or APC) for the anti-caspase-3 antibody instead of FITC or PerCP [34] [33]. Also, ensure you are gating out dead cells with a viability dye, as they increase background [33].
Q3: Can I completely eliminate background staining? A: It is not possible to eliminate background entirely, as all biological samples and detection systems have some level of inherent noise (e.g., autofluorescence). The goal is to optimize your signal-to-noise ratio to a point where the specific signal is clear and unambiguous. Proper experimental design, controls, and the troubleshooting steps outlined above are key to achieving this [34] [33] [4].
Optimized Protocols for Cleaved Caspase-3 Detection Across Platforms
Troubleshooting Guides
Guide 1: Resolving High Background Staining in Cleaved Caspase-3 Detection
High background staining is a frequent challenge in IHC that can obscure specific signal, complicating the interpretation of cleaved caspase-3 expression.
| Possible Cause | Specific Mechanism | Recommended Solution |
|---|---|---|
| Endogenous Enzymes | Peroxidase activity in tissue creates signal independent of antibody binding [10]. | Quench with 3% H2O2 in methanol or water for 10-15 minutes at room temperature [10] [36]. |
| Endogenous Biotin | Endogenous biotin in tissues (e.g., liver, kidney) binds to avidin-biotin detection systems [10]. | Use a polymer-based detection system (non-biotin) or perform an endogenous biotin block [10] [36]. |
| Primary Antibody Issues | High antibody concentration increases non-specific binding to off-target epitopes [10] [37]. | Titrate to find the optimal concentration; incubate at 4°C overnight [10] [36] [37]. |
| Secondary Antibody Cross-Reactivity | Secondary antibody binds to immunoglobulins or other proteins in the tissue [10] [36]. | Include a negative control (no primary); increase blocking serum concentration to 10%; use cross-adsorbed secondary antibodies [10] [36]. |
| Insufficient Blocking | Non-specific sites on the tissue are accessible to antibodies [37]. | Block with 1X TBST containing 5-10% normal serum from the secondary antibody host species for 30-60 minutes [36] [37]. |
| Inadequate Washes | Unbound antibodies and reagents remain on the slide [36]. | Wash slides 3 times for 5 minutes with TBST or PBST after primary and secondary antibody incubations [36]. |
Guide 2: Addressing Weak or No Target Staining
A lack of expected signal for cleaved caspase-3 can lead to false negative conclusions.
| Possible Cause | Specific Mechanism | Recommended Solution |
|---|---|---|
| Antigen Masking | Formalin fixation creates methylene cross-links that physically block antibody access to the epitope [38] [39]. | Perform Heat-Induced Epitope Retrieval (HIER): Heat to 95-97°C for 10-30 minutes in citrate (pH 6.0) or Tris-EDTA (pH 9.0) buffer [39] [36]. |
| Antibody Potency | Antibodies lose affinity due to improper storage, contamination, or repeated freeze-thaw cycles [10] [37]. | Run a positive control tissue; aliquot antibodies for storage; avoid bacterial contamination in buffers [10] [36] [37]. |
| Sub-Optimal Antigen Retrieval Buffer | The pH of the retrieval buffer is not optimal for unmasking the specific cleaved caspase-3 epitope [39]. | Systematically test both low-pH (Citrate, pH 6.0) and high-pH (Tris-EDTA, pH 9.0) buffers to determine which is superior [39]. |
| Inefficient Detection System | The detection method lacks sufficient sensitivity for the target abundance [36]. | Switch to a more sensitive, polymer-based detection system instead of avidin-biotin (ABC) or directly conjugated secondary antibodies [36]. |
| Target Degradation | The epitope is not preserved due to prolonged or improper tissue storage or fixation [36] [37]. | Use freshly cut tissue sections; avoid baking slides before storage; store slides at 4°C [36] [37]. |
Frequently Asked Questions (FAQs)
Q1: Why is antigen retrieval so critical for detecting cleaved caspase-3 in formalin-fixed tissues?
Antigen retrieval is essential because formalin fixation creates methylene bridges that cross-link proteins, altering the three-dimensional conformation of epitopes and masking the cleaved caspase-3 binding site from the primary antibody [39]. Without a retrieval step to break these cross-links, even a high-affinity antibody may fail to bind, leading to false-negative results. Heat-Induced Epitope Retrieval (HIER) is the most widely used and effective method for restoring epitope accessibility in formalin-fixed, paraffin-embedded (FFPE) tissues [39] [36].
Q2: My cleaved caspase-3 staining is weak, but my positive control is good. Should I adjust my antigen retrieval?
Yes, weak specific staining with a valid positive control strongly suggests suboptimal antigen retrieval for your experimental tissue. Under-retrieval is a common cause of weak signal [39]. To optimize, you can:
- Increase heating time during HIER (e.g., from 10 to 20 minutes).
- Switch the retrieval buffer pH. Some epitopes unmask better at high pH (Tris-EDTA, pH 9.0) while others prefer low pH (Citrate, pH 6.0) [39].
- Use a more intense heating method. A pressure cooker can sometimes provide better retrieval than a microwave for difficult targets [36].
Q3: What are the essential controls I should include in every cleaved caspase-3 IHC experiment?
Robust IHC requires multiple controls to ensure specificity and interpretability [39] [36]:
- Positive Control: A tissue known to express cleaved caspase-3 confirms your protocol and reagents are working.
- Negative Control: A section processed without the primary antibody (only detection system) identifies non-specific binding from the secondary antibody or endogenous enzyme activity.
- Specificity Control: The most rigorous control uses a blocking peptide (the specific antigen used to generate the antibody) to pre-absorb the primary antibody. Loss of staining confirms specificity. Matched antibody-antigen pairs are ideal for this [39].
Experimental Protocols
Protocol 1: Systematic Antigen Retrieval Optimization
This protocol provides a methodology for determining the optimal antigen retrieval conditions for a new cleaved caspase-3 antibody or a new tissue type.
Methodology:
- Tissue Sectioning: Cut FFPE tissue sections (including a known positive control) at 4-5 µm and mount on charged slides.
- Deparaffinization: Deparaffinize and rehydrate all sections simultaneously using fresh xylene and graded ethanols [36] [37].
- Antigen Retrieval Matrix: Subject serial sections to different retrieval conditions:
- Group A (HIER, Low pH): Incubate in 10 mM Sodium Citrate buffer (pH 6.0) at 95-97°C for 20 minutes [10] [39].
- Group B (HIER, High pH): Incubate in 1 mM Tris-EDTA buffer (pH 9.0) at 95-97°C for 20 minutes [39] [36].
- Group C (PIER): Digest with Proteinase K (e.g., 30 µg/mL) for 10-20 minutes at 37°C [39] [40]. Note: PIER can sometimes improve staining for certain matrix proteins but may damage morphology [40].
- Group D (Control): No antigen retrieval.
- Standardized IHC: Process all slides with an identical IHC protocol following retrieval: blocking, primary antibody incubation (overnight at 4°C), polymer-based detection, and chromogen development [36].
- Analysis: Compare staining intensity and background across groups to identify the optimal condition.
Protocol 2: Validation of Antibody Stripping for Multiplex IHC (mIHC)
For multiplexed detection of cleaved caspase-3 with other markers, complete antibody stripping between rounds is essential to prevent cross-reactivity [41].
Methodology (Based on Hybridization Oven-Based Antibody Removal - HO-AR-98):
- First Staining Cycle: Perform a complete IHC/IF stain for the first target (e.g., cleaved caspase-3) using a tyramide signal amplification (TSA) method with an Opal fluorophore [41].
- Antibody Stripping: After imaging, remove primary and secondary antibodies by incubating slides in antigen retrieval buffer in a hybridization oven at 98°C for 30 minutes. To prevent tissue dehydration, replenish the heated buffer every 5 minutes [41].
- Stripping Efficiency Check: To confirm successful stripping, incubate a test section with the secondary antibody and a new Opal fluorophore (different channel). The absence of signal confirms efficient removal [41].
- Subsequent Staining Cycles: Proceed with staining for the next target(s). This method has been shown to preserve tissue integrity better than microwave-assisted stripping, especially in fragile tissues like brain sections [41].
Signaling Pathways and Workflows
IHC Troubleshooting Logic Pathway
Multiplex IHC Antibody Stripping Workflow
The Scientist's Toolkit: Research Reagent Solutions
| Item | Function & Rationale |
|---|---|
| Sodium Citrate Buffer (pH 6.0) | A low-pH solution for HIER; effective for unmasking many nuclear and cytoplasmic epitopes, including many phosphorylated proteins [10] [39]. |
| Tris-EDTA Buffer (pH 9.0) | A high-pH solution for HIER; often superior for retrieving membrane proteins and more resistant epitopes. Chelates calcium ions involved in cross-linking [39] [36]. |
| Proteinase K | A broad-spectrum serine protease used in PIER. Cleaves peptide bonds to break cross-links, but requires careful optimization to avoid tissue damage [39] [40]. |
| Polymer-Based Detection Reagents | Highly sensitive detection systems that avoid endogenous biotin issues. Consist of a polymer backbone conjugated with multiple enzyme (e.g., HRP) and antibody molecules, providing significant signal amplification [36]. |
| Normal Serum | Used for blocking non-specific binding. Should be from the same species as the host of the secondary antibody (e.g., Normal Goat Serum if secondary is goat anti-rabbit) [10] [36]. |
| SignalStain Boost IHC Detection Reagents | An example of a commercially available, validated polymer-based detection system designed to provide high sensitivity and low background in IHC experiments [36]. |
Core Concepts: Permeabilization and Blocking
FAQ: Why are permeabilization and blocking critical for cleaved caspase-3 staining?
Cleaved caspase-3 is an intracellular target, and its staining is highly dependent on the antibody successfully reaching its epitope within the cell. An unpermeabilized cell membrane will block antibody entry, leading to weak or no signal. Inadequate blocking, however, results in non-specific antibody binding, causing high background that can obscure the specific signal of cleaved caspase-3 activation [42] [43] [44]. Proper optimization of these steps is therefore essential to accurately resolve the dynamics of apoptosis in your research.
Permeabilization Agent Selection Guide
The choice of permeabilization agent depends on your fixation method and the subcellular location of your target. The table below summarizes common agents and their applications, which is crucial for optimizing cleaved caspase-3 staining.
Table 1: Permeabilization Agent Selection Guide
| Agent | Mechanism | Recommended For | Notes on Caspase-3 Staining |
|---|---|---|---|
| Triton X-100 [42] [45] | Strong non-ionic detergent; creates large pores in membranes. | Targets within interior membranes (e.g., nuclear, mitochondrial). | Commonly used in standard protocols. May be ideal for cleaved caspase-3, which can be found in the cytoplasm and nucleus. |
| Saponin [42] [46] | Mild detergent; creates small, reversible pores by interacting with cholesterol. | Cytosolic targets and membrane-bound antigens. Pores close after washout. | Useful if you need to preserve delicate cellular structures or membrane integrity alongside staining. |
| Digitonin [46] | Mild detergent; similar to saponin. | Cytosolic targets. | Like saponin, it is a good choice for preserving structural details. |
| Methanol [42] [46] | Organic solvent; dehydrates and precipitates proteins. | Many intracellular targets; also acts as a fixative. | Can be used for permeabilization after aldehyde fixation. As a fixative, it can expose buried epitopes but is not recommended for soluble targets or some phospho-specific antibodies [42]. |
| Acetone [45] [46] | Strong dehydrating agent; precipitates proteins. | Frozen tissues; it fixes and permeabilizes simultaneously. | No additional permeabilization is needed after acetone fixation. |
Blocking Serum Selection
Blocking is vital to prevent non-specific binding of antibodies to the sample. A general rule is to use a blocking serum from a different species than the host of the primary antibody.
Table 2: Blocking Strategy Guidelines
| Scenario | Recommended Blocking Agent | Rationale |
|---|---|---|
| Standard Blocking | 1-5% Bovine Serum Albumin (BSA) or serum from the secondary antibody host species [46]. | Prevents the secondary antibody from binding non-specifically to the sample. |
| Primary antibody raised in Goat | Use normal serum from Donkey (if using donkey anti-goat secondary) [47] [46]. | The blocking proteins should not be recognized by the secondary antibody. |
| High Background | Consider a charge-based blocker, such as Image-iT FX Signal Enhancer, or increase blocking incubation time [43] [44]. | Addresses non-specific binding through multiple mechanisms. |
Experimental Protocols
Standard IF Protocol for Cell Culture (Aldehyde Fixation)
This is a foundational protocol for staining intracellular targets like cleaved caspase-3.
Workflow Description:
- Sample Preparation: Grow cells on poly-lysine-coated glass coverslips to ~50% confluence to avoid deformed cell architecture and high background [46].
- Fixation: Fix cells in 3-4% formaldehyde in TBS (pH 7.4) for 15 minutes at room temperature (RT) to crosslink and stabilize proteins [45] [46].
- Permeabilization: Incubate samples for 10 minutes in TBS containing 0.25% Triton X-100 to allow antibody access to intracellular targets [45].
- Blocking: Incubate cells with blocking buffer (e.g., 1-5% BSA) for 30 minutes to 2 hours at RT to minimize non-specific antibody binding [45] [46].
- Primary Antibody Incubation: Incubate with diluted cleaved caspase-3 primary antibody overnight at 4°C in the dark for optimal results [43] [45].
- Secondary Antibody Incubation: Incubate with fluorophore-conjugated secondary antibody for 1-2 hours at RT in the dark [45].
- Mounting and Imaging: Perform nuclear counterstaining with DAPI (0.1–1 μg/mL for 5 minutes), mount coverslips with an anti-fade mounting medium, and store slides in the dark at 4°C before imaging [43] [45] [46].
Protocol for Multiplexing with Antibodies Requiring Different Conditions
When multiplexing, if one antibody requires methanol fixation and another requires formaldehyde, you may need to prioritize the conditions for the most critical antibody or perform a small-scale test to find a compatible compromise [42].
Workflow Description: This logical workflow helps navigate protocol conflicts during multiplexed experiments. The process begins by identifying all antibodies and checking their validated protocols [42]. If requirements are incompatible, small-scale testing of sequential staining or compromise conditions is necessary before scaling up the successful approach [42].
Troubleshooting Guides
FAQ: How do I fix high background specifically in cleaved caspase-3 staining?
High background is a common challenge. The table below outlines potential causes and solutions.
Table 3: Troubleshooting High Background Staining
| Problem | Possible Cause | Recommended Solution |
|---|---|---|
| High Background | Insufficient Blocking [43] [44] | Increase blocking incubation time or change the blocking agent. Use normal serum from the same species as the secondary antibody [43]. |
| Primary Antibody Concentration Too High [43] [44] | Perform a titration experiment to find the optimal dilution. | |
| Insufficient Washing [43] [44] | Increase wash frequency and duration after primary and secondary antibody incubations. | |
| Non-specific Secondary Antibody Binding [43] | Run a secondary-only control (no primary antibody). If staining appears, change the secondary antibody. | |
| Sample Autofluorescence [43] [44] | Check unstained controls. Use freshly prepared formaldehyde, as old stocks can autofluoresce. Choose longer-wavelength channels for imaging if possible. | |
| Weak or No Signal | Inadequate Permeabilization [44] | Confirm cells were permeabilized after aldehyde fixation. Switch to a stronger detergent like Triton X-100 if using a mild one [46]. |
| Over-fixation [44] | Reduce fixation duration. Perform antigen retrieval to unmask the epitope. | |
| Incorrect Antibody Dilution [43] | Consult the product datasheet and perform an antibody titration. | |
| Target Protein Not Induced | Include a validated positive control to ensure apoptosis induction and staining protocol are working. |
The Scientist's Toolkit: Key Research Reagent Solutions
Table 4: Essential Materials for IF Staining
| Item | Function | Example Use Case |
|---|---|---|
| Formaldehyde (4%) [42] [45] | Crosslinking fixative; preserves cellular architecture and soluble proteins. | Standard fixation for most targets, including cleaved caspase-3. |
| Methanol [42] [46] | Precipitating fixative and permeabilizer; can expose buried epitopes. | Can be optimal for certain antibodies, especially cytoskeletal components. |
| Triton X-100 [42] [45] | Strong non-ionic detergent for permeabilization. | Creating large pores for antibody access to nuclear and cytoplasmic targets. |
| Saponin [42] [46] | Mild detergent for creating small, reversible pores. | Staining membrane-bound or delicate antigens where structure preservation is key. |
| BSA or Normal Serum [43] [45] [46] | Blocking agent to reduce non-specific antibody binding. | Essential step to minimize background; serum should match the secondary antibody host. |
| DAPI [45] [46] | Nuclear counterstain. | Identifies cellular location and provides a reference for signal localization. |
| Anti-fade Mounting Medium [43] | Preserves fluorescence and prevents photobleaching. | Crucial for maintaining signal intensity during imaging and storage. |
Cleaved caspase-3 serves as a crucial biomarker for detecting apoptosis in mixed cell populations, as this caspase is responsible for the majority of proteolysis during programmed cell death. [48] Flow cytometry offers significant advantages in this context, enabling multiparameter measurements, single-cell analysis, and rapid processing of thousands of cells per second. [49] [50] This technical resource addresses common experimental challenges and provides optimized protocols for researchers investigating cleaved caspase-3 in heterogeneous samples, with particular emphasis on resolving problematic background staining.
Troubleshooting Guide: Cleaved Caspase-3 Background Staining
The table below outlines frequent issues, their potential causes, and recommended solutions for high background fluorescence in cleaved caspase-3 flow cytometry experiments.
| Problem | Potential Causes | Recommended Solutions |
|---|---|---|
| High Background Fluorescence | Use of poorly preserved cells leading to autofluorescence [29] | Use fresh cells or cells fixed for short periods; include unstained controls to assess autofluorescence [29] |
| Non-specific binding from dead cells [29] [51] | Incorporate a viability dye (e.g., PI, 7-AAD, DAPI) to gate out dead cells during analysis [29] [51] | |
| Fc receptor-mediated antibody binding [29] [51] | Use Fc receptor blocking reagents prior to staining [29] [51] | |
| Inadequate washing steps [29] | Increase buffer volume, number, and/or duration of washes [29] [52] | |
| Antibody concentration too high [29] [52] | Titrate the primary antibody to determine the optimal dilution for your specific cell type [29] | |
| Poor compensation or spillover spreading in multicolor panels [29] | Use single-color controls and compensation beads; verify correct PMT voltages [29] [53] | |
| Weak or No Signal | Inadequate fixation and/or permeabilization [29] [51] | Optimize fixation/permeabilization protocol for your target; validate using a known positive control [29] [51] |
| Low abundance target paired with a dim fluorochrome [29] [51] | Pair low-expression targets with bright fluorochromes (e.g., PE) [29] [51] | |
| Suboptimal antibody titration [29] | Perform antibody titration for specific cell types and experimental conditions [29] | |
| Photobleaching of fluorochromes [29] | Protect samples from light during staining and analysis [29] |
Frequently Asked Questions (FAQs)
1. Why is cleaved caspase-3 considered a reliable marker for apoptosis? Caspase-3 is an effector caspase responsible for the majority of proteolytic cleavage events during apoptosis. It is present in healthy cells as an inactive zymogen (procaspase-3) and becomes activated through cleavage at specific aspartic acid residues. This cleaved, active form is a direct indicator that the apoptotic execution phase has been initiated. [48] [54]
2. How can I distinguish early apoptosis from late apoptosis and necrosis in a mixed population? Multiparameter staining is the most effective strategy. A common approach is to combine cleaved caspase-3 staining with a viability dye like Propidium Iodide (PI) and Annexin V:
- Viable, non-apoptotic: Cleaved Caspase-3 negative / Annexin V negative / PI negative
- Early apoptotic: Cleaved Caspase-3 positive / Annexin V positive / PI negative
- Late apoptotic: Cleaved Caspase-3 positive / Annexin V positive / PI positive
- Necrotic: Cleaved Caspase-3 negative / Annexin V negative (or positive) / PI positive [29] [49]
3. My cells are sticky and form clumps, which affects my flow data. What can I do? Cell clumps can block the flow cytometer's tubing and be misinterpreted as single cells. Gently pipette to mix cells before staining and running. In extreme cases, filter cells through a nylon mesh (e.g., 30-70 μm) before analysis to remove clumps. [52]
4. What are the critical controls for a valid intracellular cleaved caspase-3 experiment?
- Unstained cells: To assess autofluorescence.
- Fluorescence Minus One (FMO) controls: Essential for accurate gating in multicolor panels.
- Isotype controls: Help determine non-specific antibody binding.
- Positive control: Cells treated with a known apoptosis inducer (e.g., staurosporine, camptothecin) to confirm the staining protocol is working. [29] [53] [51]
Experimental Protocol: Detection of Cleaved Caspase-3 by Flow Cytometry
The following protocol is adapted from established methodologies for the detection of intracellular cleaved caspase-3 in apoptotic cells. [48] [49] [4]
Materials
- Cell suspension (e.g., 0.5-1x10^6 cells/sample)
- Fixation Buffer (4% formaldehyde in PBS, methanol-free is recommended)
- Permeabilization Buffer (e.g., PBS with 0.1% Triton X-100, Saponin, or 90% ice-cold methanol)
- Wash Buffer (PBS, optionally with 1-5% FBS or BSA)
- Primary Antibody specific for cleaved caspase-3
- Fluorochrome-conjugated Secondary Antibody (if using an unconjugated primary)
- Viability Dye (e.g., propidium iodide, 7-AAD, or a fixable viability dye)
- Fc Receptor Blocking Reagent (optional, but recommended for high background)
- Flow cytometry tubes
Step-by-Step Procedure
1. Cell Preparation and Viability Staining:
- Harvest your mixed cell population, ensuring minimal mechanical disruption.
- Optional but recommended: Stain live cells with a viability dye before fixation. If using a fixable viability dye, follow the manufacturer's protocol. This allows you to gate out dead cells that cause non-specific binding. [29] [51]
2. Fixation:
- Resuspend the cell pellet in an appropriate fixation buffer (e.g., 4% formaldehyde).
- Incubate for 10-20 minutes at room temperature. Do not exceed 30 minutes, as over-fixation can mask epitopes. [29] [51]
- Centrifuge and remove the supernatant.
3. Permeabilization:
- Thoroughly resuspend the fixed cell pellet in ice-cold permeabilization buffer.
- If using detergent-based buffers (e.g., Triton X-100, Saponin), incubate for 15-30 minutes on ice.
- If using methanol, add ice-cold 90% methanol drop-wise while gently vortexing the cell pellet. Incubate on ice for at least 30 minutes. Note that methanol can damage some epitopes and fluorochromes. [29] [51]
4. Intracellular Staining:
- Wash cells once with wash buffer.
- Optional: Resuspend cells in wash buffer containing an Fc receptor blocking reagent and incubate for 10-15 minutes to reduce background. [29] [51]
- Add the optimally titrated primary antibody against cleaved caspase-3.
- Incubate for 30-60 minutes at room temperature (or as per antibody datasheet), protected from light.
- Wash cells 1-2 times to remove unbound antibody.
- If using an unconjugated primary antibody, resuspend cells in the fluorochrome-conjugated secondary antibody (pre-adsorbed if possible). Incubate for 30 minutes, protected from light.
- Perform a final 1-2 washes.
5. Data Acquisition:
- Resuspend the final cell pellet in a suitable flow cytometry buffer (e.g., PBS).
- Analyze the samples immediately on a flow cytometer, using the appropriate controls (unstained, FMO, isotype) to set up compensation and gating. [29] [53]
The Scientist's Toolkit: Key Research Reagents
The table below lists essential reagents for cleaved caspase-3 flow cytometry experiments, along with their critical functions.
| Reagent | Function | Key Considerations |
|---|---|---|
| Anti-Cleaved Caspase-3 Antibody | Specifically binds the activated (cleaved) form of caspase-3; primary detection reagent. | Validate for flow cytometry; choose clones that recognize the cleaved fragment only. [48] |
| Fixation Buffer (e.g., Formaldehyde) | Cross-links and preserves cellular structures; immobilizes antigens. | Use methanol-free formulations (1-4%) to prevent premature permeabilization. [51] |
| Permeabilization Buffer (e.g., Triton X-100, Saponin, Methanol) | Dissolves membrane lipids to allow antibody access to intracellular targets. | Choice depends on target location (cytoplasm vs. nucleus); methanol can be harsher and damage some epitopes. [29] [51] |
| Viability Dye (e.g., PI, 7-AAD, Fixable Viability Dyes) | Distinguishes live from dead cells; critical for gating out dead cells that cause high background. | DNA-binding dyes (PI) are for non-fixed cells; fixable dyes are compatible with subsequent intracellular staining. [29] [53] |
| Fc Receptor Blocking Reagent | Blocks non-specific binding of antibodies to Fc receptors on immune cells. | Highly recommended for mixed populations containing myeloid cells (e.g., PBMCs). [29] [51] |
| Fluorochrome-Conjugated Secondary Antibody | Binds to the primary antibody for detection; used in indirect staining. | Must be raised against the species of the primary antibody; can amplify signal. [29] [4] |
Apoptosis Signaling Pathway and Detection Window
Understanding the temporal sequence of apoptosis is key to interpreting cleaved caspase-3 data, especially when using multiparameter panels.
This diagram illustrates the progression of apoptotic events and the corresponding detection markers. Cleaved caspase-3 detection typically becomes positive during the transition from early to late apoptosis, often before the loss of plasma membrane integrity. [49] [50]
The detection of cleaved caspase-3 activity serves as a definitive biomarker for apoptosis, playing a crucial role in cellular death research and drug development studies. Fluorogenic substrates and staining kits enable real-time monitoring of this key executioner caspase within living cells, preserving physiological conditions while providing temporal data on apoptosis progression. These methods are particularly valuable for tracking dynamic cellular processes, screening therapeutic compounds, and understanding cell death mechanisms in real-time. However, researchers often encounter challenges with background staining that can compromise data interpretation, making optimization of these techniques essential for obtaining reliable results [20] [55].
Core Detection Technologies: Mechanisms and Applications
Fluorogenic Substrate Mechanisms
Fluorogenic caspase-3 substrates operate on a molecular principle where a caspase recognition sequence (DEVD) is conjugated to a DNA-binding dye. In living cells, these substrates remain non-fluorescent until cleaved by active caspase-3/7, which releases the dye moiety allowing it to translocate to the nucleus and bind DNA, producing a bright fluorescent signal. This design enables specific detection of apoptosis without disrupting the natural cell death process [56] [55].
Key Technology Platforms:
- NucView Caspase-3 Substrates: These patented reagents utilize the DEVD caspase recognition sequence linked to various DNA-binding dyes (NucView 405, 488, and 530) that become fluorescent upon cleavage. The assay is homogeneous, typically requiring no wash steps, and is compatible with fixation for downstream analysis [56].
- CellEvent Caspase-3/7 Detection Reagents: Similar in mechanism, these reagents employ a DEVD peptide conjugated to a nucleic acid binding dye that becomes fluorescent after caspase-mediated cleavage. Available in both green (502/530 nm) and red (590/610 nm) fluorescence versions, they enable multiplexing with other probes and are validated for live-cell imaging up to 72 hours [55] [57].
Figure 1: Molecular mechanism of fluorogenic caspase-3/7 substrates in live cells
Experimental Protocol: Live-Cell Caspase-3 Detection
Materials Required:
- NucView 488 Caspase-3 Substrate (1 mM in DMSO or PBS) OR CellEvent Caspase-3/7 Green Detection Reagent
- Appropriate cell culture vessel (glass-bottom recommended)
- Phenol-free imaging medium (e.g., FluoroBrite DMEM)
- Live-cell imaging system with environmental control (34-37°C, 5% CO₂)
- FITC/GFP filter set (for green fluorescent substrates)
Step-by-Step Procedure:
Cell Preparation:
- Plate cells at appropriate density (0.1 × 10⁶ cells/mL recommended for N19-oligodendrocyte cells) on glass-bottom dishes or chambered coverslips [58].
- Culture cells overnight (16-20 hours) prior to experimentation to ensure adherence and recovery.
Treatment and Staining:
- Apply apoptosis-inducing treatments (e.g., 80 mM potassium chloride or 100 mM glutamate for neuronal cells) [58].
- Prepare staining solution by diluting fluorogenic substrate to working concentration in pre-warmed imaging medium (e.g., 3 μL NucView 488 substrate per 500 μL media) [58].
- Add substrate directly to cells in culture medium—no wash steps required before incubation.
Live-Cell Imaging:
- Incubate cells with substrate for 30-60 minutes at culture conditions [55].
- Configure microscope settings: for NucView 488, use GFP filter sets with gain ~140 and exposure time ~500 ms [58].
- Maintain environmental control throughout imaging (temperature, CO₂, humidity).
- Begin time-lapse acquisition as early as 30 minutes post-staining, continuing up to 72 hours for kinetic studies [57].
Post-Processing and Analysis:
- For fixed-cell endpoint analysis, cells can be fixed with 2-4% paraformaldehyde for 10-15 minutes after live imaging [56].
- Acquire images using appropriate filter sets and quantify fluorescence intensity using image analysis software.
Research Reagent Solutions
Table 1: Essential reagents for live-cell caspase-3 detection
| Reagent/Category | Specific Examples | Function/Application | Key Features |
|---|---|---|---|
| Fluorogenic Substrates | NucView 488 Caspase-3 Substrate [56] | Real-time caspase-3/7 activity detection | Green fluorescence (Ex/Em: 488/530 nm); fixable; no-wash protocol |
| CellEvent Caspase-3/7 Green [55] | Caspase-3/7 activity monitoring | Green fluorescence (Ex/Em: 502/530 nm); compatible with live-cell imaging up to 72 hours | |
| NucView 530 Caspase-3 Substrate [56] | Caspase-3/7 detection for multiplexing | Orange fluorescence (Ex/Em: ~530/nm); suitable for Cy3/R-PE channels | |
| Specialized Media | FluoroBrite DMEM [57] | Low-fluorescence live-cell imaging | Reduces background autofluorescence; maintains cell viability |
| Phenol-free DMEM [58] | Fluorescence imaging | Eliminates phenol red background interference | |
| Viability Indicators | SYTOX Green/Orange/Deep Red [57] | Dead cell identification | Cell-impermeant nucleic acid stains; selective for compromised membranes |
| MitoTracker dyes [57] | Mitochondrial function assessment | Accumulates in active mitochondria; indicates early apoptosis | |
| Detection Kits | Dual Apoptosis Kit (NucView 488 + Annexin V) [56] | Multiparameter apoptosis analysis | Simultaneously detects caspase activation and phosphatidylserine externalization |
| Apoptosis/Necrosis Kit (NucView 488 + RedDot2) [56] | Distinguishes apoptosis from necrosis | Differentiates caspase-mediated death from membrane disruption |
Troubleshooting Background Staining Issues
Identification and Resolution of Common Problems
Table 2: Troubleshooting guide for background fluorescence in caspase-3 detection
| Problem | Potential Causes | Recommended Solutions | Preventive Measures |
|---|---|---|---|
| High background fluorescence | Autofluorescence from sample components [59] | Switch to far-red fluorescent dyes (e.g., NucView 530) [60]; Use photobleaching pre-treatment with white LED arrays [61] | Image with FluoroBrite or phenol-free media [57]; Select glass-bottom imaging vessels [59] |
| Nonspecific dye binding or unbound fluorophores [59] | Optimize dye concentration through titration [59]; Include wash steps after staining (if compatible with assay) [59] | Use recommended antibody dilutions; validate optimal substrate concentration for each cell type | |
| Fluorescent compounds in media/drugs [59] | Test treatment-only controls (no dye) to identify contributing factors [59] | Screen all media components and inducing agents for inherent fluorescence before experiments | |
| Weak or absent signal | Insufficient caspase induction [60] | Optimize apoptosis induction conditions; extend treatment time; include positive controls (e.g., staurosporine-treated cells) [60] [55] | Validate apoptosis inducers using complementary assays before caspase detection |
| Sub-optimal imaging parameters [62] | Increase detector sensitivity; use slower camera readout speeds; employ binning modes (2×2 or 4×4) to enhance signal [62] | Perform pilot experiments to establish optimal microscope settings before main study | |
| Non-specific nuclear staining in viable cells | Compromised membrane integrity [55] | Co-stain with viability indicators (SYTOX dyes) to gate out dead cells [57] | Check cell health before experiments; minimize toxic conditions |
| Enzyme-independent cleavage [55] | Include caspase inhibitor controls (e.g., 30 μM Caspase 3/7 Inhibitor I) to confirm specificity [55] | Validate signal specificity with pharmacological inhibitors in parallel experiments |
Advanced Background Reduction Techniques
Photobleaching Pre-treatment Method: For samples with persistent autofluorescence (e.g., tissues with lipofuscin accumulation), photobleaching with broad-spectrum white LED arrays effectively reduces background. Construct an apparatus using a white phosphor LED desk lamp, slide chamber containing azide-TBS solution (0.05% sodium azide in TBS), and a reflective dome. Irradiate samples for 48 hours at 4°C before staining. This method reduces autofluorescence without affecting specific probe signal intensity [61].
Imaging Parameter Optimization: To maximize signal-to-noise ratio in live-cell imaging:
- Use cooled CCD cameras with low read noise (<5 electrons) and slow readout speeds (~1.25 MHz) [62]
- Employ binning modes (2×2 or 4×4) to increase signal collection at the expense of spatial resolution [62]
- Utilize high-numerical aperture objectives to collect more emission photons [58]
- Maintain focus stability through pre-warming of microscope stage (1-3 hours before imaging) [58]
Figure 2: Systematic troubleshooting approach for background fluorescence reduction
Frequently Asked Questions (FAQs)
Q1: Can NucView caspase substrates detect other caspases besides caspase-3? While these substrates are designed with the DEVD recognition sequence specific for caspase-3, they can also be cleaved by caspase-7 due to the similar substrate specificity of these executioner caspases. They do not effectively detect initiator caspases (e.g., caspase-8 or -9) which have different recognition sequences [56].
Q2: How long does the fluorescent signal persist after caspase activation? The signal is stable for extended periods once the DNA-binding dye is released and complexes with nuclear DNA. For NucView substrates, the signal withstands formaldehyde fixation (2-4% PFA for 10-15 minutes) and permeabilization (0.1% Triton X-100), allowing for subsequent immunostaining. However, methanol fixation is not recommended as it may diminish signal [56].
Q3: What is the optimal time window for imaging after adding caspase substrates? Detection can begin as early as 30 minutes after substrate addition, with optimal signal typically developing within 1-2 hours. For kinetic studies, imaging can continue for up to 72 hours, though the specific timeframe depends on the apoptosis induction method and cell type [57].
Q4: How can I distinguish true caspase-3 activation from non-specific staining? Always include appropriate controls: (1) untreated cells to establish baseline, (2) cells treated with caspase inhibitor (e.g., 30 μM Caspase 3/7 Inhibitor I) to confirm specificity, and (3) a known apoptosis inducer as a positive control. Specific caspase-3 activation typically shows bright, well-defined nuclear staining rather than diffuse cytoplasmic fluorescence [55].
Q5: Can these live-cell methods be combined with other apoptosis assays? Yes, fluorogenic caspase substrates are compatible with many complementary assays. Popular combinations include:
- Annexin V conjugates for phosphatidylserine externalization detection [56]
- MitoTracker dyes or TMRM for mitochondrial membrane potential assessment [57]
- SYTOX dead cell stains to exclude necrotic cells [57] These multiparameter approaches provide more comprehensive apoptosis characterization.
In the context of research focused on resolving cleaved caspase-3 background staining, integrating this marker into a multiplexed panel is essential for a comprehensive understanding of the apoptotic tumor microenvironment. Multiplexing allows for the simultaneous detection of multiple protein markers on the same tissue section while preserving crucial spatial information [63]. However, co-staining cleaved caspase-3 with other apoptotic and cell lineage markers introduces technical challenges, including antibody cross-reactivity, signal bleed-through, and heightened background. This technical support guide provides targeted troubleshooting and FAQs to address these specific issues, enabling robust and interpretable multiplex experiments.
FAQs and Troubleshooting Guides
How can I reduce high background specifically for cleaved caspase-3 in a multiplex immunofluorescence panel?
High background staining for cleaved caspase-3 can obscure true signal and compromise data interpretation. The following table summarizes common causes and solutions:
| Cause of Background | Description | Solution |
|---|---|---|
| Antibody Concentration Too High | Excessive antibody leads to non-specific binding. | Perform a checkerboard titration of the primary antibody against a known positive control tissue to determine the optimal dilution [20]. |
| Insufficient Blocking | Non-specific antibody binding to charged sites or Fc receptors. | Block with 5-10% normal serum from the host species of the secondary antibody for 1 hour; consider using commercial blocking buffers for charged sites [20]. |
| Over-Fixation | Excessive cross-linking from over-fixation can mask epitopes and increase non-specific trapping. | Standardize fixation time (e.g., 24 hours in formalin) and consider antigen retrieval optimization [64]. |
| Signal Amplification Issues | Over-amplification in TSA-based methods can drastically increase background. | Titrate the concentration of the tyramide reagent and the incubation time; ensure thorough washing between steps [63]. |
What controls are essential to validate cleaved caspase-3 specificity in a multiplex assay?
Implementing a comprehensive set of controls is non-negotiable for confirming the specificity of your cleaved caspase-3 signal, especially when background is a concern.
- Positive Control: Include a tissue or cell sample known to be undergoing apoptosis. This can be a cell pellet treated with a pro-apoptotic agent (e.g., staurosporine or camptothecin) or a positive control tissue section provided in your kit [65] [49].
- Negative Control (Isotype Control): Use a non-specific antibody from the same host species, isotype, and conjugation as the cleaved caspase-3 antibody, at the same concentration. This controls for non-specific Fc receptor binding.
- No Primary Antibody Control: Omit the cleaved caspase-3 primary antibody to identify background caused by the secondary detection system.
- Competition Control: Pre-incubate the cleaved caspase-3 antibody with a blocking peptide (if available) that contains the target antigen sequence. A significant reduction in signal confirms specificity.
- Biological Negative Control: Include a tissue type with expected low or no apoptosis to establish your baseline background levels.
How do I choose the right multiplex imaging platform to minimize background for my cleaved caspase-3 study?
The choice of platform impacts the complexity of panel design and the potential for background. The table below compares key technologies:
| Platform Type | Example Technologies | Key Principle | Pros & Cons for Background Management |
|---|---|---|---|
| Multicycle Imaging | PhenoCycler (CODEX) [63], t-CyCIF [63] | Sequential rounds of staining, imaging, and dye inactivation/antibody elution. | Pro: Uses directly conjugated antibodies, potentially lowering background. Con: Multiple cycles can accumulate background or damage tissue. |
| Single-Shot Fluorescence | PhenoImager HT [63] | Staining with an antibody cocktail, often with signal amplification (e.g., tyramide). | Pro: Faster, preserves tissue integrity. Con: Spectral overlap can cause bleed-through; TSA can increase background if not optimized. |
| Mass Spectrometry | MIBI [63], IMC [63] | Uses metal-tagged antibodies and mass spectrometry for detection. | Pro: Virtually no biological background from tissue, minimal signal overlap. Con: Low accessibility, high cost, specialized analysis. |
My TUNEL and cleaved caspase-3 signals do not perfectly co-localize. Is this a problem?
No, this is often expected and reflects the temporal sequence of apoptosis. The following workflow and table detail the relationship between these key markers:
Apoptosis Signaling Pathway Workflow:
| Marker | Detects | Stage of Apoptosis | Notes |
|---|---|---|---|
| Cleaved Caspase-3 | Activation of a key executioner caspase [65] [20] | Mid-stage (execution phase) | An early event in the execution phase, before major structural collapse. |
| Annexin V | Externalization of Phosphatidylserine (PS) on the plasma membrane [66] [65] | Early-stage | Can be reversible; also positive in necrotic cells due to membrane damage [49]. |
| TUNEL | DNA fragmentation resulting from endonuclease activity [64] | Late-stage | A late event; also can be positive in necrosis and some DNA repair processes [64]. |
A cell can be cleaved caspase-3 positive but TUNEL negative if it is in an earlier stage of apoptosis. Conversely, a TUNEL-positive cell might be cleaved caspase-3 negative if it has progressed to a late stage where caspases are no longer active or has undergone caspase-independent death. For a more complete picture, consider integrating a marker for early apoptosis (like Annexin V, in flow cytometry) or a cell viability dye to exclude necrotic cells [66] [65].
Detailed Experimental Protocols
Protocol 1: Optimized Sequential Immunofluorescence for Cleaved Caspase-3 and Pan-Cytokeratin
This protocol is adapted for a multicycle approach, ideal for standard fluorescence microscopes, to prevent cross-reactivity and reduce background [63].
Materials:
- FFPE tissue sections
- Primary antibodies: Rabbit anti-cleaved caspase-3 and Mouse anti-Pan-cytokeratin
- Species-specific secondary antibodies conjugated to spectrally distinct fluorophores (e.g., Donkey anti-Rabbit-CF568, Donkey anti-Mouse-CF488)
- Antigen retrieval buffer (e.g., citrate pH 6.0 or EDTA pH 9.0)
- Blocking buffer (e.g., 5% normal donkey serum / 1% BSA in PBS)
- Mounting medium with DAPI
Method:
- Deparaffinize and Rehydrate: Process FFPE sections through xylene and a graded ethanol series to water.
- Antigen Retrieval: Perform heat-induced epitope retrieval in an appropriate buffer using a pressure cooker or steamer. Allow slides to cool.
- Blocking: Incubate sections with blocking buffer for 1 hour at room temperature.
- First Round Staining:
- Apply optimized dilution of Mouse anti-Pan-cytokeratin in blocking buffer. Incubate overnight at 4°C.
- Wash 3x with PBS-T (PBS with 0.025% Triton X-100).
- Apply Donkey anti-Mouse-CF488 secondary antibody. Incubate for 1 hour at room temperature, protected from light.
- Wash 3x with PBS-T.
- Image the entire slide or regions of interest using the CF488 channel. This first image is critical for registration.
- Antibody Elution: To strip the first set of antibodies, incubate the slide in a low-pH glycine-HCl buffer (e.g., 0.2 M Glycine-HCl, pH 2.0-2.5) for 20-30 minutes with agitation [63]. Alternatively, a commercially available antibody elution buffer can be used.
- Validation of Elution: Wash the slide with PBS and re-image using the CF488 channel to confirm complete signal removal.
- Second Round Staining:
- Re-block the slide for 30 minutes.
- Apply optimized dilution of Rabbit anti-cleaved caspase-3 in blocking buffer. Incubate overnight at 4°C.
- Wash 3x with PBS-T.
- Apply Donkey anti-Rabbit-CF568 secondary antibody. Incubate for 1 hour at room temperature, protected from light.
- Wash 3x with PBS-T.
- Counterstaining and Mounting: Apply DAPI counterstain for 5 minutes, wash, and mount with an antifade mounting medium.
- Final Imaging: Re-image the same regions captured in Step 4. The pre- and post-elution images can be aligned using software to analyze co-expression.
Protocol 2: Combining TUNEL Assay with Immunofluorescence for Cleaved Caspase-3
This protocol allows for the direct correlation of a mid-apoptotic marker with a late-stage DNA fragmentation marker on the same section [64].
Materials:
- A commercial TUNEL assay kit (e.g., with FITC-dUTP or EdUTP)
- Primary antibody: Rabbit anti-cleaved caspase-3
- Fluorescent secondary antibody (e.g., anti-Rabbit-CF568)
- Counterstain (DAPI)
- Permeabilization buffer (0.1-0.5% Triton X-100 in PBS)
Method:
- Sample Preparation: Fix and permeabilize cells or tissue sections as required. Note: For FFPE tissues, standard deparaffinization, rehydration, and antigen retrieval (compatible with both the antibody and TUNEL) must be performed first.
- TUNEL Reaction:
- Follow the manufacturer's instructions for your TUNEL kit.
- Briefly, equilibrate the sample, then incubate with the TdT enzyme and labeled nucleotide mix for 60 minutes at 37°C in a humidified chamber [64].
- Terminate the reaction with the provided stop/wash buffer.
- Wash thoroughly with PBS.
- Immunofluorescence for Cleaved Caspase-3:
- Block the sample with an appropriate blocking buffer for 1 hour.
- Incubate with the anti-cleaved caspase-3 primary antibody overnight at 4°C.
- Wash 3x with PBS-T.
- Incubate with the fluorescent secondary antibody for 1 hour at room temperature, protected from light.
- Wash 3x with PBS-T.
- Counterstaining and Mounting: Apply DAPI, wash, and mount with an antifade mounting medium.
- Imaging and Analysis: Acquire images using a fluorescence microscope. Use the DAPI channel to identify all nuclei. Analyze the co-localization of cleaved caspase-3 (red) and TUNEL (green) signals. Expect to see cells that are positive for only cleaved caspase-3 (early-mid apoptosis) and cells positive for both (late apoptosis).
The Scientist's Toolkit: Key Research Reagent Solutions
The following table details essential reagents used in multiplex apoptosis detection, with a focus on resolving cleaved caspase-3 background.
| Reagent Category | Example Products | Function in Experiment |
|---|---|---|
| Caspase Activity Probes | BD Pharmingen Live Cell Caspase Probes (Yellow-Green, Blue, Violet) [65] | Allow detection of caspase activity in intact, unfixed live cells for flow cytometry, without requiring fixation. |
| Fixable Viability Stains | BD Horizon Fixable Viability Stains (10 colors) [65] | Critical for excluding dead cells (which can show non-specific antibody uptake or be TUNEL-positive due to necrosis) from your analysis in flow cytometry. |
| Annexin V Conjugates | Annexin V-FITC, Annexin V-PE, Annexin V-BV421 [65] | Used to detect phosphatidylserine externalization, an early marker of apoptosis, often combined with a viability dye like 7-AAD or PI [66] [65]. |
| Antibodies for Key Apoptotic Proteins | Anti-active Caspase-3, Anti-Bcl-2, Anti-cleaved PARP conjugates [65] | Directly conjugated antibodies for flow cytometry or immunofluorescence enable multiplexing by targeting different stages of the apoptotic pathway. |
| Metal-Labelled Antibodies | IONpath MIBItags, Standard BioTools Maxpar Antibodies [63] | Antibodies conjugated to heavy metal isotopes for use with mass cytometry (e.g., IMC, MIBI) to achieve high-plex imaging with minimal background. |
| DNA Staining Dyes | Propidium Iodide (PI), 7-AAD, DAPI [65] [49] | Used for cell cycle analysis, identifying sub-G1 (apoptotic) populations in fixed cells (PI), or as a nuclear counterstain in imaging (DAPI). |
Advanced Troubleshooting: Systematic Reduction of Background Staining
FAQs: Resolving High Background in Cleaved Caspase-3 Detection
What are the primary causes of high background staining in immunofluorescence (IF) for cleaved caspase-3?
High background in cleaved caspase-3 IF can arise from multiple sources related to antibody binding and sample handling. The most common causes include:
- Insufficient Blocking: Inadequate blocking of non-specific binding sites on the tissue or cells allows antibodies to bind indiscriminately [67].
- Non-Specific Antibody Binding: This can occur when the antibody binds to off-target epitopes, Fc receptors (FcRs) on cells like monocytes, or cellular components through its conjugated fluorophore [11].
- Inadequate Washing: Residual, unbound antibodies remaining between steps can produce a false positive signal [67].
- Antibody Concentration: Using a primary or secondary antibody concentration that is too high is a frequent cause of non-specific binding and high background [68] [67].
- Sample Drying: If tissue sections dry out during the staining procedure, it can significantly increase background staining, often characterized by higher staining at the edges of the tissue [67].
How can I optimize blocking conditions to reduce background for cleaved caspase-3?
Optimizing your blocking step is crucial for clean caspase-3 staining. The key is to use an effective blocking agent for an appropriate duration.
- Blocking Agent and Concentration: Use 3–5% non-fat dry milk or 5% normal serum from the species of your secondary antibody in TBST (Tris-Buffered Saline with Tween) [68] [4]. For phosphoprotein detection, 1–5% Bovine Serum Albumin (BSA) in TBST is preferred, as milk can sometimes interfere [68].
- Blocking Duration: Block for 1 to 2 hours at room temperature [68] [4]. Over-blocking for more than 2 hours can potentially mask your target protein or promote bacterial growth [68].
- Fc Receptor Blocking: For cell types with high FcR expression (e.g., immune cells), use a specific FcR blocking reagent prior to staining to reduce non-specific antibody binding [11] [69].
What constitutes a stringent wash protocol to minimize background?
Stringent and thorough washes are essential for removing unbound antibodies and reagents. The following protocol is recommended between all incubation steps [68] [4]:
- Wash Buffer: Use PBS or TBS (Tris-Buffered Saline) containing 0.05–0.1% Tween-20 (PBST or TBST). The detergent helps dislodge non-specifically bound antibodies.
- Wash Duration and Frequency: Perform 3 to 6 washes, each lasting 5 to 10 minutes, with gentle agitation [68].
The table below summarizes the optimized blocking and washing parameters for easy reference.
Table 1: Optimized Blocking and Wash Conditions for Cleaved Caspase-3 Staining
| Parameter | Recommended Condition | Purpose |
|---|---|---|
| Blocking Buffer | 3-5% non-fat dry milk or 5% normal serum in TBST; 1-5% BSA for phosphoproteins | Blocks non-specific protein binding sites [68] [4] |
| Blocking Time | 1-2 hours at room temperature | Balances effective blocking with risk of over-blocking [68] |
| Fc Blocking | Specific FcR blocking reagent | Reduces binding to Fc receptors on certain cell types [11] |
| Wash Buffer | PBS/TBS with 0.05-0.1% Tween-20 | Detergent helps remove unbound antibodies [68] [4] |
| Wash Stringency | 3-6 washes, 5-10 minutes each with agitation | Ensures complete removal of unbound reagents [68] |
How should I titrate my antibodies for cleaved caspase-3 detection?
Non-optimal antibody concentrations are a major source of background. Titration is necessary to find the best signal-to-noise ratio.
- Prepare a dilution series of your primary antibody (e.g., 1:50, 1:100, 1:200, 1:500) in your chosen blocking buffer [69] [4].
- Stain your apoptosis-induced positive control and negative control samples with each dilution, keeping all other conditions constant.
- Image the results. The optimal dilution is the one that provides the clearest specific signal with the lowest background on negative cells [69].
- Repeat this process for your secondary antibody, testing dilutions between 1:5,000 and 1:20,000 [68].
What controls are essential for interpreting cleaved caspase-3 staining?
Including the correct controls is fundamental to distinguishing specific signal from background and ensuring your data is robust.
- No-Primary-Antibody Control: Omit the primary antibody and apply only the secondary antibody. This controls for non-specific binding of the secondary antibody [4].
- Biological Negative Control: Use a population of cells or tissue known not to express cleaved caspase-3 (e.g., healthy, untreated cells) [69].
- Biological Positive Control: Use a sample where apoptosis is known to be induced, such as cells treated with staurosporine or H2O2, to confirm your staining protocol works [70] [69].
- Isotype Control: An antibody raised against an antigen not present in your sample, matched to the species, isotype, and conjugation of your primary antibody. This helps determine background from non-specific antibody binding but should not be used alone to set positive gates [11] [69].
Experimental Protocols for Optimization
Detailed Immunofluorescence Protocol for Cleaved Caspase-3
This protocol incorporates optimized blocking and wash steps to minimize background.
Materials:
- Fixed cells or tissue sections on slides
- Primary antibody against cleaved caspase-3
- Fluorophore-conjugated secondary antibody
- PBS (Phosphate-Buffered Saline)
- Triton X-100
- Blocking buffer (e.g., 5% normal serum / 0.1% Tween-20 in PBS)
- Wash buffer (0.1% Tween-20 in PBS)
- Humidified chamber
- Mounting medium
Steps:
- Permeabilization: Incubate fixed samples in PBS/0.1% Triton X-100 for 5 minutes at room temperature [4].
- Wash: Wash three times in PBS, for 5 minutes each [4].
- Blocking: Drain the slide and add enough blocking buffer to cover the sample. Incubate in a humidified chamber for 1-2 hours at room temperature [4].
- Primary Antibody Incubation: Apply the pre-titrated primary antibody diluted in blocking buffer. Incubate in a humidified chamber overnight at 4°C [68] [4].
- Stringent Washing: Wash the slides three times, for 10 minutes each, in wash buffer at room temperature with gentle agitation [4].
- Secondary Antibody Incubation: Apply the pre-titrated fluorophore-conjugated secondary antibody diluted in PBS or blocking buffer. Incubate in a humidified chamber, protected from light, for 1-2 hours at room temperature [4].
- Stringent Washing: Repeat Step 5.
- Mounting: Drain the liquid, apply mounting medium, and coverslip. Observe with a fluorescence microscope [4].
Titration Protocol for Anti-Cleaved Caspase-3 Antibody
This protocol ensures you use the optimal antibody concentration.
- Prepare a positive control sample (apoptosis-induced) and a negative control sample (healthy).
- Prepare a series of primary antibody dilutions in blocking buffer (e.g., 1:50, 1:100, 1:200, 1:500).
- Follow the standard IF protocol above, applying a different dilution to matched sample pairs (positive and negative).
- After imaging, compare the signal intensity on the positive control to the background on the negative control for each dilution.
- Select the dilution that gives the strongest specific signal on the positive control with the lowest background on the negative control. This point represents the best signal-to-noise ratio [69].
The Scientist's Toolkit: Key Reagent Solutions
Table 2: Essential Reagents for Optimizing Cleaved Caspase-3 Detection
| Reagent | Function | Example Use Case |
|---|---|---|
| Normal Serum | Blocks non-specific binding sites; should be from the species of the secondary antibody. | Used at 5% in buffer to block sections before primary antibody incubation [4]. |
| BSA | Alternative blocking agent; essential for detecting phosphoproteins. | Used at 1-5% in TBST when milk components might interfere with the antigen-antibody reaction [68]. |
| FcR Blocking Reagent | Binds to Fc receptors on cells to prevent non-specific antibody binding. | Critical when staining immune cells like monocytes and macrophages to reduce background [11] [69]. |
| Tween-20 | Detergent added to wash buffers to increase stringency and remove unbound antibodies. | Used at 0.05-0.1% in PBS or TBS for all wash steps to minimize background [68] [4]. |
Workflow and Troubleshooting Diagrams
Cleaved Caspase-3 Staining Optimization Workflow
High Background Troubleshooting Logic
FAQs on Resolving Cleaved Caspase-3 Background Staining
Q1: Why is my cleaved caspase-3 staining weak or absent, even in apoptosis-induced controls?
Weak or absent signal often stems from issues with antigen preservation or antibody accessibility.
- Suboptimal Antigen Retrieval: The chemical crosslinks from formalin fixation can mask the caspase-3 epitope. Inadequate antigen retrieval is a common cause of failure [71].
- Solution: Optimize your antigen retrieval method. Using a microwave oven is often preferred over a water bath, and for some targets, a pressure cooker may yield the best results [71]. Ensure you are using the correct, fresh buffer specified in your antibody's datasheet.
- Inadequate Antibody Concentration: The primary antibody may be too dilute [72] [73].
- Solution: Perform an antibody titration to determine the optimal concentration that provides the best signal-to-noise ratio for your specific sample type and protocol [73].
Q2: How can I reduce high background staining in my caspase-3 immunofluorescence experiments?
High background is frequently due to non-specific antibody binding or insufficient blocking.
- Incomplete Blocking: Non-specific interactions, particularly with Fc receptors on cells, can cause high background [74] [72].
- Solution: Block your samples with normal serum from the same species as the host of your secondary antibody for 1-2 hours at room temperature [4]. For complex samples, use a blocking solution containing sera from multiple relevant species [74].
- Secondary Antibody Cross-Reactivity: The secondary antibody may be binding non-specifically to endogenous immunoglobulins in the tissue [71].
- Solution: Always include a secondary-only control (no primary antibody) to identify this issue. Use secondary antibodies that have been adsorbed against the species of your tissue sample [72] [71].
Q3: My positive control works, but my experimental tissues show no cleaved caspase-3 signal. What should I check?
This indicates a problem specific to the experimental samples, not the protocol itself.
- Antigen Degradation: Delays in tissue fixation after dissection can lead to proteolysis and antigen loss [72].
- Solution: Fix tissues as soon as possible after collection. For phospho-specific targets, include protein phosphatase inhibitors in your buffers to prevent dephosphorylation [72].
- Epitope Not Present: The sample may be truly negative, or caspase-3 may not be the primary executioner caspase in your specific model. Some cell lines, like MCF-7, are caspase-3 deficient and rely on caspase-7 for apoptosis execution [3].
Troubleshooting Guides & Protocols
Guide 1: Optimizing Antibody Titration for Flow Cytometry
Accurate titration is critical for resolving positive signals from background. The goal is to find the antibody concentration that saturates all binding sites with minimal excess [73]. The table below summarizes a standard titration experiment setup.
Table 1: Example Antibody Titration Setup for a 96-Well Plate
| Well Number | Antibody Dilution | Final Antibody Concentration (Example) | Key Assessment |
|---|---|---|---|
| 1 | 1:50 | e.g., 1000 ng/test | Check for over-saturation and high background |
| 2 | 1:100 | 500 ng/test | - |
| 3 | 1:200 | 250 ng/test | - |
| 4 | 1:400 | 125 ng/test | Often the optimal dilution |
| 5 | 1:800 | 62.5 ng/test | - |
| 6 | 1:1600 | 31.25 ng/test | Check for loss of positive signal |
| 7 | Unstained | 0 ng/test | Define negative population |
Experimental Protocol [73]:
- Prepare Cells: Resuspend PBMCs or your experimental cells at 2 × 10^6 cells/mL in a staining buffer.
- Serial Dilutions: Prepare the first antibody dilution in a final volume of 200-300 µL. Perform a 2-fold serial dilution across a 96-well V-bottom plate.
- Stain Cells: Add 100 µL of cell suspension (200,000 cells) to each antibody dilution. Mix by pipetting and incubate for the required time in the dark.
- Wash and Acquire: Wash cells with buffer, centrifuge, and resuspend in a buffer containing a viability dye if needed. Acquire data on a flow cytometer.
- Analyze: Plot the fluorescence intensity (MFI) of the positive population against the antibody concentration. The optimal titer is typically at the "shoulder" of the curve, right before the signal plateaus, ensuring the highest signal-to-noise ratio.
Guide 2: Resolving Background in Immunofluorescence/Immunohistochemistry
Table 2: Troubleshooting Common Background Issues in Caspase Staining
| Potential Issue | Root Cause | Recommended Solution |
|---|---|---|
| High Uniform Background | Inadequate blocking of non-specific sites. | Extend blocking time to 1-2 hours with 5% normal serum from the secondary antibody host species [4] [71]. |
| Spotty Background | Inadequate deparaffinization (for IHC). | Repeat the experiment with new tissue sections and fresh xylene [71]. |
| Background from Fc Receptors | Secondary antibody binding to Fc receptors on cells. | Use an Fc receptor blocking reagent or include normal serum in your blocking buffer [74] [73]. |
| Signal in No-Primary Control | Cross-reactive secondary antibody. | Use a pre-adsorbed secondary antibody and ensure it is raised against the primary antibody's host species [72] [71]. |
Standard Caspase Immunofluorescence Protocol [4]:
- Permeabilization: Incubate fixed samples in PBS with 0.1% Triton X-100 for 5 minutes at room temperature.
- Washing: Wash slides three times in PBS for 5 minutes each.
- Blocking: Drain the slide and add a blocking buffer (PBS/0.1% Tween 20 + 5% appropriate serum). Incubate in a humidified chamber for 1-2 hours at room temperature.
- Primary Antibody Incubation: Apply the primary antibody (e.g., anti-Caspase-3) diluted in the blocking buffer. Incubate overnight at 4°C in a humidified chamber.
- Washing: The next day, wash the slides three times for 10 minutes each in PBS/0.1% Tween 20.
- Secondary Antibody Incubation: Apply the fluorophore-conjugated secondary antibody diluted in PBS. Incubate for 1-2 hours at room temperature, protected from light.
- Final Wash and Mounting: Wash three times in PBS/0.1% Tween 20 for 5 minutes, protect from light. Drain the liquid, mount with an anti-fade mounting medium, and image.
The Scientist's Toolkit: Key Research Reagent Solutions
Table 3: Essential Reagents for Apoptosis and Staining Research
| Reagent | Function in Cleaved Caspase-3 Research |
|---|---|
| Normal Serum | Used in blocking buffers to reduce non-specific binding by occupying non-specific protein interaction sites [4] [71]. |
| Fc Receptor Block | Specifically blocks Fc receptors on immune cells to prevent non-specific antibody binding, crucial for flow cytometry with human samples [74]. |
| Tandem Dye Stabilizer | Prevents the degradation of tandem fluorophore-conjugated antibodies, which can cause erroneous signals and high background [74]. |
| Brilliant Stain Buffer | Mitigates dye-dye interactions between polymer-based fluorescent dyes (e.g., Brilliant Violet) in flow cytometry, improving signal resolution [74] [75]. |
| Phosphatase Inhibitors | Preserves the epitope for phospho-specific antibodies by inhibiting endogenous phosphatases that cause dephosphorylation during sample processing [72]. |
| DEVD-based Biosensor | A genetically encoded FRET reporter that is cleaved by caspase-3/7, enabling real-time, dynamic tracking of apoptosis in live cells [3] [32]. |
Visualizing Caspase-3 Signaling and Experimental Workflow
Caspase-3 Apoptosis Detection Pathway
IHC/IF Experimental Workflow
Accurate detection of cleaved caspase-3 is fundamental for apoptosis research, serving as a critical biomarker for programmed cell death. However, researchers frequently encounter significant challenges with background staining and non-specific signals, particularly when working with sensitive tissue types or complex experimental models. These technical issues can compromise data interpretation and lead to erroneous conclusions about cellular death pathways. The problem is particularly pronounced in tissues with high endogenous enzymatic activity or elevated autofluorescence, where distinguishing true apoptotic signals from background becomes methodologically challenging. Furthermore, emerging evidence suggests that caspase-3 activation can occur in non-apoptotic contexts, adding another layer of complexity to experimental interpretation [76]. This technical support center provides comprehensive troubleshooting guides and FAQs to help researchers overcome these challenges, ensuring reliable and reproducible cleaved caspase-3 detection across diverse experimental systems.
Troubleshooting FAQs: Addressing Common Experimental Challenges
What are the primary causes of high background staining in cleaved caspase-3 detection?
Several technical factors can contribute to excessive background staining in cleaved caspase-3 assays. Inadequate blocking of Fc receptors represents one of the most common causes, particularly in immune cells and tissues with abundant Fc receptor expression. This can be addressed by using species-appropriate serum (e.g., 2-10% goat serum) or specific Fc receptor blocking antibodies (anti-CD16/32 for mouse cells) during sample preparation [77]. Antibody concentration issues represent another frequent problem, with both over-concentration and under-concentration potentially leading to non-specific binding. Proper antibody titration is essential for optimal signal-to-noise ratio [78]. Insufficient washing after antibody incubation can leave unbound antibodies that contribute to background, while over-fixation with aldehydes like paraformaldehyde can create autofluorescence and mask epitopes [77]. For flow cytometry, insufficient compensation and fluorophore spillover can create the appearance of background in channels adjacent to your detection fluorophore [79].
How can I distinguish true caspase-3 activation from transient, non-apoptotic activation?
Emerging research indicates that caspase-3 can be transiently activated without progressing to apoptotic cell death, particularly during T-cell activation and proliferation [76]. To distinguish these contexts, implement multiple apoptotic markers in your analysis. Combine cleaved caspase-3 staining with assessment of nuclear fragmentation (TUNEL assay), membrane integrity (viability dyes), and mitochondrial markers. In T-cell studies, researchers observed that "despite the high level of active caspase-3 present in actively proliferating cells there was little indication of increased cell death as determined by TUNEL staining," showing an inverse correlation between caspase-3 activation and DNA fragmentation during activation [76]. Temporal analysis is also crucial, as non-apoptotic caspase-3 activation is typically transient, while apoptotic activation is sustained and progressive. Additionally, consider functional assays that assess cellular outcomes following caspase-3 detection, such as clonogenic survival or long-term proliferation capacity.
What tissue-specific challenges should I anticipate when working with sensitive samples?
Different tissue types present unique challenges for cleaved caspase-3 detection. Neural tissues often exhibit high autofluorescence from lipofuscin accumulation, which can be minimized using Sudan Black or TrueBlack lipofuscin quenching reagents. Lymphoid tissues contain numerous cell types with high Fc receptor expression, necessitating rigorous Fc blocking protocols. Epithelial tissues with high turnover rates may contain numerous apoptotic cells, but also exhibit elevated baseline caspase-3 expression that requires careful threshold establishment. For tumor samples, note that elevated cleaved caspase-3 expression has been correlated with aggressive disease behavior and shorter overall survival in multiple cancer types, including gastric, ovarian, cervical, and colorectal cancers [80]. This biological context is essential for proper interpretation of staining patterns in oncology research.
Table 1: Correlation between cleaved caspase-3 expression and clinicopathological features across multiple cancer types
| Cancer Type | Cases (n) | High Cleaved Caspase-3 (%) | Correlation with Lymph Node Metastasis | Correlation with Advanced Stage | Prognostic Significance |
|---|---|---|---|---|---|
| Gastric Cancer | 97 | 56.7% | 68.8% vs 33.3% (P = 0.001) | 70.7% vs 39.4% (P = 0.017) | Shorter OS (P < 0.001) |
| Ovarian Cancer | 65 | Information missing | Information missing | Information missing | Shorter OS (P < 0.001) |
| Cervical Cancer | 104 | Information missing | Information missing | Information missing | Shorter OS (P = 0.002) |
| Colorectal Cancer | 101 | Information missing | Information missing | Information missing | Shorter OS (P < 0.001) |
| Combined Cancers | 367 | 31.6% | Information missing | Information missing | Shorter OS (P < 0.001) |
Table 2: Technical causes of background staining and their solutions
| Problem Category | Specific Issue | Recommended Solution |
|---|---|---|
| Sample Preparation | Inadequate Fc receptor blocking | Use species-specific Fc block (e.g., anti-CD16/32 for mouse cells) or 2-10% serum [77] |
| Antibody Considerations | Non-optimal antibody concentration | Perform antibody titration; typical IHC dilution 1:150-1:400 [80] [81] |
| Detection Methods | Polymer dye interactions | Use Brilliant Stain Buffer or Super Bright Complete Staining Buffer for polymer dye-based detection [82] |
| Experimental Design | Lack of appropriate controls | Include FMO controls, isotype controls, and biological controls [79] |
| Tissue-Specific Issues | Autofluorescence in neural tissues | Implement Sudan Black or TrueBlack lipofuscin autofluorescence quenching |
Essential Protocols for Optimal Cleaved Caspase-3 Detection
Standardized Immunohistochemistry Protocol for FFPE Tissues
For formalin-fixed, paraffin-embedded (FFPE) tissues, consistent results require strict protocol adherence. Begin with deparaffinization and rehydration using xylene and graded ethanol series (absolute, 95%, 80%, 50%) followed by PBS washes [80]. Perform antigen retrieval in 10 mmol/L sodium citrate buffer (pH 6.0) using microwave heating at 90-100°C for 20 minutes [80]. Block endogenous peroxidase activity with 3% hydrogen peroxide in methanol for 30 minutes, then block nonspecific binding with 2% normal goat serum, 2% BSA, and 0.1% Triton X-100 in PBS for 30 minutes at room temperature [80]. Incubate with primary antibody (e.g., anti-cleaved caspase-3 at 1:150 dilution) overnight at 4°C in a humidified chamber [80]. The following day, apply appropriate secondary antibody (e.g., goat-anti-rabbit) for 1 hour at room temperature, followed by streptavidin peroxidase incubation for 30 minutes [80]. Develop with DAB chromogen, counterstain with hematoxylin, dehydrate, and mount [80]. For quantitative assessment, calculate staining scores as the "percentage of immunostained cancer cells to all cancer cells in three view fields," with high expression typically defined as >10% cells stained [80].
Optimized Flow Cytometry Protocol for Intracellular Caspase-3 Detection
For suspension cells or dissociated tissues, begin with sample preparation by harvesting cells and preparing a single-cell suspension in staining buffer (PBS with 2-10% FCS) at 0.5-1 × 10⁶ cells/mL [77]. Perform viability staining using a fixable viability dye according to manufacturer protocols, incubating in the dark at 4°C, then wash twice with staining buffer [77]. For cell surface staining, incubate cells with fluorochrome-conjugated antibodies for 30 minutes at 2-8°C in the dark, then wash twice with 2 mL staining buffer [78]. Fix and permeabilize cells using 1-4% paraformaldehyde for 15-20 minutes on ice, followed by permeabilization with 0.1% Triton X-100 for 10-15 minutes at room temperature [77]. After washing, incubate with intracellular antibodies against cleaved caspase-3 (diluted in permeabilization buffer) for 30 minutes at 2-8°C [77]. Wash cells twice and resuspend in PBS for immediate analysis or fix for later acquisition [78]. For multicolor panels, include single-stain controls and FMO controls to properly set compensation and gating boundaries [79].
Research Reagent Solutions: Essential Materials for Cleaved Caspase-3 Detection
Table 3: Key reagents for cleaved caspase-3 detection and their applications
| Reagent Name | Specific Function | Application Notes |
|---|---|---|
| Anti-cleaved Caspase-3 (Asp175) Antibody #9661 [81] | Specifically detects endogenous 17/19 kDa fragments of activated caspase-3 | Works for WB, IHC, IF, FC; recommended IHC dilution 1:400 [81] |
| IHCeasy Cleaved Caspase-3 Ready-To-Use IHC Kit [83] | Complete kit for IHC staining of cleaved caspase-3 | Includes all reagents from antigen retrieval to mounting; uses mouse monoclonal antibody [83] |
| Fc Receptor Binding Inhibitor [82] | Reduces non-specific antibody binding via Fc receptors | Essential for human cells; use 20 μL per 100 μL sample for 10-20 minutes [82] |
| Brilliant Stain Buffer [82] | Reduces non-specific interactions of polymer dyes | Critical for multicolor flow cytometry with Brilliant Violet dyes [82] |
| Fixable Viability Dyes [77] | Distinguishes live/dead cells for exclusion of dead cells | Must use fixable dyes for intracellular staining; avoid DNA-binding dyes with fixed cells [77] |
| Permeabilization Reagents (Triton X-100, Saponin) [77] | Enables antibody access to intracellular epitopes | Harsh detergents (Triton) for nuclear antigens; mild (saponin) for cytoplasmic antigens [77] |
Visualizing Experimental Workflows and Signaling Pathways
Cleaved Caspase-3 Detection Workflow
Caspase-3 Activation Contexts
In cleaved caspase-3 research, proper control experiments are not merely suggestions—they are fundamental requirements for generating scientifically valid data. Background staining and non-specific signals can severely compromise data interpretation, leading to false conclusions about apoptotic activity. This technical support center provides targeted guidance to help researchers identify, troubleshoot, and resolve the most common challenges associated with cleaved caspase-3 detection across various methodological platforms. By implementing these validated control strategies, scientists can significantly enhance assay specificity, reduce background interference, and produce reliable, publication-quality results in their apoptosis studies.
Essential Control Experiments for Cleaved Caspase-3 Detection
Negative Controls for Specificity Validation
No-Primary-Antibody Control
- Purpose: Determines if secondary antibody contributes to non-specific background staining [84].
- Protocol: Process sample identically to experimental conditions but omit primary antibody from incubation step [4].
- Interpretation: Any signal indicates non-specific secondary antibody binding requiring optimization of secondary antibody concentration or blocking conditions.
Isotype Control
- Purpose: Assesses background fluorescence from non-specific antibody binding [11].
- Protocol: Use an antibody with the same host species, isotype, and conjugation as primary antibody but targeting an irrelevant antigen not present in samples [11].
- Interpretation: Should not be used to set positive gates; indicates level of non-specific binding [11].
Isoclonic Control
- Purpose: Determines if fluorophore conjugate binds non-specifically to cellular components [11].
- Protocol: Stain cells with conjugated antibody in presence of excess identical unlabeled antibody [11].
- Interpretation: Lack of fluorescent signal confirms conjugate specificity [11].
Specificity Controls for Caspase Activity Assays
Caspase Inhibitor Control
- Purpose: Confirms caspase-dependent signal in activity-based assays [24].
- Protocol: Pre-treat cells with specific irreversible DEVDase inhibitor (Z-DEVD-fmk) at 200μM or pan-caspase inhibitor (Z-VAD-fmk) before apoptotic stimulation [24].
- Interpretation: Significant signal reduction validates caspase-specific detection [24].
Genetic Knockdown Control
- Purpose: Verifies caspase-7 contribution in caspase-3 deficient systems [24].
- Protocol: Knockdown caspase-7 in caspase-3 deficient cells (e.g., MCF-7 line) before apoptotic stimulation [24].
- Interpretation: Signal suppression confirms caspase-7 activity contribution [24].
Instrument and Detection Controls
Unstained Cell Control
- Purpose: Measures cellular autofluorescence [11] [27].
- Protocol: Analyze untreated, unstained cells with identical instrument settings as experimental samples [11].
- Interpretation: High fluorescence may require switching to red-emitting fluorophores or improving cell viability [27].
Fluorescence Minus One (FMO) Control
- Purpose: Accurately identifies positive populations in multicolor flow cytometry by measuring spillover [11].
- Protocol: Stain cells with all antibodies except one target fluorophore [11].
- Interpretation: Provides true negative reference for gating strategy [11].
Compensation Controls
- Purpose: Corrects for spectral overlap in multicolor panels [11].
- Protocol: Use single-stained samples or compensation beads for each fluorophore [11].
- Interpretation: Ensures accurate signal measurement in each detector channel [11].
Troubleshooting Guide: Cleaved Caspase-3 Background Staining
Table: Common Background Issues and Solutions
| Problem | Possible Causes | Recommended Solutions |
|---|---|---|
| High Background Signal | Excessive antibody concentration [84] [85] | Titrate antibodies for optimal concentration [27] [86] |
| Inadequate blocking [85] | Extend blocking time; optimize blocking buffer (e.g., 1-5% BSA or serum) [4] [84] | |
| Insufficient washing [85] | Increase wash frequency/volume; add 0.05% Tween-20 to wash buffers [85] [86] | |
| Non-specific antibody binding | Include Fc receptor blocking step for immune cells [11] [27] | |
| Non-Specific Bands (Western Blot) | Antibody cross-reactivity [85] | Validate antibody specificity; use different blocking buffer [85] |
| Membrane drying [85] | Ensure membrane remains wet throughout protocol [85] | |
| Contaminated buffers [85] | Prepare fresh buffers; filter if necessary [85] | |
| High Autofluorescence | Dead cells in sample [11] [27] | Include viability dye (7-AAD, propidium iodide); keep samples on ice [11] [27] |
| Cell over-fixation [27] | Optimize fixation time/temperature [27] | |
| Endogenous fluorophores | Use red-channel fluorophores for autofluorescent cells [27] | |
| Weak/No Signal | Insufficient antigen [85] | Load more protein (20-30μg per well) [85] |
| Over-blocking [85] | Reduce blocking time or change blocking agent [85] | |
| Improper protein transfer [85] | Verify transfer efficiency with Ponceau S staining [85] |
Experimental Protocols for Control Validation
Protocol 1: Caspase Inhibition Control for Live-Cell Imaging
This protocol validates whether detected activity is caspase-specific using pharmacological inhibitors [24].
- Cell Preparation: Plate cells expressing caspase-3 activity sensor (e.g., VC3AI) in imaging-compatible chamber [24].
- Inhibitor Pretreatment: Add 200μM Z-DEVD-fmk (specific DEVDase inhibitor) or 50-100μM Z-VAD-fmk (pan-caspase inhibitor) to culture medium 1 hour before apoptotic stimulation [24].
- Apoptotic Stimulation: Apply apoptotic stimulus (e.g., TNF-α, staurosporine) according to experimental protocol [24].
- Imaging: Acquire time-lapse images using standardized microscope settings (e.g., GFP: gain 140, exposure 500ms) [58].
- Interpretation: >70% signal reduction in inhibitor-treated cells confirms caspase-specific detection [24].
Protocol 2: Optimization of Antibody Titration for Immunofluorescence
Determines optimal antibody concentration to minimize background while maintaining strong specific signal [27] [86].
- Sample Preparation: Plate cells on coverslips, treat with apoptotic inducer, and fix with appropriate fixative [4].
- Antibody Dilution Series: Prepare serial dilutions of primary antibody (e.g., 1:50, 1:100, 1:200, 1:500) in blocking buffer [4] [86].
- Staining Procedure:
- Permeabilize fixed samples with PBS/0.1% Triton X-100 for 5 minutes at room temperature [4].
- Block with PBS/0.1% Tween-20 + 5% serum for 1-2 hours [4].
- Incubate with primary antibody dilutions overnight at 4°C in humidified chamber [4].
- Wash 3×10 minutes in PBS/0.1% Tween-20 [4].
- Incubate with fluorescent secondary antibody (1:500) for 1-2 hours protected from light [4].
- Imaging and Analysis: Capture images with standardized settings; select dilution with optimal signal-to-noise ratio [86].
Control Experiment Workflow for Cleaved Caspase-3 Detection
Research Reagent Solutions for Control Experiments
Table: Essential Reagents for Control Experiments
| Reagent Type | Specific Examples | Application Purpose |
|---|---|---|
| Caspase Inhibitors | Z-DEVD-fmk (200μM) [24], Z-VAD-fmk, Q-VD-OPh [87] | Confirm caspase-specific signal; inhibit executioner caspases |
| Viability Dyes | Propidium iodide, 7-AAD, DRAQ7 [11], Calcein AM [11] | Distinguish live/dead cells; exclude dead cells from analysis |
| Blocking Reagents | Normal serum (species-matched), BSA (1-5%), Non-fat dry milk [84] | Reduce non-specific antibody binding |
| Validation Antibodies | Anti-caspase-3 (ab32351) [4], Species-matched isotype controls [11] | Specific detection; measure non-specific background |
| Activity Reporters | NucView 488 caspase-3 substrate [58], VC3AI genetic sensor [24] | Real-time caspase activity monitoring in live cells |
| Detection Kits | Cleaved/Total Caspase-3 Whole Cell Lysate Kit [88] | Simultaneous quantification of cleaved and total caspase-3 |
Frequently Asked Questions (FAQs)
Q1: My western blots for cleaved caspase-3 show high background despite proper blocking. What control experiments can identify the source?
- First, run a no-primary-antibody control to determine if your secondary antibody is causing non-specific binding [84] [85].
- Titrate your primary antibody concentration, as excess antibody is a common cause of high background [85] [86].
- Include an isotype control to assess non-specific immunoglobulin binding [11].
- Try different blocking buffers (switch between BSA and milk-based), as milk contains casein that can increase background with some antibodies [84] [86].
Q2: In flow cytometry, how do I distinguish true cleaved caspase-3 signal from cellular autofluorescence?
- Always include an unstained cell control to measure baseline autofluorescence [11] [27].
- Use viability dyes to exclude dead cells, which have higher autofluorescence [11] [27].
- For highly autofluorescent cells, switch to fluorophores that emit in the red channel [27].
- Implement FMO controls to accurately gate positive populations by accounting for fluorescence spread [11].
Q3: What controls prove that my fluorescence signal in live-cell imaging is specifically from caspase-3 activation?
- Pre-treat cells with caspase-specific inhibitors (Z-DEVD-fmk for caspase-3/7); >70% signal reduction confirms specificity [24].
- Include a non-cleavable reporter control (e.g., VCAIcon with GSGCG instead of DEVDG sequence) that shouldn't activate upon apoptosis [24].
- In caspase-3 deficient cells (e.g., MCF-7), use caspase-7 knockdown to verify contribution of specific caspase [24].
Q4: How can I validate antibody specificity for cleaved caspase-3 in immunofluorescence?
- Use caspase inhibitor controls - specific signal should disappear with inhibition [24].
- Include genetic controls where possible (knockout cells or siRNA knockdown) [24].
- Perform peptide competition experiments with the immunogen peptide.
- Compare staining pattern with multiple independent antibodies targeting different epitopes.
Sources of Background Staining in Caspase-3 Detection
Effective control experiments form the foundation of reliable cleaved caspase-3 research. By systematically implementing the negative controls, specificity validation experiments, and instrument controls outlined in this guide, researchers can confidently distinguish true apoptotic signaling from experimental artifacts. The troubleshooting protocols and reagent solutions provided here address the most common challenges encountered across detection platforms, from western blotting to live-cell imaging. Remember that proper control experiments not only resolve immediate background issues but also provide critical validation that strengthens experimental conclusions and ensures the scientific rigor of your apoptosis research.
Troubleshooting Guide: Resolving Background Staining in Cleaved Caspase-3 Detection
This guide addresses common experimental artifacts that compromise data interpretation in apoptosis research, specifically focusing on cleaved caspase-3 detection.
Frequently Asked Questions
Q1: My cleaved caspase-3 immunofluorescence shows high background staining. What are the primary causes? High background is frequently caused by non-specific antibody binding, inadequate blocking, or over-fixation. Insufficient washing after antibody incubation can leave unbound antibodies trapped, especially in intracellular staining [89]. Suboptimal permeabilization may also cause artifacts by preventing proper antibody access or causing protein mislocalization [90].
Q2: Could my fixation method itself be creating artifacts in my caspase staining? Yes. Common fixation methods can induce protein mislocalization artifacts. One study demonstrated that standard fixation and permeabilization caused artifactual redistribution of a type II transmembrane protein from vesicles to the Golgi complex—an artifact not present in live cells or with mild paraformaldehyde fixation without permeabilization [90]. Glutaraldehyde fixation can introduce autofluorescence if not properly quenched with reagents like NaBH4 or glycine [91].
Q3: Why do I get inconsistent caspase-3 staining results between experimental replicates? Inconsistency often stems from variability in sample handling, fixation timing, or reagent degradation. Standardizing sample collection, using freshly prepared fixation reagents, and avoiding repeated freeze-thaw cycles of antibodies are crucial [92] [93]. Implementing internal controls and technical replicates helps identify and account for this variability [94].
Q4: What specific steps can I take to improve signal-to-noise ratio in my caspase assays? To improve signal-to-noise: optimize antibody titration, increase blocking time with appropriate serum, include additional wash steps with mild detergents, and use Fc receptor blocking steps for cellular assays [4] [89]. Pairing low-abundance targets like cleaved caspase-3 with bright fluorophores (e.g., PE, APC) rather than dim ones significantly enhances detection [89].
Troubleshooting Table: Cleaved Caspase-3 Background Staining
| Problem | Possible Cause | Solution |
|---|---|---|
| High Background Noise | Inadequate blocking | Use 5% serum from secondary antibody host species for blocking; extend blocking time to 1-2 hours [4]. |
| Unbound antibodies | Increase wash steps; include 0.1% Tween-20 or Triton X-100 in wash buffers [89]. | |
| Non-specific antibody binding | Validate antibody specificity with knockout controls; include isotype controls; pre-absorb antibodies if needed [94]. | |
| Weak or No Signal | Low antigen accessibility | Optimize permeabilization protocol (e.g., 0.1% Triton X-100 for 10 minutes) [4] [91]. |
| Antibody concentration too low | Titrate primary antibody; typical dilutions range from 1:100 to 1:2000 [4]. | |
| Over-fixation | Limit paraformaldehyde fixation to 12 minutes for 3.7% PFA; avoid prolonged fixation [91] [89]. | |
| Inconsistent Results | Variable sample handling | Standardize fixation timing immediately after treatment; use pre-warmed buffers [91] [93]. |
| Reagent degradation | Aliquot antibodies; avoid repeated freeze-thaw cycles; use fresh TMB substrate [92]. | |
| Unexpected Localization | Fixation artifact | Validate findings with mild PFA fixation without permeabilization or live-cell imaging when possible [90]. |
Optimized Protocol for Cleaved Caspase-3 Immunofluorescence
This protocol is adapted from general caspase immunofluorescence guidelines and fixation optimization studies [4] [91].
Materials Required
- Primary antibody against cleaved caspase-3
- Fluorescently-labeled secondary antibody
- Paraformaldehyde (PFA)
- Triton X-100
- Phosphate Buffered Saline (PBS)
- Blocking serum
- Mounting medium
Step-by-Step Procedure
- Fixation: Aspirate culture medium and simultaneously add 3.7% PFA in PBS, pre-warmed to 37°C. Fix for 12 minutes at room temperature [91].
- Washing: Quickly aspirate fixative and wash cells 3-5 times with PBS [91].
- Permeabilization: Incubate cells in PBS containing 0.1% Triton X-100 for 10 minutes at room temperature [4].
- Blocking: Drain slides and apply blocking buffer (PBS with 5% serum and 0.1% Tween-20). Incubate for 1-2 hours in a humidified chamber [4].
- Primary Antibody Incubation: Apply cleaved caspase-3 primary antibody diluted in blocking buffer. Incubate overnight at 4°C in a humidified chamber [4].
- Secondary Antibody Incubation: Wash slides 3 times in PBS/0.1% Tween-20. Apply fluorescently-labeled secondary antibody diluted in PBS. Incubate for 1-2 hours at room temperature, protected from light [4].
- Mounting: Perform final washes, drain liquid, and mount slides with appropriate mounting medium for fluorescence microscopy [4].
Experimental Workflow for Caspase-3 Detection
The diagram below visualizes the optimized experimental workflow and key decision points for cleaved caspase-3 detection.
Research Reagent Solutions for Caspase-3 Research
| Reagent | Function | Optimization Tips |
|---|---|---|
| Paraformaldehyde (PFA) | Protein cross-linking fixative | Use fresh 3.7% solution in isotonic PBS, pH 7.4; fix for 12 minutes for optimal epitope preservation [91]. |
| Triton X-100 | Non-ionic detergent for membrane permeabilization | Titrate concentration (0.1-1%) and time (5-10 min) to balance antigen access and membrane integrity [4] [91]. |
| Blocking Serum | Reduces non-specific antibody binding | Use serum from secondary antibody host species at 5% concentration in blocking buffer [4]. |
| Primary Antibody | Binds specifically to cleaved caspase-3 | Titrate from 1:100 to 1:2000; validate with positive/negative controls including knockout cell lines [4] [94]. |
| Fluorescent Secondary Antibody | Enables detection of primary antibody | Use bright fluorophores (e.g., Alexa Fluor conjugates); protect from light; typical dilution 1:500 [4]. |
| Mounting Medium | Preserves fluorescence and enables imaging | Use anti-fade mounting medium compatible with your fluorophores and microscope [4]. |
Method Validation and Comparative Analysis of Detection Platforms
Frequently Asked Questions (FAQs)
Q1: What is the purpose of a knockout control in a western blot? A knockout control uses a lysate from a cell line or tissue sample known not to express your target protein. It is essential for checking your primary antibody's specificity and identifying non-specific binding or false-positive results. A band in the knockout lane indicates that your antibody is binding to something other than your intended target [95].
Q2: Why do I have a high background on my cleaved caspase-3 blot? High background is a common issue that can obscure specific bands. The table below summarizes the primary causes and their solutions [96].
| Possible Cause | Recommended Solution |
|---|---|
| Antibody concentration too high | Decrease the concentration of your primary and/or secondary antibody [96]. |
| Incompatible blocking buffer | Use BSA in Tris-buffered saline instead of milk when detecting phosphoproteins. For alkaline phosphatase (AP) conjugates, use Tris-buffered saline instead of PBS [96]. |
| Insufficient blocking | Increase blocking time to at least 1 hour at room temperature or overnight at 4°C. Increase the concentration of protein in your blocking buffer [96]. |
| Insufficient washing | Increase the number and volume of washes. Add Tween 20 to your wash buffer to a final concentration of 0.05% [96]. |
Q3: How does a positive control lysate help validate my experiment? A positive control lysate is derived from a cell line or tissue known to express your protein of interest. A positive signal from this control, even if your test samples are negative, verifies that your protocol and reagents are working correctly. This validates any negative results you obtain from your experimental samples [95].
Q4: What should I do if I get a weak or no signal for cleaved caspase-3? This problem can stem from several issues in your workflow. The following table outlines key troubleshooting steps [96].
| Possible Cause | Recommended Solution |
|---|---|
| Inefficient transfer | Stain your gel post-transfer with a total protein stain to check efficiency. Ensure proper orientation in the transfer apparatus. For low MW antigens, add 20% methanol to the transfer buffer [96]. |
| Antibody concentration too low | Increase the concentration of your primary antibody. Check antibody activity with a dot blot if you suspect it has degraded [96]. |
| Insufficient antigen present | Load more protein onto your gel [96]. |
| Signal too weak | Increase your film exposure time or substrate incubation time. Ensure your chemiluminescent substrate is not expired [96]. |
Troubleshooting Guide: Resolving Cleaved Caspase-3 Background Staining
Using Knockout Controls to Diagnose Specificity
The cornerstone of validating antibody specificity for cleaved caspase-3 is the use of a caspase-3 knockout cell line as a negative control. After running your western blot, compare the lanes. The presence of a band in the knockout control lane confirms that the signal in your experimental lanes is at least partially due to non-specific antibody binding, not just the specific detection of cleaved caspase-3 [95].
Optimizing Protocols to Minimize Background
Based on the common causes identified in the FAQs, follow this detailed protocol to resolve high background:
- Antibody Titration: Perform a checkerboard titration of your primary and secondary antibodies. Start with the dilution recommended on the datasheet and test a series of higher dilutions (e.g., 1:500, 1:1000, 1:2000) to find the lowest concentration that gives a strong specific signal with minimal background [96].
- Blocking and Buffers:
- Enhanced Washing:
- After primary antibody incubation, wash the membrane three times for 10 minutes each with a large volume (e.g., 50 mL for a mini-gel) of TBST.
- Repeat the same rigorous washing procedure after secondary antibody incubation [96].
Experimental Workflow for Specificity Validation
The following diagram illustrates the logical workflow for designing an experiment to validate cleaved caspase-3 antibody specificity and troubleshoot background staining.
Research Reagent Solutions
The table below lists essential reagents and their functions for successful cleaved caspase-3 western blotting and specificity validation.
| Reagent | Function & Application |
|---|---|
| Caspase-3 Knockout Cell Lysate | Serves as a critical negative control to confirm antibody specificity and identify non-specific binding [95]. |
| Cell Lysate Known to Express Cleaved Caspase-3 | Acts as a positive control to verify that all reagents and the protocol are working correctly [95]. |
| Anti-Tubulin or Anti-GAPDH Antibody | Common loading control antibodies used to normalize for protein loading across lanes and check for even transfer [95]. |
| BSA (Bovine Serum Albumin) in TBST | A preferred blocking agent for phosphoproteins and when using alkaline phosphatase-conjugated antibodies to reduce background [96]. |
| HRP-Conjugated Secondary Antibody | Used for signal detection in chemiluminescent western blotting. Ensure it is specific to the host species of your primary antibody. |
| Ponceau S Stain | A reversible stain used to quickly visualize total protein on a membrane after transfer, assessing transfer efficiency and loading uniformity. |
This technical support center is designed to assist researchers in resolving a common challenge in apoptosis research: high background staining when detecting cleaved caspase-3. Selecting the appropriate platform—Immunohistochemistry (IHC), Flow Cytometry, or Live-Cell Assays—is critical for obtaining clean, interpretable data. The following guides and FAQs provide targeted troubleshooting and detailed protocols to address specific experimental issues.
Technique Comparison and Selection Guide
The table below summarizes the key characteristics of IHC, Flow Cytometry, and Live-Cell Assays to help you select the most appropriate method for your apoptosis research.
| Feature | IHC | Flow Cytometry | Live-Cell Assays |
|---|---|---|---|
| Spatial Context | Preserved in intact tissue [10] | Lost (single-cell suspension) [97] | Preserved in 2D/3D culture [3] |
| Throughput & Quantification | Lower (semi-quantitative) | High (statistically robust) [97] | Medium to High (kinetic data) [3] [98] |
| Cellular Resolution | Single-cell within tissue architecture | Single-cell in suspension [97] | Single-cell in culture [3] |
| Sensitivity (Example: NMDAR Ab) | Gold standard [99] | 87% [99] | 100% (in live CBA) [99] |
| Key Advantage | Morphology and protein localization [10] | Multiplexing and high-speed analysis [97] | Real-time kinetics and dynamic processes [3] |
| Main Disadvantage | No live cell tracking; endpoint only | No spatial data; stressful for cells [97] | Often requires genetic manipulation [3] |
Troubleshooting FAQs
Immunohistochemistry (IHC) Troubleshooting
Q: My IHC staining for cleaved caspase-3 shows high background across the entire tissue section. What could be the cause and how can I fix it?
A: High background in IHC is often related to non-specific antibody binding or endogenous enzyme activity.
- Cause: Endogenous peroxidase activity. Tissues contain endogenous peroxidases that react with the HRP substrate (e.g., DAB), causing widespread precipitate [10].
- Solution: Quench endogenous peroxidases by incubating tissue sections with 3% H₂O₂ in methanol or water for 15 minutes at room temperature before blocking and antibody incubation [10].
- Cause: Non-specific binding of the primary or secondary antibody. The antibody concentration may be too high, or there may be ionic interactions with non-target epitopes [10].
- Solution: Titrate your primary antibody to find the optimal concentration. Consider adding 0.15 M to 0.6 M NaCl to your antibody diluent to reduce ionic interactions [10].
- Cause: Inadequate blocking. Serum proteins or other blocking agents may not have sufficiently masked non-specific binding sites.
- Solution: Extend the blocking step or increase the concentration of the blocking serum (e.g., to 10%) from the host species of your secondary antibody [10].
Q: The target staining for cleaved caspase-3 is weak, even in my positive control tissue. What should I check?
A: Weak staining typically points to issues with antibody potency or antigen retrieval.
- Cause: Loss of primary antibody potency. Antibodies can degrade or denature due to improper storage, repeated freeze-thaw cycles, or microbial contamination [10].
- Solution: Always aliquot antibodies upon receipt and store according to the manufacturer's instructions. Include a known positive control tissue in every experiment to verify antibody performance [10].
- Cause: Inefficient epitope retrieval. The cleaved caspase-3 epitope may be masked, especially in formalin-fixed, paraffin-embedded (FFPE) tissues.
- Solution: Optimize your heat-induced epitope retrieval (HIER) protocol. Test different buffer pHs (e.g., sodium citrate pH 6.0, Tris-EDTA pH 9.0) and retrieval times [10].
Flow Cytometry Troubleshooting
Q: I am detecting weak or no signal for cleaved caspase-3 in my flow cytometry experiment. What are the common reasons?
A: Weak signal in flow cytometry can stem from multiple steps in the protocol, from sample preparation to instrument settings.
- Cause: Inadequate fixation and permeabilization. The antibodies cannot access the intracellular cleaved caspase-3 antigen if the cells are not properly permeabilized [100] [101].
- Cause: Using the wrong viability dye. Standard viability dyes like Propidium Iodide (PI) or 7-AAD are not compatible with fixation and permeabilization steps, as they enter all cells after permeabilization, making it impossible to gate out dead cells [102] [101].
- Cause: Suboptimal instrument settings. The laser and photomultiplier tube (PMT) settings on the cytometer may not be configured correctly for the fluorophore you are using [100].
- Solution: Ensure the laser wavelength and PMT detector settings match the excitation and emission spectra of your fluorophore. Use compensation controls to correct for spectral overlap [100].
Q: The background signal in my flow cytometry plot is high, making it difficult to distinguish positive cells. How can I reduce it?
A: High background is frequently caused by dead cells or too much antibody.
- Cause: Presence of dead cells. Dead cells bind antibodies non-specifically [100] [102].
- Solution: As above, use a fixable viability dye and gate out the dead cells during analysis [102].
- Cause: Too much antibody. An excessive concentration of antibody can lead to off-target binding [100].
- Solution: Titrate all antibodies in your panel to determine the optimal concentration that provides the best signal-to-noise ratio [100].
Live-Cell Imaging Assay Troubleshooting
Q: The fluorescent signal in my live-cell caspase-3/7 reporter assay is dim. How can I enhance it?
A: A dim signal can compromise the sensitivity of your kinetic measurements.
- Cause: Low expression of the biosensor. The cell line may not be expressing the caspase-3/7 reporter (e.g., a ZipGFP-based biosensor) at a high enough level [3].
- Solution: Generate a stable cell line to ensure consistent and robust expression of the reporter. Use a constitutive fluorescent marker (e.g., mCherry) to normalize for cell presence and transduction efficiency [3].
- Cause: Incorrect imaging parameters. The exposure time or laser power for the GFP channel might be too low.
- Solution: Optimize your imaging settings using a positive control (e.g., cells treated with a known apoptosis inducer like carfilzomib). Ensure you are not causing phototoxicity with excessively high light exposure [3].
Q: How can I confirm that the GFP signal in my reporter is specifically from caspase-3/7 activation and not from other artifacts?
A: Specificity controls are essential for validating live-cell imaging data.
- Solution: Pharmacological inhibition. Co-treat cells with a pan-caspase inhibitor such as zVAD-FMK. The specific GFP signal should be abolished, confirming that the fluorescence is due to caspase activity [3].
- Solution: Use caspase-3 deficient cell lines. In MCF-7 cells, which are caspase-3 deficient, a GFP signal upon apoptosis induction confirms that the reporter can also be activated by caspase-7, demonstrating its specificity for executioner caspases [3].
Detailed Experimental Protocols
Protocol 1: IHC for Cleaved Caspase-3 in FFPE Tissues
This protocol is adapted from standard IHC methods for detecting proteins in formalin-fixed, paraffin-embedded (FFPE) tissues [10].
- Dewaxing and Rehydration:
- Deparaffinize sections by washing in xylene (3 x 5 min).
- Rehydrate through a graded ethanol series (100%, 95%, 70%) and finally into distilled water.
- Antigen Retrieval: Perform Heat-Induced Epitope Retrieval (HIER) using 10 mM sodium citrate buffer (pH 6.0). Heat in a microwave or pressure cooker for the optimal time (e.g., 8-20 min). Allow slides to cool to room temperature.
- Endogenous Peroxidase Blocking: Incubate sections with 3% H₂O₂ in methanol or water for 15 minutes at room temperature to quench endogenous peroxidase activity [10].
- Blocking: Block non-specific binding by applying 2-10% normal serum from the secondary antibody host species or a protein block for 1 hour at room temperature.
- Primary Antibody Incubation: Apply the anti-cleaved caspase-3 primary antibody, diluted in an antibody diluent (e.g., PBS with 3% BSA), overnight at 4°C in a humidified chamber.
- Secondary Antibody Incubation: Wash slides and apply an HRP-conjugated secondary antibody for 1 hour at room temperature.
- Detection: Visualize using a chromogenic substrate like DAB. Monitor the reaction under a microscope and stop by immersing in water.
- Counterstaining and Mounting: Counterstain with hematoxylin, dehydrate, clear in xylene, and mount with a permanent mounting medium.
Protocol 2: Intracellular Flow Cytometry for Cleaved Caspase-3
This protocol outlines the steps for detecting intracellular cleaved caspase-3 in single-cell suspensions [103] [101].
- Sample Preparation: Create a single-cell suspension from culture or tissue. For tissues, use enzymatic digestion (e.g., collagenase) or mechanical disruption followed by filtration through a cell strainer [104].
- Viability Staining (Critical Step): Resuspend cells in azide-free PBS. Add a fixable viability dye (e.g., eFluor 660) and incubate for 30 minutes at 2-8°C. Wash with flow cytometry staining buffer [102].
- Cell Surface Staining (Optional): If staining surface markers, resuspend the cell pellet in an antibody dilution buffer and incubate with fluorochrome-conjugated surface antibodies for 30 minutes on ice. Wash twice [103].
- Fixation and Permeabilization: Fix cells using 4% formaldehyde for 10-20 minutes on ice. Wash, then permeabilize the cells by resuspending the pellet in ice-cold 90% methanol added drop-wise while gently vortexing. Incubate for at least 30 minutes on ice. Cells can be stored in methanol at -20°C at this point [100].
- Intracellular Staining: Wash cells twice to remove methanol. Resuspend in permeabilization buffer (e.g., with saponin) or antibody dilution buffer. Incubate with the fluorochrome-conjugated anti-cleaved caspase-3 antibody for 30-60 minutes on ice. Wash twice.
- Data Acquisition: Resuspend cells in flow cytometry staining buffer and analyze on a flow cytometer. Use unstained and single-stain controls for compensation.
Protocol 3: Live-Cell Imaging with a Caspase-3/7 Reporter
This protocol describes the use of a stable fluorescent reporter for real-time imaging of caspase-3/7 activity [3].
- Cell Line Generation: Stably transduce your cell line of interest with a lentiviral vector expressing a caspase-3/7 biosensor (e.g., a ZipGFP-based reporter that fluoresces upon DEVD cleavage) and a constitutive marker like mCherry [3].
- Assay Setup:
- Seed reporter cells in an imaging-optimized multi-well plate.
- Allow cells to adhere and grow to the desired confluency.
- Add the apoptotic stimulus or experimental drug.
- Image Acquisition:
- Place the plate in a live-cell imaging system (e.g., an IncuCyte) maintained at 37°C and 5% CO₂.
- Set up a time-lapse program to acquire images from both the GFP (caspase activity) and mCherry (cell presence) channels at regular intervals (e.g., every 2-4 hours) over the desired duration (e.g., 24-80 hours).
- Data Analysis:
- Use integrated software to quantify the GFP-positive objects per well or image field over time.
- Normalize the GFP signal to the mCherry signal or total cell count to account for changes in cell confluence.
The Scientist's Toolkit: Key Research Reagent Solutions
| Item | Function/Application | Key Consideration |
|---|---|---|
| Fixable Viability Dyes (FVDs) | Covalently labels dead cells before fixation; allows exclusion from analysis in flow cytometry and fixed-cell assays [102]. | Essential for intracellular staining; incompatible with standard dyes like PI or 7-AAD [101]. |
| Sodium Citrate Buffer (pH 6.0) | Common buffer for Heat-Induced Epitope Retrieval (HIER) in IHC; exposes masked epitopes in FFPE tissues [10]. | pH and heating method (microwave, pressure cooker) require optimization for different targets [10]. |
| Caspase-3/7 Reporter (ZipGFP) | Genetically encoded biosensor for real-time, live-cell imaging of apoptosis; fluoresces upon caspase-mediated cleavage [3]. | Provides irreversible, time-accumulating signal; allows kinetic studies and tracking of single-cell fates [3]. |
| Propidium Iodide (PI) | Membrane-impermeant DNA dye used to identify dead cells in flow cytometry with intact membranes [102]. | Not compatible with intracellular staining protocols as it enters all cells after permeabilization [102]. |
| Pan-Caspase Inhibitor (zVAD-FMK) | Cell-permeant, irreversible inhibitor of a broad range of caspases [3]. | Critical control for live-cell assays to confirm caspase-specificity of a signal or phenotype [3]. |
| Bovine Serum Albumin (BSA) | Common blocking agent and component of antibody dilution buffers; reduces non-specific antibody binding. | Can be used at 0.5-3% concentration in PBS or Tris buffers for blocking and antibody dilution. |
Experimental Workflow Diagrams
IHC Staining Workflow
Intracellular Flow Cytometry Workflow
Live-Cell Caspase Assay Workflow
Core Concepts and Assay Correlation
Principles of Annexin V and Caspase-3 in Apoptosis Detection
Annexin V Assay detects early apoptosis by exploiting a key morphological event: the translocation of phosphatidylserine (PS) from the inner to the outer leaflet of the plasma membrane. Annexin V is a 35-36 kDa protein that binds to externalized PS with high affinity in a calcium-dependent manner. When conjugated to a fluorochrome like FITC, it allows for the detection of early apoptotic cells via flow cytometry. The assay is typically combined with a viability dye like Propidium Iodide (PI), which is excluded by live cells and early apoptotic cells with intact membranes but penetrates late apoptotic and necrotic cells. This dual staining enables the discrimination of four cell populations:
- Viable cells: Annexin V⁻ / PI⁻
- Early apoptotic cells: Annexin V⁺ / PI⁻
- Late apoptotic cells: Annexin V⁺ / PI⁺
- Necrotic cells: Annexin V⁻ / PI⁺ [66] [105].
Cleaved Caspase-3 Detection targets a pivotal biochemical event in the execution phase of apoptosis. Caspase-3 is an effector caspase that is activated through proteolytic cleavage of its inactive zymogen. The appearance of the cleaved, active fragments (17 kDa and 19 kDa) is considered a definitive biochemical marker of apoptosis. Antibodies specific for cleaved caspase-3 (e.g., recognizing the fragment containing Asp175) allow for the specific detection of this activated enzyme via flow cytometry (in fixed, permeabilized cells) or western blot, without cross-reacting with the full-length protein [48] [106].
Comparative Analysis of Apoptosis Assays
The table below summarizes the key characteristics of Annexin V/PI staining and cleaved caspase-3 detection, highlighting their complementary nature.
Table 1: Comparison of Key Apoptosis Detection Assays
| Feature | Annexin V/PI Staining | Cleaved Caspase-3 Detection |
|---|---|---|
| Primary Target | Phosphatidylserine externalization (cell membrane event) | Proteolytic cleavage of caspase-3 (intracellular biochemical event) |
| Stage Detected | Early apoptosis (Annexin V⁺/PI⁻) and late apoptosis/necrosis (Annexin V⁺/PI⁺) | Mid-to-late execution phase of apoptosis |
| Key Advantage | Distinguishes early apoptosis from late apoptosis/necrosis; live-cell analysis possible | High specificity for apoptotic pathway commitment; definitive marker of caspase activation |
| Key Limitation | Cannot distinguish apoptosis from other forms of PS-exposing cell death (e.g., necroptosis) | Requires cell fixation and permeabilization; not suitable for live-cell analysis |
| Technical Note | Calcium-dependent binding; sensitive to mechanical damage | Requires specific antibodies that recognize only the cleaved form, not full-length caspase-3 |
Signaling Pathway Integration
The relationship between caspase-3 activation, PS externalization, and other apoptotic events can be visualized in the following pathway. Cleaved caspase-3 is a key executor that leads to the morphological changes characteristic of apoptosis, including the activation of scramblases that externalize PS, making cells Annexin V-positive.
Diagram 1: Apoptosis Signaling and Detection Markers. This diagram illustrates the sequence of key apoptotic events, showing how cleaved caspase-3 activation leads to phosphatidylserine externalization (detected by Annexin V) and DNA fragmentation.
Troubleshooting Guide & FAQs
Resolving High Background in Cleaved Caspase-3 Staining
High background staining is a common challenge in immunodetection methods. The table below outlines frequent causes and their solutions.
Table 2: Troubleshooting Cleaved Caspase-3 Background Staining
| Problem | Potential Cause | Recommended Solution |
|---|---|---|
| High Background | Inadequate blocking of non-specific antibody binding. | Use blocking buffer with 5% serum from the secondary antibody host species. Incubate for 1-2 hours [4]. |
| Non-specific antibody binding or cross-reactivity. | Include a negative control without the primary antibody. Validate antibody specificity using a knockout cell line if possible [11]. | |
| Antibody concentration too high. | Titrate the primary antibody to determine the optimal signal-to-noise ratio [11]. | |
| Inadequate washing after antibody incubation. | Increase wash frequency and duration (e.g., three washes for 5-10 minutes each with PBS/0.1% Tween 20) [4]. | |
| Weak or No Signal | Low levels of cleaved caspase-3 in the sample. | Include a positive control (e.g., Jurkat cells treated with 25 μM Etoposide for 5 hours). Ensure apoptosis is adequately induced [106]. |
| Over-fixation or improper antigen retrieval. | Optimize fixation time and concentration. For IHC, ensure proper antigen retrieval methods are used [4] [106]. | |
| Non-Specific Staining | Non-specific binding to Fc receptors. | When working with immune cells (e.g., monocytes), add an Fc receptor (FcR) blocking reagent prior to staining [11]. |
Annexin V/PI Staining FAQs
Q1: My unstreated control cells show a high percentage of Annexin V-positive cells. What could be causing this false positive? A1: Several factors can lead to false positives in control groups:
- Cell Handling: Over-trypsinization (especially with EDTA, which chelates Ca²⁺ required for Annexin V binding) or excessive pipetting can mechanically damage the plasma membrane, causing non-specific PS exposure [107]. Use gentle, non-enzymatic dissociation agents like Accutase where possible.
- Cell Health: Using over-confluent, starved, or otherwise unhealthy cells can lead to spontaneous apoptosis. Always use healthy, log-phase cells [107].
- Delayed Analysis: Analyzing samples more than one hour after staining can result in increased apoptosis and necrosis. Analyze samples promptly [107] [105].
Q2: After treatment, I see a strong Annexin V signal but no cleaved caspase-3 signal. Is this a discrepancy? A2: Not necessarily. This observation can be method-dependent. The Annexin V assay is highly sensitive and can detect early apoptosis before caspase-3 is fully activated. Furthermore, certain cell death pathways, such as necroptosis, can lead to PS externalization in a caspase-independent manner. If using flow cytometry, ensure your fixation and permeabilization protocol for cleaved caspase-3 staining is optimal, as this can affect signal intensity [4] [20].
Q3: How critical are controls for flow cytometry-based apoptosis assays? A3: Controls are essential for generating robust and interpretable data [11].
- For Annexin V/PI: You need:
- Unstained cells: For instrument setup and voltage adjustment.
- Single-stained controls (Annexin V-only, PI-only): For accurate fluorescence compensation.
- Induced apoptotic cells (positive control): To confirm the assay is working.
- Healthy cells (negative control): To establish baseline staining [11] [107] [105].
- For Cleaved Caspase-3:
Detailed Experimental Protocols
Annexin V/FITC & PI Apoptosis Detection Protocol
This protocol is designed for the detection of apoptotic cells in suspension by flow cytometry [66] [105].
Materials:
- Annexin V-FITC conjugate
- Propidium Iodide (PI) solution (e.g., 50 µg/mL)
- 1X Annexin V Binding Buffer (must contain 2.5 mM CaCl₂)
- Ice-cold PBS
- Flow cytometer with 488 nm excitation and filters for FITC (FL1) and PI (FL2)
Procedure:
- Cell Preparation and Staining
- Harvest cells (0.5-1.0 x 10⁶) by gentle centrifugation (300 x g for 5 minutes). For adherent cells, use a gentle dissociation method without EDTA.
- Wash cells once with ice-cold PBS.
- Resuspend the cell pellet in 500 µL of 1X Annexin V Binding Buffer.
- Add 5 µL of Annexin V-FITC and 5 µL of PI to the cell suspension.
- Gently vortex the tubes and incubate for 15 minutes at room temperature in the dark.
- Analysis by Flow Cytometry
- Analyze the cells on a flow cytometer within 1 hour of staining.
- Use the unstained and single-stained controls to set voltages and compensation.
- Collect a minimum of 10,000 events per sample.
- Plot Annexin V-FITC on the x-axis (FL1) and PI on the y-axis (FL2) to identify the distinct cell populations.
Flow Cytometric Detection of Cleaved Caspase-3
This protocol outlines the steps for detecting intracellular cleaved caspase-3 in fixed and permeabilized cells [4] [48].
Materials:
- Antibody against cleaved caspase-3 (e.g., Rabbit Monoclonal Anti-Cleaved Caspase-3 [Asp175])
- Fluorescently labeled secondary antibody (e.g., Goat Anti-Rabbit Alexa Fluor 488)
- Fixation buffer (e.g., 4% Paraformaldehyde in PBS)
- Permeabilization buffer (e.g., PBS with 0.1% Triton X-100)
- Blocking buffer (e.g., PBS with 5% normal goat serum and 0.1% Tween 20)
- Flow cytometry tubes
Procedure:
- Cell Fixation and Permeabilization
- Harvest and wash 1x10⁶ cells as described above.
- Resuspend the cell pellet in 500 µL of fixation buffer and incubate for 10-15 minutes at room temperature.
- Centrifuge, remove supernatant, and wash cells with PBS.
- Resuspend the cell pellet in 500 µL of permeabilization buffer and incubate for 5-10 minutes at room temperature.
- Centrifuge and wash cells with PBS.
Antibody Staining
- Resuspend the fixed/permeabilized cells in 200 µL of blocking buffer and incubate for 1-2 hours at room temperature to block non-specific binding.
- Centrifuge and resuspend cells in 100 µL of blocking buffer containing the primary antibody at the recommended dilution (e.g., 1:200). Incubate overnight at 4°C or for 1-2 hours at room temperature.
- Wash cells twice with PBS/0.1% Tween 20.
- Resuspend cells in 100 µL of blocking buffer containing the fluorochrome-conjugated secondary antibody (e.g., 1:500 dilution). Incubate for 1-2 hours at room temperature in the dark.
- Wash cells twice with PBS/0.1% Tween 20.
Analysis by Flow Cytometry
- Resuspend the final cell pellet in 500 µL of PBS and analyze immediately on a flow cytometer.
- Use an isotype control or a secondary-antibody-only control to set the negative population and gate for cleaved caspase-3-positive cells.
The Scientist's Toolkit: Research Reagent Solutions
Table 3: Essential Reagents for Apoptosis Detection Assays
| Reagent / Kit | Function / Specificity | Key Application Notes |
|---|---|---|
| Annexin V-FITC/PI Kit | Detects PS exposure (early apoptosis) and membrane integrity. | Not species-specific. Calcium-dependent. Avoid trypsin-EDTA; use Accutase for adherent cell detachment [66] [107]. |
| Anti-Cleaved Caspase-3 [Asp175] | Specifically recognizes the activated 17/19 kDa fragments of caspase-3. | Does not detect full-length caspase-3. Ideal for confirming commitment to the apoptotic pathway via WB, IF, IHC, or Flow Cytometry [106]. |
| Fixation/Permeabilization Buffer | Preserves cell structure and allows intracellular antibody access. | Required for all intracellular targets like cleaved caspase-3. Over-fixation can mask epitopes [4]. |
| FcR Blocking Reagent | Blocks non-specific antibody binding to Fc receptors on immune cells. | Critical for reducing background in samples containing monocytes, macrophages, or related cell lines [11]. |
| Compensation Beads | Used for accurate fluorescence compensation in multicolor flow cytometry. | Provide a consistent and cell-free method for setting compensation, superior to using stained cells [11]. |
| Apoptosis Inducer (e.g., Staurosporine, Etoposide) | Provides a reliable positive control for assay validation. | Treatment of Jurkat cells with 25 μM Etoposide for 5 hours is a documented method to generate a cleaved caspase-3 positive control [106]. |
Clinical validation is a critical step in translational research, confirming that a biological marker reliably predicts a clinical outcome of interest, such as disease progression or survival. For researchers investigating cleaved caspase-3 as a marker of apoptosis, establishing its prognostic significance involves demonstrating that its detection and measurement consistently correlate with meaningful patient outcomes across different studies and populations. This process moves beyond simple laboratory detection to determine genuine clinical utility.
Regulated cell death, particularly apoptosis executed by caspase-3, plays a central role in tissue homeostasis, disease progression, and therapeutic responses [3]. In cancer research, the presence and level of cleaved caspase-3 can indicate whether treatments are successfully inducing apoptosis in tumor cells. However, background staining and non-specific signals can compromise data interpretation, potentially leading to inaccurate prognostic conclusions. This technical support center provides targeted guidance to overcome these challenges and establish robust clinical validation for cleaved caspase-3 findings.
Troubleshooting Guides & FAQs
Frequently Asked Questions
Q1: What are the primary causes of high background staining when detecting cleaved caspase-3? High background staining typically results from non-specific antibody binding, suboptimal fixation/permeabilization, endogenous enzyme activity, or presence of dead cells. Fc receptors on certain cell types can bind antibodies non-specifically, while incomplete permeabilization can trap antibodies intracellularly without specific binding [108]. Autofluorescence in certain cell types (e.g., neutrophils) can also mimic positive signals [108].
Q2: How can I distinguish true caspase-3 activation from background signal? Implement multiple validation approaches including:
- Use of caspase-3 deficient cell lines (e.g., MCF-7) as negative controls [3]
- Inhibition with pan-caspase inhibitors (e.g., zVAD-FMK) to confirm specificity [3]
- Correlation with additional apoptosis markers (Annexin V, PARP cleavage) [3]
- Employment of fluorescence lifetime imaging (FLIM) which is concentration-independent [32]
Q3: What sample preparation issues most commonly affect prognostic validation studies? Inadequate fixation and permeabilization are common pitfalls. Fixatives must be fresh and used at appropriate concentrations (e.g., 4% formaldehyde recommended) to preserve epitopes while inhibiting enzymatic activity [108]. Methanol permeabilization requires careful ice-cold application to prevent hypotonic shock [108]. Sample age and processing delays can also compromise antigen integrity.
Q4: How does clinical sample type (fresh vs. frozen, tissue vs. fluid) impact cleaved caspase-3 detection? Fresh samples generally provide superior results. When using PBMCs, avoid frozen samples whenever possible and isolate fresh cells for optimal antigen preservation [108]. Tissue architecture in FFPE samples can mask epitopes, requiring careful antigen retrieval optimization. Viability dyes are essential for flow cytometry to gate out dead cells that exhibit non-specific antibody binding [108].
Troubleshooting Flow Chart
Experimental Protocols for Validation
Protocol 1: Specific Detection of Cleaved Caspase-3 Using FLIM-FRET
This protocol utilizes Fluorescence Lifetime Imaging Microscopy with Förster Resonance Energy Transfer (FLIM-FRET) to detect caspase-3 activity with minimal background, as fluorescence lifetime is independent of probe concentration and light scattering [32].
Materials:
- LSS-mOrange-DEVD-mKate2 FRET reporter construct [32]
- Appropriate cell lines (e.g., MDA-MB-231 breast cancer cells) [32]
- Lentiviral packaging system for stable expression [32]
- FLIM-capable microscope system
- Apoptosis-inducing agents (e.g., carfilzomib, oxaliplatin) [3]
- Caspase inhibitor (zVAD-FMK) for controls [3]
Procedure:
- Generate stable cell lines expressing the FRET reporter using lentiviral transduction or PiggyBac transposon system [32].
- Treat cells with apoptosis-inducing agents alongside controls with caspase inhibitors.
- Perform FLIM imaging to measure lifetime of LSSmOrange donor fluorophore.
- Calculate lifetime changes: intact reporter shows shorter lifetime (FRET active), while caspase-3 cleavage increases lifetime (FRET lost) [32].
- Validate with complementary methods such as Western blot for cleaved caspase-3 or PARP [3].
Validation:
- Include control cells expressing unfused LSSmOrange to establish baseline lifetime [32].
- Use caspase-3 deficient cell lines (MCF-7) to confirm specificity [3].
- Correlate with Annexin V staining and morphological apoptosis assessment [3].
Protocol 2: Flow Cytometry Panel Design for Apoptosis Detection in Clinical Samples
This protocol enables multiplexed detection of cleaved caspase-3 alongside other markers in patient samples, crucial for establishing prognostic significance.
Materials:
- Fresh clinical samples (PBMCs, tissue suspensions)
- Viability dye (e.g., fixable viability dyes compatible with intracellular staining) [108]
- Antibodies for cleaved caspase-3 and lineage markers
- Intracellular staining buffers and permeabilization reagents
- Flow cytometer with appropriate laser and detector configuration
Procedure:
- Panel Design:
Staining Protocol:
- Include viability dye to gate out dead cells that cause non-specific binding [108].
- Surface stain first, then fix and permeabilize for intracellular targets.
- Use fresh permeabilization buffers (e.g., 0.1% Triton X-100) [108].
- Include controls: unstained, fluorescence minus one (FMO), and isotype controls.
Compensation and Acquisition:
Analysis:
Data Presentation & Quantitative Analysis
Table 1: Performance Metrics for Caspase-3 Detection Methods
| Method | Sensitivity | Specificity | Background Issues | Suitable for Patient Samples | Key Considerations |
|---|---|---|---|---|---|
| Western Blot | Moderate | High | Low with optimized blocking | Limited (requires bulk tissue) | Semi-quantitative, requires cell lysates |
| Immunofluorescence | High | Variable | High without proper controls | Yes (tissue sections) | Subjective quantification, autofluorescence concerns [108] |
| Flow Cytometry | High | High with FMO controls | Moderate (non-specific binding) | Yes (single cell suspensions) | Requires fresh samples, complex compensation [109] [108] |
| FRET-Based Reporters | Very High | Very High | Low | Limited (engineered cells) | Requires genetic modification, ideal for kinetic studies [3] [32] |
| FLIM-FRET | Highest | Highest | Minimal | Limited (currently research) | Concentration-independent, minimal background [32] |
Table 2: Prognostic Validation Study Design Considerations
| Aspect | Options | Recommendations for Cleaved Caspase-3 |
|---|---|---|
| Study Population | Homogeneous vs. Heterogeneous | Balance inclusion criteria with generalizability; document key clinical variables [112] |
| Sample Size | Event-based calculation | 15 events per variable for time-to-event endpoints [112] |
| Endpoint Selection | Overall survival, Disease-free survival, Treatment response | Choose clinically meaningful endpoints; cleaved caspase-3 may correlate with early treatment response |
| Validation Approach | Internal vs. External | Internal validation first (bootstrapping preferred over split-sample) [113] |
| Performance Metrics | Discrimination, Calibration | C-statistic for discrimination; calibration plots for prediction accuracy [113] |
| Statistical Models | Cox regression, Logistic regression | Multivariable Cox for time-to-event; adjust for key prognostic factors [112] |
Signaling Pathways & Experimental Workflows
Caspase-3 Activation Pathway and Detection Methods
The Scientist's Toolkit: Research Reagent Solutions
Table 3: Essential Reagents for Cleaved Caspase-3 Research
| Reagent/Category | Specific Examples | Function & Application Notes |
|---|---|---|
| Caspase-3 Reporters | ZipGFP-based DEVD biosensor [3], LSSmOrange-DEVD-mKate2 FRET reporter [32] | Real-time visualization of caspase-3/7 activity; FRET reporters enable background-reduced detection |
| Apoptosis Inducers | Carfilzomib, Oxaliplatin [3] | Positive controls for apoptosis induction; essential for assay validation |
| Caspase Inhibitors | zVAD-FMK (pan-caspase inhibitor) [3] | Specificity controls to confirm caspase-dependent signals |
| Validation Antibodies | Anti-cleaved PARP, Anti-cleaved caspase-3 [3] | Orthogonal validation of apoptosis activation |
| Viability Markers | Fixable viability dyes (eFfluor), Propidium Iodide, 7-AAD [108] | Exclusion of dead cells to reduce non-specific background |
| Flow Cytometry Reagents | Compensation beads, Fc receptor blocking reagents [109] [108] | Improve signal-to-noise ratio in multicolor panels |
| Analysis Software | FlowJo [110], OMIQ [114], FlowAtlas [111] | Advanced analysis tools for high-dimensional data including clustering and dimensionality reduction |
Advanced Technical Considerations
Addressing Spectral Overlap in Multiplexed Assays
Spectral overlap presents significant challenges in cleaved caspase-3 detection, particularly when incorporating multiple markers for comprehensive prognostic validation. When designing multicolor panels:
- Place bright fluorophores (PE, APC) on low-abundance targets like cleaved caspase-3 [109] [108]
- Use dimmer fluorophores (FITC) for highly expressed antigens [108]
- Avoid problematic combinations such as APC and PE-Cy5 due to significant emission overlap [109]
- Implement proper compensation controls using cells or beads with positive and negative populations for each fluorophore [109]
Advanced analysis platforms like OMIQ [114] and FlowAtlas [111] now offer improved capabilities for analyzing high-parameter data without down-sampling, preserving rare cell populations that might show important caspase-3 activation patterns.
Statistical Considerations for Prognostic Validation
When establishing cleaved caspase-3 as a prognostic marker, rigorous statistical validation is essential:
- Discrimination: Evaluate using the C-statistic (area under ROC curve) to assess how well cleaved caspase-3 levels distinguish patient outcomes [113]
- Calibration: Assess agreement between predicted and observed outcomes using calibration plots [113]
- Multivariable Analysis: Adjust for established prognostic factors using Cox regression to determine if cleaved caspase-3 provides independent prognostic information [112]
- Validation: Perform internal validation (preferably using bootstrapping rather than split-sample) before proceeding to external validation in independent cohorts [113]
Proper validation ensures that cleaved caspase-3 detection provides clinically meaningful information rather than merely statistical associations, ultimately supporting its use in patient management and therapeutic decision-making.
Troubleshooting Guide: Resolving Cleaved Caspase-3 Background Staining
FAQ: Addressing Common Experimental Challenges
1. What are the primary causes of high background staining in cleaved caspase-3 detection? High background typically results from three main issues: (1) Inadequate blocking of Fc receptors on immune cells, leading to non-specific antibody binding; (2) Sample autofluorescence originating from endogenous components like collagen and lipofuscin, or from aldehyde fixatives; and (3) Non-specific antibody binding due to insufficient washing, antibody overconcentration, or using non-cross-adsorbed secondary antibodies [115].
2. How can I amplify a weak specific signal for low-abundance cleaved caspase-3? When detecting low analyte concentrations, consider these signal amplification methods:
- Switch to indirect detection using unlabeled primary antibodies followed by labeled secondary antibodies, which allows multiple reporter molecules per primary antibody
- Implement the Labeled-Streptavidin Biotin (LSAB) method by adding a biotinylated secondary antibody followed by streptavidin-fluorophore conjugates
- Utilize Tyramide Signal Amplification (TSA), which uses HRP-catalyzed deposition of fluorescently-labeled tyramide to achieve up to 200-fold sensitivity enhancement compared to standard methods [115]
3. My negative controls show staining—what optimization steps should I take? For persistent background despite negative controls:
- Validate antibody specificity using appropriate isotype controls and ensure primary antibody recognizes only the 17/19 kDa large fragment of activated caspase-3
- Implement Fc receptor blocking using normal serum from the same species as your secondary antibody or Fab fragment antibodies
- Apply autofluorescence quenching reagents such as TrueBlack Lipofuscin Autofluorescence Quencher or similar products
- Use highly cross-adsorbed secondary antibodies to minimize off-target binding, especially in multiplexed experiments [115] [116]
4. How do I determine whether background stems from biological versus technical issues? Systematically evaluate these control experiments:
- Include unstained cells to assess autofluorescence levels
- Use fluorescence-minus-one (FMO) controls for accurate gate setting in flow cytometry
- Test isotype controls to measure non-specific antibody binding
- Validate with caspase inhibitor controls (Z-DEVD-fmk) to confirm specificity of caspase-3 detection [117] [24]
5. What are the key differences between traditional immunoassays and emerging technologies for caspase-3 detection? Emerging technologies offer significant advantages:
Table: Comparison of Caspase-3 Detection Methodologies
| Method | Key Principle | Spatial Resolution | Live-Cell Capability | Sensitivity | Multiplexing Potential |
|---|---|---|---|---|---|
| Immunofluorescence | Antibody-based detection with fluorophores | High (subcellular) | No (fixed samples) | Moderate | High (with multiple fluorophores) |
| Flow Cytometry | Antibody detection in suspended cells | Low (population-level) | No (fixed/permeabilized) | High | Very High (10+ parameters) |
| FRET-Based Reporters | Cleavage-induced fluorescence resonance energy transfer | High | Yes | Moderate | Limited |
| SFCAI/VC3AI Biosensors | Genetically-encoded switch-on fluorescence | High | Yes | High | Moderate |
| NucView 488 Substrate | Fluorogenic caspase-3 substrate cleavage | High | Yes | High | Limited [4] [48] [58] |
Advanced Technical Solutions
Implementation of Genetically-Encoded Caspase Indicators The Venus-based C3AI (VC3AI) represents a novel approach for real-time caspase-3-like activity monitoring. This cyclized chimera contains a caspase-3 cleavage site (DEVD) and remains non-fluorescent until cleaved by activated caspases, enabling switch-on fluorescence detection. The system utilizes Npu DnaE intein-mediated cyclization to eliminate background fluorescence, providing superior sensitivity compared to linear biosensors [24].
Live-Cell Imaging with Fluorogenic Substrates NucView 488 caspase-3 substrate allows real-time apoptosis monitoring in live cells. This bifunctional substrate contains a DEVD caspase-3 recognition sequence coupled to a DNA-binding dye. Upon caspase-3 activation, the substrate is cleaved, releasing the dye which translocates to the nucleus, binds DNA, and fluoresces green, enabling quantitative apoptosis assessment without fixation [58].
Experimental Protocols for Cleaved Caspase-3 Detection
Protocol 1: Immunofluorescence Detection of Cleaved Caspase-3
Materials Required:
- Primary antibody against cleaved caspase-3 (e.g., Cleaved Caspase-3 (Asp175) Antibody #9661)
- Prepared, fixed cell samples on slides
- Triton X-100 or NP-40 for permeabilization
- PBS buffer
- Blocking buffer (PBS/0.1% Tween 20 + 5% appropriate serum)
- Fluorescently-labeled secondary antibody (e.g., Alexa Fluor conjugates)
- Mounting medium
- Humidified chamber [4]
Methodology:
- Permeabilization: Incubate fixed samples in PBS/0.1% Triton X-100 for 5 minutes at room temperature
- Washing: Wash three times in PBS, 5 minutes each at room temperature
- Blocking: Apply blocking buffer (200 μL) and incubate in humidified chamber for 1-2 hours at room temperature
- Primary Antibody Incubation: Add 100 μL primary antibody diluted 1:200 in blocking buffer, incubate overnight at 4°C in humidified chamber
- Secondary Antibody Incubation: Wash slides three times (10 minutes each) in PBS/0.1% Tween 20, then apply 100 μL fluorescent secondary antibody diluted 1:500 in PBS, incubate 1-2 hours protected from light
- Mounting and Imaging: Wash three times in PBS/0.1% Tween 20, mount with appropriate medium, and image with fluorescence microscope [4]
Protocol 2: Flow Cytometric Detection of Cleaved Caspase-3
Materials Required:
- Cleaved Caspase-3 (Asp175) Antibody (#9661) validated for flow cytometry
- Single-cell suspension (1 × 10^6 cells per 100 μL staining buffer recommended)
- Fixation and permeabilization buffers
- Flow cytometry staining buffer
- Compensation beads for multicolor experiments
- Cell viability dye (e.g., 7-AAD, propidium iodide) [48] [117] [116]
Methodology:
- Cell Preparation: Create single-cell suspension at recommended density
- Fixation and Permeabilization: Treat cells according to manufacturer protocols for intracellular staining
- Antibody Staining: Incubate cells with cleaved caspase-3 antibody (diluted 1:800) for recommended time
- Control Preparation: Include unstained cells, isotype controls, and FMO controls
- Viability Staining: Incorporate viability dye to exclude dead cells
- Acquisition and Analysis: Run samples on flow cytometer, using controls for proper compensation and gating [117] [116]
Research Reagent Solutions
Table: Essential Reagents for Cleaved Caspase-3 Detection
| Reagent Category | Specific Examples | Function/Purpose | Key Features |
|---|---|---|---|
| Primary Antibodies | Cleaved Caspase-3 (Asp175) Antibody #9661 [116] | Specifically detects 17/19 kDa activated caspase-3 fragment | Does not recognize full-length caspase-3; validated for WB, IHC, IF, FC |
| Secondary Detection | Goat anti-rabbit Alexa Fluor 488 conjugate [4] | Indirect detection with signal amplification | High fluorescence intensity; photostable |
| Signal Amplification | Tyramide Signal Amplification Kits [115] | Enzyme-mediated signal enhancement | Up to 200-fold sensitivity increase; enables multiplexing |
| Background Reduction | TrueBlack Lipofuscin Autofluorescence Quencher [115] | Reduces autofluorescence from endogenous pigments | Improved signal-to-noise; compatible with various sample types |
| Live-Cell Imaging | NucView 488 Caspase-3 Substrate [58] | Fluorogenic substrate for real-time apoptosis monitoring | Cell-permeable; becomes fluorescent upon caspase-3 cleavage |
| Flow Cytometry Controls | Compensation Beads [117] | Instrument calibration and compensation | Ensure proper fluorophore detection in multicolor panels |
| Biosensors | VC3AI (Venus-based C3AI) [24] | Genetically-encoded caspase-3 activity indicator | Switch-on fluorescence; enables real-time monitoring in live cells |
Detection Workflow and Molecular Mechanisms
Caspase-3 Detection Methodology Workflow
Molecular Mechanism of Genetic Biosensors
Conclusion
Effective resolution of cleaved caspase-3 background staining requires a comprehensive approach spanning from fundamental understanding of caspase biology to meticulous technical optimization. By implementing systematic troubleshooting protocols and rigorous validation standards, researchers can achieve the specificity needed for accurate apoptosis quantification across diverse applications. The clinical significance of cleaved caspase-3 as both a cell death marker and potential prognostic indicator underscores the critical importance of precise detection. Future directions should focus on developing even more specific detection reagents, standardized validation protocols across laboratories, and exploring the implications of non-apoptotic caspase-3 functions in various disease contexts. Mastering these techniques will enhance research reproducibility and advance our understanding of programmed cell death in both basic science and therapeutic development.
References
- 1. Paradoxical roles of caspase-3 in regulating cell survival ... [https://pmc.ncbi.nlm.nih.gov/articles/PMC9106709/]
- 2. Caspases as master regulators of programmed cell death [https://www.nature.com/articles/s12276-025-01470-9]
- 3. Integrated real-time imaging of executioner caspase ... [https://www.nature.com/articles/s41420-025-02662-y]
- 4. Protocol for detection of caspases using immunofluorescence [https://www.abcam.com/en-us/technical-resources/protocols/immunofluorescence-protocol-to-detect-caspases]
- 5. 蛋白质印迹法疑难排解指南 - Cell Signaling Technology [https://www.cellsignal.cn/learn-and-support/troubleshooting/western-blot-troubleshooting-guide]
- 6. Co-imaging extrinsic, intrinsic and effector caspase activity ... [https://pmc.ncbi.nlm.nih.gov/articles/PMC6120609/]
- 7. Western Blot Protocol for Caspase 3 Antibody (NB500-210) [https://www.novusbio.com/support/protocols/western-blot-protocol-for-caspase-3-antibody-nb500-210.html?srsltid=AfmBOoqUcg4XpdBCEOJVDuDFvXLFiEsIdkdhFSxRMaIK6nqlmXCPjZZI]
- 8. Purified Mouse Anti-Human CD11a [https://www.bdbiosciences.com/en-dk/products/reagents/flow-cytometry-reagents/research-reagents/single-color-antibodies-ruo/purified-mouse-anti-human-cd11a.555378]
- 9. 5 Sources Of Non-specific Staining And Background In IHC ... [https://vectorlabs.com/blog/5-sources-of-non-specific-staining-and-background-in-ihc-and-if/?srsltid=AfmBOop5T8pB-X0kgv9O0eUuT-TlLwcMSYh_jWu_bwdlotPpi4KJr3z7]
- 10. IHC Troubleshooting Guide [https://www.thermofisher.com/us/en/home/life-science/protein-biology/protein-biology-learning-center/protein-biology-resource-library/pierce-protein-methods/ihc-troubleshooting-guide.html]
- 11. Recommended controls for flow cytometry [https://www.abcam.com/en-us/technical-resources/guides/flow-cytometry-guide/recommended-controls-for-flow-cytometry]
- 12. Spectral Flow Cytometry Panel Controls and Sample ... [https://www.thermofisher.com/us/en/home/life-science/cell-analysis/flow-cytometry/flow-cytometry-learning-center/flow-cytometry-resource-library/flow-cytometry-methods/spectral-flow-cytometry-panel-controls-sample-preparation.html]
- 13. Non-specific binding of antibodies in immunohistochemistry [https://www.nature.com/articles/srep00028]
- 14. Background Staining or Non-specific Binding of Antibodies ... [https://www.fn-test.com/knowledge-share/background-staining-or-non-specific-binding-of-antibodies-in-immunohistochemistry/]
- 15. Caspase Protocols in Mice - PMC - PubMed Central - NIH [https://pmc.ncbi.nlm.nih.gov/articles/PMC4084876/]
- 16. Immunocytochemistry protocol [https://www.abcam.com/en-us/technical-resources/protocols/icc-protocol]
- 17. Ten Approaches That Improve Immunostaining: A Review of ... [https://pmc.ncbi.nlm.nih.gov/articles/PMC8836139/]
- 18. Non-Apoptotic Caspase-3 Activation Mediates Early ... [https://pmc.ncbi.nlm.nih.gov/articles/PMC9141690/]
- 19. Nonapoptotic caspase-3 guides C1q-dependent synaptic ... [https://www.nature.com/articles/s41467-025-56342-7]
- 20. A Comprehensive Exploration of Caspase Detection Methods [https://pmc.ncbi.nlm.nih.gov/articles/PMC11121653/]
- 21. Caspase-3 Is Transiently Activated without Cell Death ... [https://pmc.ncbi.nlm.nih.gov/articles/PMC3008739/]
- 22. Transient caspase-mediated activation of ... [https://www.sciencedirect.com/science/article/pii/S2211124724005795]
- 23. Troubleshooting Tips for Fluorescence Staining [https://biotium.com/tech-tips-protocols/troubleshooting-tips-for-fluorescence-staining/]
- 24. Visualization of caspase-3-like activity in cells using a ... [https://www.nature.com/articles/ncomms3157]
- 25. Antibody validation - PMC [https://pmc.ncbi.nlm.nih.gov/articles/PMC3891910/]
- 26. Antibody validation for Western blot: By the user, for the user [https://pmc.ncbi.nlm.nih.gov/articles/PMC6983856/]
- 27. Flow Cytometry Troubleshooting Guide [https://fluorofinder.com/flow-cytometry-troubleshooting/]
- 28. Troubleshooting Flow Cytometry Issues [https://www.bosterbio.com/protocol-and-troubleshooting/flow-cytometry-troubleshooting?srsltid=AfmBOoraGse4jQ93BrdQHuplNOKzWXBVwVIz5_fLv-qlwenJpvZTiX-E]
- 29. Flow Cytometry Troubleshooting Guide [https://www.bio-techne.com/applications/flow-cytometry/flow-cytometry-troubleshooting-guide]
- 30. Tools to Confirm Antibody Specificity | Validation - CST Blog [https://blog.cellsignal.com/tools-to-confirm-antibody-specificity]
- 31. Antibody validation [https://v19.proteinatlas.org/about/antibody+validation]
- 32. Fluorescence Lifetime Imaging of a Caspase-3 Apoptosis ... [https://pmc.ncbi.nlm.nih.gov/articles/PMC5729923/]
- 33. Flow Cytometry Troubleshooting Guide [https://www.cellsignal.com/learn-and-support/troubleshooting/flow-cytometry-troubleshooting-guide?srsltid=AfmBOooAzf3iSRH0CHu6V6gBFMSyNYnv5Ev7NTuFOXGT-5djUBzVbppT]
- 34. Designing a multicolor flow cytometry panel [https://www.abcam.co.jp/primary-antibodies/multicolor-flow-cytometry-panel-design]
- 35. EuroFlow standardization of flow cytometer instrument ... [https://www.nature.com/articles/leu2012122]
- 36. Immunohistochemistry (IHC) Troubleshooting Guide & the ... [https://www.cellsignal.com/learn-and-support/troubleshooting/ihc-troubleshooting-guide?srsltid=AfmBOop9znsjIfQyrt72yVzthpIZa-5zPuWkuiZm7HeH4sKM9W7bMJu5]
- 37. IHC Troubleshooting Guide | Common Issues & Fixes [https://www.bosterbio.com/protocol-and-troubleshooting/ihc-troubleshooting?srsltid=AfmBOopM4OnkTGspX5NvB4Er_5NMVHah4VIaorM4-W0IuYPaDGtSjHLG]
- 38. Immunohistochemistry (IHC): The Complete Guide [https://www.antibodies.com/applications/immunohistochemistry]
- 39. Antigen Retrieval in IHC: Why It Matters and How to Get ... [https://www.atlasantibodies.com/knowledge-hub/blog/antigen-retrieval-in-ihc-why-it-matters-and-how-to-get-it-right/]
- 40. Comparison of Antigen Retrieval Methods for ... [https://www.mdpi.com/2409-9279/7/5/67]
- 41. Optimization of a thermochemical antibody stripping ... [https://pmc.ncbi.nlm.nih.gov/articles/PMC12117710/]
- 42. Successful Immunofluorescence: Fixation & Permeabilization [https://blog.cellsignal.com/successful-immunofluorescence-fixation-and-permeabilization]
- 43. Immunofluorescence (IF) Troubleshooting Guide [https://www.cellsignal.com/learn-and-support/troubleshooting/if-troubleshooting-guide?srsltid=AfmBOopXUXhEN70ipCLGFH7q8GHN0M994AhlrFkCA6lVr5FAwQWCqchP]
- 44. Immunofluorescence Troubleshooting | Tips & Tricks [https://www.stressmarq.com/support/technical-support/troubleshooting/immunofluorescence-troubleshooting/?srsltid=AfmBOoq8w2tzy3OwM6xV4Ads8MaJTUYJkpVCNIxv2mCx5VqdlhzLLSgp]
- 45. Immunofluorescence Protocol [https://www.biossusa.com/pages/immunofluorescence-protocol?srsltid=AfmBOooaI6X1hX2UwCCmkGjEZAxtG1lrq2uzw91M0KUyDa9jotkUnPNd]
- 46. 9 Tips to optimize your IF experiments [https://www.ptglab.com/news/blog/9-tips-to-optimize-your-if-experiments/?srsltid=AfmBOopc39cWbzBHVw1wkRg0WnYi8KpCPWMXrkxmZ8J_rJXH4mUjcrd1]
- 47. The use of four-colour immunofluorescence techniques to ... [https://pmc.ncbi.nlm.nih.gov/articles/PMC1571246/]
- 48. Detecting Cleaved Caspase-3 in Apoptotic Cells by Flow ... [https://pubmed.ncbi.nlm.nih.gov/27803251/]
- 49. Flow cytometry-based apoptosis detection - PMC [https://pmc.ncbi.nlm.nih.gov/articles/PMC3863590/]
- 50. Apoptosis and Beyond: Cytometry in Studies of ... [https://pmc.ncbi.nlm.nih.gov/articles/PMC3263828/]
- 51. Flow Cytometry Troubleshooting Guide [https://www.cellsignal.com/learn-and-support/troubleshooting/flow-cytometry-troubleshooting-guide?srsltid=AfmBOope-bxRNMPxBQQLk7m79449G9R2lay2fnL0bSBESWEEiczLOj8R]
- 52. Flow cytometry troubleshooting [https://www.abcam.com/en-us/technical-resources/applications/flow-cytometry/troubleshooting]
- 53. 4 Biggest Mistakes Scientists Make During Multicolor Flow ... [https://expertcytometry.com/biggest-mistakes-multicolor-flow-cytometry-cell-sorting-experiments/]
- 54. Flow cytometry detection of caspase 3 activation in ... [https://pubmed.ncbi.nlm.nih.gov/10805935/]
- 55. Caspase Assays [https://www.thermofisher.com/us/en/home/life-science/cell-analysis/cell-viability-and-regulation/apoptosis/caspase-assays.html]
- 56. NucView® Caspase-3 Substrates [https://biotium.com/technology/nucview-caspase-3-substrates/]
- 57. Live-Cell Imaging | Thermo Fisher Scientific - US [https://www.thermofisher.com/us/en/home/life-science/cell-analysis/cellular-imaging/fluorescence-microscopy-and-immunofluorescence-if/microscopy-reagents-and-media/live-cell-imaging-reagents.html]
- 58. Monitoring Cleaved Caspase-3 Activity and Apoptosis of ... [https://pmc.ncbi.nlm.nih.gov/articles/PMC3462581/]
- 59. Background in Fluorescence Imaging [https://www.thermofisher.com/us/en/home/life-science/cell-analysis/cell-analysis-learning-center/molecular-probes-school-of-fluorescence/imaging-basics/protocols-troubleshooting/troubleshooting/background-fluorescence.html]
- 60. Flow Cytometry Troubleshooting Guide [https://www.cellsignal.com/learn-and-support/troubleshooting/flow-cytometry-troubleshooting-guide?srsltid=AfmBOoqlEecKKQ0pPEoCbjqJVTCaLE5kn0yDJ_cQ90gvKmVGoH3Rz6bU]
- 61. Simple Elimination of Background Fluorescence in ... [https://pmc.ncbi.nlm.nih.gov/articles/PMC5614400/]
- 62. Optical System and Detector Requirements for Live-Cell ... [https://www.microscopyu.com/techniques/fluorescence/optical-system-and-detector-requirements]
- 63. Spatial analysis by current multiplexed imaging technologies for the molecular characterisation of cancer tissues | British Journal of Cancer [https://www.nature.com/articles/s41416-024-02882-6]
- 64. Mastering Apoptosis Detection: A Step-by-Step TUNEL Assay ... [https://www.clyte.tech/post/mastering-apoptosis-detection-a-step-by-step-tunel-assay-protocol?srsltid=AfmBOoobGsdkEmgoOTBJlxdrKAlYVCJgJ8qtm-Vr4XnQg6xwQg9Oyymq]
- 65. Apoptosis Detection [https://www.bdbiosciences.com/en-us/learn/research/cell-biology/apoptosis]
- 66. Annexin V staining assay protocol for apoptosis [https://www.abcam.com/en-us/technical-resources/protocols/annexin-v-for-apoptosis]
- 67. High background in immunohistochemistry [https://www.abcam.com/en-us/technical-resources/troubleshooting/high-background-in-immunohistochemistry]
- 68. How to reduce background noise on PVDF membranes? [https://www.membrane-solutions.com/blog-How-to-reduce-background-noise-on-PVDF-membranes]
- 69. Spectral Flow Panel Cytometry and Sample Preparation Controls [https://www.thermofisher.com/de/de/home/life-science/cell-analysis/flow-cytometry/flow-cytometry-learning-center/flow-cytometry-resource-library/flow-cytometry-methods/spectral-flow-cytometry-panel-controls-sample-preparation.html]
- 70. Designing an apoptosis reporter by mutagenesis-based ... [https://www.sciencedirect.com/science/article/pii/S2090123225004795]
- 71. Immunohistochemistry (IHC) Troubleshooting Guide & the ... [https://www.cellsignal.com/learn-and-support/troubleshooting/ihc-troubleshooting-guide?srsltid=AfmBOorDcuuVwhUmkFHnXxkqwObIIDar09C7942RAejVlhL4AbXlxgPm]
- 72. Immunohistochemistry Troubleshooting [https://www.antibodies.com/applications/immunohistochemistry/ihc-troubleshooting]
- 73. The Power of Reagent Titration in Flow Cytometry [https://www.mdpi.com/2073-4409/13/20/1677]
- 74. Optimization of the Blocking and Signal Preservation ... [https://pmc.ncbi.nlm.nih.gov/articles/PMC12462741/]
- 75. 7 Tips for Optimizing Your Flow Cytometry Experiments [https://www.bdbiosciences.com/en-us/learn/science-thought-leadership/blogs/optimizing-tips-flow-cytometry-experiments]
- 76. Caspase-3 Is Transiently Activated without Cell Death during ... [https://journals.plos.org/plosone/article?id=10.1371/journal.pone.0015328]
- 77. Flow Cytometry Protocol | Abcam [https://www.abcam.com/en-us/technical-resources/protocols/flow-cytometry-for-intracellular-and-extracellular-targets]
- 78. Protocol for FACS Staining and Considerations for Gating [https://www.stemcell.com/protocol-for-facs-staining.html]
- 79. Quick Tips for Better Flow Cytometry Data [https://www.bdbiosciences.com/en-us/learn/science-thought-leadership/blogs/flow-cytometry-data-quick-tips]
- 80. Elevated cleaved caspase-3 is associated with shortened ... [https://pmc.ncbi.nlm.nih.gov/articles/PMC4152069/]
- 81. Cleaved Caspase-3 (Asp175) Antibody #9661 [https://www.cellsignal.com/products/primary-antibodies/cleaved-caspase-3-asp175-antibody/9661?srsltid=AfmBOor3G3PelT_3Kh3BBn8ViiWXRuF0ceiseUL82VmFokUDmfV8FAwl]
- 82. Staining Cell Surface Targets for Flow Cytometry [https://www.thermofisher.com/us/en/home/references/protocols/cell-and-tissue-analysis/protocols/staining-cell-surface-targets-flow-cytometry.html]
- 83. IHCeasy® Cleaved Caspase 3 Ready-To-Use IHC Kit [https://www.ptglab.com/products/IHCeasy-Cleaved-Caspase-3-Ready-To-Use-IHC-Kit-KHC2513.htm?srsltid=AfmBOoqoCIdHhVBgGgH3ilbXtqSK8sZECxNJCcoRpcodFL0zoyycj4V8]
- 84. 5 Tips for Reducing Non-specific Signal on Western Blots [https://nordicbiosite.com/news/5-tips-for-reducing-non-specific-signal-on-western-blots]
- 85. Western Blot Troubleshooting Guide | Boster Bio [https://www.bosterbio.com/protocol-and-troubleshooting/western-blot-troubleshooting?srsltid=AfmBOoqmDH8fDzbvTJDrRAnn2WP-7wZEmOwiqyhgZlir8BCT22ZojtZ6]
- 86. How To Optimize Your Western Blot [https://www.ptglab.com/support/western-blot-protocol/how-to-optimize-your-western-blot/?srsltid=AfmBOopKZve4j7sgqEdnlkTAq3WB8JgwIaNb0bOzQ_5swH-b0dklkr9X]
- 87. Cell survival following direct executioner-caspase activation [https://pmc.ncbi.nlm.nih.gov/articles/PMC9942801/]
- 88. Cleaved/Total Caspase-3 Whole Cell Lysate Kit [https://www.mesoscale.com/en/products/cleaved-total-caspase-3-whole-cell-lysate-kit-k15140d/]
- 89. Troubleshooting Flow Cytometry Issues [https://www.bosterbio.com/protocol-and-troubleshooting/flow-cytometry-troubleshooting?srsltid=AfmBOor39HywO1MVpluJN2sDqYmcZnG8UXKn2M-DJXWEdscPEM2xNsuf]
- 90. Common fixation-permeabilization methods cause ... [https://pubmed.ncbi.nlm.nih.gov/27587511/]
- 91. Image artifacts in Single Molecule Localization Microscopy [https://www.nature.com/articles/srep07924]
- 92. 5 Common Pitfalls to Avoid in ELISA Experiments | Boster Bio [https://www.bosterbio.com/blog/post/5-pitfalls-to-avoid-for-elisa?srsltid=AfmBOopP1rQH0oVgqQptf5dEgi26F7b4MU6S_5N7i2ehEuxh9kXGbLzF]
- 93. How to Reduce Medical Lab Errors [https://biomolecularsystems.com/how-can-errors-be-minimised-in-a-medical-lab/]
- 94. Common Challenges in Western Blotting and How to ... [https://blog.mblintl.com/common-challenges-in-western-blotting-and-how-to-overcome-them]
- 95. Recommended controls for western blot [https://www.abcam.com/en-us/technical-resources/guides/western-blot-guide/recommended-controls-for-western-blot]
- 96. Western Blot Troubleshooting [https://www.thermofisher.com/us/en/home/life-science/protein-biology/protein-biology-learning-center/protein-gel-electrophoresis-information/western-blot-troubleshooting.html]
- 97. Flow vs. Image Cytometry: Comparing Techniques to ... [https://evidentscientific.com/en/insights/flow-vs-image-cytometry-comparing-techniques-to-evaluate-large-cell-populations]
- 98. Highly sensitive live-cell imaging-based cytotoxicity assay ... [https://pmc.ncbi.nlm.nih.gov/articles/PMC12095279/]
- 99. Comparison of Diagnostic Accuracy of Microscopy and Flow ... [https://pmc.ncbi.nlm.nih.gov/articles/PMC4376531/]
- 100. Flow Cytometry Troubleshooting Guide [https://www.cellsignal.com/learn-and-support/troubleshooting/flow-cytometry-troubleshooting-guide?srsltid=AfmBOop8o8Xk4xtFg7OI5Ybx_6UlIkQxtENBPSzwNqOXCIKfSqFFi7Vl]
- 101. Intracellular Flow Cytometry [https://fluorofinder.com/intracellular-flow/]
- 102. BestProtocols: Viability Staining Protocol for Flow Cytometry [https://www.thermofisher.com/us/en/home/references/protocols/cell-and-tissue-analysis/protocols/viability-staining-flow-cytometry.html]
- 103. Flow Cytometry Live Cell Protocol [https://www.cellsignal.com/learn-and-support/protocols/protocol-flow-live-cell?srsltid=AfmBOootsmL6-z6kJc75bunjBR6_MjZMP4bawONejCnrCpKRHZ2P34kw]
- 104. BestProtocols: Cell Preparation for Flow Cytometry Protocols [https://www.thermofisher.com/us/en/home/references/protocols/cell-and-tissue-analysis/protocols/cell-preparation-flow-cytometery.html]
- 105. Annexin V PI Staining Guide for Apoptosis Detection [https://www.bosterbio.com/blog/post/methods/flow-cytometry-with-annexin-v-pi-staining?srsltid=AfmBOoq2t3JZmEhINVBcHpNH5q0nj7h0piYg71ZZJ8kDniZNF0HbK8sZ]
- 106. Cleaved Caspase3 (Asp175) Antibody [P20N20] [https://www.selleckchem.com/antibodies/cleaved-caspase3-asp175-antibody-p20n20.html]
- 107. Common Problems and Solutions in Annexin V-Based Flow ... [https://www.yeasenbio.com/blogs/cell/common-problems-and-solutions-in-annexin-v-based-flow-cytometry-apoptosis-assays]
- 108. Flow Cytometry Troubleshooting Guide [https://www.cellsignal.com/learn-and-support/troubleshooting/flow-cytometry-troubleshooting-guide?srsltid=AfmBOor0eHH5ht6mdznshlpaveuhrrSVxqAWCCLZTMe7giw52e2T0yTP]
- 109. Designing a multicolor flow cytometry protocol [https://www.abcam.com/en-us/technical-resources/guides/flow-cytometry-guide/designing-a-multicolor-protocol]
- 110. Advanced flow cytometry data analysis ... [https://www.flowjo.com/advanced_analysis.html]
- 111. FlowAtlas: an interactive tool for high-dimensional ... [https://pmc.ncbi.nlm.nih.gov/articles/PMC11288863/]
- 112. The Importance of Identifying and Validating Prognostic ... [https://pmc.ncbi.nlm.nih.gov/articles/PMC2929829/]
- 113. Validation of prognostic models: challenges and opportunities [https://jeccm.amegroups.org/article/view/4742/5275]
- 114. OMIQ - Flow Cytometry Software, Reimagined [https://www.omiq.ai/]
- 115. Amplification and Background Reduction Techniques [https://fluorofinder.com/amplification-and-background-reduction-techniques/]
- 116. - Cleaved (Asp175) Antibody... | Cell Signaling Technology Caspase 3 [https://www.cellsignal.com/products/primary-antibodies/cleaved-caspase-3-asp175-antibody/9661]
- 117. Flow Cytometry Reagents [https://www.bio-techne.com/applications/flow-cytometry]