Troubleshooting High Background in Cleaved PARP-1 Detection: A Strategic Guide for Reliable Apoptosis Analysis
Accurate detection of cleaved PARP-1 is crucial for apoptosis research, drug development, and cancer biology, yet high background noise frequently compromises data reliability.
Troubleshooting High Background in Cleaved PARP-1 Detection: A Strategic Guide for Reliable Apoptosis Analysis
Abstract
Accurate detection of cleaved PARP-1 is crucial for apoptosis research, drug development, and cancer biology, yet high background noise frequently compromises data reliability. This guide provides a comprehensive, step-by-step framework for researchers and scientists to overcome this challenge. It covers the foundational biology of PARP-1 cleavage, methodological best practices for Western blotting and immunoassays, targeted troubleshooting strategies for high background, and rigorous validation techniques to ensure specificity and reproducibility. By integrating current insights into PARP-1 function and cleavage, this article delivers a practical roadmap to achieve clean, interpretable results in the detection of this key apoptotic marker.
Understanding PARP-1 Cleavage: Biology, Significance, and the Specificity Challenge
PARP-1's Dual Role in DNA Repair and as a Key Apoptosis Marker
Poly (ADP-ribose) polymerase 1 (PARP1) is a critical nuclear enzyme with a well-established dual life. It functions as a first responder in DNA damage repair, maintaining genome stability, and serves as a definitive biochemical marker for apoptosis when cleaved by executioner caspases. Understanding these roles and the technical aspects of detecting both full-length and cleaved PARP1 is fundamental for research in DNA repair, cell death, and cancer biology. This guide provides targeted troubleshooting and FAQs to address common experimental challenges.
Fundamental Concepts: The Dual Roles of PARP1
PARP1's functions can be categorized into two primary, context-dependent roles, summarized in the table below.
| Function | Biological Context | Key Action | Downstream Consequence |
|---|---|---|---|
| DNA Damage Repair | Cellular response to single-strand and double-strand DNA breaks [1]. | Binds DNA breaks; synthesizes poly(ADP-ribose) (PAR) chains on itself (auto-modification) and histones [2] [1]. | Facilitates DNA repair, chromatin relaxation, and recruitment of repair factors; auto-modification promotes its release from DNA [3] [4]. |
| Apoptosis Marker | Execution phase of programmed cell death [5] [6]. | Cleaved by caspase-3 between Asp214 and Gly215, generating 24 kDa and 89 kDa fragments [5]. | Inactivation of DNA repair function; the 89 kDa fragment is a widely used biomarker for confirming apoptosis [5] [6]. |
Key Experimental Workflow and Signaling Pathways
The following diagram illustrates the core pathways governing PARP1's dual role, which is central to interpreting experimental outcomes.
Troubleshooting Guide & FAQs
This section addresses specific issues you might encounter during your research on PARP1, particularly concerning the challenge of high background in cleaved PARP-1 detection.
FAQ 1: What does the appearance of an 89 kDa band indicate in my Western blot?
The appearance of an 89 kDa band is a definitive indicator of apoptosis. It results from the specific cleavage of full-length PARP1 (116 kDa) by activated caspase-3 during the execution phase of programmed cell death. The cleavage occurs at Asp214-Gly215, separating the DNA-binding domains (24 kDa fragment) from the catalytic domain (89 kDa fragment) [5]. The persistence of the 89 kDa fragment in assays is a reliable marker for apoptotic cells.
FAQ 2: Why is my cleaved PARP-1 (89 kDa) signal weak or absent, even when apoptosis is expected?
A weak or absent cleaved PARP1 signal can occur for several reasons:
- Timing of Assay: Apoptosis is a dynamic process. The cleaved fragment may appear transiently. It is crucial to harvest cells at multiple time points after the apoptotic stimulus to capture the peak of caspase-3 activity and PARP1 cleavage.
- Incomplete Cell Lysis: The 89 kDa fragment is primarily cytoplasmic following cleavage [6]. Ensure your lysis buffer is robust enough to fully disrupt the plasma membrane and nuclear envelope to recover this fragment efficiently.
- Antibody Specificity: Verify that your antibody is validated to detect the caspase-cleaved fragment of PARP1. Some antibodies may be raised against epitopes lost during cleavage.
FAQ 3: How can I reduce high background noise specifically when detecting the cleaved PARP-1 fragment?
High background is a common issue in Western blotting that can obscure the 89 kDa band.
- Optimize Antibody Concentration: The primary cause of high background is often using too high a concentration of the primary or secondary antibody. Perform a dilution series to find the optimal signal-to-noise ratio.
- Enhanced Blocking: Increase the blocking step to 1-2 hours at room temperature using 5% non-fat dry milk or BSA in TBST. For persistent background, try blocking overnight at 4°C.
- Stringent Washes: Increase the number and duration of washes after antibody incubations. Using TBST (TBS with 0.1% Tween-20) for 5-10 minutes per wash, for a total of 5-6 washes, can significantly reduce non-specific binding.
- Membrane Quality: Ensure the PVDF membrane was activated in 100% methanol prior to use and that the transfer was efficient and bubble-free.
Detailed Experimental Protocols
Protocol 1: Western Blotting for PARP1 and Cleaved PARP1 (89 kDa)
This protocol is adapted from standard methodologies and specific resource examples [5] [7].
Sample Preparation:
- Lyse cells in a suitable RIPA buffer supplemented with protease inhibitors and, crucially, a caspase inhibitor (e.g., Z-VAD-FMK) if you wish to prevent cleavage during processing [6].
- Quantify protein concentration and prepare samples in Laemmli buffer.
Gel Electrophoresis and Transfer:
- Load 20-50 µg of total protein per lane onto a 4-12% Bis-Tris polyacrylamide gel.
- Resolve proteins by SDS-PAGE at constant voltage (e.g., 120-150V) until the dye front reaches the bottom.
- Transfer proteins to a PVDF membrane using a wet or semi-dry transfer system.
Blocking and Antibody Incubation:
- Blocking: Incubate the membrane in 5% BSA or non-fat milk in TBST for 1 hour at room temperature to reduce high background [7].
- Primary Antibody: Incubate with anti-PARP1 antibody (e.g., #9542, which detects both full-length and the 89 kDa fragment [5]) at a dilution of 1:1000 in blocking buffer, overnight at 4°C.
- Washing: Wash the membrane 3-5 times for 5 minutes each with TBST.
- Secondary Antibody: Incubate with an HRP-conjugated secondary antibody (e.g., goat anti-rabbit, at 1:6000 dilution) in blocking buffer for 1 hour at room temperature [8].
- Washing: Repeat the TBST wash step 3-5 times for 5 minutes each.
Detection:
- Develop the blot using a chemiluminescent substrate (e.g., SuperSignal West Pico PLUS) and image with a compatible system [7].
Protocol 2: Assessing PARP1 Activation via Auto-modification
This protocol can be used to study PARP1's DNA repair function.
In Vitro PARPylation Assay:
- Incubate immunoprecipitated PARP1 or purified protein with activated DNA (e.g., sonicated salmon sperm DNA) in reaction buffer (e.g., 50 mM Tris-HCl pH 8.0, 50 mM NaCl, 4 mM MgCl2).
- Initiate the reaction by adding NAD⁺ substrate. To enable detection, include a percentage (e.g., 10%) of biotinylated NAD⁺ [7].
- Incubate at room temperature for 30-60 minutes.
Detection of PAR Chains:
- Stop the reaction with Laemmli buffer.
- Resolve proteins by SDS-PAGE and transfer to a membrane.
- Block the membrane with 1% BSA in TBST.
- Detect the biotin-labeled PAR chains by incubating with a Streptavidin-HRP conjugate (1:5000-1:10000), followed by chemiluminescent detection [7].
- A shift in the molecular weight of PARP1 or a smeared band indicates successful auto-PARylation.
The Scientist's Toolkit: Research Reagent Solutions
The table below lists essential materials for studying PARP1, based on protocols and commercial resources.
| Research Reagent / Tool | Function / Application | Example / Catalog Number |
|---|---|---|
| PARP Antibody (#9542) | Detects endogenous levels of full-length (116 kDa) and cleaved (89 kDa) PARP1 by Western Blot [5]. | Cell Signaling Technology #9542 |
| Biotinylated NAD+ | Allows for detection of PARP auto-modification and trans-modification in in vitro assays via streptavidin-HRP [7]. | BPS Bioscience |
| PARP Inhibitors (PARPi) | Chemical tools to inhibit PARP1 enzymatic activity. Used to study synthetic lethality and DNA repair mechanisms. | Olaparib, Talazoparib, PJ34 [9] [7] |
| Caspase Inhibitor (Z-VAD-FMK) | Pan-caspase inhibitor. Used as a control to confirm that PARP1 cleavage is caspase-dependent [6]. | MedChemExpress (HY-16658B) |
| PARP1 Mutant Cell Lines | Separation-of-function mutants (e.g., auto-modification deficient) to dissect specific roles of PARP1 catalysis vs. auto-modification [3]. | Generated via site-directed mutagenesis |
Advanced Topic: The PARP1-HPF1 Complex and Serine Modification
A recent paradigm shift in the field is the discovery of Histone PARylation Factor 1 (HPF1). This protein forms a complex with PARP1 at DNA damage sites and fundamentally alters its enzyme activity. HPF1 switches PARP1's target amino acids from aspartate/glutamate to serine residues on histones and PARP1 itself [2] [10]. This Ser-ADP-ribosylation (Ser-ADPr) constitutes a major wave of PARP1 signaling and is critical for an efficient DNA damage response. Furthermore, this serine mono-ADPr has been identified as a cellular target for a unique, ester-linked ubiquitylation, adding a layer of complexity to PARP1 signaling [10]. When studying non-apoptotic PARP1 functions, consider the potential involvement of the HPF1 complex.
Core Concepts: PARP-1 Cleavage at a Glance
What is the Caspase-3 Cleavage Event at Asp214? Caspase-3 cleavage at Asp214 is a specific proteolytic event that occurs during caspase-dependent apoptosis. It severs the full-length 116-kDa PARP-1 protein into two major fragments: a 24-kDa fragment and an 89-kDa fragment [11] [12]. This cleavage separates the DNA-binding domain (located in the 24-kDa fragment) from the catalytic domain (located in the 89-kDa fragment), which is considered a hallmark of apoptosis [11] [13].
What is the Biological Significance of This Cleavage? The primary role of this cleavage is to inactivate PARP-1's catalytic function [11]. This prevents excessive consumption of NAD+ and ATP, which is crucial for the energy-dependent apoptotic process, ensuring the cell has sufficient energy to undergo orderly apoptosis rather than necrosis [11]. Recent research also indicates the 89-kDa fragment may have a second function: when modified with PAR polymers, it can translocate to the cytoplasm and act as a carrier to facilitate AIF-mediated parthanatos, a different form of programmed cell death [12].
Frequently Asked Questions (FAQs)
1. In my Western blot for cleaved PARP-1, I am getting high background signal across multiple lanes. What could be the cause? High background is a common issue in Western blotting for cleaved PARP-1, often traced to suboptimal antibody binding conditions or insufficient blocking.
- Primary Causes and Solutions:
- Insufficient Blocking: The membrane was not adequately blocked, allowing antibodies to bind non-specifically. Solution: Test different blocking buffers (e.g., milk, BSA, or commercial intercept blockers) and their combinations to find the one that provides the strongest specific signal with the lowest background for your antibody pair [14].
- Non-optimized Antibody Concentration: Using an overly concentrated primary or secondary antibody can cause non-specific binding. Solution: Perform a dilution series for your primary and secondary antibodies to establish the concentration that provides the best signal-to-noise ratio [14].
- Incomplete Washing: Residual antibodies remain on the membrane after incubation. Solution: Ensure thorough washing with an appropriate buffer (e.g., TBST) between steps [15].
2. My experiment suggests PARP-1 is cleaved, but I cannot detect the 89-kDa fragment. Why might this be? Failure to detect the fragment can be due to several factors related to protein handling and transfer.
- Primary Causes and Solutions:
- Protein Degradation: The 89-kDa fragment may have been degraded by proteases after cleavage. Solution: Always use fresh protease inhibitors during protein extraction and keep samples on ice [15].
- Inefficient Transfer to Membrane: The 89-kDa fragment may not have transferred efficiently from the gel to the membrane. Solution: Optimize your transfer protocol; for proteins around 90 kDa, ensure you use appropriate transfer conditions (e.g., longer transfer time or higher current) [14] [15].
- Antibody Specificity: The antibody may not recognize the cleaved fragment well. Solution: Verify the antibody's specificity for the 89-kDa fragment by checking the manufacturer's datasheet for validation data, and ensure it is designed to detect an epitope located between the cleavage site and the C-terminus [14].
3. What is the functional difference between the 24-kDa and 89-kDa PARP-1 fragments? The two fragments have distinct roles due to their different protein domains.
- The 24-kDa Fragment: Contains the DNA-binding domain. After cleavage, this fragment may remain associated with DNA lesions in the nucleus [12] [13].
- The 89-kDa Fragment: Contains the automodification and catalytic domains. It loses its ability to be recruited to DNA damage sites due to the separation from the DNA-binding domain. However, if it becomes poly(ADP-ribosyl)ated, it can translocate to the cytoplasm and promote AIF release from mitochondria, contributing to parthanatos [12].
Troubleshooting Guide: High Background in Cleaved PARP-1 Detection
| Problem Phenomenon | Potential Root Cause | Recommended Solution | Principle Explained |
|---|---|---|---|
| High background across entire membrane | Inadequate blocking of membrane | Test multiple blocking buffers (e.g., 5% milk, 3-5% BSA, or commercial protein-free blockers). Consider mixing blockers (e.g., 50:50). | Blocking agents occupy non-specific protein-binding sites on the membrane, preventing antibody adherence [14]. |
| Non-specific bands at unexpected molecular weights | Cross-reactivity of secondary antibody | Use secondary antibodies that are highly specific to the host species of the primary antibody. Avoid multiplexing primaries from closely related species (e.g., mouse and rat) [14]. | Ensures the secondary antibody only binds to the primary antibody, not to other proteins or non-target primaries [14]. |
| High background with multiple primaries | Antibody cross-reactivity | Use primary antibodies raised in different host species (e.g., mouse, rabbit, chicken). For mouse monoclonals, exploit IgG subclass specificity (e.g., IgG1 vs. IgG2b) with subclass-specific secondaries [14]. | Allows for spectrally distinct detection without cross-reactivity, enabling accurate multiplexing [14]. |
| Faint or no target band with high background | Primary antibody concentration too high | Perform an antibody titration experiment. Test a range of dilutions (e.g., from vendor's suggestion to 5x more dilute) to find the optimal concentration [14]. | An overly concentrated antibody binds non-specifically. The correct dilution maximizes specific binding and minimizes background [14]. |
Experimental Protocol: Optimized Multiplex Western Blot for PARP-1 Cleavage Products
This protocol is designed to simultaneously detect the full-length (116-kDa) and cleaved (89-kDa) PARP-1 while minimizing background, based on established fluorescent Western blot methodologies [14].
1. Sample Preparation
- Lysis: Use a RIPA buffer supplemented with a complete protease inhibitor cocktail to prevent post-lysis protein degradation. Include a pan-caspase inhibitor (e.g., zVAD) if you wish to preserve the full-length protein.
- Denaturation: Boil samples in SDS-PAGE sample loading buffer containing a reducing agent (e.g., DTT or β-mercaptoethanol) for 5-10 minutes [15].
2. Gel Electrophoresis and Transfer
- Gel Choice: Use a 4-20% gradient polyacrylamide gel for optimal resolution of both large (116-kDa) and smaller (89-kDa) proteins.
- Transfer: Transfer proteins to a PVDF membrane using a wet or semi-dry transfer system. PVDF typically provides a better signal-to-noise ratio for many antigen-antibody pairs. Activate PVDF membrane in methanol before use [14].
3. Membrane Blocking and Antibody Incubation
- Blocking: Incubate the membrane in a suitable blocking buffer for 1 hour at room temperature with gentle agitation. Example optimized blocker: A 1:1 mixture of Intercept (TBS) Blocking Buffer and Intercept (TBS) Protein-Free Blocking Buffer [14].
- Primary Antibody Incubation: Prepare a cocktail of primary antibodies in the chosen blocking buffer.
- Example Combination:
- Mouse anti-PARP-1 (cleavage specific), IgG1 isotype -> Detects 89-kDa fragment.
- Rabbit anti-PARP-1 (C-terminal) -> Detects full-length PARP-1 and the 89-kDa fragment.
- Chicken anti-GAPDH -> Loading control.
- Incubate membrane with the antibody cocktail overnight at 4°C with agitation [14].
- Example Combination:
- Washing: Wash the membrane 3-4 times for 5-10 minutes each with TBST.
- Secondary Antibody Incubation: Prepare a cocktail of fluorescent secondary antibodies in blocking buffer.
- Example Combination (compatible with the primaries above):
- IRDye 800CW Goat anti-Mouse IgG1 (Green, ~800 nm)
- VRDye 549 Goat anti-Rabbit (Blue, ~549 nm)
- IRDye 680LT Donkey anti-Chicken (Red, ~680 nm)
- Incubate for 1 hour at room temperature, protected from light [14].
- Example Combination (compatible with the primaries above):
- Final Wash: Perform a final series of washes with TBST, followed by a rinse with TBS to remove residual Tween.
4. Imaging and Analysis
- Image the membrane using a fluorescence imager (e.g., Odyssey M Imager) capable of detecting the specific wavelengths of your secondary antibodies.
- Ensure the signal for all targets is within the linear range of detection by analyzing a dilution series of your sample [14].
Research Reagent Solutions
| Reagent / Material | Key Function in the Experiment | Troubleshooting Tip |
|---|---|---|
| Caspase Inhibitor (zVAD-fmk) | A pan-caspase inhibitor used as a negative control to prevent PARP-1 cleavage and confirm the specificity of the cleavage event [11]. | If cleavage is not inhibited, check inhibitor solubility and ensure it is added to cell culture prior to the apoptosis-inducing stimulus. |
| PARP Inhibitor (e.g., 3-AB) | Inhibits PARP-1 enzymatic activity. Used to investigate the role of PARylation in cell death pathways and to prevent energy depletion [11]. | Can be used to differentiate between apoptosis and PARP-mediated necrosis (parthanatos). |
| PVDF Membrane | A porous membrane used to immobilize proteins after transfer for antibody probing. Often provides superior protein binding and lower background for many targets [14] [15]. | Compare with nitrocellulose; PVDF must be activated in methanol before use. |
| Fluorescent Secondary Antibodies | Antibodies conjugated to fluorophores that bind to species-specific primary antibodies, enabling multiplex detection [14]. | Protect from light during storage and use. Always use secondary antibodies that are highly specific to the host species of the primary antibody to avoid cross-reactivity. |
| Anti-PARP-1 (cleavage specific) Antibody | A primary antibody that specifically recognizes the neo-epitope of the 89-kDa fragment created by caspase cleavage at Asp214 [12]. | Validate the antibody using a positive control sample (e.g., cells treated with a known apoptosis inducer like staurosporine). |
| Parameter | Full-Length PARP-1 | 89-kDa Fragment | 24-kDa Fragment |
|---|---|---|---|
| Molecular Weight | 116 kDa [11] | 89 kDa [11] [12] | 24 kDa [11] [12] |
| Key Domains | DNA-binding, Automodification, Catalytic [13] | Automodification, Catalytic [12] [13] | DNA-binding [12] [13] |
| Primary Localization | Nuclear [11] | Nuclear (can translocate to cytoplasm if PARylated) [12] | Nuclear (remains at DNA lesions) [12] |
| Main Function | DNA repair, NF-κB co-activation [13] | Inactivated catalysis; potential PAR carrier in parthanatos [12] | Separation from catalytic domain; function unclear [12] |
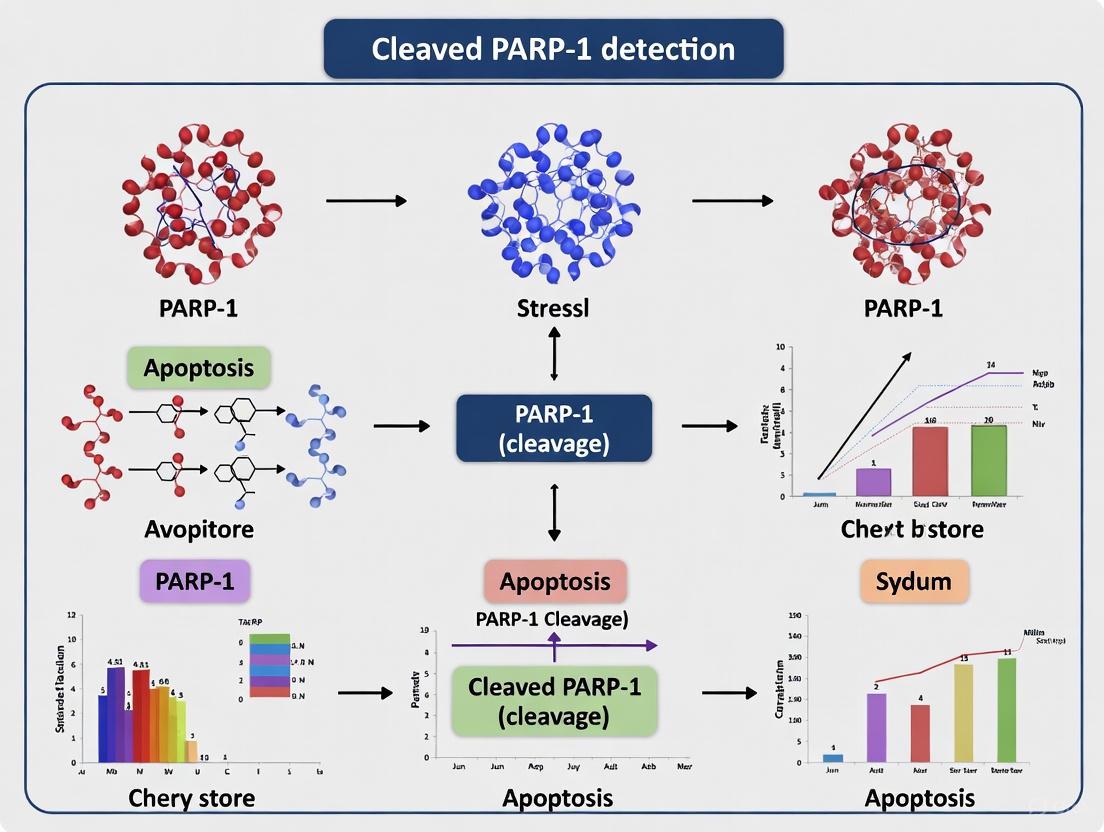
PARP-1 Cleavage and Cell Death Pathways
PARP-1 Cleavage in Apoptosis: This diagram illustrates the classic caspase-dependent apoptotic pathway where PARP-1 cleavage inactivates the enzyme, conserving cellular energy to allow the apoptotic process to proceed [11].
Alternative Fates of the 89-kDa Fragment
89-kDa Fragment in Parthanatos: This diagram shows an alternative pathway where the 89-kDa fragment, if it becomes heavily PARylated, can translocate to the cytoplasm and contribute to AIF-mediated parthanatos, a form of programmed necrosis [12].
For researchers investigating apoptosis, the detection of cleaved PARP-1 is a critical biomarker. However, experiments are frequently compromised by high background signals stemming from cross-reactivity and non-specific binding. This technical guide addresses these pervasive issues within the context of cleaved PARP-1 research, providing targeted troubleshooting strategies, validated protocols, and essential resources to ensure data reliability.
FAQs & Troubleshooting Guides
FAQ 1: What are the primary causes of high background in cleaved PARP-1 western blotting?
High background signal primarily arises from antibody-related issues and the presence of non-specific protein complexes. The full-length PARP-1 protein (116 kDa) is significantly more abundant in cells than the cleaved fragment (89 kDa). If an antibody lacks high specificity for the cleavage site, it will detect this more prevalent full-length protein, creating a dominant background signal [16]. Furthermore, PARP-1 interacts with numerous nuclear proteins and nucleic acids; incomplete removal of these interacting partners, particularly RNA which binds PARP1 non-specifically, can lead to the retention of high-molecular-weight complexes that contribute to a smeared background [17].
FAQ 2: How can I confirm that my 89 kDa band is specifically the caspase-cleaved PARP-1 fragment?
Specific confirmation requires multiple experimental approaches. First, use a well-characterized antibody specifically raised against the neo-epitope created by caspase cleavage, such as one targeting the C-terminal residues surrounding Asp214 [16]. Second, include apoptosis induction controls (e.g., staurosporine treatment) and caspase inhibition controls (e.g., Z-VAD-FMK). The genuine 89 kDa cleaved band should appear upon apoptosis induction and disappear when caspases are inhibited. Finally, siRNA-mediated knockdown of PARP-1 can provide genetic validation that both the full-length and the 89 kDa bands are diminished [18].
FAQ 3: What are the best practices for minimizing non-specific binding when studying PARP-1?
A combination of optimized buffer conditions and stringent controls is essential for minimizing non-specific binding [17].
- Stringent Washes: Incorporate high-stringency washes with buffers containing 0.1% SDS or 500 mM NaCl.
- Blocking Agents: Use a combination of protein-based blockers (5% BSA or non-fat dry milk) and non-ionic detergents (0.1% Tween-20).
- Sample Preparation: Treat lysates with RNase A to remove RNA that can bind PARP-1 non-specifically and create aggregates [17].
- Antibody Validation: Always run a positive control (e.g., apoptotic cell lysate) alongside your samples to confirm the antibody's specific reactivity.
FAQ 4: Could other proteases contribute to PARP-1 cleavage patterns and confuse interpretation?
Yes, this is a significant consideration. While caspase-3 and -7 are the primary proteases that cleave PARP-1 at DEVD214↓G to generate the classic 89 kDa and 24 kDa fragments, other proteases can cleave PARP-1 at different sites, producing alternative fragments [18]. The following table summarizes the key proteases and their cleavage signatures.
Table 1: Proteases that Cleave PARP-1 and Their Signature Fragments
| Protease | Cleavage Site | Signature Fragments | Associated Cell Death/Condition |
|---|---|---|---|
| Caspase-3/7 | DEVD214↓G | 89 kDa (CD + AMD), 24 kDa (DBD) | Apoptosis [18] |
| Calpain | ? | 55 kDa, 42 kDa | Necrosis, Excitotoxicity [18] |
| Granzyme A | ? | 50 kDa, 36 kDa | Immune-mediated killing [18] |
| Cathepsins | ? | 50 kDa, 36 kDa | Lysosomal-mediated cell death [18] |
| MMPs | ? | 35 kDa | Extracellular matrix remodeling [18] |
FAQ 5: How does the phenomenon of "PARP trapping" impact background signals in assays?
PARP trapping, where PARP-1 becomes stably bound to DNA, is a key mechanism of cytotoxicity induced by PARP inhibitors (PARPi) [19]. In a research context, this trapped complex can be a source of experimental background. When studying PARP-1 localization or conducting DNA-protein pull-down assays, trapped complexes can lead to persistent, non-specific signals that are not related to the initial DNA damage response. Understanding this mechanism is crucial for designing appropriate controls when working with PARPi.
Experimental Protocols & Methodologies
Protocol 1: Optimized Western Blot for Cleaved PARP-1 Detection
This protocol is designed to maximize signal-to-noise ratio for detecting the 89 kDa cleaved PARP-1 fragment.
- Sample Preparation:
- Lyse cells in RIPA buffer supplemented with protease inhibitors (including caspase inhibitors if studying basal levels) and RNase A (10 µg/mL) to disrupt PARP1-RNA interactions [17].
- Determine protein concentration and prepare samples in Laemmli buffer.
- Gel Electrophoresis:
- Load 20-50 µg of total protein per well on a 4-12% Bis-Tris gel. Include a pre-stained protein ladder, a positive control (apoptotic cell lysate), and a negative control (caspase-inhibited lysate).
- Run gel at 120-150V for 1-2 hours.
- Membrane Transfer:
- Transfer to a PVDF membrane using standard wet or semi-dry transfer systems.
- Blocking and Antibody Incubation:
- Block membrane with 5% BSA in TBST for 1 hour at room temperature.
- Incubate with primary antibody (e.g., Cleaved PARP (Asp214) #9546 from Cell Signaling Technology at 1:2000 dilution [16]) in 5% BSA/TBST overnight at 4°C.
- Wash membrane 3 times for 10 minutes each with TBST.
- Incubate with HRP-conjugated secondary antibody in 5% BSA/TBST for 1 hour at room temperature.
- Wash membrane 3 times for 10 minutes each with TBST.
- Detection:
- Use a high-sensitivity chemiluminescent substrate and image with a digital imager, ensuring you do not over-expose the blot.
Protocol 2: RNAse Treatment to Reduce Non-Specific Aggregates
This supplementary protocol is critical for reducing high-molecular-weight smearing.
- After cell lysis, split the lysate into two aliquots.
- To one aliquot, add RNase A to a final concentration of 10-50 µg/mL.
- Incubate both aliquots at 37°C for 15-30 minutes.
- Proceed with standard western blot preparation as in Protocol 1.
- Compare the RNase-treated and untreated samples. A reduction in smearing at the top of the gel and in the well indicates successful removal of RNA-bound PARP-1 complexes [17].
Visualizing PARP-1 Cleavage and Detection
PARP-1 Cleavage and Detection Pathway
The Scientist's Toolkit: Key Research Reagents
Table 2: Essential Reagents for Cleaved PARP-1 Research
| Reagent / Tool | Specific Function / Role | Key Characteristic / Rationale |
|---|---|---|
| Anti-Cleaved PARP (Asp214) | Primary antibody for specific detection of the 89 kDa fragment [16]. | Targets the neo-epitope created by caspase cleavage; minimal cross-reactivity with full-length PARP-1. |
| PARP Inhibitors (e.g., Olaparib) | Induces "PARP trapping" for mechanistic studies [19]. | Used to study synthetic lethality in HR-deficient cells and model PARP-1 DNA retention. |
| RNase A | Nucleic acid hydrolase to reduce non-specific binding [17]. | Degrades RNA that binds non-specifically to PARP-1, reducing high-MW aggregates and smearing. |
| Caspase Inhibitor (Z-VAD-FMK) | Pan-caspase inhibitor for experimental controls [18]. | Essential negative control to confirm caspase-dependent cleavage is responsible for the 89 kDa band. |
| HPF1 | Histone PARylation Factor 1 for studying PARP1 signaling [10]. | Switches PARP1 activity to promote serine mono-ADP-ribosylation, a key regulatory mechanism. |
Mitigating background in cleaved PARP-1 detection demands a meticulous, multi-faceted strategy. Success hinges on the use of a rigorously validated, cleavage-site-specific antibody, the implementation of RNase treatment to eliminate confounding nucleic acid interactions, and the clear differentiation of caspase-mediated cleavage from proteolysis by other cellular enzymes. By adhering to the optimized protocols and troubleshooting guides outlined above, researchers can significantly enhance the specificity and reliability of their apoptosis detection assays.
Frequently Asked Questions (FAQs)
Q1: What is the specific role of cleaved PARP-1 as a marker in cell death? Cleaved PARP-1 is a well-established marker for caspase-dependent apoptosis. The full-length PARP1 protein (116 kDa) is a DNA repair enzyme. During apoptosis, executioner caspases (like caspase-3) cleave PARP1 at Asp214, generating characteristic fragments of approximately 89 kDa and 24 kDa. This cleavage inactivates PARP1's DNA repair function, facilitating cellular disassembly and serving as a definitive indicator of apoptotic cell death [20] [21].
Q2: My western blot for cleaved PARP-1 shows high background noise. What are the primary causes? High background in cleaved PARP-1 detection typically stems from three areas:
- Antibody Specificity: The antibody may not be specific enough and could be detecting the full-length (116 kDa) PARP1 or other non-specific proteins [21].
- Incomplete Cleavage or Sample Conditions: The presence of other PARP1 fragments or improper sample preparation (e.g., incomplete lysis, protease degradation) can create multiple bands or smearing [21].
- Overexposure or High Signal Amplification: The western blot detection method may be too sensitive for the amount of protein loaded, leading to a washed-out or over-exposed signal [20].
Q3: How can I confidently distinguish cleaved PARP-1 from the full-length protein on a western blot? You should observe a clear band at ~89 kDa corresponding to the large cleaved fragment, with a corresponding decrease in the full-length 116 kDa band in apoptotic samples. Always include the recommended controls [20] [21]:
- Apoptotic Positive Control: Treat cells with an apoptosis inducer (e.g., Staurosporine).
- Negative Control: Use untreated cells.
- Knockout Validation: If possible, use PARP1 knockout cell lysates (e.g., A549 or HAP1) to confirm the absence of non-specific bands [21].
Troubleshooting Guide: High Background in Cleaved PARP-1 Detection
Problem: High background or non-specific bands in western blot.
| Step | Potential Issue | Recommended Solution | Verification |
|---|---|---|---|
| 1. Antibody | Non-specific antibody binding | Titrate the primary antibody to find the optimal dilution (e.g., start at 1:1000 for CST #9541 [20]). Use a knockout-validated antibody [21]. | A single, clean band at ~89 kDa in induced samples, with no band in knockout controls. |
| 2. Sample Prep | Protein degradation or inappropriate lysate | Use fresh protease inhibitors. Ensure complete cell lysis. Confirm protein concentration accuracy. | Sharp, clear bands for all major proteins; no smearing. |
| 3. Blotting | Over-saturation of signal | Reduce the protein loading amount. Optimize the exposure time for the detection system. Use a different, more sensitive detection substrate. | Band intensity is within the linear range of detection. |
Experimental Protocols for Key Applications
This protocol is adapted for the Cleaved PARP (Asp214) Antibody #9541 (Cell Signaling Technology) and can be generalized to other validated antibodies.
1. Sample Preparation:
- Culture and treat cells according to your experimental design (e.g., treat with 1-3 µM Staurosporine for 3-24 hours to induce apoptosis as a positive control).
- Lyse cells in a suitable RIPA buffer supplemented with protease and phosphatase inhibitors.
- Determine protein concentration and prepare samples in Laemmli buffer.
2. Gel Electrophoresis and Transfer:
- Load 20-30 µg of total protein per well on an SDS-PAGE gel.
- Run the gel at constant voltage until the dye front reaches the bottom.
- Transfer proteins from the gel to a nitrocellulose or PVDF membrane.
3. Immunoblotting:
- Blocking: Block the membrane with 5% non-fat dry milk or BSA in TBST for 1 hour at room temperature.
- Primary Antibody Incubation: Incubate membrane with anti-cleaved PARP-1 (Asp214) primary antibody diluted 1:1000 in blocking buffer with gentle agitation, overnight at 4°C.
- Washing: Wash membrane 3-4 times with TBST for 5 minutes each.
- Secondary Antibody Incubation: Incubate with an HRP-conjugated secondary antibody (e.g., Anti-rabbit IgG) diluted 1:2000-1:10000 in blocking buffer for 1 hour at room temperature.
- Washing: Repeat washing steps as above.
4. Detection:
- Use a chemiluminescent substrate for detection.
- Expose the membrane to X-ray film or use a digital imaging system. Avoid overexposure.
This protocol outlines a method for detecting apoptosis via PARP-1 cleavage in the context of DNA damage, using intracellular staining and flow cytometry.
1. Cell Preparation and Stimulation:
- Seed cells (e.g., HBE or PBMCs) and treat with your chosen DNA damage agent (e.g., Particulate Matter, LPS, or chemotherapeutic drugs).
- Include a control treated with a PARP inhibitor (e.g., ABT-888/Veliparib at 1 µM) to confirm PARP-1-dependent effects [22].
2. Fixation and Permeabilization:
- Harvest cells and wash twice with cold PBS.
- Fix and permeabilize cells using a commercial kit (e.g., Cytofix/Cytoperm Solution Kit) for 20 minutes at room temperature [22].
3. Intracellular Staining:
- Staining: Incubate cells with a saturating amount of a fluorochrome-conjugated anti-cleaved PARP-1 (Asp214) antibody (e.g., FITC-conjugated clone F21-852) for 45 minutes at 4°C [22].
- Optional Co-staining: Co-stain with an antibody for active Caspase-3 (PE-conjugated) to confirm the apoptotic pathway [22].
- Controls: Include an unstained control and an isotype control to set up flow cytometry parameters.
4. Data Acquisition and Analysis:
- Analyze the stained cells on a flow cytometer.
- Gate on the cell population of interest and analyze the fluorescence intensity for the cleaved PARP-1 channel.
- Report the results as the percentage of cells positive for cleaved PARP-1 and/or the Mean Fluorescent Intensity (MFI) [22].
Visualizing the Pathway and Workflow
Apoptosis Signaling to PARP-1 Cleavage
Experimental Workflow for Detection
The Scientist's Toolkit: Research Reagent Solutions
| Item | Function / Application | Example Product / Citation |
|---|---|---|
| Anti-Cleaved PARP1 (Asp214) Antibody | Primary antibody for specific detection of the 89 kDa fragment in WB, IF, IHC, and Flow Cytometry. | Rabbit mAb #9541 (CST) [20]; Recombinant mAb [SP276] (Abcam) [21] |
| PARP Inhibitor (Positive Control) | Chemical inhibitor used to validate PARP1-dependent effects in functional assays. | ABT-888 (Veliparib) [22] |
| Apoptosis Inducer (Positive Control) | Chemical used to induce caspase-dependent apoptosis to generate a positive control lysate. | Staurosporine [21] |
| PARP1 Knockout Cell Line | Critical control to confirm antibody specificity and identify non-specific bands in western blot. | PARP1 KO A549 or HAP1 cells [21] |
| Flow Cytometry Antibody Panel | Antibodies for co-staining to analyze PARP1 cleavage in specific cell populations or alongside other markers. | FITC anti-Cleaved PARP1 & PE anti-active Caspase-3 [22] |
| Proteomics & Interaction Tools | Domains like ZUD (zfDi19-UIM) used to study complex ADP-ribosylation-dependent modifications like ubiquitylation. [23] | ZUD domain of RNF114 [23] |
Methodological Mastery: Optimized Protocols for Clean Cleaved PARP-1 Detection
A frequent challenge in apoptosis research is the specific and sensitive detection of cleaved PARP1, a key biomarker for programmed cell death. A common obstacle faced by researchers is high background signal or non-specific detection in Western blot assays, often stemming from antibody cross-reactivity with the abundant full-length PARP1 protein. This technical guide addresses the critical factors in selecting and validating antibodies for distinguishing the caspase-cleaved form of PARP1 (at Asp214) from the full-length protein, providing troubleshooting strategies to ensure experimental reliability within the context of cleaved PARP-1 detection research.
FAQ: Antibody Selection and Specificity
Q1: What is the fundamental difference between antibodies targeting Asp214 versus full-length PARP1?
Antibodies targeting cleaved PARP1 at Asp214 are cleavage-site specific. They are designed to recognize the novel epitope created when caspases cleave PARP1 between Asp214 and Gly215, and typically do not bind to the full-length protein [24] [25]. In contrast, antibodies against full-length PARP1 recognize epitopes present on the intact protein and will often detect both the full-length (116 kDa) and its major cleavage fragments (89 kDa and 24 kDa) [26].
Q2: Why might my experiment show high background when trying to detect cleaved PARP1?
High background is frequently caused by antibody cross-reactivity. If using a total PARP1 antibody, it will detect the abundant full-length protein, potentially obscuring the cleaved fragment. This can also occur if a "cleaved-specific" antibody has not been adequately purified to remove contaminants that recognize the full-length form [24]. Insufficient blocking or overexposure during detection can also amplify background noise.
Q3: How can I confirm that my cleaved PARP1 antibody is specific?
The most robust method is to include appropriate controls in your experimental design:
- Apoptosis-induced cell lysates: Treat cells with a known apoptosis inducer (e.g., staurosporine, etoposide) alongside untreated cells [24] [25] [26].
- Expected band sizes: A specific anti-cleaved PARP1 (Asp214) antibody should produce a strong band at ~89 kDa in induced samples and little to no signal at ~116 kDa (full-length). A total PARP1 antibody will show both bands [25] [26].
Troubleshooting Guide: High Background in Cleaved PARP1 Detection
| Problem Area | Potential Cause | Recommended Solution |
|---|---|---|
| Antibody Selection | Using a "total PARP1" antibody instead of a "cleaved-specific" one. | Select a monoclonal antibody specifically validated for cleaved PARP1 (e.g., clone HLNC4 [25] or a purified polyclonal like ab4830 [24]). |
| Antibody Specificity | Inadequate removal of antibodies that recognize full-length PARP1 during production. | Use antibodies that are negatively pre-adsorbed against the full-length protein [24]. |
| Experimental Controls | Lack of proper controls to interpret background signal. | Always run induced (apoptotic) and non-induced cell lysates in parallel [24] [26]. |
| Band Pattern | Strong signal at 116 kDa when you expect only 89 kDa. | Titrate antibody concentration; verify apoptosis induction; confirm antibody is specific for the cleaved form. |
Key Reagents and Experimental Protocols
Research Reagent Solutions
| Item | Function/Explanation | Example Products / Specifications |
|---|---|---|
| Anti-Cleaved PARP1 (Asp214) | Monoclonal antibody specific to the neo-epitope created after caspase cleavage. Essential for specific detection. | Clone HLNC4 (Cat# 14-6668-82) [25]; Abcam ab4830 [24]. |
| Anti-Total PARP1 | Detects both full-length and cleaved fragments. Useful for assessing overall PARP1 levels and cleavage efficiency. | Clone EPR18461 (ab191217) [26]. |
| Apoptosis Inducers | Positive control reagents to trigger caspase-mediated PARP1 cleavage in cell cultures. | Staurosporine (3 µM) [24], Etoposide (1 µM) [24] [25]. |
| Cell Lines for Validation | Well-characterized cell models for optimizing apoptosis assays. | Jurkat, HeLa, SH-SY5Y [24] [13] [25]. |
Standard Protocol for Validating Cleaved PARP1 Antibody Specificity by Western Blot
This protocol is adapted from vendor-specific validation data and peer-reviewed methodologies [24] [13] [25].
Sample Preparation:
- Culture cells (e.g., Jurkat or HeLa) and split into two groups.
- Induced Sample: Treat cells with an apoptosis inducer (e.g., 1 µM Etoposide for 16 hours or 3 µM Staurosporine for 4-16 hours).
- Non-induced Control: Treat with vehicle only (e.g., DMSO).
- Prepare whole cell or nuclear-enriched lysates using RIPA or SDS lysis buffers.
Gel Electrophoresis and Transfer:
- Load 20-40 µg of protein from each sample onto an SDS-PAGE gel.
- Include a pre-stained protein ladder.
- Transfer proteins to a PVDF or nitrocellulose membrane.
Immunoblotting:
- Blocking: Incubate membrane with 5% non-fat dry milk (NFDM) in TBST for 1 hour at room temperature.
- Primary Antibody Incubation: Incubate with the anti-cleaved PARP1 antibody (e.g., HLNC4 at 0.1-0.25 µg/mL [25] or ab4830 at 1/1000 dilution [24]) in blocking buffer overnight at 4°C.
- Washing: Wash membrane 3 times for 5 minutes each with TBST.
- Secondary Antibody Incubation: Incubate with an HRP-conjugated anti-mouse or anti-rabbit IgG antibody (as appropriate) at a dilution of 1/5000 to 1/14000 [24] in blocking buffer for 1 hour at room temperature.
- Washing: Repeat washing as above.
Detection:
- Use a chemiluminescent substrate for detection.
- Expected Result: A specific antibody will show a strong band at ~85-89 kDa only in the induced apoptotic sample, with minimal to no signal at 116 kDa.
PARP1 Cleavage Signaling Pathway
The following diagram illustrates the key steps in PARP1 cleavage during apoptosis, highlighting the critical role of caspase-3 at the Asp214 site.
Experimental Workflow for Troubleshooting Specificity
This workflow provides a logical, step-by-step approach to diagnosing and resolving high background issues.
In cleaved PARP-1 research, the high abundance of the full-length protein (113 kDa) in the nucleus creates significant detection challenges for its cleavage fragments (89 kDa and 24 kDa). These fragments are established hallmarks of apoptosis and serve as biomarkers for specific protease activities in unique cell death programs [18]. Inadequate sample preparation can lead to excessive background noise, masking these critical signatures and compromising experimental validity. This guide provides targeted troubleshooting methodologies to prevent artefacts throughout the preparation workflow, ensuring reliable detection of cleaved PARP-1 fragments.
FAQ: Addressing Common PARP-1 Cleavage Detection Issues
Why is background from full-length PARP-1 so problematic when detecting cleavage fragments? PARP-1 is an extremely abundant nuclear protein with approximately 1-2 million copies per cell, accounting for ~85% of total cellular PARP activity [18]. When detecting the cleavage fragments (24 kDa and 89 kDa), this creates a significant signal-to-noise challenge because the abundant full-length protein (113 kDa) can obscure the less abundant fragments, especially if partial degradation occurs during sample preparation.
What are the signature cleavage fragments of PARP-1 and which proteases produce them? Cleavage by different "suicidal" proteases produces specific signature fragments that serve as biomarkers for particular cell death pathways [18]. The table below summarizes the major PARP-1 cleavage fragments and their associated proteases.
Table 1: PARP-1 Cleavage Fragments and Associated Proteases
| Protease | Cleavage Site | Fragments Generated | Primary Association |
|---|---|---|---|
| Caspase-3/7 | DEVD²¹⁴↓G | 24 kDa (DBD) + 89 kDa (CAT) | Apoptosis [13] [18] |
| Calpain | ? | 55 kDa + 62 kDa | Necrosis, excitotoxicity [18] |
| Granzyme A | ? | 50 kDa + 64 kDa | Immune-mediated cytotoxicity [18] |
| MMPs | ? | 40-50 kDa fragments | Inflammation, pathology [18] |
How does the subcellular localization of cleavage fragments affect detection? Following caspase cleavage, the 89-kD fragment containing the auto-modification and catalytic domains has a greatly reduced DNA binding capacity and is liberated from the nucleus into the cytosol [18]. The 24-kD cleaved fragment with two zinc-finger motifs is retained in the nucleus, irreversibly binding to nicked DNA [18]. This separation necessitates careful fractionation or whole-cell lysate preparation strategies to ensure complete detection of all fragments.
Essential Protocols for Clean PARP-1 Cleavage Detection
Protocol 1: High-Salt Extraction for Reducing Nuclear Background
The high background from nuclear PARP-1 can be mitigated using a novel in-situ fractionation technique that selectively depletes unbound or "free" PARP-1 while retaining the PARP-1 that is bound to damaged DNA [27].
Table 2: High-Salt Extraction Buffer Components
| Component | Final Concentration | Function |
|---|---|---|
| CSK Buffer | 1X | Maintains cellular architecture |
| Triton X-100 | 0.1-0.5% | Membrane permeabilization |
| NaCl | 0.42 M | Extraction of free PARP-1 |
| Protease Inhibitors | 1X | Prevents post-lysis cleavage |
| PARP Inhibitor | 1-10 µM | Prevents auto-modification |
Methodology:
- Culture cells on coverslips and apply experimental treatments
- Wash briefly with PBS and incubate with C+T+S buffer (CSK + Triton + 0.42 M NaCl) for 5-10 minutes at 4°C
- Remove extraction buffer and fix cells with appropriate fixative
- Proceed with immunodetection protocols
This protocol extracts most "free" PARP-1 from control and treated cells while leaving behind residual PARP-1 that interacts with DNA for normal physiological functions and stronger punctate patterns of PARP-1 in cells with DNA damage [27].
Protocol 2: Prevention of Artificial Cleavage During Lysis
Artificial cleavage during sample preparation can be minimized through optimized lysis conditions:
Key Considerations:
- Maintain samples at 4°C throughout preparation
- Include specific caspase inhibitors (e.g., Z-VAD-FMK) in lysis buffer when studying non-apoptotic processes
- Use rapid lysis and immediate denaturation to prevent post-lysis protease activity
- Avoid repeated freeze-thaw cycles of samples and reagents
The Scientist's Toolkit: Research Reagent Solutions
Table 3: Essential Reagents for PARP-1 Cleavage Studies
| Reagent | Specific Example | Application/Function |
|---|---|---|
| PARP Inhibitors | Rucaparib, Olaparib | Control for PARP activity, prevent auto-modification [28] |
| Caspase Inhibitors | Z-VAD-FMK | Prevent artificial cleavage during preparation [18] |
| Protease Inhibitor Cocktails | Commercial tablets | Broad-spectrum protease inhibition [29] |
| PARP-1 Mutants | PARP-1UNCL (D214N) | Cleavage-resistant control [13] [30] |
| PARP-1 Fragments | PARP-124, PARP-189 | Fragment-specific controls [13] |
| PAR Antibodies | Multiple vendors | Detect PARP-1 activation [27] |
| Cleaved PARP-1 Antibodies | Anti-89 kDa fragment | Specific detection of apoptotic cleavage [13] |
| High-Salt Extraction Buffers | C+T+S buffer | Reduce nuclear background [27] |
Experimental Design & Workflow Visualization
The following diagram illustrates the critical decision points in sample preparation for cleaved PARP-1 detection:
Troubleshooting Guide: PARP-1 Detection Issues
Table 4: Troubleshooting Common PARP-1 Cleavage Detection Problems
| Problem | Potential Causes | Solutions |
|---|---|---|
| High background from full-length PARP-1 | Abundant nuclear PARP-1 obscuring cleavage fragments | Implement high-salt extraction (0.42 M NaCl) [27]; Optimize antibody dilution |
| Faint or absent cleavage fragments | Inefficient transfer, low abundance fragments | Use positive controls (apoptotic cells); Ensure proper transfer conditions; Increase protein loading |
| Multiple non-specific bands | Antibody cross-reactivity, protein degradation | Include PARP-1 knockout controls; Fresh protease inhibitors; Optimize blocking conditions |
| Inconsistent results between experiments | Variable lysis efficiency, protease activity | Standardize lysis time/temperature; Use fresh inhibitors; Consistent cell counting |
| Poor band resolution | Overloading, improper gel percentage | Use 4-12% gradient gels [29]; Reduce protein load; Optimize running conditions |
Advanced Considerations for Specific Research Contexts
Cell Cycle Dependencies: PAR levels naturally fluctuate during the cell cycle, peaking during S phase and reaching lowest levels in G1 phase [31]. Under non-stressed conditions, PAR has a remarkably short half-life of less than 40 seconds [31]. These physiological variations should be considered when designing experiments and interpreting results.
Inflammation Research Applications: In studies of ischemia-reperfusion injury or endotoxic shock, consider using uncleavable PARP-1 (PARP-1UNCL) models, which have demonstrated reduced NF-κB-mediated transcription and production of inflammatory mediators despite normal DNA binding [13] [30].
This technical support center provides targeted troubleshooting guides and FAQs to help researchers optimize Western blotting, specifically for detecting cleaved PARP-1 in the context of DNA damage response and apoptosis research.
Troubleshooting High Background in Cleaved PARP-1 Detection
FAQ: I am detecting cleaved PARP-1 and experiencing high, uniform background across my membrane. What are the primary causes and solutions?
A high uniform background is often due to non-specific antibody binding or suboptimal blocking. The solutions are multi-faceted [32].
- Primary Cause: Insufficient Blocking. Inadequate blocking allows antibodies to bind non-specifically to the membrane.
Solution: Increase the concentration of your blocking reagent (e.g., up to 5-10%) and/or extend the blocking time to at least 1 hour at room temperature or overnight at 4°C. Ensure your blocking buffer is compatible with your target; for phosphorylated proteins, avoid milk due to its phosphoprotein content [32] [33] [34].
Primary Cause: Antibody Concentration is Too High. An excess of primary or secondary antibody increases the chance of non-specific binding.
Solution: Titrate both your primary and secondary antibodies to find the lowest concentration that provides a strong specific signal. Reusing diluted antibodies is not recommended, as they are less stable and prone to contamination [32] [35].
Primary Cause: Incompatible Blocking Buffer. The choice of blocking agent can significantly impact the signal-to-noise ratio for specific targets.
Solution: Empirically test different blocking buffers. For cleaved PARP-1 detection, 2-5% Bovine Serum Albumin (BSA) is often preferred over non-fat dry milk, especially if you are simultaneously detecting phosphorylation events. BSA is biotin-free and does not contain phosphoproteins that can interfere [34].
Primary Cause: Insufficient Washing. Unbound antibodies remain on the membrane if not washed away thoroughly.
Solution: Increase the number, duration, and volume of washes. Typically, three to five washes for 5 minutes each with TBST (Tris-Buffered Saline with 0.1% Tween 20) are sufficient. Adding Tween 20 to the wash buffer helps minimize background [32] [36].
Primary Cause: Signal Over-Exposure. Leaving the membrane in contact with chemiluminescent substrate for too long or over-exposing the film can swamp the signal.
- Solution: Reduce the incubation time with the substrate to 1 minute and drain excess substrate before imaging. Test a range of exposure times to find the optimal one that does not produce background [32].
FAQ: My Western blot for cleaved PARP-1 shows multiple non-specific bands. How can I improve target specificity?
Non-specific bands suggest antibody cross-reactivity or sample degradation [33].
- Confirm Antibody Specificity: Check the antibody's datasheet for validated isoforms and known cross-reactivity. The appearance of multiple bands could be due to alternative splicing, other protein isoforms, or post-translational modifications (e.g., ubiquitination, phosphorylation) that alter the protein's migration [35].
- Optimize Protein Load: Overloading the gel with too much total protein can cause non-specific binding and mask the target band. Reduce the amount of protein loaded per lane; 10–40 µg of cell lysate is typically recommended [37] [33].
- Prevent Sample Degradation: Protein degradation by proteases can create cleavage products that are detected by the antibody. Always prepare fresh lysates and keep samples on ice. Include protease inhibitors (e.g., PMSF, leupeptin) and phosphatase inhibitors in your lysis buffer [37] [35].
- Check Antibody Dilution Buffer: The buffer used to dilute the primary antibody can affect specificity. Non-fat dry milk can be more effective at reducing non-specific bands than BSA for some antibodies. Consult the antibody manufacturer's protocol for the recommended dilution buffer [35].
Western Blot Optimization Tables
Table 1: Gel Percentage Selection Based on Protein Size
Select the appropriate gel chemistry to achieve optimal separation for your target protein.
| Target Protein Size | Recommended Gel Type | Recommended Running Buffer |
|---|---|---|
| 10 - 30 kDa | 4-12% acrylamide gradient Bis-Tris gel [37] | MES [37] |
| 31 - 150 kDa | 4-12% acrylamide gradient Bis-Tris gel [37] | MOPS [37] |
| > 150 kDa | 3-8% acrylamide gradient Tris-Acetate gel [37] | Tris-Acetate [37] |
| Fixed-Concentration Tris-Glycine Gels | ||
| Small proteins (> 4 kDa) | 20% separating gel [37] | Tris-Glycine [37] |
| Average proteins (12 - 100 kDa) | 10-15% separating gel [37] | Tris-Glycine [37] |
| Large proteins (< 200 kDa) | 8% separating gel [37] | Tris-Glycine [37] |
Table 2: Blocking Buffer Selection Guide
Choosing the right blocking buffer is critical for minimizing background and maximizing specific signal.
| Blocking Agent | Benefits | Drawbacks | Ideal For |
|---|---|---|---|
| Non-Fat Dry Milk (2-5%) | Inexpensive; contains multiple protein types for effective blocking [34]. | Contains biotin and phosphoproteins; can interfere with streptavidin systems and phospho-protein detection [34]. | General use, non-phospho targets, non-biotin systems [34]. |
| Bovine Serum Albumin (BSA) (2-5%) | Biotin-free; phosphoprotein-friendly; often increases detection sensitivity [34]. | Can be a weaker blocker, potentially leading to more non-specific binding [34]. | Detecting phosphorylated proteins; biotin-streptavidin systems; low-abundance targets [32] [34]. |
| Purified Casein | Single-protein buffer minimizes cross-reaction; high-performance [34]. | More expensive than milk or BSA [34]. | Sensitive detection when milk blocks antigen-antibody binding [34]. |
Table 3: Optimized Electrotransfer Conditions
Tailor your transfer conditions based on the molecular weight of your target protein to ensure efficient movement from gel to membrane.
| Condition | Low MW Proteins (< 30 kDa) | Standard Proteins (30 - 150 kDa) | High MW Proteins (> 150 kDa) |
|---|---|---|---|
| Transfer Buffer | 1X Tris-Glycine + 20% Methanol [35] | 1X Tris-Glycine + 20% Methanol [36] | 1X Tris-Glycine + 5-10% Methanol [35] |
| Membrane Type | Nitrocellulose, 0.2 µm pore size [35] | Nitrocellulose or PVDF, 0.45 µm pore size [36] | Nitrocellulose or PVDF, 0.45 µm pore size [36] |
| Transfer Time & Settings | 1 hour at 100V (wet tank) or 15 min (semi-dry) [35] | 2 hours at 70-100V (wet tank) [36] [35] | 3-4 hours at 70V (wet tank) [35] |
| Key Consideration | Prevent "blow-through" by reducing transfer time [35]. | Standard conditions apply. | Aid mobility of large proteins by reducing methanol [35]. |
Experimental Workflow and PARP-1 Signaling
The following diagram illustrates the core workflow of a Western blot experiment, from sample preparation to detection.
Western Blot Core Workflow
The detection of cleaved PARP-1 occurs within the context of DNA damage signaling. PARP1 is a key sensor of DNA breaks, and its activation leads to complex signaling events.
PARP-1 Signaling in DNA Damage and Apoptosis
Research Reagent Solutions
This table lists essential materials and reagents used in the Western blotting workflow for reliable protein detection.
| Item | Function / Purpose | Examples / Notes |
|---|---|---|
| Protease Inhibitor Cocktail | Prevents protein degradation by endogenous proteases during sample preparation [37] [35]. | Added fresh to lysis buffer (e.g., PMSF, leupeptin) [35]. |
| Phosphatase Inhibitor Cocktail | Preserves protein phosphorylation status by inhibiting phosphatases; crucial for detecting phospho-proteins [37] [35]. | Added to lysis buffer when studying phosphorylation [37]. |
| Dithiothreitol (DTT) | Reducing agent that breaks disulfide bonds in proteins for complete denaturation [37] [38]. | Added to loading buffer; final concentration should be < 50 mM [37] [32]. |
| SDS-PAGE Gel & Buffer | Separates proteins based on molecular weight under denaturing conditions [37] [38]. | Choose gradient or fixed % gel based on target size (see Table 1) [37]. |
| Transfer Buffer | Medium for transferring proteins from gel to membrane via electrophoresis [36] [39]. | Typically Tris-Glycine with methanol; methanol % can be optimized [35]. |
| Blocking Buffer | Blocks unused binding sites on the membrane to prevent non-specific antibody binding [34]. | 5% BSA or non-fat dry milk in TBST; choice is critical (see Table 2) [34]. |
| HRP-Conjugated Secondary Antibody | Binds to primary antibody and enables detection via enzymatic reaction with a substrate [36]. | Species must be raised against the host of the primary antibody [36]. |
| Chemiluminescent Substrate | HRP substrate that produces light upon reaction, allowing protein visualization [38] [36]. | Signal intensity declines after ~2 hours [36]. |
FAQs: Troubleshooting High Background in Cleaved PARP-1 Detection
What are the primary causes of high background in ELISA-based PARP-1 detection?
High background in ELISA, which can obscure the specific signal from cleaved PARP-1, is typically caused by non-specific antibody binding, insufficient washing, or suboptimal incubation conditions [40] [41] [42].
Key Causes and Solutions:
- Antibody Non-Specificity: The secondary antibody may bind non-specifically, or the primary antibody concentration may be too high [40].
- Insufficient Blocking: Inadequate blocking of non-specific binding sites on the plate can lead to high background [40] [42].
- Inadequate Washing: Residual unbound antibodies or other components left in the wells due to insufficient washing are a common cause [40] [41].
- Contamination: Contaminated reagents or a dirty plate can produce elevated signals [40] [41].
- Substrate Issues: Using too much substrate, allowing precipitate to form, or waiting too long to read the plate after adding the stop solution can increase background [40] [42].
How can I optimize my ELISA protocol to minimize background for PARP-1 assays?
Optimization involves systematically addressing each step of the assay, from antibody selection to final detection [40] [41].
Optimization Strategies
| Troubleshooting Area | Specific Action | Expected Outcome |
|---|---|---|
| Antibody Concentration | Titrate both primary and secondary antibodies to find the optimal dilution; use a control without the primary antibody [40]. | Reduced non-specific binding. |
| Blocking | Increase blocking incubation time; consider changing to a more effective blocking agent (e.g., 5-10% normal serum) [40]; increase concentration or add a non-ionic detergent [42]. | More effective occupation of non-specific sites. |
| Washing | Wash wells extensively with buffer between all steps; increase the number of wash cycles or add a short incubation (soak) period during washes [40] [42]. | Removal of unbound reagents. |
| Incubation Conditions | Ensure precise adherence to recommended incubation times and temperatures; use a calibrated incubator [41]. | Minimized non-specific reactions. |
| Reagent Quality | Use high-quality, specific antibodies and ensure all reagents are fresh and uncontaminated [40] [41]. | Lower baseline noise and more reliable results. |
When using Mass Spectrometry to validate PARP-1 cleavage, what sample preparation steps are critical to avoid interference?
For MS, the key is to preserve the specific post-translational modifications (PTMs) and cleavage events of PARP-1 while minimizing sample complexity that can lead to background noise in the spectra. Specialized proteomics methods are required to accurately identify modifications like ADP-ribosylation [10].
Critical Steps for MS Sample Preparation:
- Lysis and Digestion: Use tailored digestion protocols. For studying ADP-ribosyl-ubiquitylation, a short, acidic ArgC digestion method has been successfully employed to handle the unique chemical features of this composite PTM [10].
- Enrichment Strategies: Implement specific biochemical enrichment to isolate your target. The use of affinity domains, such as the zfDi19–UIM domain (ZUD) of RNF114, which binds mono-ADP-ribosylated targets, can selectively pull down PARP-1 and its fragments [10].
- Chemical Elution: For specific elution from affinity beads, chelating agents like EDTA can be used to disrupt zinc finger domain interactions (e.g., with the zfDi19 domain), providing a more targeted elution than general denaturation [10].
- Controls: Always include appropriate controls, such as samples from cells expressing a binding-deficient mutant (e.g., RNF114-C176A), to distinguish specific interactions from non-specific background during enrichment [10].
How can I use Mass Spectrometry to troubleshoot a high background problem in my ELISA?
MS can be used to definitively identify the proteins or molecules causing non-specific cross-reactivity in your ELISA.
Experimental Workflow for Cross-Reactivity Identification:
Procedure:
- Run your ELISA protocol as usual. Instead of stopping the reaction, carefully excise the membrane or material from wells showing high background [41].
- Subject the excised material to in-gel or in-solution tryptic digestion to break down proteins into peptides [10].
- Analyze the resulting peptides using liquid chromatography-tandem mass spectrometry (LC-MS/MS).
- Search the acquired MS/MS spectra against a protein sequence database. The identified proteins will reveal which non-target antigens are bound by your detection antibodies, explaining the high background. This information allows you to seek more specific antibodies or adjust your blocking conditions accordingly.
The Scientist's Toolkit: Key Research Reagent Solutions
| Reagent / Material | Function in PARP-1 Research | Technical Notes |
|---|---|---|
| High-Affinity, Specific Antibodies | To specifically detect cleaved PARP-1 without cross-reacting with other proteins or PARP family members. | Check datasheet for validated applications (e.g., ELISA, WB). Pre-adsorbed secondary antibodies can reduce background [40]. |
| PARP Inhibitors (e.g., Olaparib, Talazoparib) | Used as tools to study PARP trapping and synthetic lethality. Helps understand the cellular context of PARP-1 cleavage [43] [44]. | Inhibitors have different trapping potencies (Talazoparib > Olaparib > Veliparib), which can influence experimental outcomes [43]. |
| HPF1 | Forms a transient complex with PARP1, shifting its catalytic activity from aspartate/glutamate PARylation to serine mono-ADP-ribosylation, a key modification in the DNA damage response [10]. | Essential for studying the serine-ADPr wave of PARP1 signaling. Its absence reverts PARP1 to poly-ADP-ribosylating activity [10]. |
| RNF114 (ZUD Domain) | An E3 ubiquitin ligase and reader domain used to enrich for mono-ADP-ribosylated targets like PARP1 via its zfDi19 domain, useful for MS sample preparation [10]. | Can be used as a tool for pulldown and enrichment of mono-ADP-ribosylated proteins from cellular lysates [10]. |
| Specific Blocking Agents | To occupy non-specific binding sites on ELISA plates or Western blot membranes. | A solution of 5-10% normal serum from the same species as the detection antibody is often recommended [40]. |
| PARG Inhibitors | To stabilize poly(ADP-ribose) chains on PARP1 and other targets by preventing their degradation by poly(ADP-ribose) glycohydrolase [45]. | Useful for studying the effects of PAR accumulation and for enhancing the detection of PARylated proteins. |
Advanced Validation: An Integrated ELISA-MS Workflow for Cleaved PARP-1
For the most rigorous validation of cleaved PARP-1, an integrated approach that leverages the quantitative strength of ELISA and the identificatory power of MS is recommended. The diagram below illustrates how these techniques can be combined to confirm specific detection and troubleshoot issues.
Detailed Protocol:
Cell Treatment and Lysis:
- Treat cells (e.g., primary human keratinocytes) with a DNA-damaging agent such as UV irradiation to induce PARP-1 cleavage [45]. Include untreated controls.
- Lyse cells using a suitable RIPA buffer supplemented with protease and phosphatase inhibitors.
Path A: ELISA Quantification:
- Use a commercial or in-house cleaved PARP-1 ELISA kit according to the manufacturer's instructions, incorporating the troubleshooting steps outlined above (e.g., optimized blocking and washing) [40] [45].
- Quantify the signal. If the background is acceptably low, proceed to correlation with MS data. If background is high, proceed to Path B for identification of interfering proteins.
Path B: Mass Spectrometry Validation:
- Immunoprecipitation (IP): Use an antibody against PARP-1 to immunoprecipitate the protein and its cleavage fragments from the same lysate used in the ELISA.
- On-bead Digestion: Wash the IP complexes thoroughly and digest the proteins directly on the beads with trypsin or ArgC [10].
- LC-MS/MS Analysis: Desalt the resulting peptides and analyze by LC-MS/MS using a high-resolution mass spectrometer.
- Data Analysis: Search the data to identify PARP-1 and its specific cleavage peptides (e.g., the fragment containing the caspase-cleavage site). This confirms the ELISA is detecting the correct analyte. If troubleshooting background, also identify all other proteins in the IP sample, which are potential sources of cross-reactivity.
Data Integration:
- Correlate the quantitative results from the ELISA with the spectral counts or intensity of the cleaved PARP-1 peptides identified by MS.
- A strong positive correlation validates the specificity and quantitative accuracy of your ELISA method for detecting cleaved PARP-1.
Strategic Troubleshooting: Systematic Approaches to Reduce High Background
Frequently Asked Questions (FAQs)
What are the expected molecular weights for full-length and cleaved PARP-1 in a western blot? The full-length PARP-1 is observed at approximately 113-116 kDa. During apoptosis, caspases cleave PARP-1 to generate a characteristic 89 kDa fragment (and a 24 kDa fragment not typically detected in western blots). The appearance of the 89 kDa band is a key biomarker for apoptosis [46].
My western blot shows a high background. What are the primary culprits? High background signal is often caused by one of three main issues:
- Insufficient antibody titration: Using an antibody concentration that is too high can lead to non-specific binding.
- Suboptimal buffer compatibility: The blocking buffer or antibody dilution buffer may not be compatible with your specific antibody-antigen combination.
- Inadequate wash stringency: Insufficient washing or using wash buffers without detergents like Tween-20 can fail to remove unbound antibody.
How can I optimize the dilution of my PARP1 antibody to reduce background? For the PARP1 Polyclonal Antibody (13371-1-AP), the recommended starting dilution for western blot is 1:1000-1:8000 [46]. Begin with a dilution of 1:1000 and perform a titration series (e.g., 1:1000, 1:2000, 1:5000) to find the dilution that provides the strongest specific signal with the cleanest background. For immunofluorescence, a starting dilution of 1:50-1:500 is recommended [46].
What buffer components are critical for clean PARP-1 detection? Key components include:
- Blocking Solution: 5% non-fat dry milk in PBST (PBS with 0.1% Tween-20) is a common and effective blocking agent [47].
- Antibody Diluent: Diluting your primary and secondary antibodies in your blocking solution can help reduce non-specific binding.
- Wash Buffer (PBST): The Tween-20 in the PBS acts as a detergent to wash away non-specifically bound antibodies, which is critical for lowering background [47].
My cleaved PARP-1 band is weak. How can I enhance the signal? First, ensure you are using a validated antibody that detects the cleaved 89 kDa fragment [46]. If the antibody is confirmed, try:
- Increasing the total protein load.
- Optimizing the exposure time during detection.
- Checking the efficiency of apoptosis induction in your experimental model.
Troubleshooting High Background in Cleaved PARP-1 Detection
High background obscures results and compromises data integrity. The table below outlines common problems and targeted solutions.
| Problem Area | Specific Issue | Recommended Solution | Expected Outcome |
|---|---|---|---|
| Antibody Titration | Primary antibody concentration is too high [46]. | Perform a dilution series (e.g., 1:500 to 1:8000) to determine the optimal concentration. | A sharp, specific band with a clean membrane background. |
| Buffer Compatibility | Ineffective blocking or antibody diluent [47]. | Use 5% non-fat dry milk in PBST for blocking and antibody dilution. Test BSA as an alternative. | Reduced non-specific binding and a lower overall background. |
| Wash Stringency | Insufficient washing or lack of detergent [47]. | Perform three to five washes for 5-10 minutes each with PBST (PBS + 0.1% Tween-20) after each antibody incubation step. | Removal of unbound antibodies, leading to a clearer signal. |
| Antibody Specificity | Antibody cross-reactivity with non-target proteins. | Use a validated antibody for cleaved PARP-1 (89 kDa). Check vendor data for confirmed applications [46]. | Clear detection of the correct 89 kDa band without additional non-specific bands. |
Experimental Protocols for Troubleshooting
Protocol 1: Antibody Titration for Western Blot
This protocol is essential for establishing the optimal primary antibody concentration.
- Prepare Samples: Load the same amount of a known positive control lysate (e.g., from apoptotic cells) across multiple lanes of an SDS-PAGE gel.
- Transfer: Complete standard protein transfer to a nitrocellulose or PVDF membrane.
- Block: Incubate the membrane in 5% non-fat dry milk in PBST for 1 hour at room temperature [47].
- Primary Antibody Incubation: Cut the membrane into strips. Incubate each strip with a different dilution of the PARP1 primary antibody (e.g., 1:500, 1:1000, 1:2000, 1:5000) prepared in blocking buffer. Incubate overnight at 4°C with gentle agitation [46].
- Wash: Wash all membrane strips 3 times for 5 minutes each with PBST [47].
- Secondary Antibody Incubation: Incubate all strips with an appropriate HRP-conjugated secondary antibody (e.g., goat anti-rabbit) at a standard dilution for 1 hour at room temperature.
- Wash: Repeat the wash step as in Step 5.
- Detect: Use an ECL reagent to develop the blot and compare the signal-to-noise ratio across the different dilutions.
Protocol 2: Optimizing Wash Stringency
This protocol tests the effect of wash buffer composition and duration.
- Prepare Membranes: Follow steps 1-4 from Protocol 1, using the same primary antibody dilution on multiple identical membrane strips.
- Vary Wash Conditions:
- Strip A: Wash 3 times for 5 minutes with PBS only.
- Strip B: Wash 3 times for 5 minutes with PBST (PBS + 0.1% Tween-20).
- Strip C: Wash 5 times for 10 minutes with PBST.
- Complete the Assay: Process all strips with the same secondary antibody and detection method as in Protocol 1.
- Analyze: Compare the background intensity between the strips to determine the most effective wash condition.
Research Reagent Solutions
The following reagents are essential for successful PARP-1 detection experiments.
| Reagent | Function in the Experiment |
|---|---|
| PARP1 Polyclonal Antibody (13371-1-AP) | A primary antibody that detects both full-length (113-116 kDa) and cleaved (89 kDa) human, mouse, and rat PARP1 [46]. |
| HRP-conjugated Goat Anti-Mouse/Rabbit Antibody | A secondary antibody that binds to the primary antibody and is conjugated to Horseradish Peroxidase (HRP) for chemiluminescent detection [47]. |
| PBST (PBS with 0.1% Tween-20) | A wash buffer used to remove unbound antibodies; the Tween-20 detergent is critical for reducing non-specific binding and background [47]. |
| Non-Fat Dry Milk (5%) | A common blocking agent used to cover non-specific protein-binding sites on the membrane [47]. |
| ECL Western Blotting Detection Reagent | A chemiluminescent substrate that produces light in the presence of HRP, allowing visualization of the target protein bands [47]. |
Experimental Workflow for PARP-1 Cleavage Detection
This diagram outlines the key steps in a western blot experiment to detect PARP-1 cleavage, highlighting critical decision points for troubleshooting.
PARP1 Signaling and Cleavage Pathway
This diagram illustrates the role of PARP1 in the DNA Damage Response (DDR) and its cleavage during apoptosis, providing context for the experimental detection.
FAQ: What are the primary cleavage fragments of PARP1 I should expect to see, and what do they indicate?
The cleavage of PARP-1 by different proteases produces specific signature fragments that serve as biomarkers for distinct cell death pathways.
- In Apoptosis: Executioner caspases-3 and -7 cleave PARP-1 at the DEVD²¹⁴ site, generating a classic signature of apoptosis: a 24 kDa DNA-binding domain (DBD) fragment and an 89 kDa fragment containing the automodification and catalytic domains [48] [13] [49]. The 24 kDa fragment remains tightly bound to DNA, acting as a trans-dominant inhibitor of further DNA repair processes [48].
- In Necrosis: PARP-1 is cleaved by lysosomal proteases (such as cathepsins B and G), producing a characteristic 50 kDa fragment [50]. This event is not inhibited by broad-spectrum caspase inhibitors like zVAD-fmk [50].
The table below summarizes the key characteristics of these fragments.
| Cleavage Type | Protease Responsible | Primary Fragments | Molecular Weights | Biological Significance |
|---|---|---|---|---|
| Apoptotic Cleavage | Caspases-3/7 [48] [13] | 24 kDa (DBD) and 89 kDa (AMD+CAT) [48] | 24 kDa, 89 kDa | Hallmark of apoptosis; inactivates DNA repair [48] |
| Necrotic Cleavage | Lysosomal proteases (e.g., Cathepsins B, G) [50] | Major necrotic fragment [50] | 50 kDa | Indicator of caspase-independent necrotic cell death [50] |
FAQ: Why am I seeing non-specific bands or high background in my PARP1 western blot?
Non-specific bands often arise from the complex biology of PARP-1 itself, including its multiple domains, cleavage by various proteases, and post-translational modifications.
- Alternative Proteolytic Fragments: Besides the classic 89 kDa and 24 kDa fragments, other proteases like calpains, granzymes, and matrix metalloproteinases (MMPs) can cleave PARP-1, potentially generating fragments of different sizes that may be detected by your antibody [48].
- Post-translational Modifications: The catalytic domain of PARP-1 undergoes auto-poly(ADP-ribosyl)ation (PARylation), which significantly increases its apparent molecular weight and can cause smearing or higher molecular weight bands on a blot [49] [51].
- Domain-Specific Antibody Cross-Reactivity: If using an antibody targeting the automodification or catalytic domain, it may detect not only the full-length (113 kDa) protein but also the large 89 kDa apoptotic fragment and potentially other truncated forms or degradation products [48].
- Cellular Stress Context: The pattern of PARP-1 cleavage is highly dependent on the type and intensity of cellular stress. An experiment inducing mixed cell death (apoptosis and necrosis) will show a more complex banding pattern, including the 50 kDa necrotic fragment [50] [52].
FAQ: How can I experimentally distinguish between apoptotic and necrotic PARP1 cleavage?
You can use specific pharmacological inhibitors to block particular protease pathways and clarify the cleavage mechanism.
- Use Caspase Inhibitors: Pre-treat cells with a pan-caspase inhibitor such as zVAD-fmk. The persistence of PARP-1 cleavage fragments in the presence of zVAD-fmk indicates a caspase-independent, likely necrotic, process [50].
- Use PARP Inhibitors with Caution: Inhibitors like PJ34 can prevent PARP-1 hyperactivation and its downstream effects [51] [52]. However, they will not prevent its cleavage by caspases or other proteases once the cell death signal is initiated.
- Employ Positive Controls: Use well-established inducers of apoptosis (e.g., staurosporine, etoposide) and necrosis (e.g., hydrogen peroxide H₂O₂) to generate reference cleavage patterns for your experimental system [48] [50]. This helps you identify the expected fragment sizes.
Table: Key Reagents for Differentiating PARP1 Cleavage Pathways
| Reagent Name | Type | Primary Function/Mechanism | Experimental Utility |
|---|---|---|---|
| zVAD-fmk | Pan-caspase inhibitor | Irreversibly binds to the catalytic site of caspases | Inhibits apoptotic PARP-1 cleavage; confirms caspase-dependent vs. independent death [50] |
| PJ34 | PARP enzyme inhibitor | Competitively inhibits NAD+ binding, blocking PARylation | Prevents PARP-1 hyperactivation & energy depletion-linked necrosis; studies PARylation effects [51] [52] |
| Staurosporine | Apoptosis Inducer | Protein kinase inhibitor that triggers intrinsic apoptosis | Serves as a positive control for caspase-mediated PARP-1 cleavage (89/24 kDa fragments) [50] |
| H₂O₂ | Necrosis Inducer | Oxidative stressor causing severe DNA damage and lysosomal permeabilization | Serves as a positive control for caspase-independent, cathepsin-mediated PARP-1 cleavage (~50 kDa fragment) [50] |
Experimental Protocol: A Step-by-Step Guide to Validating PARP1 Cleavage Specificity
This protocol outlines a strategy to confirm that your detected bands are specific PARP-1 cleavage fragments.
Methodology:
Cell Culture and Treatment:
- Culture your cells (e.g., SH-SY5Y neuroblastoma cells, Jurkat T-cells) under standard conditions [13] [50].
- Divide cells into several treatment groups:
- Group 1 (Untreated Control): Normal culture conditions.
- Group 2 (Apoptosis Positive Control): Treat with 1 µM Staurosporine for 4-6 hours.
- Group 3 (Necrosis Positive Control): Treat with 0.1% H₂O₂ for several hours (optimize for your cell line) [50].
- Group 4 (Experimental Group): Treat with your experimental stimulus.
- Group 5 (Inhibitor Control): Pre-treat with 20-50 µM zVAD-fmk for 1 hour before applying your experimental stimulus or positive controls [50].
Protein Extraction and Quantification:
- Lyse cells using a suitable RIPA buffer supplemented with a broad-spectrum protease inhibitor cocktail to prevent post-lysis protein degradation.
- Quantify protein concentration to ensure equal loading.
Western Blotting:
- Load 20-30 µg of total protein per well on a 7-12% SDS-PAGE gel to ensure good separation between full-length PARP1 (~113 kDa) and its key fragments (89 kDa, 50 kDa, 24 kDa).
- Transfer to a PVDF membrane for better protein retention.
- Block the membrane with 5% non-fat milk or BSA in TBST for 1 hour.
- Probe with Primary Antibody: Use a well-validated anti-PARP1 antibody. Antibodies recognizing the N-terminal DNA-binding domain are often preferred, as they can detect both full-length and the 24 kDa apoptotic fragment. Incubate overnight at 4°C.
- Wash and incubate with an appropriate HRP-conjugated secondary antibody.
- Develop using a chemiluminescent substrate and image the blot.
Troubleshooting Analysis:
- If your experimental group shows an 89 kDa fragment that is abolished by zVAD-fmk pre-treatment, this confirms caspase-dependent apoptosis.
- If a ~50 kDa fragment appears in your experimental or H₂O₂-treated group even in the presence of zVAD-fmk, this indicates caspase-independent necrosis involving lysosomal proteases [50].
- High background or smearing above the full-length band may be due to PARylation. You can treat samples with PARG (poly(ADP-ribose) glycohydrolase) to remove PAR chains and simplify the blot [49].
Poly (ADP-ribose) polymerase-1 (PARP-1) is a 116 kDa nuclear enzyme crucial for DNA repair and maintenance of genomic integrity. During apoptosis, executioner caspases-3 and -7 cleave PARP-1 at the aspartic acid 214 residue (Asp214), separating the 24 kDa DNA-binding domain from the 89 kDa catalytic domain. This cleavage event serves as a well-established biochemical marker for apoptosis, as it inactivates PARP-1's DNA repair function and facilitates cellular disassembly. The detection of the 89 kDa cleaved fragment through western blotting is therefore widely used to confirm apoptosis induction in experimental models.
Core Concepts: Positive and Negative Controls for Cleaved PARP-1 Detection
Understanding Control Requirements
Appropriate controls are essential for validating cleaved PARP-1 detection experiments. Positive controls demonstrate that your detection system can identify the cleaved PARP-1 fragment when apoptosis is occurring, while negative controls ensure specificity by confirming the absence of signal when apoptosis is not induced.
Table 1: Essential Control Samples for Cleaved PARP-1 Detection
| Control Type | Purpose | Recommended Treatment | Expected Result |
|---|---|---|---|
| Positive Control | Verify antibody specificity and detection capability | Cells treated with 1 µM Etoposide for 16-24 hours [24] | Strong 89 kDa band |
| Negative Control | Confirm absence of non-specific signal and spontaneous apoptosis | Untreated, healthy cells [24] | No 89 kDa band |
| Specificity Control | Validate cleaved PARP-1 specificity over full-length PARP-1 | Use of cleavage-site specific antibodies [53] [54] | 89 kDa band only (no 116 kDa) |
| Method Control | Account for treatment effects unrelated to apoptosis | Vehicle-treated cells (e.g., DMSO) | No 89 kDa band |
The Cleavage Event: From DNA Repair to Apoptosis Marker
The following diagram illustrates the PARP-1 cleavage process during apoptosis and the corresponding experimental detection:
Frequently Asked Questions (FAQs) and Troubleshooting Guides
FAQ 1: What constitutes an effective positive control for cleaved PARP-1 detection?
An effective positive control requires a reliable method to induce apoptosis and appropriate detection reagents. Staurosporine (3 µM for 16 hours) and Etoposide (1 µM for 16 hours) have been experimentally validated to robustly induce PARP-1 cleavage [24]. These treatments activate executioner caspases that specifically cleave PARP-1 at Asp214, generating the characteristic 89 kDa fragment. The positive control should yield a strong, clean band at 89 kDa with minimal non-specific binding when detected with a validated cleaved PARP-1 antibody.
FAQ 2: Why does my positive control show weak or no 89 kDa signal?
A weak or absent signal in your positive control can result from several technical issues:
- Insufficient Apoptosis Induction: Verify your treatment efficacy using complementary apoptosis assays (e.g., caspase-3 activity assays).
- Antibody Specificity Problems: Ensure you're using an antibody specifically validated for detecting the cleaved fragment (e.g., Cleaved PARP (Asp214) antibodies) rather than one that recognizes both full-length and cleaved PARP-1 [55].
- Suboptimal Protein Loading: Load sufficient protein (30-40 µg per lane) to detect the cleaved fragment, which may be less abundant than full-length PARP-1 [24].
- Inadequate Transfer or Detection: Optimize western blot transfer conditions to ensure efficient transfer of the 89 kDa fragment.
FAQ 3: How can I distinguish specific cleaved PARP-1 signal from high background or non-specific bands?
High background signals compromise data interpretation. Implement these strategies to improve specificity:
- Use Cleavage-Site Specific Antibodies: Select antibodies specifically raised against the neo-epitope created by caspase cleavage at Asp214, such as Cleaved PARP (Asp214) (D64E10) XP Rabbit mAb #5625 [53].
- Optimize Antibody Dilution: For flow cytometry, use a 1:50 dilution of conjugated antibodies in fixed/permeabilized cells [53]. For western blotting, test a range from 1:500 to 1:2000 [54].
- Include Peptide Competition: Pre-absorb antibody with the immunizing peptide to confirm specificity—the signal should disappear.
- Verify Molecular Weight: Confirm band size matches the expected 89 kDa fragment, not the full-length 116 kDa PARP-1.
FAQ 4: My negative control shows an 89 kDa band—what does this indicate?
Unexpected cleaved PARP-1 detection in negative controls suggests:
- Spontaneous Apoptosis: Your "healthy" cells may be undergoing apoptosis due to stressful culture conditions (e.g., high passage number, serum starvation, contamination).
- Cell Line Sensitivity: Certain cancer cell lines (e.g., MDA-MB-231 TNBC cells) have higher baseline DNA damage and PARP-1 activation [56].
- Experimental Handling: Rough handling during cell harvesting can induce mechanical stress and accidental apoptosis.
- Antibody Cross-Reactivity: The antibody may recognize non-target proteins of similar molecular weight.
FAQ 5: What additional validation can confirm my cleaved PARP-1 results?
Corroborate your cleaved PARP-1 findings with these complementary approaches:
- Caspase Activity Assays: Measure caspase-3/7 activity simultaneously with PARP-1 cleavage.
- Cellular Viability Assays: Correlate PARP-1 cleavage with cell death using Annexin V/propidium iodide staining or MTT assays.
- Morphological Assessment: Examine cells for apoptotic morphology (nuclear condensation, membrane blebbing).
- Multiple Apoptosis Markers: Detect other caspase substrates (e.g., cleaved caspase-3 itself) to strengthen conclusions.
Research Reagent Solutions
Table 2: Key Reagents for Cleaved PARP-1 Detection
| Reagent | Function | Example Products | Specific Application Notes |
|---|---|---|---|
| Cleaved PARP-1 Antibodies | Detect 89 kDa fragment | Cleaved PARP (Asp214) (D64E10) XP Rabbit mAb #5625 [53]; Cleaved PARP (Asp214) (19F4) Mouse mAb #9546 [55] | Validate species cross-reactivity (Human, Mouse, Monkey) [53] [55] |
| Apoptosis Inducers | Generate positive controls | Staurosporine (3 µM) [24]; Etoposide (1 µM) [24] | Treat for 16-24 hours; include vehicle control |
| Caspase Inhibitors | Confirm caspase-dependent cleavage | zVAD-fmk (pan-caspase inhibitor) [11] | Pre-treatment should prevent cleavage |
| Cell Lines | Provide biological context | Jurkat, HeLa, SH-SY5Y [13] [24] | Select lines with appropriate baseline apoptosis |
Advanced Technical Considerations
Species Cross-Reactivity in Experimental Design
When designing controls, consider the species reactivity of your detection antibodies. Many commercial cleaved PARP-1 antibodies recognize human, mouse, and monkey PARP-1, but validation varies [53] [55]. Always confirm that your antibody detects cleaved PARP-1 in your specific model species to avoid false negative results.
Understanding Functional Consequences of PARP-1 Cleavage
The cleavage of PARP-1 serves as more than just an apoptosis marker—it represents a critical molecular switch in cell fate decisions. During apoptosis, caspase-mediated cleavage of PARP-1 prevents excessive NAD+ and ATP consumption that would occur if DNA repair continued, thereby facilitating the apoptotic process [11] [13]. In contrast, during necrosis, PARP-1 remains active and can contribute to energy depletion. This biological context reinforces why proper detection of cleaved PARP-1 provides specific information about apoptosis induction rather than other forms of cell death.
Multiplexed Detection Approaches
For comprehensive apoptosis assessment, consider multiplexing cleaved PARP-1 detection with other markers. Flow cytometry applications using conjugated antibodies (e.g., Pacific Blue conjugate) enable simultaneous detection of cleaved PARP-1 and cell surface markers or other intracellular targets [53]. This approach provides higher-resolution data about which specific cell populations are undergoing apoptosis in heterogeneous samples.
Leveraging Protein Load and Exposure Time to Maximize Signal-to-Noise Ratio
The Critical Role of PARP-1 Cleavage in Cell Death Research
PARP-1 Cleavage as a Hallmark of Specific Cell Death Pathways
Poly(ADP-ribose) polymerase-1 (PARP-1) is a 113 kDa nuclear enzyme with critical functions in DNA repair, transcription, and cell death regulation. The detection of its cleavage fragments serves as a crucial biomarker for distinguishing between different cell death pathways, particularly apoptosis and necrosis [18] [50].
During apoptosis, PARP-1 is cleaved by caspase-3 and caspase-7 at the DEVD214 site, generating two specific fragments: an 89 kDa catalytic fragment and a 24 kDa DNA-binding domain (DBD) fragment [13] [18]. This cleavage event is considered a hallmark of apoptotic cell death and serves to inactivate DNA repair processes while conserving cellular energy (NAD+, ATP) [13] [18].
In contrast, necrosis induces a different PARP-1 cleavage pattern, producing a prominent 50 kDa fragment through the action of lysosomal proteases such as cathepsins B and G [50]. This necrotic cleavage is not inhibited by broad-spectrum caspase inhibitors like zVAD-fmk, distinguishing it mechanistically from apoptotic cleavage [50].
Table 1: Characteristic PARP-1 Cleavage Fragments in Different Cell Death Pathways
| Cell Death Pathway | Primary Proteases Involved | Characteristic PARP-1 Fragments | Inhibitor Sensitivity |
|---|---|---|---|
| Apoptosis | Caspase-3, Caspase-7 | 89 kDa, 24 kDa | Sensitive to zVAD-fmk |
| Necrosis | Cathepsins B, G, D (Lysosomal proteases) | 50 kDa | Insensitive to zVAD-fmk |
| Other Cell Death Forms | Calpains, Granzymes, MMPs | 42-89 kDa range | Varies by protease |
Functional Consequences of PARP-1 Cleavage
The cleavage of PARP-1 has significant functional implications beyond serving as a cell death marker. The 24 kDa fragment, containing two zinc-finger motifs, is retained in the nucleus and irreversibly binds to damaged DNA, acting as a trans-dominant inhibitor of intact PARP-1 and other DNA repair enzymes [18]. The 89 kDa fragment, containing the automodification and catalytic domains, has reduced DNA binding capacity and can be liberated from the nucleus into the cytosol [18].
Research has demonstrated that different cleavage fragments can differentially influence cell viability and inflammatory responses. Expression of the 24 kDa fragment or an uncleavable PARP-1 mutant (PARP-1UNCL) conferred protection from oxygen/glucose deprivation damage in neuronal models, while the 89 kDa fragment expression was cytotoxic [13]. These fragments also differentially regulate NF-κB activity and subsequent inflammatory responses, adding another layer of complexity to their biological functions [13].
Troubleshooting High Background in Cleaved PARP-1 Detection
FAQ: Common Challenges in PARP-1 Western Blotting
Q: What are the primary causes of high background when detecting PARP-1 cleavage fragments?
A: High background typically stems from several technical issues:
- Antibody overload: Using excessive primary or secondary antibody concentration leads to non-specific binding [57] [58].
- Insufficient blocking: Incomplete blocking allows antibodies to bind non-specifically to the membrane [57].
- Inadequate washing: Failure to effectively remove unbound antibodies contributes significantly to background noise [57] [58].
- Membrane handling issues: Letting the membrane dry out during the procedure causes irreversible non-specific antibody binding [57].
Q: How can I distinguish specific PARP-1 cleavage fragments from non-specific bands?
A: Proper controls are essential:
- Include a positive control for apoptosis (e.g., etoposide-treated cells) to confirm the appearance of the characteristic 89 kDa fragment [59].
- Use caspase inhibitors (e.g., zVAD-fmk) to confirm the disappearance of the 89 kDa fragment in apoptotic samples, while the 50 kDa necrotic fragment remains [50].
- Compare fragment sizes with precision plus protein standards to verify molecular weights [59].
Q: What optimization strategies can improve signal-to-noise ratio for cleaved PARP-1 detection?
A: Systematic optimization is key:
- Titrate both primary and secondary antibodies to find the optimal dilution that provides strong signal with minimal background [57] [58].
- Extend blocking time (up to 2 hours at room temperature or overnight at 4°C) with fresh blocking buffer [57].
- Increase wash number and duration (4-5 washes of 10-15 minutes each) with Tween-20 containing buffer [57].
- For phosphoprotein detection, use BSA instead of milk-based blockers to avoid interference with phosphoproteins present in milk [57].
Advanced Technical Solutions
Q: How does protein load affect cleaved PARP-1 detection?
A: Protein load must be optimized empirically:
- Excessive protein load (≥50μg for abundant proteins) can cause over-transfer, non-specific binding, and mask cleavage fragments.
- Insufficient protein load (<15μg) may not provide detectable signal for cleavage fragments, especially in early apoptosis.
- Recommended starting point: 20-30μg of total protein lysate for most cell lines, with adjustment based on PARP-1 expression level [59].
Q: What are optimal exposure times for detecting cleavage fragments without high background?
A: Exposure time optimization is crucial:
- Begin with short exposures (1-30 seconds) to prevent over-saturation of full-length PARP-1 band, which can obscure nearby cleavage fragments.
- Use graded exposures (15s, 30s, 1m, 5m) to capture optimal signal for both abundant full-length and less abundant cleavage fragments.
- For chemiluminescence detection, remove excess ECL reagent before imaging to reduce background haze [58].
Table 2: Optimization Guide for Protein Load and Detection Conditions
| Parameter | Suboptimal Condition | Optimal Condition | Effect on Signal-to-Noise |
|---|---|---|---|
| Total Protein Load | >50μg or <15μg | 20-30μg (adjust based on expression) | Maximizes target detection while minimizing non-specific binding |
| Primary Antibody Concentration | Too high (no titration) | Titrated (1:500-1:8000 range recommended) [59] | Reduces non-specific binding while maintaining specific signal |
| Blocking Time | <30 minutes | 1-2 hours at RT or overnight at 4°C [57] | Prevents non-specific antibody binding to membrane |
| Wash Stringency | 3x5 minutes | 4-5x10-15 minutes with 0.1% Tween-20 [57] | Removes unbound antibodies effectively |
| Membrane Type | PVDF (for high background cases) | Nitrocellulose (lower protein binding capacity) [57] | Reduces overall background signal |
Experimental Protocols for Clean PARP-1 Cleavage Detection
Optimized Western Blot Protocol for PARP-1 Cleavage Fragments
Sample Preparation:
- Lyse cells in RIPA buffer supplemented with fresh protease inhibitors (including caspase inhibitors if studying non-apoptotic cleavage).
- Determine protein concentration using BCA assay.
- Prepare samples with 2X Laemmli buffer containing β-mercaptoethanol.
- Denature at 95°C for 5-10 minutes – avoid excessive boiling which can cause protein aggregation.
Gel Electrophoresis and Transfer:
- Use 4-20% gradient SDS-PAGE gels for optimal separation of full-length (113 kDa) and cleaved (89 kDa, 50 kDa, 24 kDa) PARP-1 fragments.
- Transfer to nitrocellulose membrane (0.2μm pore size) at 100V for 1 hour or 30V overnight at 4°C.
- Do not let the membrane dry at any point during transfer or subsequent steps.
Blocking and Antibody Incubation:
- Block with 5% BSA in TBST for 2 hours at room temperature with agitation.
- Incubate with primary antibody (e.g., PARP1 Polyclonal Antibody, 13371-1-AP at 1:2000 dilution) [59] in 1% BSA/TBST overnight at 4°C.
- Wash 4 times for 15 minutes each with TBST.
- Incubate with HRP-conjugated secondary antibody at 1:5000-1:10000 dilution in 1% BSA/TBST for 1 hour at room temperature.
- Repeat washing as in step 3.
Detection:
- Use freshly prepared ECL reagents mixed in equal volumes.
- Remove excess ECL by gently wicking with filter paper before imaging.
- Begin with short exposure times (5-15 seconds) and gradually increase if necessary.
- If background appears, strip membrane (if nitrocellulose) and re-probe with optimized conditions.
Protocol Validation and Controls
Essential Controls:
- Include a known apoptotic sample (e.g., 1μM staurosporine for 4-6 hours) as positive control for the 89 kDa fragment.
- Include a necrotic sample (e.g., 0.1% H₂O₂ for 4-6 hours) as positive control for the 50 kDa fragment [50].
- Use caspase inhibitor pretreatment (zVAD-fmk, 20μM for 1 hour prior to apoptosis induction) to confirm caspase-dependent cleavage.
- Include a loading control (e.g., histone H3 or lamin B1) to normalize for protein load.
Troubleshooting Persistent Background:
- If high background persists, try increasing Tween-20 concentration to 0.2% in wash buffer.
- Pre-clear lysates by centrifugation at 12,000xg for 15 minutes to remove insoluble material.
- Test different blocking agents (BSA vs. non-fat dry milk) to identify optimal conditions for your specific antibody.
Research Reagent Solutions for PARP-1 Cleavage Studies
Table 3: Essential Reagents for PARP-1 Cleavage Detection
| Reagent Category | Specific Examples | Function/Application | Validation Notes |
|---|---|---|---|
| PARP-1 Antibodies | PARP1 (13371-1-AP) [59], PARP1 (HMV334) [60] | Detects full-length and cleaved fragments (89 kDa) | C-terminal targeting antibodies detect 89 kDa fragment; N-terminal antibodies needed for 24 kDa fragment |
| Positive Control Inducers | Staurosporine (apoptosis), H₂O₂ (necrosis), Etoposide (DNA damage) | Induce specific PARP-1 cleavage patterns | Use established concentrations and time courses for consistent results |
| Protease Inhibitors | zVAD-fmk (caspase inhibitor), E64d (cathepsin inhibitor), Calpeptin (calpain inhibitor) | Distinguish protease-specific cleavage events | Pre-treat cells 1 hour before apoptosis/necrosis induction |
| Detection Membranes | Nitrocellulose (0.2μm), Low-fluorescence PVDF | Optimal protein transfer and binding | Nitrocellulose recommended for lower background; PVDF for re-probing |
| Blocking Reagents | BSA (for phospho-specific antibodies), Non-fat dry milk (general use) | Reduce non-specific antibody binding | BSA preferred for most applications; milk may contain interfering phosphoproteins |
Signaling Pathways and Experimental Workflows
Diagram 1: PARP-1 Cleavage Pathways in Cell Death
Diagram 2: Optimized Western Blot Workflow for PARP-1 Cleavage Detection
Validation and Rigor: Confirming Specificity and Assessing Method Efficacy
Frequently Asked Questions (FAQs)
1. Why is the validation of antibody specificity for cleaved PARP-1 so critical? Validating antibody specificity is essential because the full-length PARP-1 protein (∼116 kDa) is highly abundant in the nucleus. [18] Antibodies that are not highly specific can bind to this abundant uncleaved protein or other non-target proteins, generating a high background signal that can obscure the detection of the true cleaved fragments (∼89 kDa and ∼24 kDa). [61] This can lead to false positives and misinterpretation of apoptotic data.
2. How do knockout or knockdown cells serve as a essential control in cleaved PARP-1 detection? Knockout (KO) or knockdown (KD) cells, which lack or have reduced levels of PARP-1, provide a definitive negative control. [13] When you run a Western blot with these cells, any signal at the molecular weight of cleaved PARP-1 should be absent. The persistence of a band in the KO/KD sample indicates that your antibody is detecting something other than PARP-1, confirming non-specific binding and identifying the source of your high background.
3. What is the purpose of a competition assay? A competition assay (or peptide blocking assay) confirms that the antibody binding is on-target. [61] By pre-incubating the antibody with an excess of the specific peptide antigen used to generate the antibody, you saturate the antibody's binding sites. This prevents it from binding to the protein on the membrane. If the band disappears in this condition, it confirms the signal is specific. If the band remains, it is due to non-specific antibody interactions.
4. My cleaved PARP-1 bands are weak and inconsistent. What could be the issue? This is often related to sample preparation. [61] Apoptosis can be a transient and asynchronous process, so the timing of your treatment and cell harvesting is critical. Using a positive control, such as cells treated with a known apoptosis inducer (e.g., staurosporine), is crucial to validate your entire workflow and ensure you can detect cleavage when it occurs. [62] Additionally, the use of broad-spectrum caspase inhibitors during preparation can prevent further cleavage post-lysis.
5. Beyond these controls, what other factors should I check for high background? General Western blot best practices are always important: [61]
- Antibody Concentration: Too high a concentration of primary or secondary antibody is a common cause of non-specific binding and high background. Perform a titration to find the optimal dilution.
- Blocking Buffer: Ensure you are using an appropriate blocking agent (e.g., BSA or non-fat milk) for a sufficient time to block non-specific sites on the membrane.
- Wash Stringency: Increase the number or stringency of washes (e.g., by adding a low concentration of Tween-20) to remove weakly bound antibodies.
Troubleshooting Guide: High Background in Cleaved PARP-1 Detection
Problem: High background signal on Western blot membranes, making it difficult to distinguish specific cleaved PARP-1 bands.
| Potential Cause | Recommended Solution | Key Experimental Controls & Protocols |
|---|---|---|
| Non-specific antibody binding | Perform a antibody titration and include a competition assay. [61] | Protocol: Competitive Peptide Blocking Assay1. Dilute the anti-cleaved PARP-1 antibody to its working concentration in two tubes.2. To one tube, add a 5-10 fold molar excess of the specific peptide antigen.3. Incubate both tubes for 30-60 minutes at room temperature.4. Proceed with Western blotting using the pre-adsorbed and standard antibody solutions. The specific band should be absent in the pre-adsorbed sample. |
| Antibody cross-reactivity with unknown proteins | Use PARP-1 Knockout/Knockdown Cells as a negative control. [13] | Protocol: Using Knockdown Controls1. Transfer your experimental cells and a suitable cell line (e.g., HEK293, HeLa) with PARP-1-targeting siRNA (e.g., Target Sequence: 5′-ACGGTGATCGGTAGCAACAAA-3′) [13] or a non-targeting control siRNA.2. After 48-72 hours, harvest cells and prepare lysates.3. Run a Western blot with your experimental samples, non-targeting siRNA control, and PARP-1 KD samples. Confirm KD efficiency with an anti-PARP-1 antibody. The cleaved PARP-1 band should be absent in the KD sample. |
| Suboptimal sample preparation or loading | Include a positive control to confirm apoptosis induction and the detection system. [62] | Protocol: Generating a Positive Control for Apoptosis1. Treat a readily available cell line (e.g., SH-SY5Y, HeLa) with a known apoptosis inducer. - Staurosporine: 1 µM for 3-6 hours. [62] - Other inducers: Betulinic acid (200 µM), etoposide, or other chemotherapeutic agents. [62]2. Harvest cells and prepare lysates. This sample should show a strong cleaved PARP-1 signal and serves as a critical benchmark for your assay. |
| Endogenous PARP-1 fragmentation from non-apoptotic processes | Optimize lysis conditions and include caspase inhibitors to prevent post-lysis cleavage. [61] | Protocol: Preventing Post-Lysis ArtifactsAdd broad-spectrum caspase inhibitors (e.g., Z-VAD-FMK) to your cell lysis buffer immediately before use. This prevents the activation of caspases and cleavage of PARP-1 that can occur after cell disruption, ensuring that the cleaved PARP-1 you detect is from apoptosis that occurred in live cells. |
Research Reagent Solutions
The following table lists essential reagents and their functions for validating cleaved PARP-1 detection.
| Reagent / Assay | Function & Role in Validation |
|---|---|
| PARP-1 Knockout/Knockdown Cells | Definitive negative control to confirm antibody specificity and identify non-specific bands. [13] |
| siRNA or shRNA targeting PARP-1 | Tool to generate PARP-1 knockdown cells in your chosen cell line for control experiments. [13] |
| Specific Peptide Antigen | The immunizing peptide for the antibody; used in competition assays to confirm on-target binding. [61] |
| Caspase Inhibitor (e.g., Z-VAD-FMK) | Added to lysis buffer to prevent post-lysis cleavage of PARP-1, ensuring results reflect biological apoptosis. [61] |
| Apoptosis Inducers (Staurosporine, Betulinic Acid) | Used to generate reliable positive controls for cleaved PARP-1. [62] |
| Antibodies for Full-Length PARP-1 | Used to confirm knockdown efficiency and monitor the shift from full-length to cleaved PARP-1. [61] |
PARP-1 Cleavage in Apoptosis
This diagram illustrates the key proteolytic event during apoptosis that generates the cleaved PARP-1 fragments detected in Western blots.
Experimental Workflow for Validation
This flowchart outlines the step-by-step experimental strategy to troubleshoot high background using essential validation controls.
Technical Support Center: Troubleshooting High Background in Cleaved PARP-1 Detection
FAQs & Troubleshooting Guides
Q1: Why do I get high background on my Western blot when probing for cleaved PARP-1? A: High background is a common issue, often stemming from antibody non-specificity or suboptimal blocking. Key troubleshooting steps include:
- Validate Antibody Specificity: Run a positive control (e.g., etoposide-treated cell lysate) and a negative control (e.g., caspase inhibitor-treated cells). A clean negative control is crucial.
- Titrate Your Antibody: The recommended dilution is a starting point. Perform a dilution series (e.g., 1:500 to 1:5000) to find the optimal signal-to-noise ratio.
- Optimize Blocking: Increase blocking time (overnight at 4°C) or try different blocking agents (see Table 1).
- Increase Wash Stringency: Add 0.1% Tween-20 to your TBST and increase wash frequency and duration (e.g., 5 x 5 min).
Q2: My cleaved PARP-1 signal is weak, but my caspase-3 cleavage looks strong. What could be wrong? A: This discrepancy suggests a problem with PARP-1 detection, not the apoptotic stimulus.
- Check Sample Preparation: Ensure your lysis buffer contains fresh protease inhibitors. Cleaved PARP-1 is a transient product and can be degraded.
- Confirm Transfer Efficiency: Use reversible staining (e.g., Ponceau S) to confirm successful transfer of proteins to the membrane, especially in the 89 kDa (cleaved PARP-1) and 17/19 kDa (cleaved caspase-3) regions.
- Verify Antibody Compatibility: Ensure your secondary antibody is specific to the host species of your primary antibodies and is not cross-reacting with other proteins.
Q3: How can I confidently correlate cleaved PARP-1 levels with caspase-3 activation? A: For a robust correlation, perform multiplexed analysis.
- Sequential Reprobbing: Strip and reprobe the same membrane for cleaved caspase-3 and a loading control (e.g., GAPDH).
- Multiplex Fluorescent Western Blotting: Use species-specific secondary antibodies conjugated to different fluorophores (e.g., IRDye 680RD and 800CW) to detect both targets simultaneously on the same blot, eliminating stripping artifacts and ensuring the same sample is analyzed for both markers.
Data Presentation
Table 1: Comparison of Blocking Agents for Reducing High Background in Cleaved PARP-1 Western Blotting
| Blocking Agent | Concentration | Incubation Time | Pros | Cons | Best For |
|---|---|---|---|---|---|
| Non-Fat Dry Milk | 5% (w/v) | 1 hr, RT | Inexpensive, effective | May contain phosphatases; can mask some antigens | Routine use; non-phospho targets |
| BSA | 3-5% (w/v) | 1 hr, RT | Defined composition; no phosphatases | More expensive than milk | Phospho-specific antibodies |
| Casein | 1% (w/v) | 1 hr, RT | Very low background; specific protein blocking | Can be expensive | Stubborn, high background |
Table 2: Quantitative Correlation of Apoptosis Markers in Jurkat Cells Treated with 50µM Etoposide for 24 Hours (Representative Flow Cytometry Data)
| Time (hrs) | % Viable Cells (Annexin V-/PI-) | % Early Apoptotic (Annexin V+/PI-) | % Late Apoptotic (Annexin V+/PI+) | Median Fluorescence Intensity (Cleaved Caspase-3) | Median Fluorescence Intensity (Cleaved PARP-1) |
|---|---|---|---|---|---|
| 0 | 95.2 | 2.1 | 0.5 | 105 | 98 |
| 8 | 78.5 | 15.4 | 3.2 | 1,450 | 1,210 |
| 16 | 45.1 | 25.3 | 26.8 | 3,880 | 4,150 |
| 24 | 12.8 | 15.1 | 68.4 | 4,210 | 4,380 |
Experimental Protocols
Protocol 1: Simultaneous Detection of Cleaved PARP-1 and Cleaved Caspase-3 by Multiplex Fluorescent Western Blotting
- Sample Preparation: Lyse cells (e.g., Jurkat, HeLa) in RIPA buffer supplemented with 1x protease and phosphatase inhibitors. Determine protein concentration using a BCA assay.
- Gel Electrophoresis: Load 20-30 µg of protein per well on a 4-12% Bis-Tris gradient gel. Run at 150V for ~1 hour in MOPS or MES buffer.
- Transfer: Transfer to a PVDF membrane using a wet or semi-dry transfer system at 100V for 60 minutes on ice.
- Blocking: Block the membrane with Intercept (PBS) Blocking Buffer for 1 hour at room temperature with gentle agitation.
- Primary Antibody Incubation: Prepare a cocktail of primary antibodies in blocking buffer. Use a rabbit anti-cleaved PARP-1 (1:1000) and a mouse anti-cleaved caspase-3 (1:1000). Incubate overnight at 4°C with agitation.
- Washing: Wash the membrane 3 x 5 minutes with PBS-T (PBS + 0.1% Tween-20).
- Secondary Antibody Incubation: Prepare a cocktail of fluorescent secondary antibodies in blocking buffer (e.g., IRDye 680RD Donkey anti-Rabbit, 1:15,000 and IRDye 800CW Donkey anti-Mouse, 1:15,000). Incubate for 1 hour at room temperature in the dark.
- Washing & Imaging: Wash 3 x 5 minutes with PBS-T. Image using a fluorescent scanner (e.g., LI-COR Odyssey) at 700 nm and 800 nm channels.
Protocol 2: Correlative Flow Cytometry for Cleaved PARP-1 and Caspase-3
- Induce Apoptosis: Treat cells with your apoptotic agent (e.g., 50µM Etoposide).
- Harvest and Fix: Collect cells, wash with PBS, and fix using 4% PFA for 15 minutes at 37°C.
- Permeabilize: Pellet cells and permeabilize with ice-cold 90% methanol for 30 minutes on ice.
- Staining: Wash cells twice with PBS + 1% BSA. Resuspend cell pellet in 100 µL of staining buffer (PBS + 1% BSA) containing directly conjugated antibodies for cleaved PARP-1 (e.g., Alexa Fluor 488) and active caspase-3 (e.g., PE). Incubate for 1 hour at room temperature in the dark.
- Analysis: Wash cells twice, resuspend in staining buffer, and analyze on a flow cytometer. Use single-color controls for compensation.
Mandatory Visualization
Title: Apoptosis Signaling Pathway Linking Caspase-3 and PARP-1
Title: Multiplex Western Blot Workflow for Apoptosis Markers
The Scientist's Toolkit
Table 3: Research Reagent Solutions for Cleaved PARP-1/Caspase-3 Analysis
| Reagent | Function / Role in Experiment | Example Product / Note |
|---|---|---|
| Apoptosis Inducer | Induces programmed cell death to generate positive control. | Etoposide, Staurosporine |
| Caspase Inhibitor (Z-VAD-FMK) | Negative control; confirms caspase-dependent PARP-1 cleavage. | Pan-caspase inhibitor |
| RIPA Lysis Buffer | Efficiently extracts nuclear and cytoplasmic proteins, including PARP-1. | Must include fresh protease inhibitors. |
| Phosphatase Inhibitor Cocktail | Preserves phosphorylation states of signaling proteins upstream of caspases. | Essential for phospho-specific upstream analysis. |
| Anti-cleaved PARP-1 (Rabbit mAb) | Primary antibody specifically recognizing the 89 kDa fragment. | Clone Asp214; validate for WB/Flow. |
| Anti-cleaved Caspase-3 (Rabbit mAb) | Primary antibody recognizing large fragment of activated caspase-3. | Clone Asp175; critical for correlation. |
| Fluorescent Secondary Antibodies | Enable multiplex detection on a single blot without stripping. | IRDye 680RD/800CW; use from different hosts. |
| Intercept Blocking Buffer | Superior blocking agent for fluorescent WB, reduces background. | LI-COR product; better than BSA/milk for multiplexing. |
Accurate detection of cleaved PARP-1 represents a critical experimental endpoint in diverse research fields spanning apoptosis detection, DNA damage response studies, and cancer drug development. The characteristic caspase-mediated cleavage of full-length PARP-1 (113 kDa) into 89 kDa and 24 kDa fragments serves as a established biochemical hallmark of apoptosis [30] [63]. However, researchers frequently encounter significant technical challenges when attempting to correlate cleaved PARP-1 data across Western blot (WB), enzyme-linked immunosorbent assay (ELISA), and immunofluorescence (IF) platforms. Inconsistencies often stem from antibody specificity limitations, sample preparation artifacts, and platform-specific detection parameters that collectively contribute to high background noise and compromised data integrity. This technical guide addresses these cross-platform verification challenges through targeted troubleshooting methodologies and standardized experimental protocols.
Understanding PARP-1 Biology and Detection Principles
PARP-1 Cleavage: From Molecular Event to Detection Target
PARP-1 (poly(ADP-ribose) polymerase 1) is a nuclear enzyme that functions as a primary DNA damage sensor. Upon apoptosis induction, caspases (particularly caspase-3/7) cleave PARP-1 at the conserved DEVD214 motif, separating the N-terminal DNA-binding domain (24 kDa) from the C-terminal catalytic domain (89 kDa) [30] [64]. This cleavage event inactivates PARP-1's DNA repair function and facilitates the dismantling of the nucleus during apoptotic execution. Beyond its classical apoptotic role, emerging evidence indicates that inflammasome-activated caspase 7 can cleave PARP-1 at D214 to enhance the expression of a subset of NF-κB target genes, revealing a non-apoptotic function in inflammatory gene regulation [64].
Antibody Selection Strategy for Cleaved PARP-1 Detection
The fundamental requirement for specific cleaved PARP-1 detection across platforms is the selection of appropriate antibodies targeting distinct epitopes:
- Full-length PARP-1 antibodies: Typically recognize C-terminal domains (e.g., amino acids 667-1014) and detect both intact (113 kDa) and cleaved (89 kDa) fragments [63]
- Cleavage-specific PARP-1 antibodies: Specifically engineered to recognize neo-epitopes created by caspase cleavage at D214, exclusively detecting the 89 kDa fragment while ignoring full-length PARP-1 [65] [66]
Figure 1: PARP-1 Cleavage Pathway and Detection Platforms. Caspase-mediated cleavage at DEVD214 generates distinct fragments detectable across multiple experimental platforms.
Research Reagent Solutions: Essential Materials for Cleaved PARP-1 Detection
Table 1: Key Antibody Reagents for PARP-1 Detection Across Experimental Platforms
| Antibody Specificity | Catalog Number | Host Species | Applications | Key Characteristics |
|---|---|---|---|---|
| Cleaved PARP1 (Asp214) | 60555-1-PBS [65] | Mouse monoclonal | WB, IHC, IF/ICC, FC, ELISA | Specifically detects only cleaved form (89 kDa); does not recognize full-length PARP1 |
| PARP1 (C-terminal) | 13371-1-AP [63] | Rabbit polyclonal | WB, IHC, IF/ICC, IP, ELISA | Detects both full-length (113 kDa) and cleaved (89 kDa) PARP1; recognizes C-terminal domain |
| PARP1 (cleaved Asp214) | MA5-41020 [66] | Mouse monoclonal | WB, ICC/IF, Flow Cytometry | Verified for specificity to cleaved PARP1 in human, mouse, rat samples |
| PARP1 (general) | ab227244 [67] | Rabbit polyclonal | WB, IP, IHC-P, ICC/IF, ChIP | Detects PARP1 at predicted band size: 113 kDa; validated in multiple species |
Cross-Platform Verification Strategy: Methodological Alignment
Sample Preparation Standardization
Consistent sample preparation across WB, ELISA, and IF is paramount for meaningful data correlation:
- Apoptosis Induction Controls: Include staurosporine-treated cells (1-2 μM, 4-6 hours) as a positive control for PARP-1 cleavage [63]
- Inhibition Controls: Utilize Z-VAD-FMK (pan-caspase inhibitor, 20-50 μM) to confirm caspase-dependent cleavage
- Simultaneous Harvesting: Process identical cell aliquots in parallel for all three platforms to minimize biological variability
- Lysis Consistency: Employ RIPA buffer with protease inhibitors (including caspase inhibitors) for WB and ELISA, while using cross-linking fixatives (4% PFA) for IF to preserve epitopes [68] [69]
Experimental Workflow for Cross-Platform Correlation
Figure 2: Cross-Platform Verification Workflow. Parallel sample processing and analysis across multiple detection platforms ensures reliable cleaved PARP-1 detection.
Troubleshooting High Background in Cleaved PARP-1 Detection
Frequently Asked Questions: Platform-Specific Issues
Q1: Why do I detect strong cleaved PARP-1 signal in Western blot but minimal signal in immunofluorescence, despite using the same antibody?
A: This discrepancy typically stems from epitope accessibility issues. In IF, the cleaved PARP-1 fragment may remain partially obscured within condensed chromatin of apoptotic cells. Implement antigen retrieval methods (heat-induced epitope retrieval with citrate buffer, pH 6.0) and enhance permeabilization (0.5% Triton X-100 for 10 minutes post-fixation) to improve antibody access [63] [69]. Additionally, verify that your fixation method (4% PFA for 15 minutes) adequately preserves nuclear architecture without excessive cross-linking that masks epitopes.
Q2: How can I reduce high background specifically in cleaved PARP-1 ELISA while maintaining signal sensitivity?
A: High background in cleaved PARP-1 ELISA frequently results from nonspecific antibody binding. Implement these specific modifications:
- Increase blocking time to 2 hours with 5% BSA in PBS containing 0.1% Tween-20
- Include a species-matched IgG isotype control to establish background threshold
- Titer both capture and detection antibodies to determine optimal concentration (typically 1-2 μg/mL for capture, 0.5-1 μg/mL for detection)
- Add a washing step with high-stringency buffer (PBS with 0.5 M NaCl, 0.1% Tween-20) after secondary antibody incubation [65]
Q3: What causes inconsistent cleaved PARP-1 band patterns across Western blot replicates when comparing treated and untreated samples?
A: Inconsistent cleavage patterns typically indicate suboptimal apoptosis induction or improper sample handling:
- Confirm caspase activation in parallel using caspase-3 cleavage as a positive control
- Avoid repeated freeze-thaw cycles of cell lysates, as endogenous proteases can generate additional cleavage fragments
- Include a positive control (e.g., etoposide-treated cells) to establish expected cleavage pattern
- Ensure equal protein loading (50-100 μg per lane) and transfer efficiency using Ponceau S staining before immunoblotting [63]
Troubleshooting Guide: High Background Across Platforms
Table 2: Systematic Troubleshooting for High Background in Cleaved PARP-1 Detection
| Problem | Possible Cause | Recommended Solution | Applicable Platforms |
|---|---|---|---|
| High background signal | Non-specific antibody binding | Titrate antibody to optimal dilution; pre-clear lysates with protein A/G beads; use species-matched normal serum for blocking | WB, ELISA, IF |
| Non-specific nuclear staining | Inadequate blocking | Increase blocking time to 1-2 hours with 5% BSA; add 10% normal serum from secondary antibody species; include 0.3% Triton X-100 in blocking buffer | IF, IHC |
| Multiple extra bands in WB | Antibody cross-reactivity or protein degradation | Use fresh protease inhibitors; check antibody specificity with PARP1 knockout lysates; ensure proper lysis conditions | WB |
| High background in negative controls | Secondary antibody cross-reactivity | Use pre-adsorbed secondary antibodies; increase stringency washes with high-salt buffers; include secondary-only control | IF, WB, ELISA |
| Weak target signal with high background | Antibody concentration too high | Perform serial dilution of primary antibody to determine optimal signal:noise ratio; extend incubation time with dilute antibody | WB, IF, ELISA |
| Nuclear speckling pattern in IF | Incomplete permeabilization | Optimize permeabilization condition (0.5% Triton X-15 for 15 min); include antigen retrieval step | IF, IHC |
| High well-to-well variation in ELISA | Inconsistent washing | Automated plate washing; increase wash volume (300 μL/well) and cycle number (5-6 washes) | ELISA |
Platform-Specific Optimization Protocols
Western Blot Protocol for Cleaved PARP-1 Detection
Modified from established protocols with enhanced specificity controls [63]:
Sample Preparation: Lyse cells in RIPA buffer (50 mM Tris-HCl pH 7.4, 150 mM NaCl, 1% NP-40, 0.5% sodium deoxycholate, 0.1% SDS) supplemented with complete protease inhibitor cocktail and 1 mM PMSF. Incubate on ice for 30 minutes with occasional vortexing, then centrifuge at 14,000 × g for 15 minutes at 4°C.
Electrophoresis: Load 50-100 μg total protein per lane on 7.5-10% SDS-PAGE gel. Include molecular weight marker and positive control for apoptosis (staurosporine-treated cell lysate). Run at 80V through stacking gel, 120V through resolving gel until dye front reaches bottom.
Transfer: Transfer to PVDF membrane using semi-dry transfer system at 18V for 60 minutes [67].
Blocking and Antibody Incubation:
- Block membrane with 5% non-fat dry milk in TBST for 1 hour at room temperature
- Incubate with primary antibody (anti-cleaved PARP1 at 1:1000 dilution in 5% BSA/TBST) overnight at 4°C [65] [63]
- Wash 3× with TBST, 10 minutes each
- Incubate with species-appropriate HRP-conjugated secondary antibody (1:10000 dilution in 5% milk/TBST) for 1 hour at room temperature
- Wash 3× with TBST, 10 minutes each
Detection: Develop with enhanced chemiluminescence substrate and image with appropriate exposure times (30 seconds to 10 minutes).
Immunofluorescence Protocol for Cleaved PARP-1 Detection
Optimized to minimize background while preserving nuclear signal [68] [69]:
Cell Culture and Fixation: Plate cells on glass coverslips in 12-well plates. After treatment, remove media and wash once with PBS. Fix with 4% paraformaldehyde in PBS for 15 minutes at room temperature.
Permeabilization and Blocking: Permeabilize with 0.5% Triton X-100 in PBS for 15 minutes. Block with 5% BSA and 10% normal serum (from secondary antibody species) in PBS for 1 hour at room temperature.
Antibody Incubation:
- Prepare primary antibody (anti-cleaved PARP1) at 1:100-1:500 dilution in blocking buffer [65] [63]
- Incubate coverslips with primary antibody in a humidified chamber overnight at 4°C
- Wash 3× with PBS, 5 minutes each
- Incubate with fluorophore-conjugated secondary antibody (1:1000 dilution) for 1 hour at room temperature in the dark
- Wash 3× with PBS, 5 minutes each
Counterstaining and Mounting: Incubate with Hoechst 33342 (1 μg/mL) for 10 minutes to stain nuclei. Wash with PBS and mount on glass slides using anti-fade mounting medium. Seal with nail polish and store at 4°C in the dark until imaging [68].
Imaging: Acquire images using confocal microscopy within 24 hours. Include unstained and secondary-only controls to assess background fluorescence.
Validation and Data Interpretation Guidelines
Controls for Cross-Platform Validation
Essential controls for verifying cleaved PARP-1 detection specificity:
- Biological Positive Control: Cells treated with apoptosis inducer (1 μM staurosporine for 4-6 hours)
- Biological Negative Control: Cells pre-treated with caspase inhibitor (20 μM Z-VAD-FMK) before apoptosis induction
- Technical Negative Control: Primary antibody replaced with species-matched IgG at same concentration
- Knockout Validation: When possible, use PARP1-deficient cells or siRNA knockdown to confirm antibody specificity [66]
- Platform Bridging Control: Split single cell population equally across all three detection platforms
Quantitative Correlation Approach
For rigorous cross-platform verification:
- Normalize Signals: Express cleaved PARP-1 levels as ratio to full-length PARP-1 (WB) or total protein (ELISA)
- Establish Dynamic Range: Generate dilution series of apoptotic cell lysates to determine linear detection range for each platform
- Calculate Correlation Coefficients: Statistically compare normalized cleaved PARP-1 values across platforms using Pearson correlation
- Determine Platform Sensitivity: Compare limit of detection across platforms using serial dilutions of positive control
By implementing these standardized protocols, troubleshooting methods, and validation strategies, researchers can achieve reliable correlation of cleaved PARP-1 data across Western blot, ELISA, and immunofluorescence platforms, thereby enhancing experimental rigor in apoptosis and DNA damage response studies.
High background signal is a common challenge in detecting cleaved PARP-1 (cPARP-1), a key biomarker of apoptosis in cancer research and drug development. This interference can compromise data interpretation, leading to inaccurate assessment of therapeutic efficacy. This guide provides a systematic, step-by-step approach to identify and resolve the causes of high background in cleaved PARP-1 Western blotting.
Troubleshooting High Background in Cleaved PARP-1 Detection
High background can manifest as a uniform haze, specific bands, or nonspecific speckling across the blot. The flowchart below outlines a logical path for diagnosing and correcting these issues.
Step 1: Verify Antibody Specificity and Quality
Nonspecific antibody binding is a primary cause of high background. PARP-1 antibodies must distinguish between full-length (116 kDa) and cleaved (89 kDa) fragments [70].
Verification Protocol:
- Use Validated Antibodies: Employ monoclonal antibodies known to detect both full-length PARP-1 and the large 89 kDa cleavage fragment, such as PARP (46D11) Rabbit mAb, which does not cross-react with PARP-2 or PARP-3 [70].
- Include Appropriate Controls:
- Positive Control: Use lysates from cells treated with a known apoptosis inducer (e.g., Staurosporine, 1 µM for 4-6 hours).
- Negative Control: Use lysates from untreated, healthy cells.
- Perform Antibody Titration: Titrate the primary and secondary antibodies to determine the minimum concentration that provides a clean, specific signal. High antibody concentrations often cause nonspecific binding.
Step 2: Optimize Blocking and Washing Conditions
Inefficient blocking or washing can leave residual proteins that bind detection reagents, creating a uniform background.
Optimization Protocol:
- Blocking Buffer: Test different blocking buffers (e.g., 5% BSA or non-fat dry milk in TBST) for at least 1 hour at room temperature. Note that milk can sometimes contain biotin, which interferes with avidin-biotin systems.
- Washing Stringency: Increase the number and duration of washes after antibody incubations. Use TBST (Tris-Buffered Saline with 0.1% Tween-20) and ensure adequate volume to cover the membrane.
- Add Detergent: Ensure that all antibody dilution buffers contain 0.1% Tween-20 to reduce nonspecific hydrophobic interactions.
Step 3: Assess Sample Quality and Preparation
Sample degradation or overloading can produce multiple nonspecific bands and smearing.
Assessment Protocol:
- Prevent Proteolysis: Always prepare samples on ice using freshly added, broad-spectrum protease inhibitor cocktails [8].
- Avoid Overloading: Load an appropriate amount of total protein (typically 20-50 µg for whole cell lysates). Overloading is a common cause of high background and masked bands.
- Verify Apoptosis Induction: Confirm that your treatment effectively induces apoptosis and PARP-1 cleavage. The 89 kDa fragment should be prominent in positive control lanes and absent in negative controls [71] [70].
Step 4: Troubleshoot the Detection System
The chemical detection process itself can generate high background if not properly optimized.
Troubleshooting Protocol:
- Check Reagent Contamination: Ensure substrates and enhancers are not contaminated. Use fresh aliquots and avoid metal tool contact with chemiluminescent substrates.
- Optimize Substrate Incubation: Reduce the incubation time with the chemiluminescent substrate. Over-incubation can saturate the signal and amplify background noise.
- Membrane Handling: Always wear gloves to prevent contamination from fingerprints and skin oils. Ensure the membrane does not dry out during the procedure, as this can permanently trap proteins and cause high background.
PARP-1 Cleavage and Detection Workflow
The diagram below illustrates the core biological process and key detection steps for cleaved PARP-1.
Research Reagent Solutions
The following table lists essential reagents for successful cleaved PARP-1 detection, along with their specific functions in the experimental workflow.
| Reagent Name | Function / Application | Key Considerations |
|---|---|---|
| PARP (46D11) Rabbit mAb [70] | Detects total full-length PARP-1 and the 89 kDa cleavage fragment. | Monoclonal antibody offering superior lot-to-lot consistency; does not cross-react with PARP-2/3. |
| Anti-pADPr Binding Reagent [8] | Detects poly(ADP-ribose) polymers, a marker of PARP activation. | Useful for confirming PARP-1 enzymatic activity prior to cleavage. |
| Protease Inhibitor Cocktail [8] | Prevents protein degradation during sample preparation. | Essential for preserving the full-length and cleaved fragments of PARP-1. |
| PJ34 [8] | Potent PARP inhibitor used in control experiments. | Helps confirm the specificity of PARP-1 related signals. |
| ADP-HPD [8] | Poly(ADP-ribose) glycohydrolase (PARG) inhibitor. | Stabilizes PAR chains on proteins by blocking their degradation. |
| Olaparib / Talazoparib [8] | Clinical PARP inhibitors. | Used as positive controls for PARP inhibition studies and for inducing specific cellular phenotypes. |
Frequently Asked Questions (FAQs)
Q1: My blot shows the correct 89 kDa band for cleaved PARP-1, but also several nonspecific bands. How can I improve specificity? This typically indicates suboptimal antibody binding conditions. First, ensure you are using a validated antibody like PARP (46D11) [70]. Then, increase the stringency of washing by raising the Tween-20 concentration to 0.1-0.5% or adding a mild denaturant. Performing an antibody titration is the most critical step to eliminate nonspecific bands.
Q2: I do not see any cleaved PARP-1 signal in my positive control. What should I check? Begin by verifying your apoptosis induction. Confirm that your positive control treatment (e.g., Staurosporine) is effective using an alternative apoptosis assay (e.g., caspase-3 activity). Then, check the integrity of your lysates and confirm that the antibody detects total PARP1 (116 kDa). Ensure your electrophoresis and transfer conditions are optimal for resolving a ~90 kDa protein.
Q3: The background is consistently high even after optimizing all steps. What is a less common cause I might be missing? Consider the quality of your transfer buffer and membrane. Old or improperly prepared transfer buffers can lead to inefficient protein transfer and retention. Also, try a different lot of your commercial detection substrates, as they can degrade over time or be contaminated. Finally, verify that your secondary antibody is not cross-reacting with proteins from the species of your samples.
Conclusion
Successfully troubleshooting high background in cleaved PARP-1 detection requires a holistic strategy that integrates a deep understanding of its biological context, meticulous methodological execution, systematic problem-solving, and rigorous validation. Mastering these elements is not merely a technical exercise but is fundamental for generating reliable data in apoptosis research. As the roles of PARP-1 continue to expand into areas like replication stress and ferroptosis-apoptosis crosstalk, and with the growing clinical importance of PARP inhibitors, the ability to accurately detect its cleaved form becomes ever more critical. The strategies outlined herein provide a robust foundation to enhance experimental reproducibility, thereby strengthening research outcomes in basic science and accelerating the development of novel therapeutic agents.
References
- 1. Multifaceted Role of PARP1 in Maintaining Genome Stability ... [https://pmc.ncbi.nlm.nih.gov/articles/PMC11552663/]
- 2. Histone PARylation factor 1: a review of its role in the DNA ... [https://pmc.ncbi.nlm.nih.gov/articles/PMC12596734/]
- 3. PARP1 auto-modification promotes faithful Okazaki ... [https://www.sciencedirect.com/science/article/pii/S1097276525007476]
- 4. The dynamics and Regulation of PARP1 and PARP2 in ... [https://pmc.ncbi.nlm.nih.gov/articles/PMC12217778/]
- 5. PARP Antibody #9542 [https://www.cellsignal.com/products/primary-antibodies/parp-antibody/9542?srsltid=AfmBOopgx4vv-ox9KWxo5pvvbYkNJX-42Ye5bgD2-YbexiKA5JcETwHX]
- 6. RSL3 promotes PARP1 apoptotic functions by distinct ... [https://pmc.ncbi.nlm.nih.gov/articles/PMC12492750/]
- 7. Western blotting analysis of PARP1 and PARP10 [https://bio-protocol.org/exchange/minidetail?id=10340569&type=30]
- 8. Mapping the Subtype-Specific PARP1 ADP-ribosylated ... - PMC [https://pmc.ncbi.nlm.nih.gov/articles/PMC12621782/]
- 9. Poly(ADP-ribose) polymerase-1 (PARP1)-based dual ... [https://www.sciencedirect.com/science/article/abs/pii/S0223523425007020]
- 10. Serine ADPr on histones and PARP1 is a cellular target of ... [https://www.nature.com/articles/s41589-025-01974-5]
- 11. Activation and Caspase-mediated Inhibition of PARP - PMC [https://pmc.ncbi.nlm.nih.gov/articles/PMC99613/]
- 12. The 89-kDa PARP1 cleavage fragment serves as a ... - PubMed [https://pubmed.ncbi.nlm.nih.gov/33168626/]
- 13. Poly(ADP-ribose) polymerase-1 and its cleavage products ... [https://pmc.ncbi.nlm.nih.gov/articles/PMC4013233/]
- 14. Developing a 3-Color Western Blot [https://www.licorbio.com/support/contents/applications/western-blots/developing-a-3-color-western.html]
- 15. Western blot [https://en.wikipedia.org/wiki/Western_blot]
- 16. Cleaved PARP (Asp214) (19F4) Mouse Monoclonal Antibody [https://www.cellsignal.com/products/primary-antibodies/cleaved-parp-asp214-19f4-mouse-monoclonal-antibody/9546?srsltid=AfmBOoqikSK5063r_FDTDdiOv8oc1HmPiZCPHsla9dJtzGAw4Z9UuRbK]
- 17. Non-specific binding of RNA to PARP1 and PARP2 does ... [https://pmc.ncbi.nlm.nih.gov/articles/PMC7386247/]
- 18. PARP-1 cleavage fragments: signatures of cell-death ... [https://biosignaling.biomedcentral.com/articles/10.1186/1478-811X-8-31]
- 19. Epigenetic Insights on PARP-1 Activity in Cancer Therapy - PMC [https://pmc.ncbi.nlm.nih.gov/articles/PMC9817704/]
- 20. Cleaved PARP (Asp214) Antibody #9541 [https://www.cellsignal.com/products/primary-antibodies/cleaved-parp-asp214-antibody/9541?srsltid=AfmBOopC94yCJBP4sOEvFLgjk6GlWeLXWBRHFhNqchfHiGx6B8dRB6eW]
- 21. Anti-Cleaved PARP1 antibody [SP276] (ab225715) [https://www.abcam.com/en-us/products/primary-antibodies/cleaved-parp1-antibody-sp276-ab225715]
- 22. New Insights into the Significance of PARP-1 Activation [https://www.mdpi.com/2073-4409/10/3/599]
- 23. Serine ADPr on histones and PARP1 is a cellular target of ... [https://pmc.ncbi.nlm.nih.gov/articles/PMC12568645/]
- 24. Anti-Cleaved PARP1 antibody (ab4830) [https://www.abcam.com/en-us/products/primary-antibodies/cleaved-parp1-antibody-ab4830]
- 25. PARP1 (cleaved Asp214) Monoclonal Antibody (HLNC4) ... [https://www.thermofisher.com/antibody/product/PARP1-cleaved-Asp214-Antibody-clone-HLNC4-Monoclonal/14-6668-82]
- 26. Anti-PARP1 antibody [EPR18461] (ab191217) [https://www.abcam.com/en-us/products/primary-antibodies/parp1-antibody-epr18461-ab191217]
- 27. Characterization of the interactions of PARP-1 with UV- ... [https://www.nature.com/articles/srep19020]
- 28. PROTAC® Optimization Kit for PARP1-Cereblon Binding [https://bpsbioscience.com/protacr-optimization-kit-for-parp1-cereblon-binding-78441]
- 29. PARP1 genomics: chromatin immunoprecipitation ... [https://pmc.ncbi.nlm.nih.gov/articles/PMC3164790/]
- 30. Noncleavable poly(ADP-ribose) polymerase-1 regulates ... [https://pmc.ncbi.nlm.nih.gov/articles/PMC522248/]
- 31. Physiological levels of poly(ADP-ribose) during the cell ... [https://www.sciencedirect.com/science/article/pii/S0014482722001562]
- 32. Western Blot Troubleshooting [https://www.thermofisher.com/us/en/home/life-science/protein-biology/protein-biology-learning-center/protein-gel-electrophoresis-information/western-blot-troubleshooting.html]
- 33. Western Blot Troubleshooting Guide [https://www.bio-techne.com/resources/protocols-troubleshooting/western-blotting-troubleshooting]
- 34. for Blocking ... | Thermo Fisher Scientific - RU Buffers Western Blot [https://www.thermofisher.com/ru/ru/home/life-science/protein-biology/protein-biology-learning-center/protein-biology-resource-library/pierce-protein-methods/blocking-buffers-western-blot-elisa.html]
- 35. Western Blotting Troubleshooting Guide [https://www.cellsignal.com/learn-and-support/troubleshooting/western-blot-troubleshooting-guide?srsltid=AfmBOooV8REmbn4phagxA_UZ7ZxeSSBmgUC0S_oY7-SUy9fatJgho50c]
- 36. Procedure | Cell Signaling Technology Western Blot [https://www.cellsignal.com/learn-and-support/protocols/protocol-western]
- 37. | Abcam Western blot protocol [https://www.abcam.com/en-us/technical-resources/protocols/western-blot]
- 38. Experimental Protocol for Western | AAT Bioquest Blotting [https://www.aatbio.com/resources/application-notes/experimental-protocol-for-western-blotting]
- 39. Introduction to Western Detection of Proteins Blot [https://www.sigmaaldrich.com/RU/en/technical-documents/technical-article/protein-biology/western-blotting/western-blotting]
- 40. How to deal with high background in ELISA [https://www.abcam.com/en-us/technical-resources/troubleshooting/high-background-elisa]
- 41. How to troubleshoot if the Elisa Kit has high background? [https://www.jg-biotech.com/blog/how-to-troubleshoot-if-the-elisa-kit-has-high-background-191623.html]
- 42. Elisa troubleshooting tips – High background - Blog [https://www.arp1.com/blog/post/elisa-troubleshooting-tips-high-background.html]
- 43. PARP trapping is governed by the PARP inhibitor ... [https://pmc.ncbi.nlm.nih.gov/articles/PMC11259578/]
- 44. Tumor-targeted top1 inhibitor delivery with optimized parp ... [https://www.nature.com/articles/s41467-025-64509-5]
- 45. 1,25-Dihydroxyvitamin D3 Suppresses UV-Induced Poly(ADP ... [https://pmc.ncbi.nlm.nih.gov/articles/PMC11171802/]
- 46. PARP1 antibody (13371-1-AP) [https://www.ptglab.com/products/PARP1-Antibody-13371-1-AP.htm?srsltid=AfmBOooXyqYPHNLsh03je4oZu_5CyvFnkbgPH6NKNWMd5oOTY3EHcp_p]
- 47. Small-molecule collection and high-throughput colorimetric ... [https://pmc.ncbi.nlm.nih.gov/articles/PMC3164787/]
- 48. PARP-1 cleavage fragments: signatures of cell-death ... [https://pmc.ncbi.nlm.nih.gov/articles/PMC3022541/]
- 49. The Enigmatic Function of PARP1: From PARylation Activity to ... [https://pmc.ncbi.nlm.nih.gov/articles/PMC6953017/]
- 50. Characterization of the necrotic cleavage of poly(ADP- ... [https://www.nature.com/articles/4400851]
- 51. PARP1 mediated PARylation contributes to myogenic ... [https://www.nature.com/articles/s41420-023-01420-2]
- 52. PARP1 activation/expression modulates regional-specific ... [https://pmc.ncbi.nlm.nih.gov/articles/PMC4454306/]
- 53. Cleaved PARP (Asp214) (D64E10) Rabbit Monoclonal ... [https://www.cellsignal.com/products/antibody-conjugates/cleaved-parp-asp214-d64e10-xp-rabbit-mab-pacific-blue-conjugate/60068?srsltid=AfmBOopz3E5NOMs55ri06ypCj8SStmM3sdtbn0QFyAhTFRQT5zusVEk3]
- 54. Cleaved PARP-1 (Asp214) Rabbit pAb - PRODUCTS - Immunoway [https://www.immunoway.com/shows/20/YC0101.html]
- 55. Cleaved PARP (Asp214) (19F4) Mouse Monoclonal Antibody [https://www.cellsignal.com/products/primary-antibodies/cleaved-parp-asp214-19f4-mouse-monoclonal-antibody/9546?srsltid=AfmBOoo5rdAkMnke4r2uUP22jABP2WXgDnbdIZEQKNHUdf3FPwZ3m1oV]
- 56. Nuclear IMPDH2 controls the DNA damage response by ... [https://www.nature.com/articles/s41467-024-53877-z]
- 57. A Scientist's Guide to Conquering High Background in ... - clyte [https://www.clyte.tech/post/guide-to-conquering-high-background-in-western-blotting?srsltid=AfmBOoqhVx15gHQaJv65BJJgpc83fTZYjfmlPEZhyj5EHUybCgVOr49U]
- 58. 5 Tips for Reducing Non-specific Signal on Western Blots [https://www.biossusa.com/blogs/news/5-tips-for-reducing-non-specific-signal-on-western-blots?srsltid=AfmBOoqbxbbGuGiCV5MD2aVYjItcL27SzjVZ_m2XQu862JvIPZmrXFQw]
- 59. PARP1 antibody (13371-1-AP) [https://www.ptglab.com/products/PARP1-Antibody-13371-1-AP.htm?srsltid=AfmBOopnyqOW1E1mYE4ewr3cNpV2fXWkKdrTkRYc-MlrUFeflGT0irYC]
- 60. PARP1 (HMV334) [https://ms-validatedantibodies.com/product/parp1-hmv334/]
- 61. Apoptosis western blot guide | Abcam [https://www.abcam.com/en-us/knowledge-center/western-blot/western-blot-analysis-of-apoptosis]
- 62. - Cleaved , an Apoptotic Marker, can be PARP in Ram... 1 Detected [https://pubmed.ncbi.nlm.nih.gov/26031316/]
- 63. PARP1 antibody (13371-1-AP) [https://www.ptglab.com/products/PARP1-Antibody-13371-1-AP.htm?srsltid=AfmBOoo8G3UqVZRgT6CuKAdAA97daTx-37EH_W34QTDQSTdERu8oolRk]
- 64. Inflammasome-Activated Caspase 7 Cleaves PARP1 to ... [https://www.sciencedirect.com/science/article/pii/S109727651200175X]
- 65. Cleaved PARP1 antibody (60555-1-PBS) [https://www.ptglab.com/products/Cleaved-PARP1-Antibody-60555-1-PBS.htm?srsltid=AfmBOoopnKnWE101gUTneoiZVJFVlh7hfFAw0ieZgg3v0j2TM2UxhI8D]
- 66. Anti-PARP1 (cleaved Asp214) Antibodies | Invitrogen [https://www.thermofisher.com/antibody/primary/target/parp1%20(cleaved%20asp214)]
- 67. Anti-PARP1 antibody (ab227244) [https://www.abcam.com/en-us/products/primary-antibodies/parp1-antibody-ab227244]
- 68. Immunofluorescence (IF) Troubleshooting ... | Cell Signaling Technology [https://www.cellsignal.com/learn-and-support/troubleshooting/if-troubleshooting-guide]
- 69. Immunofluorescence - Hycult Biotech Troubleshooting [https://www.hycultbiotech.com/immuno-fluorescence/troubleshooting/]
- 70. (46D11) Rabbit mAb | Cell Signaling Technology PARP [https://www.cellsignal.com/products/primary-antibodies/parp-46d11-rabbit-mab/9532]
- 71. Antibody (194C1439) | SCBT - Santa Cruz Biotechnology PARP 1 [https://www.scbt.com/p/cleaved-parp-1-antibody-194c1439]